Home>Garden Essentials>How To Make A Wood Chip Play Area
Garden Essentials
How To Make A Wood Chip Play Area
Modified: October 20, 2024
Learn how to create a fun and safe wood chip play area in your garden. Find step-by-step instructions and expert tips to transform your outdoor space.
(Many of the links in this article redirect to a specific reviewed product. Your purchase of these products through affiliate links helps to generate commission for Storables.com, at no extra cost. Learn more)
Introduction
Welcome to this comprehensive guide on how to create a wood chip play area. If you have children or want to provide a safe and fun outdoor space for kids, a wood chip play area is a fantastic option. This type of play area offers various benefits, including being low-maintenance, cost-effective, and providing a soft and cushioned surface for children to play on.
Whether you have a backyard, a school playground, or a community park, creating a wood chip play area is relatively easy and can be done by following a few simple steps. In this guide, we will walk you through the process to ensure that you can create a safe and enjoyable play area for your little ones.
Before we dive into the steps of making a wood chip play area, there are a few key considerations to keep in mind. First, you need to choose a suitable location for the play area. Ideally, it should be an area that is easily visible and accessible from your home. Additionally, consider factors such as sunlight exposure, proximity to trees, and any potential hazards that could affect the play area.
Another important aspect of creating a wood chip play area is ensuring that you have the right materials and equipment. You will need wood chips, a weed barrier, a border for the play area, and any play equipment you wish to include. The type and quantity of these materials will depend on the size of the play area and your personal preferences.
Once you have gathered your materials and chosen a location, it’s time to get started! In the following steps, we will guide you through the process of clearing the area, preparing the ground, installing a weed barrier, creating a border, and spreading the wood chips evenly. We will also cover maintenance tips and safety checks to ensure that your wood chip play area remains in optimal condition over time.
So, let’s dive in and get started on creating a wonderful wood chip play area that will provide hours of fun and excitement for your children!
Key Takeaways:
- Creating a wood chip play area involves choosing a suitable location, clearing the area, preparing the ground, and installing play equipment. Regular maintenance and safety checks are essential for a safe and enjoyable play space for children.
- A wood chip play area offers benefits such as low maintenance, cost-effectiveness, and a soft surface for kids to play on. It promotes outdoor play, fosters children’s development, and provides endless fun and excitement.
Read more: How To Make A Wood Chip Path
Step 1: Choose a Suitable Location
The first step in creating a wood chip play area is to choose a suitable location. When selecting a location, there are several factors to consider to ensure the optimal play experience for children.
Firstly, consider the size of the area you have available. The play area should be large enough to accommodate the desired play equipment and allow children to move around comfortably. Additionally, take into account any potential expansion plans or future additions to the play area.
Next, think about the accessibility of the location. Ideally, the play area should be easily reachable from your home or any other relevant areas, such as schools or community centers. This will make it convenient for children to play and for adults to supervise them.
Sunlight exposure is another important factor to consider. A wood chip play area that receives adequate sunlight will dry out faster after rain, reducing the chances of it becoming muddy and slippery. Additionally, sunlight exposure helps prevent the growth of mold and mildew on the wood chips.
Take note of any existing trees or plants nearby. Trees can provide shade and add a natural element to the play area. However, ensure that there are no overhanging branches that could pose a safety hazard or drop debris onto the play surface. Also, consider any potential root systems that could impact the stability of the play area’s ground.
Lastly, assess the area for any potential hazards. Keep an eye out for uneven ground, sharp objects, or any nearby water sources that could pose a danger to children. It’s crucial to choose a location that is free from obstructions and is as safe as possible for children to play in.
Once you have taken these factors into consideration, you can finalize the location for your wood chip play area. Remember that the location should be visible from your home to ensure easy supervision of children at play.
By carefully choosing a suitable location, you can lay the foundation for a safe and enjoyable wood chip play area that will bring endless hours of fun and excitement to children of all ages. So, take the time to assess your options and select the perfect spot for your new play area!
Step 2: Clear the Area
Before you can begin creating your wood chip play area, it’s crucial to clear the designated space of any debris, vegetation, or unwanted objects. This step ensures a clean and safe surface for the play area.
Start by removing any large rocks, branches, or other objects that may be present in the area. These can pose tripping hazards and create an uneven surface for the play area. Use gloves and appropriate tools, such as a rake or shovel, to safely clear out the debris.
Next, evaluate the area for any existing vegetation, such as grass, weeds, or plants. It’s important to remove these to prevent them from growing through the wood chips and compromising the integrity of the play surface. Use a lawnmower, weed trimmer, or manual weed removal tools to clear the vegetation from the area.
If the area is covered with grass, you may need to take additional steps to ensure proper clearance. Consider using a sod cutter or manually removing the grass layer to create a clean slate for the play area. Alternatively, you can choose to lay down a weed barrier to prevent the growth of grass and weeds beneath the wood chips.
During the clearing process, keep an eye out for any unwanted pests, such as ants or rodents, that may be present in the area. If necessary, consult with a pest control professional or take appropriate measures to ensure that the play area remains free from pests.
Once you have successfully cleared the area of debris, vegetation, and pests, take a final walk-through to ensure that the surface is even and free from any potential hazards. This step is crucial to creating a safe and enjoyable wood chip play area for children.
Clearing the area can be a labor-intensive process, but the effort is well worth it. By starting with a clean and debris-free surface, you can lay the foundation for a smooth installation process and a play area that is both visually appealing and safe for children to enjoy.
With the area cleared, you’re now ready to move on to the next step: preparing the ground for the wood chip play area.
Step 3: Prepare the Ground
After clearing the area for your wood chip play area, it’s time to prepare the ground to ensure a solid and stable foundation. This step involves leveling the ground and addressing any potential drainage issues.
Start by assessing the current condition of the ground. If there are any noticeable bumps, indentations, or uneven areas, you will need to level them out. Use a rake, shovel, or garden tools to redistribute the soil and create a smooth surface. This will help prevent any tripping hazards and ensure a uniform installation of the wood chips.
Next, pay attention to the drainage of the area. Proper drainage is important to prevent water from pooling in the play area, which can lead to mud and create an unsafe surface. If the ground is naturally sloped or prone to water accumulation, you may need to take steps to improve drainage.
One option is to create a slight slope away from the play area so that water naturally flows away. This can be achieved by adding or redistributing soil to create a gentle gradient. Alternatively, you can install a French drain or a perforated drainage pipe to redirect excess water away from the play area.
It’s also a good idea to consider adding a layer of gravel or crushed stone beneath the wood chips. This will further aid in drainage by allowing water to drain easily through the ground. The gravel layer should be level and compacted to provide a stable base for the wood chips.
During the ground preparation process, remember to take into account any underground utilities or cables that may be present in the area. Be cautious and avoid damaging any infrastructure while preparing the ground for your wood chip play area.
By properly preparing the ground, you will create a level and well-drained surface that will contribute to the overall safety and longevity of your wood chip play area. This step sets the stage for the next step: installing a weed barrier.
Step 4: Lay Down a Weed Barrier
One important step in creating a wood chip play area is to lay down a weed barrier. This barrier helps prevent the growth of weeds and other unwanted plants beneath the wood chips, ensuring a clean and low-maintenance play surface.
Start by measuring the dimensions of your play area to determine the size of the weed barrier you will need. Use a landscape fabric or a geotextile fabric that is specifically designed for weed control. These materials are permeable, allowing water to drain through while preventing weeds from growing.
Before laying down the weed barrier, make sure that the ground is clean and free from debris. Clear any rocks, sticks, or other objects that may interfere with the proper installation of the barrier.
Unroll the weed barrier and lay it over the prepared ground, ensuring that it covers the entire area of your play space. Use garden stakes or landscape pins to secure the edges and corners of the barrier, preventing it from shifting or moving over time.
If necessary, cut the weed barrier to fit around any existing trees, play equipment, or other features in your play area. Leave a small overlap between sections of the barrier to ensure complete coverage and prevent weed growth.
Once the weed barrier is securely in place, it’s time to move on to the next step: installing a border around the play area. The border will help contain the wood chips and create a neat and defined edge for your wood chip play area.
By laying down a weed barrier, you create a barrier that inhibits the growth of weeds, reduces the need for regular maintenance, and keeps your play area looking clean and well-kept. This step contributes to the longevity and attractiveness of your wood chip play area.
Read more: How To Make A Play Area For Baby
Step 5: Install a Border Around the Play Area
Installing a border is an important step in creating a wood chip play area. The border helps to contain the wood chips, prevent them from spreading or shifting, and create a defined edge for the play area.
There are various options for borders, depending on your preference and budget. Some common choices include plastic or rubber landscape edging, wooden timbers, or stone blocks. Consider factors such as durability, aesthetics, and ease of installation when selecting a border material.
Before installing the border, ensure that the area is clean and clear of any debris. Use a shovel or garden tools to create a shallow trench along the perimeter of the play area. The trench should be wide enough to accommodate the chosen border material.
If you opt for a flexible border material like plastic or rubber edging, follow the manufacturer’s instructions for installation. Typically, this involves inserting the border into the trench and securing it with spikes or stakes. Ensure that the border is level and aligned with the edge of the play area.
For wooden or stone borders, place the timbers or blocks into the trench, making sure they sit firmly in place. Use a level to ensure that the border is even and straight. Consider applying a wood preservative or sealing the wooden border to protect it from weathering and prolong its lifespan.
Once the border is installed, use a rubber mallet or a hammer to tap it into place and secure it firmly in the ground. Double-check that all sections of the border are aligned and level.
The border not only provides a clear separation between the play area and the surrounding environment, but it also helps to contain the wood chips within the designated space. This is essential for maintaining a neat and organized play area.
A properly installed border adds the finishing touch to your wood chip play area and sets the stage for the next step: spreading the wood chips evenly.
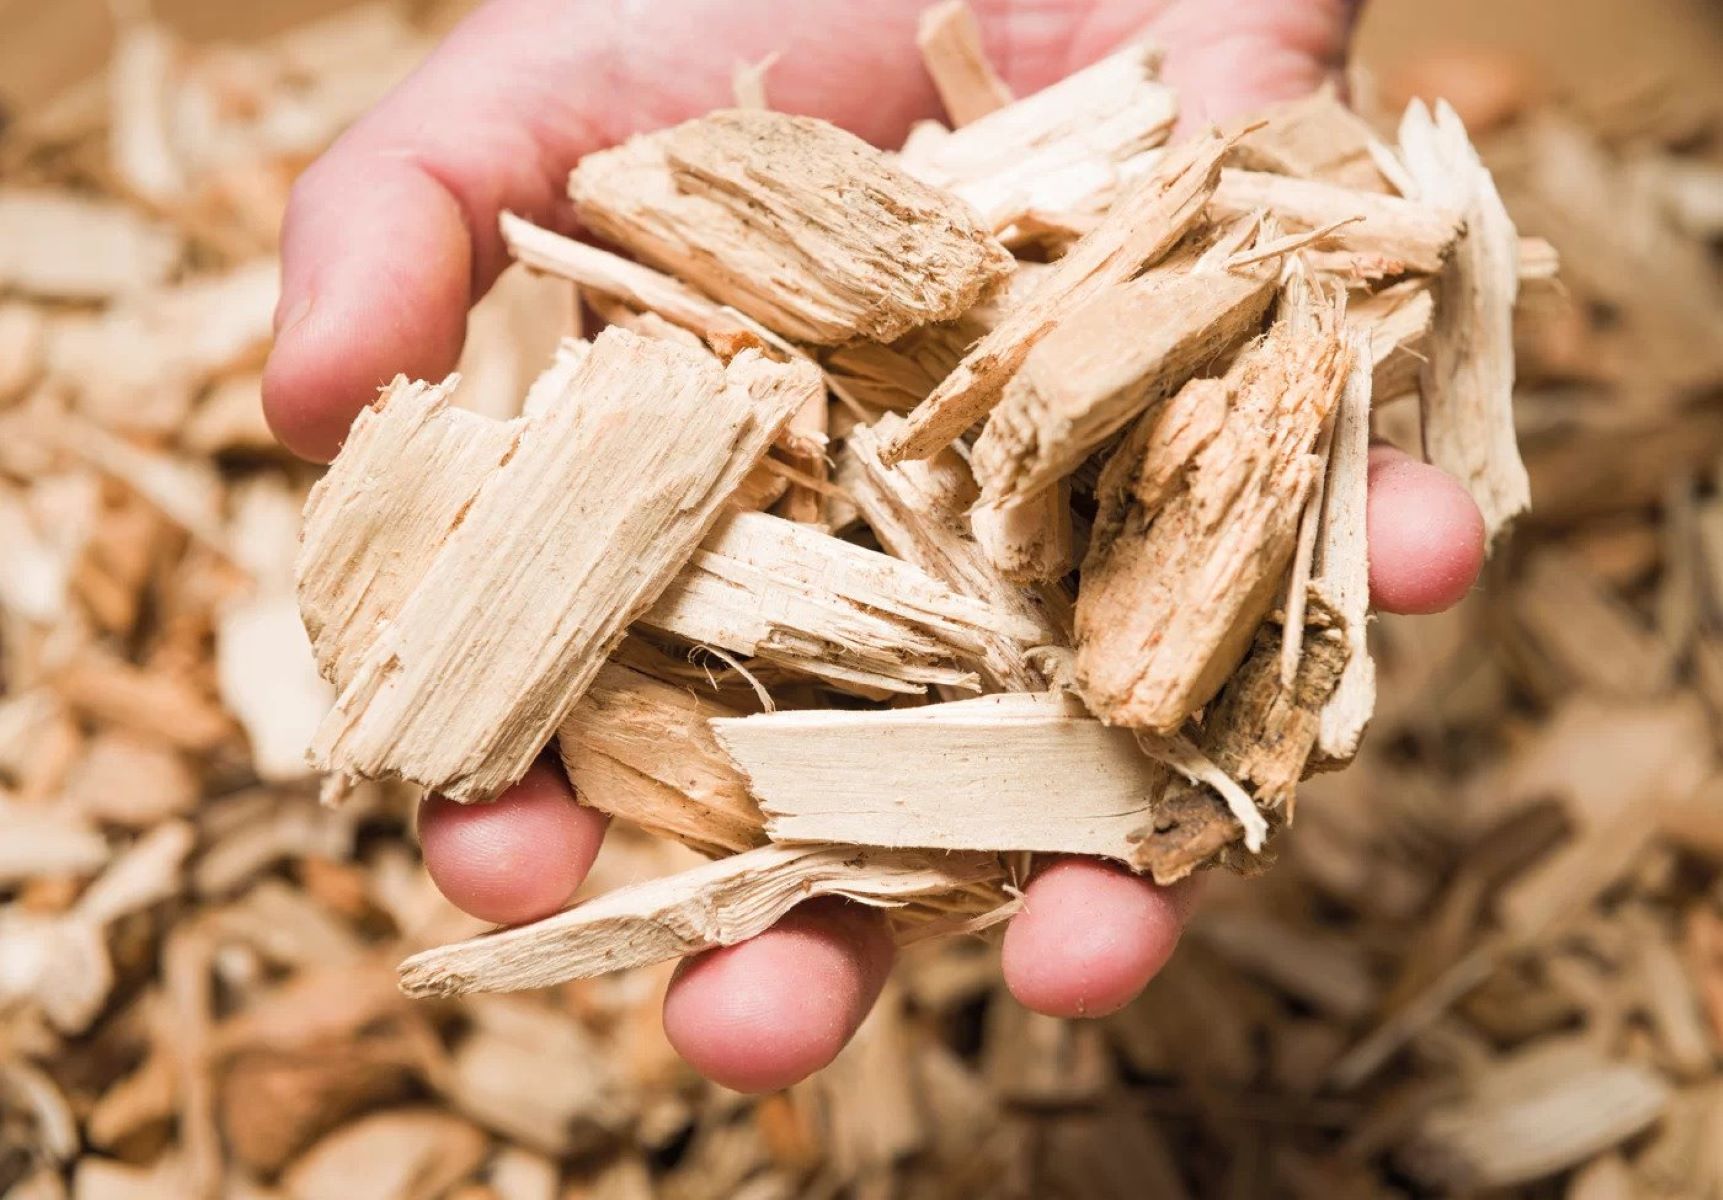
When creating a wood chip play area, be sure to use a thick layer of wood chips (at least 12 inches) to provide a soft and safe surface for children to play on. Also, regularly check and replenish the wood chips to maintain the safety and effectiveness of the play area.
Step 6: Spread Wood Chips Evenly
Now that you have prepared the ground and installed a border, it’s time to spread the wood chips evenly over the play area. This step creates a soft and cushioned surface for children to play on, while also providing a visually appealing finish to your wood chip play area.
Before spreading the wood chips, ensure that the play area is clean and free from any debris or foreign objects. Sweep or rake the area to remove any remaining dirt or leaves.
Start by estimating the amount of wood chips you will need for your play area. This will depend on the size of the play area and the desired depth of the wood chip layer. A minimum depth of 6 inches is recommended to provide adequate cushioning and impact absorption.
If you are unsure how many wood chips you need, consult a local garden center or landscaping supplier for guidance. They can help you calculate the quantity based on the dimensions of your play area.
Once you have your wood chips ready, begin by pouring them onto the play area in small piles or spreading them out with a rake. Use a garden rake or shovel to evenly distribute the wood chips across the entire surface of the play area.
As you spread the wood chips, aim for a consistent depth throughout the play area. Avoid creating uneven spots or mounds that may create tripping hazards or impede the play experience.
Periodically step back and assess the distribution of the wood chips as you go along. Make any necessary adjustments to ensure that they are spread evenly and provide a smooth and level surface.
Continue spreading the wood chips until you have achieved the desired depth and coverage across the entire play area. This may require additional bags or trips to the supplier, depending on the size of your play area.
With the wood chips evenly spread, take a moment to walk through the play area to test the depth and firmness. Make any necessary adjustments to ensure a comfortable and safe play surface.
Spreading the wood chips evenly is a crucial step in creating a wood chip play area. It provides a comfortable and cushioned surface for children to play on, reducing the risk of injuries. This step brings you one step closer to completing your wood chip play area and creating a fun and safe outdoor space for kids.
Step 7: Level and Compact the Wood Chips
After spreading the wood chips evenly over your play area, the next step is to level and compact them. This process helps to create a stable and even surface for children to play on, ensuring maximum safety and comfort.
Start by using a rake or garden tool to smooth out any uneven spots or mounds in the wood chip layer. Spread the wood chips evenly to fill in any gaps and create a consistent depth across the entire play area.
Once the wood chips are spread evenly, use a lawn roller or compactor to compress and compact them. This step helps to prevent the wood chips from shifting or scattering, especially with regular use and foot traffic.
Roll the compactor over the play area in a grid pattern, applying moderate pressure. Make multiple passes to ensure even compaction. If you don’t have access to a compactor, you can use a tamper or simply walk over the wood chips in a systematic manner to achieve a similar effect.
While compacting, pay attention to any areas that may need additional wood chips to reach the desired depth. Add more wood chips as needed and repeat the leveling and compacting process until you have achieved a uniformly compacted surface.
It’s important to note that the wood chips may settle over time, especially with regular use and exposure to the elements. Periodically check and maintain the level of the wood chips by adding more as necessary to maintain the desired depth.
Leveling and compacting the wood chips ensures that the play surface remains stable, minimizing the risk of tripping or uneven areas. This step adds an extra layer of safety to your wood chip play area, providing peace of mind for both children and parents.
With the wood chips leveled and compacted, you only have a few more steps left to complete your wood chip play area. The next step is to add the desired play equipment, bringing even more excitement and fun to your outdoor space for kids!
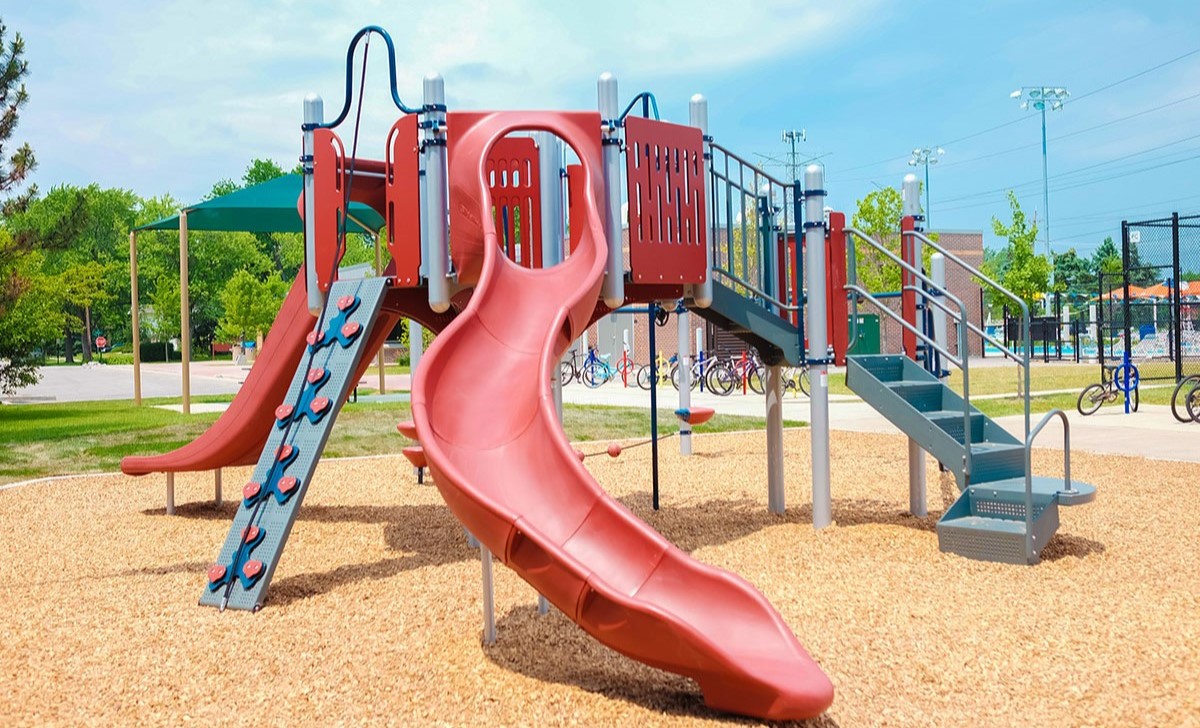
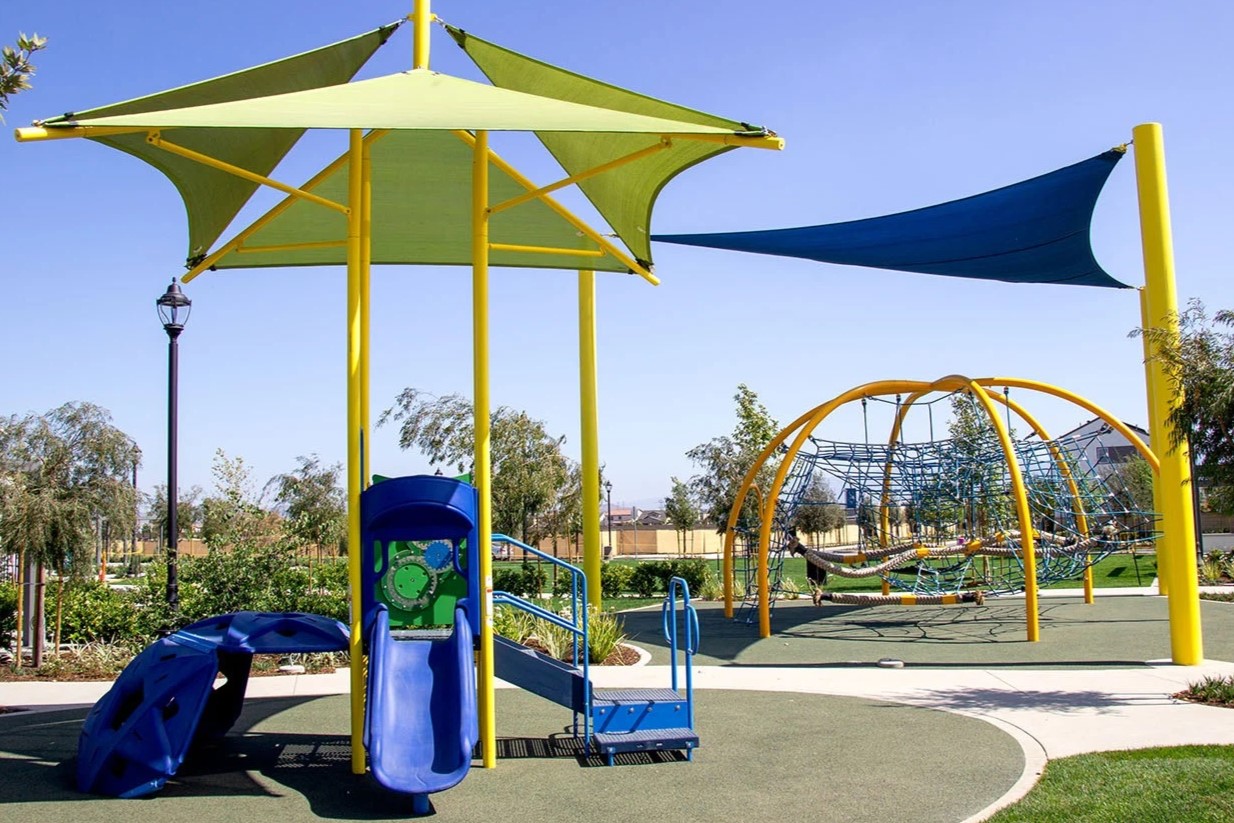
Step 8: Add Play Equipment
The next step in creating your wood chip play area is to add play equipment. This is the stage where you can truly customize the space and create a fun and interactive environment for children to enjoy.
Start by considering the age and interests of the children who will be using the play area. Popular options for play equipment include swings, slides, climbing structures, sandbox areas, and outdoor playhouses. You can also include elements like balance beams, stepping stones, or outdoor games to add variety and promote imaginative play.
When selecting and installing play equipment, always prioritize safety. Ensure that the equipment is age-appropriate and complies with safety standards. Follow the manufacturer’s guidelines for proper installation, anchoring, and maintenance.
Before installing the play equipment, take a moment to envision their placement within the play area. Consider factors such as sun exposure, visibility from your home, and the overall layout of the space. Allow for enough space between different play elements to ensure safe movement and clear pathways.
Once you have decided on the placement, install the play equipment according to the manufacturer’s instructions. This may involve sinking posts, attaching parts securely, or anchoring the equipment to the ground. Ensure that all connections are tight and stable to provide a safe and secure play experience.
As you install the play equipment, periodically step back and assess the overall layout and functionality. Make any necessary adjustments to optimize the play area and ensure the best possible experience for children of all ages.
Remember to regularly inspect and maintain the play equipment to ensure its continued safety. Check for loose bolts or screws, worn-out parts, and any signs of damage. Regularly clean the equipment and address any maintenance needs promptly.
Adding play equipment brings life and excitement to your wood chip play area. It provides children with opportunities for physical activity, creative play, and social interaction. With the equipment in place, your wood chip play area is now ready for endless hours of fun and laughter!
Read more: How To Make A Dog Play Area
Step 9: Regular Maintenance and Safety Checks
Creating a wood chip play area is an exciting project, but it’s important to remember that regular maintenance and safety checks are crucial for keeping the play area in optimal condition and ensuring the safety of the children who use it. Here are some guidelines for maintaining and checking the play area:
1. Inspect the play equipment: Regularly inspect the play equipment for any signs of wear, damage, or loose parts. Check for any sharp edges, rust, or splintered wood. Address any issues promptly to maintain the safety and durability of the equipment.
2. Clean the play area: Remove debris, leaves, and any other foreign objects from the wood chips regularly. This will help maintain a clean and hygienic play space. Use a rake or leaf blower to keep the surface free from clutter.
3. Level the wood chips: Over time, the wood chips may shift or settle. Periodically check the depth and evenness of the wood chip layer. Add more wood chips as needed and use a rake to level the surface if necessary.
4. Check for hazards: Inspect the play area for any potential hazards, such as protruding roots, sharp objects, or trip hazards. Remove any hazards promptly to ensure a safe environment for children to play in.
5. Maintain the border and weed barrier: Check the condition of the border and weed barrier regularly. Replace any damaged sections or secure loose components. Ensure that the weed barrier is intact and effectively preventing weed growth.
6. Address drainage issues: Watch for any drainage issues that may arise, such as water pooling or erosion around the play area. Take necessary measures to improve drainage, such as adding or redirecting drainage channels or adjusting the slope of the ground.
7. Monitor for pests: Keep an eye out for pests that may be attracted to the play area, such as ants, wasps, or rodents. Take appropriate measures to address pest infestations to ensure the safety and comfort of children using the play area.
8. Regular safety checks: Conduct regular safety checks of the play area, including the play equipment, ground surface, and surrounding environment. Look for any potential hazards or issues that may compromise the safety of children. Address any concerns promptly.
9. Provide adult supervision: Remember that adult supervision is essential whenever children are using the play area. Regularly supervise and interact with the children to ensure their safety and well-being.
By performing regular maintenance and safety checks, you create a safe and inviting play area for children to enjoy. These steps help maintain the integrity of the play equipment, ensure a clean and hazard-free surface, and provide peace of mind for parents and caregivers.
Now that you have completed all the steps for creating and maintaining a wood chip play area, it’s time to sit back, relax, and watch as children delight in the joys of outdoor play in their fun and safe environment!
Conclusion
Creating a wood chip play area is a rewarding project that allows you to provide a safe and enjoyable outdoor play space for children. By following the steps outlined in this guide, you can transform your backyard, school playground, or community park into a hub of fun and excitement.
From choosing a suitable location to installing play equipment, each step plays a crucial role in creating a successful wood chip play area. The careful selection of the location ensures accessibility, sunlight exposure, and safety. Clearing the area and preparing the ground creates a clean and stable foundation for the play area. Installing a weed barrier and border help maintain cleanliness and defined boundaries.
Spreading the wood chips evenly and compacting them ensures a soft and cushioned surface that minimizes the risk of injuries. Adding play equipment brings the play area to life, providing opportunities for physical activity, creativity, and social interaction. Regular maintenance and safety checks help preserve the play area’s integrity and ensure a safe environment for children to enjoy.
Creating a wood chip play area not only promotes outdoor play but also fosters children’s physical, cognitive, and social development. It encourages imagination, problem-solving, and physical movement, allowing children to explore, learn, and have fun in a natural and engaging setting.
Remember that adult supervision is vital whenever children are using the play area. Regular supervision, coupled with proper maintenance, ensures the ongoing safety and enjoyment of the play area for all who use it.
So, roll up your sleeves, gather the necessary materials, and start creating your own wood chip play area. With the helpful guidance provided in this guide, you have all the tools you need to make a safe, inviting, and memorable space for children. Get ready to witness the joy, laughter, and endless adventures that await in your wood chip play area!
Frequently Asked Questions about How To Make A Wood Chip Play Area
Was this page helpful?
At Storables.com, we guarantee accurate and reliable information. Our content, validated by Expert Board Contributors, is crafted following stringent Editorial Policies. We're committed to providing you with well-researched, expert-backed insights for all your informational needs.


0 thoughts on “How To Make A Wood Chip Play Area”