Home>Garden Essentials>How To Repair Peeling Play Area Surfaces
Garden Essentials
How To Repair Peeling Play Area Surfaces
Modified: March 7, 2024
Discover effective techniques for repairing peeling play area surfaces in your garden. Ensure a safe and beautiful outdoor space for your children to enjoy.
(Many of the links in this article redirect to a specific reviewed product. Your purchase of these products through affiliate links helps to generate commission for Storables.com, at no extra cost. Learn more)
Introduction
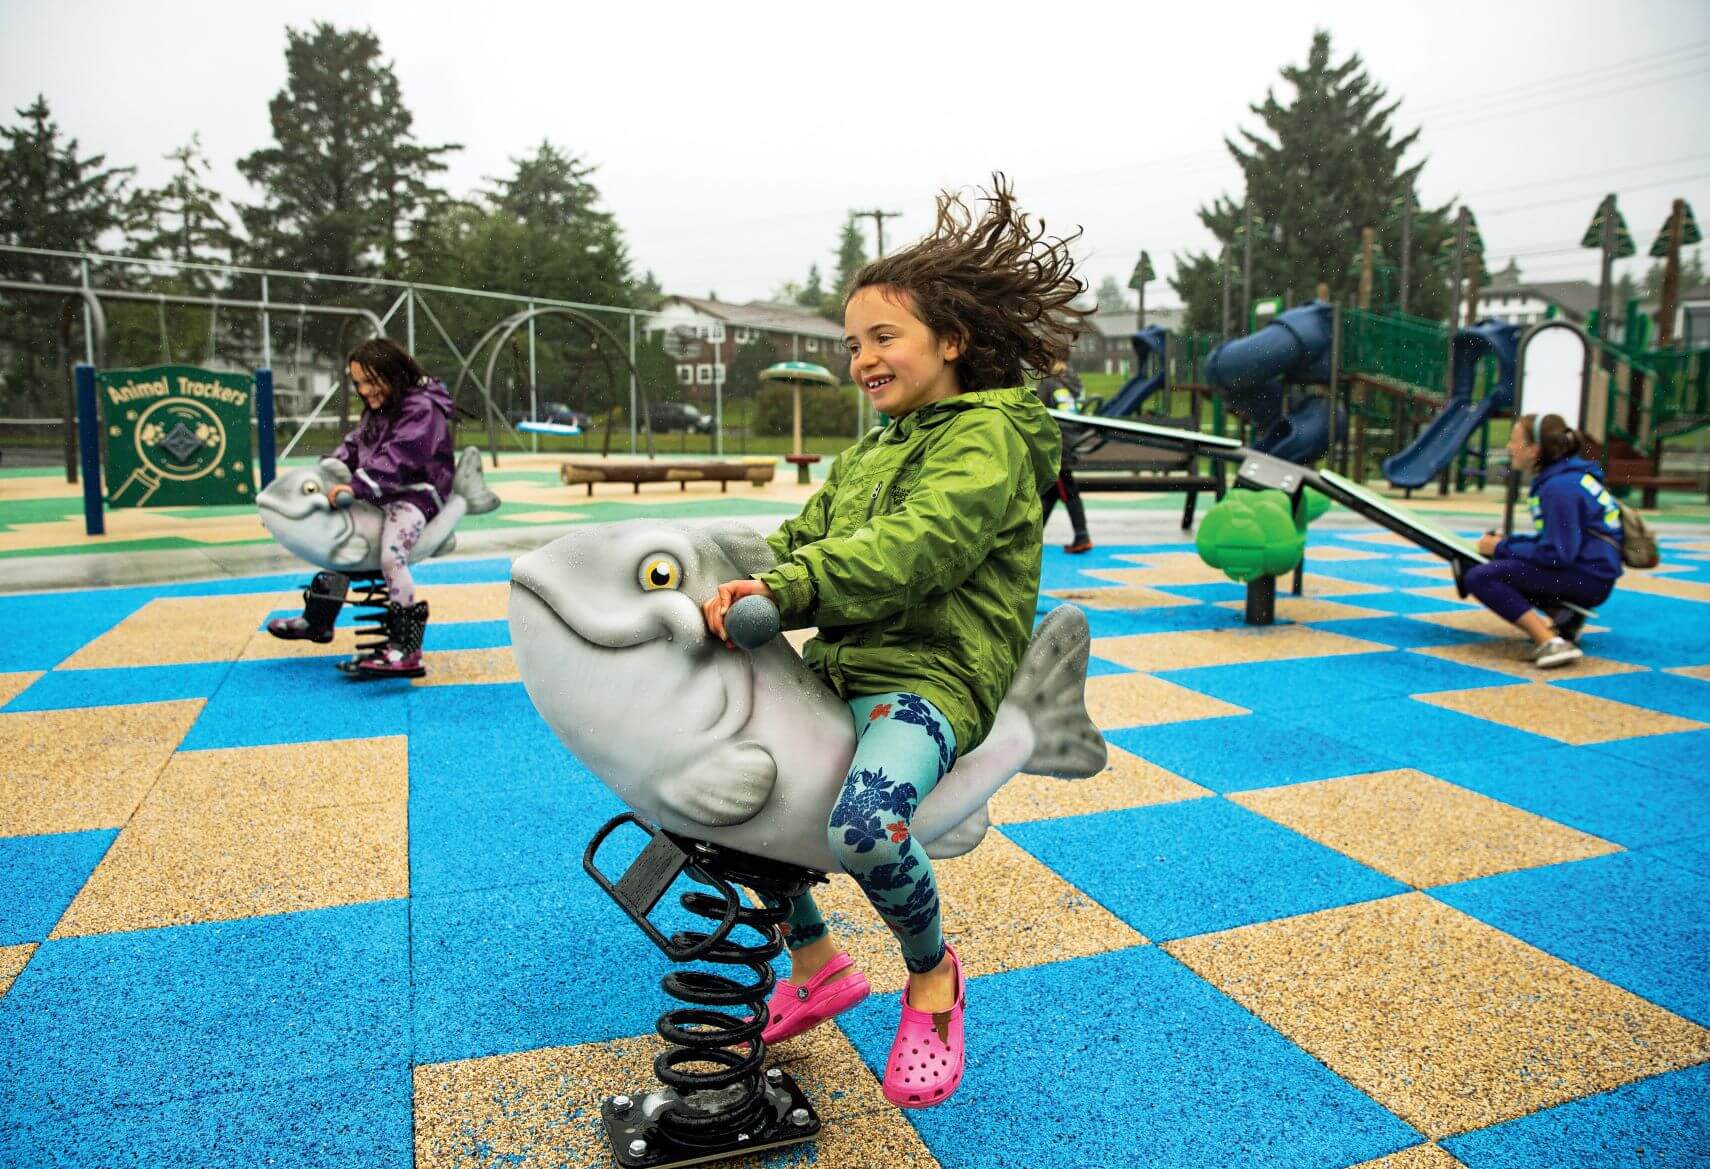
Welcome to our comprehensive guide on how to repair peeling play area surfaces. Play areas are a fantastic place for children to have fun, let their imaginations run wild, and engage in physical activities. However, over time, the surfaces of play areas can begin to peel and deteriorate, posing safety risks for children and diminishing the overall aesthetic appeal.
In this article, we will explore the reasons behind peeling play area surfaces, discuss the common types of play area surfaces, and provide a step-by-step guide on how to effectively repair and restore these surfaces. Whether you have a residential play area in your backyard or manage a commercial play area, this guide will equip you with the knowledge and tools needed to ensure a safe and enjoyable play environment.
Before we delve into the repair process, let’s first understand why play area surfaces may peel in the first place.
Key Takeaways:
- Regular maintenance, proper preparation, and using the right materials are crucial for repairing peeling play area surfaces. By following the step-by-step guide and incorporating essential maintenance tips, you can ensure a safe and enjoyable play environment for children.
- Addressing the underlying issues, applying a protective coating, and conducting regular inspections are key to preventing future peeling and maintaining a vibrant play area. With the right approach and tools, you can restore the safety and beauty of the play area surface.
Read more: How To Make A Play Area For Baby
Reasons for Peeling Play Area Surfaces
There are several factors that can contribute to the peeling of play area surfaces. Understanding these reasons will help you better diagnose the underlying issues and implement effective repair strategies.
1. Age and Weathering: Over time, play area surfaces can become worn out and deteriorated due to constant use and exposure to harsh weather conditions. The constant sun exposure, rain, snow, and freezing temperatures can cause the materials to degrade, resulting in peeling surfaces.
2. Improper Installation: Insufficient or incorrect surface preparation and installation techniques can lead to peeling. If the surface was not properly cleaned, primed, or the adhesive was not applied correctly, it can cause the top layer to detach over time.
3. Poor Quality Materials: Using low-quality or inappropriate materials for play area surfaces can contribute to peeling. Inferior coatings, adhesives, or patching compounds may not have the necessary durability to withstand the demands of constant use and exposure.
4. Inadequate Maintenance: Neglecting regular maintenance, such as cleaning, re-coating, and repairs, can lead to the deterioration and eventual peeling of play area surfaces. Regular inspections and proactive maintenance are essential to prevent larger issues from developing.
5. Environmental Factors: The surrounding environment can play a significant role in the deterioration of play area surfaces. Factors like heavy foot traffic, exposure to tree sap, bird droppings, and chemicals from nearby plants can all contribute to the peeling of surfaces.
By identifying and understanding the reasons behind peeling play area surfaces, you can effectively address the root causes during the repair process. Now, let’s explore the common types of play area surfaces that are prone to peeling.
Common Types of Play Area Surfaces
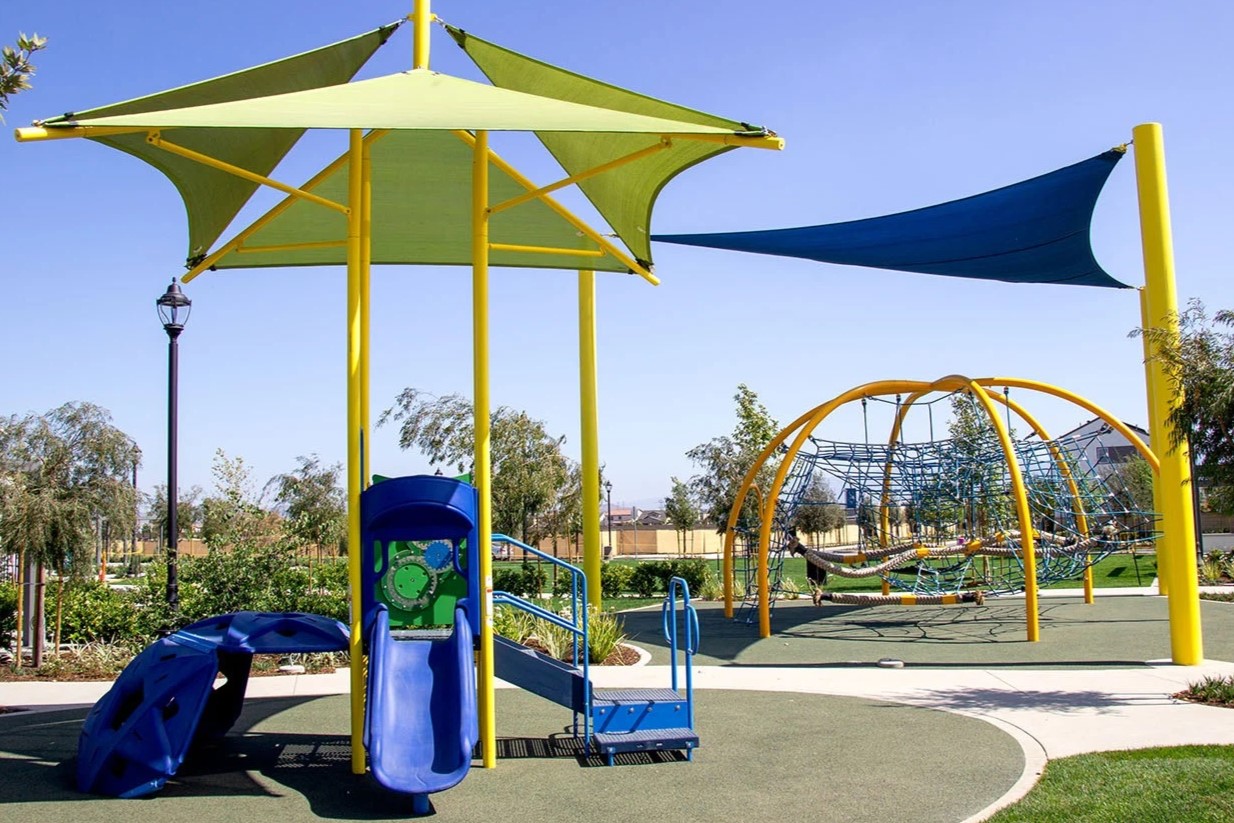
Play area surfaces come in various forms, each with its own unique characteristics and maintenance requirements. Understanding the different types of play area surfaces can help you determine the best approach to repair and restore them. Let’s take a look at some of the most common play area surface materials:
1. Rubber Mulch: Rubber mulch is made from recycled rubber tires and provides a cushioned surface to minimize the risk of injuries from falls. It is durable, long-lasting, and requires minimal maintenance. However, over time, the top layer of rubber mulch can peel and degrade due to weathering and wear.
2. Poured-in-Place Rubber: Poured-in-place rubber surfaces are made by mixing rubber granules with a polyurethane binder and then poured onto a prepared sub-base. This type of surface offers excellent impact absorption and is highly resilient. However, if not properly maintained or installed, it can develop cracks and peel over time.
3. Artificial Turf: Synthetic turf provides a lush and natural-looking playing surface that requires minimal maintenance. It is durable and can withstand heavy use. However, if not properly cared for, the synthetic fibers can become matted and peel, impacting the safety and appearance of the play area.
4. Playground Tiles: Playground tiles are typically made of rubber or synthetic materials and offer a soft, non-slip surface. These tiles are easy to install and replace, providing a cost-effective solution for play areas. However, if the tiles are worn down or not properly secured, they can peel and become hazardous.
5. Wood Chips: Wood chips or mulch are a popular choice for natural play areas. They provide a soft and attractive surface, but they require regular replenishment and maintenance to prevent peeling and deterioration due to weathering and decomposition.
Each type of play area surface may have specific repair and maintenance requirements. Now that we have discussed the common types of play area surfaces, let’s move on to the tools and materials you will need for the repair process.
Tools and Materials Needed
Before you begin the process of repairing peeling play area surfaces, it’s important to gather all the necessary tools and materials. Having the right equipment will ensure that you can effectively and efficiently carry out the repairs. Here are the essential tools and materials you’ll need:
1. Safety Equipment: Safety should always be a priority when working on any project. Make sure to have safety goggles, gloves, and a dust mask to protect yourself from debris and harmful particles.
2. Cleaning Supplies: Start by thoroughly cleaning the play area surface. Depending on the material, you may need a broom, leaf blower, pressure washer, or a scrub brush. It’s important to remove all dirt, debris, and loose material before proceeding with the repairs.
3. Primer: A good quality primer is essential for prepping the surface and ensuring proper adhesion of the patching material. Choose a primer specifically designed for the material of your play area surface, such as rubber or concrete.
4. Patching Compound: The type of patching compound you use will depend on the material of your play area surface. For rubber surfaces, use a patching compound specifically formulated for rubber, while for concrete or asphalt surfaces, opt for a suitable patching compound for those materials.
5. Trowel: A trowel will be needed to apply the patching compound to the surface. Choose a trowel with a comfortable grip and a flat edge for smooth and even application.
6. Sanding Block: A sanding block is useful for smoothing and leveling the repaired surface. It helps to create a seamless transition between the patched area and the surrounding surface.
7. Protective Coating: Once the repairs are complete, you may want to apply a protective coating to enhance the durability of the play area surface. This could be a sealant or a specialized coating designed to protect the specific material you are working with.
8. Paint and Brushes: If your play area surface requires painting, make sure to have the appropriate paint and brushes on hand. Choose a paint that is specifically formulated for outdoor use and is resistant to peeling and fading.
Remember to read and follow the instructions provided by the manufacturers for all tools and materials to ensure proper usage and safety.
Now that you have all the necessary tools and materials, let’s dive into the step-by-step guide for repairing peeling play area surfaces.
Step-by-Step Guide to Repairing Peeling Play Area Surfaces
Follow these steps to effectively repair peeling play area surfaces and restore them to their former safety and beauty:
- Prepare the Surface: Begin by thoroughly cleaning the play area surface. Remove any loose debris, dirt, or peeling material using a broom, leaf blower, or pressure washer. Ensure that the surface is dry before proceeding to the next step.
- Remove Loose or Peeling Material: Use a scraper or putty knife to carefully remove any loose or peeling material from the surface. Be gentle to avoid causing further damage. Sand the edges of the peeled area to create a smooth transition with the surrounding surface.
- Apply a Primer: Apply a layer of primer to the repaired area. The primer will help the patching compound adhere better to the surface and ensure a long-lasting repair. Follow the manufacturer’s instructions for the specific primer you are using, including drying time.
- Patch the Surface: Use a trowel to apply the appropriate patching compound to the repaired area. Spread the compound evenly, filling any gaps or depressions. Smooth the surface with the trowel for a seamless finish. Allow the patching compound to dry completely according to the manufacturer’s instructions.
- Smooth and Level the Surface: Once the patching compound is dry, use a sanding block to smooth and level the repaired area. Sand in a circular motion, gradually blending the edges of the patch with the surrounding surface. Wipe away any dust or debris with a clean cloth.
- Add a Protective Coating: Depending on the material of your play area surface, consider applying a protective coating to enhance durability and protect against future peeling. Follow the instructions provided by the manufacturer for the specific coating you are using. Allow the coating to dry thoroughly before allowing children to use the play area.
Your repaired play area surface should now be safe and ready for use. Remember to regularly inspect and maintain the surface to prolong its lifespan and prevent future peeling. Here are some maintenance tips to keep in mind:
Read more: How To Organize A Play Area For Toddlers
Preparing the Surface
Before you begin the repair process for peeling play area surfaces, it is essential to properly prepare the surface. This step will ensure that the repairs adhere well and that the finished result is smooth and seamless. Here’s how to prepare the surface for repair:
- Clean the Surface: Start by thoroughly cleaning the play area surface to remove any dirt, debris, or loose material. Use a broom, leaf blower, or pressure washer, depending on the surface material, to ensure a clean and clear working area. Pay special attention to any areas with extensive peeling.
- Inspect for Damages: Take the time to carefully inspect the play area surface for any damages or underlying issues. Look for cracks, holes, or signs of wear that may need to be addressed before proceeding with the repair. If you notice any significant structural issues, it may be necessary to consult a professional for repairs.
- Repair Any Structural Damage: If you discover any cracks or holes during the inspection, you will need to repair them before addressing the peeling surface. Use the appropriate materials and techniques for the specific damage you are dealing with. Allow sufficient time for the repairs to dry or cure before moving on to the next step.
- Remove Loose or Peeling Material: Using a scraper or putty knife, carefully remove any loose or peeling material from the surface. Gently scrape away the damaged layers, being careful not to cause further damage to the surface. Sand the edges of the peeled area to create a smooth transition with the surrounding surface.
- Smooth the Surface: After removing the loose material, use sandpaper or a sanding block to smooth the surface further. This step will help create a level and even base for the patching compound. Sand in a circular motion, gradually blending the edges of the peeled area with the surrounding surface.
- Clean the Surface Again: Once the peeling material has been removed and the surface has been smoothed, clean the area once more to eliminate any dust or debris. Use a broom or vacuum cleaner to remove loose particles, ensuring a clean surface for the next steps of the repair process.
By thoroughly preparing the surface, you are taking the necessary steps to ensure a successful and long-lasting repair. With the surface properly prepped, you can move on to the next step: removing any remaining loose or peeling material.
Removing Loose or Peeling Material
Once you have prepared the surface of the play area by cleaning and inspecting it, the next step in repairing peeling play area surfaces is to remove any remaining loose or peeling material. This is crucial to ensure a smooth and even repair. Follow these steps to effectively remove loose or peeling material:
- Inspect the Surface: Carefully examine the play area surface to identify any areas where the material is loose or peeling. Look for bubbles, flaking, or areas where the surface is visibly coming off. Take note of the extent of the damage and the size of the affected areas.
- Use a Scraper or Putty Knife: Select a scraper or putty knife that is appropriate for the size and condition of the peeling material. Begin at one edge of the affected area and gently scrape away the loose or peeling material. Be cautious not to apply too much pressure, as this could damage the surface further.
- Work in Small Sections: It is advisable to work in small sections at a time. Focus on one area and remove as much loose material as possible before moving on to the next section. This will help ensure that you are thorough in the removal process and prevent any missed patches of peeling material.
- Sand the Edges: After removing the loose material, use sandpaper or a sanding block to smooth the edges of the peeled area. This will create a seamless transition between the repaired section and the surrounding surface. Be gentle and take care not to damage the adjacent areas.
- Remove Dust and Debris: Once you have removed the loose or peeling material and sanded the edges, clean the area to remove any dust or debris. Use a brush or vacuum cleaner to eliminate any loose particles, ensuring a clean and clear surface for the next steps of the repair process.
- Inspect for Remaining Peeling Material: After removing the loose material, inspect the surface again to ensure that all the peeling material has been removed. Look for any remaining bubbles, ripples, or areas where the surface is not fully adhered. It is important to address any remaining issues before proceeding with the repair.
By effectively removing the loose or peeling material, you are preparing the surface for the next steps of the repair process. The next step is to apply a primer, which will help ensure proper adhesion of the patching material. We will cover this step in detail in the next section of the guide.
To repair peeling play area surfaces, start by cleaning the area thoroughly to remove any loose debris. Then, apply a new layer of the appropriate surface material, such as rubber mulch or synthetic turf, to cover the peeling areas and ensure a safe and smooth play surface.
Applying a Primer
Once you have properly prepared the surface and removed any loose or peeling material, the next step in repairing peeling play area surfaces is to apply a primer. Primer is an essential component of the repair process as it helps create a strong bond between the patching material and the existing surface. Here’s how to apply a primer:
- Select the Right Primer: Choose a primer that is specifically designed for the material of your play area surface. Different surfaces may require different types of primers for optimal adhesion. Read the manufacturer’s instructions carefully to ensure that the primer is compatible with your surface material.
- Prepare the Primer: Follow the manufacturer’s instructions to properly prepare the primer for application. This may involve stirring the primer or diluting it with a specified amount of water or solvent. Make sure to thoroughly mix the primer before use to ensure consistent coverage.
- Apply the Primer: Use a paintbrush or roller to apply the primer to the repaired area. Dip the brush or roller into the primer and apply a thin, even coat to the surface. Work in smooth and consistent strokes, covering the entire repaired area. Take care not to apply the primer too thickly as it may affect the adhesion of the patching material.
- Allow the Primer to Dry: Follow the recommended drying time specified by the manufacturer. It is crucial to allow the primer to fully dry before proceeding with the patching process. Drying times can vary depending on the type of primer and environmental conditions, so be sure to check the instructions.
- Inspect the Primed Surface: After the primer has dried, inspect the primed surface to ensure that it is properly coated and ready for the patching material. Look for any areas where the primer may have been missed, ensuring that the entire repaired section is adequately primed.
Applying a primer serves as an important step in the repair process as it promotes better adhesion of the patching material to the surface. The primer creates a strong bond, helping to prevent future peeling and ensuring a long-lasting repair. Now that the primer has been applied, the next step is to patch the surface using an appropriate patching compound.
Patching the SurfaceAfter applying a primer to the repaired area, the next step in repairing peeling play area surfaces is to patch the surface. Patching effectively fills in the damaged areas and creates a smooth and seamless finish. Follow these steps to patch the surface:
- Select the Right Patching Compound: Choose a patching compound that is suitable for the material of your play area surface. Different types of surfaces may require different patching compounds for optimal results. Ensure that the patching compound is designed for outdoor use and is compatible with the primer and surface material.
- Prepare the Patching Compound: Follow the manufacturer’s instructions to properly prepare the patching compound for application. This may involve mixing the compound with water or a specified solvent. Thoroughly mix the compound until it reaches a uniform consistency.
- Apply the Patching Compound: Using a trowel, scoop a generous amount of the prepared patching compound and apply it to the repaired area. Spread the compound evenly, filling any gaps or depressions in the surface. Be sure to extend the patch slightly beyond the boundaries of the affected area to ensure a seamless patch.
- Smooth the Surface: Use the trowel to smooth the surface of the freshly applied patching compound. Glide the trowel over the surface, applying light pressure to create a level and uniform finish. Take care to blend the edges of the patching compound with the surrounding surface for a seamless transition.
- Allow the Patching Compound to Dry: Follow the drying time recommended by the manufacturer. The drying time may vary depending on factors such as the type of patching compound and environmental conditions. It is essential to allow the patching compound ample time to dry and cure properly.
- Inspect and Fine-Tune the Patch: Once the patching compound has dried, inspect the patched area for any imperfections or unevenness. If needed, use sandpaper or a sanding block to smooth out any rough edges or high spots. Wipe away any dust or debris with a clean cloth.
Patching the surface effectively fills in the damaged areas and creates a more aesthetically pleasing and safe play area. With the patching complete, the next step is to smooth and level the surface for a seamless finish. We will cover this step in detail in the next section of the guide.
Read more: How To Make A Dog Play Area
Smoothing and Leveling the Surface
Once you have patched the damaged areas of the play area surface, the next step in repairing peeling play area surfaces is to smooth and level the surface. This step ensures a seamless transition between the patched area and the surrounding surface, creating a visually appealing and safe play area. Follow these steps to smooth and level the surface:
- Gather the Necessary Tools: For this step, you will need a sanding block or sandpaper (fine grit), a clean cloth, and possibly a putty knife or scraper.
- Sand the Patched Area: Using the sanding block or sandpaper, gently sand the patched area in a circular motion. The goal is to create a smooth surface by leveling out any unevenness or ridges caused by the patching compound. Be mindful not to oversand and remove too much material, as this can affect the integrity of the repair.
- Blending the Edges: Pay close attention to the edges of the patched area. Use the sanding block or sandpaper to blend the edges with the surrounding surface, creating a seamless transition. This will help prevent any noticeable elevation differences or rough edges that could pose a tripping hazard.
- Inspect and Fine-Tune: After sanding, carefully inspect the surface to ensure that it is smooth and level. Run your hand over the repaired area to check for any remaining roughness or inconsistencies. If needed, repeat the sanding process until you achieve a satisfactory result.
- Remove Dust and Debris: Once you are satisfied with the smoothing and leveling of the surface, use a clean cloth to wipe away any dust or debris. Ensuring a clean surface will facilitate the next step of the repair process, which involves adding a protective coating if desired.
- Consider Adding a Protective Coating: While not mandatory, adding a protective coating to the repaired surface can enhance its durability and longevity. This can include applying a sealant or a specialized coating designed to protect the specific material of your play area surface. Follow the manufacturer’s instructions for proper application and drying times.
By smoothing and leveling the surface, you are creating a seamless finish and ensuring a safe and visually appealing play area. With the surface now smooth and level, the final step is to consider regular maintenance tips to prolong the life of your play area surface. We will cover these maintenance tips in the next section of the guide.
Adding a Protective Coating
After completing the repair process and ensuring that the play area surface is smooth and level, you may want to consider adding a protective coating. While not mandatory, a protective coating can enhance the durability and longevity of the surface, providing an added layer of protection against future peeling and wear. Here’s how to add a protective coating:
- Select the Right Coating: Choose a protective coating that is specifically designed for the type of play area surface you have. Consider factors such as weather resistance, UV protection, and ease of application. It is recommended to use a coating that is appropriate for outdoor use and is compatible with the primer and patching material you used.
- Prepare the Surface: Before applying the protective coating, ensure that the surface is clean and free from any dust or debris. Use a brush, broom, or vacuum cleaner to remove any loose particles that may interfere with the application process.
- Read the Manufacturer’s Instructions: Carefully read and follow the manufacturer’s instructions provided with the protective coating. These instructions will outline specific application techniques, recommended drying times, and safety precautions. Adhering to these instructions will ensure the best results and avoid any potential issues.
- Apply the Protective Coating: Using a brush, roller, or sprayer, apply the protective coating to the play area surface. Work in small sections, ensuring even and comprehensive coverage. Be mindful of any nooks, corners, or seams that may require special attention to ensure full protection.
- Allow the Coating to Dry: Follow the recommended drying time specified by the manufacturer. Keep in mind that drying times may vary depending on the type of protective coating and environmental conditions. It is crucial to allow the coating to fully dry and cure before allowing children to use the play area.
- Inspect and Maintain: Once the protective coating has dried, inspect the surface to ensure that it is adequately and evenly coated. Regularly monitor the surface for signs of wear or peeling, and promptly address any issues to maintain the integrity of the protective coating. Follow any additional maintenance guidelines provided by the manufacturer.
Adding a protective coating to the play area surface can help prolong its lifespan and protect against future peeling or deterioration. However, it is important to note that the frequency of reapplication may vary depending on factors such as climate, usage, and the specific coating used. Regularly inspect and maintain the surface to ensure continued protection and a safe play area for children.
With the peeling play area surface now repaired, smoothed, and protected, you’ve taken the necessary steps to create a safe and enjoyable play environment. However, it is important to keep in mind that regular maintenance is key to preserving the condition of the surface over time. Let’s explore some essential maintenance tips in the next section.
Regular Maintenance Tips
To ensure the longevity and continued safety of your play area surface, regular maintenance is essential. With proper care and attention, you can prevent future peeling and maintain a vibrant and inviting play environment. Here are some important maintenance tips to keep in mind:
- Clean Regularly: Regularly clean the play area surface to remove dirt, debris, and any potential contaminants. Use a broom, leaf blower, or pressure washer to remove loose particles. For more stubborn stains, use a mild soap solution and a soft brush to gently scrub the surface.
- Inspect for Damage: Regularly inspect the surface for any signs of damage, including peeling, cracking, or uneven areas. Promptly address any issues to prevent further damage and ensure the safety of those using the play area.
- Repair Small Damages: If you notice any small areas of peeling or damage, repair them promptly. Use the appropriate patching compound and follow the same repair steps outlined earlier in this guide. By addressing small damages right away, you can prevent them from becoming larger issues.
- Reapply Protective Coating: If you have applied a protective coating to the play area surface, be aware that it may need to be reapplied periodically. Follow the manufacturer’s instructions regarding the recommended frequency of reapplication. This will ensure continued protection against peeling and wear.
- Minimize Harsh Chemical Exposure: Avoid using harsh chemicals, solvents, or abrasive cleaning agents on the play area surface. These can cause damage and accelerate the peeling process. Stick to mild and environmentally friendly cleaning products.
- Manage Environmental Factors: Be mindful of environmental factors that can impact the play area surface. Trim nearby trees to prevent excessive sap or leaf litter from accumulating. Clean up any bird droppings or other debris that may land on the surface. Consider using protective covers during periods of inclement weather or when the play area is not in use for an extended period of time.
- Encourage Proper Use: Educate children and adults on the proper use of the play area to minimize unnecessary wear and tear. Encourage them to remove objects that may cause damage, avoid dragging heavy items across the surface, and follow any guidelines or rules specific to the play equipment.
- Regular Inspections: Conduct regular inspections of the play area surface to identify any potential issues before they escalate. Look for signs of peeling, cracking, or areas of concern. Address any problems promptly to maintain the safety and integrity of the play area.
By incorporating these maintenance tips into your routine, you can help prevent future peeling and maintain a well-maintained and inviting play area for children to enjoy.
Repairing peeling play area surfaces may seem like a daunting task, but with the right approach, tools, and regular maintenance, you can restore the safety and aesthetic appeal of the play area. By properly preparing the surface, removing loose material, applying a primer and patching compound, smoothing and leveling the surface, and adding a protective coating, you can ensure a durable and enjoyable play environment for years to come.
Remember to always follow the manufacturer’s instructions for specific products and materials used. Safety should be a top priority throughout the repair process, so make sure to wear appropriate protective gear and work in a well-ventilated area.
By investing time and effort into repairing and maintaining peeling play area surfaces, you are creating a safe and entertaining space that will be enjoyed by children for years to come.
Conclusion
Repairing peeling play area surfaces is crucial for maintaining a safe and visually appealing play environment. By addressing the underlying issues and following the step-by-step guide we’ve provided, you can effectively restore the surface and prevent further peeling.
Throughout this comprehensive guide, we have discussed the reasons for peeling play area surfaces, the common types of play area surfaces, and the tools and materials required for the repair process. We covered the step-by-step instructions for preparing the surface, removing loose or peeling material, applying a primer, patching the surface, and smoothing and leveling the repaired area. Additionally, we discussed the option of adding a protective coating and provided essential maintenance tips to prolong the lifespan of your play area surface.
Remember, proper preparation, using the right materials, and regular maintenance are key to preserving the integrity and safety of your play area surface. Regularly inspect the surface for potential damage and address any issues promptly. By doing so, you can ensure a long-lasting and enjoyable play environment for children.
As you embark on the repair process, always prioritize safety. Use appropriate safety equipment and follow the manufacturer’s instructions for the tools and materials you are using. If you encounter significant structural issues or are unsure about the repair process, it is advisable to consult with a professional to ensure proper assessment and repair of the play area surface.
Ultimately, investing time and effort into repairing and maintaining peeling play area surfaces is a worthwhile endeavor. By creating a safe and inviting play environment, you provide children with the opportunity to enjoy outdoor activities, foster creativity, and promote physical development.
So, roll up your sleeves, gather your tools, and embark on the journey of repairing your peeling play area surfaces. With the knowledge and guidance provided in this guide, you are well-equipped to restore the beauty and safety of your play area. Remember, a well-maintained play area surface will bring joy and smiles to children’s faces for years to come.
Frequently Asked Questions about How To Repair Peeling Play Area Surfaces
Was this page helpful?
At Storables.com, we guarantee accurate and reliable information. Our content, validated by Expert Board Contributors, is crafted following stringent Editorial Policies. We're committed to providing you with well-researched, expert-backed insights for all your informational needs.

0 thoughts on “How To Repair Peeling Play Area Surfaces”