Home>Garden Essentials>Garden Storage>Small Vegetable Garden Ideas: 15 Ways To Maximize Your Space
Garden Storage
Small Vegetable Garden Ideas: 15 Ways To Maximize Your Space
Modified: October 20, 2024
Looking for small vegetable garden ideas? Discover 15 clever ways to maximize your space and optimize storage for your plants and tools.
(Many of the links in this article redirect to a specific reviewed product. Your purchase of these products through affiliate links helps to generate commission for Storables.com, at no extra cost. Learn more)
Introduction
Having a small garden doesn’t mean you have to miss out on the joy of growing your own vegetables. With a little creativity and strategic planning, you can maximize every inch of your space and create a thriving vegetable garden. Whether you have a tiny balcony, a small patio, or even just a windowsill, there are numerous ways to turn your limited space into a bountiful garden.
Not only does growing your own vegetables in a small garden help you save money and reduce your carbon footprint, but it also allows you to enjoy the satisfaction of harvesting fresh produce right at your doorstep. Plus, the flavors of homegrown vegetables are unmatched, making your meals even more delicious and nutritious.
In this article, we will explore 15 small vegetable garden ideas that will help you make the most of your limited space. From container gardening to vertical gardening, raised bed gardening, and more, there is a solution for every type of small garden. Let’s dive in and discover the possibilities!
Key Takeaways:
- Maximize small gardening spaces with innovative techniques like vertical gardening, container gardening, and edible landscaping, allowing for bountiful harvests and visually appealing gardens.
- Embrace creativity and experimentation with unconventional gardening methods such as growing vegetables in old tires, wooden pallets, and vintage watering cans, adding a unique and whimsical touch to your garden.
Selecting the Right Vegetables for a Small Garden
When planning a small garden, it’s essential to choose the right vegetables that are well-suited to your space constraints. Some vegetables require more space to grow and may not be suitable for small gardens. Here are a few factors to consider when selecting vegetables for your small garden:
- Compact Growth: Opt for vegetables that have a compact growth habit and don’t spread out too much. Look for varieties bred specifically for small spaces or those that can be trained to grow vertically.
- Dwarf Varieties: Choose dwarf or mini varieties of vegetables, such as cherry tomatoes, baby carrots, or patio cucumbers. These varieties are bred to produce full-sized fruits but on compact plants.
- Quick Maturation: Select vegetables with a shorter growing season. This way, you can harvest your produce sooner, allowing you to replant or grow a different crop in the same space.
- Succession Planting: Consider vegetables that lend themselves well to succession planting. This technique involves planting new crops as soon as the previous ones are harvested, ensuring a continuous supply of fresh vegetables throughout the growing season.
- Versatility: Choose vegetables that can be harvested at different stages of development. For example, baby lettuce leaves can be harvested early on for salads, while the rest of the plant continues to grow, saving space for other plants.
Some great choices for small gardens include salad greens like spinach and lettuce, herbs like basil and parsley, radishes, cherry tomatoes, bush beans, and peppers. These vegetables are compact, grow relatively quickly, and can be harvested continuously throughout the season.
Remember to also consider your personal preferences and the vegetables you enjoy eating the most. Gardening is not just about maximizing space; it’s also about growing the vegetables you love.
Now that you have an idea of what to look for in terms of vegetable selection, let’s explore different gardening techniques that will help you make the most of your limited space.
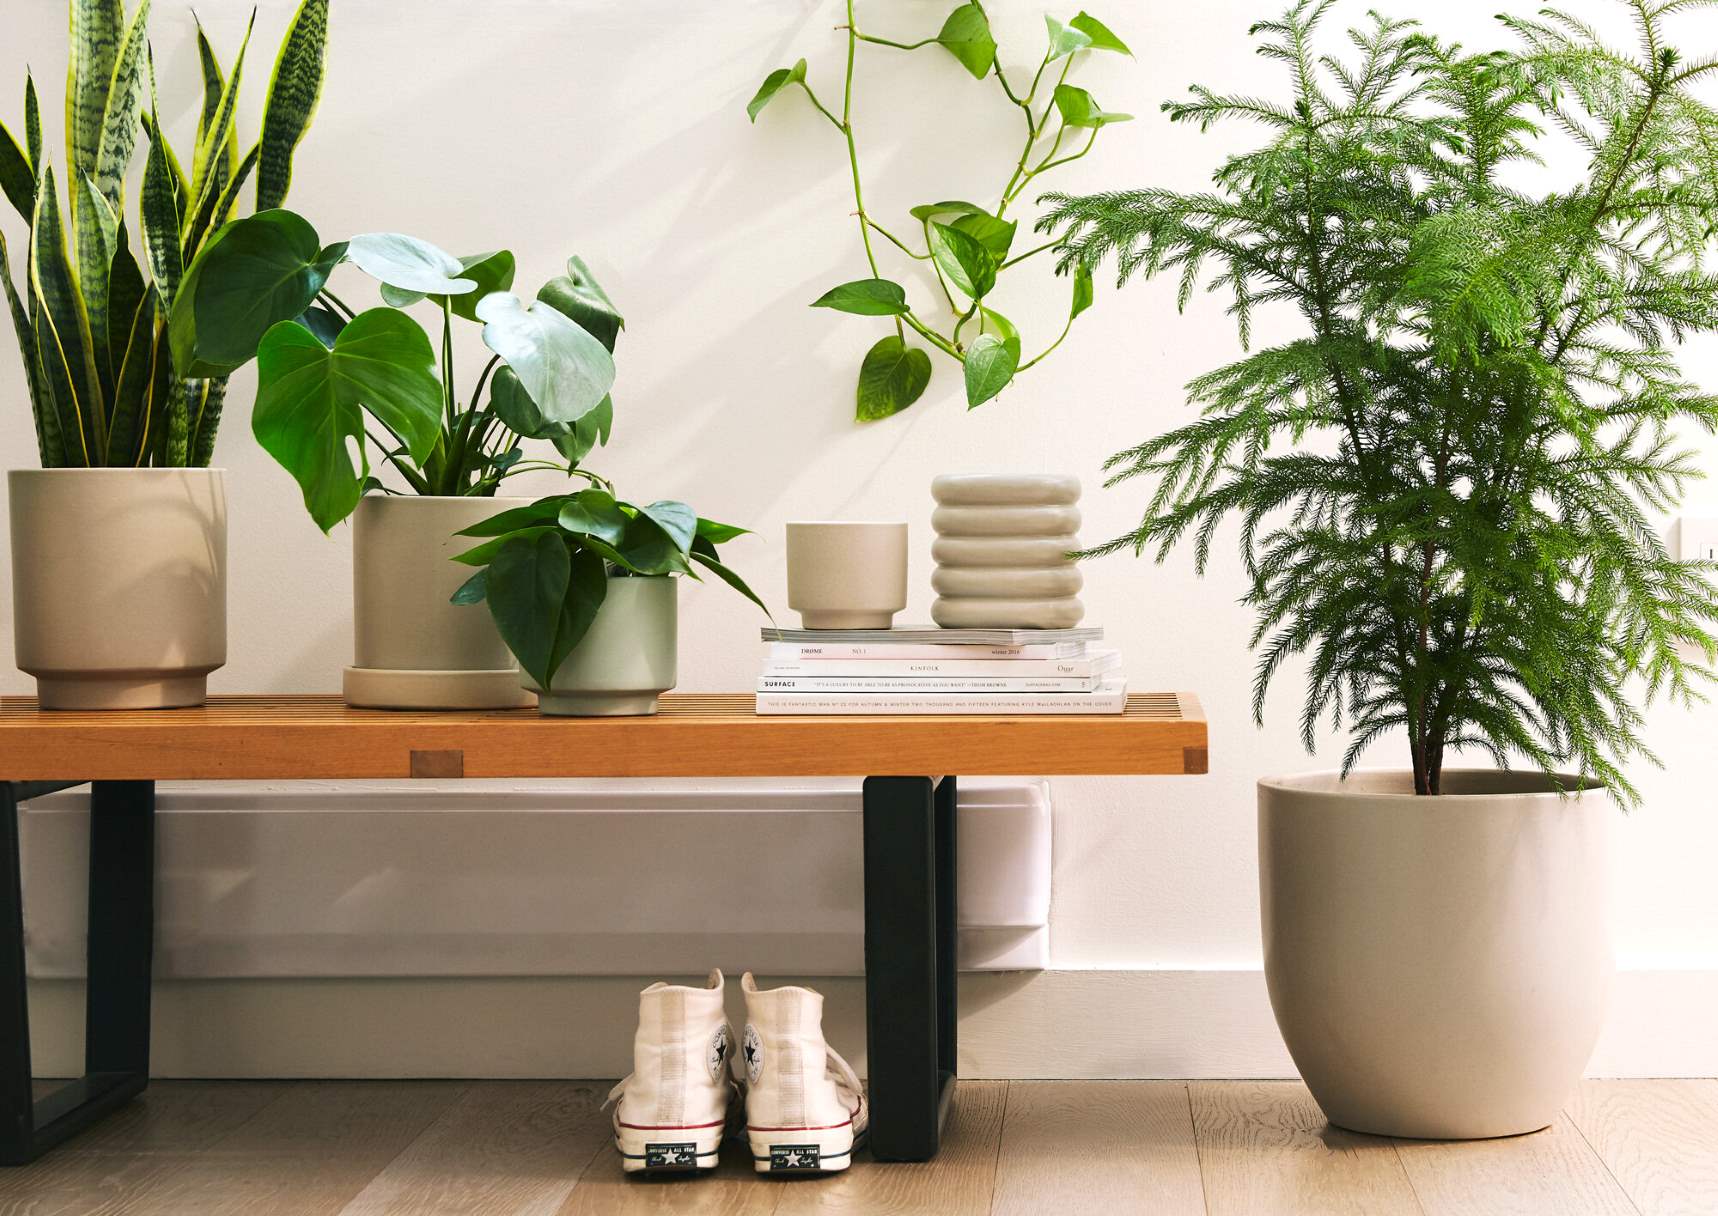
Container Gardening: Growing Vegetables in Pots
Container gardening is a fantastic solution for small spaces, allowing you to grow a variety of vegetables even if you don’t have a traditional garden bed. It offers flexibility, as you can easily move your pots around to optimize sunlight exposure and change the garden layout whenever needed.
Here are some tips for successful container gardening:
- Choose the Right Size Pots: Select pots that are appropriate for the vegetables you plan to grow. Larger plants require bigger containers with enough depth for their root systems to thrive.
- Ensure Proper Drainage: Good drainage is essential to prevent waterlogging and root rot. Make sure your pots have drainage holes at the bottom. You can also add a layer of gravel or broken pottery to improve drainage.
- Use High-Quality Potting Soil: Invest in a high-quality potting mix that is well-draining and lightweight. Avoid using garden soil, as it can become compacted in containers.
- Water Regularly: Container plants dry out more quickly than those in the ground, so regular watering is crucial. Check the moisture level by sticking your finger into the soil; if it feels dry, it’s time to water.
- Fertilize Appropriately: Container vegetables require regular fertilization to ensure proper nutrition. Choose a balanced, slow-release fertilizer or use organic alternatives like compost or worm castings.
- Consider Companion Planting: Maximize space by planting compatible vegetables together in the same container. For example, tomatoes and basil are excellent companion plants.
When it comes to selecting vegetables for container gardening, choose compact varieties or those specifically bred for container growing. Salad greens like lettuce and spinach, herbs like thyme and mint, cherry tomatoes, peppers, and even dwarf varieties of zucchini and eggplant are ideal choices for containers.
Place your containers in a sunny location that receives at least six to eight hours of sunlight per day. If your space is limited, you can get creative and utilize vertical space by using hanging baskets or stacking containers on shelves or trellises.
Remember to regularly monitor the moisture levels and check for any signs of pests or diseases. With proper care and attention, container gardening can provide a bountiful harvest, even in the smallest of spaces.
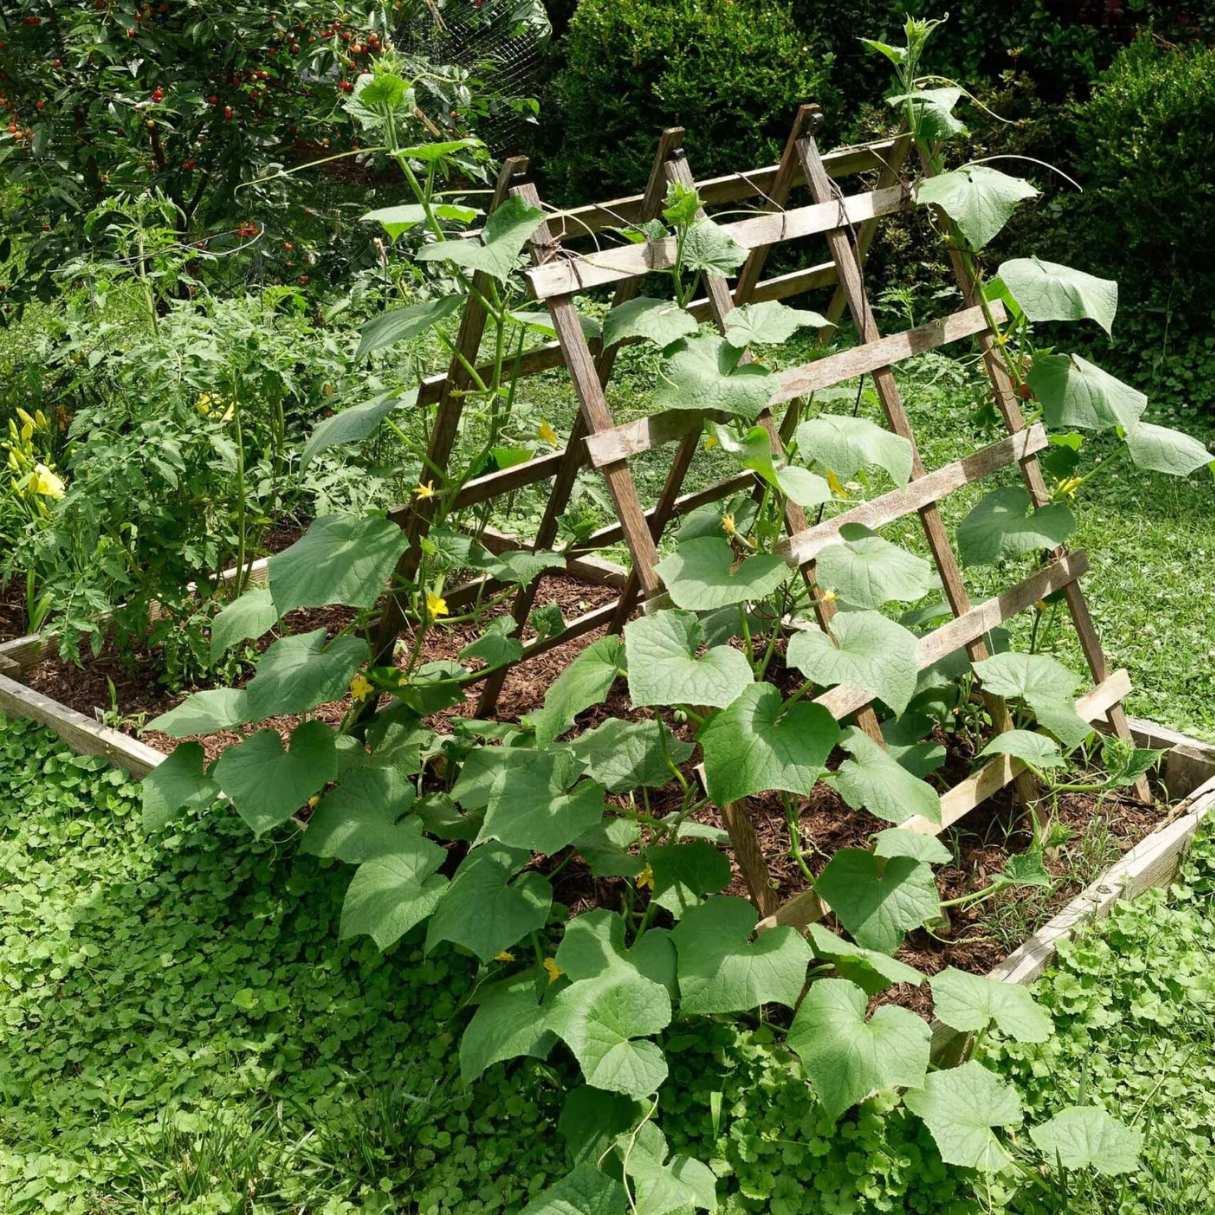
Vertical Gardening: Utilizing Walls and Trellises
Vertical gardening is a clever technique that allows you to grow vegetables upward, making the most of your available vertical space. By utilizing walls, fences, and trellises, you can create a lush and productive garden without taking up valuable ground space.
Here are some ideas for successful vertical gardening:
- Choose the Right Vegetables: Certain vegetables are well-suited for vertical growth, such as vine tomatoes, cucumbers, pole beans, and peas. These plants naturally climb and can be trained onto trellises or other support structures.
- Install Sturdy Supports: Proper support is crucial for vertical gardening. Install trellises, stakes, or fencing against the wall or in the ground, ensuring they are strong enough to hold the weight of the plants as they grow.
- Train and Prune: As your plants grow, gently guide their tendrils or vines onto the support structure. Regularly prune and tie up the plants to keep them properly supported and prevent them from becoming tangled or overcrowded.
- Use Hanging Containers: Hanging baskets and vertical planters are another excellent option for vertical gardening. You can grow trailing plants like strawberries or herbs in these hanging containers, maximizing space while adding visual interest.
- Create a Living Wall: Consider installing a living wall, also known as a green wall or vertical garden system. These innovative structures allow you to grow multiple layers of plants on a vertical surface, creating an impressive and space-efficient garden display.
- Companion Planting: Take advantage of vertical gardening by practicing companion planting. For example, grow pole beans alongside corn or use tall sunflowers as a support for climbing vegetables.
Vertical gardening not only saves space but also provides several benefits. It improves air circulation around the plants, reduces disease and pests, and allows for easier harvesting and maintenance. Additionally, growing vertically can create a stunning visual display and add a touch of greenery to your walls or fences.
Remember to provide adequate water and nutrients to your vertically grown vegetables, as they can dry out more quickly. Regularly check the stability of your supports and make any necessary adjustments to ensure the safety and success of your vertical garden.
By utilizing walls and trellises, you can transform any small space into a thriving vertical garden, full of healthy and productive vegetables.
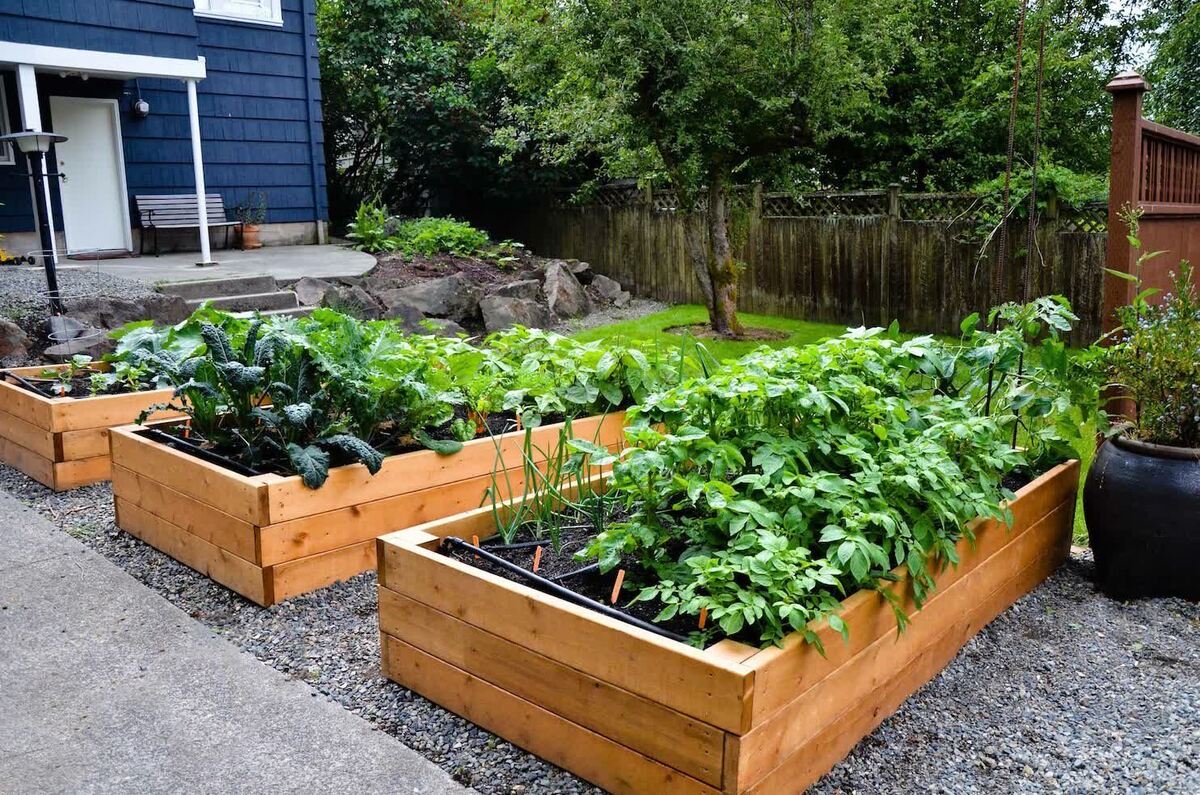
Raised Bed Gardening: Making the Most of Limited Space
Raised bed gardening is a popular choice for maximizing space in small gardens. It involves creating contained garden beds that are elevated above the ground, providing several benefits for vegetable growth and making the most of limited space.
Here are some tips for successful raised bed gardening:
- Choose the Right Location: Select a sunny spot in your garden where the raised beds will receive at least six to eight hours of direct sunlight per day. Avoid placing them in shady or low-lying areas that may lead to poor drainage.
- Plan the Size and Shape: Determine the size and shape of your raised beds based on your available space and accessibility. A width of around 3 to 4 feet is ideal, as it allows for easy reaching without the need to step into the bed.
- Construct the Beds: Build the raised beds using materials like wood, bricks, or concrete blocks. Ensure that the walls of the beds are at least 12 inches high to provide enough depth for the roots to grow freely.
- Amend the Soil: Fill the raised beds with a nutrient-rich soil mixture that is well-draining. Incorporate organic matter like compost or aged manure to improve fertility and provide a healthy growing environment for your vegetables.
- Utilize Intensive Planting: Take advantage of the compact space within the raised beds by practicing intensive planting techniques. This involves closely spacing plants together, making use of every available inch of the bed.
- Practice Crop Rotation: Rotate your vegetables each season to prevent the buildup of pests and diseases. This can be easier to accomplish in raised beds since you can clearly delineate each planting area.
- Install Drip Irrigation: Consider installing a drip irrigation system for efficient watering of your raised beds. This will help conserve water, prevent overwatering, and ensure that each plant receives the necessary moisture.
Raised bed gardening offers numerous benefits for small gardens. It allows for better soil drainage and aeration, provides better control over soil quality, minimizes weed growth, and makes it easier to maintain and harvest your vegetables.
When choosing vegetables for your raised beds, consider the compact nature of their growth and the amount of space they require. Some great options for raised bed gardening include leafy greens like lettuce and spinach, root vegetables like carrots and radishes, and compact varieties of tomatoes, peppers, and herbs.
With raised bed gardening, you can transform a small area of your yard into a highly productive and organized vegetable garden, maximizing the use of limited space and ensuring a successful harvest.
Square Foot Gardening: Efficient and Organized Planting
Square foot gardening is a method of gardening that maximizes space efficiency and promotes organized planting. It involves dividing the garden into small, square sections and growing different crops in each square foot, resulting in a highly productive and visually appealing garden.
Here are some tips for successful square foot gardening:
- Plan Your Layout: Before starting your square foot garden, carefully plan the layout by determining the number and size of the planting squares. You can use a physical grid system or mark the sections with string or wooden dividers.
- Use a Raised Bed or Containers: Square foot gardening is often done in raised beds or containers. By using contained spaces, you can easily maintain the organization and avoid plants encroaching into neighboring squares.
- Divide the Garden: Divide the garden into one-foot squares. Each square can be further divided into smaller sections depending on the recommended spacing for each crop. This helps you maximize space while ensuring proper plant growth.
- Select the Right Crops: Choose crops that are suitable for square foot gardening. Compact varieties of vegetables and herbs work best in this method. Lettuce, radishes, carrots, herbs like basil and parsley, and small-sized tomatoes and peppers are excellent choices.
- Rotate Crops: Rotate your crops each season to maintain soil health and minimize the risk of pests and diseases. By following a crop rotation plan, you can ensure that the plants receive the nutrients they need and reduce the likelihood of soil depletion.
- Companion Planting: Take advantage of companion planting principles. Plant compatible crops together in the same square to maximize space usage and enhance growth. For example, tomatoes and basil make great companion plants.
- Succession Planting: Practice succession planting to maximize your harvest throughout the growing season. As you harvest crops, replant the square with a new crop, ensuring a continuous supply of fresh vegetables.
- Maintain Proper Spacing: Follow the recommended spacing guidelines for each crop to ensure optimal growth and prevent overcrowding. Overcrowded plants can lead to stunted growth, increased pest and disease incidence, and lower yields.
Square foot gardening is not only efficient but also aesthetically pleasing. It creates a well-organized and visually appealing garden, making it easier to tend to and harvest your crops.
Not only does square foot gardening enable you to maximize your space, but it also helps conserve resources such as water, fertilizers, and time. By focusing on intensive planting in designated squares, you reduce the need for excessive weeding, watering, and maintenance.
If you have limited space but still desire a productive vegetable garden, square foot gardening is a fantastic option. It allows you to grow a variety of vegetables in a small area while maintaining an organized and efficient garden layout.
Companion Planting: Maximizing Space and Deterring Pests
Companion planting is a technique that involves growing specific plants together for the benefit of both plants. By carefully selecting and pairing compatible plants, you can maximize your space utilization, improve plant health, and deter pests naturally.
Here are some tips for successful companion planting:
- Choose Complementary Plants: Select plants that have beneficial interactions with each other. Some plants repel pests, while others attract beneficial insects or enhance soil fertility. For example, planting marigolds alongside tomatoes can deter aphids, while growing basil near peppers can enhance their flavor and deter pests.
- Attract Beneficial Insects: Certain plants act as natural insect repellents or attract beneficial insects that help control pests. For instance, planting flowers like calendula, cosmos, or yarrow can attract pollinators and predatory insects that prey on pests.
- Deter Pest Insects: Some plants have natural defenses that repel pests. For example, planting onions or garlic near carrots can deter carrot flies, while planting mint near cabbage can deter cabbage worms.
- Provide Shade and Support: Companion plants can also provide shade or support to each other. Taller plants can offer shade to shorter, heat-sensitive plants, while climbing plants like beans or cucumbers can utilize vertical space by growing on trellises or alongside taller crops.
- Rotate Crops: Practice crop rotation when companion planting to avoid plant diseases and soil depletion. By rotating the locations of plants within the companion planting scheme each season, you can prevent the buildup of pests and diseases and maintain soil fertility.
- Observe Compatibility: Be mindful of plant compatibility and the specific needs of each companion plant. Some plants may compete for nutrients or grow at different rates, so ensure compatibility to prevent overcrowding or stunted growth.
- Research Best Companion Combos: Before planting, research specific companion plant combinations that work well together. There are many tried and tested combinations, such as tomatoes with basil or peppers with marigolds, that have been proven to enhance each other’s growth and deter pests.
Companion planting not only maximizes space usage but also creates a harmonious and balanced ecosystem in your garden. By utilizing the natural interactions between plants, you can reduce the need for chemical pesticides and create a healthier environment for your vegetables to thrive.
Keep in mind that companion planting is not a foolproof method and may not work in all situations. It is essential to observe and adapt your companion planting strategies based on the specific conditions of your garden and the performance of the plants.
By implementing companion planting techniques, you can create a more biodiverse and resilient garden that takes advantage of nature’s synergistic relationships, ultimately leading to healthier plants and a more abundant harvest.
Succession Planting: Extending the Growing Season
Succession planting is a gardening technique that involves planting new crops as soon as the previous ones are harvested. By staggered planting throughout the growing season, you can maximize your harvest, extend the productive period of your garden, and make the most of your available space.
Here are some tips for successful succession planting:
- Plan Your Planting Schedule: Create a planting schedule based on the specific requirements of each crop and the length of your growing season. Determine the average days to maturity for each vegetable and calculate the appropriate time to start new seedlings or transplant new plants.
- Choose Quick-Maturing Varieties: Opt for quick-maturing varieties of vegetables to ensure a faster turnaround between plantings. Look for varieties that have shorter days to maturity, allowing you to harvest and replant in a shorter time frame.
- Utilize Season Extenders: Use season extenders like row covers, cold frames, or hoop houses to protect crops from frost and extend the growing season. This allows you to plant earlier in the spring or continue growing later into the fall.
- Select Crops with Different Maturation Times: Mix and match crops with varying maturation times to ensure a continuous supply of vegetables throughout the growing season. Plant early-season crops like lettuce and radishes alongside mid-season crops like beans and cucumbers, followed by late-season crops like winter squash or Brussels sprouts.
- Optimize Space Usage: As you harvest one crop, replant the space immediately with a new crop. This way, you can utilize every inch of your garden space and ensure a continuous supply of fresh produce.
- Rotate Crops: Practice crop rotation during succession planting as well. By rotating the location of crops each season, you help prevent the buildup of pests and diseases and minimize nutrient depletion in the soil.
- Prepare the Soil: After harvesting a crop, replenish the soil with organic matter like compost or well-rotted manure to restore nutrients and improve soil fertility for the next planting.
- Observe Germination and Harvest Times: Keep a record of your planting dates, germination times, and harvest times for each crop. This information will help you refine your succession planting schedule in subsequent seasons.
Succession planting is an effective strategy for maximizing the productivity of your garden and extending the growing season. It allows you to make the most of your available space and enjoy a continuous harvest of fresh vegetables.
Be sure to monitor the condition of your plants regularly and address any pest or disease issues promptly to ensure the success of your succession planting efforts. With proper planning and a well-executed schedule, you can enjoy a bountiful harvest from your garden throughout the entire growing season.
Intensive Garden Layout: Packing More Plants per Square Foot
An intensive garden layout is a technique that involves maximizing the number of plants grown per square foot of garden space. By closely spacing plants and utilizing every inch of available area, you can significantly increase your yield and make the most of limited space.
Here are some tips for designing an intensive garden layout:
- Plan Your Garden Beds: Determine the layout and size of your garden beds, considering the available space and sunlight requirements of your plants. Optimize the shape and arrangement of the beds to ensure easy access for planting, maintenance, and harvesting.
- Utilize Plant Spacing Guidelines: Follow the recommended spacing guidelines for each crop, but consider pushing the limits by spacing plants slightly closer together. Most vegetables benefit from being spaced closer than traditionally recommended, as it creates a microclimate that helps conserve moisture and reduces weed growth.
- Interplanting and Succession Planting: Incorporate interplanting and succession planting techniques to maximize space usage. Interplanting involves planting quick-growing crops alongside slower-growing ones, utilizing space in between the larger plants. Succession planting ensures a continuous harvest by planting new crops as soon as others are harvested.
- Vertical Gardening: Utilize trellises, stakes, or cages to grow vining plants vertically, allowing you to make the most of vertical space. Vegetables like tomatoes, cucumbers, and beans can be trained to grow upward, freeing up ground space for other plants.
- Companion Planting: Take advantage of companion planting principles to maximize the use of space. Pairing compatible plants together allows you to grow various crops within close proximity, benefiting from their potential synergistic interactions.
- Use Raised Beds or Containers: Raised beds or containers provide better control over soil quality and allow for compact spacing. You can create separate planting areas within raised beds, each dedicated to a specific crop, optimizing space and minimizing competition.
- Consider Plant Height and Growth Habit: When planning your layout, take into account the height and growth habit of each plant. Place taller plants in locations where they won’t shade out shorter plants, ensuring that each plant receives adequate sunlight.
- Regular Maintenance: Intensive gardening requires close monitoring and consistent care. Regularly check for pests, diseases, and nutrient deficiencies, ensuring that your plants receive the necessary attention to thrive in a high-density garden environment.
Intensive gardening allows you to grow a significant amount of food in a relatively small area. It promotes efficient use of resources, maximizes productivity, and minimizes the effort required for weeding and maintenance.
Remember to strike a balance between densely spacing your plants and providing enough room for healthy growth. Overcrowded plants may compete for resources and result in stunted growth or increased susceptibility to diseases.
With proper planning and diligent gardening practices, an intensive garden layout can lead to a bountiful harvest, even in limited space, allowing you to enjoy a diverse range of fresh vegetables throughout the growing season.
Consider using vertical gardening techniques such as trellises, hanging baskets, and wall-mounted planters to maximize space in your small vegetable garden. This allows you to grow more plants in a smaller area.
Edible Landscaping: Combining Aesthetics with Functionality
Edible landscaping is a creative approach to gardening that combines the beauty of ornamental plants with the practicality of growing edible crops. Rather than separating your vegetable garden from your front or backyard, edible landscaping integrates food-producing plants seamlessly into your landscape design, creating a visually stunning and productive outdoor space.
Here are some tips for successful edible landscaping:
- Select Beautiful Edible Plants: Choose edible plants that not only provide a harvest but also have aesthetic appeal. Consider attractive varieties of vegetables, fruits, and herbs with interesting colors, textures, and foliage. This includes plants like rainbow chard, purple basil, or ornamental peppers.
- Integrate Edibles into Existing Landscaping: Instead of having separate vegetable beds, incorporate edible plants into your existing flower beds or borders. Interplant vegetables, herbs, and edible flowers with ornamental perennials or annuals to add color and interest to your landscape.
- Create Focal Points: Use edible plants as focal points in your landscape design. Plant fruit trees as centerpieces or espalier them against a wall, creating a visual focal point that also provides delicious harvests. Trellis vining vegetables like cucumbers or scarlet runner beans to create vertical interest.
- Consider Seasonal Interest: Choose edible plants that offer seasonal interest beyond their harvest. Incorporate plants with beautiful flowers in the spring and vibrant foliage in the fall. This creates visual appeal throughout the year, even when the plants are not directly producing food.
- Utilize Containers: Use decorative containers to grow edible plants like lettuces, herbs, or strawberries, and place them strategically around your outdoor living space. This adds both functionality and a decorative element to your landscape design.
- Practice Pruning and Shaping: Trim and shape your edible plants to enhance their aesthetic appeal. Utilize pruning techniques like espalier or topiary to create visually striking forms while maintaining productivity.
- Include Edible Edges: Enhance the borders of your garden beds with edible plants like colorful Swiss chard, edible flowers, or cascading herbs. This adds a unique touch to your landscape while utilizing every available space.
- Consider Pollinator-Friendly Plants: Plant a variety of flowering herbs, vegetables, and fruits that attract pollinators like bees and butterflies. This not only adds beauty but also helps ensure proper pollination and fruit set in your edible landscape.
Edible landscaping offers the best of both worlds – a visually appealing landscape that also provides a bountiful harvest. It establishes a harmonious balance between aesthetics and functionality, turning your outdoor space into an inviting and productive sanctuary.
Remember to maintain proper care for your edible plants, including regular watering, fertilizing, and pest management. By incorporating edible plants into your landscaping, you can enjoy the beauty of nature while indulging in the flavors of homegrown produce.
Window Box Gardening: Bringing the Garden Indoors
Window box gardening is a fantastic way to bring the beauty and benefits of a garden right into your home. Whether you have limited outdoor space or simply want to add a touch of nature to your windowsills, window box gardens allow you to cultivate a mini garden indoors, filled with vibrant flowers, herbs, and even small vegetables.
Here are some tips for successful window box gardening:
- Choose the Right Window Box: Select a window box that fits the size and style of your windowsill. Consider the material of the window box, such as wood, metal, or plastic, and ensure it has proper drainage holes to prevent waterlogging.
- Select Suitable Plants: Choose plants that thrive in indoor conditions and are suited for the amount of light your window receives. Herbs like basil, parsley, and mint, or small vegetables like cherry tomatoes and salad greens, are excellent choices for window box gardens.
- Use High-Quality Potting Soil: Fill your window boxes with a well-draining potting mix. Indoor plants rely on the nutrients available in the soil, so using a high-quality potting soil provides a good foundation for their growth and health.
- Consider Sunlight Requirements: Most plants require bright light to grow successfully. Choose plants that match the sunlight conditions in your window, whether it’s full sun, partial sun, or shade. Supplemental artificial lighting may be necessary for plants that require more sunlight than your window can provide.
- Water Regularly: Check the moisture level of the soil in your window boxes and water as needed. Do not let the soil dry out completely, as indoor environments tend to have lower humidity levels. However, avoid overwatering, as excess moisture can lead to root rot and other issues.
- Fertilize Appropriately: Indoor plants benefit from regular fertilization to ensure they receive the necessary nutrients. Use a balanced indoor plant fertilizer or consider organic options like compost tea or diluted liquid seaweed fertilizer.
- Manage Pests: Keep an eye out for pests, such as aphids or spider mites, that may infest your indoor plants. Monitor the plants regularly for signs of infestation and address any issues promptly to prevent the pests from spreading.
- Rotate Plants: Rotate the position of your window boxes periodically to ensure that all sides of the plants receive adequate light and promote even growth. This helps prevent plants from leaning or reaching toward the light source.
- Harvest and Enjoy: As your plants grow and produce, harvest the herbs or vegetables as needed. Freshly picked herbs can be used in cooking, while ripe vegetables can become the star ingredients of your meals.
Window box gardening not only brings the natural beauty of plants indoors but also helps purify the air and improve the overall ambiance of your living space. It provides a connection to nature and the joy of nurturing and watching your plants thrive.
Remember to watch for signs of nutrient deficiencies, monitor the size of the plants to prevent overcrowding, and be mindful of any specific care requirements for the plant varieties you choose. With proper attention and care, window box gardening can transform your windowsills into a lush and vibrant indoor garden.
Hanging Baskets: Creating Vertical Growing Space
Hanging baskets are a creative and practical solution for adding greenery and growing plants in small spaces. They allow you to utilize vertical space, transforming empty walls, balconies, or porches into beautiful and productive gardens. With hanging baskets, you can grow a variety of plants, including flowers, herbs, and even small vegetables.
Here are some tips for successful hanging basket gardening:
- Choose the Right Basket: Select hanging baskets that are appropriately sized for the plants you want to grow. Ensure the basket has proper drainage holes to prevent water from accumulating.
- Use Lightweight Potting Mix: Since hanging baskets are suspended, use a lightweight potting mix that provides good drainage. This will prevent the basket from becoming too heavy and facilitate optimal root growth.
- Consider Plant Size and Growth Habit: Choose plants that are naturally trailing or have cascading growth habits, as they will thrive in hanging baskets. Popular choices include trailing petunias, ivy geraniums, lobelia, and trailing herbs like thyme or trailing rosemary.
- Pick Complementary Colors and Textures: Select plants with complementary colors and textures to create a visually appealing hanging basket. Mix different flower varieties or combine flowers with trailing foliage plants for added interest.
- Regular Watering: Hanging baskets require frequent watering since they tend to dry out quicker than plants grown in the ground. Check the moisture level regularly, and water the basket thoroughly whenever the soil feels dry to the touch.
- Provide Adequate Sunlight: Place your hanging baskets in a location that receives the appropriate amount of sunlight for the plants you are growing. Make sure they get enough direct sunlight or bright indirect light throughout the day.
- Fertilize Regularly: Hanging baskets benefit from regular fertilization due to the frequent watering and drainage. Use a slow-release or liquid fertilizer specifically formulated for container plants to ensure proper nutrition.
- Prune and Deadhead: Regularly prune your hanging basket plants to maintain their shape and prevent them from becoming leggy. Deadhead spent flowers to encourage continuous blooming and maintain a tidy appearance.
- Protect from Extreme Weather: In extreme heat or cold, hanging baskets may require additional protection. Move them to a sheltered area during heatwaves or frosty nights to prevent damage to the plants.
- Rotate for Balanced Growth: Rotate your hanging baskets periodically to ensure even growth and prevent one side from being constantly shaded. This will help your plants grow more symmetrically and thrive in all directions.
Hanging baskets not only add beauty to your outdoor spaces but also allow you to maximize your gardening possibilities. They bring life to areas that may otherwise go unused and provide an opportunity to enjoy the benefits of gardening in small or unconventional spaces.
Be sure to adjust your watering and fertilization practices based on the specific needs of the plants you choose. With proper care and attention, hanging baskets can create stunning displays and bring a touch of nature to any environment.
Herb Spiral: Growing Herbs in a Compact and Beautiful Way
An herb spiral is a unique and practical way to grow a variety of herbs in a small space. This vertical garden structure is designed in a spiral shape, allowing you to grow different herbs at varying levels within the structure. Not only does an herb spiral maximize space utilization, but it also creates a visually appealing focal point in your garden.
Here are some tips for creating a successful herb spiral:
- Choose the Right Location: Select a sunny spot in your garden for your herb spiral. Most herbs thrive in full sun, so ensure the area receives at least six to eight hours of direct sunlight per day.
- Design the Spiral: Plan the size and shape of your herb spiral. The spiral can be constructed from stones, bricks, or wood, creating raised beds that gradually ascend in a spiral pattern. Aim for a diameter of around 4-6 feet to allow enough space for various herbs.
- Select Herbs with Similar Requirements: Choose herbs that have similar sun, water, and soil preferences to make maintenance easier. Group herbs together in the spiral based on their needs to ensure they thrive in their designated areas.
- Build the Foundation: Create a solid foundation for your herb spiral by first leveling the ground. If desired, line the bottom layer of the spiral with a weed barrier or sturdy landscape fabric to prevent weed growth.
- Layer with Soil: Begin filling the spiral with a well-draining soil mix, incorporating compost or organic matter for improved fertility. As you build the layers, create varying heights to accommodate different herbs that require different depths of soil.
- Planting the Herbs: Once the spiral is built and filled with soil, start planting the herbs. Consider the height and growth habit of each herb and place taller or more vigorous herbs towards the center of the spiral, allowing them to cascade down as they grow.
- Water Regularly: Herbs in an herb spiral may require more frequent watering due to their proximity to one another and potential variations in soil moisture levels. Ensure the soil remains consistently moist but not waterlogged.
- Harvest and Prune: Regularly harvest herbs to encourage bushier growth and ensure a continuous supply of fresh herbs. Prune herbs as needed to maintain their size, shape, and health.
- Consider Companion Planting: Take advantage of companion planting principles within your herb spiral. Plant herbs that benefit each other, such as basil and tomatoes, or chives and roses, to create a symbiotic relationship and ward off pests.
- Add Decorative Elements: Enhance the visual appeal of your herb spiral by incorporating decorative elements like stones, small figurines, or colorful plant markers. This adds a touch of personality and transforms your herb spiral into a focal point of your garden.
An herb spiral not only provides a compact and efficient way to grow herbs but also adds beauty and functionality to your garden. The spiral design allows for easy access to each herb, while the varying heights create a visually striking display.
Remember to consider the specific requirements of each herb, including sunlight, water, and soil preferences, as you plan and plant your herb spiral. With proper care and attention, you can enjoy a flourishing collection of aromatic and culinary herbs right at your fingertips.
Read more: How To Maximize Small Closet Space
Tiered Garden Beds: Utilizing Different Levels for More Planting Space
Tiered garden beds are a creative and efficient way to maximize planting space in your garden. By utilizing different levels or tiers, you can create multiple layers of growing areas, effectively increasing the amount of available space for planting a variety of flowers, vegetables, and herbs.
Here are some tips for successful tiered garden beds:
- Plan the Design: Determine the number of tiers and the size of each level based on the available space in your garden and the types of plants you want to grow. Consider the height and width of the tiers to ensure easy access for planting, maintenance, and harvesting.
- Choose Appropriate Materials: Select sturdy and durable materials for building your tiered garden beds, such as wood, bricks, or concrete blocks. Ensure that the materials can withstand the weight of the soil and plants while providing proper drainage.
- Level the Ground: Make sure the ground is level before constructing your tiered garden beds. This will help ensure stability and balance for each level. Use a level tool or adjust the ground’s surface as needed.
- Construct the Tiers: Build each tier by stacking the materials, securing them together to create stable and sturdy levels. Leave enough space between tiers for plants to grow and for easy access during maintenance.
- Soil Preparation: Fill each tier with well-draining and nutrient-rich soil. Incorporate compost or organic matter to improve fertility and provide a healthy growing environment for your plants.
- Plant Selection: Choose plants that are well-suited to the growing conditions of each tier. Consider the amount of sunlight each level receives, as well as the height and growth habits of the plants. Opt for cascading plants for the higher tiers and smaller, compact plants for lower levels.
- Watering and Drainage: Ensure that each tier has adequate drainage to prevent waterlogging. Water plants regularly, considering the different moisture needs of the plants in each tier.
- Maintain Proper Spacing: Follow the recommended spacing guidelines for each plant to ensure optimal growth and prevent overcrowding. Proper spacing allows for adequate air circulation and helps minimize the risk of disease.
- Use Companion Planting: Take advantage of companion planting principles in your tiered garden beds. Plant combinations of compatible plants together to maximize space usage and promote healthier growth. For example, grow lettuce alongside tall-growing beans or plant sage near cabbage.
- Harvest and Prune: Regularly harvest crops when they are ready and prune plants as needed to maintain their size, shape, and health. This will promote continuous growth and ensure the longevity of your tiered garden beds.
Tiered garden beds not only provide extra planting space but also create an eye-catching focal point in your garden. The varying heights and layers add depth and dimension to your landscape, resulting in a visually stunning and productive garden.
Remember to monitor the moisture levels, provide appropriate sunlight conditions, and maintain proper care for the plants in each tier. With proper planning and regular maintenance, your tiered garden beds can provide abundant yields and a beautiful display of plants.
Edible Containers: Growing Vegetables in Unconventional Objects
Edible container gardening goes beyond traditional pots and planters, allowing you to grow vegetables in unique and unconventional objects. It’s a creative way to maximize your gardening space and add a touch of personality to your garden. With edible containers, you can transform everyday objects into functional and eye-catching vessels for growing vegetables.
Here are some ideas for growing vegetables in unconventional objects:
- Old Tires: Paint and stack old tires to create a vertical planting tower. Fill each tire with soil and plant vegetables like strawberries, lettuce, or herbs in each tier. This repurposing idea adds a modern and unique touch to your garden.
- Wooden Pallets: Lay a wooden pallet flat and use the slats as individual planting sections. Fill each space with soil and plant vegetables like lettuce, radishes, or succulent herbs. Lean the pallet against a wall or fence for a vertical garden.
- Hanging Shoe Organizer: Hang a fabric shoe organizer on a wall or fence and fill each pocket with soil and vegetable plants. This creates a vertical garden with multiple growing spaces, perfect for growing crops like lettuce, peppers, or cherry tomatoes.
- Recycled Bottles: Cut the top off of plastic bottles and invert them, creating makeshift planters. Fill each bottle with soil and plant compact vegetables like herbs, lettuce, or small varieties of tomatoes. Hang the bottles from a fence or arrange them in a vertical garden display.
- Vintage Watering Cans: Convert old watering cans into unique planters. Fill them with well-draining soil and plant vegetables like trailing herbs, small pepper plants, or dwarf varieties of tomatoes. The vintage charm of the watering cans adds a nostalgic touch to your garden.
- Colander or Strainer: Use a colander or strainer as a planter by lining it with landscape fabric or burlap to prevent soil from falling through. Fill it with a well-draining potting mix and plant vegetables like herbs, lettuces, or trailing flowers. Hang the colander or place it on a table for an eye-catching centerpiece.
- Wine Barrels: Convert old wine barrels into large planters for growing vegetables. Cut out a portion of the top and fill the barrel with nutrient-rich soil. Plant larger vegetables like tomatoes, zucchini, or eggplant. The rustic charm of the wine barrel adds character to your garden.
- PVC Pipe: Cut sections of PVC pipes and drill several drainage holes along the bottom. Fill them with soil and plant compact vegetables like radishes, carrots, or herbs. Arrange the PVC pipes vertically or horizontally in your garden for a modern and space-saving design.
When growing vegetables in unconventional containers, it’s important to choose the right plants for the specific growing conditions and size of each container. Consider the depth and width requirements of each vegetable and select compact or dwarf varieties that are well-suited to the container’s capacity.
Remember to provide proper watering, fertilization, and regular maintenance for your vegetables in the edible containers. Monitor the moisture levels and adjust watering accordingly, ensuring the soil remains consistently moist but not waterlogged.
Edible container gardening allows you to unleash your creativity and transform everyday objects into functional planters. It adds a unique and whimsical touch to your garden while providing a bountiful harvest of homegrown vegetables.
Microgreens and Sprouts: Nutrient-Packed Greens in a Small Area
If you’re short on space but still want to enjoy fresh and nutritious greens, microgreens and sprouts are the perfect solution. These tiny greens are packed with flavor and nutrients, and they can be grown indoors in a small area, making them an excellent choice for urban gardeners or anyone with limited gardening space.
Here’s what you need to know about growing microgreens and sprouts:
- Difference between Microgreens and Sprouts: Microgreens are young vegetable greens harvested when they have developed their first true leaves, usually around 1-3 inches tall. Sprouts, on the other hand, are germinated seeds that are harvested before the development of leaves, typically within a few days of sprouting.
- Benefits of Microgreens and Sprouts: Despite their small size, microgreens and sprouts are packed with vitamins, minerals, and antioxidants. They often contain higher nutrient levels compared to their mature counterparts, making them a concentrated source of nutrition.
- Growing Microgreens: Microgreens can be grown in containers indoors, using trays or shallow containers filled with a sterile potting mix or soilless growing medium. Sow the seeds densely, mist them with water, and place them in a well-lit area. Harvest the microgreens when they have reached the desired size by snipping them just above the soil level.
- Growing Sprouts: Sprouts can be grown in a jar or a special sprouting tray designed to allow water drainage. Soak the seeds overnight, then rinse and drain them thoroughly. Repeat this process twice a day until the sprouts have fully developed. Once they are ready, rinse them one final time, remove any hulls, and let them dry before storing or consuming.
- Popular Microgreens: Some popular microgreens include radish, broccoli, kale, arugula, and sunflower. These greens add a burst of flavor and a crispy texture to salads, sandwiches, or as a garnish for various dishes.
- Popular Sprouts: Commonly sprouted seeds include alfalfa, mung bean, lentil, chickpea, and fenugreek. These sprouts are mild in flavor and can be enjoyed in salads, sandwiches, stir-fries, or blended in smoothies.
- Hygiene and Safety: When growing sprouts, it’s essential to practice good hygiene to prevent bacterial contamination. Rinse and drain the sprouts thoroughly at each stage, and sanitize the sprouting equipment regularly.
- Continuous Harvest: The beauty of growing microgreens and sprouts is their quick growth cycle. They can be grown year-round, allowing for a continuous harvest of fresh greens to enjoy.
- Experiment and Enjoy: Growing microgreens and sprouts is a fun and versatile process. Experiment with different seed varieties and mix them to create unique flavor combinations. Get creative with how you incorporate these nutrient powerhouses into your meals.
Microgreens and sprouts are an excellent way to enjoy fresh greens in a small space. They require minimal time, effort, and resources, making them a convenient option for any gardener. Plus, their vibrant colors and intense flavors will add a delicious and nutritious touch to your culinary creations.
Remember to use quality seeds, provide proper ventilation and light, and maintain cleanliness throughout the growing process to ensure the best results. With microgreens and sprouts, you can have a constant supply of nutrient-packed greens right at your fingertips.
Conclusion
In conclusion, there are numerous ways to maximize your gardening space and enjoy the satisfaction of growing your own vegetables, even in small or limited areas. By implementing various techniques and tapping into your creativity, you can create a productive and visually appealing garden that fits your needs and constraints.
Selecting the right vegetables for your small garden, utilizing container gardening, vertical gardening, raised bed gardening, square foot gardening, companion planting, succession planting, and other innovative techniques discussed in this article, allows you to make the most of your available space and resources. Each approach offers unique advantages, whether it’s the efficiency of space utilization, extended growing seasons, or the combination of aesthetics and functionality.
Whether you have a balcony, a small patio, or just windowsills, container gardening enables you to grow vegetables in pots with careful selection of plants and proper care. Vertical gardening is perfect for those who want to make use of walls and trellises to optimize space and create a lush garden display. Raised bed and square foot gardening allow you to grow a multitude of plants in a compact area, while companion planting and succession planting promote high yields and natural pest control.
Furthermore, edible landscaping allows you to combine the beauty of ornamental plants with the practicality of growing edible crops, creating an environment that is both visually appealing and productive. Window box gardening, hanging baskets, herb spirals, tiered garden beds, and growing vegetables in unconventional objects provide unique and creative ways to expand your gardening options and express your personal style.
Lastly, microgreens and sprouts offer a nutrient-packed solution for those with limited space. These greens can be grown indoors, providing fresh and flavorful additions to your meals, even if you have no outdoor gardening space at all.
Remember, each gardening technique mentioned in this article offers its own set of benefits and considerations. Pay attention to the specific requirements of your chosen plants, provide proper care and maintenance, and have fun experimenting with different approaches that best suit your space and gardening goals.
Regardless of the size of your gardening space, there are always innovative methods to grow your own vegetables and enjoy the rewards of a bountiful harvest. With a little creativity, planning, and passion, you can create a thriving and productive garden no matter how small or unconventional your space may be.
Ready to take your gardening skills up a notch? If maximizing space in your small garden was a win, consider diving deeper with our guide on how to raise a bed. You'll learn effective strategies for elevated gardening, helping you boost productivity even in the most compact areas. Whether you're a novice or seasoned green thumb, these insights can transform your approach and yield impressive results. So, why wait? Dig into the world of raised bed gardening and watch your garden flourish!
Frequently Asked Questions about Small Vegetable Garden Ideas: 15 Ways To Maximize Your Space
Was this page helpful?
At Storables.com, we guarantee accurate and reliable information. Our content, validated by Expert Board Contributors, is crafted following stringent Editorial Policies. We're committed to providing you with well-researched, expert-backed insights for all your informational needs.


0 thoughts on “Small Vegetable Garden Ideas: 15 Ways To Maximize Your Space”