Home>Gardening & Outdoor>Landscaping Ideas>How To Clean Dried Grass From Weed Eater
Landscaping Ideas
How To Clean Dried Grass From Weed Eater
Published: January 25, 2024
Learn effective landscaping ideas on how to clean dried grass from a weed eater. Discover expert tips and techniques to keep your equipment in top condition.
(Many of the links in this article redirect to a specific reviewed product. Your purchase of these products through affiliate links helps to generate commission for Storables.com, at no extra cost. Learn more)
Introduction
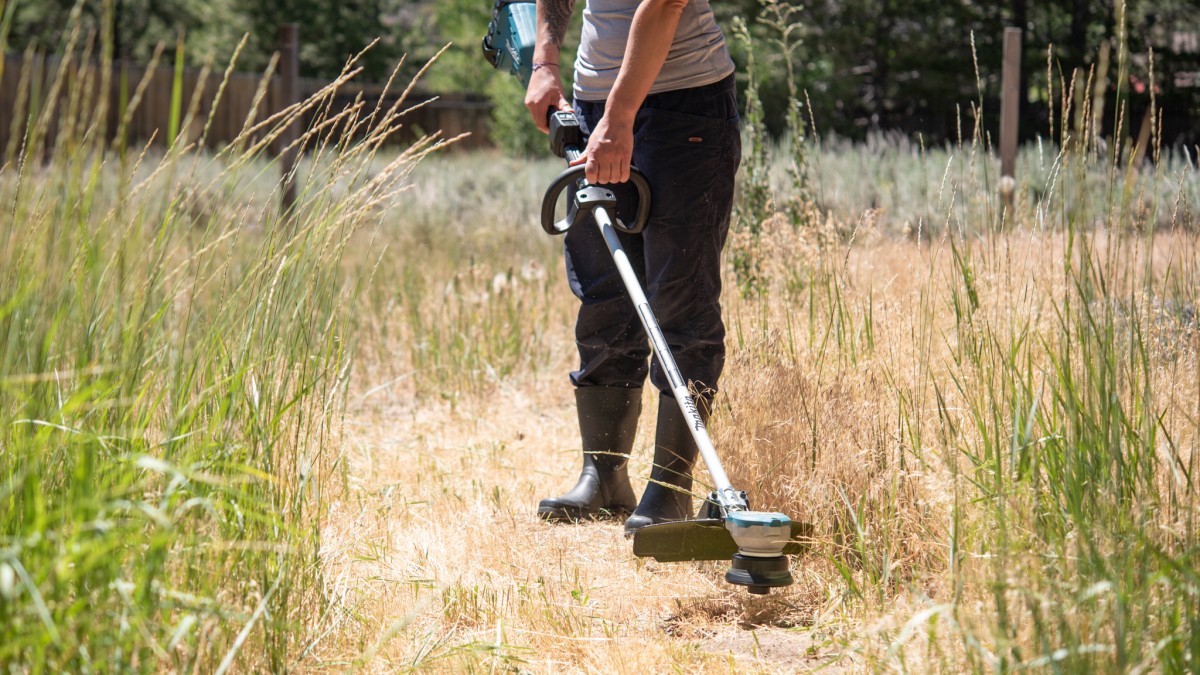
Keeping your weed eater in top condition is essential for maintaining a well-groomed lawn. Over time, dried grass and debris can accumulate in the trimmer head, impeding its performance. Cleaning the trimmer head is a straightforward task that can significantly improve the efficiency and longevity of your weed eater. In this guide, we’ll walk you through the process of cleaning dried grass from a weed eater, ensuring that your equipment remains in optimal working condition.
By following the steps outlined in this article, you’ll be able to maintain your weed eater with ease, allowing you to tackle yard work with precision and efficiency. Let’s dive into the tools and materials you’ll need to get started.
Key Takeaways:
- Keep your weed eater in top condition by following these steps to clean dried grass from the trimmer head. It’s essential for maintaining a well-groomed lawn and ensuring peak efficiency.
- Prioritize safety, gather the necessary tools, and follow the steps outlined to maintain a safe and efficient work environment while caring for your equipment.
Read more: How To Clean Ryobi Weed Eater Carburetor
Tools and Materials Needed
Before you begin cleaning the dried grass from your weed eater, it’s important to gather the necessary tools and materials. Here’s what you’ll need:
- Work Gloves: Protect your hands with a sturdy pair of work gloves to prevent injury while handling the trimmer head.
- Safety Glasses: Shield your eyes from debris and ensure clear vision during the cleaning process.
- Wire Brush: A wire brush is essential for removing stubborn grass and debris from the trimmer head.
- Compressed Air: Use a can of compressed air to blow away loose grass and dirt from hard-to-reach areas.
- Clean Cloth: Have a clean cloth or rag on hand to wipe down the trimmer head and remove any remaining residue.
- Owner’s Manual: Keep the weed eater’s owner’s manual nearby for reference, especially when detaching and reattaching the trimmer head.
With these tools and materials at your disposal, you’ll be well-equipped to tackle the task of cleaning dried grass from your weed eater. Now that you’re prepared, let’s move on to the first step: taking safety precautions.
Step 1: Safety Precautions
Prior to cleaning the dried grass from your weed eater, it’s crucial to prioritize safety. By taking the following precautions, you’ll reduce the risk of accidents and ensure a secure working environment:
- Power Off the Weed Eater: Before any maintenance work, switch off the weed eater and disconnect it from the power source to prevent accidental activation.
- Allow Cooling Time: If the weed eater has been in use, allow it to cool down before handling the trimmer head to avoid burns or injuries.
- Wear Protective Gear: Put on work gloves and safety glasses to shield your hands and eyes from debris and potential hazards during the cleaning process.
- Work in a Well-Ventilated Area: Choose a well-ventilated outdoor space to carry out the cleaning, minimizing exposure to fumes and ensuring proper air circulation.
- Secure the Weed Eater: Place the weed eater on a stable surface to prevent it from tipping over while you work on the trimmer head.
By adhering to these safety precautions, you’ll create a safe environment for cleaning the weed eater’s trimmer head. Now that safety measures are in place, we can proceed to the next step: removing the trimmer head from the weed eater.
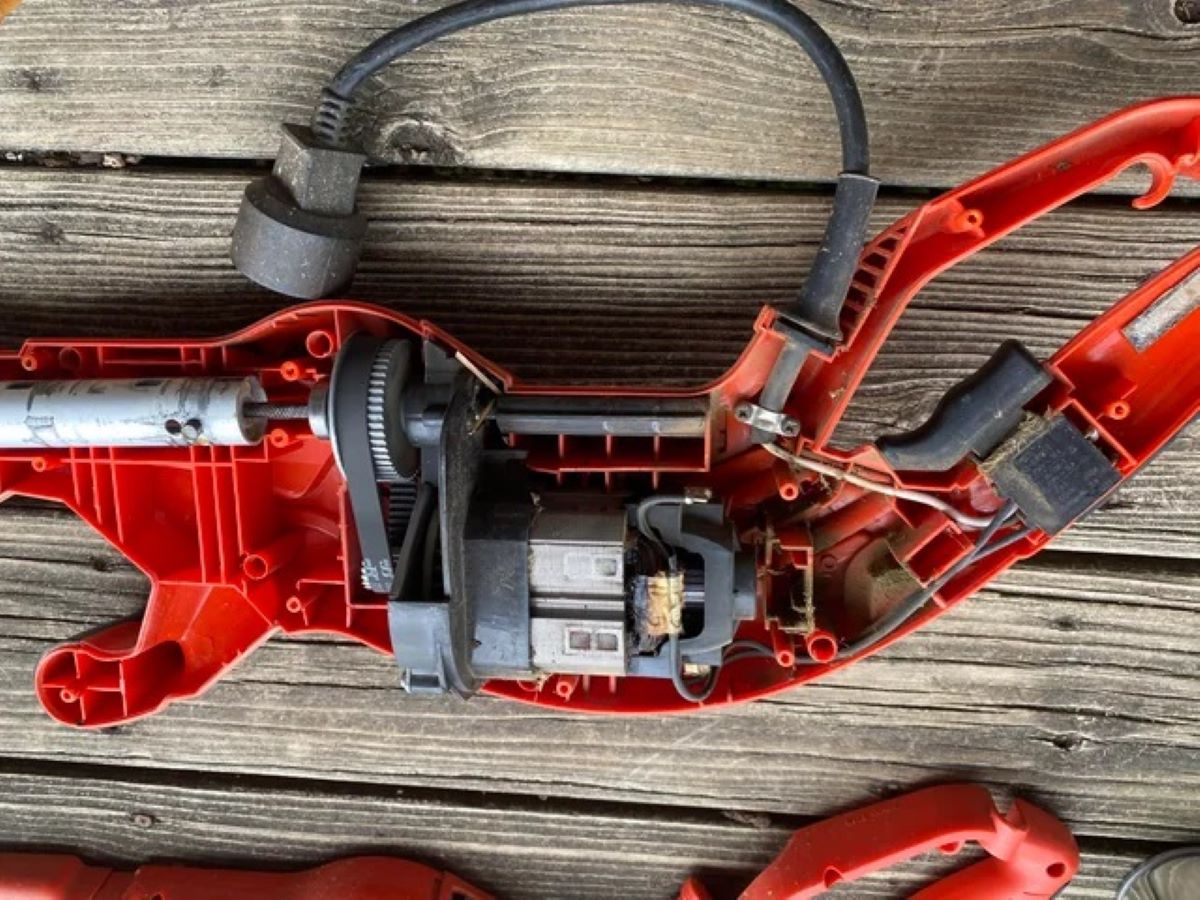
Step 2: Removing the Trimmer Head
Once safety precautions are in place, you can begin the process of removing the trimmer head from the weed eater. Follow these steps to detach the trimmer head safely and effectively:
- Refer to the Owner’s Manual: Consult the weed eater’s owner’s manual for specific instructions on detaching the trimmer head. Different models may have varying methods for removal.
- Secure the Weed Eater: Place the weed eater on a flat, stable surface, ensuring that it is turned off and disconnected from the power source.
- Locate the Trimmer Head: Identify the location of the trimmer head on the weed eater. It is typically located at the end of the shaft and may be secured with a retaining bolt or knob.
- Use the Correct Tools: Depending on the weed eater model, you may need a wrench or socket set to loosen the retaining bolt and detach the trimmer head. Ensure that you have the appropriate tools for the task.
- Unscrew the Retaining Bolt: Carefully loosen and remove the retaining bolt or knob that secures the trimmer head to the weed eater’s shaft. Keep track of any washers or other components that may be present.
- Remove the Trimmer Head: Once the retaining bolt is removed, gently slide the trimmer head away from the shaft, disconnecting it from the weed eater.
With the trimmer head successfully removed, you can proceed to the next step: clearing the dried grass and debris from the trimmer head. By following these steps attentively, you’ll be able to detach the trimmer head without encountering any complications. Now, let’s move on to the crucial task of clearing the accumulated grass from the trimmer head.
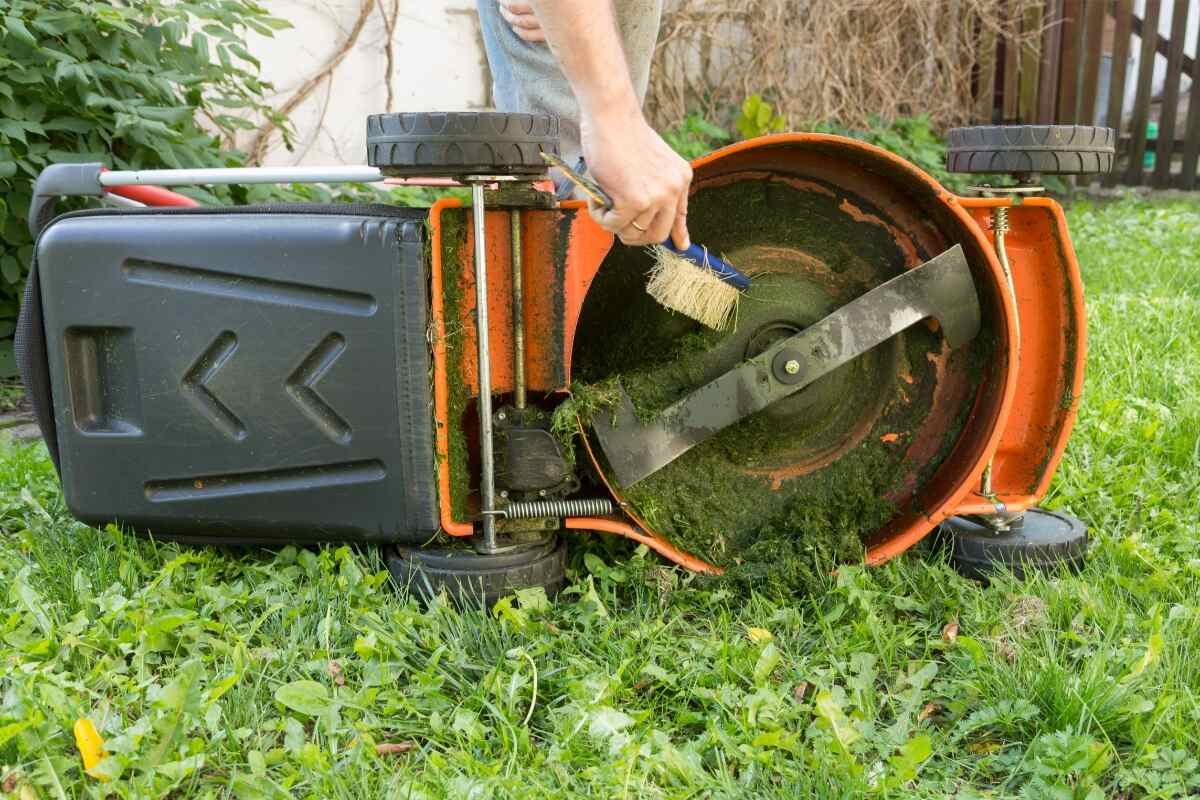
To clean dried grass from a weed eater, use a brush or compressed air to remove debris. Then, use a damp cloth to wipe down the cutting head and blades. Be sure to wear gloves and disconnect the power source before cleaning.
Step 3: Clearing Dried Grass from the Trimmer Head
With the trimmer head removed from the weed eater, it’s time to focus on clearing the dried grass and debris that have accumulated within the head. Follow these steps to effectively remove the buildup:
- Inspect the Trimmer Head: Take a close look at the trimmer head to assess the extent of grass and debris accumulation. Use a flashlight if necessary to illuminate hard-to-see areas.
- Remove Visible Debris: Using your hands or a small brush, carefully extract any visible clumps of dried grass and debris from the interior and exterior of the trimmer head.
- Utilize Compressed Air: If the grass and debris are tightly packed or lodged in crevices, use a can of compressed air to dislodge and blow away the remaining particles. Direct the airflow away from your face and body, and wear safety glasses for added protection.
- Thoroughly Clean the Trimmer Head: Employ a wire brush to scrub the interior and exterior surfaces of the trimmer head, loosening and removing any stubborn remnants of dried grass and debris.
- Inspect for Residue: After clearing the trimmer head, inspect it once more to ensure that all traces of grass and debris have been eliminated. Wipe down the interior and exterior with a clean cloth to remove any remaining residue.
By diligently following these steps, you’ll successfully clear the accumulated dried grass and debris from the trimmer head, restoring its functionality and preparing it for thorough cleaning. The next step will involve cleaning the trimmer head to ensure that it operates at peak performance. Let’s proceed to the task of thoroughly cleaning the trimmer head to maintain its efficiency.
Read more: How To Store A Gas Weed Eater
Step 4: Cleaning the Trimmer Head
Once the dried grass and debris have been cleared from the trimmer head, it’s essential to proceed with a thorough cleaning to maintain its optimal functionality. Follow these steps to clean the trimmer head effectively:
- Prepare a Cleaning Solution: In a small container, mix a mild detergent or dish soap with warm water to create a cleaning solution. This solution will help remove grease, grime, and residual debris from the trimmer head.
- Submerge the Trimmer Head: Immerse the trimmer head in the cleaning solution, ensuring that it is fully submerged. Allow it to soak for several minutes to loosen any remaining dirt and debris.
- Scrub the Trimmer Head: Using a wire brush or a small cleaning brush, gently scrub the interior and exterior surfaces of the trimmer head to dislodge any lingering residue. Pay particular attention to hard-to-reach areas and crevices.
- Rinse the Trimmer Head: Thoroughly rinse the trimmer head with clean water to remove the cleaning solution and dislodged debris. Ensure that all traces of the solution are washed away.
- Dry the Trimmer Head: Use a clean cloth to dry the trimmer head thoroughly, removing excess moisture and preventing the accumulation of rust or corrosion.
- Inspect for Cleanliness: After cleaning and drying the trimmer head, inspect it to ensure that all dirt, debris, and cleaning solution residue have been effectively removed. The trimmer head should appear clean and free of any contaminants.
By meticulously following these steps, you’ll be able to clean the trimmer head with precision, ensuring that it operates at peak performance. Once the trimmer head is thoroughly cleaned, the next step involves reattaching it to the weed eater. Let’s move on to the process of reattaching the trimmer head to complete the maintenance task.
Step 5: Reattaching the Trimmer Head
With the trimmer head cleaned and free of debris, it’s time to reattach it to the weed eater. Follow these steps to securely and effectively reattach the trimmer head:
- Refer to the Owner’s Manual: Consult the weed eater’s owner’s manual for specific instructions on reattaching the trimmer head. Different models may have varying methods for attachment.
- Position the Trimmer Head: Align the trimmer head with the end of the weed eater’s shaft, ensuring that it is oriented correctly for secure attachment.
- Secure the Trimmer Head: If the trimmer head is secured with a retaining bolt, carefully slide it onto the shaft and align it with the mounting hole. Insert the retaining bolt and any accompanying washers, if applicable.
- Tighten the Retaining Bolt: Use the appropriate tool, such as a wrench or socket set, to securely tighten the retaining bolt, ensuring that the trimmer head is firmly attached to the weed eater’s shaft.
- Verify Stability: Once the trimmer head is reattached, gently test its stability by giving it a slight tug to confirm that it is securely fastened to the shaft.
By following these steps diligently, you’ll successfully reattach the trimmer head to the weed eater, completing the maintenance process. With the trimmer head securely in place, your weed eater is now ready for use, equipped with a clean and properly functioning trimmer head. Let’s conclude this guide with a summary of the essential steps and the significance of maintaining a well-maintained weed eater.
Conclusion
Cleaning dried grass from a weed eater is a fundamental aspect of equipment maintenance that significantly impacts its performance and longevity. By following the comprehensive steps outlined in this guide, you’ve learned how to effectively clean and maintain the trimmer head, ensuring that your weed eater operates at peak efficiency. From taking safety precautions to reattaching the trimmer head, each step plays a crucial role in preserving the functionality of your equipment.
Regularly cleaning the trimmer head not only enhances the weed eater’s cutting performance but also prevents premature wear and tear, ultimately prolonging its lifespan. Additionally, a well-maintained trimmer head contributes to a more polished and precise lawn-cutting experience, allowing you to achieve professional-looking results with ease.
Remember, safety should always be a top priority when working on power tools such as weed eaters. By adhering to safety measures and following the outlined steps meticulously, you can maintain a safe and efficient work environment while caring for your equipment.
With the knowledge and skills acquired from this guide, you are well-equipped to keep your weed eater in prime condition, ensuring that it remains a reliable ally in maintaining a well-groomed and pristine lawn. By integrating these maintenance practices into your routine, you’ll enjoy the benefits of a consistently high-performing weed eater and a beautifully manicured outdoor space.
Now that you’ve mastered the art of cleaning dried grass from a weed eater, you can approach your yard work with confidence, knowing that your equipment is well-maintained and ready for any landscaping challenge.
Frequently Asked Questions about How To Clean Dried Grass From Weed Eater
Was this page helpful?
At Storables.com, we guarantee accurate and reliable information. Our content, validated by Expert Board Contributors, is crafted following stringent Editorial Policies. We're committed to providing you with well-researched, expert-backed insights for all your informational needs.


0 thoughts on “How To Clean Dried Grass From Weed Eater”