Home>Articles>How To Replace Primer Bulb On Ryobi Weed Eater
Articles
How To Replace Primer Bulb On Ryobi Weed Eater
Modified: January 6, 2024
Learn how to easily replace the primer bulb on your Ryobi weed eater with our informative articles. Get back to tackling your yard maintenance in no time!
(Many of the links in this article redirect to a specific reviewed product. Your purchase of these products through affiliate links helps to generate commission for Storables.com, at no extra cost. Learn more)
Introduction
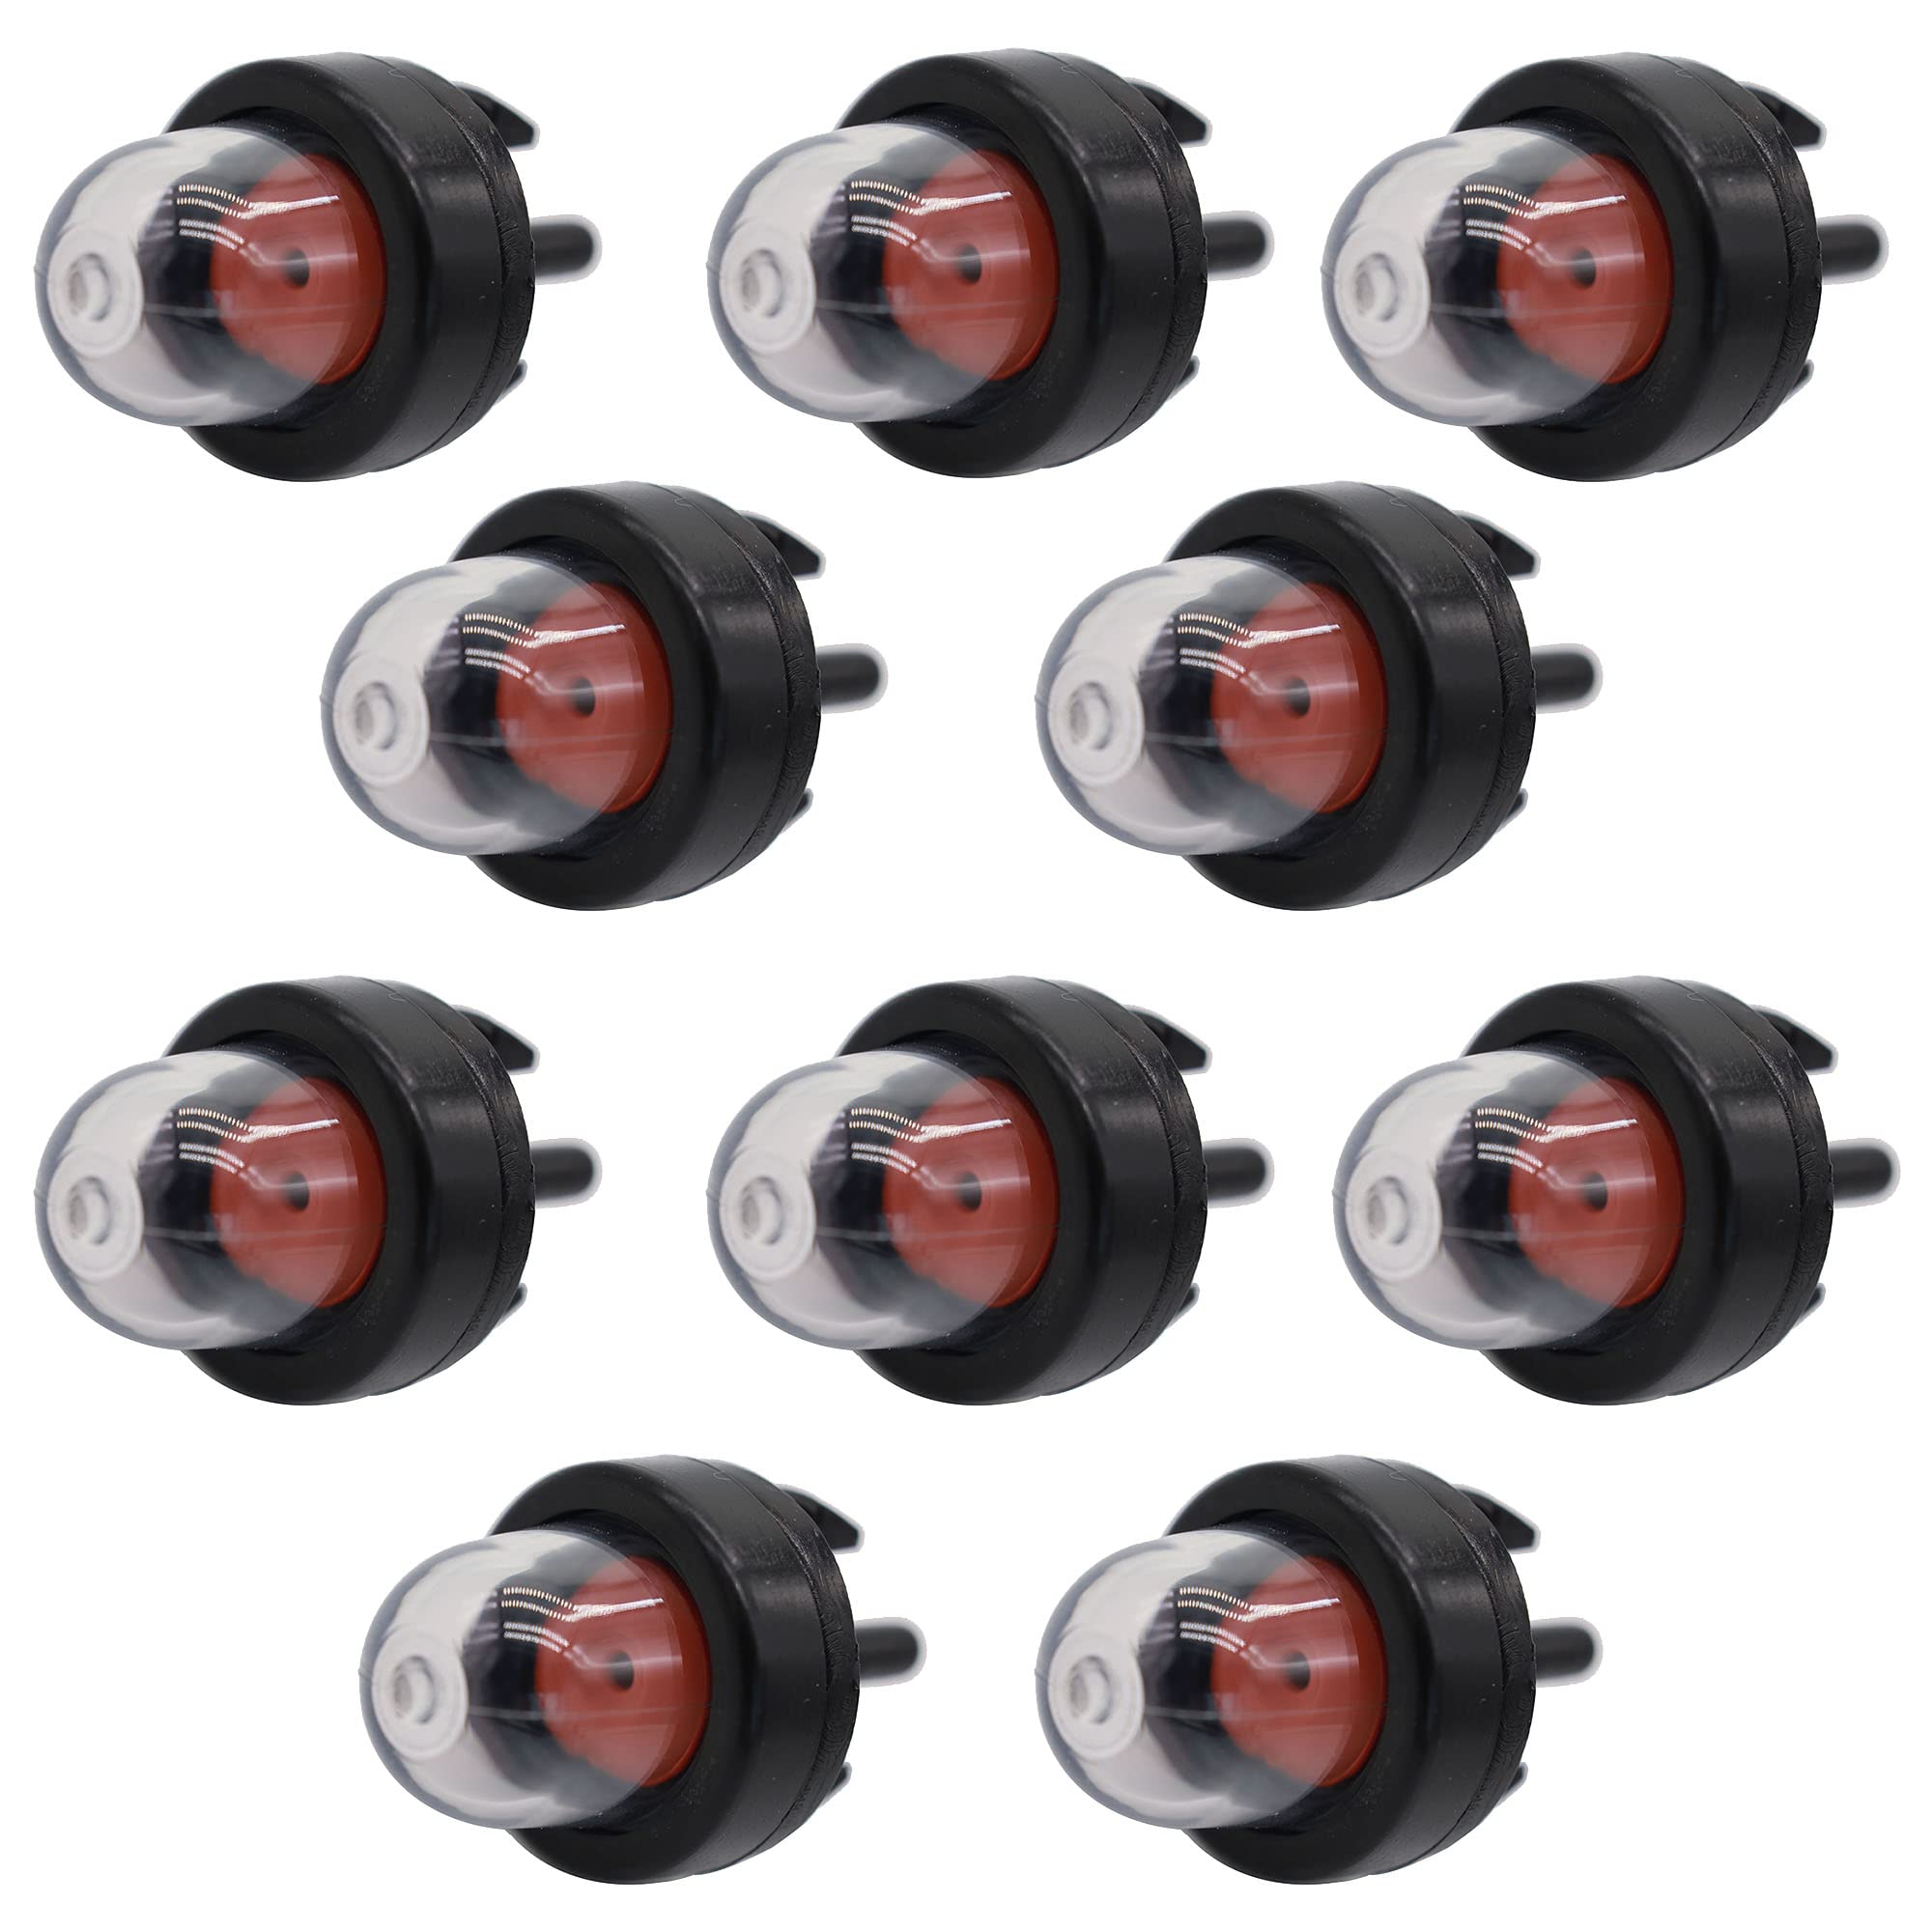
Having a well-functioning primer bulb is crucial for starting your Ryobi weed eater. The primer bulb plays a key role in delivering fuel to the carburetor, which in turn helps to start the engine. Over time, the primer bulb can wear out or become damaged, requiring replacement. Fortunately, replacing the primer bulb on a Ryobi weed eater is a relatively simple task that can be done with just a few tools. In this article, we will guide you through the step-by-step process of replacing the primer bulb on your Ryobi weed eater, ensuring that you can get back to work in no time.
Key Takeaways:
- Ensure safety and preparation by powering off the weed eater, wearing protective gear, and working in a clean, well-lit area. Take your time and follow the steps carefully for a successful primer bulb replacement.
- Test the new primer bulb by priming it and starting the weed eater. Look for firmness and smooth engine start-up. If any issues arise, troubleshoot or seek professional assistance for proper functioning.
Read more: How To Clean Ryobi Weed Eater Carburetor
Tools and materials needed
Before you start replacing the primer bulb on your Ryobi weed eater, it’s important to gather all the necessary tools and materials. Here’s what you’ll need:
-
Screwdriver – You’ll need a screwdriver to remove the screws holding the primer bulb cover in place.
-
Replacement primer bulb – Purchase a compatible primer bulb for your specific Ryobi weed eater model. They are typically available at hardware stores or online.
-
Pliers – Pliers may be needed to disconnect the fuel lines from the old primer bulb.
-
Clean cloth – A clean cloth or paper towel will be helpful for cleaning any debris or fuel spills during the process.
Once you have gathered these tools and materials, you will be fully prepared to replace the primer bulb on your Ryobi weed eater.
Step 1: Preparation
Before diving into the primer bulb replacement process, it’s essential to take a few preliminary steps to ensure safety and efficiency. Here’s what you need to do:
-
Power off the weed eater – Make sure the weed eater is completely powered off and disconnected from any power sources. This will prevent any accidental starts while working on the primer bulb.
-
Find a suitable work area – Choose a well-lit and clean work area to perform the replacement. A flat surface, such as a workbench or a table, is ideal for stability.
-
Put on protective gear – It’s important to protect yourself during the process. Before starting, put on safety glasses and work gloves to prevent any accidental injuries.
-
Remove any obstructions – Check the weed eater for any debris or plant material that may obstruct your access to the primer bulb. Clear these obstructions to ensure smooth and unhindered progress.
By following these preparation steps, you’ll create a safe and organized environment to work on the primer bulb replacement.
Step 2: Removing the old primer bulb
Once you have completed the necessary preparations, it’s time to remove the old primer bulb from your Ryobi weed eater. Follow these steps:
-
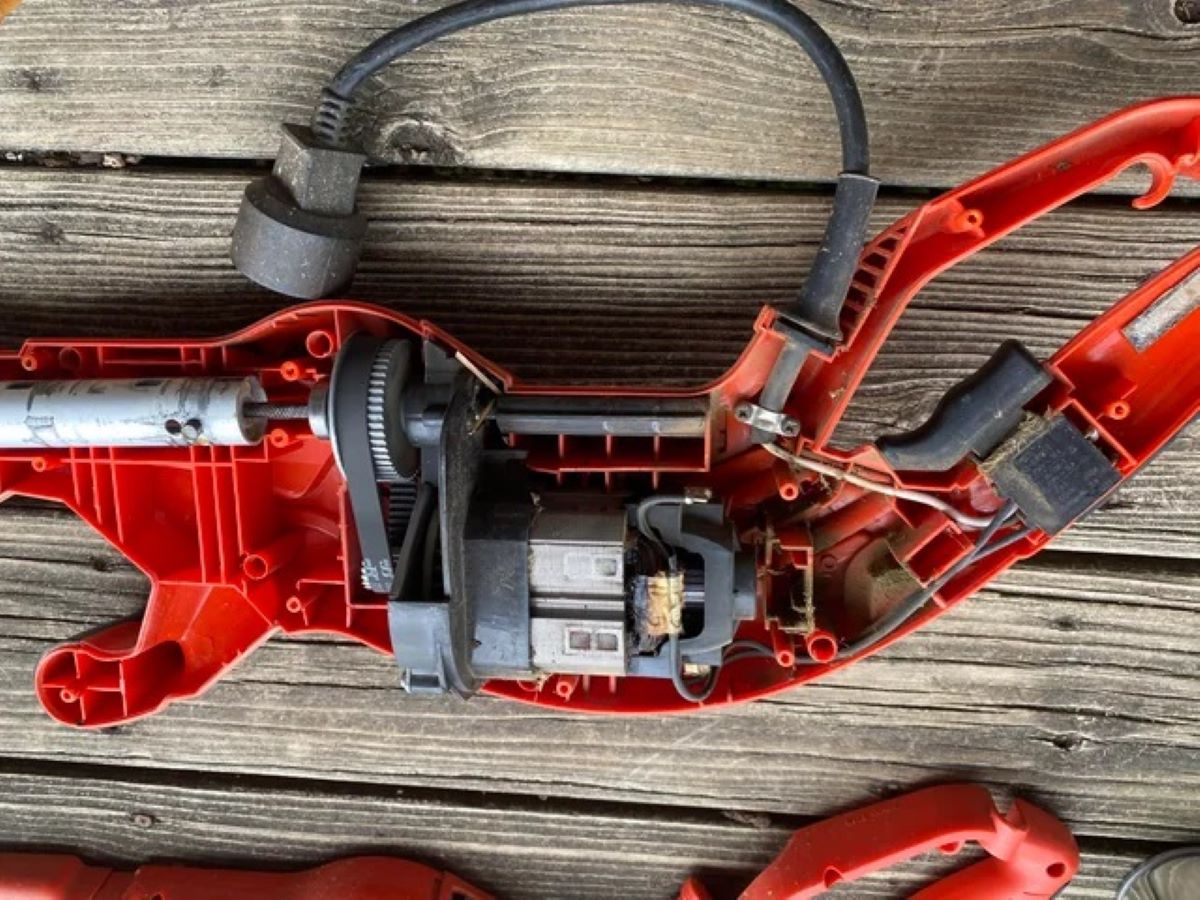
Locate the primer bulb – On most Ryobi weed eaters, you’ll find the primer bulb situated on the side of the engine, near the carburetor. It is usually housed in a cover that needs to be removed.
-
Remove the primer bulb cover – Use a screwdriver to remove the screws securing the primer bulb cover. Carefully set the screws aside in a safe place, as they will be needed later.
-
Disconnect the fuel lines – Look for the two fuel lines attached to the primer bulb. Using pliers, gently squeeze the sides of the fuel line connectors and pull them away from the primer bulb. Make sure to catch any fuel that may spill when disconnecting the lines.
-
Remove the old primer bulb – With the fuel lines disconnected, you can now remove the old primer bulb from its housing. Simply grasp it firmly and pull it out. If it is stubborn or stuck, you may need to use pliers to help you remove it.
Once you have successfully removed the old primer bulb, set it aside and proceed to the next step for installing the new primer bulb.
When replacing the primer bulb on a Ryobi weed eater, make sure to disconnect the spark plug wire for safety. Use a small flathead screwdriver to carefully pry out the old bulb and insert the new one, making sure it is seated properly.
Step 3: Installing the new primer bulb
Now that you have removed the old primer bulb, it’s time to install the new one. Follow these steps carefully:
-
Prepare the new primer bulb – Before installing the new primer bulb, make sure it is clean and free from any debris. Inspect it for any defects or damage that may have occurred during storage or transportation.
-
Insert the new primer bulb – Take the new primer bulb and align it with the housing where the old bulb was removed. Gently press it into place until it fits snugly and securely.
-
Connect the fuel lines – Reattach the fuel lines to the new primer bulb. Ensure that the fuel lines are securely connected and cannot easily be pulled off.
-
Replace the primer bulb cover – Take the primer bulb cover and position it over the new bulb. Align the screw holes and insert the screws that were removed earlier. Use a screwdriver to tighten the screws until the cover is securely fastened.
At this point, the new primer bulb should be installed and ready to use. However, before testing, it’s important to ensure that everything is properly connected and there are no leaks or loose connections.
Read more: How To Store A Gas Weed Eater
Step 4: Testing the new primer bulb
After successfully installing the new primer bulb on your Ryobi weed eater, it’s crucial to test it to ensure it’s functioning correctly. Here’s how:
-
Reconnect the power source – If your Ryobi weed eater is battery-operated, insert the fully charged battery into the weed eater. If it is corded, plug it into a suitable power outlet.
-
Prime the bulb – Press the new primer bulb several times to draw fuel into the carburetor. You should feel resistance as you press the bulb, indicating that the fuel is being pumped.
-
Start the weed eater – Follow the manufacturer’s instructions for starting the Ryobi weed eater. Typically, this involves pulling the starter cord or engaging the ignition switch. The weed eater should start up smoothly without any issues.
-
Observe the primer bulb – While the weed eater is running, keep an eye on the primer bulb. It should remain firm and not collapse or show signs of damage. If the primer bulb is leaking or damaged, you may need to repeat the installation process.
If the new primer bulb passes the test, you can confidently use your Ryobi weed eater knowing that it will start reliably, thanks to the properly functioning primer bulb. However, if you encounter any issues or notice any abnormalities, it’s recommended to consult the user manual or seek the assistance of a professional for further troubleshooting.
Conclusion
Replacing the primer bulb on your Ryobi weed eater is a task that can easily be accomplished with a few tools and a little patience. By following the step-by-step guide outlined in this article, you can successfully remove the old primer bulb and install a new one to ensure reliable engine start-up. Proper preparation, careful removal of the old bulb, and correct installation of the new bulb are key to a successful replacement process.
Remember to always prioritize safety by powering off the weed eater, wearing protective gear, and working in a suitable work area. Take your time during each step to ensure that everything is done correctly, and pay close attention to any fuel spillage or leaks during the process.
Once the new primer bulb is installed, take the time to test it by priming the bulb and starting the weed eater. The bulb should pump fuel easily and the engine should start smoothly. If any issues arise, it’s best to troubleshoot or seek professional assistance to ensure proper functioning.
By replacing the primer bulb on your Ryobi weed eater, you can ensure that your tool is always ready to use when you need it. Plus, it saves you the hassle and additional costs of taking it to a repair shop. So, don’t hesitate to tackle this DIY task and enjoy the convenience and efficiency of a properly functioning primer bulb.
Frequently Asked Questions about How To Replace Primer Bulb On Ryobi Weed Eater
Was this page helpful?
At Storables.com, we guarantee accurate and reliable information. Our content, validated by Expert Board Contributors, is crafted following stringent Editorial Policies. We're committed to providing you with well-researched, expert-backed insights for all your informational needs.

0 thoughts on “How To Replace Primer Bulb On Ryobi Weed Eater”