Home>Gardening & Outdoor>Outdoor Structures>How To Make A Shed With Pallets
Outdoor Structures
How To Make A Shed With Pallets
Modified: August 28, 2024
Learn how to build a durable shed using pallets for outdoor structures. Discover step-by-step instructions and expert tips for creating your own pallet shed. Ideal for DIY enthusiasts.
(Many of the links in this article redirect to a specific reviewed product. Your purchase of these products through affiliate links helps to generate commission for Storables.com, at no extra cost. Learn more)
Introduction
So, you"ve got some unused pallets lying around and a desire to create a functional and charming outdoor structure? Well, you"re in for an exciting journey! Building a shed with pallets is not only a sustainable and cost-effective endeavor but also a fantastic way to showcase your creativity and craftsmanship. Whether you"re a seasoned DIY enthusiast or a novice looking to embark on a new project, constructing a shed with pallets can be a rewarding and fulfilling experience.
In this comprehensive guide, we"ll walk you through the step-by-step process of creating a sturdy and visually appealing shed using pallets. From gathering the necessary materials to designing and assembling the structure, we"ll cover every aspect to ensure that you"re well-equipped to tackle this project with confidence. Additionally, we"ll explore the importance of proper planning and offer valuable tips to help you avoid common pitfalls along the way.
By the time you"ve finished reading this guide, you"ll have a clear understanding of the tools and techniques required to transform humble pallets into a practical and eye-catching shed. So, roll up your sleeves, gather your supplies, and let"s dive into the wonderful world of pallet shed construction!
Key Takeaways:
- Transform reclaimed pallets into a sturdy and charming shed with careful planning, preparation, and construction. Embrace sustainability and DIY creativity to create a unique outdoor structure.
- Elevate your pallet shed with finishing touches like paint, sealant, and personalized decor. Embrace maintenance for longevity and infuse the space with warmth and functionality.
Read more: How To Make Furniture With Pallets
Materials Needed
Before embarking on your pallet shed construction journey, it"s essential to gather all the necessary materials. While the primary building blocks of this project are the pallets themselves, several additional items and tools will be required to ensure a smooth and successful construction process.
Here"s a rundown of the materials and tools you"ll need:
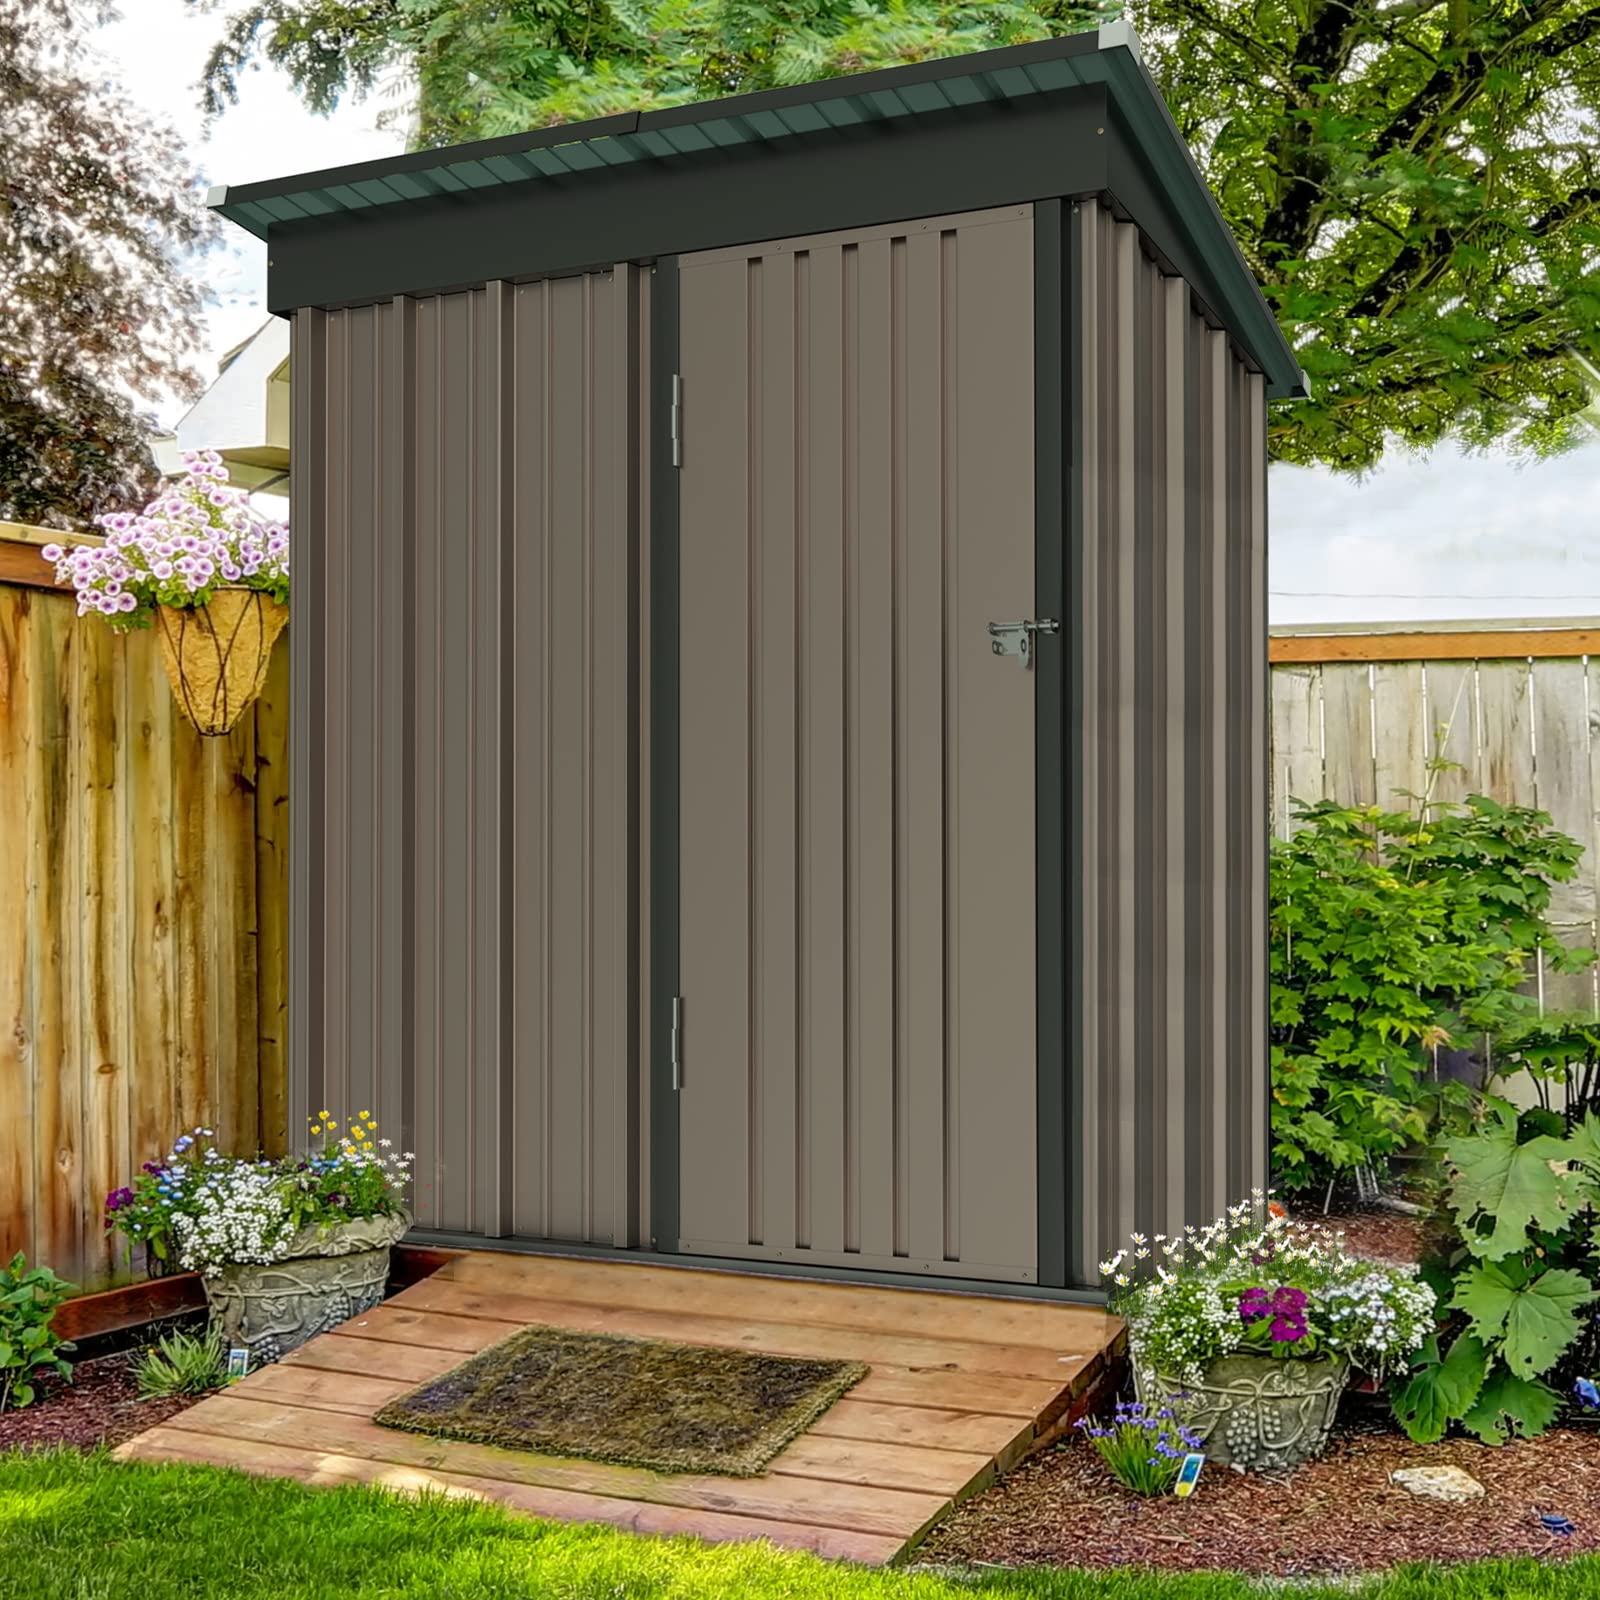
- Pallets: The foundation of your shed will be constructed from pallets. Ensure that the pallets you select are in good condition and free from rot or damage.
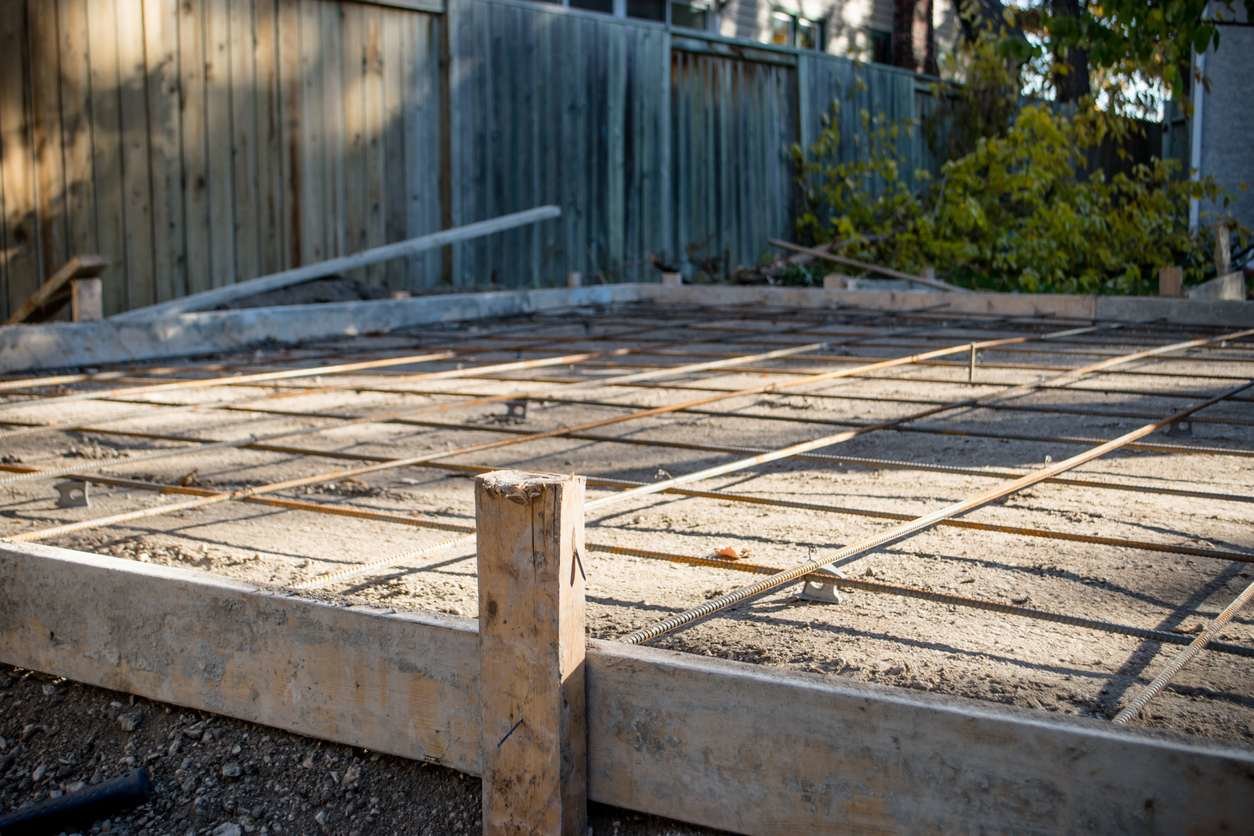
- Foundation materials: Depending on the size of your shed, you may require concrete blocks, gravel, or other suitable materials to create a stable and level foundation.
- Support beams: To reinforce the structure, you"ll need sturdy support beams to provide stability and strength.
- Roofing materials: Consider using corrugated metal sheets, shingles, or other weather-resistant materials to protect your shed from the elements.
- Fasteners: Stock up on nails, screws, and other fastening materials to securely join the pallets and other components together.
- Tools: Essential tools for this project include a saw, hammer, drill, level, measuring tape, and a pry bar. Additionally, having a sander and paintbrushes will be beneficial for finishing touches.
- Protective gear: Safety should always be a priority. Equip yourself with gloves, safety goggles, and a dust mask to safeguard against potential hazards during construction.
- Optional extras: Depending on your design preferences, you may want to incorporate windows, doors, hinges, and other decorative or functional elements into your shed.
By ensuring that you have all the required materials and tools at your disposal, you"ll be well-prepared to commence the construction of your pallet shed. With everything in place, you"re one step closer to bringing your vision to life and creating a remarkable outdoor structure from reclaimed materials.
Planning and Design
Before diving into the physical construction of your pallet shed, it"s crucial to devote ample time to thoughtful planning and meticulous design. By establishing a clear vision and blueprint for your project, you"ll set the stage for a successful and satisfying building process.
Here are essential steps to consider during the planning and design phase:
- Assess your space: Take a close look at the area where you intend to erect the shed. Consider the dimensions, ground conditions, and any potential obstacles that may impact the construction process.
- Sketch your design: Create a rough sketch or use a design software to visualize the layout and appearance of your shed. Determine the size, shape, and overall aesthetic you wish to achieve.
- Consider functionality: Think about how you"ll use the shed. Will it serve as a storage space, a workshop, or a cozy retreat? Tailor the design to accommodate your specific needs and intended use.
- Utilize the pallets effectively: Explore different ways to integrate the pallets into the design. Consider the orientation, arrangement, and potential modifications required to optimize their structural and visual appeal.
- Factor in ventilation and lighting: Plan for adequate ventilation and natural light within the shed. Incorporating windows or vents into your design will contribute to a comfortable and well-lit interior.
- Ensure structural integrity: While embracing the rustic charm of pallets, it"s essential to prioritize structural stability. Determine how you"ll reinforce the pallets and incorporate additional support elements to enhance the shed"s strength.
- Comply with regulations: If applicable, familiarize yourself with local building codes and regulations. Ensure that your shed design adheres to any relevant guidelines and obtain any necessary permits before commencing construction.
By investing time and effort into the planning and design phase, you"ll lay a solid foundation for a well-conceived and purposeful pallet shed. This thoughtful approach will not only streamline the construction process but also result in a final product that aligns with your vision and functional requirements.
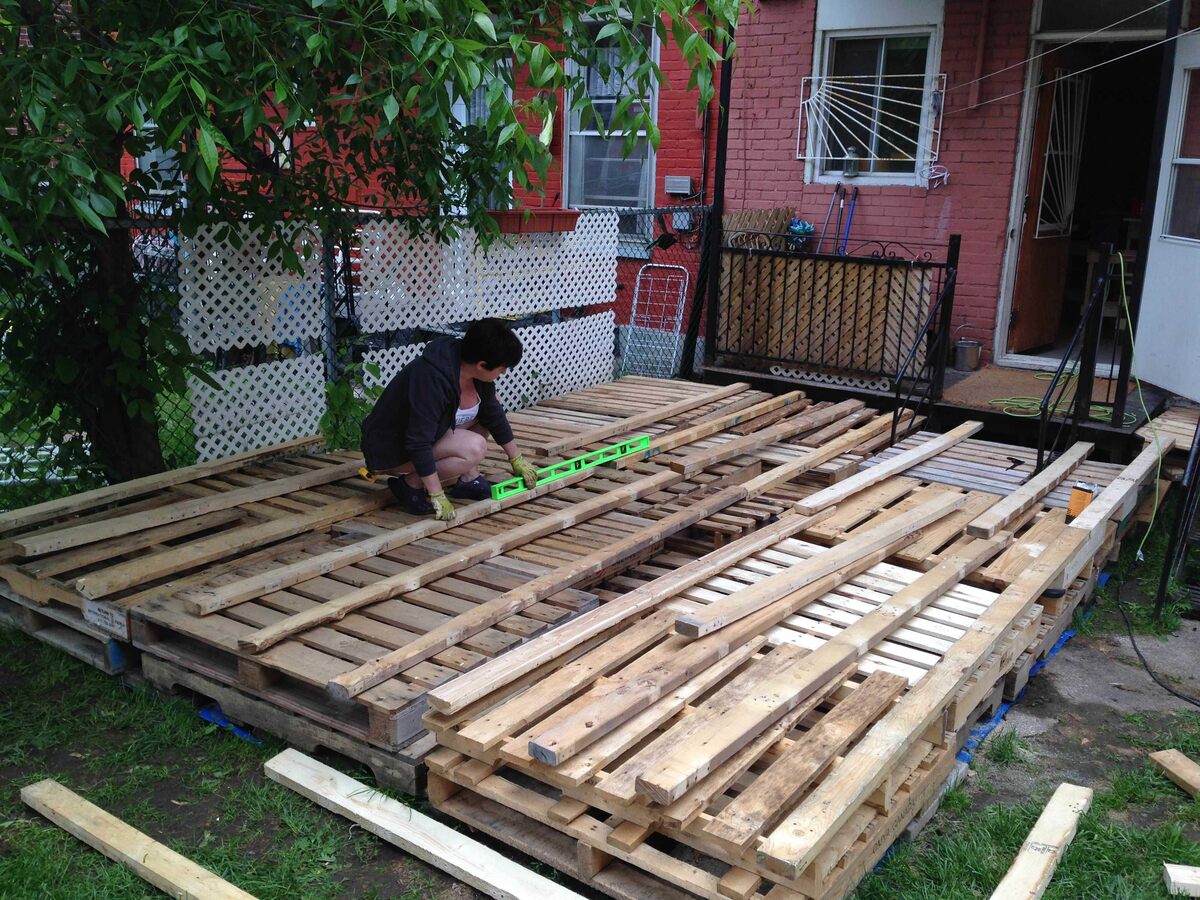
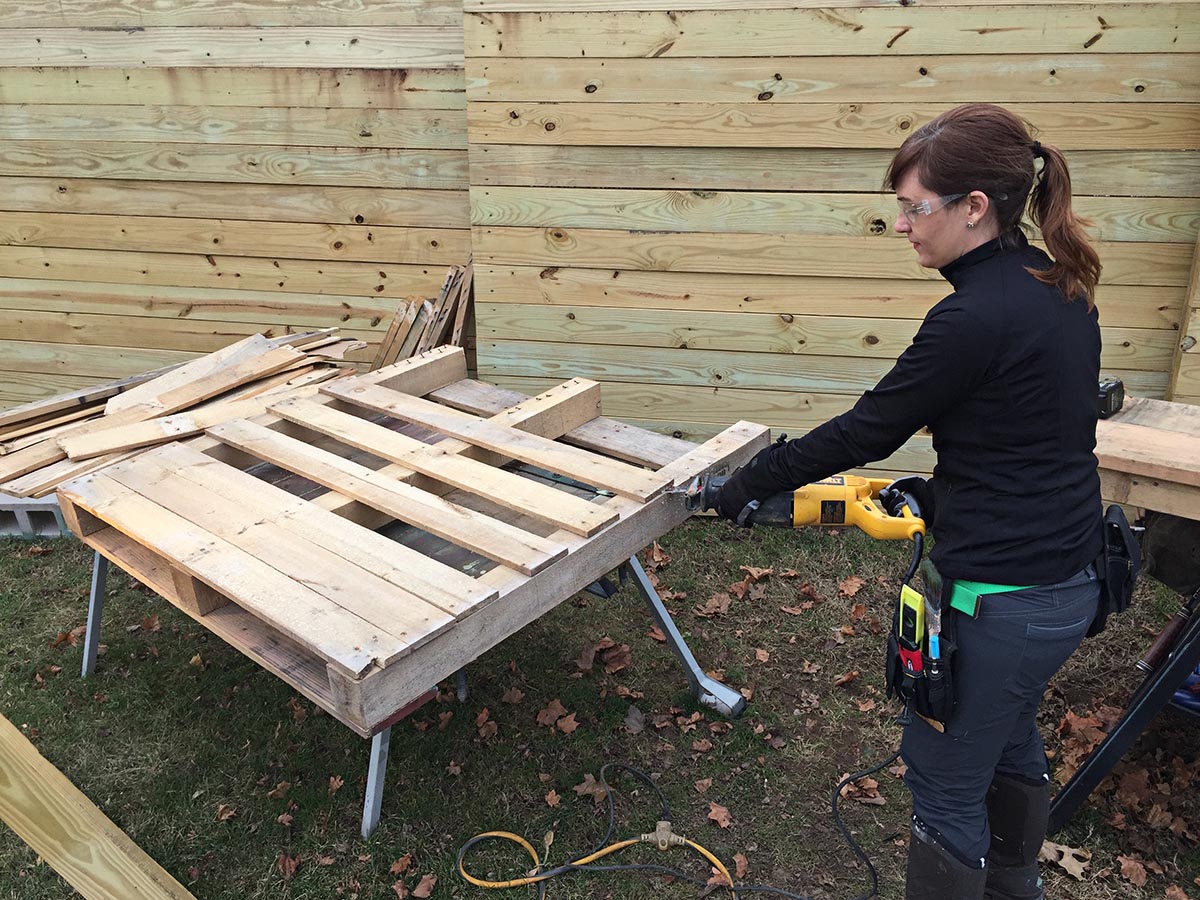
Preparing the Pallets
As the fundamental building material for your shed, the pallets require careful preparation to ensure they are structurally sound and ready for construction. Preparing the pallets involves several essential steps to maximize their potential and longevity in the finished structure.
Here"s a detailed guide on preparing the pallets for shed construction:
- Inspect for damage: Thoroughly examine each pallet to identify any signs of damage, such as rot, cracks, or weakened components. Discard any pallets that are unsalvageable and prioritize those in good condition.
- Deconstruct if necessary: Depending on your design, you may need to disassemble some pallets to obtain individual planks or components. Carefully pry the pallets apart using a pry bar and hammer, taking care to preserve the integrity of the wood.
- Remove protruding nails: Ensure that all nails, staples, or other fasteners are removed from the pallets. This will prevent potential injuries during handling and construction, as well as facilitate seamless assembly.
- Clean and sand the wood: Thoroughly clean the pallets to remove dirt, debris, and any residual contaminants. Use a sander to smooth the surfaces and eliminate rough edges, splinters, and imperfections that could compromise safety and aesthetics.
- Treat for durability: Consider applying a wood preservative or sealant to enhance the durability and weather resistance of the pallets. This additional step can prolong the lifespan of the wood and protect it from moisture, pests, and decay.
- Organize by size and quality: Categorize the pallet components based on their size, quality, and suitability for specific areas of the shed. This will streamline the construction process and enable you to select the most appropriate pieces for each part of the structure.
By meticulously preparing the pallets, you"ll ensure that they are primed for integration into your shed with optimal strength, safety, and visual appeal. This preparatory phase is a crucial investment in the overall quality and longevity of your pallet shed, laying the groundwork for a resilient and attractive outdoor structure.
When building a shed with pallets, make sure to choose sturdy and undamaged pallets. It’s also important to properly level the ground and use a solid foundation to ensure stability and longevity of the shed.
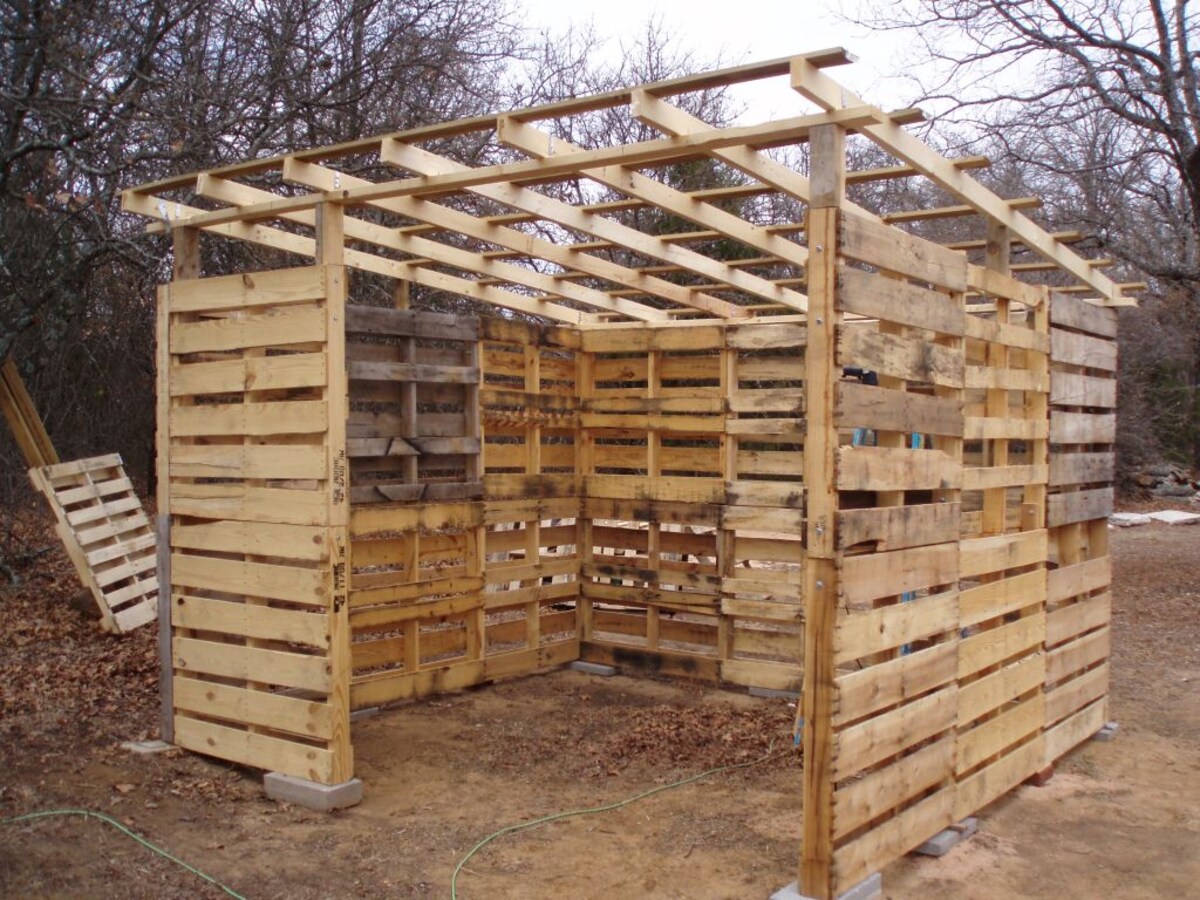
Building the Shed
With the pallets prepared and the design meticulously planned, it"s time to embark on the exhilarating phase of constructing your pallet shed. This hands-on process involves assembling the components, integrating structural elements, and bringing your vision to life through careful craftsmanship and attention to detail.
Here"s a comprehensive overview of the steps involved in building your pallet shed:
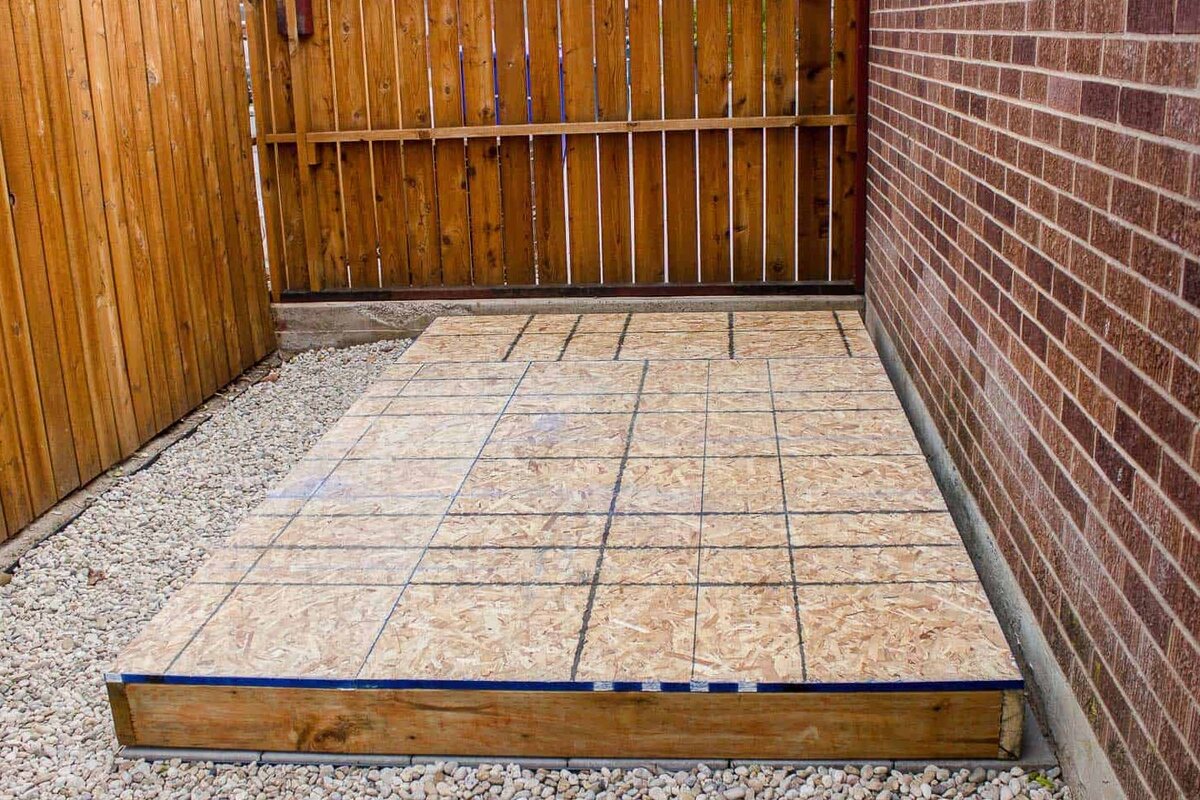
- Lay the foundation: Begin by establishing a stable and level foundation for your shed. Depending on your chosen design, this may involve positioning concrete blocks, pouring a gravel base, or implementing other suitable foundation methods.
- Arrange the pallets: Strategically position the prepared pallets according to your design plan. Ensure that they are aligned, securely placed, and level to form the walls and structural framework of the shed.
- Secure the pallets: Utilize appropriate fasteners such as nails, screws, or brackets to securely join the pallets together. Pay attention to the stability and structural integrity of the connections to fortify the shed"s framework.
- Reinforce with support beams: Integrate sturdy support beams within the shed structure to enhance stability and load-bearing capacity. These beams will bolster the overall strength of the shed and contribute to its resilience.
- Construct the roof: Depending on your design preferences, install the roofing materials atop the shed framework. Whether using corrugated metal sheets, shingles, or alternative roofing options, ensure that the roof provides reliable protection from the elements.
- Install doors and windows: If included in your design, add doors, windows, and other functional elements to the shed. Ensure that these components are properly fitted, sealed, and contribute to the shed"s functionality and aesthetic appeal.
- Attend to finishing touches: Sand any rough edges, apply a protective finish or paint, and address any remaining details to refine the appearance and longevity of the shed. This step adds a polished and personalized touch to your creation.
Throughout the construction process, maintain a keen eye for precision and craftsmanship. By adhering to your design plan and executing each step with care, you"ll witness the transformation of pallets into a robust and visually striking shed that reflects your creativity and dedication.
Read more: How To Make Pallet Bookshelves
Adding Finishing Touches
As the construction of your pallet shed nears completion, it"s time to shift focus to the essential phase of adding finishing touches. This stage offers an opportunity to elevate the visual appeal, functionality, and overall ambiance of the shed, transforming it into a welcoming and purposeful outdoor space.
Here are key considerations for adding finishing touches to your pallet shed:
- Paint and stain: Consider applying a coat of paint or stain to the exterior of the shed to enhance its appearance and protect the wood from weathering. Choose colors that complement the surrounding environment and align with your aesthetic preferences.
- Sealant and weatherproofing: Apply a weather-resistant sealant to the wood surfaces to safeguard against moisture, UV exposure, and environmental wear. This proactive measure will extend the lifespan of the shed and maintain its pristine condition.
- Interior organization: If the shed will serve as a storage space or workshop, invest in organizational solutions such as shelves, hooks, and storage containers to optimize the interior layout and maximize functionality.
- Personalized decor: Infuse the shed with personal touches by incorporating decorative elements such as potted plants, artwork, or signage. These details contribute to a warm and inviting atmosphere, making the shed feel like an extension of your home.
- Lighting and accessories: Enhance the shed"s usability and charm by integrating lighting fixtures, solar-powered lanterns, or other accessories that illuminate the space and create an inviting ambiance, especially during evening hours.
- Maintenance and upkeep: Establish a maintenance routine to preserve the shed"s condition and address any potential wear and tear. Regular inspections, cleaning, and minor repairs will ensure that your pallet shed remains a durable and appealing asset for years to come.
By attending to these finishing touches, you"ll elevate the overall appeal and functionality of your pallet shed, culminating in a space that harmonizes with its surroundings and serves as a valuable addition to your outdoor environment. These thoughtful details will not only enhance the shed"s visual allure but also contribute to its longevity and practicality.
Conclusion
Congratulations on successfully completing the construction of your pallet shed! Through dedicated planning, resourcefulness, and craftsmanship, you have transformed reclaimed pallets into a functional and visually captivating outdoor structure. This rewarding endeavor not only showcases your creativity and DIY prowess but also embodies the principles of sustainability and upcycling.
As you admire the fruits of your labor, it"s important to reflect on the journey and the valuable lessons learned along the way. Building a shed with pallets is a testament to the potential of repurposed materials and the power of ingenuity. By embracing this eco-friendly approach, you have contributed to the reduction of waste and the promotion of sustainable practices.
Furthermore, your pallet shed stands as a testament to the beauty of handmade craftsmanship and the fulfillment that comes from creating a tangible, enduring structure with your own hands. Every nail driven, every board secured, and every finishing touch applied represents a labor of love and dedication, resulting in a unique and personalized addition to your outdoor space.
As you enjoy the benefits of your pallet shed, whether as a storage solution, a workshop, or a tranquil retreat, remember the transformative potential that lies within reclaimed materials. Your shed serves as an inspiring example of how innovation and resourcefulness can converge to produce remarkable results.
Finally, share your experience and knowledge with others who may be inspired to embark on similar projects. Your insights and expertise can empower fellow DIY enthusiasts to embark on their own pallet shed construction journeys, fostering a community of creativity and sustainable craftsmanship.
With your pallet shed standing proudly as a testament to your vision and dedication, take pride in the fact that you have not only built a structure but also woven a story of creativity, sustainability, and the enduring spirit of DIY craftsmanship.
Now that you've mastered building a shed with pallets, why not delve deeper into crafting and enhancing your skills? For those who relish creating with their hands, our article on the joys and benefits of DIY projects will surely inspire further creative ventures. Keen on expanding your carpentry know-how? Don't miss our comprehensive guide to the best woodworking trends set to dominate next year. And for a serene escape right in your backyard, our piece on enclosed garden structures offers splendid ideas for transforming your outdoor space into a cozy retreat.
Frequently Asked Questions about How To Make A Shed With Pallets
Was this page helpful?
At Storables.com, we guarantee accurate and reliable information. Our content, validated by Expert Board Contributors, is crafted following stringent Editorial Policies. We're committed to providing you with well-researched, expert-backed insights for all your informational needs.


0 thoughts on “How To Make A Shed With Pallets”