Home>Gardening & Outdoor>Outdoor Structures>How To Renovate An Old Shed
Outdoor Structures
How To Renovate An Old Shed
Modified: October 18, 2024
Learn how to transform your outdoor structures with our step-by-step guide on renovating an old shed. Discover tips and ideas for upgrading your outdoor space.
(Many of the links in this article redirect to a specific reviewed product. Your purchase of these products through affiliate links helps to generate commission for Storables.com, at no extra cost. Learn more)
**
Introduction
**
Renovating an old shed can breathe new life into your outdoor space, providing a versatile and functional area for various activities. Whether you envision a cozy backyard retreat, a workshop for DIY projects, or a storage space for gardening tools and equipment, transforming an aging shed can significantly enhance your property's value and utility.
The process of renovating an old shed involves careful planning, resourcefulness, and a creative vision. From assessing the shed's current condition to executing structural repairs, upgrading the interior and exterior, and adding essential amenities, each step contributes to the overall success of the renovation project.
In this comprehensive guide, we will delve into the essential steps and considerations for renovating an old shed, offering valuable insights and practical tips to help you achieve a successful transformation. Whether you're a seasoned DIY enthusiast or a homeowner embarking on your first renovation venture, this guide will equip you with the knowledge and confidence to revitalize your old shed into a functional and aesthetically pleasing space. So, roll up your sleeves, gather your tools, and let's embark on this exciting journey of shed renovation!
**
Key Takeaways:
- Revitalizing an old shed through renovation creates a versatile and functional space, enhancing property value and lifestyle. From structural repairs to interior upgrades, the process requires planning, creativity, and attention to detail.
- Prioritizing insulation, electricity, and efficient storage solutions optimizes the shed’s functionality and comfort. Adding final touches and establishing a maintenance routine ensures enduring quality and sustainability.
Read more: How To Turn An Old Shed Into A She Shed
Assessing the Condition of the Shed
**
Before diving into the renovation process, it’s crucial to conduct a thorough assessment of the shed’s current condition. This step enables you to identify existing issues, determine the extent of necessary repairs, and develop a clear vision for the renovation project.
Start by inspecting the exterior of the shed. Look for signs of structural damage, such as rotting wood, warped panels, or deteriorating roofing materials. Pay close attention to the foundation, ensuring it is stable and free from cracks or instability. Additionally, examine the doors and windows for any signs of wear, including damaged frames, broken hinges, or ineffective weather sealing.
Next, venture inside the shed to assess its interior condition. Check for water damage, mold, or pest infestations, as these issues can compromise the structural integrity and safety of the space. Evaluate the flooring for signs of rot or decay, and inspect the walls and ceiling for water stains or structural weaknesses.
Once you’ve thoroughly evaluated the physical condition of the shed, consider its overall layout and functionality. Determine whether the existing design and layout align with your renovation goals. Assess the available space and envision how it can be optimized to suit your intended use, whether it’s for storage, hobbies, or as a functional workspace.
Throughout the assessment process, take detailed notes and photographs to document the existing condition of the shed. These records will serve as valuable references when planning the renovation and communicating with contractors or professionals, if needed. By gaining a comprehensive understanding of the shed’s condition, you can proceed to the next phase of planning with clarity and purpose.
**
Planning the Renovation
**
Embarking on a successful shed renovation begins with meticulous planning and thoughtful consideration of your goals and priorities. As you envision the transformation of your old shed, take the time to develop a clear plan that outlines the desired outcomes, budgetary considerations, and a realistic timeline for the project.
Start by defining the purpose of the renovated shed. Will it serve as a tranquil retreat for relaxation, a functional workspace for hobbies and DIY projects, or a well-organized storage area for tools and equipment? Understanding the intended use of the shed will guide your decision-making process as you plan the renovation.
Consider the aesthetic elements you wish to incorporate into the shed’s design. Whether you prefer a rustic, traditional look or a modern, sleek appearance, envisioning the desired style will inform your choices regarding materials, colors, and decorative accents. Additionally, explore inspirational sources such as home improvement magazines, online platforms, or local hardware stores to gather ideas and refine your vision.
As you delve into the planning phase, create a detailed budget that accounts for materials, labor, permits, and any unforeseen expenses. Research the cost of essential renovation materials, such as lumber, roofing materials, insulation, and lighting fixtures, to establish a realistic budget that aligns with your financial resources.
Furthermore, develop a project timeline that outlines key milestones and deadlines for the renovation. Consider factors such as seasonal weather conditions, availability of contractors or assistance, and any personal commitments that may impact the renovation schedule. A well-structured timeline will help you stay organized and focused as you progress through the renovation process.
Lastly, if the renovation involves complex structural changes or electrical work, consider consulting with a professional contractor or architect to ensure compliance with building codes and safety standards. Their expertise can provide valuable insights and guidance, contributing to a successful and code-compliant renovation.
By investing time and effort into thorough planning, you lay a solid foundation for a successful shed renovation, setting the stage for a transformative and rewarding project.
**
Obtaining Necessary Permits
**
Before commencing the renovation of your old shed, it’s essential to navigate the regulatory landscape by obtaining the necessary permits and approvals. The requirements for permits can vary based on the scope of the renovation, local building codes, and zoning regulations, making it imperative to conduct thorough research and adhere to legal mandates.
Begin by researching the specific permit requirements for shed renovations in your locality. Contact your local building department or visit their official website to access information regarding permit applications, relevant regulations, and any specific guidelines pertaining to shed renovations. Understanding the permit process and associated regulations will empower you to navigate the administrative aspects of the renovation with confidence.
Depending on the nature of the renovation, you may need to secure permits for structural modifications, electrical work, plumbing installations, or changes to the shed’s footprint. Common renovation activities that typically require permits include roof replacement, window and door installations, foundation repairs, and electrical system upgrades. By identifying the specific permits required for your project, you can ensure compliance with legal requirements and avoid potential complications in the future.
When applying for permits, prepare a comprehensive documentation package that outlines the scope of the renovation, proposed structural changes, and any relevant technical specifications. This package may include architectural drawings, engineering reports, material specifications, and a detailed project plan. By presenting a thorough and well-documented permit application, you enhance the likelihood of a smooth approval process.
It’s important to note that while the permit acquisition process may introduce administrative complexities and time constraints, adhering to regulatory requirements is crucial for ensuring the safety, integrity, and legal compliance of the renovated shed. By obtaining the necessary permits, you demonstrate a commitment to responsible renovation practices and contribute to the long-term durability and value of the structure.
Engaging with the permit acquisition process proactively and diligently will pave the way for a successful renovation journey, allowing you to proceed with confidence and peace of mind as you breathe new life into your old shed.
**
Clearing Out the Shed
**
Before diving into the physical renovation work, it’s essential to start with a clean slate by clearing out the contents of the old shed. This process not only creates a blank canvas for the renovation but also presents an opportunity to declutter, organize, and assess the items stored within the space.
Begin by removing all items from the shed, categorizing them based on their relevance and condition. Evaluate each item to determine whether it will be retained, repurposed, donated, or discarded. This approach allows you to prioritize essential items, discard unnecessary clutter, and create a streamlined inventory of belongings that align with the shed’s future purpose.
As you clear out the shed, take the opportunity to assess the condition of stored items. Identify any damaged or deteriorating possessions that may require repair or replacement. Additionally, consider implementing storage solutions that optimize the use of space and enhance organization, such as shelving units, wall-mounted racks, or storage containers.
Once the shed is emptied, thoroughly clean the interior to remove dust, debris, and any accumulated grime. This step sets the stage for a fresh start, ensuring that the renovated shed will be free from residual dirt and contaminants. Consider using environmentally friendly cleaning products to promote a healthy and sustainable environment within the shed.
During the clearing-out process, take the opportunity to inspect the shed’s interior for any hidden issues that may require attention during the renovation. Look for signs of water damage, pest infestations, or structural weaknesses, and address these concerns before proceeding with the renovation work. By addressing underlying issues early in the process, you can mitigate potential complications and ensure a solid foundation for the renovation.
As you complete the clearing-out phase, consider donating usable items to local charities or community organizations, contributing to a sustainable and socially responsible approach to decluttering. By repurposing and recycling items whenever possible, you align the renovation process with eco-conscious principles, reducing waste and promoting environmental stewardship.
By diligently clearing out the shed and preparing it for the renovation journey, you establish a conducive and organized environment for the subsequent phases of the project. This proactive approach sets the stage for a successful and transformative renovation, breathing new life into the old shed.
**
Read more: What To Do With An Old Shed
Repairing Structural Damage
**
Addressing any structural damage is a critical step in the renovation of an old shed, as it ensures the safety, stability, and longevity of the structure. Whether the damage stems from aging, weather-related wear, or neglect, thorough repairs are essential to fortify the shed’s framework and foundation.
Begin by conducting a comprehensive assessment of the shed’s structural components, including the walls, roof, flooring, and foundation. Look for signs of rot, decay, termite damage, or compromised integrity. Common areas prone to structural damage include the base of the walls, the roof eaves, and areas susceptible to water infiltration.
Address any identified structural issues promptly to prevent further deterioration and mitigate the risk of safety hazards. Replace rotted or termite-damaged wood, reinforce weakened supports, and repair any compromised joints or connections. Additionally, consider reinforcing the shed’s foundation to ensure stability and resistance to shifting or settling.
When repairing structural damage, prioritize the use of high-quality materials and techniques that align with industry best practices. This approach enhances the durability and resilience of the repaired components, contributing to the overall integrity of the renovated shed. Additionally, consider applying protective coatings or treatments to vulnerable structural elements to enhance their resistance to moisture, pests, and environmental stressors.
Throughout the repair process, maintain a keen focus on safety measures, particularly when working with power tools, heavy materials, or elevated surfaces. Adhere to recommended safety protocols, wear appropriate personal protective equipment, and exercise caution to prevent accidents or injuries during the structural repair phase.
Depending on the extent of the structural damage and your comfort level with renovation tasks, consider consulting with a professional contractor or structural engineer. Their expertise and insights can provide valuable guidance, particularly when addressing complex structural issues or implementing advanced repair techniques.
By diligently addressing structural damage, you fortify the foundation of the old shed, laying the groundwork for a resilient and enduring structure that will serve its intended purpose for years to come. This proactive approach ensures that the renovated shed embodies strength, safety, and structural integrity, setting the stage for the subsequent phases of the transformation.
**
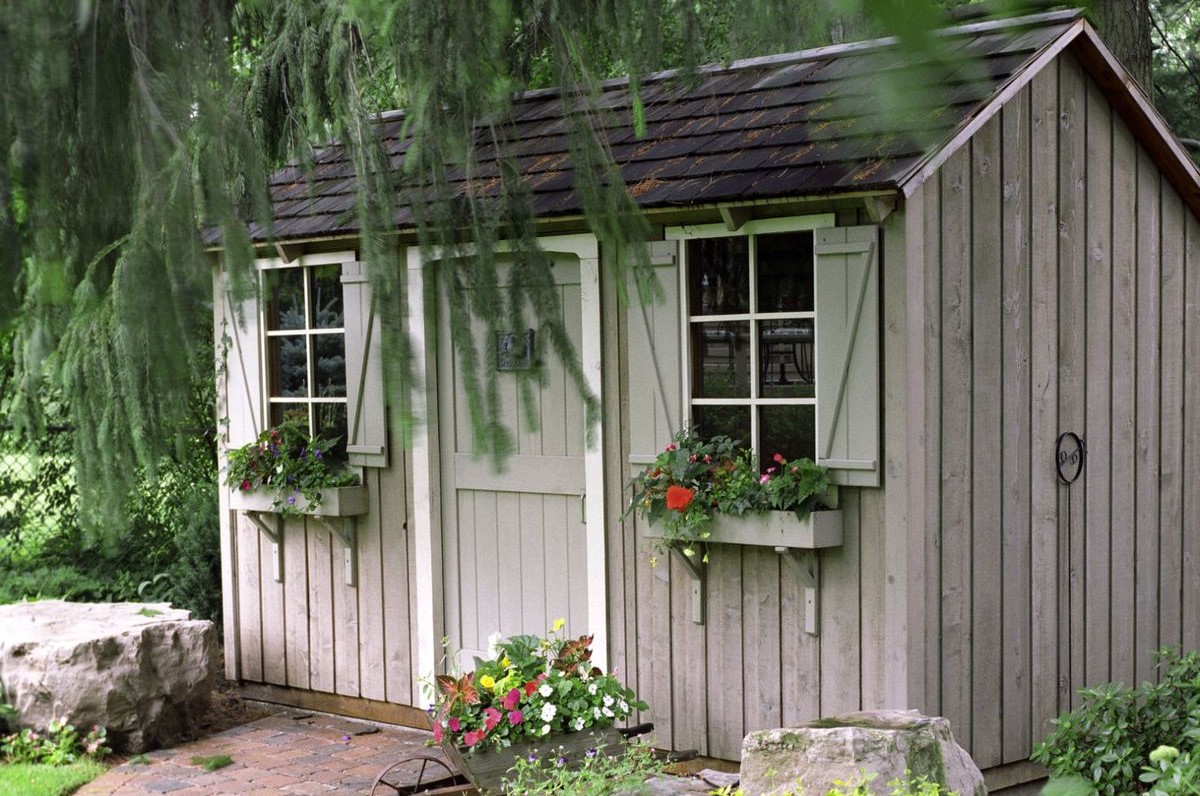
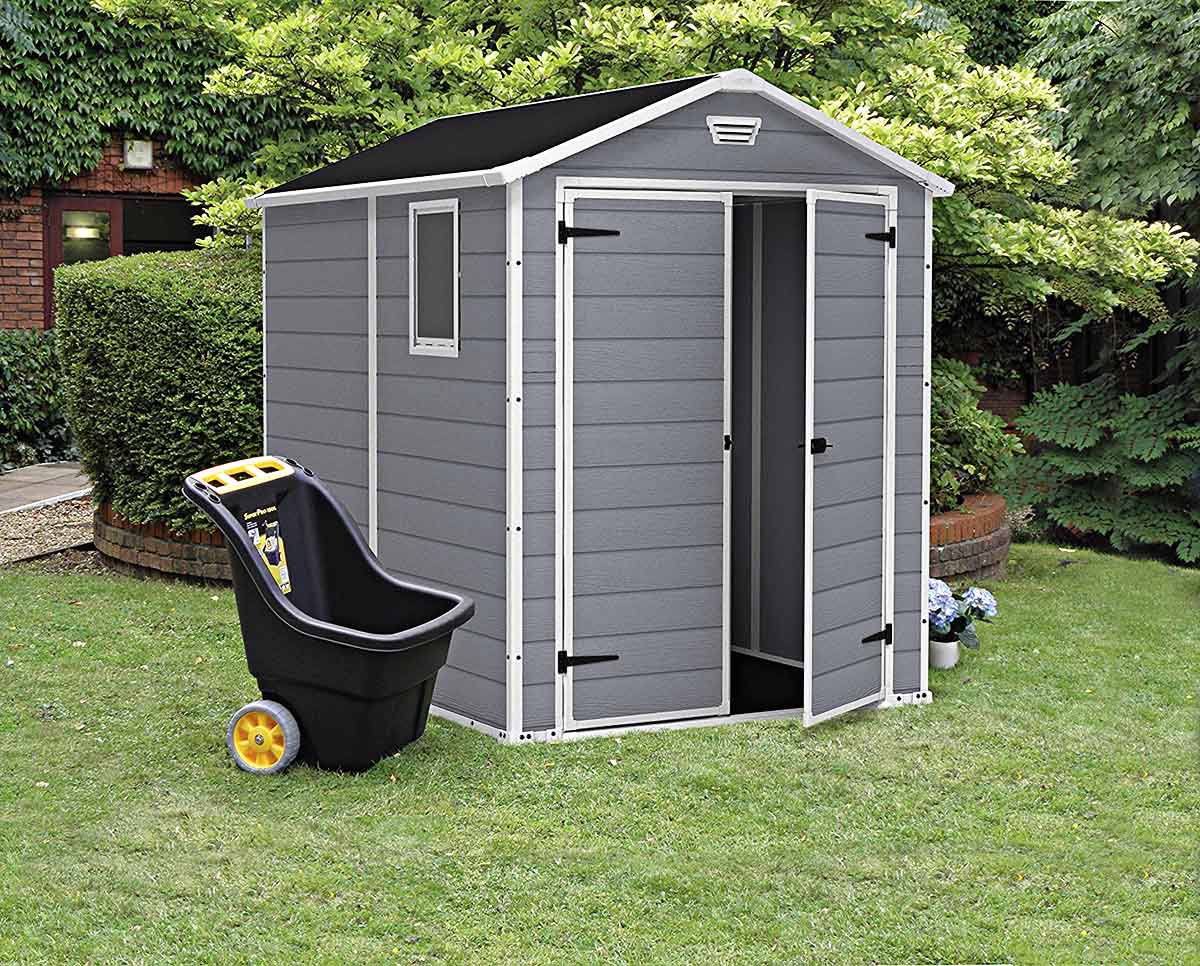
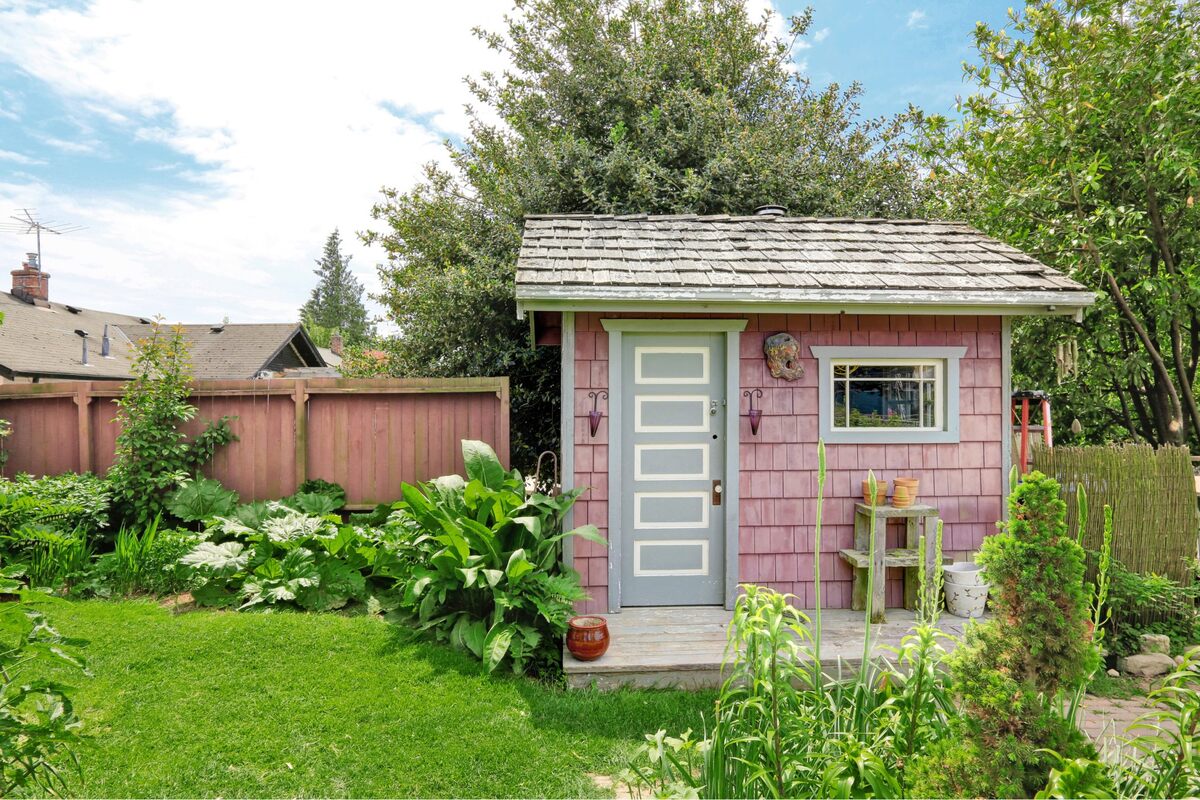
Upgrading the Exterior
**
Enhancing the exterior of an old shed is a transformative endeavor that elevates its visual appeal, durability, and weather resistance. By implementing strategic upgrades, you can rejuvenate the shed’s facade, protect it from the elements, and infuse it with character and charm that complements your outdoor space.
Start by evaluating the condition of the shed’s exterior surfaces, including the walls, roof, doors, and windows. Address any signs of wear, such as peeling paint, weathered siding, or damaged roofing materials. Consider applying a fresh coat of high-quality exterior paint that not only revitalizes the shed’s appearance but also provides a protective barrier against moisture and UV exposure.
If the shed features wooden siding, assess its condition and consider options for repair or replacement. Upgrading to durable, weather-resistant siding materials, such as vinyl or composite cladding, can enhance the shed’s longevity and reduce maintenance requirements. Additionally, explore the possibility of adding decorative elements, such as trim accents, shutters, or window boxes, to infuse the exterior with a touch of personality and charm.
When addressing the roofing, inspect for signs of damage, leaks, or deterioration. Consider replacing worn shingles or roofing panels with high-quality materials that offer superior weather protection and longevity. Properly sealing roof penetrations, such as vents and chimneys, is essential to prevent water infiltration and ensure a watertight exterior envelope.
Upgrade the doors and windows to enhance functionality, security, and energy efficiency. Install weather-stripping to create a tight seal around doors and windows, reducing drafts and improving thermal insulation. Consider upgrading to energy-efficient windows and doors that offer enhanced insulation properties, contributing to a comfortable and energy-conscious interior environment.
Additionally, consider landscaping and hardscaping elements that complement the shed’s exterior. Implementing pathways, garden beds, or decorative plantings around the shed can enhance its visual integration with the surrounding outdoor space, creating a cohesive and inviting setting.
As you upgrade the exterior, prioritize the use of materials and finishes that align with the architectural style of your home and the aesthetic character of your outdoor space. By harmonizing the shed’s exterior with its surroundings, you create a visually cohesive and appealing environment that enriches the overall appeal of your property.
By conscientiously upgrading the exterior of the old shed, you breathe new life into its appearance while fortifying its resilience and longevity. This transformative process sets the stage for a visually striking and enduring outdoor structure that enriches your property and lifestyle.
**
Before starting the renovation of an old shed, make sure to thoroughly inspect the structure for any damage or rot. This will help you identify any areas that need to be repaired or replaced before beginning the renovation process.
Upgrading the Interior
**
Transforming the interior of an old shed presents an opportunity to create a functional, inviting space that aligns with your specific needs and preferences. Whether you envision a cozy retreat, a productive workshop, or a well-organized storage area, upgrading the shed’s interior allows you to optimize its functionality and aesthetic appeal.
Begin by evaluating the layout and spatial configuration of the shed’s interior. Consider how the space can be optimized to accommodate your intended use, whether it involves creating distinct zones for different activities, maximizing storage capacity, or enhancing the overall comfort and usability of the space.
If the shed lacks insulation, consider adding this essential feature to regulate indoor temperatures and improve energy efficiency. Insulating the walls, ceiling, and flooring creates a comfortable interior environment, particularly if the shed will be used for extended periods throughout the year. Explore options for eco-friendly insulation materials that align with sustainable renovation practices.
Upgrade the flooring to enhance both functionality and visual appeal. Consider durable, easy-to-clean flooring options such as laminate, vinyl, or engineered wood, which offer resilience against wear and tear while providing a welcoming foundation for the interior space. Additionally, strategically placed area rugs can add warmth and style to the renovated interior.
Lighting plays a pivotal role in the functionality and ambiance of the shed’s interior. Assess the existing lighting fixtures and consider augmenting them with energy-efficient LED lighting, task lighting for work areas, and decorative lighting to create a welcoming atmosphere. Incorporating natural light through strategically placed windows or skylights can further enhance the interior environment.
Customize the interior to accommodate your specific needs and interests. Integrate storage solutions such as shelving, cabinets, and wall-mounted organizers to optimize space and maintain a clutter-free environment. Consider incorporating versatile furniture pieces that serve dual purposes, such as storage benches, fold-down work surfaces, or modular seating arrangements.
Furthermore, infuse the interior with personal touches and decorative elements that reflect your style and interests. Whether it involves artwork, decorative accents, or functional accessories, these details contribute to a personalized and inviting interior that resonates with your vision for the space.
By conscientiously upgrading the shed’s interior, you create a functional and inviting space that aligns with your lifestyle and aspirations. This transformative process enhances the shed’s versatility and comfort, setting the stage for a rewarding and purposeful interior environment.
**
Adding Insulation and Weatherproofing
**
Enhancing the insulation and weatherproofing of an old shed is a pivotal step in creating a comfortable, energy-efficient, and durable interior environment. By fortifying the shed’s thermal performance and resistance to external elements, you can optimize its functionality and ensure a welcoming space throughout the year.
Commence the insulation and weatherproofing process by evaluating the shed’s existing insulation, if any, and identifying areas that require improvement. Insulate the walls, ceiling, and flooring to create a thermal barrier that regulates indoor temperatures, minimizes heat loss in winter, and prevents heat gain in summer. Consider eco-friendly insulation materials that align with sustainable renovation practices and offer superior performance.
Seal any gaps, cracks, or air leaks in the shed’s envelope to prevent drafts and heat loss. Apply weather-stripping to doors and windows to create a tight seal, reducing air infiltration and enhancing the shed’s energy efficiency. Additionally, consider caulking around exterior penetrations, such as vents and utility openings, to further fortify the shed’s resistance to external elements.
Address moisture management by implementing effective ventilation strategies that promote air circulation and prevent condensation. Proper ventilation mitigates the risk of mold, mildew, and moisture-related issues, safeguarding the interior environment and preserving the integrity of the shed’s structure.
Consider upgrading windows and doors to models that offer enhanced thermal performance and weather resistance. Energy-efficient windows with low-E coatings and insulated frames, along with well-insulated doors, contribute to the overall insulation and weatherproofing efforts, creating a more comfortable and sustainable interior environment.
Explore options for weather-resistant cladding materials that protect the shed’s exterior from moisture, UV exposure, and temperature fluctuations. Durable siding materials, such as vinyl, fiber cement, or engineered wood, offer superior weather resistance and require minimal maintenance, contributing to the long-term durability and aesthetics of the shed’s exterior.
When implementing insulation and weatherproofing measures, prioritize quality materials and meticulous installation to ensure optimal performance and longevity. By fortifying the shed’s insulation and weather resistance, you create a comfortable, resilient, and sustainable environment that enhances the shed’s functionality and livability.
**
Installing Electricity and Lighting
**
Integrating electricity and lighting into an old shed expands its functionality, convenience, and safety, enabling you to create a versatile and well-illuminated space for various activities. Whether you plan to use the shed as a workshop, hobby area, or multifunctional retreat, the addition of electrical amenities enhances its usability and comfort.
Begin by assessing the electrical requirements of the shed, considering factors such as intended uses, power needs for tools or equipment, and the number of lighting fixtures. If the shed is located a significant distance from the main electrical panel, consult with a licensed electrician to determine the feasibility and requirements for extending the electrical supply to the shed.
When installing electrical wiring, adhere to local building codes and safety standards to ensure compliance and the safe operation of the electrical system. Consider incorporating ground fault circuit interrupter (GFCI) outlets to protect against electrical shocks in potentially damp or wet environments, such as near sinks or work areas.
Integrate a subpanel within the shed to distribute power to various circuits, accommodating lighting, outlets, and specialized equipment. This subpanel allows for efficient power management and enhances the safety and flexibility of the shed’s electrical system.
Illuminate the shed’s interior with a thoughtfully designed lighting scheme that caters to specific functional areas and enhances the overall ambiance. Incorporate overhead lighting, task lighting for work areas, and accent lighting to create a well-lit and inviting environment. Energy-efficient LED fixtures offer longevity and cost-effective operation, contributing to a sustainable and environmentally conscious lighting design.
Consider installing motion-activated exterior lighting to enhance security and visibility around the shed’s perimeter. These fixtures provide added safety and deter unwanted intrusions while facilitating access to the shed during evening hours.
When integrating electricity and lighting, prioritize energy efficiency and safety to create a sustainable and secure interior environment. By proactively addressing the electrical needs of the shed, you enhance its functionality and comfort, setting the stage for a versatile and well-equipped space that aligns with your specific requirements.
**
Adding Storage and Organization
**
Efficient storage solutions and thoughtful organization are essential components of a successful shed renovation, enabling you to maximize space, maintain order, and optimize functionality. By strategically integrating storage features and organizational systems, you can create a well-structured and clutter-free environment that accommodates diverse storage needs and enhances the shed’s usability.
Begin by assessing the specific storage requirements based on the shed’s intended use. Whether it will serve as a workshop, gardening station, or general storage space, consider the types of items to be stored, their sizes, and the frequency of access. This assessment guides the selection and implementation of storage solutions that align with your organizational needs.
Integrate versatile storage options, such as shelving units, cabinets, and pegboards, to accommodate a variety of items while optimizing vertical space. Adjustable shelving allows for customization based on the dimensions of stored items, while cabinets provide enclosed storage for tools, supplies, and other belongings. Pegboards offer a flexible and accessible solution for organizing and displaying frequently used tools and equipment.
Utilize wall-mounted organizers and hooks to efficiently store and access frequently used items, such as gardening tools, hand tools, or outdoor gear. This approach maximizes available wall space and keeps essential items within easy reach, promoting a well-organized and functional interior environment.
Customize storage solutions to accommodate specific activities or hobbies. For example, if the shed will serve as a woodworking workshop, consider installing specialized storage for lumber, hardware, and power tools. Tailoring storage features to the unique requirements of the shed’s intended use enhances its functionality and efficiency.
Consider incorporating multi-functional furniture pieces that offer built-in storage, such as benches with under-seat compartments or work tables with integrated shelving. These dual-purpose furnishings maximize space utilization and contribute to a streamlined and organized interior environment.
Implement labeling and categorization systems to streamline organization and facilitate easy retrieval of stored items. Clearly labeled bins, containers, and shelves enhance visibility and accessibility, promoting a systematic and efficient approach to storage and retrieval.
By conscientiously integrating storage and organization solutions, you create a well-structured and efficient interior environment that aligns with your specific needs and activities. This proactive approach enhances the shed’s functionality and usability, contributing to a purposeful and organized space that supports diverse storage requirements.
**
Final Touches and Maintenance
**
Completing the renovation of an old shed involves adding the finishing touches that elevate its aesthetics, functionality, and longevity. By attending to the finer details and establishing a maintenance regimen, you ensure that the renovated shed embodies enduring quality and serves as a valuable asset to your outdoor space.
Enhancing Curb Appeal: Consider adding decorative elements, such as window boxes, exterior lighting fixtures, or ornamental accents, to enhance the shed's visual appeal and complement its surroundings. Landscaping around the shed, incorporating pathways, and adding potted plants contribute to a cohesive and inviting exterior environment.
Implementing Security Measures: Enhance the shed's security by installing a robust locking system on doors and windows. Consider incorporating motion-activated security lighting and, if applicable, a security alarm system to safeguard the shed and its contents.
Establishing a Maintenance Schedule: Develop a regular maintenance schedule to preserve the shed's condition and functionality. This may involve periodic inspections for signs of wear, cleaning the exterior surfaces, and addressing any emerging maintenance needs promptly to prevent deterioration.
Implementing Seasonal Preparations: Prepare the shed for seasonal changes by ensuring that it is equipped to withstand varying weather conditions. This may involve applying protective coatings or treatments to exterior surfaces, reinforcing weatherproofing measures, and adjusting interior climate control settings as needed.
Incorporating Personal Touches: Infuse the shed with personal touches, such as artwork, decorative accents, or functional accessories, that reflect your style and interests. These details contribute to a welcoming and personalized interior environment that resonates with your vision for the space.
Promoting Sustainability: Consider incorporating eco-friendly practices into the shed's maintenance routine, such as using environmentally friendly cleaning products, implementing energy-efficient lighting and appliances, and practicing responsible waste management.
Monitoring and Addressing Wear: Regularly inspect the shed for signs of wear, such as peeling paint, loose hardware, or weather-related damage. Addressing these issues promptly helps maintain the shed's structural integrity and visual appeal.
By attending to these final touches and establishing a proactive maintenance approach, you ensure that the renovated shed remains a valuable and enduring asset to your outdoor space. This comprehensive and attentive approach contributes to the shed's long-term durability, functionality, and visual appeal, ensuring that it continues to enrich your property for years to come.
**
Conclusion
**
The renovation of an old shed is a transformative journey that breathes new life into a neglected structure, creating a versatile, functional, and visually appealing space within your outdoor environment. By embarking on this endeavor, you have revitalized a key component of your property, unlocking its potential to serve as a workshop, storage area, or retreat that enhances your lifestyle and property value.
Throughout the renovation process, you have demonstrated resourcefulness, creativity, and a commitment to responsible renovation practices. From assessing the shed’s condition to implementing structural repairs, upgrading the interior and exterior, and integrating essential amenities, you have navigated each phase with diligence and purpose, ensuring a successful transformation.
By prioritizing insulation and weatherproofing, integrating electricity and lighting, and implementing efficient storage and organization solutions, you have optimized the shed’s functionality and comfort, creating a well-structured and inviting interior environment that aligns with your specific needs and activities.
As you add the final touches and establish a maintenance regimen, you pave the way for a shed that embodies enduring quality, visual appeal, and sustainability. By incorporating personal touches, enhancing security measures, and promoting eco-friendly practices, you have cultivated a space that resonates with your individual style, values, and aspirations.
As you embark on this exciting journey of shed renovation, you have not only revitalized a physical structure but also enriched your outdoor space with a versatile and purposeful asset. The renovated shed stands as a testament to your dedication, creativity, and vision, serving as a valuable and enduring extension of your property.
As you reflect on the culmination of this renovation project, take pride in the transformation you have achieved and the potential that the shed now embodies. Embrace this space as a reflection of your ingenuity and commitment to enhancing your property, and may it continue to inspire and enrich your lifestyle for years to come.
Frequently Asked Questions about How To Renovate An Old Shed
Was this page helpful?
At Storables.com, we guarantee accurate and reliable information. Our content, validated by Expert Board Contributors, is crafted following stringent Editorial Policies. We're committed to providing you with well-researched, expert-backed insights for all your informational needs.


0 thoughts on “How To Renovate An Old Shed”