Home>Garden Essentials>How To Make Your Dramatic Play Area Look Like A Kitchen
Garden Essentials
How To Make Your Dramatic Play Area Look Like A Kitchen
Modified: August 16, 2024
Transform your dramatic play area into a captivating garden-inspired kitchen. Get step-by-step tips and ideas to create a vibrant and imaginative space for children.
(Many of the links in this article redirect to a specific reviewed product. Your purchase of these products through affiliate links helps to generate commission for Storables.com, at no extra cost. Learn more)
Introduction
Welcome to the wonderful world of dramatic play, where children’s imaginations can run wild! One of the most popular themes for a dramatic play area is a kitchen. Setting up a kitchen-themed dramatic play area can be a fantastic way to engage young learners and promote creativity, communication, and problem-solving skills.
In this article, we will guide you through the process of creating a realistic and inviting kitchen space for children to explore, pretend, and have fun! We will cover everything from choosing the right furniture and props to organizing play food and utensils. Whether you are a teacher, a parent, or a caregiver, this article will provide you with all the tips and ideas you need to transform your dramatic play area into a captivating kitchen.
Dramatic play areas not only provide children with a fun and imaginative play experience, but they also offer numerous educational benefits. Through pretend play, children develop and enhance a range of skills, including language and communication skills, social-emotional skills, problem-solving skills, and cognitive development. A kitchen-themed dramatic play area specifically fosters skills related to food preparation, sharing, and collaboration.
Creating a kitchen dramatic play area involves careful consideration of furniture, props, and accessories that will make the experience feel realistic and engaging. It’s important to create a space that is functional, aesthetically pleasing, and safe for children to play in. So, let’s jump right in and explore the steps to create a fantastic kitchen-themed dramatic play area!
Key Takeaways:
- Creating a kitchen-themed dramatic play area can engage children’s imaginations, promote social skills, and enhance cognitive development through pretend cooking and dining activities.
- Carefully selecting furniture, props, and accessories, and emphasizing safety and organization, can create an immersive and educational play space for children to explore and enjoy.
Read more: What Should Be In The Dramatic Play Area
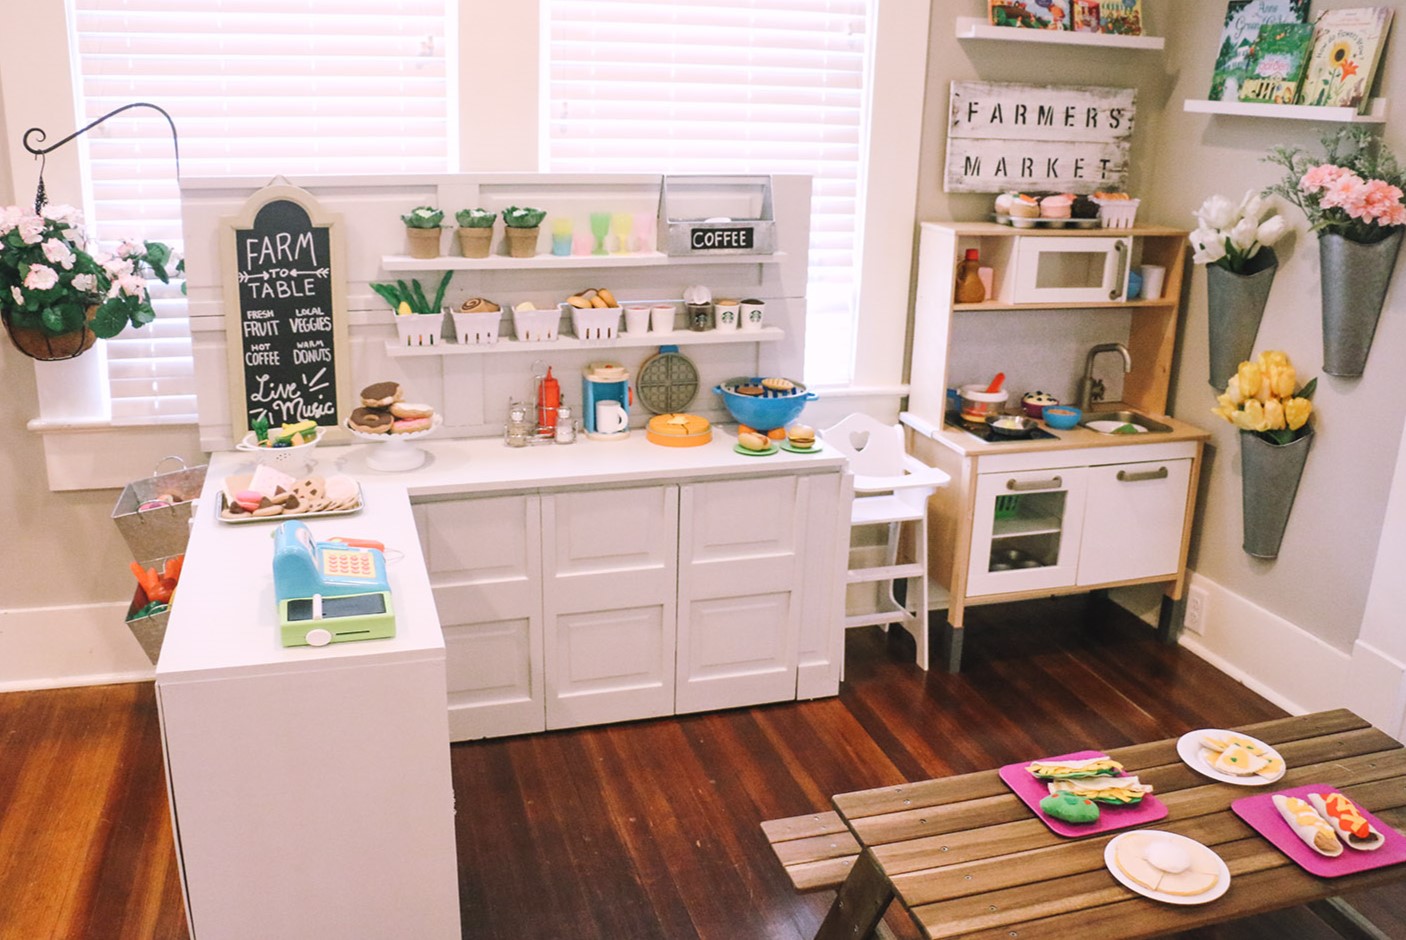
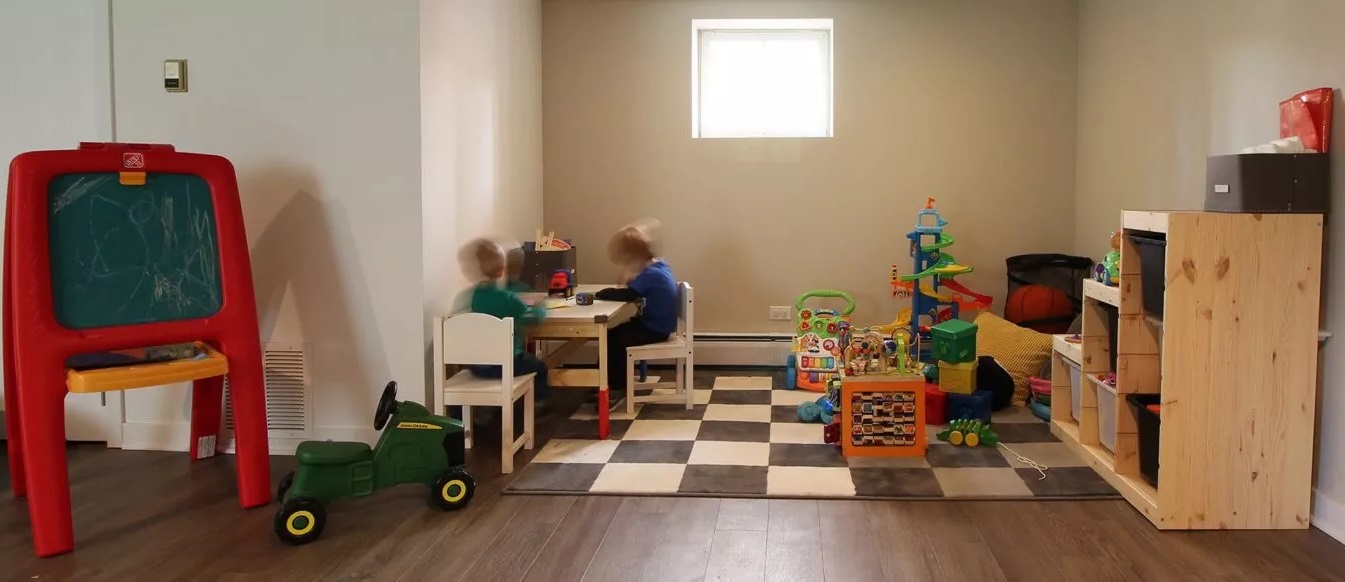
Step 1: Choosing the Right Furniture and Layout
The first step in creating a kitchen-themed dramatic play area is to choose the right furniture and layout. Selecting appropriate furniture will not only enhance the realism of the kitchen setting but also ensure that children can comfortably engage in pretend play.
When it comes to choosing furniture for your kitchen dramatic play area, consider using child-sized tables and chairs. This will allow children to easily access and manipulate props and engage in imaginative play comfortably. Look for sturdy and durable furniture that can withstand the energetic play of children.
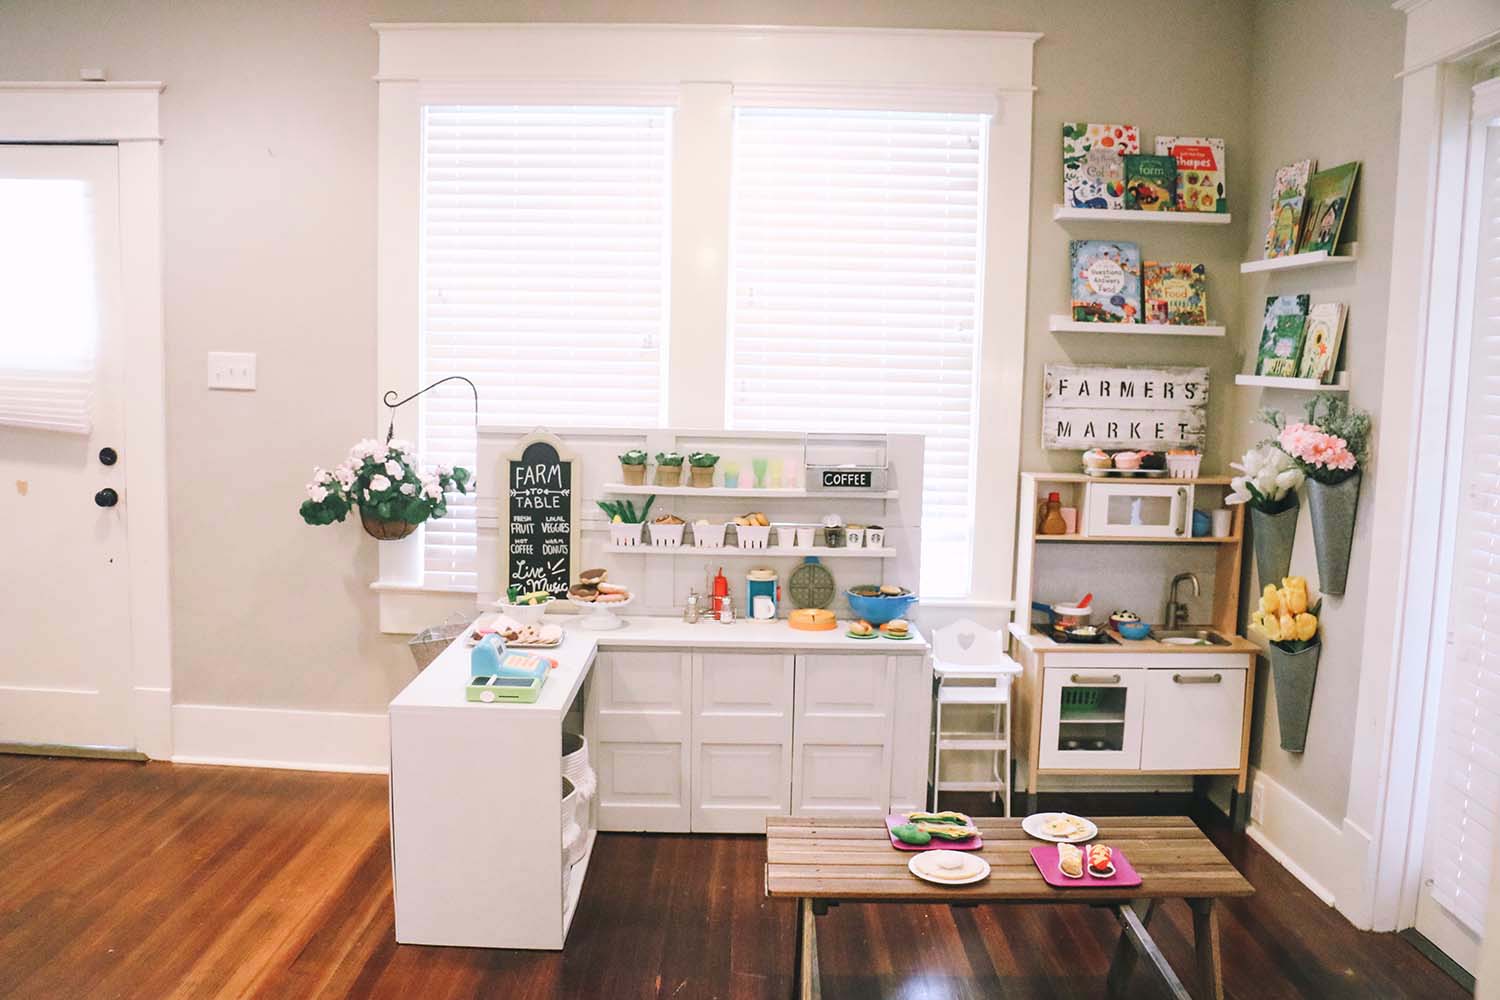
In addition to tables and chairs, incorporating a kitchen counter with cabinets and shelves can add authenticity to the play area. Consider using a play kitchen set that includes a sink, stove, oven, and refrigerator. These playsets often come in various sizes and materials, ranging from plastic to wood. Choose one that best fits your space and budget.
It’s also important to think about the layout of the kitchen area. Aim for a design that allows enough space for multiple children to play and move around freely. You can set up different stations within the kitchen, such as a cooking area, a dining area, and a washing-up area. Keep in mind that a well-organized and spacious play area will promote a more engaging and interactive play experience.
Don’t forget to consider safety when choosing furniture. Look for rounded edges and sturdy construction to prevent accidents. Avoid furniture with small parts that could pose a choking hazard. It’s also important to ensure that the furniture is properly anchored to the floor or wall to avoid tip-overs.
Once you have chosen the right furniture and decided on the layout, it’s time to move on to the next step – adding essential kitchen props and accessories. By carefully selecting and incorporating the right props, you can elevate the immersive experience and encourage children’s creativity in the kitchen dramatic play area. So, let’s move on to Step 2!
Step 2: Essential Kitchen Props and Accessories
To bring your kitchen-themed dramatic play area to life, it’s essential to have the right props and accessories. These props will help children immerse themselves in the role of a chef or a home cook and enhance their pretend play experience. Here are some essential kitchen props and accessories to consider:
1. Play Food: Include a variety of play food items, such as fruits, vegetables, meats, and baked goods. Look for realistic-looking play food made from materials like plastic or felt. You can find play food sets that come with a wide range of items for more imaginative play.
2. Utensils and Cookware: Provide a selection of child-sized utensils like spatulas, ladles, and measuring spoons, as well as cookware like pots, pans, and baking sheets. Opt for durable and child-friendly materials, such as plastic or metal with rounded edges.
3. Dishware and Cutlery: Add a set of play dishes, cups, and cutlery to complete the kitchen setup. Look for child-safe options made from non-toxic materials. You can also consider incorporating different sizes and shapes to promote sorting and matching skills.
4. Cooking Tools and Appliances: Include kitchen essentials like mixing bowls, mixing spoons, whisks, and rolling pins. You can also consider adding play kitchen appliances like blenders, toasters, and microwaves to make the experience more realistic.
5. Cleaning Supplies: Don’t forget to provide play cleaning supplies like brooms, mops, and spray bottles. This will encourage children to engage in pretend clean-up activities, teaching them about responsibility and cooperation.
6. Grocery Store Items: Consider adding a grocery store section with pretend grocery items like canned goods, cereal boxes, and packaged snacks. This will create opportunities for children to play roles like a shopper or a cashier and further expand their imaginative play scenarios.
7. Aprons and Chef Hats: Provide child-sized aprons and chef hats to help children immerse themselves fully in their roles as chefs or cooks. This simple addition can enhance their sense of identity and make the experience even more enjoyable.
Remember to rotate and update your props regularly to keep the play area fresh and exciting. Additionally, encourage children to engage in open-ended play by allowing them to incorporate their own creative ideas and imaginations into their role-playing.
Now that you have all the essential props and accessories, it’s time to create a functional sink area. Let’s move on to Step 3!
Step 3: Creating a Functional Sink Area
In a kitchen-themed dramatic play area, a functional sink area adds another layer of realism and play value. Here’s how you can create a sink area that allows children to engage in role-playing activities related to cooking, cleaning, and washing up:
1. Sink and Faucet: Start by incorporating a child-sized sink with a faucet. Look for play sinks made from durable materials like plastic or metal. Opt for options that have realistic features like a movable faucet and a basin that can hold water.
2. Water Source: Ensure that there is a convenient source of water near the sink area. You can use a water dispenser or connect a hose to provide a continuous water supply. Make sure to supervise children and set rules for water usage to avoid any accidents or excessive water play.
3. Play Dishes and Utensils: Provide a collection of play dishes, utensils, and cookware near the sink area. Children can pretend to wash and rinse the dishes using water from the sink. Encourage them to engage in role-play activities like washing, rinsing, and drying dishes.
4. Dish Soap and Sponges: Place child-safe dish soap and child-sized sponges near the sink area. This allows children to learn and practice basic cleaning skills while engaging in pretend play. Teach them the importance of using soap and rinsing properly.
5. Towels and Dish Drying Rack: Include child-sized towels and a dish drying rack near the sink area. After washing dishes, children can dry them using a towel before placing them on the dish drying rack. This promotes organization and helps develop fine motor skills.
6. Labels and Signs: Add labels and signs near the sink area to promote literacy skills and provide visual cues. Label different containers for soap, sponges, and towels. You can also display signs with simple instructions for dishwashing or cleaning.
It’s important to emphasize rules and safety practices when using the sink area. Teach children to wash their hands before and after play to maintain hygiene. Supervise their activities and ensure that they handle water and soap safely.
By creating a functional sink area, you provide children with opportunities to engage in real-life activities while fostering their imagination and creativity. Now that the sink area is set up, let’s move on to Step 4 and learn how to create a stove and oven section in your dramatic play kitchen.
Step 4: Setting up a Stove and Oven Section
No kitchen-themed dramatic play area is complete without a stove and oven section. This step will guide you on how to create a realistic and engaging cooking area where children can pretend to cook and bake delightful imaginary meals:
1. Play Stove and Oven: Choose a child-sized play stove and oven set that matches the overall theme of your dramatic play area. Look for options with knobs, buttons, and a door that opens and closes. Some sets even have sound effects or light-up features for added excitement.
2. Cooktop Props: Enhance the authenticity of the stove by adding cooktop props such as play burners, griddles, or hotplates. Consider using materials like felt or laminated paper to create the illusion of heat.
3. Play Food and Pots and Pans: Place a variety of play food, pots, and pans near the stove. Children can use the cookware to pretend to cook meals on the stovetop or in the oven. Encourage them to explore different cooking techniques like frying, boiling, and baking.
4. Oven Mitts and Aprons: Provide child-sized oven mitts and aprons to add an extra touch of realism and safety. Children can wear these while handling the play food or pretending to take dishes in and out of the oven.
5. Timer and Kitchen Tools: Include a timer and a selection of kitchen tools near the stove and oven section. Children can use the timer to keep track of their cooking times and use different tools like spatulas, tongs, and mixing spoons during their cooking adventures.
6. Backsplash and Pot Holders: Consider adding a decorative backsplash to your stove and oven section. You can use adhesive vinyl or foam boards with kitchen-themed patterns. Also, provide pot holders or trivets for children to place hot pots and pans to prevent accidents.
Encourage children to explore different recipes and cooking methods while engaging in imaginary play. Ask open-ended questions to prompt their creativity and help them develop problem-solving skills. You can introduce concepts like measuring ingredients, following recipes, and adjusting cooking temperatures to enhance their learning experience.
Remember, safety is crucial even during pretend play. Teach children about fire safety, the importance of using oven mitts, and how to handle kitchen tools properly. Supervise their activities to ensure that they interact with the stove and oven section safely.
With a fully equipped stove and oven section, children will have endless opportunities to whip up imaginative meals and delight in the joy of cooking. Now, let’s move on to Step 5 and learn how to design a cozy dining area in your dramatic play kitchen.
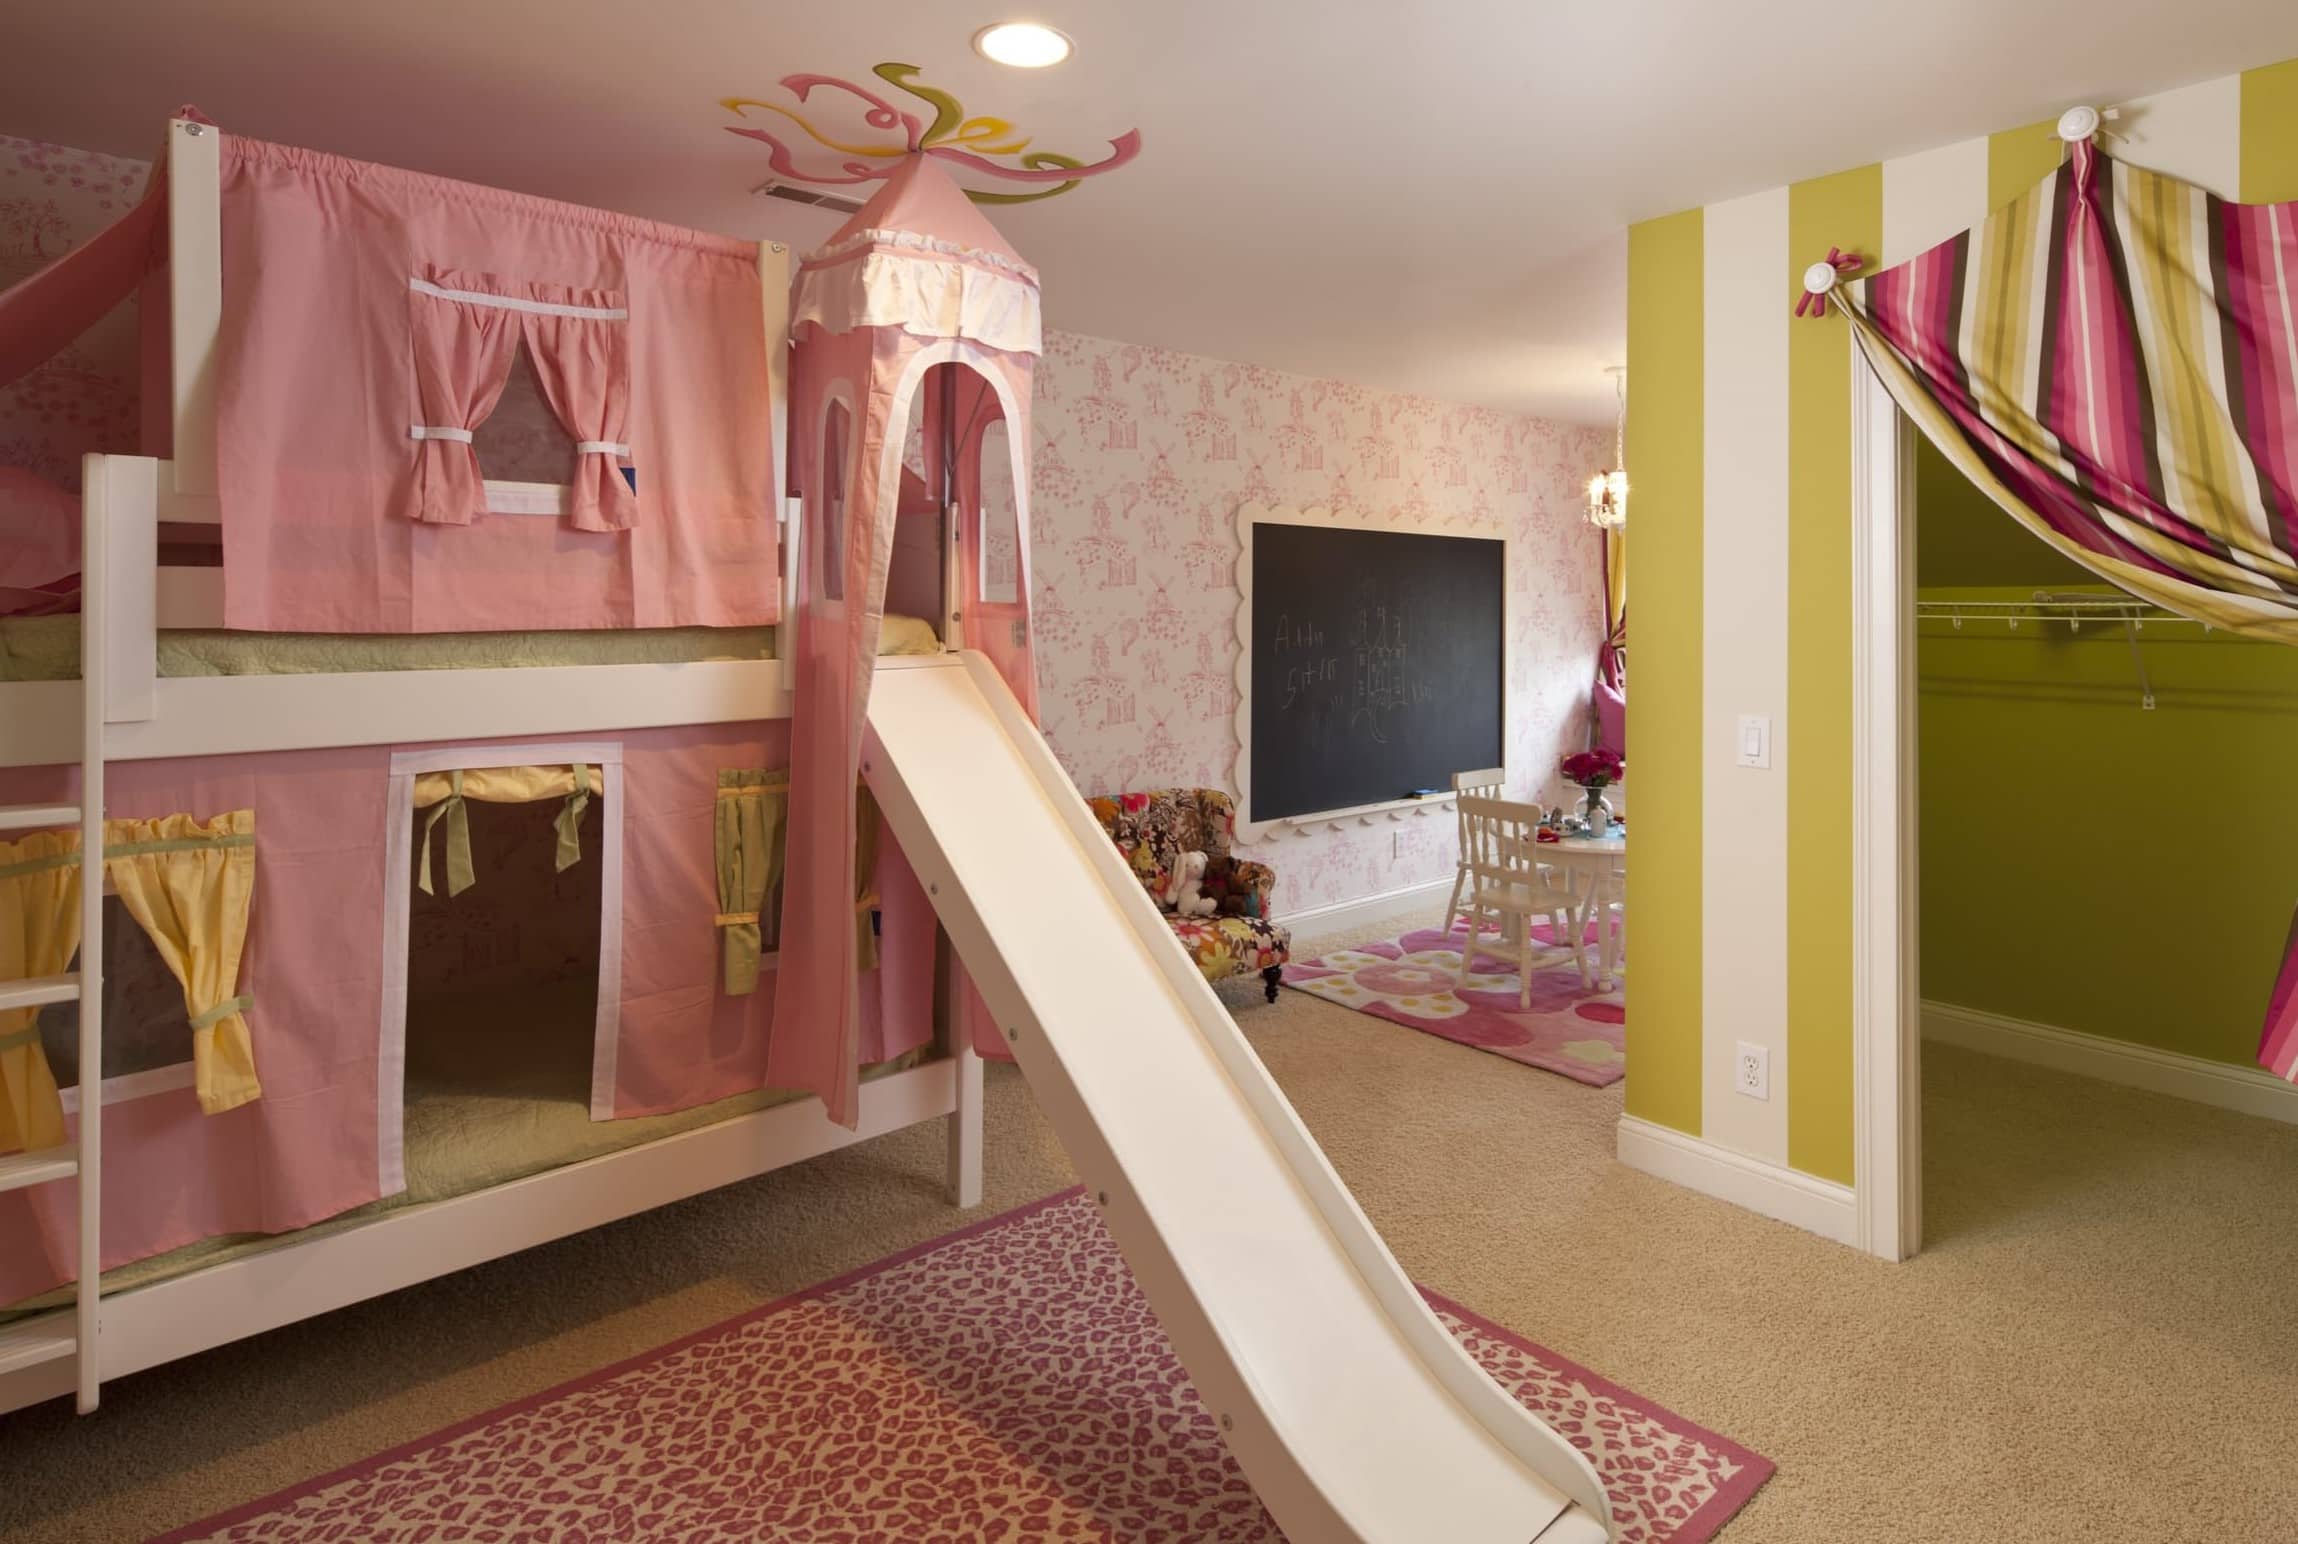
Use realistic props like play food, pots, and pans. Add a small table and chairs for a dining area. Hang a curtain to create a “window” and use a small rug for a “kitchen floor.”
Step 5: Designing a Cozy Dining Area
Creating a cozy dining area in your kitchen-themed dramatic play area allows children to extend their imaginative play beyond cooking and engage in social interactions. Here are some tips to help you design a welcoming and functional dining space:
1. Child-Sized Table and Chairs: Choose a child-sized table and chairs that match the style of your kitchen. Look for sturdy and durable options that can accommodate multiple children. You can opt for a round or rectangular table depending on the space available.
2. Table Setting: Set the table with child-safe plates, cups, and utensils. Encourage children to arrange them in an orderly manner. You can also add napkins, placemats, and a centerpiece to make the dining area more inviting.
3. Seating Cushions: Consider adding cushions or seat pads to the chairs to enhance comfort and aesthetics. Choose washable materials that are easy to clean in case of spills or accidents.
4. Table Decorations: Add a personal touch to the dining area with decorations like a tablecloth, flowers, or candles (battery-operated for safety). These small details can make the space feel more special and engaging for the children.
5. Menu Board: Incorporate a menu board or a chalkboard where children can write or draw the day’s menu. This allows them to practice writing, mathematical skills (counting and pricing), and imaginative play as they take on the roles of chefs or servers.
6. Role-Play Props: Consider adding role-play props like pretend food trays, cash registers, or order pads. This enhances the dining experience and encourages children to take on different roles such as a waiter or a customer.
Encourage children to engage in role-playing scenarios such as cooking and serving meals, restaurant visits, or hosting dinner parties. These activities promote social skills, turn-taking, communication, and problem-solving.
Foster inclusivity and cultural awareness by incorporating diverse foods, utensils, and decor elements that reflect different cultures and cuisines. This not only exposes children to a diverse world but also encourages learning and appreciation of different traditions.
Make sure to emphasize table manners and polite dining etiquette during play. Teach children about concepts like sharing, using utensils properly, and cleaning up after meals. This helps develop social skills and reinforces good habits.
With a cozy dining area in your dramatic play kitchen, children can engage in pretend meals, host tea parties, or even practice serving others. Now that the dining area is set, let’s move on to Step 6 and learn how to add decorative touches and wall art to enhance the ambiance of your kitchen-themed dramatic play area.
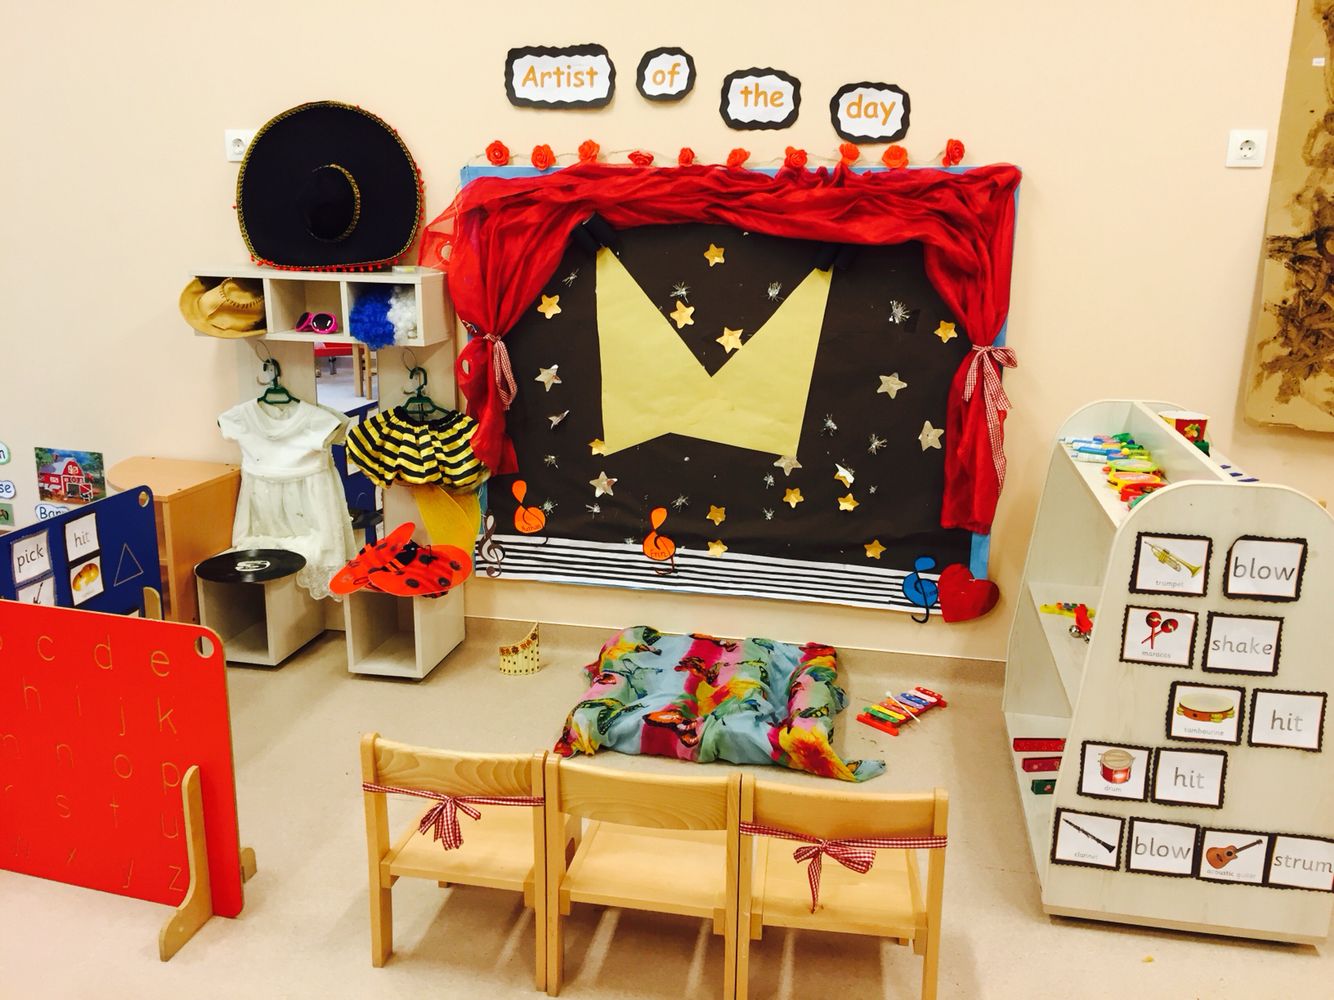
Step 6: Adding Decorative Touches and Wall Art
Adding decorative touches and wall art to your kitchen-themed dramatic play area can elevate the ambiance and create an immersive environment for children. Here are some ideas to help you enhance the visual appeal of the space:
1. Wallpaper or Wall Decals: Use wallpaper or removable wall decals to set the backdrop of your play kitchen. Choose designs that resemble a kitchen environment, such as tile patterns or floral prints. This will add depth and make the play area feel more realistic.
2. Curtains or Valances: Install curtains or valances in coordinating colors or patterns to dress up the windows of the play kitchen. This simple addition can create a sense of privacy and enhance the overall aesthetic.
3. Wall Shelves and Hooks: Install wall shelves or hooks to display kitchen-themed decorative items or hang small pots and pans. These additional features not only add visual interest but also provide storage space for play food and utensils.
4. Wall Clock: Hang a child-friendly wall clock in the play kitchen area. This not only helps children learn to tell time but also adds a decorative element to the space. Look for clocks with brightly colored numbers and fun designs.
5. Chalkboard or Whiteboard: Incorporate a small chalkboard or whiteboard on one of the walls. Children can use it to jot down recipes, doodle, or leave messages for fellow playmates. This interactive element can spark creativity and communication during play.
6. Display Artwork: Encourage children’s creativity by displaying their artwork on the walls. You can create a dedicated art gallery space or use adhesive wall clips to showcase their masterpieces. This personal touch adds a sense of pride and ownership to the play area.
7. Plants and Flowers: Add a touch of nature by including potted plants or artificial flowers in the play kitchen. Choose low-maintenance varieties or opt for lifelike faux plants to create a fresh and inviting atmosphere.
Remember to ensure that any decorations or artwork are child-safe and securely attached to the walls. Regularly inspect the play area to make sure that no loose or small parts pose a choking hazard.
By incorporating decorative touches and wall art, you can transform your kitchen-themed dramatic play area into a visually captivating and engaging space. Now that the aesthetics are taken care of, let’s move on to Step 7 and learn about organizing and labeling play food and utensils.
Step 7: Organizing and Labeling Play Food and Utensils
Organizing and labeling play food and utensils in your kitchen-themed dramatic play area not only promotes a sense of orderliness but also enhances children’s cognitive and language skills. Here’s how you can effectively organize and label these items:
1. Categorize Play Food: Sort play food items into categories, such as fruits, vegetables, meats, and baked goods. Use bins, baskets, or shelves to separate and display each category. This helps children understand different food groups and practice sorting skills.
2. Use Clear Containers and Labels: Place play food items in clear containers or jars to keep them organized and easily visible. Label each container with words or pictures depicting the contents. This promotes word recognition, vocabulary development, and literacy skills.
3. Label Utensils and Cookware: Attach labels or tags to pots, pans, utensils, and other cookware. Labeling these items helps children acquire new vocabulary related to cooking and reinforces the concept of word-object association.
4. Create a Food Storage Area: Set up a designated area for storing play food when it’s not in use. This can be a cupboard, shelf, or play refrigerator. Encourage children to return the play food to its proper place after playtime, promoting responsibility and organization.
5. Color-Coded Bins or Shelves: Use color-coded bins or shelves to organize play food and utensils. Assign a specific color to each food category or type of utensil. This visual organization system helps children quickly identify and sort items while promoting color recognition.
6. Label the Dining Area: Label the dining area with words such as “Table,” “Chairs,” and “Dining Area” to help children develop print awareness. This also supports their understanding of functional spaces and encourages language development.
7. Rotate and Refresh: Periodically rotate and refresh the play food and utensils to keep the play area exciting and engaging. Introduce new items or themes to spark children’s curiosity and creativity.
Encourage children to actively participate in the organization and labeling process. Involve them in sorting the play food, creating labels, and maintaining the order of the play area. This not only builds a sense of ownership but also promotes fine motor skills, decision-making, and critical thinking.
Through organized play, children can easily locate and identify different items, fostering their cognitive and language development. Additionally, the labeled play food and utensils create an authentic and immersive experience, enhancing the overall pretend play scenario.
Congratulations! You have successfully completed all the steps to create a captivating and engaging kitchen-themed dramatic play area. This interactive and imaginative play space will provide children with endless opportunities for learning, creativity, and fun. Enjoy watching them explore and grow as they immerse themselves in the world of pretend cooking and dining!
Conclusion
Creating a kitchen-themed dramatic play area is a fantastic way to engage children in imaginative play, promote social interaction, and develop important skills. By following the steps outlined in this article, you can design a realistic and inviting play space that will capture children’s imagination and provide them with a wealth of learning opportunities.
Choosing the right furniture and layout sets the foundation for creating an immersive play experience. Child-sized tables and chairs, along with a well-organized layout, ensure comfort and ease of play. Adding essential kitchen props and accessories, such as play food, utensils, and cookware, enhances the realism and enables children to fully engage in pretend cooking and baking activities.
Creating functional areas like a sink station and stove and oven section further enhances the authenticity of the play kitchen. Teaching children about safety practices and incorporating role-play opportunities develop life skills and foster problem-solving abilities.
Designing a cozy dining area encourages social interaction, communication, and the practice of good table manners. Incorporating decorative touches and wall art adds depth and visual appeal to the play area, creating an immersive environment that sparks creativity.
Organizing and labeling play food and utensils promotes organization, language development, and cognitive skills. By involving children in the process, they not only learn about categorization and fine motor skills but also develop a sense of responsibility and ownership.
Through the creation of a kitchen-themed dramatic play area, children have the opportunity to engage in open-ended play, role-playing, and collaborative activities. They can explore their creativity, develop problem-solving skills, enhance their social-emotional development, and expand their language and communication abilities.
Remember to encourage children to use their imaginations, ask open-ended questions, and support their ideas as they engage in pretend cooking, baking, and dining experiences. As they create imaginary meals, serve guests, and participate in make-believe restaurant scenarios, they will develop important life skills and have endless hours of fun.
So, gather your materials, get creative, and watch as children immerse themselves in the joy and wonder of the kitchen-themed dramatic play area. Enjoy the smiles, laughter, and learning that will unfold as they embark on exciting culinary adventures in their imaginary world of cooking and dining.
Frequently Asked Questions about How To Make Your Dramatic Play Area Look Like A Kitchen
Was this page helpful?
At Storables.com, we guarantee accurate and reliable information. Our content, validated by Expert Board Contributors, is crafted following stringent Editorial Policies. We're committed to providing you with well-researched, expert-backed insights for all your informational needs.


0 thoughts on “How To Make Your Dramatic Play Area Look Like A Kitchen”