Home>Home Appliances>Bathroom Appliances>How To Use Heat Shrink Tubing With A Hair Dryer
Bathroom Appliances
How To Use Heat Shrink Tubing With A Hair Dryer
Modified: August 17, 2024
Learn how to use heat shrink tubing with a hair dryer for your bathroom appliances. Follow our step-by-step guide for a quick and easy solution.
(Many of the links in this article redirect to a specific reviewed product. Your purchase of these products through affiliate links helps to generate commission for Storables.com, at no extra cost. Learn more)
Introduction
Are you looking to harness the power of heat shrink tubing for your DIY projects, but don't have a heat gun on hand? Fear not, for there's a versatile alternative at your disposal – the humble hair dryer. In this comprehensive guide, we'll delve into the fascinating world of heat shrink tubing and unveil the secrets of using a hair dryer to achieve professional-grade results.
Whether you're a seasoned DIY enthusiast or a newcomer to the world of electrical work, understanding the ins and outs of heat shrink tubing is essential. This versatile material serves as a protective casing for wires, cables, and various components, offering insulation and safeguarding against moisture, abrasion, and other environmental factors. By utilizing heat, this tubing contracts snugly around the enclosed items, creating a secure and durable covering.
While heat guns are the conventional tool for shrinking tubing, a hair dryer can serve as a convenient and effective alternative. With its adjustable heat settings and airflow, a hair dryer can deliver the precise amount of heat required to shrink the tubing without causing damage. This makes it a valuable tool for DIYers and professionals alike, especially when a heat gun is unavailable or impractical for the task at hand.
So, join us as we embark on a journey to demystify heat shrink tubing and unlock the potential of your trusty hair dryer. By the end of this guide, you'll be equipped with the knowledge and confidence to tackle your projects with finesse, all while harnessing the power of heat shrink tubing and a hair dryer. Let's dive in and explore this innovative approach to achieving professional results in your DIY endeavors.
Key Takeaways:
- DIY enthusiasts can achieve professional results by using a hair dryer to shrink heat shrink tubing, offering a cost-effective and versatile alternative to a heat gun.
- By following simple steps and safety precautions, anyone can confidently use a hair dryer to shrink heat shrink tubing for their DIY projects, ensuring precise and uniform results.
Read more: How To Use Shrink Wrap With A Hair Dryer
What is Heat Shrink Tubing?
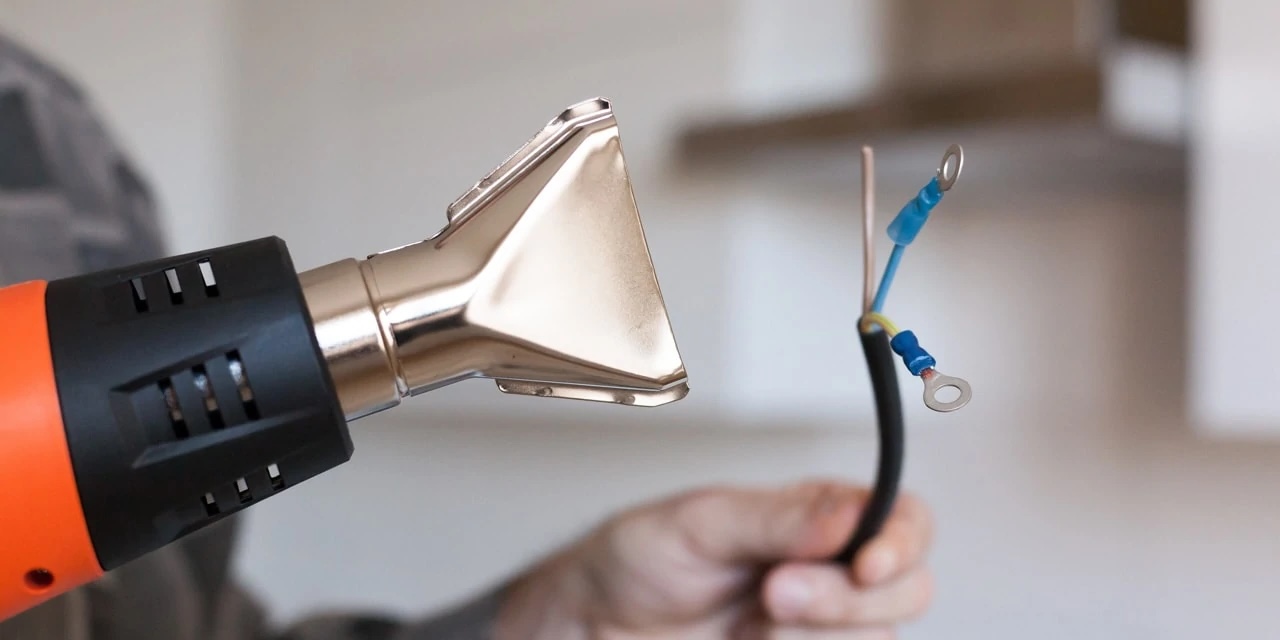
Heat shrink tubing, also known as heat shrink wrap or heat shrink sleeve, is a versatile and indispensable tool in the realms of electrical work, DIY projects, and various other applications. Composed of polyolefin, a durable and heat-resistant polymer, heat shrink tubing is designed to provide insulation, protection, and strain relief for wires, cables, and electronic components.
One of the most remarkable features of heat shrink tubing is its ability to contract in size when exposed to heat. This property allows it to conform snugly to the shape of the enclosed items, creating a protective barrier that shields against moisture, chemicals, abrasion, and other environmental hazards. Additionally, heat shrink tubing offers excellent electrical insulation, making it an essential component in the maintenance and repair of electrical systems.
Available in a wide range of sizes, colors, and shrink ratios, heat shrink tubing can accommodate various diameters and applications. Whether you need to insulate a single wire or bundle multiple cables together, there is a heat shrink tubing solution to suit your specific requirements. Furthermore, specialized variants such as adhesive-lined heat shrink tubing provide enhanced protection and sealing for critical connections, ensuring long-term reliability in demanding environments.
Beyond its practical utility, heat shrink tubing also offers a convenient method for color-coding wires, organizing cables, and labeling components. By utilizing different colors and sizes, you can streamline identification and maintenance processes, reducing the likelihood of errors and simplifying future modifications or repairs.
Overall, heat shrink tubing stands as a versatile and indispensable asset in the toolkit of DIY enthusiasts, electricians, engineers, and hobbyists. Its ability to provide durable protection, insulation, and organization makes it an essential component in a wide array of projects and applications. In the following sections, we will explore how a hair dryer can be effectively utilized to shrink this versatile material, opening up new possibilities for achieving professional results without specialized equipment.
Why Use a Hair Dryer?
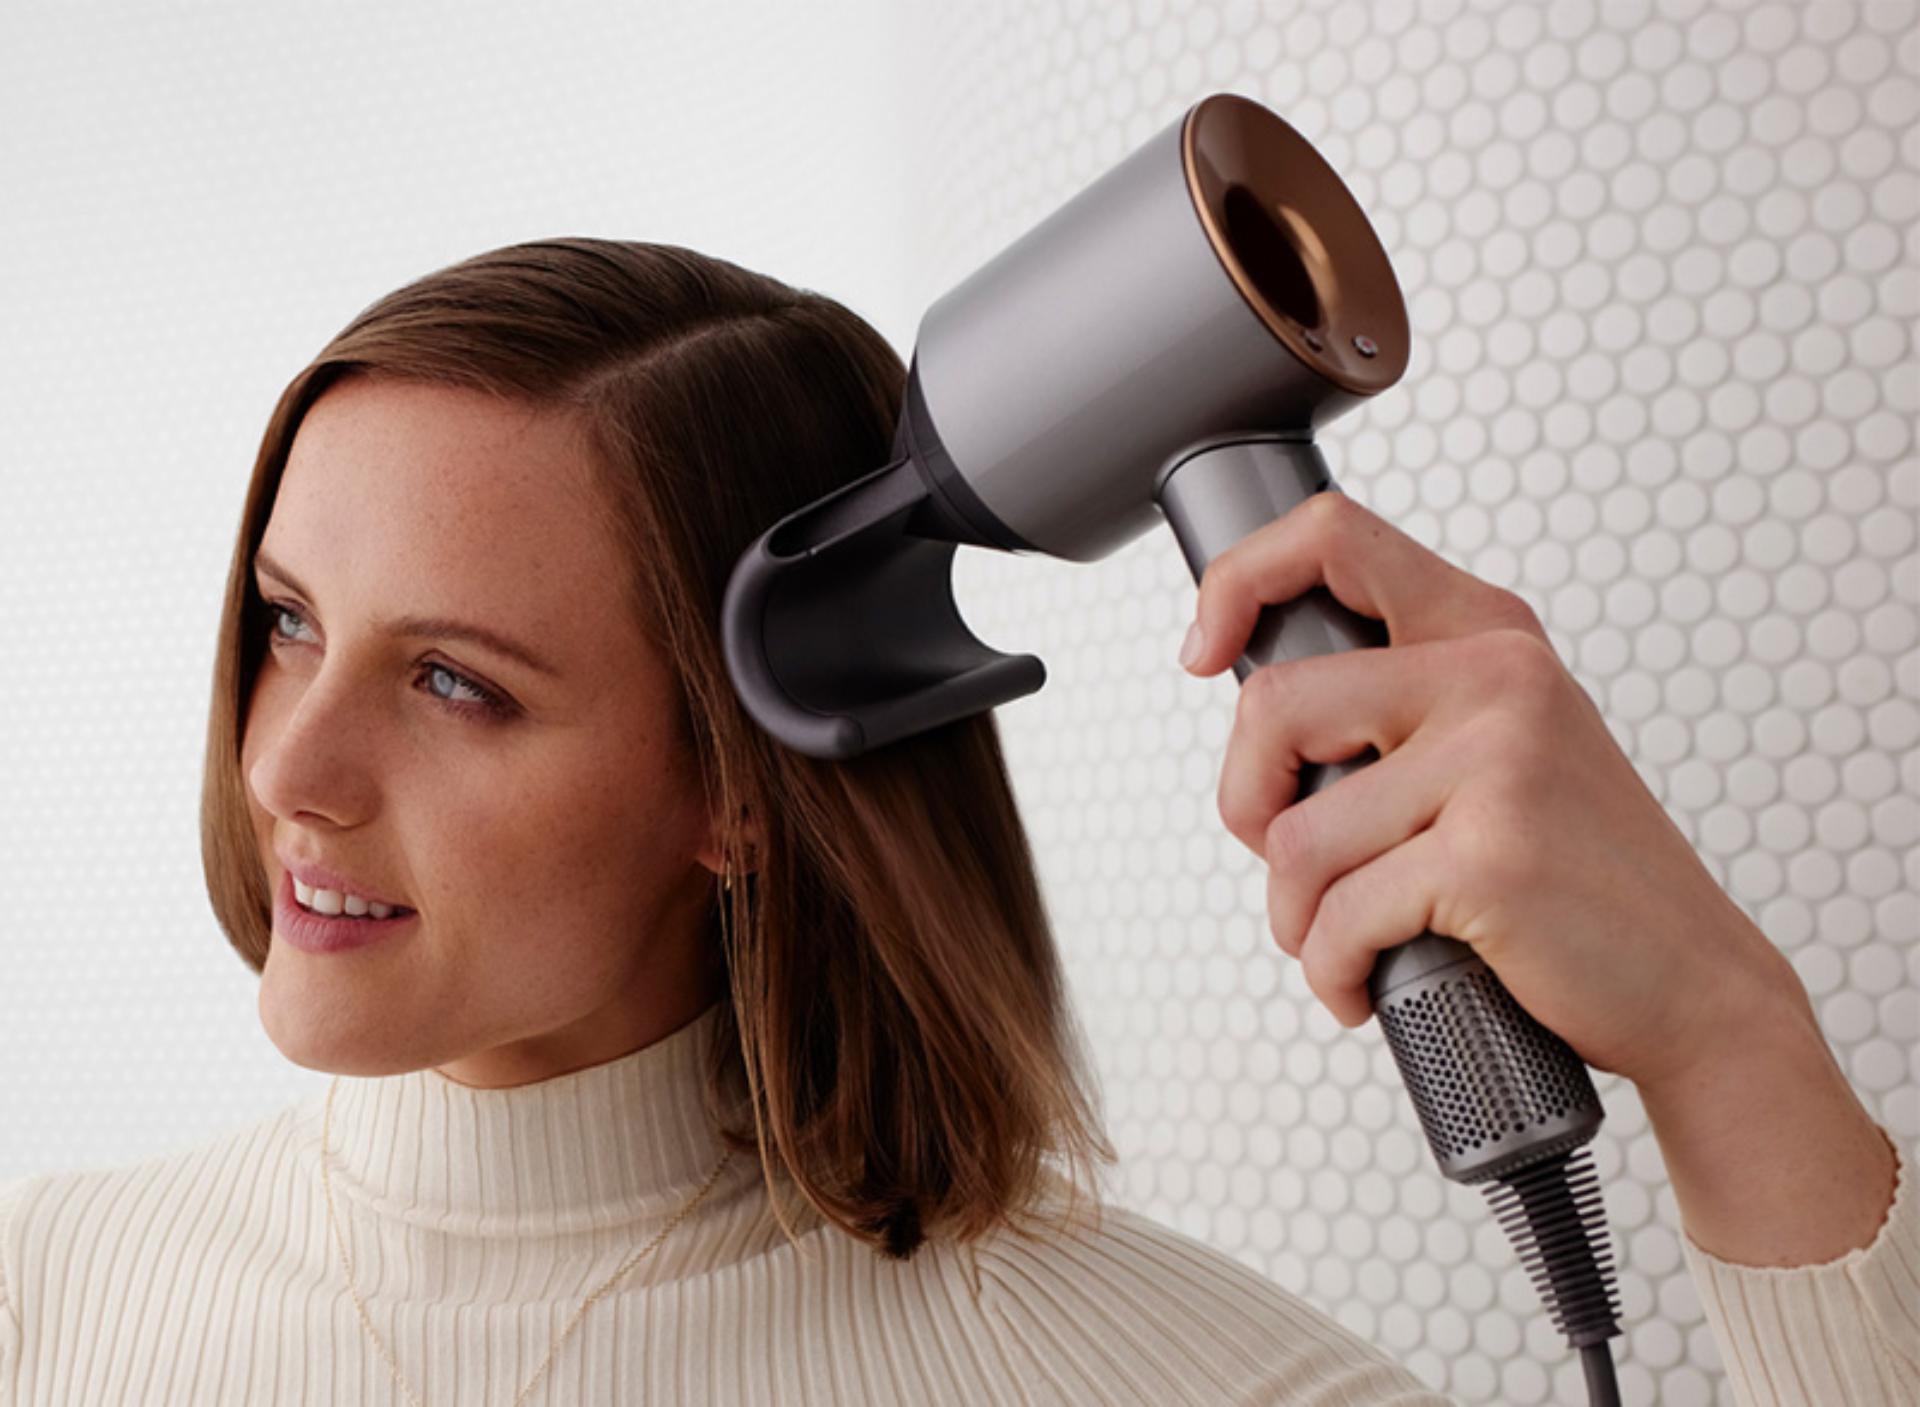
While heat guns are commonly employed for shrinking heat shrink tubing, a hair dryer presents a compelling alternative for several reasons. The accessibility, versatility, and precision offered by a hair dryer make it a valuable tool for DIY enthusiasts, hobbyists, and professionals alike.
Accessibility is a key advantage of using a hair dryer for heat shrink tubing applications. Unlike heat guns, which are specialized tools often associated with industrial or professional settings, a hair dryer is a common household appliance found in many homes. This accessibility means that individuals can readily utilize a hair dryer for their DIY projects without the need to invest in additional equipment, making it a cost-effective and practical solution.
Furthermore, the adjustable heat settings and airflow of a hair dryer provide a level of versatility that is well-suited to heat shrink tubing applications. By selecting the appropriate heat and airflow settings, users can effectively control the amount of heat applied to the tubing, ensuring precise and uniform shrinking without the risk of overheating or damaging the materials. This level of control is particularly beneficial when working with sensitive components or when a more delicate touch is required.
Another advantage of using a hair dryer is its gentle and even distribution of heat. Unlike heat guns, which can emit intense and concentrated heat, a hair dryer disperses heat more evenly across a wider area. This even distribution reduces the likelihood of localized overheating, minimizing the risk of damaging the tubing or the enclosed components. Additionally, the broader coverage provided by a hair dryer can facilitate the simultaneous shrinking of multiple tubing sections, streamlining the process and saving time.
For DIYers and hobbyists who may not have frequent or extensive use for a heat gun, a hair dryer offers a practical and multifunctional alternative. Its ability to serve multiple purposes, from drying hair to shrinking heat shrink tubing, underscores its versatility and value as a tool for various applications.
By harnessing the accessibility, versatility, and precision of a hair dryer, individuals can confidently tackle heat shrink tubing projects with ease and efficiency. In the following sections, we will outline the steps for effectively using a hair dryer to shrink heat shrink tubing, empowering DIY enthusiasts and professionals to achieve professional-grade results with a common household appliance.
When using a hair dryer to shrink tubing, hold the hair dryer about 2 inches away from the tubing and move it back and forth to evenly distribute the heat. Be careful not to overheat the tubing, as it can melt or burn.
Steps to Use Heat Shrink Tubing with a Hair Dryer
Using a hair dryer to shrink heat shrink tubing is a straightforward process that, when executed with care and precision, yields professional-quality results. By following the steps outlined below, you can confidently leverage the power of your hair dryer to achieve precise and uniform shrinkage of heat shrink tubing for your DIY projects.
- Select the Right Tubing: Begin by choosing the appropriate heat shrink tubing for your application. Ensure that the tubing diameter matches the size of the wires or components you intend to cover. Additionally, consider the shrink ratio and color options to best suit your specific needs.
- Prepare the Workspace: Clear a well-ventilated and clutter-free area for your work. It is essential to have adequate space and ventilation to ensure safe and effective heat shrinking. Arrange the wires or components to be covered with heat shrink tubing in a manner that facilitates easy access and maneuverability.
- Position the Hair Dryer: Set up your hair dryer in a stable position, ensuring that it is directed away from flammable materials and obstructions. If your hair dryer has adjustable heat and airflow settings, start with a low to medium heat setting to avoid overheating the tubing.
- Apply Heat Evenly: With the hair dryer in hand, begin applying heat to the heat shrink tubing, moving the dryer back and forth to ensure even distribution of heat. Maintain a consistent distance between the hair dryer and the tubing to prevent overheating. As the tubing heats up, you will notice it starting to shrink and conform to the enclosed items.
- Monitor the Shrinking Process: As the tubing continues to shrink, pay close attention to its progress. Ensure that the shrinkage occurs uniformly around the entire circumference of the tubing, adjusting the position and angle of the hair dryer as needed to achieve even results.
- Final Inspection: Once the tubing has fully shrunk and conforms tightly to the enclosed items, turn off the hair dryer and allow the tubing to cool. After cooling, inspect the shrunk tubing to ensure that it provides a secure and snug fit, with no gaps or irregularities. If necessary, reapply heat to any areas that require further shrinking.
By following these steps with diligence and attention to detail, you can effectively utilize a hair dryer to shrink heat shrink tubing, achieving professional-grade results without the need for specialized equipment. The accessibility and precision offered by a hair dryer make it a valuable tool for DIY projects, repairs, and electrical work, empowering individuals to tackle their tasks with confidence and efficiency.
Tips and Tricks
When using a hair dryer to shrink heat shrink tubing, incorporating the following tips and tricks can enhance the efficiency, precision, and safety of the shrinking process, ensuring optimal results for your DIY projects.
- Test the Heat: Before applying heat to the heat shrink tubing, test the hair dryer on a small piece of tubing to gauge the heat intensity and airflow. This allows you to adjust the settings as needed to achieve the desired shrinkage without overheating the tubing.
- Keep a Safe Distance: Maintain a consistent distance of approximately 2 to 3 inches between the hair dryer and the heat shrink tubing. This distance helps prevent overheating and ensures that the heat is evenly distributed across the tubing’s surface.
- Use a Reflector: To further enhance the heat distribution and prevent localized overheating, consider using a reflective surface, such as aluminum foil, behind the heat shrink tubing. This can help disperse the heat more evenly and promote uniform shrinkage.
- Rotate the Tubing: While applying heat, gently rotate the tubing to ensure that all sides receive uniform exposure. This rotational movement helps prevent uneven shrinking and promotes a consistent fit around the enclosed items.
- Allow Cooling Time: After the heat shrink tubing has fully conformed to the enclosed items, allow it to cool naturally before handling or manipulating it. This cooling period ensures that the tubing sets in its shrunken state, providing a secure and durable covering.
- Inspect for Uniformity: After the tubing has cooled, inspect it carefully to ensure that the shrinkage is uniform and snug around the enclosed items. Pay attention to any areas that may require additional heat application for further shrinking.
- Practice Safety Precautions: Always prioritize safety when using a hair dryer for heat shrink tubing. Avoid directing the hair dryer toward yourself or others, and be mindful of the proximity to flammable materials. Additionally, ensure that the work area is well-ventilated to dissipate any fumes or odors generated during the shrinking process.
By incorporating these tips and tricks into your heat shrink tubing projects, you can optimize the effectiveness and precision of using a hair dryer, achieving professional-quality results with ease and confidence. These insights empower DIY enthusiasts and professionals to leverage the accessibility and versatility of a hair dryer for a wide range of applications, from electrical work to crafting and beyond.
Read more: How To Shrink Crocs With A Hair Dryer
Conclusion
As we conclude our exploration of using a hair dryer for heat shrink tubing applications, it becomes clear that this versatile household appliance holds tremendous potential for DIY enthusiasts, hobbyists, and professionals. By harnessing the accessibility, precision, and versatility of a hair dryer, individuals can achieve professional-grade results in their projects without the need for specialized equipment.
Heat shrink tubing, with its ability to provide insulation, protection, and organization for wires, cables, and components, stands as a fundamental component in various electrical and DIY endeavors. The utilization of a hair dryer as a heat source for shrinking this versatile material opens up new possibilities for individuals seeking to streamline their work processes and achieve precise and uniform results.
Through the steps outlined in this guide, accompanied by valuable tips and tricks, individuals can confidently embark on their heat shrink tubing projects, leveraging the power of a hair dryer to achieve optimal shrinkage without compromising on quality or safety. The accessibility and precision offered by a hair dryer make it a valuable tool for a wide array of applications, empowering users to tackle their projects with efficiency and confidence.
As you venture into your DIY projects, repairs, and creative endeavors, consider the potential of using a hair dryer for heat shrink tubing applications. By doing so, you can unlock a convenient and effective method for achieving professional-quality results, all while maximizing the utility of a common household appliance.
With this newfound knowledge and approach, you are well-equipped to embark on your heat shrink tubing projects, harnessing the power of a hair dryer to shrink, protect, and organize with precision and finesse. Embrace the versatility and accessibility of this innovative method, and let your DIY endeavors flourish as you elevate your projects to new heights of quality and craftsmanship.
Frequently Asked Questions about How To Use Heat Shrink Tubing With A Hair Dryer
Was this page helpful?
At Storables.com, we guarantee accurate and reliable information. Our content, validated by Expert Board Contributors, is crafted following stringent Editorial Policies. We're committed to providing you with well-researched, expert-backed insights for all your informational needs.


0 thoughts on “How To Use Heat Shrink Tubing With A Hair Dryer”