Home>Furniture>Bedroom Furniture>How To Shrink A Mattress

Bedroom Furniture
How To Shrink A Mattress
Modified: August 23, 2024
Discover the best methods for shrinking a mattress in your bedroom. Save space and optimize your bedroom furniture with our helpful tips.
(Many of the links in this article redirect to a specific reviewed product. Your purchase of these products through affiliate links helps to generate commission for Storables.com, at no extra cost. Learn more)
Introduction
When it comes to bedroom furniture, mattresses play a critical role in ensuring a good night’s sleep. But what do you do when you need to shrink a mattress? It may seem like a daunting task, but with the right knowledge and tools, you can effectively reduce the size of a mattress to fit your specific needs.
In this article, we will guide you through the process of shrinking a mattress, step by step. From preparation to the finalization of the shrinkage, we will cover all the essential details to ensure that you achieve the desired outcome.
Shrinking a mattress can be useful in various situations. For example, if you are moving to a smaller space and need to downsize your bedding, or if you have a custom-made bed frame that requires a slightly smaller mattress. By understanding the shrinkage process, you can save money and avoid the hassle of purchasing a new mattress.
The process of shrinking a mattress involves removing excess air, folding and compressing the mattress, securing it with shrink wrap, and applying heat to finalize the shrinkage. While this may sound complicated, we will break it down into easy-to-follow steps that you can implement without professional assistance.
Before we dive into the specifics, it is important to note that not all mattresses can be easily shrunk. Some types, such as memory foam or latex mattresses, may not respond well to the shrinking process. It is crucial to check with the manufacturer or consult a professional before attempting to shrink these types of mattresses.
Now that we have a brief overview, let’s delve into the details of how to shrink a mattress effectively. Get ready to transform your oversized mattress into a perfectly sized one that fits your space and needs!
Key Takeaways:
- Shrinking a mattress can be a practical and cost-effective solution for space limitations, custom bed frames, budget constraints, transportation convenience, and environmental sustainability. Follow the step-by-step guide and safety measures for successful results.
- Remember to consult the manufacturer’s guidelines, exercise caution when using heat sources, ensure proper ventilation, protect yourself with heat-resistant gloves, and avoid sharp objects when shrinking a mattress. Proper storage and transportation are essential for maintaining the quality and longevity of the shrunken mattress.
Read more: How To Shrink A Hat In The Washing Machine
Why Shrink a Mattress?
There are several reasons why you might need to shrink a mattress. Let’s explore the most common scenarios:
- Space Limitations: One of the main reasons to shrink a mattress is when you have space limitations. Perhaps you’ve downsized to a smaller apartment or moved into a tiny house. In these situations, having a mattress that fits properly can make all the difference in maximizing your living space.
- Custom Bed Frames: Another reason to shrink a mattress is when you have a custom-made bed frame. These bed frames often require specific mattress measurements, and finding the right-sized mattress can be challenging. By shrinking a mattress to fit the dimensions of your custom bed frame, you can ensure a perfect fit.
- Budget Considerations: Buying a new mattress can be expensive, especially if you’re on a tight budget. Shrinking a mattress allows you to repurpose your current mattress instead of purchasing a brand-new one. This can save you a significant amount of money while still providing you with a comfortable sleeping surface.
- Transportation Convenience: If you’re moving or traveling, a shrunken mattress can be much easier to transport. Large, bulky mattresses can be heavy and cumbersome to move. By shrinking your mattress, you can reduce its size and make it more manageable to maneuver, whether you’re relocating to a new home or going on a camping trip.
- Environmental Sustainability: Shrinking a mattress is also an environmentally-friendly choice. By repurposing and reusing your existing mattress, you’re reducing waste and minimizing your carbon footprint. Instead of adding another mattress to the landfill, you can extend the lifespan of your current one through shrinkage.
It’s important to note that not all mattresses can be easily shrunk. As mentioned earlier, memory foam and latex mattresses may not respond well to the shrinking process due to their unique properties. It’s crucial to check with the manufacturer or consult a professional before attempting to shrink these types of mattresses.
Now that you understand the various reasons why you might need to shrink a mattress, let’s move on to the step-by-step process of how to effectively accomplish this task.
Understanding the Shrinkage Process
Before you begin the process of shrinking a mattress, it’s important to have a clear understanding of how the shrinkage process works. By knowing the key steps and techniques involved, you can ensure that you achieve the desired results effectively and safely.
The shrinkage process involves reducing the size of the mattress by removing excess air, folding and compressing the mattress, securing it with shrink wrap, and applying heat to finalize the shrinkage. Let’s break down each step:
- Cleaning and Preparation: The first step to shrink a mattress is to ensure it is clean and free from any dirt or debris. This is important to prevent any moisture or contaminants from getting trapped during the shrinkage process. Take the time to thoroughly clean and dry the mattress before proceeding.
- Removing Excess Air: The next step is to remove as much air as possible from the mattress. This can be done by manually pressing and squeezing the mattress or by using a vacuum cleaner to extract the air. The goal is to reduce the volume of the mattress and create a compact shape.
- Folding and Compression: Once the excess air is removed, carefully fold and compress the mattress to further reduce its size. Start by folding the mattress in half lengthwise, and then continue folding it until you achieve the desired compactness. It’s important to be gentle and avoid putting too much pressure on the mattress to prevent damage.
- Securing the Shrink Wrap: After folding and compressing the mattress, it’s time to secure it with shrink wrap. Shrink wrap is a plastic film that helps hold the mattress in its folded position and provides additional protection. Wrap the shrink wrap tightly around the mattress, making sure to cover all sides and corners. Use a tape or heat sealer to secure the shrink wrap in place.
- Heat Shrinking the Mattress: The next step involves applying heat to the shrink wrap to activate its shrinking properties. Use a heat gun or a hairdryer on a high heat setting to evenly heat the wrapped mattress. Move the heat source back and forth across the surface of the shrink wrap, allowing it to shrink and conform to the folded shape of the mattress.
- Finalizing the Shrinkage: Once the shrink wrap has fully shrunk and adhered to the mattress, carefully inspect the mattress to ensure that it is securely wrapped and all seams are sealed. Make any necessary adjustments or reseal any areas where the shrink wrap may not be tightly in place. It’s important to create a tight and secure seal to prevent any air or moisture from entering the wrapped mattress.
Following these steps will ensure that you successfully shrink your mattress to the desired size. However, it’s important to take some precautions and safety measures during the process, which we will discuss in the next section.
Now that you have a solid understanding of the shrinkage process, let’s move on to the step-by-step instructions on how to shrink a mattress effectively.
Step 1: Cleaning and Preparation
Before you begin the process of shrinking your mattress, it’s crucial to ensure that it is clean and free from any dirt or debris. Cleaning the mattress properly will prevent any moisture or contaminants from getting trapped during the shrinkage process, ensuring a successful outcome. Follow these steps for cleaning and preparation:
- Remove all bedding: Start by removing all bedding from your mattress, including sheets, blankets, and mattress protectors. This will give you a clear surface to work with and allow you to thoroughly clean the mattress.
- Spot clean any stains: Check your mattress for any visible stains or spots. If you encounter any, use a gentle cleaner or upholstery cleaner specifically designed for mattresses to spot clean the affected areas. Follow the instructions provided with the cleaner and use a clean cloth or sponge to gently dab and clean the stains. Allow the mattress to dry completely before proceeding to the next step.
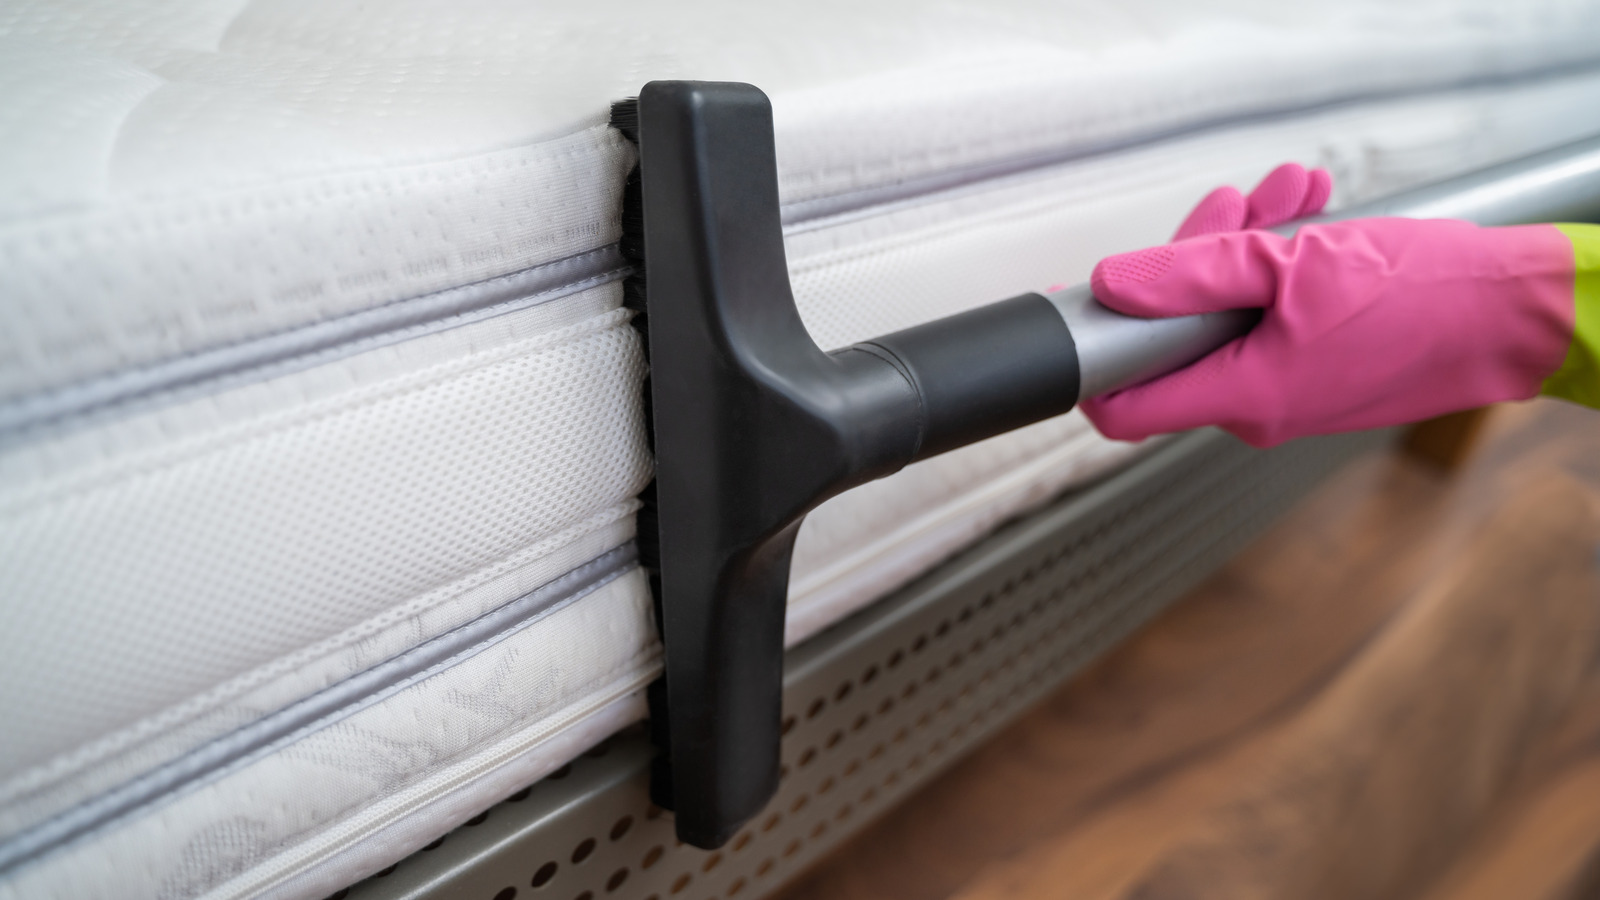
- Vacuum the mattress: Using a vacuum cleaner with an upholstery attachment, thoroughly vacuum the entire surface of the mattress. This will help remove any loose dirt, dust, or allergens that may be present. Pay special attention to the seams and edges of the mattress, as these areas tend to accumulate more debris. Vacuuming will not only ensure a clean surface but also help remove excess air from the mattress.
- Air out the mattress: If possible, expose the mattress to fresh air and sunlight. This will help eliminate any odors or lingering moisture that may be trapped within the mattress. You can place the mattress outside on a clean, dry surface or next to an open window. Allow the mattress to air out for a few hours or longer, depending on the weather conditions.
- Inspect for damage: While cleaning the mattress, take the opportunity to inspect it for any signs of damage, such as tears, punctures, or sagging areas. Address any issues found before proceeding with the shrinking process. If necessary, consult a professional or the mattress manufacturer for guidance on how to repair or replace damaged areas.
By cleaning and properly preparing your mattress, you are creating an ideal environment for the shrinkage process. This step is essential to ensure that your mattress is in the best possible condition before reducing its size.
Now that you have cleaned and prepared your mattress, you’re ready to move on to the next step: removing excess air from the mattress. This crucial step will help create a more compact size and make the shrinking process more effective.
Step 2: Removing Excess Air
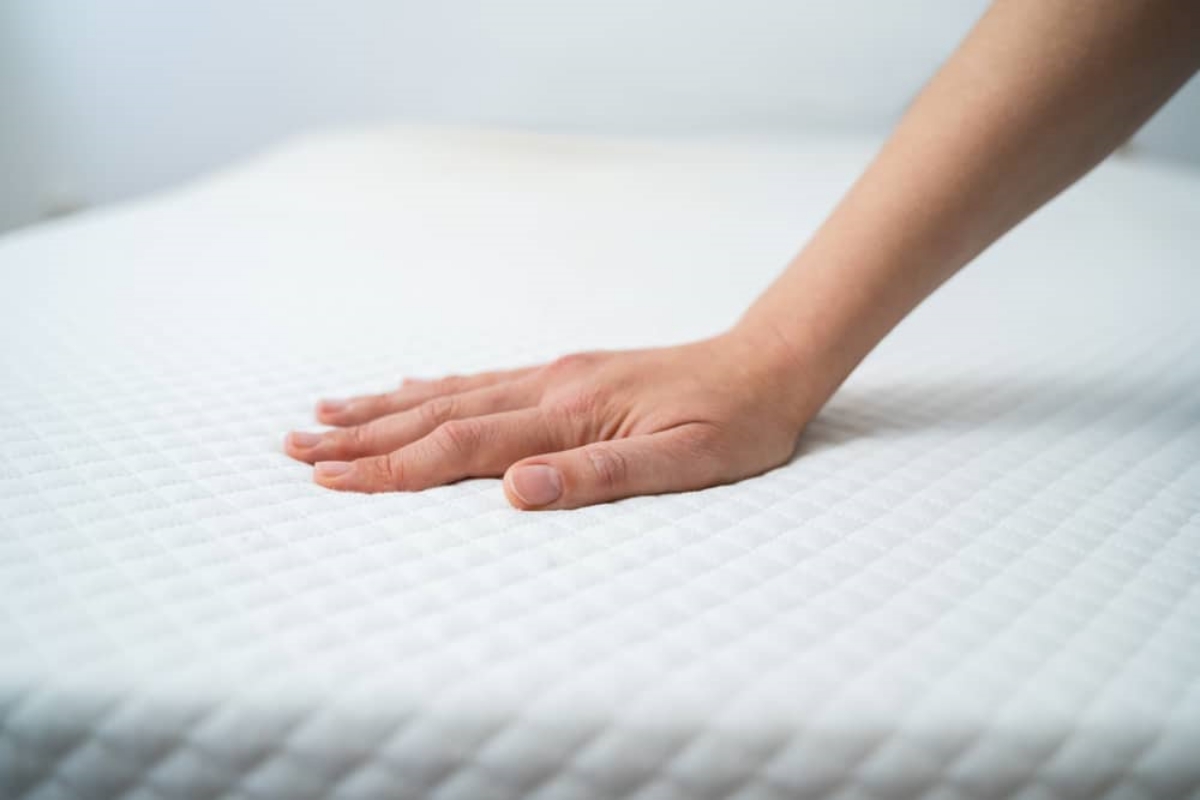
Once you have cleaned and prepared your mattress, the next step in the shrinkage process is to remove as much air as possible from the mattress. This step is important to reduce the volume of the mattress and create a more compact shape. Here’s how to effectively remove excess air from your mattress:
- Press and squeeze: Start by manually pressing and squeezing the mattress to release trapped air. Work your way across the entire surface, applying firm but gentle pressure. Pay attention to different areas of the mattress, including the corners and edges, as these areas tend to trap more air.
- Use a vacuum cleaner: If manually pressing and squeezing the mattress doesn’t remove enough air, you can use a vacuum cleaner with a hose and upholstery attachment to suck out the air. Start at one corner of the mattress and slowly work your way to the other corners. Make sure the attachment is securely attached to the vacuum hose to ensure a tight seal.
- Apply pressure: As you vacuum, apply gentle pressure to the mattress with your hands to further compress it and facilitate the air removal process. This will help create a tighter seal between the mattress and the vacuum attachment, allowing for more efficient air extraction.
- Repeat the process: Depending on the size and thickness of your mattress, you may need to repeat the pressing, squeezing, and vacuuming process multiple times to remove as much air as possible. Make sure to take breaks between repetitions to avoid overheating the vacuum cleaner. Monitor the firmness of the mattress and continue until you are satisfied with the reduction in air volume.
Remember to be patient and cautious during this step to prevent any damage to the mattress. Avoid applying excessive force or using sharp objects that could puncture the mattress. The goal is to create a more compact and condensed mattress that is ready for the next steps of the shrinking process.
With the excess air removed, you’re now ready to move on to step 3: folding and compressing the mattress. This step will further reduce the size of the mattress and prepare it for the next stages of the shrinkage process.
Read more: How To Shrink A Duvet Cover
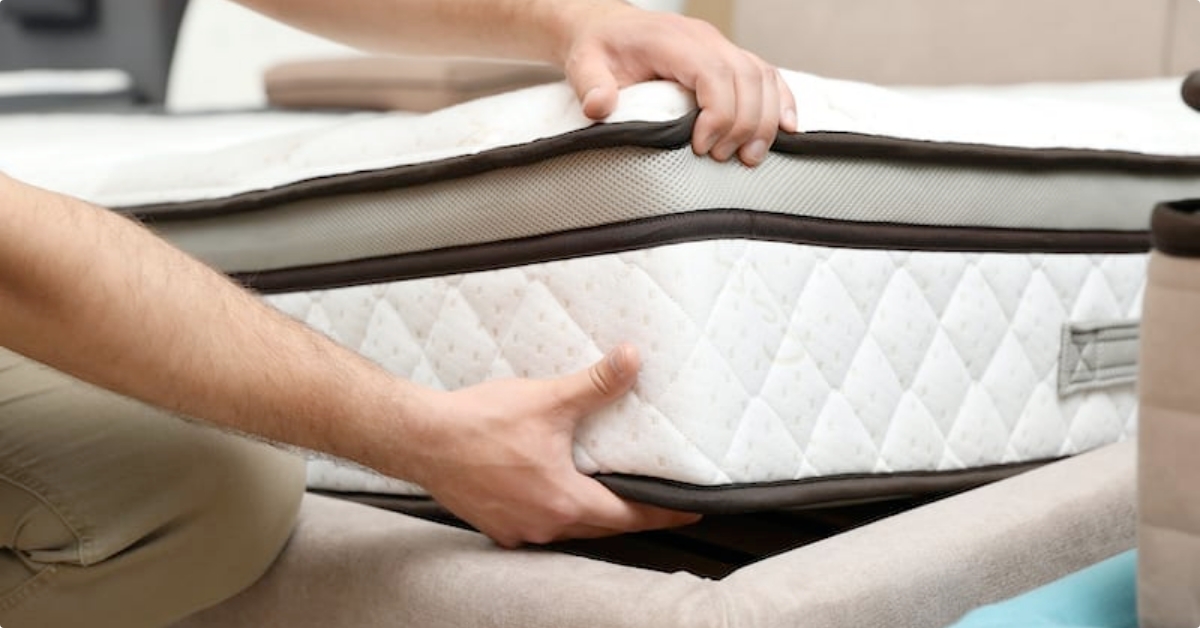
Step 3: Folding and Compression
After removing excess air from your mattress, it’s time to move on to step 3: folding and compressing the mattress. This step is crucial for reducing the size of the mattress and preparing it for the shrinkage process. Follow these steps to effectively fold and compress your mattress:
- Clear a spacious area: Find a clean and spacious area where you can lay out the mattress for folding. Make sure the surface is free from any sharp objects or debris that could potentially damage the mattress.
- Fold in half lengthwise: Start by folding the mattress in half lengthwise. Stand at one end of the mattress and gently lift it, folding it toward the other end. Be careful not to apply excessive pressure or force that could strain or damage the mattress. This half-fold will help reduce the overall length of the mattress.
- Continue folding: Once you have the mattress folded in half lengthwise, continue folding it in manageable sections. Gradually fold the mattress into thirds or smaller sections, depending on the desired compactness and the flexibility of your mattress material. Take your time and ensure that the folding is neat and even to create a uniform shape.
- Apply gentle pressure: As you fold the mattress, apply gentle pressure with your hands to compress it further. This will help reduce the thickness and create a more compact size. Be cautious not to apply excessive force that could damage the mattress or affect its structural integrity.
- Secure the folded mattress: Use straps, bungee cords, or strong adhesive tape to secure the folded mattress. This will help maintain the folded shape throughout the shrinking process and prevent it from unfurling. Make sure the straps or tape are tight enough to hold the mattress securely without causing damage.
Keep in mind that the folding and compression process may vary slightly depending on the size, thickness, and material of your mattress. It’s important to be gentle and mindful of any specific instructions provided by the mattress manufacturer.
Once you have successfully folded and compressed your mattress, you’re ready to proceed to step 4: securing the mattress with shrink wrap. This step will create a protective layer around the folded mattress, ensuring its stability and preventing any shifting during the shrinking process.
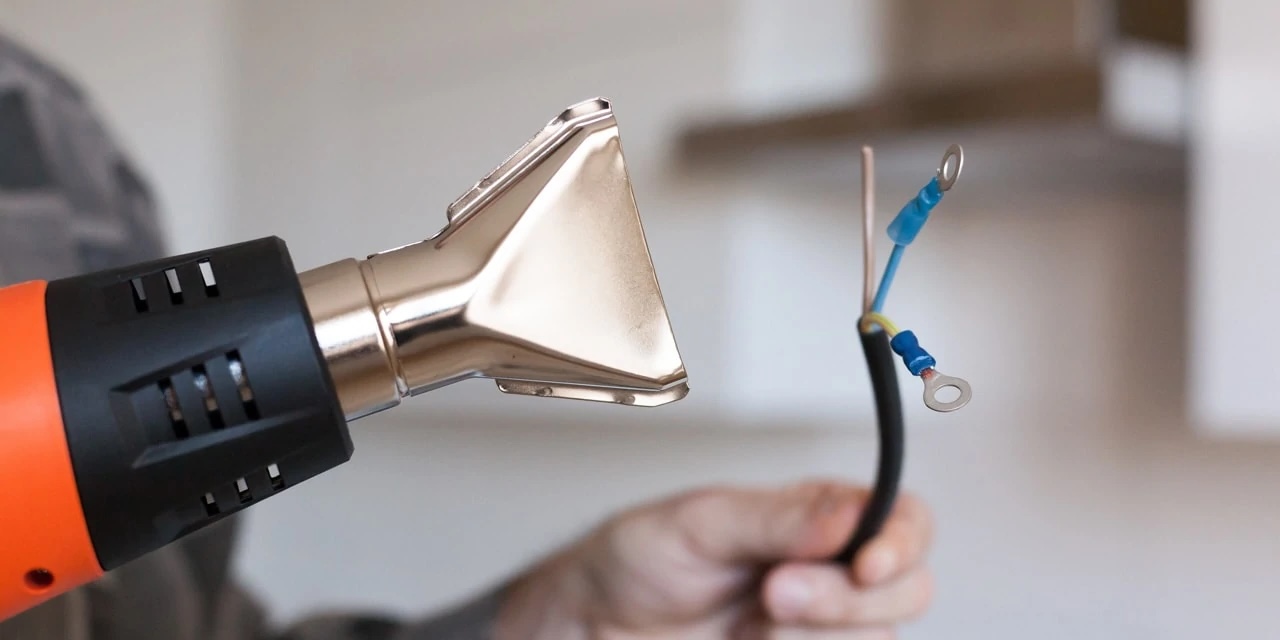
To shrink a mattress, use a handheld steam cleaner to apply steam to the mattress surface. This will help to shrink the materials and reduce the overall size of the mattress.
Step 4: Securing the Shrink Wrap
Now that you have folded and compressed your mattress, the next step in the shrinkage process is to secure it with shrink wrap. This step is essential for holding the folded shape and providing additional protection during the shrinking process. Follow these steps to effectively secure your mattress with shrink wrap:
- Choose the right shrink wrap: Select a high-quality shrink wrap that is suitable for the size and thickness of your mattress. Shrink wrap is available in various widths and thicknesses, so make sure to choose one that offers enough coverage and strength to hold your folded mattress securely.
- Start at one end: Begin by firmly wrapping the shrink wrap around one end of the folded mattress. Make sure to leave a slight overlap to ensure a secure seal later on.
- Continue wrapping: Slowly and evenly wrap the shrink wrap around the entire folded mattress. Pull the wrap tightly as you go to ensure a snug fit. Be cautious not to wrap it too tightly, as this could put excessive pressure on the mattress and cause damage.
- Cover all sides and corners: As you wrap the shrink wrap, pay attention to all sides and corners of the folded mattress. Ensure that the shrink wrap fully covers the mattress from top to bottom, including the edges and corners, providing comprehensive protection and stability.
- Ensure a tight seal: Once you have wrapped the entire mattress, overlap the end of the shrink wrap with the starting point. Use strong tape or a heat sealer to secure the shrink wrap in place. The goal is to create a tight and secure seal that will prevent any air or moisture from entering the wrapped mattress.
It’s important to remember that shrink wrap should be applied with caution to avoid puncturing or damaging the mattress. Be gentle when wrapping and sealing the shrink wrap to preserve the integrity of the mattress.
After securing the shrink wrap around your mattress, you’re now ready for the next step: heat shrinking. This is a crucial step that activates the shrink wrap, causing it to tightly conform to the folded shape of the mattress and finalize the shrinking process.
Step 5: Heat Shrinking the Mattress
After securely wrapping your mattress with shrink wrap, the next step in the shrinkage process is to apply heat to activate the shrink wrap and tighten it around the folded mattress. The heat will cause the shrink wrap to conform to the shape of the mattress, creating a secure and compact size. Follow these steps to effectively heat shrink your mattress:
- Prepare a heat source: Use a heat gun or a hairdryer with a high heat setting to provide the necessary heat for shrinking the wrap. Ensure that you have a reliable and adjustable heat source that can deliver consistent and controlled heat to the shrink wrap.
- Hold the heat source at a safe distance: Point the heat gun or hairdryer at the shrink wrap, keeping a safe distance to prevent overheating or burning the plastic. Read the manufacturer’s instructions for the heat source to determine the appropriate distance to maintain while applying heat.
- Move the heat source back and forth: Start applying heat to the shrink wrap and move the heat source back and forth in a sweeping motion. This ensures even distribution of heat across the entire surface of the wrapped mattress. Keep the heat source moving continuously to avoid localized overheating or melting of the shrink wrap.
- Observe the shrinkage process: As you apply heat, you’ll begin to notice the shrink wrap tightening around the folded mattress. Continue applying heat until the shrink wrap has fully shrunk and adhered to the mattress, conforming to its shape. Be patient and allow the shrink wrap to shrink gradually, ensuring a thorough and uniform shrinkage.
- Monitor the temperature: While applying heat, periodically check the temperature of the shrink wrap. Avoid overheating by preventing the shrink wrap from becoming too hot. If the shrink wrap starts to bubble or smoke, immediately adjust the distance and heat setting of the heat source to prevent damage to the mattress or the wrap.
Remember to exercise caution and follow the manufacturer’s instructions for the heat source you are using. Safety should be a top priority during this step to avoid any accidents or damage to the mattress or surrounding area.
With the heat shrinking process complete, you are now ready for the final step: finalizing the shrinkage. This step involves inspecting the wrapped mattress and making any necessary adjustments to ensure a tight and secure seal.
Step 6: Finalizing the Shrinkage
After heat shrinking your mattress, the final step in the shrinkage process is to inspect the wrapped mattress and make any necessary adjustments to ensure a tight and secure seal. This step is crucial for maintaining the compact size of the mattress and ensuring its stability during use. Follow these steps to effectively finalize the shrinkage of your mattress:
- Inspect the wrapped mattress: Carefully examine the wrapped mattress to ensure that the shrink wrap is tightly adhered to the folded shape. Look for any areas where the wrap may be loose or not tightly sealed. Take note of any potential issues that need to be addressed.
- Make necessary adjustments: If you notice any areas of the shrink wrap that are not securely sealed or areas that need reinforcement, take the time to make the necessary adjustments. This may involve adding additional tape or heat sealing to ensure a tight seal. Pay attention to corners and edges that may be prone to shifting or coming loose.
- Check the overall stability: Gently shake and move the wrapped mattress to test its stability. It should feel secure and maintain its folded shape without any shifting or unfurling. If you notice any movement or instability, go back and reinforce the shrink wrap at the problem areas. Ensuring a tight and stable seal is essential for the longevity and functionality of the shrunken mattress.
- Trim any excess shrink wrap: If necessary, trim any excess shrink wrap that extends beyond the wrapped mattress. Be careful not to cut too close to the seal to avoid compromising its integrity. Use scissors or a utility knife to trim the excess wrap, creating a tidy and neat appearance.
- Perform a final inspection: Once you have made all the necessary adjustments and trimmed any excess wrap, perform a final inspection of the wrapped mattress. Ensure that the shrink wrap is securely sealed, all corners and edges are protected, and the overall appearance is neat and compact.
By carefully finalizing the shrinkage and ensuring a tight and secure seal, you can confidently use and transport your shrunken mattress without worrying about it coming undone or losing its compact shape. With the final step complete, your shrunken mattress is ready to be utilized according to your space and needs.
Now that you’ve successfully completed the shrinkage process, it’s important to be aware of some precautions and safety measures to follow when dealing with shrunken mattresses. These will help you maintain the quality and durability of your mattress while ensuring your own safety and comfort.
Read more: How Do Clothes Shrink In The Dryer
Precautions and Safety Measures
While shrinking a mattress can be a practical solution, it’s essential to take some precautions and follow safety measures to ensure the process is done correctly and without any risks. Here are some key precautions to keep in mind:
- Check manufacturer guidelines: Before attempting to shrink your mattress, check the manufacturer’s guidelines and warranty information. Some mattress types, such as memory foam or latex, may not be suitable for the shrinking process. It’s important to follow the manufacturer’s instructions to avoid damaging the mattress or voiding the warranty.
- Ensure proper ventilation: When applying heat to the shrink wrap, make sure you are working in a well-ventilated area. Adequate airflow will help dissipate any fumes or odors that may be released during the heat shrinking process. Open windows or use a fan to improve ventilation if necessary.
- Use heat sources with caution: Be mindful when using heat sources such as heat guns or hairdryers. Follow the manufacturer’s instructions for safe use and appropriate heat settings. Avoid pointing the heat source directly at yourself, and be aware of nearby objects or materials that may be sensitive to heat.
- Protect yourself: As a safety measure, wear heat-resistant gloves when working with heat sources or handling hot shrink wrap. This will protect your hands from potential burns or discomfort. Additionally, ensure that you are wearing appropriate clothing to minimize the risk of accidents or injuries.
- Avoid sharp objects: When wrapping the mattress with shrink wrap, ensure that there are no sharp objects or surfaces that could puncture or damage the plastic. Use caution when handling tape or adhesives to prevent accidental cuts or injuries.
- Store or transport the shrunken mattress properly: Once you have successfully shrunk your mattress, store or transport it in a clean and dry area. Protect it from moisture and extreme temperatures to maintain its quality. If necessary, use mattress storage bags or covers to provide an extra layer of protection.
- Seek professional assistance if needed: If you are unsure about any part of the process or have concerns about shrinking your specific mattress type, don’t hesitate to seek professional assistance. A mattress manufacturer or a professional in the field can provide expert advice and guidance tailored to your specific situation.
By following these precautions and safety measures, you can minimize risks and ensure a smooth and safe shrinking process for your mattress. Remember, safety should always be a priority when working with any tools, heat sources, or materials.
Now that you’ve learned how to shrink a mattress effectively and safely, you can enjoy the benefits of a perfectly sized mattress that fits your space and meets your needs. Whether you’re dealing with limited space, a custom bed frame, or a budget constraint, shrinking a mattress can be a practical and cost-effective solution.
Remember to always check with the manufacturer for specific instructions and guidelines relating to your mattress type. With the right knowledge, tools, and precautions, you can successfully shrink your mattress and create a comfortable sleeping environment that perfectly aligns with your requirements.
Happy shrinking!
Conclusion
Shrinking a mattress can be a practical solution for various situations, including space limitations, custom bed frames, budget considerations, transportation convenience, and environmental sustainability. By following the step-by-step guide outlined in this article, you can shrink your mattress effectively and safely.
Understanding the shrinkage process and taking necessary precautions are key factors in achieving successful results. The process involves cleaning and preparing the mattress, removing excess air, folding and compressing the mattress, securing it with shrink wrap, heat shrinking, and finalizing the shrinkage.
Throughout the process, remember to consult the manufacturer’s guidelines to ensure compatibility with your specific mattress type. Additionally, exercise caution when using heat sources, ensure proper ventilation, protect yourself with heat-resistant gloves, and avoid sharp objects.
By following these guidelines and safety measures, you can transform your oversized mattress into a perfectly sized one that fits your space and needs. Shrinking a mattress not only saves you money but also reduces waste and contributes to environmental sustainability.
Once you have successfully shrunk your mattress, store or transport it properly to maintain its quality and longevity. Keep it in a clean and dry area, protected from moisture and extreme temperatures.
Remember, if you have any doubts or concerns about shrinking your mattress, it’s always best to seek professional assistance. They can provide you with tailored guidance and help you achieve the best possible results.
Now that you have the knowledge and steps to shrink a mattress, you can take control of your bedroom furniture and create a comfortable sleeping environment that perfectly meets your needs. Happy shrinking!
Frequently Asked Questions about How To Shrink A Mattress
Was this page helpful?
At Storables.com, we guarantee accurate and reliable information. Our content, validated by Expert Board Contributors, is crafted following stringent Editorial Policies. We're committed to providing you with well-researched, expert-backed insights for all your informational needs.