Home>Home Appliances>Kitchen Appliances>How To Use Nesco Dehydrator
Kitchen Appliances
How To Use Nesco Dehydrator
Modified: August 16, 2024
Learn how to use the Nesco dehydrator to preserve fruits, vegetables, and meats at home. Get tips and tricks for using this versatile kitchen appliance. Ideal for anyone interested in kitchen appliances and food preservation.
(Many of the links in this article redirect to a specific reviewed product. Your purchase of these products through affiliate links helps to generate commission for Storables.com, at no extra cost. Learn more)
Introduction
Welcome to the world of food dehydration, where you can preserve the goodness of fruits, vegetables, meats, herbs, and more with the help of the Nesco Dehydrator. Whether you are an avid home cook, a health-conscious individual, or someone who loves to experiment with flavors, a food dehydrator can be a valuable addition to your kitchen arsenal.
In this comprehensive guide, we will delve into the art and science of using the Nesco Dehydrator to create delicious and nutritious dehydrated snacks and ingredients. From understanding the basic functions of the dehydrator to mastering the art of dehydrating a variety of foods, this guide will equip you with the knowledge and skills to make the most of this versatile kitchen appliance.
So, grab your apron and let's embark on a culinary journey that celebrates the magic of dehydration and the endless possibilities it offers for enhancing your culinary creations and promoting a sustainable approach to food preservation. Whether you are a seasoned dehydrating enthusiast or a newcomer to the world of food dehydration, this guide is designed to inspire, inform, and empower you to make the most of your Nesco Dehydrator.
Key Takeaways:
- Master the art of dehydrating with your Nesco Dehydrator to preserve fruits, vegetables, meats, and herbs, creating delicious and nutritious snacks and ingredients with ease.
- Properly prepare, use, and store dehydrated foods to enjoy the convenience of having a well-stocked pantry of wholesome, shelf-stable ingredients at your fingertips.
Read more: How Long To Dry Jerky In Nesco Dehydrator
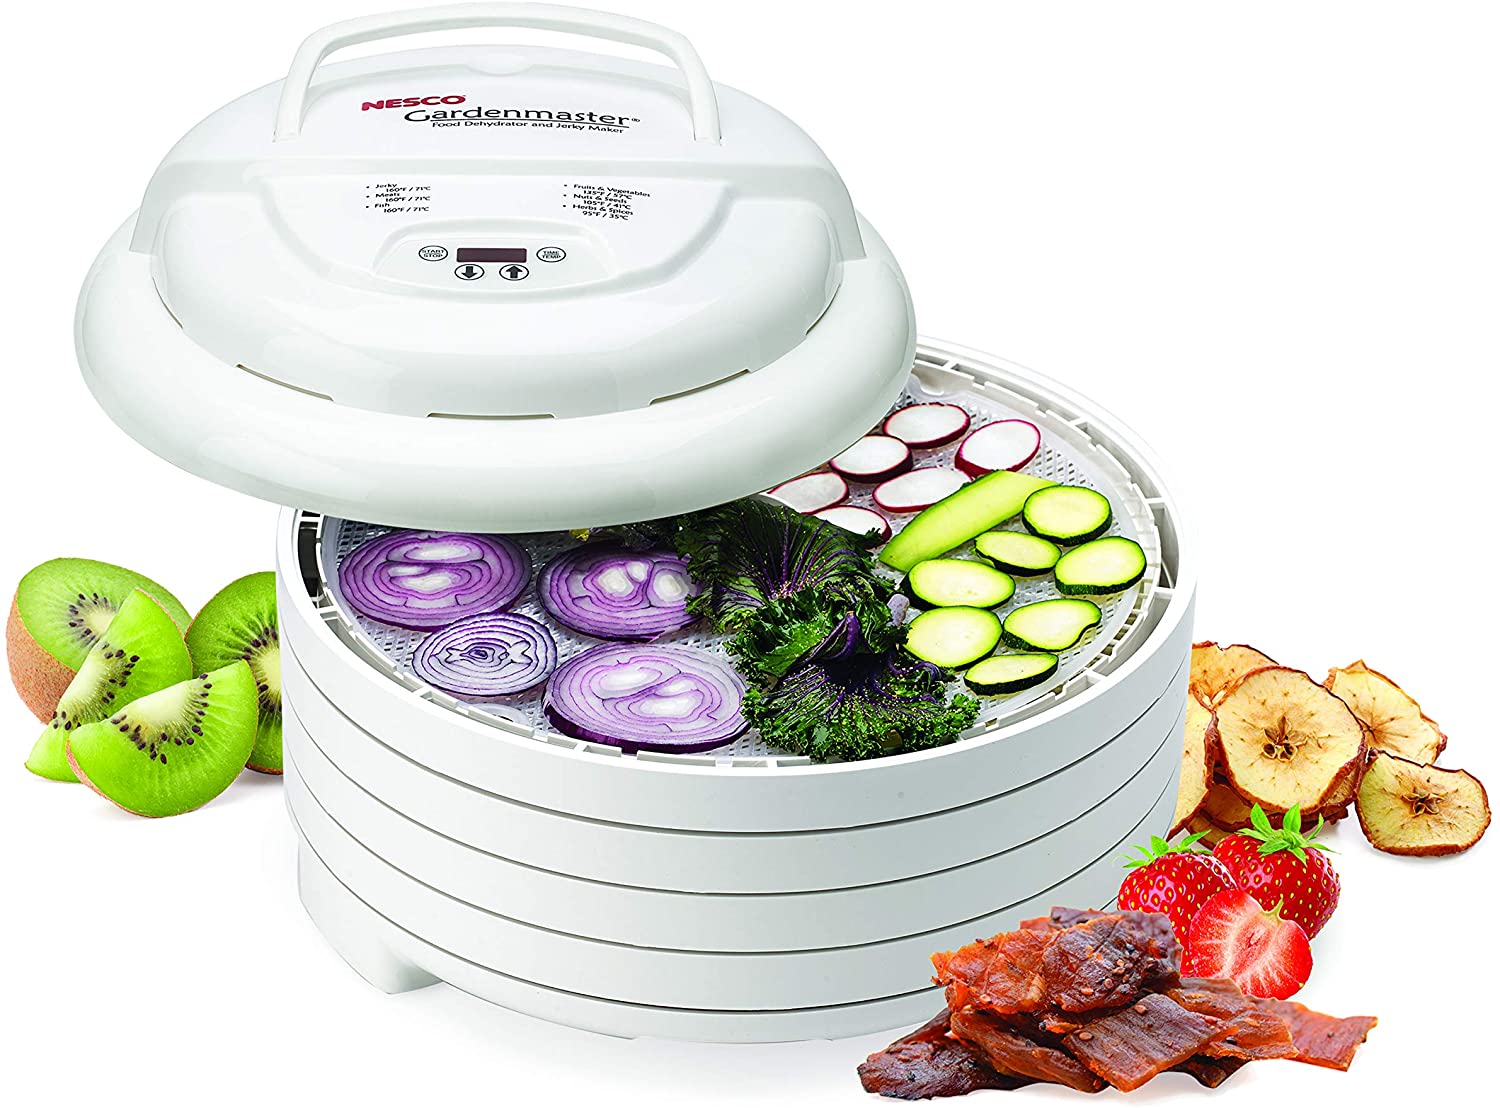
Getting to Know Your Nesco Dehydrator
Before you dive into the dehydrating process, it’s essential to familiarize yourself with the Nesco Dehydrator and its key features. This will enable you to make the most of this innovative appliance and understand how it can transform various foods into delectable, shelf-stable treats.
The Nesco Dehydrator is designed to efficiently remove moisture from foods while preserving their natural flavors, nutrients, and textures. One of the standout features of the Nesco Dehydrator is its adjustable thermostat, which allows you to set the ideal temperature for different types of foods, ensuring optimal dehydration results.
Equipped with multiple drying trays, the Nesco Dehydrator provides ample space to dehydrate large quantities of food simultaneously, making it a convenient option for batch dehydration. The airflow system ensures even drying throughout the trays, resulting in uniform dehydration without the need for constant tray rotation.
Additionally, the transparent construction of the dehydrator’s top and trays allows you to monitor the progress of the dehydration process without disrupting it. This visibility feature enables you to check on the foods without having to open the dehydrator, maintaining consistent drying conditions.
Understanding the various components of the Nesco Dehydrator, such as the heating element, fan, and trays, will give you a holistic view of how the appliance operates and how you can leverage its capabilities to achieve the best results. Familiarizing yourself with the assembly and disassembly of the dehydrator will also streamline the cleaning and maintenance processes, ensuring that it remains in optimal condition for future use.
By getting to know your Nesco Dehydrator inside and out, you can approach the dehydration process with confidence, knowing that you have a reliable and versatile appliance at your disposal. With this foundational knowledge in place, you are ready to embark on a flavorful journey of transforming fresh produce and meats into delicious, long-lasting snacks and ingredients.
Preparing Your Food for Dehydration
Before you begin the dehydration process with your Nesco Dehydrator, it’s essential to prepare your food properly to ensure optimal results. Proper preparation not only enhances the quality of the dehydrated end product but also contributes to the safety and longevity of the preserved foods.
Washing and Cleaning: Start by thoroughly washing and cleaning the fruits, vegetables, meats, and herbs that you intend to dehydrate. This step is crucial for removing any dirt, pesticides, or contaminants from the surface of the foods. For fruits and vegetables, consider using a produce wash or a mixture of water and vinegar to effectively clean the produce.
Slicing and Cutting: Depending on the type of food, you may need to slice, chop, or cut it into uniform pieces to ensure consistent drying. When slicing fruits and vegetables, aim for uniform thickness to promote even dehydration. Meats should be sliced thinly to expedite the drying process and ensure food safety.
Blanching (Optional): Some vegetables benefit from blanching before dehydration. Blanching involves briefly immersing the vegetables in boiling water and then rapidly cooling them in ice water. This process helps to preserve the color, texture, and nutritional quality of the vegetables before dehydration.
Marinating (Optional): For meats, marinating before dehydration can add depth of flavor and tenderize the meat. Consider marinating meats in your preferred seasonings, sauces, or spice blends for a period of time before placing them in the dehydrator.
Pre-Treating: Certain fruits, such as apples and bananas, benefit from pre-treating to prevent browning. Options for pre-treating fruits include soaking them in lemon juice, citric acid solution, or a commercial fruit protector to maintain their natural color during dehydration.
Removing Excess Moisture: Pat dry any excess moisture from the surface of the foods before placing them on the dehydrator trays. This step helps expedite the dehydration process and prevents the formation of moisture pockets during drying.
By taking the time to properly prepare your foods for dehydration, you set the stage for successful and efficient drying with your Nesco Dehydrator. Thoughtful preparation not only enhances the quality and safety of the dehydrated foods but also contributes to a more enjoyable and flavorful end product.
Using Your Nesco Dehydrator
Now that you have prepared your foods for dehydration, it’s time to put your Nesco Dehydrator to work. The process of using the dehydrator involves a few simple steps that, when executed correctly, yield delicious and shelf-stable results.
Assembling the Dehydrator: Begin by assembling the dehydrator according to the manufacturer’s instructions. This typically involves stacking the drying trays, ensuring that the heating element and fan are properly positioned, and securing the top of the dehydrator in place.
Setting the Temperature: The Nesco Dehydrator features an adjustable thermostat that allows you to set the ideal temperature for the specific foods you are dehydrating. Consult the dehydration guide that accompanies the dehydrator or refer to reliable resources to determine the recommended temperature settings for different types of foods.
Arranging the Food: Carefully place the prepared foods onto the drying trays, ensuring that there is ample space between the pieces for proper air circulation. Avoid overcrowding the trays, as this can impede the dehydration process and lead to uneven drying.
Monitoring the Progress: Once the food is arranged on the trays, place the top of the dehydrator onto the unit and turn it on. Throughout the dehydration process, periodically check the progress of the foods to ensure that they are drying uniformly. The transparent construction of the dehydrator allows for easy monitoring without disrupting the drying environment.
Rotating the Trays (If Necessary): Depending on the model of the Nesco Dehydrator and the specific foods being dried, you may need to rotate the trays during the dehydration process to promote even drying. Follow the guidelines provided in the instruction manual or reputable dehydration resources to determine if and when tray rotation is necessary.
Completing the Dehydration: The duration of the dehydration process varies based on the type of food, its water content, and the environmental conditions. Once the foods have reached the desired level of dryness, turn off the dehydrator and allow the foods to cool before testing for doneness.
By following these straightforward steps, you can harness the full potential of your Nesco Dehydrator to transform fresh foods into delectable, shelf-stable treats. The user-friendly design and functionality of the dehydrator make the entire process accessible and rewarding, allowing you to enjoy the benefits of homemade dehydrated foods with ease.
Dehydrating Fruits
Dehydrated fruits offer a delightful combination of natural sweetness and concentrated flavors, making them a popular choice for healthy snacking, baking, and adding to cereals and trail mixes. With your Nesco Dehydrator, you can easily transform an assortment of fruits into delicious, long-lasting snacks that retain their nutritional value and vibrant taste.
Selection of Fruits: Choose ripe, fresh fruits that are free from blemishes and bruises. Some popular fruits for dehydration include apples, bananas, berries, mangoes, peaches, and pears. Each type of fruit may require slightly different preparation methods, such as slicing, coring, or pitting, before placing them in the dehydrator.
Preparation: Wash the fruits thoroughly and remove any stems, seeds, or cores as needed. Depending on the type of fruit, consider pre-treating slices or pieces to prevent browning. For example, dipping apple slices in a solution of water and lemon juice can help maintain their natural color during dehydration.
Arranging on Trays: Place the prepared fruit pieces onto the drying trays of the Nesco Dehydrator, ensuring that there is ample space between the pieces for air circulation. Avoid overlapping the fruit slices to promote even drying.
Dehydration Process: Set the temperature of the dehydrator according to the recommended settings for the specific fruits you are dehydrating. Typically, fruits are dried at a lower temperature to preserve their natural enzymes and flavors. Monitor the progress of the fruits, rotating the trays if necessary to ensure uniform drying.
Testing for Doneness: Once the fruits have been in the dehydrator for the recommended duration, perform a simple test to check for doneness. The fruits should be pliable and slightly tacky to the touch, indicating that they have reached the desired level of dryness. Allow the fruits to cool before assessing their texture and flavor.
Dehydrated fruits can be enjoyed as standalone snacks, added to granola or yogurt, or incorporated into baked goods and desserts. By mastering the art of dehydrating fruits with your Nesco Dehydrator, you can savor the natural sweetness and nutritional benefits of fruits throughout the year, knowing that you have a stash of wholesome snacks at your fingertips.
Read more: How To Use Nesco Electric Pressure Cooker
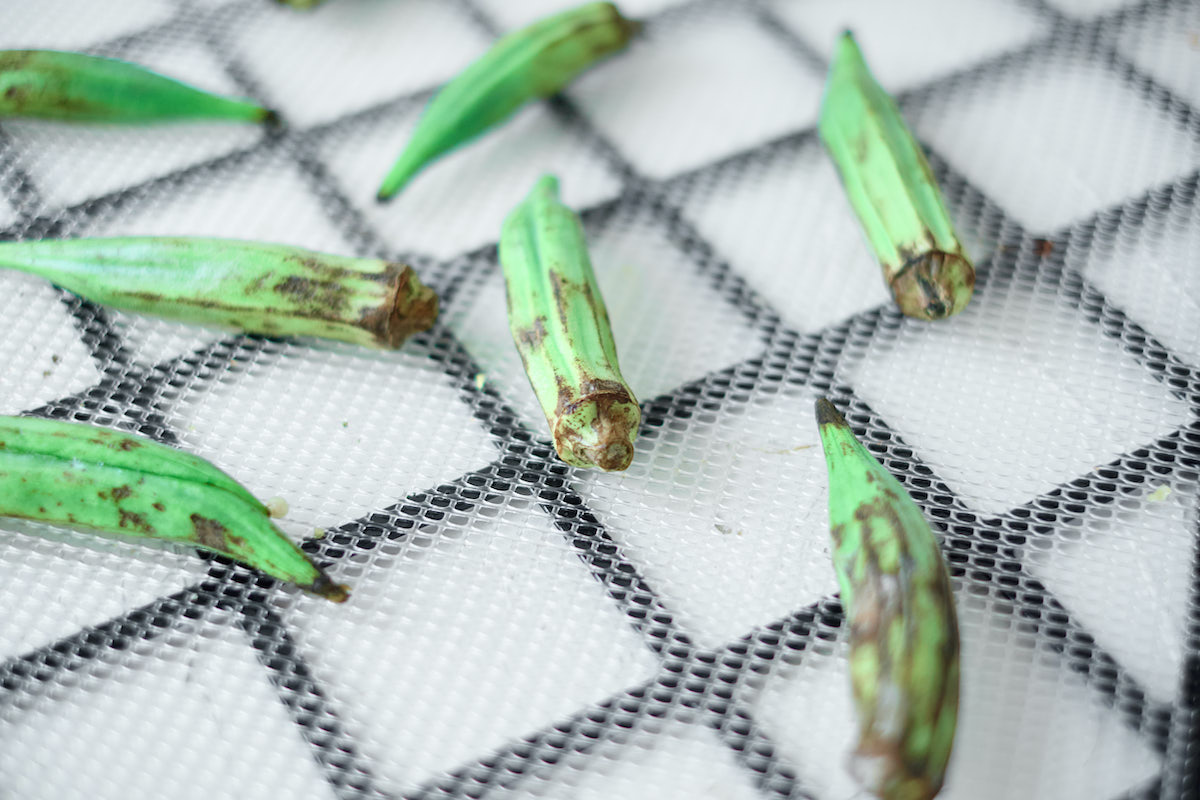
Dehydrating Vegetables
Dehydrating vegetables with your Nesco Dehydrator offers a convenient way to preserve the flavors and nutrients of fresh produce while creating versatile ingredients for soups, stews, and savory dishes. Whether you have an abundant harvest from your garden or wish to take advantage of seasonal vegetables, the dehydration process allows you to stock your pantry with a variety of shelf-stable vegetable options.
Selection of Vegetables: Choose firm, fresh vegetables that are at their peak ripeness. Common vegetables for dehydration include bell peppers, carrots, tomatoes, zucchini, onions, and leafy greens. Each type of vegetable may require specific preparation techniques, such as blanching or slicing, to ensure optimal dehydration results.
Preparation: Wash the vegetables thoroughly and trim off any stems, roots, or blemishes. Depending on the vegetable, consider blanching it before dehydration to help preserve its color, texture, and nutritional value. Blanching involves briefly immersing the vegetables in boiling water and then rapidly cooling them in ice water before placing them in the dehydrator.
Slicing or Dicing: Depending on your preference and the intended use of the dehydrated vegetables, slice or dice them into uniform pieces. This ensures even drying and facilitates their rehydration when used in recipes. Leafy greens can be dried as whole leaves or torn into smaller pieces for efficient dehydration.
Arranging on Trays: Place the prepared vegetable pieces onto the drying trays of the Nesco Dehydrator, taking care to provide ample space between the pieces for proper air circulation. Avoid overcrowding the trays, as this can impede the drying process and result in uneven dehydration.
Dehydration Process: Set the temperature of the dehydrator to the recommended settings for the specific vegetables you are dehydrating. Typically, vegetables are dried at a slightly higher temperature than fruits to facilitate moisture removal. Monitor the progress of the vegetables, rotating the trays if necessary to ensure uniform drying.
Testing for Doneness: Once the vegetables have undergone the dehydration process, allow them to cool before testing for doneness. The dehydrated vegetables should be brittle and free of moisture, indicating that they are ready for storage. Properly dehydrated vegetables can be used in soups, stews, casseroles, and other culinary creations, adding a burst of flavor and nutrition to your dishes.
By mastering the art of dehydrating vegetables with your Nesco Dehydrator, you can enjoy the convenience of having an array of wholesome, garden-fresh vegetables at your disposal year-round, ready to elevate your favorite recipes with their vibrant flavors and nutritional benefits.
When using a Nesco dehydrator, make sure to evenly space out the food on the trays to allow for proper air circulation. This will help ensure that the food dehydrates evenly and thoroughly.
Dehydrating Meats
Dehydrating meats with your Nesco Dehydrator opens up a world of culinary possibilities, allowing you to create flavorful, protein-packed snacks and ingredients that are perfect for on-the-go energy and enhancing the taste of various dishes. Whether you are making jerky, preserving cooked meats, or experimenting with new flavor profiles, the dehydration process transforms meats into shelf-stable, savory treats.
Selection of Meats: Choose lean cuts of meat, such as beef, poultry, or game meats, for dehydration. It’s important to select meats with minimal fat content, as fat can become rancid during the dehydration process and affect the quality and shelf life of the dehydrated meat.
Preparation: Trim any visible fat from the meat and slice it into thin, uniform strips. Slicing the meat against the grain helps create a tender and chewy texture in the finished product. Consider marinating the meat in your preferred seasonings, spices, and marinades to infuse it with flavor before dehydration.
Arranging on Trays: Lay the prepared meat strips onto the drying trays of the Nesco Dehydrator, ensuring that there is space between the pieces for adequate air circulation. Avoid overlapping the meat strips, as this can hinder the dehydration process and lead to uneven drying.
Dehydration Process: Set the dehydrator to the recommended temperature for meat jerky or the specific type of meat you are dehydrating. The drying temperature for meats typically ranges higher than that for fruits and vegetables to ensure the elimination of any potential pathogens and to achieve the desired texture and flavor in the finished product.
Testing for Doneness: Once the meat has undergone the dehydration process, allow it to cool before testing for doneness. Properly dehydrated meat should be dry, firm, and leathery, with no signs of moisture. Perform a visual and tactile assessment to ensure that the meat is thoroughly dehydrated and ready for storage.
Dehydrated meats, such as jerky, can be enjoyed as a high-protein snack, added to trail mixes, or incorporated into recipes to impart a rich, savory essence. By mastering the art of dehydrating meats with your Nesco Dehydrator, you can savor the convenience of having a stash of protein-packed, shelf-stable meats at your fingertips, perfect for fueling your adventures and culinary creations.
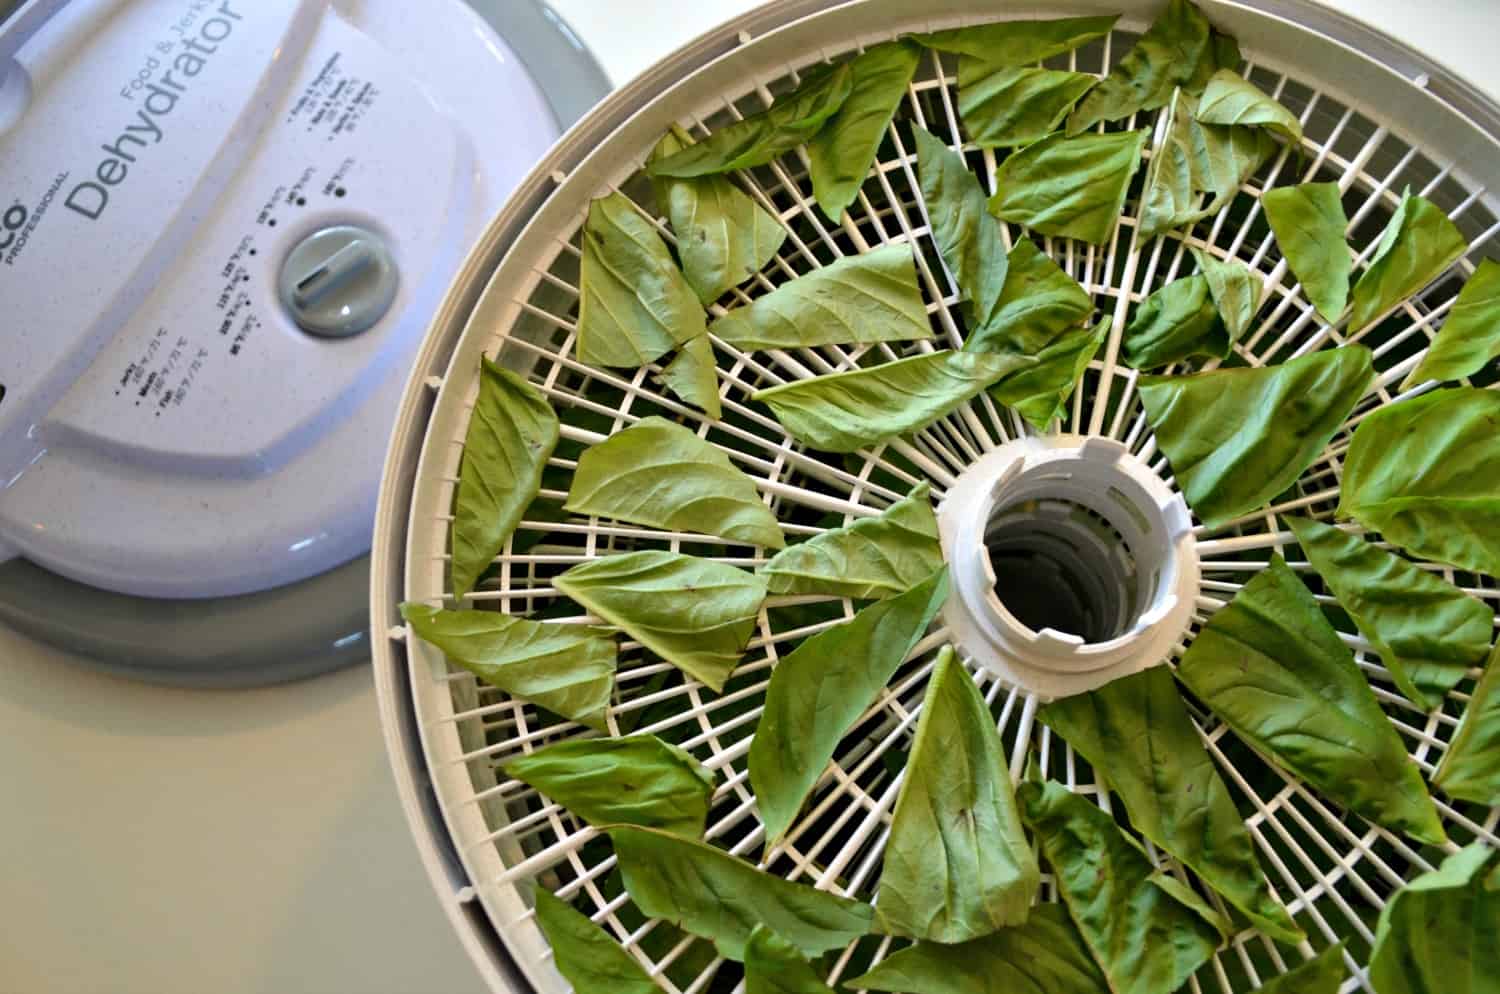
Dehydrating Herbs and Spices
Dehydrating herbs and spices with your Nesco Dehydrator allows you to capture the essence of fresh herbs and intensify the flavors of various spices, creating a pantry of aromatic ingredients that can elevate your culinary creations. Whether you have an abundant herb garden or wish to preserve seasonal herbs and spices, the dehydration process provides a simple and effective way to extend their shelf life while retaining their essential oils and flavors.
Selection of Herbs and Spices: Choose fresh, aromatic herbs such as basil, rosemary, thyme, oregano, mint, and parsley for dehydration. Additionally, select whole spices such as cinnamon sticks, cloves, cumin seeds, and peppercorns to intensify their flavors through dehydration.
Preparation: Wash the herbs gently and pat them dry to remove any moisture. Remove the leaves from the stems and spread them evenly on the drying trays. For whole spices, consider lightly toasting them in a dry skillet to release their essential oils before placing them in the dehydrator.
Arranging on Trays: Spread the prepared herbs and spices in a single layer on the drying trays of the Nesco Dehydrator, allowing ample space between the pieces for air circulation. This promotes even drying and ensures that the herbs and spices retain their vibrant colors and potent flavors.
Dehydration Process: Set the dehydrator to the recommended temperature for herbs and spices, typically a low and gentle heat to preserve their essential oils and aromatic compounds. Monitor the progress of the herbs and spices, adjusting the drying time as needed to achieve the desired level of dryness.
Testing for Doneness: Once the herbs and spices have undergone the dehydration process, allow them to cool before testing for doneness. The dehydrated herbs should crumble easily, while the spices should be brittle and aromatic. Perform a visual and olfactory assessment to ensure that the herbs and spices are thoroughly dehydrated and ready for storage.
Dehydrated herbs and spices can be ground into flavorful powders, used to infuse oils and vinegars, or added directly to culinary creations to impart depth and complexity of flavor. By mastering the art of dehydrating herbs and spices with your Nesco Dehydrator, you can enjoy the convenience of having an array of potent, shelf-stable ingredients at your fingertips, ready to enhance your dishes with their aromatic allure.
Storing Dehydrated Food
Proper storage of dehydrated food is essential to maintain its quality, flavor, and nutritional value over an extended period. Whether you have dehydrated fruits, vegetables, meats, herbs, or spices using your Nesco Dehydrator, following best practices for storage ensures that your culinary creations remain fresh and enjoyable for months to come.
Cooling and Conditioning: Once the dehydration process is complete, allow the dehydrated foods to cool to room temperature. This cooling period helps equalize the moisture content within the foods, preparing them for storage.
Testing for Dryness: Perform a final assessment of the dehydrated foods to ensure that they have reached the desired level of dryness. Properly dehydrated foods should be free of moisture, pliable, and brittle, depending on the type of food.
Packaging: Store the dehydrated foods in airtight containers, such as glass jars, vacuum-sealed bags, or food-grade plastic containers with tight-fitting lids. Proper packaging helps protect the foods from exposure to moisture, light, and air, which can compromise their quality over time.
Labeling and Dating: Clearly label each container with the type of food and the date of dehydration. This information helps you identify and rotate your stored foods, ensuring that you use the oldest items first to maintain freshness.
Storage Conditions: Store the packaged dehydrated foods in a cool, dark, and dry environment to prolong their shelf life. Avoid exposing the foods to direct sunlight, heat, or humidity, as these factors can lead to spoilage and loss of quality.
Monitoring Shelf Life: Keep an eye on the stored dehydrated foods and periodically check for signs of moisture, off odors, or discoloration. Properly stored dehydrated foods can remain viable for several months to a few years, depending on the type of food and the storage conditions.
By following these guidelines for storing dehydrated food, you can ensure that your culinary creations retain their vibrant flavors, nutritional benefits, and versatility for an extended period, allowing you to enjoy the convenience and satisfaction of having a well-stocked pantry of wholesome, shelf-stable ingredients at your disposal.
Read more: How To Use Oven As A Dehydrator
Cleaning and Maintenance of Your Nesco Dehydrator
Proper cleaning and maintenance of your Nesco Dehydrator are crucial for ensuring its longevity, optimal performance, and the safety of the foods you dehydrate. By incorporating routine maintenance into your dehydrating routine, you can preserve the functionality of the dehydrator and uphold food safety standards, allowing you to continue creating delicious dehydrated treats with confidence.
Unplugging and Cooling: Before cleaning the dehydrator, ensure that it is unplugged from the power source and has completely cooled down. This precaution minimizes the risk of electrical hazards and prevents accidental burns during the cleaning process.
Disassembly: Carefully disassemble the dehydrator according to the manufacturer’s instructions, removing the trays, heating element, and other detachable components. This allows for thorough cleaning and inspection of each part.
Washing Trays and Components: Wash the trays and other washable components with mild dish soap and warm water. Use a non-abrasive sponge or cloth to remove any food residue, grease, or stains. Ensure that the components are completely dry before reassembling the dehydrator.
Cleaning the Exterior: Wipe the exterior surfaces of the dehydrator with a damp cloth or sponge to remove any dust, spills, or splatters. Avoid using harsh cleaning agents or abrasive materials that could damage the finish of the dehydrator.
Inspecting for Wear and Tear: While cleaning the dehydrator, take the opportunity to inspect the components for any signs of wear, damage, or malfunction. Check the power cord, heating element, fan, and other critical parts for any issues that may affect the dehydrator’s performance or safety.
Storage and Protection: After cleaning and drying the components, reassemble the dehydrator and store it in a clean, dry environment. Consider covering the dehydrator with a dust cover or storing it in a protective case to prevent dust accumulation and potential damage when not in use.
Regular Maintenance: Incorporate regular maintenance tasks into your dehydrating routine, such as checking the airflow vents for obstructions, inspecting the power cord for any damage, and ensuring that the dehydrator is functioning as intended before each use.
By dedicating time to the cleaning and maintenance of your Nesco Dehydrator, you can prolong its lifespan, uphold food safety standards, and continue enjoying the benefits of dehydrating a variety of foods with confidence and peace of mind.
Troubleshooting Common Issues
While the Nesco Dehydrator is designed for reliable performance, occasional issues may arise during the dehydrating process. Understanding common challenges and knowing how to address them can help you maintain a seamless dehydrating experience and achieve optimal results with your dehydrated foods.
Uneven Drying: If you notice that certain areas of the food are drying faster than others, rotate the trays periodically during the dehydration process. This promotes even airflow and consistent drying throughout the dehydrator. Additionally, ensure that the food pieces are evenly spaced on the trays to facilitate uniform drying.
Sticky or Tacky Texture: If the dehydrated foods have a sticky or tacky texture after the recommended drying time, they may require further dehydration. Return the foods to the dehydrator and continue drying them until they reach the desired level of dryness and firmness.
Excessive Drying Time: If the foods are taking longer to dehydrate than expected, check the temperature settings of the dehydrator. Ensure that the dehydrator is set to the appropriate temperature for the type of food being dried. Additionally, consider the ambient humidity and airflow conditions, as these factors can influence the drying time.
Brittle or Overly Dry Foods: If the dehydrated foods become excessively dry or brittle, they may have been exposed to high temperatures for an extended period. Adjust the temperature settings of the dehydrator to a lower setting for future batches, and monitor the drying progress closely to prevent over-drying.
Condensation Inside the Dehydrator: If condensation forms inside the dehydrator during the drying process, it may indicate that the dehydrator was not preheated to the appropriate temperature before adding the food. Preheat the dehydrator to the recommended temperature for the specific foods being dried to prevent condensation from forming.
Odors or Flavors Mixing: To prevent the transfer of odors and flavors between different foods during dehydration, consider using the individual fruit, vegetable, meat, or herb trays exclusively for specific types of foods. This helps maintain the distinct flavors and aromas of each food and prevents cross-contamination of flavors.
By addressing common issues that may arise during the dehydrating process, you can fine-tune your approach, optimize the performance of your Nesco Dehydrator, and consistently produce high-quality dehydrated foods that retain their flavors, textures, and nutritional benefits.
Conclusion
Congratulations on embarking on a flavorful journey into the world of food dehydration with your Nesco Dehydrator. By mastering the art of dehydrating a variety of foods, you have unlocked a world of culinary possibilities, allowing you to preserve the natural goodness of fruits, vegetables, meats, herbs, and spices while creating delicious and shelf-stable ingredients and snacks.
Throughout this comprehensive guide, you have gained valuable insights into the functions and capabilities of the Nesco Dehydrator, learned essential techniques for preparing, dehydrating, and storing a diverse range of foods, and discovered practical tips for cleaning, maintenance, and troubleshooting common issues. Armed with this knowledge, you are well-equipped to harness the full potential of your dehydrator and elevate your culinary creations with wholesome, homemade ingredients.
As you continue your dehydrating adventures, remember to embrace creativity and experimentation, exploring new flavor combinations, and discovering innovative uses for your dehydrated foods. Whether you are crafting vibrant fruit leathers, creating savory meat jerky, or infusing oils with aromatic herbs, the possibilities for culinary exploration are endless with your Nesco Dehydrator at your side.
By integrating the art of dehydration into your culinary repertoire, you are not only savoring the flavors and nutrition of fresh foods year-round but also embracing a sustainable approach to food preservation and reducing food waste. Your dehydrator empowers you to transform seasonal abundance into long-lasting delights, ensuring that you always have a pantry stocked with wholesome, homemade ingredients at your fingertips.
So, as you set out to dehydrate, savor, and share your culinary creations, may your Nesco Dehydrator continue to be a source of inspiration, creativity, and wholesome goodness, enriching your kitchen endeavors and delighting your taste buds with every delectable bite.
Frequently Asked Questions about How To Use Nesco Dehydrator
Was this page helpful?
At Storables.com, we guarantee accurate and reliable information. Our content, validated by Expert Board Contributors, is crafted following stringent Editorial Policies. We're committed to providing you with well-researched, expert-backed insights for all your informational needs.


0 thoughts on “How To Use Nesco Dehydrator”