Home>Home Maintenance>Home Repair Wisdom & Know-How: Timeless Techniques To Fix, Maintain, And Improve Your Home
Home Maintenance
Home Repair Wisdom & Know-How: Timeless Techniques To Fix, Maintain, And Improve Your Home
Modified: October 20, 2024
Discover timeless techniques and valuable wisdom for home maintenance with "Home Repair Wisdom & Know-How." Improve, fix, and maintain your home effectively.
(Many of the links in this article redirect to a specific reviewed product. Your purchase of these products through affiliate links helps to generate commission for Storables.com, at no extra cost. Learn more)
Introduction
Welcome to the world of home repair wisdom and know-how! Whether you’re a first-time homeowner or a seasoned DIY enthusiast, this comprehensive guide is here to equip you with the timeless techniques and essential knowledge needed to fix, maintain, and improve your home.
From minor repairs to major renovations, owning a home comes with a never-ending list of tasks. But fear not! With the right tools, techniques, and a bit of know-how, you can tackle these projects head-on and turn your house into a well-maintained haven.
Throughout this article, we will explore various areas of home maintenance and repair, providing you with practical tips, step-by-step instructions, and expert advice. Whether you’re dealing with a leaky faucet, a cracked ceiling, or a drafty window, we’ve got you covered.
Are you ready to unlock a world of DIY possibilities? Let’s dive right into the chapters that await you, each offering valuable insights and techniques to help you become a home maintenance pro.
Key Takeaways:
- Maintaining a home involves regular upkeep, DIY projects, and energy-efficient upgrades. From fixing leaks to restoring historic homes, this guide empowers homeowners to care for their living spaces effectively.
- Preserving a home’s integrity while incorporating modern comforts is key in historic restoration. Research, attention to detail, and professional expertise are essential for honoring a property’s unique heritage.
Chapter 1: Essential Tools for Home Repairs
When it comes to tackling home repairs, having the right tools is essential. With the right set of tools at your disposal, you’ll be well-prepared to handle a wide range of repair tasks effectively. Here’s a breakdown of the essential tools every homeowner should have in their toolbox:
- Screwdriver Set: A good set of screwdrivers is a must-have for any homeowner. Invest in a set that includes both flathead and Phillips screwdrivers in various sizes. These versatile tools will come in handy for tasks such as tightening loose screws, assembling furniture, or removing electrical outlet covers.
- Hammer: No toolbox is complete without a sturdy hammer. From hanging pictures to repairing loose floorboards, a hammer is a versatile tool that can handle a variety of household tasks. Look for a hammer with a comfortable grip and a claw on the opposite end for removing nails.
- Adjustable Wrench: An adjustable wrench is a must-have for tackling plumbing repairs, such as tightening or loosening pipe connections. Look for a wrench with a wide jaw capacity and ensure it is easy to adjust for different-sized nuts and bolts.
- Tape Measure: Accurate measurements are critical for a variety of home repair projects, from hanging curtains to installing shelving units. Invest in a quality tape measure that is at least 25 feet long and features both metric and imperial measurements.
- Utility Knife: A utility knife is a versatile tool that can be used for a wide range of tasks, such as cutting drywall, opening packages, or trimming carpet. Look for a knife with a retractable blade for safety and ease of use.
- Wire Cutters: Wire cutters are essential for any electrical repair or DIY project involving wires. They can cut through electrical wires cleanly and precisely, ensuring safety and efficiency. Look for wire cutters with insulated handles for added protection.
- Stud Finder: When hanging heavy items on your walls, such as mirrors or shelves, it’s important to find the studs for secure mounting. A stud finder will help you locate the wooden framing behind your walls, ensuring a secure anchor point for your hardware.
- Level: A level is essential for ensuring that items such as pictures or shelves are hanging straight. Look for a level that is at least 2 feet long and features both horizontal and vertical vials for accurate leveling.
- Cordless Drill: A cordless drill is a versatile tool that can handle a variety of tasks, from drilling holes to driving screws. Look for a drill with variable speed settings, multiple torque settings, and a rechargeable battery for convenience.
- Safety Equipment: Last but not least, don’t forget to prioritize safety. Invest in a good pair of safety goggles to protect your eyes from flying debris, and keep a pair of work gloves and a dust mask handy for added protection during certain tasks.
By having these essential tools ready and organized in your toolbox, you’ll be well-prepared to tackle a wide range of home repair and maintenance tasks effectively. Remember to always use your tools safely and store them properly to ensure their longevity.
Chapter 2: Understanding Home Maintenance
Home maintenance is a crucial part of being a homeowner. Regular upkeep and preventive measures can help prolong the life of your home and save you from costly repairs down the road. In this chapter, we’ll explore the key aspects of home maintenance and provide you with valuable tips to keep your home in top shape.
1. Create a Maintenance Schedule: Start by creating a maintenance schedule that outlines regular tasks to be performed throughout the year. This can include tasks such as cleaning gutters, changing HVAC filters, and inspecting your home’s exterior for any signs of damage. By staying organized and following a schedule, you can ensure that no important maintenance tasks are overlooked.
2. Check for Water Leaks: Water damage can lead to costly repairs and even mold growth. Regularly inspect your home for any signs of water leaks, such as damp spots on walls or ceilings, musty odors, or water stains. If you encounter any leaks, address them promptly to prevent further damage.
3. Maintain Your HVAC System: Heating, ventilation, and air conditioning (HVAC) systems need regular maintenance to function efficiently. Change air filters regularly, clean air vents, and schedule professional HVAC inspections and maintenance at least once a year. This will help ensure that your HVAC system operates at peak performance, saving you energy and reducing the risk of breakdowns.
4. Protect Your Exterior: Your home’s exterior is constantly exposed to the elements. Regularly inspect the roof for damaged shingles, check gutters for clogs or damage, and clean siding to prevent dirt buildup. Trim trees and shrubs near your home to minimize the risk of damage from falling branches or overgrowth. Additionally, consider applying a fresh coat of paint or stain to protect and enhance the appearance of your home’s exterior.
5. Keep a Clean and Organized Home: Maintaining a clean and organized home not only improves its aesthetic appeal but also helps prevent accidents and promotes a healthier living environment. Regularly declutter, clean surfaces, and vacuum carpets to keep your home looking its best. Remember to clean and maintain appliances, such as your refrigerator, dishwasher, and washing machine, to ensure their longevity and efficient operation.
6. Stay on Top of Plumbing Maintenance: Plumbing issues can cause significant damage if left unattended. Inspect your plumbing fixtures regularly for leaks or signs of wear. Clean drains and invest in drain covers to prevent clogs. It’s also a good idea to learn how to shut off the main water supply in case of emergencies.
7. Address Potential Safety Hazards: Regularly inspect your home for potential safety hazards. Check smoke detectors and carbon monoxide detectors, and replace batteries as needed. Ensure that fire extinguishers are in working order and easily accessible. Repair any loose handrails or uneven steps to prevent falls.
By understanding and implementing these key aspects of home maintenance, you’ll be able to keep your home in excellent condition and avoid costly repairs. Regular upkeep and preventive measures will not only save you money but also provide you with peace of mind knowing that your home is well-maintained and safe.
Chapter 3: Basic Electrical Repairs
Dealing with electrical repairs may seem daunting, but with the right knowledge and precautions, you can safely tackle basic electrical tasks in your home. In this chapter, we’ll explore some common electrical issues and provide you with essential tips for handling them.
1. Changing a Light Bulb: One of the simplest electrical repairs is changing a light bulb. Make sure to turn off the light fixture and allow the bulb to cool before replacing it. Remember to handle the new bulb with a clean cloth or gloves to prevent oil and debris from affecting its lifespan.
2. Replacing an Electrical Outlet: If you have a non-functioning or damaged electrical outlet, you can replace it yourself. Before starting, turn off the power to the circuit at the breaker panel. Properly identify the wires and their connections, then disconnect and reconnect them to the new outlet according to the manufacturer’s instructions.
3. Fixing a Tripped Circuit Breaker: When a circuit breaker trips, it cuts off power to a specific electrical circuit to prevent overloading and potential fire risks. To fix a tripped circuit breaker, locate the breaker panel, identify the tripped breaker, and reset it by turning it off and then back on. If the breaker continues to trip, there may be an underlying issue that requires professional attention.
4. Installing a Ceiling Fan: Installing a ceiling fan can improve air circulation and provide comfort in your home. Before starting, turn off the power to the circuit at the breaker panel. Follow the manufacturer’s instructions to mount the fan securely and connect the wiring properly, ensuring all connections are tight and insulated. It’s recommended to have a helper assist you in holding the fan while you make the electrical connections.
5. Troubleshooting a Non-Functioning Outlet: If an outlet in your home is not providing power, start by checking the circuit breaker to ensure it hasn’t tripped. If the breaker is fine, use a voltage tester to check for power at the outlet. If there is no power, the issue may lie with a loose wire connection or a faulty outlet. In this case, it’s best to consult a licensed electrician for further troubleshooting.
6. Installing Light Fixtures: When installing a new light fixture, turn off the power to the circuit at the breaker panel. Remove the old fixture and disconnect the wiring. Connect the wires of the new fixture to the corresponding wires in the electrical box, ensuring proper grounding. Secure the fixture in place and follow the manufacturer’s instructions for finishing the installation.
7. Upgrading an Electrical Switch: If you have an outdated or malfunctioning light switch, you can replace it with a new one. Begin by turning off the power to the circuit at the breaker panel. Remove the cover plate and disconnect the wires from the old switch. Connect the corresponding wires to the new switch and secure it in the electrical box. Finally, attach the cover plate and restore power.
Remember, if you’re unsure about any electrical repairs or feel uncomfortable working with electricity, it’s always best to consult a professional electrician. They have the knowledge and expertise to handle complex electrical tasks and ensure your safety. By following these basic electrical repair tips, you’ll be able to handle simple electrical issues confidently and keep your home’s electrical system in good working order.
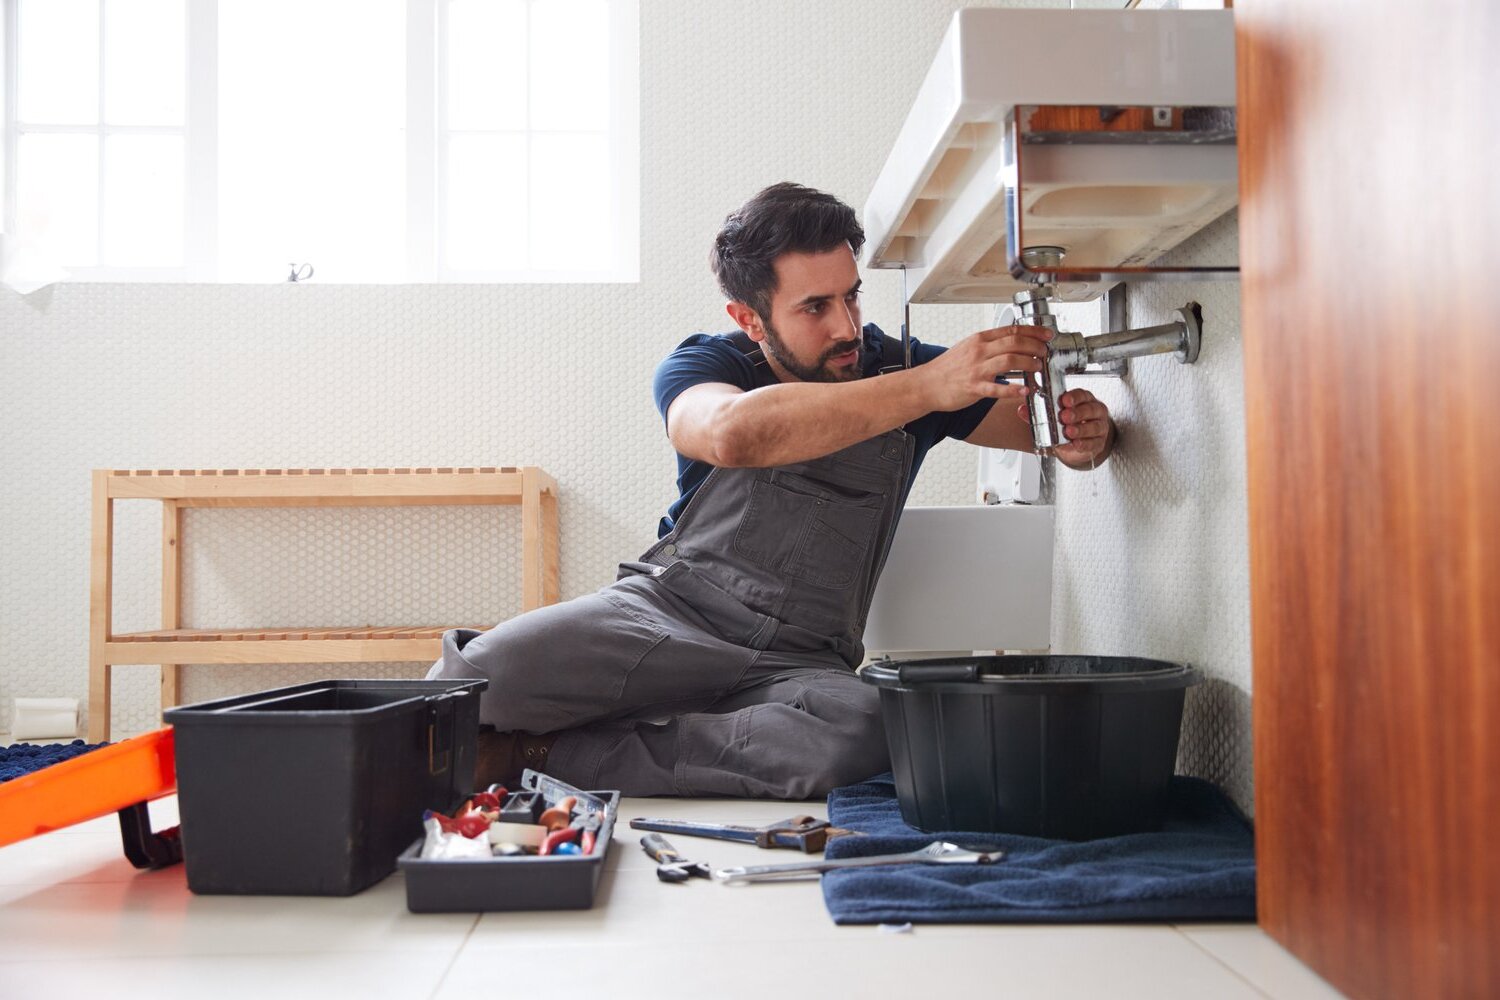
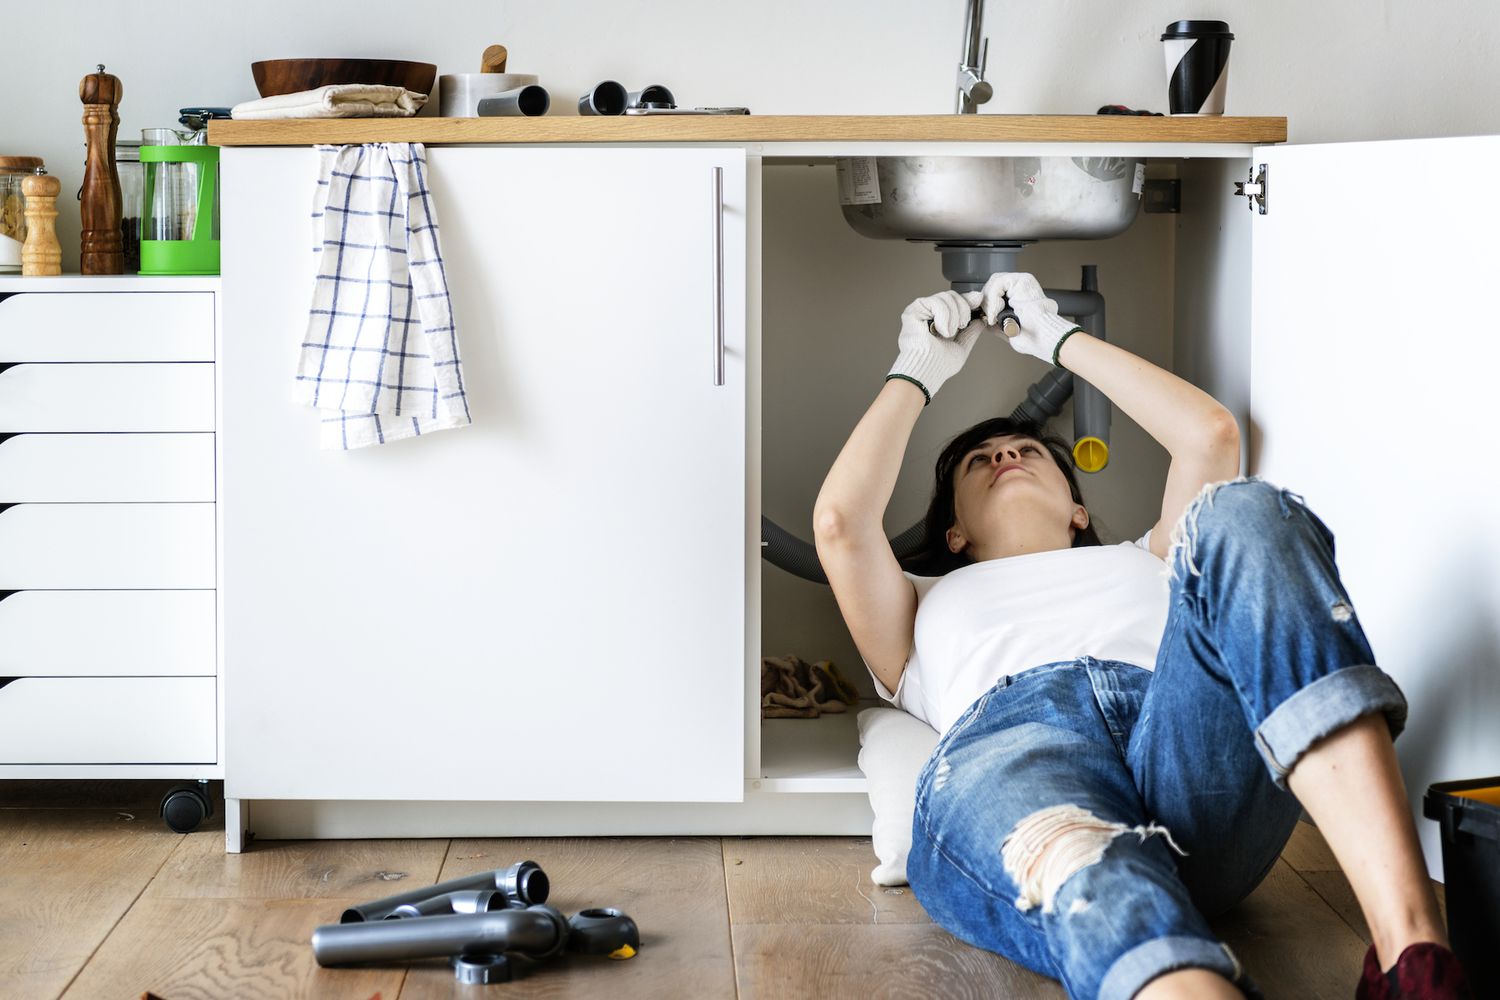
Chapter 4: Plumbing Fixes and Upgrades
Plumbing issues can be a homeowner’s nightmare, but with some basic knowledge and the right tools, you can tackle common plumbing problems and even upgrade your plumbing system. In this chapter, we’ll explore some plumbing fixes and upgrades that you can handle yourself.
1. Fixing a Leaky Faucet: A leaky faucet can waste water and drive up your water bill. Start by turning off the water supply to the faucet. Remove the handle and replace any worn-out washers or O-rings. Reassemble the faucet, turn on the water supply, and check for leaks. If the issue persists, you may need to replace the faucet cartridge or seek professional help.
2. Unclogging a Drain: A clogged drain is a common plumbing issue that can be resolved with the right tools. Begin by using a plunger to create suction and loosen the clog. If that doesn’t work, try using a drain snake to physically remove the blockage. Avoid using chemical drain cleaners, as they can damage the pipes and worsen the problem.
3. Replacing a Toilet Flapper: If your toilet continues to run or has a weak flush, a faulty flapper valve may be the culprit. Turn off the water supply to the toilet and flush to drain the tank. Remove the old flapper and install a new one, making sure it creates a tight seal. Turn the water supply back on and test the flush to ensure proper functioning.
4. Installing a Toilet Bidet: Upgrading your bathroom with a toilet bidet can add comfort and improve hygiene. Start by turning off the water supply to the toilet. Remove the existing toilet seat and install the bidet according to the manufacturer’s instructions. Connect the water supply hose and turn on the water. Test for any leaks and adjust the settings to your preference.
5. Upgrading Showerheads and Faucets: Installing a new showerhead or faucet can enhance the look and functionality of your bathroom. Start by turning off the water supply to the shower or faucet. Remove the old fixture and clean the mounting area. Install the new fixture, ensuring a tight and secure fit. Turn on the water supply and check for any leaks.
6. Fixing a Running Toilet: A running toilet can waste water and be quite annoying. Start by checking and adjusting the water level in the tank. Inspect the flapper valve, fill valve, and flush valve for any signs of wear or damage. Replace any faulty components and ensure proper connections. If the problem persists, it’s advisable to seek professional assistance.
7. Repairing a Dripping Showerhead: A dripping showerhead can be caused by a loose connection or a worn-out washer. Start by turning off the water supply to the shower. Use a wrench to tighten any loose connections. If the problem persists, disassemble the showerhead and replace the washer. Reassemble the showerhead and turn on the water supply to test for leaks.
Remember, while these fixes and upgrades can be done by homeowners, plumbing systems can be complex. If you encounter a plumbing issue that is beyond your knowledge or comfort level, it’s best to seek professional help. Proper maintenance and timely repairs can help you avoid costly water damage and keep your plumbing system in good working order.
Chapter 5: Painting and Wall Repair Techniques
Painting and repairing walls can significantly improve the appearance of your home and give it a fresh, new look. In this chapter, we’ll explore various painting and wall repair techniques that you can employ to transform your living space.
1. Preparing the Surface: Before painting, it’s vital to prepare the walls by removing any dirt, dust, or loose paint. Use a mild detergent solution or a wall cleaner to wash the surface thoroughly. Fill in any holes or cracks with spackle or putty and sand them smooth. Lastly, apply a primer to create a smooth and even base for the paint.
2. Choosing the Right Paint: Selecting the right paint color and type is crucial for achieving the desired results. Consider factors such as the room’s lighting, the mood you wish to create, and the purpose of the space. Opt for high-quality paint that is durable and washable, especially for high-traffic areas.
3. Proper Paint Application: Start by cutting in the edges with a brush, painting along the corners, ceiling, and baseboards. Then, use a roller to apply the paint to the large wall surfaces. Work in small sections, maintaining a wet edge to avoid visible brush or roller marks. Apply a second coat if necessary, allowing the first coat to dry completely before proceeding.
4. Repairing Wall Imperfections: Walls can develop cracks, dents, or holes over time. To fix small cracks and dents, use a patching compound or spackle. Apply the compound, smooth it out with a putty knife, and sand it once dry. For larger holes, use a patching kit or cut a piece of drywall to fit the hole, secure it in place, apply joint compound, and sand it smooth.
5. Textured Wall Techniques: If you want to add texture to your walls, consider techniques such as sponge painting, rag rolling, or stucco finishes. Experiment with different tools and application methods to achieve the desired textured effect. Remember to practice on a small area or sample board first to ensure you achieve the desired look.
6. Creating Accent Walls: Accent walls can add depth and visual interest to a room. Choose a contrasting color or a different paint finish to create a focal point. This can be a wall behind the bed in a bedroom or the wall facing the entrance in a living room. The key is to select a wall that naturally draws attention or complements the room’s overall design.
7. Wall Stenciling and Wallpaper: If you’re looking for unique wall finishes, consider using stencils or wallpaper. Stenciling allows you to add intricate designs or patterns to your walls using paint. Wallpaper comes in a wide variety of designs and textures, allowing you to achieve a customized look. Follow the manufacturer’s instructions for proper application and ensure the surface is clean and smooth.
By mastering painting and wall repair techniques, you can transform your home and express your personal style. Remember to take your time, follow proper preparation and application methods, and always use high-quality materials. With a little creativity and attention to detail, you’ll be able to breathe new life into your walls and create a space that reflects your unique personality.
Chapter 6: Flooring Repair and Replacement
Your home’s flooring plays a crucial role in the overall aesthetic and functionality of your space. Over time, flooring can experience wear and tear, requiring repairs or replacement. In this chapter, we’ll explore various flooring repair and replacement techniques that can help you maintain and enhance the beauty and durability of your floors.
1. Repairing Damaged Hardwood Floors: Hardwood floors are known for their natural beauty and durability. If you have scratched or damaged hardwood floors, you can address these issues with refinishing or spot-treatment. Refinishing involves sanding the entire floor surface to remove the old finish and applying a new coating. For minor scratches or dents, you can touch up the affected areas with a matching stain or finish.
2. Fixing Loose or Squeaky Floorboards: Loose or squeaky floorboards can be fixed by securing them with screws or nails. Locate the loose boards and use a drill or hammer to secure them to the subfloor. For squeaky floors, apply a lubricant between the subfloor and the floorboards to reduce friction and eliminate the noise.
3. Repairing Ceramic or Porcelain Tiles: Cracked or chipped ceramic or porcelain tiles can be replaced individually. Start by carefully removing the damaged tile using a grout saw or chisel. Clean out any debris and apply tile adhesive or mortar to secure the new tile in place. Once the adhesive has dried, apply grout and wipe away any excess.
4. Fixing Vinyl or Laminate Flooring: Vinyl and laminate flooring are relatively easy to repair. For minor scratches or gouges, use a repair kit specific to your flooring type. Simply fill the damaged area with the repair compound, smooth it out, and allow it to dry. For larger damaged sections, you may need to replace the affected planks or tiles.
5. Replacing Carpet: If your carpet has stains, worn-out areas, or has reached the end of its lifespan, it’s time for a replacement. Start by removing the old carpet and padding. Inspect the subfloor for any damage or moisture issues. Install new carpet padding, and then lay and secure the new carpet using appropriate methods such as gluing or stretching.
6. Upgrading Flooring Materials: If you’re looking to upgrade your flooring, consider options such as hardwood, laminate, tile, or luxury vinyl. Research the benefits and maintenance requirements of each material to determine the best fit for your lifestyle and budget. Follow the manufacturer’s instructions for installation or hire a professional for a seamless finish.
7. Regular Floor Maintenance: To keep your floors in good condition, it’s important to establish a regular maintenance routine. This can include sweeping or vacuuming regularly, using appropriate cleaning products for your flooring type, and promptly addressing spills or stains. Avoid using harsh chemicals or abrasive tools that can damage the floor’s surface.
Proper care and timely repairs or replacements can extend the lifespan of your flooring and keep it looking beautiful for years to come. Whether you’re repairing damaged hardwood, replacing worn-out carpet, or upgrading to a new flooring material, following these techniques will help you maintain a functional and visually appealing space.
When repairing drywall, use a self-adhesive mesh tape to cover the seams before applying joint compound. This will help prevent cracks from reappearing.
Chapter 7: Repairing and Maintaining Windows and Doors
Windows and doors are essential components of any home, providing security, natural light, and ventilation. However, over time, they may require repairs and maintenance to ensure their proper functionality and energy efficiency. In this chapter, we’ll explore various techniques for repairing and maintaining windows and doors.
1. Fixing Window and Door Frames: Over time, window and door frames can become cracked, warped, or damaged. Repairing these issues can help improve the insulation and security of your home. Begin by cleaning the area and removing any loose paint or debris. Use wood putty or epoxy to fill the cracks or holes, smooth it out, and sand it once dry. Finish by painting or staining the repaired area to match the rest of the frame.
2. Repairing Window and Door Hardware: If you’re experiencing issues with window or door hardware, such as loose hinges, broken locks, or faulty handles, it’s essential to address them promptly. Tighten loose screws or replace worn-out hinges and hardware. Lubricate moving parts with silicone spray or graphite lubricant for smooth operation. For more complex hardware repairs, consult the manufacturer’s instructions or hire a professional.
3. Sealing and Weatherstripping: Proper sealing and weatherstripping can improve energy efficiency, reduce drafts, and prevent moisture infiltration. Inspect the existing weatherstripping and replace any worn-out or damaged sections. Use caulk or weatherstripping tape to seal gaps around windows and doors, ensuring a tight and insulated seal. This simple step can help lower your energy bills and enhance the comfort of your home.
4. Repairing Window Screens: Window screens can become torn or damaged, allowing insects and debris to enter your home. Repairing or replacing window screens is a straightforward task. Start by removing the damaged screen and measure the dimensions for the replacement. Cut a new screen to size and use a screen installation tool to secure it in the frame. Trim any excess screen material, and your window screen will be good as new.
5. Refinishing and Repainting: Wooden windows and doors may require periodic refinishing and repainting to protect them from the elements and maintain their appearance. Start by cleaning the surface and sanding any rough spots or peeling paint. Apply a primer to the bare areas, and once dry, follow with a high-quality paint or stain. This process will restore the beauty of your woodwork and extend its lifespan.
6. Regular Cleaning and Maintenance: Regular cleaning and maintenance are essential for the longevity and performance of your windows and doors. Routinely clean the glass, frames, and tracks using mild soap and water or an appropriate glass cleaner. Inspect for any signs of wear or damage, such as rot or warping, and address them promptly to prevent further deterioration.
7. Upgrading to Energy-Efficient Windows and Doors: If you’re looking to improve energy efficiency and enhance the comfort of your home, consider upgrading to energy-efficient windows and doors. Look for products with high insulation values, such as double-pane or triple-pane glass, Low-E coatings, and insulated frames. This investment can lead to lower energy bills and a more comfortable living environment.
By regularly maintaining and repairing your windows and doors, you can ensure their longevity, functionality, and energy efficiency. Take the time to inspect and address any issues promptly, and consider upgrades to enhance the overall performance of these essential components of your home.
Chapter 8: Roofing Repair and Maintenance
Your home’s roof is its first line of defense against the elements, so it’s crucial to keep it in good condition. Chapter 8 will focus on roofing repair and maintenance, helping you ensure the longevity and integrity of your roof.
1. Regular Roof Inspections: Regular roof inspections are essential for identifying potential issues early on. Inspect the roof for any signs of damage, such as missing or damaged shingles, cracks, or loose flashing. Additionally, check for signs of water damage on the ceiling or interior walls, as these can indicate a roof leak.
2. Maintaining and Clearing Gutters: Gutters play a vital role in directing water away from your roof and foundation. Inspect your gutters regularly, cleaning them out to prevent clogs. Clogged gutters can lead to water backup on the roof and potential leaks. Ensure that downspouts are directing water away from the foundation to prevent water damage.
3. Fixing Damaged Shingles: If you notice damaged or missing shingles, it’s important to address them promptly. Replace any cracked or curled shingles using a pry bar to lift the damaged shingle, removing the nails, and installing a new shingle in its place. This will help prevent moisture penetration and further damage to the roof.
4. Sealing Leaks and Gaps: Leaks and gaps in the roof can occur around vents, chimneys, and flashing. Inspect these areas for signs of damage and deterioration. Use roofing cement or silicone caulk to seal any leaks or gaps, ensuring a watertight seal. If the damage is significant, consider consulting a professional roofer for repair or replacement.
5. Removing Moss and Algae: Moss and algae can grow on your roof, especially in areas with high humidity. While they may not cause immediate damage, their presence can trap moisture on the roof’s surface, leading to deterioration. Use a mild detergent or a specialized moss and algae cleaner to remove these growths and prevent further damage.
6. Keeping Trees Trimmed: Overhanging tree branches can cause damage to the roof, especially during storms. Trim back any branches that are in close proximity to the roof to prevent them from rubbing against the surface or causing damage from falling debris. This will help extend the lifespan of your roof and prevent potential hazards.
7. Professional Roof Inspections and Maintenance: While regular inspections are important, it’s also beneficial to have your roof professionally inspected and maintained periodically. A professional roofer can identify issues that may not be immediately apparent to an untrained eye. They can assess the overall condition of your roof and provide recommendations for repairs or maintenance.
By following these roofing repair and maintenance techniques, you can prolong the life of your roof, prevent leaks and water damage, and ensure the overall structural integrity of your home. Taking a proactive approach to roof care will save you money in the long run and provide peace of mind, knowing that your home is well-protected.
Chapter 9: Outdoor Repairs and Upkeep
Your home’s exterior is just as important as its interior. In Chapter 9, we’ll delve into outdoor repairs and upkeep, ensuring that your home’s exterior remains beautiful, functional, and well-maintained throughout the seasons.
1. Maintaining the Landscape: Regularly maintaining your landscape enhances the curb appeal of your home and promotes a healthy outdoor environment. Trim bushes and trees, weed flower beds, and mow the lawn regularly. Consider adding mulch to retain moisture and prevent weed growth, and fertilize plants and grass to promote healthy growth.
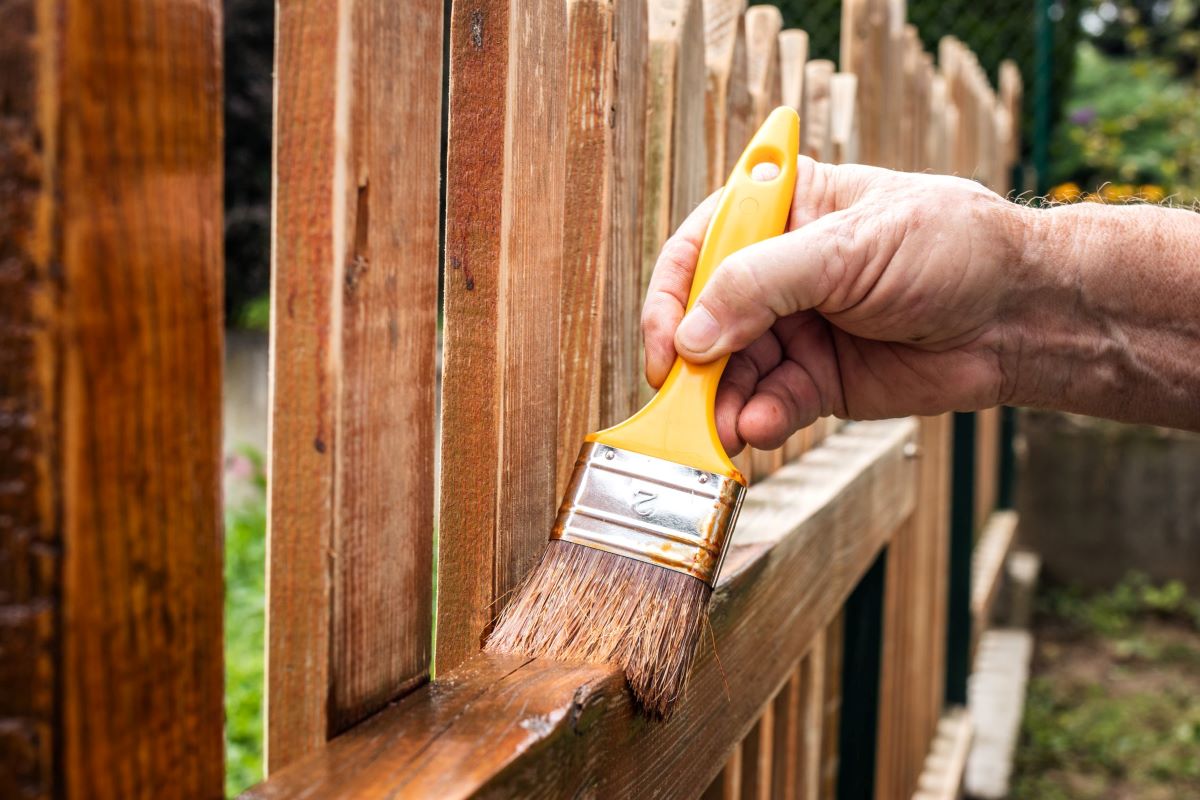
2. Repairing and Staining Decks and Fences: Decks and fences can be subject to wear and weathering. Inspect them for loose boards, nails, or damaged parts. Replace or repair any damaged areas, and consider staining or painting them to protect against moisture and UV damage. Regularly cleaning these surfaces will also help extend their lifespan.
3. Cleaning and Maintaining Outdoor Furniture: Outdoor furniture is exposed to the elements and can accumulate dirt and grime. Clean and inspect your furniture regularly, following the manufacturer’s instructions for cleaning and maintenance. Treat wood furniture with appropriate sealants or oils to protect against moisture damage, and store furniture during the winter months to prolong its lifespan.
4. Power Washing Exterior Surfaces: Over time, dirt, moss, algae, and stains can accumulate on the exterior surfaces of your home. Power washing these surfaces, such as siding, decks, and sidewalks, can effectively remove these contaminants and restore their appearance. Follow proper power washing techniques and use the appropriate nozzle and pressure settings for each surface.
5. Repairing Cracked Walkways and Driveways: Cracked or damaged walkways and driveways not only detract from the appearance of your home but can also pose safety hazards. Repair cracks and uneven surfaces by filling them with concrete filler or resurfacing the area. Regularly clean these surfaces and seal them to protect against water penetration and further damage.
6. Inspecting and Cleaning Gutters and Downspouts: Gutters and downspouts are crucial in directing water away from your home’s foundation. Regularly inspect and clean them, removing any debris or clogs that may hinder proper water drainage. Properly maintain and secure gutters to prevent leaks or damage during heavy rains.
7. Checking Outdoor Lighting: Outdoor lighting improves visibility and safety around your home. Regularly check bulbs, replace any burnt-out ones, and clean the fixtures to ensure optimal performance. Consider installing motion-activated or solar-powered lights for added convenience and energy efficiency.
By performing outdoor repairs and upkeep, you can enhance the beauty and functionality of your home’s exterior. Regular maintenance ensures that your landscape remains vibrant, your outdoor furniture lasts longer, and your home’s exterior surfaces retain their appeal. Taking care of these outdoor areas will not only protect your investment but also create a welcoming and enjoyable outdoor space for you and your family to enjoy.
Chapter 10: Energy Efficiency Enhancements
In Chapter 10, we’ll explore various energy efficiency enhancements that can help reduce your home’s energy consumption and lower your utility bills. These upgrades not only benefit the environment but also create a more comfortable and sustainable living space for you and your family.
1. Insulating Your Home: Proper insulation is key to energy efficiency. Insulate your attic, walls, and crawl spaces to prevent heat loss in the winter and heat gain in the summer. Use materials like fiberglass batts, spray foam, or blown-in insulation. Consider upgrading windows to double-pane or energy-efficient options.
2. Sealing Air Leaks: Air leaks around windows, doors, and vents can significantly impact energy efficiency. Use weatherstripping to seal gaps and caulking to fill cracks and openings. Install door sweeps to seal gaps beneath exterior doors and consider adding insulation to electrical outlets and switch plates.
3. Upgrading to Energy-Efficient Appliances: Replace old, inefficient appliances with energy-efficient models. Look for appliances with the ENERGY STAR label, which indicates high energy efficiency. Upgrading your refrigerator, washer, dryer, and HVAC system to energy-efficient models can lead to significant energy savings over time.
4. Installing Programmable Thermostats: Programmable thermostats allow you to automatically adjust the temperature settings based on your schedule. Set lower temperatures when you’re away or sleeping, and higher temperatures when you’re at home. This helps optimize energy usage and save on heating and cooling costs.
5. Using LED Lighting: LED (Light Emitting Diode) bulbs are highly energy-efficient and have a long lifespan. Replace traditional incandescent bulbs with LEDs throughout your home. They use less energy and produce less heat, contributing to energy and cost savings while providing bright, high-quality light.
6. Installing Low-Flow Fixtures: Reduce water consumption and heating costs by installing low-flow fixtures in bathrooms and kitchens. Low-flow showerheads and faucets can significantly decrease water usage without compromising water pressure. Dual-flush toilets offer different flushing options for liquid and solid waste, conserving water accordingly.
7. Utilizing Natural Lighting and Ventilation: Make the most of natural light by keeping curtains and blinds open during the day. This reduces the need for artificial lighting. Similarly, promote natural ventilation by opening windows and using fans instead of relying solely on air conditioning. This can improve indoor air quality and reduce energy usage.
By implementing these energy efficiency enhancements, you can enjoy lower utility bills and contribute to a greener, more sustainable environment. Taking steps to increase energy efficiency not only saves you money but also enhances the comfort and value of your home. Embrace these upgrades to create a more eco-friendly living space for yourself and future generations.
Chapter 11: DIY Home Improvement Projects
In Chapter 11, we’ll dive into various do-it-yourself (DIY) home improvement projects that can add value, functionality, and a personal touch to your living space. Whether you’re a seasoned DIY enthusiast or just starting out, these projects allow you to unleash your creativity and make your home uniquely yours.
1. Creating a Feature Wall: Add visual interest and personality to a room by creating a feature wall. Choose a bold paint color, apply wallpaper, or use decorative wall panels to make a statement. This project is cost-effective and can transform the look and feel of a space without a complete renovation.
2. Installing a Backsplash: Upgrade your kitchen or bathroom by installing a tile backsplash. This project not only protects the walls from water damage but also adds a stylish and functional element to the space. Choose a variety of tile options, from classic subway tiles to vibrant mosaic patterns, to suit your style.
3. Building Custom Shelving: Maximize storage space and display cherished items by building custom shelving. Utilize wall space in living rooms, bedrooms, or home offices to create functional and attractive storage solutions. Choose from various materials such as wood, metal, or floating shelves to suit your aesthetic preferences.
4. Refinishing Furniture: Give new life to old furniture pieces by refinishing them. Sand down wooden surfaces, apply a fresh coat of paint or stain, and seal with a protective finish. This project allows you to customize furniture to match your style and can be a fun way to repurpose items while saving money.
5. Creating Outdoor Living Spaces: Enhance your outdoor living experience by creating inviting spaces in your backyard. Build a deck or patio, and furnish it with comfortable seating, outdoor rugs, and plants. Add lighting, a fire pit, or a built-in barbecue area to create a cozy and functional outdoor oasis.
6. Installing Smart Home Technology: Embrace the convenience and efficiency of smart home technology by installing devices like smart thermostats, smart door locks, and smart lighting systems. These upgrades offer increased control, energy efficiency, and home security.
7. Upcycling and Repurposing: Get creative by upcycling and repurposing old items into new functional pieces. Turn vintage suitcases into unique side tables, transform old window frames into decorative wall art, or repurpose mason jars into stylish storage containers. Not only will you save money, but you’ll also have one-of-a-kind pieces that reflect your personal style.
DIY home improvement projects allow you to express your creativity, save money, and customize your living space to reflect your unique personality. Remember to plan your projects carefully, acquire the necessary tools and materials, and always prioritize safety. Embrace the satisfaction of completing a DIY project and enjoy the transformation of your home.
Chapter 12: Historic Home Restoration
Chapter 12 focuses on the rewarding process of restoring a historic home. Restoring a historic property requires a delicate balance between preserving its historical integrity and incorporating modern comforts. Let’s explore the essential aspects of historic home restoration.
1. Researching the History: Begin by researching the history of your home. Gather information about its architectural style, original features, and any historic significance. Understanding the home’s past will guide your restoration decisions and help you maintain its authenticity.
2. Preserving Architectural Details: Identify and preserve the original architectural details that make your home unique. This includes features like decorative moldings, trim, windows, and doors. Carefully restore or replicate these elements, ensuring that they align with the period design and craftsmanship.
3. Repairing and Restoring Woodwork: Woodwork is a prominent feature in historic homes. Repair or replace damaged woodwork, preserving the original design and using appropriate materials and techniques. Strive to maintain the home’s original craftsmanship while ensuring structural integrity.
4. Restoring Flooring: Historic homes often feature unique flooring materials like hardwood, terrazzo, or mosaic tiles. Repair, refinish, or replace damaged flooring while maintaining the original design and materials. Reveal and restore hidden gems if the home has layers of floor coverings.
5. Updating Electrical and Plumbing: Balancing modern convenience with historic preservation may require upgrading electrical and plumbing systems. Working with experienced professionals, incorporate updated systems discreetly without compromising the home’s character.
6. Selecting Appropriate Finishes: Choose appropriate finishes that reflect the era of the home. Consult with experts to select historically accurate paint colors, wallpaper patterns, and roofing materials. Pay attention to details that evoke the original charm of the home.
7. Conserving Energy Efficiency: While preserving historical integrity is essential, consider energy-efficient upgrades to make your historic home more sustainable. Install insulation, energy-efficient windows, and smart thermostats to enhance comfort and save on energy costs without compromising the home’s aesthetic.
8. Maintaining Landscaping: Restore and enhance the landscaping around your historic home. Research period-appropriate plantings and landscaping features that complement the property’s style. Maintain the outdoor space to provide a cohesive and welcoming atmosphere.
9. Consulting Professionals: Historic home restoration often requires the expertise of professionals, such as architects, preservation specialists, and contractors experienced in historic properties. Engage their services to ensure that restoration work is carried out with precision and in compliance with preservation guidelines and regulations.
By undertaking a historic home restoration project, you become a custodian of history, preserving the architectural heritage for future generations. Embrace the process, celebrate the unique character of your home, and enjoy the satisfaction of breathing new life into a piece of the past.
Conclusion
Congratulations! You have reached the end of this comprehensive guide to home maintenance, repairs, and improvements. Throughout this article, we have explored various chapters, delving into the essential tools, techniques, and knowledge needed to take care of your home.
From understanding the importance of regular maintenance to tackling specific repairs in areas like electrical systems, plumbing, painting, and flooring, you now possess a wealth of information to confidently handle a range of home-related tasks. With each chapter, you have learned how to approach different projects, taking into account safety precautions, energy efficiency, and preservation of historical integrity.
Remember, maintaining a home is an ongoing process. By staying proactive and addressing issues promptly, you can prevent small problems from turning into costly repairs. Keep a regular maintenance schedule, periodically inspect your home, and prioritize tasks to keep your living space in excellent condition.
While this guide aims to inform and empower you, it is essential to recognize your limits and seek professional help when needed. Certain repairs or improvements may require specialized skills or knowledge, and it’s crucial to prioritize safety above all else.
Lastly, let your creativity shine by exploring DIY projects and making your home uniquely yours. Whether it’s a feature wall, custom shelving, or outdoor enhancements, these personal touches bring a sense of fulfillment and make your home truly special.
Thank you for joining us on this home maintenance journey, and we hope that the knowledge and insights gained here will serve you well in keeping your home a haven of comfort, functionality, and visual appeal. Here’s to a well-maintained and beautiful home for years to come!
Frequently Asked Questions about Home Repair Wisdom & Know-How: Timeless Techniques To Fix, Maintain, And Improve Your Home
Was this page helpful?
At Storables.com, we guarantee accurate and reliable information. Our content, validated by Expert Board Contributors, is crafted following stringent Editorial Policies. We're committed to providing you with well-researched, expert-backed insights for all your informational needs.