Home>Home Maintenance>How To Complete The Buyer’s Final Inspection
Home Maintenance
How To Complete The Buyer’s Final Inspection
Modified: August 28, 2024
Learn how to efficiently complete the buyer's final inspection for your home and ensure proper maintenance.
(Many of the links in this article redirect to a specific reviewed product. Your purchase of these products through affiliate links helps to generate commission for Storables.com, at no extra cost. Learn more)
Introduction
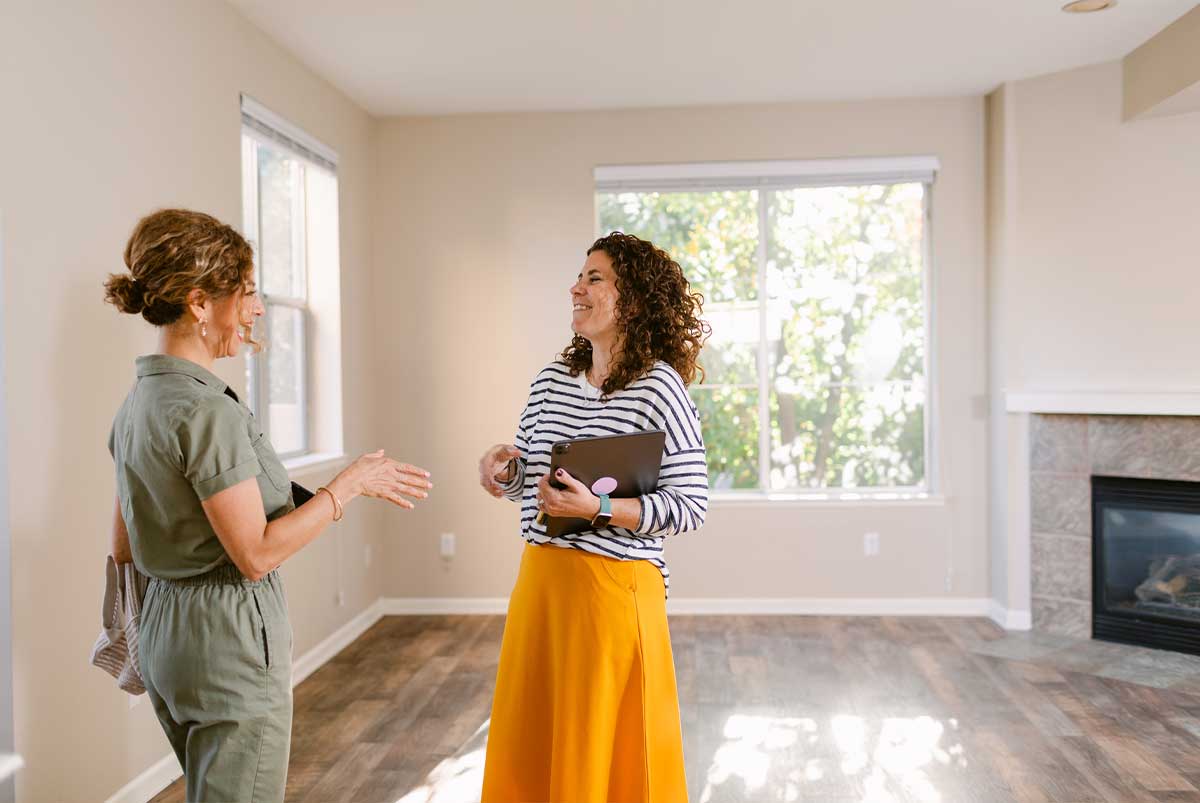
Welcome to our comprehensive guide on completing the buyer’s final inspection for your home purchase. The buyer’s final inspection is a crucial step in the home-buying process, allowing you to thoroughly examine the property before completing the sale. This inspection provides an opportunity to identify any issues or discrepancies that may have arisen since your initial inspection or negotiation phase.
By conducting a detailed and comprehensive final inspection, you can ensure that you are making an informed decision and protect yourself from any unforeseen surprises or costly repairs. In this guide, we will walk you through the process of preparing for the inspection, conducting the inspection effectively, and resolving any discrepancies that may arise.
Whether you are a first-time homebuyer or have been through the buying process before, this guide will be a valuable resource to help you navigate the buyer’s final inspection with confidence. So let’s dive in and explore the purpose and importance of the buyer’s final inspection.
Key Takeaways:
- The buyer’s final inspection is crucial for assessing the property’s condition and ensuring that all agreed-upon repairs are completed. It empowers buyers to make informed decisions and protect their investment.
- Effective communication and negotiation skills are essential for resolving any discrepancies or repairs identified during the inspection. Buyers should prioritize concerns and collaborate with the seller to reach a mutually satisfactory resolution.
Purpose of the Buyer’s Final Inspection
The buyer’s final inspection serves several important purposes. First and foremost, it allows you, as the buyer, to assess the condition of the property and verify that it meets your expectations as outlined in the purchase agreement. This is your last chance to ensure that the property is in the same condition or better than when you initially made your offer.
During the final inspection, you have the opportunity to identify any issues or damage that may have occurred between the time of your initial inspection and the closing date. By thoroughly examining the property, you can ensure that there are no surprises or hidden problems that could potentially affect your decision to move forward with the purchase.
Another purpose of the final inspection is to ensure that the seller has fulfilled their responsibilities as outlined in the purchase agreement. This includes any repairs or improvements that were agreed upon during the negotiation phase. By conducting a comprehensive inspection, you can verify that the seller has completed the agreed-upon tasks to your satisfaction.
The final inspection is also an important step in protecting yourself from any potential future liability. By identifying any issues or defects now, you can address them with the seller before the sale is finalized. This gives you the opportunity to negotiate repairs or compensation, ensuring that you are not responsible for any costly repairs or maintenance that should have been addressed by the seller.
Additionally, the final inspection provides an opportunity to familiarize yourself with the property before taking ownership. You can take note of important features, such as the location of utility shut-offs, electrical panels, and HVAC systems. This knowledge will be invaluable as you settle into your new home and begin regular maintenance and repairs.
Overall, the purpose of the buyer’s final inspection is to empower you as the buyer to make an informed decision and protect your investment. It is your final opportunity to ensure that the property meets your expectations and that all obligations outlined in the purchase agreement have been fulfilled. So let’s move on to the next step and learn how to prepare for the inspection.
Preparing for the Inspection
Preparing for the buyer’s final inspection is essential in order to make the most of this crucial step. Here are some steps you can take to ensure a smooth and effective inspection:
- Review the purchase agreement: Familiarize yourself with the terms and conditions outlined in the purchase agreement. This will help you understand the seller’s obligations and what you should be looking for during the inspection.
- Coordinate with your real estate agent: Communicate with your real estate agent to ensure that all necessary arrangements are made for the inspection. They can help schedule the inspection and guide you through the process.
- Bring the inspection checklist: Create or obtain an inspection checklist to help you stay organized and ensure that you cover all aspects of the property. This can include items such as the exterior, interior, mechanical systems, and more.
- Gather necessary tools: Bring a notepad, camera, flashlight, and any other tools that may be helpful during the inspection. These will help you document any issues or concerns and provide evidence if needed later on.
- Set aside enough time: Allocate sufficient time for the inspection to thoroughly examine the property. Rushing through the process may cause you to overlook important details.
- Research the property: Before the inspection, take some time to research the property’s history and any past issues or repairs. This information can help you focus your inspection and be aware of potential areas of concern.
- Develop a plan: Determine the order in which you will inspect different areas of the property. This will help you stay organized and ensure that you cover everything.
- Notify the seller: If there are specific areas or issues you would like the seller to address during the inspection, notify them in advance. This will give them an opportunity to resolve any concerns before the inspection.
By following these preparation steps, you can approach the buyer’s final inspection with confidence and ensure that you are well-prepared to evaluate the property thoroughly. In the next section, we will provide you with a comprehensive checklist to guide you through the inspection process.
Checklist for the Buyer’s Final Inspection
When conducting the buyer’s final inspection, it’s important to have a checklist to ensure that you cover all the necessary areas and aspects of the property. Here is a comprehensive checklist to guide you through the inspection process:
Exterior:
- Inspect the roof for any signs of damage, such as missing shingles or leaks.
- Check the gutters and downspouts for debris or any visible damage.
- Examine the siding or exterior walls for cracks, peeling paint, or signs of water damage.
- Inspect the windows and doors for proper operation and any signs of air or water leakage.
- Check the condition of the driveway, walkways, and any outdoor structures, such as sheds or fences.
- Verify that the landscaping is in good condition and evaluate the drainage around the property.
Interior:
- Inspect all rooms for any visible damage, such as cracks in the walls or ceilings.
- Check the flooring for any signs of wear, stains, or damage.
- Test all light fixtures, switches, and outlets to ensure they are functioning properly.
- Inspect the plumbing, including faucets, toilets, and drains, for any leaks or signs of damage.
- Check the HVAC system to ensure it is in good working order and properly maintained.
- Inspect the attic and/or crawl space for proper insulation and ventilation.
Mechanical Systems:
- Inspect the electrical panel and check for any signs of outdated or faulty wiring.
- Test all appliances and ensure they are functioning properly.
- Check the water heater for leaks and ensure it is in good working condition.
- Inspect the HVAC system, including the furnace and air conditioning unit, and verify that they are operating effectively.
- Test the smoke detectors and carbon monoxide detectors to ensure they are functioning properly.
Overall Condition:
- Inspect the overall cleanliness and condition of the property.
- Take note of any signs of pests or infestations.
- Verify that all agreed-upon repairs have been completed to your satisfaction.
- Consider the general livability and functionality of the property, taking note of any areas that may need attention or improvement.
By using this checklist as a guide, you can ensure that you thoroughly inspect all aspects of the property during the buyer’s final inspection. Remember to take notes and document any issues or concerns you come across, as this will be helpful during the negotiation and resolution process. Now that you know how to conduct the inspection, let’s proceed to the next section to learn about common issues to look for during the inspection.
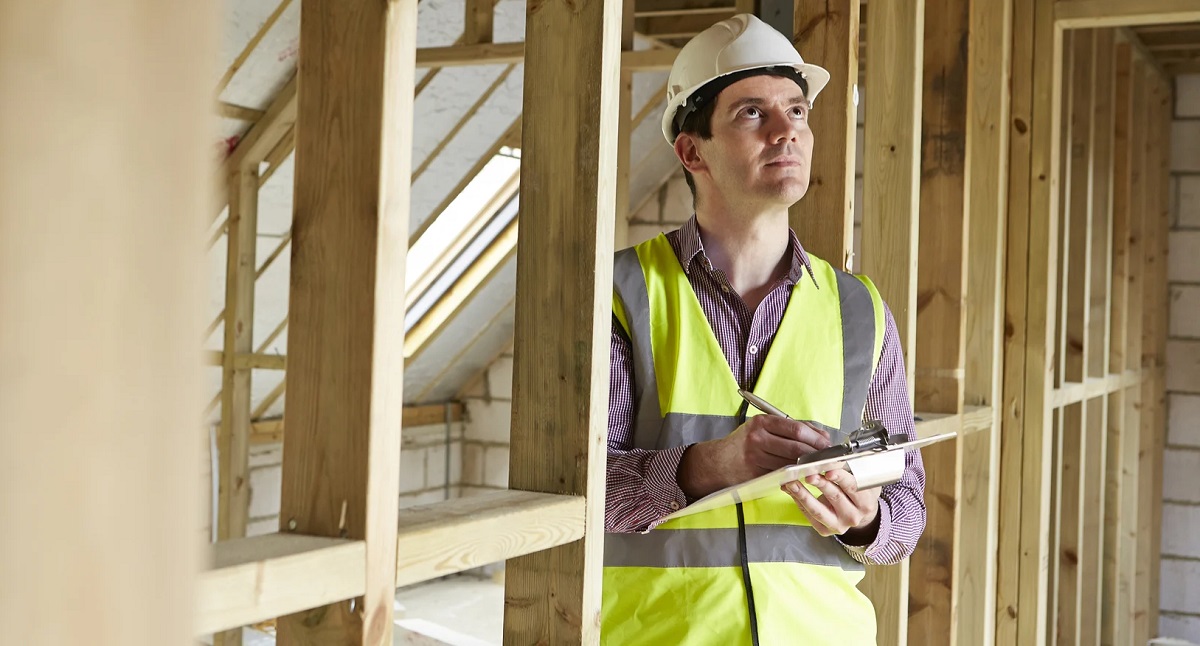
Conducting the Inspection
Now that you have prepared for the buyer’s final inspection and have a comprehensive checklist in hand, it’s time to conduct the inspection. Here are some tips to help you effectively and efficiently conduct the inspection:
Take Your Time:
Approach the inspection with a patient and thorough mindset. Take your time to carefully examine each area of the property and document any issues or concerns that you come across. It’s important not to rush through the inspection to avoid overlooking potential problems.
Refer to the Checklist:
Use the checklist you prepared as a guide to ensure that you cover all the necessary areas and aspects of the property. This will help you stay organized and ensure that nothing is missed during the inspection.
Document Issues:
As you go through the inspection, document any issues or concerns you come across. Take detailed notes and, if possible, take photos as evidence. This documentation will be useful when discussing the issues with the seller or negotiating repairs if needed.
Ask Questions:
If you come across something that you are unsure about or need further clarification on, don’t hesitate to ask questions. Your real estate agent or a professional inspector can provide insights and help you understand the significance of certain issues.
Test Systems and Appliances:
During the inspection, test all electrical systems, appliances, and mechanical systems to ensure they are functioning properly. Turn on lights, run water faucets, test outlets, and check the heating and cooling systems. This will help you identify any potential problems that may need attention.
Be Observant:
Pay close attention to any signs of water damage, mold, cracks in walls or ceilings, or any visible structural issues. Look for signs of pests or infestations as well. It’s essential to have a keen eye and be observant of even the smallest details.
Consult Professionals:
If you are unsure about the severity of a particular issue or need expertise in assessing a specific aspect of the property, don’t hesitate to consult professionals. A qualified inspector, contractor, or engineer can provide valuable insights and help you make informed decisions.
By following these guidelines and approaches, you can conduct the buyer’s final inspection effectively and ensure that no stone is left unturned. Remember to stay calm and focused throughout the process. In the next section, we will discuss common issues to look for during the inspection.
Common Issues to Look for During the Inspection
During the buyer’s final inspection, it’s important to keep an eye out for common issues that may impact the condition or value of the property. While the specific issues can vary depending on the age, location, and type of property, here are some common issues to look for:
Read more: Verification Of Property Condition: Buyer Final Inspection And Why This Form Is For Vacant Land
Structural Problems:
Inspect the foundation of the property for any visible cracks, signs of settling, or unevenness. Look for sagging floors, leaning walls, or doors and windows that do not close properly. These could be signs of structural issues that may require professional assessment and repair.
Water Damage and Leakages:
Check for any water stains on ceilings, walls, or floors, as they may indicate leaks or water intrusion. Look for signs of mold or mildew in bathrooms, basements, or areas with high humidity. Be sure to inspect plumbing fixtures, pipes, and appliances for any signs of leaks or water damage.
Electrical Problems:
Test light switches, outlets, and electrical systems to ensure they are in proper working condition. Look for any exposed wiring, outdated electrical panels, or faulty circuit breakers. Additionally, check for potential fire hazards such as overloaded electrical outlets or improperly installed wiring.
Roof Issues:
Inspect the roof for any missing or damaged shingles, signs of wear, or leakages. Look for sagging areas or loose tiles. Pay attention to the condition of flashing around chimneys, vents, and skylights. A well-maintained roof is crucial for protecting the property from water damage.
Read more: What Is The Final Completion In Construction
Plumbing Concerns:
Check for any leaks or water stains around sinks, toilets, and water fixtures. Run faucets and showers to ensure there is adequate water pressure and drainage. Examine the condition of pipes, especially in older homes, as corroded or damaged pipes can lead to leaks and water damage.
HVAC System Evaluation:
Inspect the heating, ventilation, and air conditioning (HVAC) system to ensure it is in proper working order. Test the furnace, air conditioning unit, and thermostat. Check for any unusual noises, improper ventilation, or signs of poor maintenance that may indicate the need for repairs or replacement.
Aesthetic Considerations:
While cosmetic issues may not be deal-breakers, it’s essential to take note of any major cosmetic concerns. Look for peeling paint, cracked tiles, damaged flooring, or other visible signs of wear and tear that may require attention or factor into future maintenance or renovation costs.
Permit and Code Compliance:
Ensure that any renovations or additions made to the property have the necessary permits and comply with local building codes. Unpermitted work may pose legal and safety risks. Consider requesting documentation from the seller to verify the proper permits were obtained.
These are just some of the common issues to look for during the final inspection. It’s important to approach the inspection with a critical eye and thoroughly evaluate the property to identify any potential problems. If you have any concerns or are unsure about any specific issue, consult with a professional inspector or contractor for a thorough assessment. In the next section, we will discuss how to resolve discrepancies and negotiate repairs based on the findings during the inspection.
Resolving Discrepancies and Negotiating Repairs
After completing the buyer’s final inspection, you may encounter discrepancies or issues that need to be addressed before finalizing the sale. Here’s a step-by-step guide on how to resolve these discrepancies and negotiate repairs:
1. Document and Prioritize:
Refer back to the notes and documentation you made during the inspection. Identify the issues that are most important to you and prioritize them based on their severity or potential impact on the property.
2. Consult with Professionals:
If you are unsure about the severity or potential costs of any particular issue, consider consulting with professionals such as contractors, engineers, or repair specialists. Their expertise can help you better understand the problem and determine appropriate solutions.
3. Prepare a Request for Repairs:
Based on your priorities and consultation with professionals, prepare a detailed and organized request for repairs or remedies. Be specific about the issues you identified and provide supporting evidence such as photos or inspection reports.
4. Submit the Request:
Submit your request for repairs to the seller or their agent in writing. Be sure to adhere to any deadlines or procedures outlined in the purchase agreement for submitting such requests. Communicate clearly and professionally, expressing your concerns and expectations.
5. Negotiation and Response:
The seller may respond to your request with a counteroffer or proposed solutions. Review their response carefully and assess whether their proposed actions adequately address your concerns. It may be necessary to negotiate further to reach a mutually acceptable agreement.
6. Consider Financial Adjustments:
If the seller is unwilling or unable to complete certain repairs, you may consider alternative options such as financial adjustments. Requesting a price reduction or seller credits at closing can help offset the cost of addressing the repairs yourself after the sale.
7. Consult with Your Agent:
Throughout the negotiations, it is essential to consult with your real estate agent. They can provide guidance and advocate on your behalf to help you navigate the process. They have experience in these situations and can advise you on the best course of action.
Read more: What Is A Buyer’s Inspection Advisory?
8. Resolve the Discrepancies:
Once negotiations are complete and all parties have agreed on the resolution, take the necessary steps to carry out the repairs or financial adjustments as agreed upon. Keep records and documentation of all communication and transactions related to the resolution of the discrepancies.
Resolving discrepancies and negotiating repairs is an important aspect of the buyer’s final inspection process. By effectively communicating your concerns and working cooperatively with the seller, you can ensure that necessary repairs or adjustments are made before finalizing the sale. In the next section, we will discuss the final steps to take after the inspection to finalize the sale.
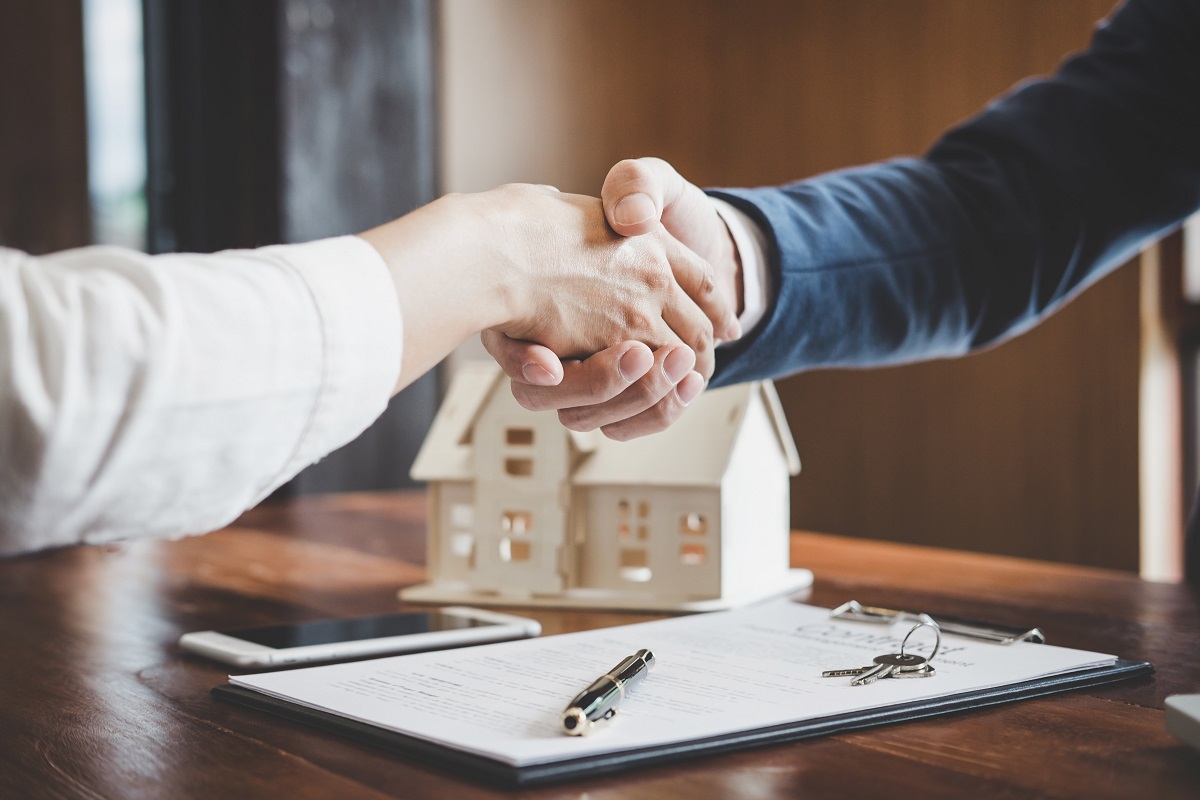
Finalizing the Sale After the Inspection
After completing the buyer’s final inspection and resolving any discrepancies or repairs, you are one step closer to finalizing the sale of your home. Here are the essential steps to take to complete the process:
1. Review the Resolution:
Ensure that all repairs or adjustments agreed upon during the negotiation process have been completed to your satisfaction. Review any documentation or receipts provided by the seller or contractors to verify the work that has been done.
2. Obtain Clearance Certificates:
If applicable, request clearance certificates for completed repairs or inspections, such as termite inspections or roofing certifications. These certificates provide assurance that the necessary work has been done according to industry standards and local regulations.
3. Review Closing Documents:
Carefully review all the closing documents provided by your lender, real estate agent, and the seller’s agent. This includes the settlement statement, loan documents, deed, and any other paperwork required for the closing. Make sure you understand the terms and conditions outlined in these documents before signing.
4. Conduct a Final Walk-Through:
Before the closing, schedule a final walk-through of the property to ensure that it is in the same condition as when you signed the purchase agreement and completed the buyer’s final inspection. Verify that any repairs or changes have been implemented as agreed upon.
5. Secure Homeowner’s Insurance:
Prior to closing, make sure you have secured homeowner’s insurance for the property. This is required by most lenders and protects your investment in case of damage or loss to the property.
6. Attend the Closing:
On the agreed-upon closing date, attend the closing meeting with your real estate agent, the seller, and your lender (if applicable). Review and sign all necessary documents, pay any remaining closing costs or fees, and receive the keys to your new home.
7. Update Utilities and Change of Address:
After the closing, update your utility accounts and inform service providers of the change in ownership. Forward your mail to your new address and update your contact information with any relevant institutions or organizations.
8. Celebrate and Settle In:
Congratulations! You have successfully finalized the sale of your new home. Take the time to celebrate this milestone and start settling into your new property. Consider conducting your own thorough inspection to familiarize yourself with the home and address any minor issues promptly.
By following these steps, you can confidently complete the sale and officially become the owner of your new home. Remember to keep copies of all closing documents and maintain a record of any warranties or guarantees provided for repairs or improvements. Now, it’s time to enjoy your new home!
Conclusion
Completing the buyer’s final inspection is a critical step in the home-buying process. It allows you to thoroughly assess the condition of the property and confirm that it meets your expectations before finalizing the sale. By following the steps outlined in this guide, you can conduct a comprehensive and effective inspection.
During the inspection, be diligent in identifying any issues or concerns, document them, and prioritize them based on their impact and severity. With a well-organized checklist and the guidance of professionals, you can navigate the inspection process with confidence.
In the event that discrepancies or repairs are needed, effective communication and negotiation skills will be key to reaching a mutually satisfactory resolution. Collaborate with the seller and your real estate agent to ensure that necessary repairs or financial adjustments are made before closing the sale.
Once all concerns have been addressed and the necessary paperwork has been reviewed and signed, you can proceed to the closing meeting. Take the time to conduct a final walk-through, update your utility services and address, and celebrate this milestone in becoming a homeowner.
Remember, the buyer’s final inspection serves to protect your investment and ensure that you are making an informed decision. By being thorough and proactive during the inspection process, you can minimize the risk of unexpected surprises and future expenses.
We hope this comprehensive guide has provided you with valuable insights and information to successfully complete the buyer’s final inspection. Armed with this knowledge, you are now well-equipped to navigate the home-buying process with confidence and peace of mind.
Happy house hunting and congratulations on finding your new home!
Frequently Asked Questions about How To Complete The Buyer's Final Inspection
Was this page helpful?
At Storables.com, we guarantee accurate and reliable information. Our content, validated by Expert Board Contributors, is crafted following stringent Editorial Policies. We're committed to providing you with well-researched, expert-backed insights for all your informational needs.

0 thoughts on “How To Complete The Buyer’s Final Inspection”