Home>Home Maintenance>What Need To Do For AC Maintenance
Home Maintenance
What Need To Do For AC Maintenance
Modified: March 25, 2024
Ensure the longevity of your home's air conditioning system with proper maintenance. Follow these steps for effective AC maintenance and keep your home cool and comfortable.
(Many of the links in this article redirect to a specific reviewed product. Your purchase of these products through affiliate links helps to generate commission for Storables.com, at no extra cost. Learn more)
Introduction
Welcome to a comprehensive guide on AC maintenance. In today’s modern world, air conditioning has become an essential part of our lives, providing comfort and relief from the scorching heat. To ensure that your AC system functions efficiently and effectively, regular maintenance is crucial.
AC maintenance involves a series of steps and tasks that are designed to keep your air conditioning unit in optimal condition. By following these maintenance procedures, you can not only extend the lifespan of your AC system but also improve its performance and energy efficiency.
In this article, we will explore the importance of AC maintenance and discuss some key signs of AC problems. We will also provide you with a step-by-step guide on how to properly maintain your AC system and keep it running smoothly.
Whether you are a homeowner or a renter, understanding the significance of AC maintenance can help you save money in the long run. Neglecting regular maintenance can lead to costly repairs, decreased efficiency, and even a complete breakdown of your AC unit. By being proactive and investing time in maintenance tasks, you can prevent these issues and enjoy a cool and comfortable living environment.
So, let’s dive deep into the world of AC maintenance and learn how to take care of our air conditioning systems effectively.
Key Takeaways:
- Regular AC maintenance is crucial for efficient cooling, lower energy bills, and cleaner air. Follow simple steps like cleaning filters and checking refrigerant levels to keep your AC running smoothly.
- By performing regular AC maintenance, you can prevent costly repairs, ensure reliable cooling, and enjoy a comfortable living environment. Simple tasks like cleaning coils and adjusting thermostat settings can make a big difference.
Read more: How Many Btu AC Do I Need
Importance of AC Maintenance
Regular AC maintenance is essential for several reasons. Let’s explore the key reasons why you should prioritize the maintenance of your air conditioning system:
- Enhanced Energy Efficiency: A well-maintained AC unit operates more efficiently, using less energy to cool your home. This translates to lower energy bills, saving you money in the long run.
- Improved Air Quality: Over time, dust, dirt, and other particles can accumulate in your AC system. Regular maintenance includes cleaning or replacing filters, ensuring clean and fresh air circulation, and reducing allergens and pollutants in your home.
- Extended Lifespan: Just like any other mechanical system, regular maintenance can help extend the lifespan of your AC unit. By keeping all components clean, lubricated, and in good condition, you can avoid premature wear and tear, ultimately prolonging the life of your investment.
- Early Detection of Issues: Regular maintenance allows for the early detection of potential problems. By identifying and addressing minor issues before they escalate, you can prevent major breakdowns and costly repairs.
- Optimal Performance: AC maintenance ensures that your system operates at its optimal performance level. This means you can enjoy consistent cooling throughout your home, even during the hottest summer days.
- Warranty Protection: Many AC units come with manufacturer warranties that require regular maintenance to remain valid. By neglecting maintenance, you may void your warranty and be responsible for covering the costs of repairs or replacements.
- Peace of Mind: Lastly, regular AC maintenance allows you to have peace of mind, knowing that your system is in good working order. It eliminates the stress and inconvenience of unexpected breakdowns, giving you comfort and reliability when you need it most.
By understanding the importance of AC maintenance, you can prioritize the well-being of your system and enjoy the numerous benefits it brings. Now that we’ve explored its significance, let’s move on to identifying the signs that indicate your AC system may need maintenance or repairs.
Signs of AC Problems
Being able to recognize the signs of AC problems is crucial in maintaining the efficiency and performance of your air conditioning system. Here are some common indicators that your AC unit may be experiencing issues:
- Insufficient Cooling: If you notice that your AC is no longer providing consistent or sufficient cooling to your home, it could be a sign of a problem. This may be due to a refrigerant leak, a malfunctioning compressor, or issues with the ductwork.
- Strange Noises: Unusual sounds coming from your AC unit, such as grinding, banging, or squealing noises, should not be ignored. These noises can indicate problems with the fan motor, compressor, or other internal components.
- Frequent Cycling On and Off: If your AC system cycles on and off frequently, it may be a sign of an underlying issue. This could be caused by a faulty thermostat, improper refrigerant levels, or a malfunctioning compressor.
- Unpleasant Odors: Strange smells emanating from your AC unit can indicate mold or mildew growth, clogged drains, or burnt-out wiring. These issues not only affect the air quality in your home but also indicate potential health hazards.
- Poor Airflow: If you notice weak or restricted airflow coming from your vents, it could be a sign of a clogged air filter, ductwork problems, or a malfunctioning fan motor. Restricted airflow can negatively impact your AC system’s performance and energy efficiency.
- Leakage or Moisture: Any signs of water leakage or excessive moisture around your AC unit should be addressed immediately. This could indicate a refrigerant leak, a clogged or damaged condensate drain line, or a malfunctioning component.
- High Energy Bills: If you notice a sudden increase in your energy bills without any change in usage patterns, it may be a sign that your AC system is working harder than necessary. This could be due to issues such as a dirty filter, improper airflow, or a malfunctioning thermostat.
If you observe any of these signs, it is important to take prompt action and address the underlying issues. Ignoring these problems can lead to further damage to your AC unit and potentially result in expensive repairs or even a complete system failure. Regular maintenance can help prevent many of these problems from occurring in the first place, so let’s move on to learning the steps for AC maintenance.
Steps for AC Maintenance
To keep your air conditioning system running smoothly and efficiently, it is important to perform regular maintenance. By following these steps, you can ensure that your AC unit remains in optimal condition:
- Clean or Replace the Air Filters: Dirty air filters can restrict airflow and reduce the efficiency of your AC system. Clean or replace the filters every 1-2 months, or as recommended by the manufacturer.
- Clear Dust and Debris from Vents and Ducts: Use a vacuum cleaner or a soft brush to remove dust, pet hair, and debris from the vents and ducts. This helps maintain proper airflow and prevents blockages.
- Check and Clean the Condenser Coils: Inspect the outdoor condenser unit for dirt and debris. Use a hose or a soft brush to gently clean the coils, removing any buildup that can inhibit heat transfer.
- Inspect and Tighten Electrical Connections: Turn off the power to your AC unit and inspect the electrical connections for any loose or damaged wires. Tighten any loose connections and replace frayed wires if necessary.
- Lubricate Moving Parts: Lubricate the motor and other moving parts of your AC unit to reduce friction and prevent wear and tear. Refer to the manufacturer’s instructions for proper lubrication techniques.
- Check the Refrigerant Levels: Monitor the refrigerant levels in your AC system. Low levels can indicate a leak and affect the cooling performance. If you suspect a leak, contact a professional technician to address the issue.
- Clean or Replace the Blower Motor: Clean the blower motor blades and housing to remove dust and debris. If the motor is damaged or not functioning properly, consider replacing it for optimal performance.
- Inspect and Clean the Evaporator Coils: Remove the access panel to your indoor AC unit and inspect the evaporator coils for dust and dirt buildup. Use a soft brush or compressed air to clean the coils gently.
- Clear the Condensate Drain Line: Check the condensate drain line for clogs and blockages. Use a mixture of bleach and water to flush out any buildup and ensure proper drainage.
- Test and Adjust Thermostat Settings: Verify the accuracy of your thermostat and calibrate it if necessary. Consider upgrading to a programmable thermostat for greater control and energy savings.
By following these steps on a regular basis, you can maintain the efficiency, performance, and longevity of your AC system. However, it is essential to remember that some maintenance tasks are best left to professional technicians. If you are unsure or uncomfortable performing certain procedures, it is always wise to seek professional assistance.
Now that you have learned the steps for AC maintenance, you are well-equipped to take care of your air conditioning system and enjoy years of comfortable and reliable cooling. Remember, prevention is key, so don’t neglect regular maintenance!
Clean or Replace the Air Filters
One of the most important steps in AC maintenance is cleaning or replacing the air filters. AC filters are responsible for capturing dust, pollen, and other particles from the air, ensuring cleaner and healthier indoor air quality. Over time, these filters can become clogged with dirt and debris, obstructing airflow and reducing the efficiency of your AC system. Therefore, it is crucial to clean or replace the filters regularly.
The frequency of cleaning or replacing the filters depends on several factors, including the type of filter, the level of indoor air pollution, and the usage of your AC system. As a general guideline, it is recommended to clean or replace the filters every 1-2 months, or as recommended by the manufacturer.
To clean the filters, follow these steps:
- Turn off your AC system: Before attempting any maintenance on your AC unit, ensure that the power is turned off to prevent any accidents or injury.
- Locate the air filters: The air filters are typically located behind a front panel of your AC unit or in the return air ducts. Consult your AC unit’s manual or manufacturer’s instructions if you are unsure.
- Remove the filters: Gently remove the filters from their housing. Be careful not to damage or bend the filter frame.
- Clean the filters: If your filters are reusable, use a vacuum cleaner or a soft brush to remove the dust and debris. You can also rinse the filters with water, ensuring that you let them dry completely before reinstalling them.
- Replace the filters: If your filters are disposable, it is recommended to replace them with new ones. Make sure to choose the correct size and type of filter for your AC system.
- Reinstall the filters: Carefully place the filters back into their housing, ensuring that they are properly aligned and securely in place.
- Turn on the AC system: After cleaning or replacing the filters, you can turn on the power to your AC system and enjoy improved airflow and cleaner air in your home.
Regularly cleaning or replacing your air filters not only improves the efficiency of your AC system but also enhances the quality of the air you breathe. By ensuring proper airflow, your AC unit can cool your home more effectively, resulting in better comfort and energy savings.
Remember, different AC systems may have different filter types and maintenance requirements. Therefore, it is essential to refer to the manufacturer’s instructions or seek professional guidance if you are unsure about the specific maintenance needs of your AC unit.
Read more: What Size Window AC Unit Do I Need
Clear Dust and Debris from Vents and Ducts
Another important step in AC maintenance is clearing dust and debris from the vents and ducts. Over time, dust, pet hair, and other particles can accumulate in the vents and ducts of your AC system. This buildup can restrict airflow, reduce cooling efficiency, and even worsen indoor air quality. Therefore, it is essential to regularly clean and clear the vents and ducts to ensure optimal performance.
Here’s how you can clear dust and debris from your vents and ducts:
- Turn off your AC system: Before starting any maintenance, make sure your AC system is turned off to avoid any accidents or injuries.
- Access the vents and ducts: Locate the vents in each room and remove the vent covers. You may need a screwdriver or simply use your hands to unscrew or pull the covers off. If you have central air conditioning, you may need to access the ductwork in the basement or attic.
- Clean the vent covers: Use a vacuum cleaner with a brush attachment or a damp cloth to clean the vent covers thoroughly. Remove any dust, dirt, or debris that may have accumulated on the covers.
- Clean the vents and ducts: Use a vacuum cleaner with a long hose or a soft brush attachment to clean the inside of the vents and ducts. Carefully insert the hose or brush into the vents and gently move it back and forth to dislodge any dust or debris.
- Clear any obstructions: If you notice any obstructions, such as toys, leaves, or excess buildup, use a vacuum cleaner or your hands (if accessible) to remove them carefully.
- Replace the vent covers: Once you have cleaned the vents and ducts and cleared any obstructions, reattach the vent covers securely in each room.
- Turn on the AC system: After completing the cleaning process, you can turn on your AC system and enjoy improved airflow and better cooling performance.
Clearing dust and debris from the vents and ducts not only helps maintain proper airflow but also ensures cleaner and healthier indoor air quality. By removing these obstructions, you can prevent potential blockages and enhance the efficiency of your AC system.
If you are unsure about accessing or cleaning your vents and ducts, or if you suspect significant buildup or mold growth, it is recommended to seek professional assistance. Professional technicians have the necessary tools and expertise to perform thorough duct cleaning, ensuring optimal airflow and air quality.
By incorporating this step into your AC maintenance routine, you can maintain the performance and efficiency of your AC system, providing you with cool and comfortable air throughout your home.
Check and Clean the Condenser Coils
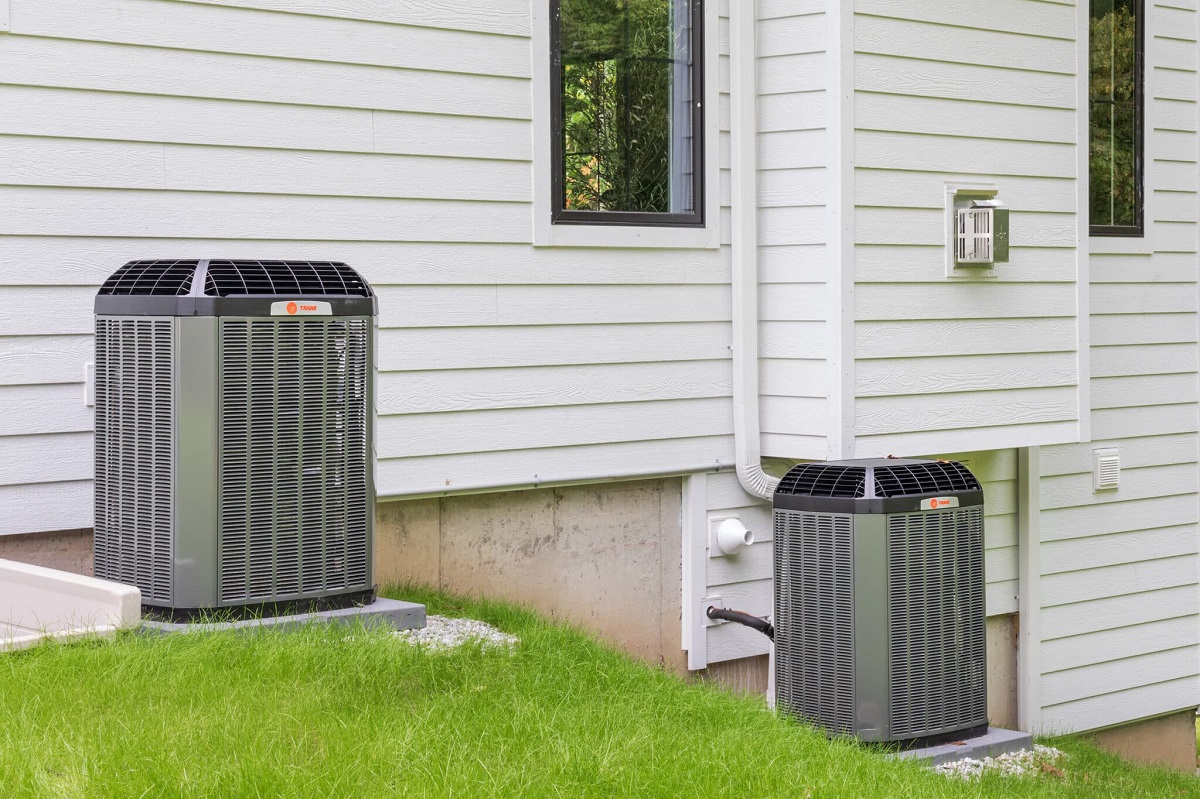
Checking and cleaning the condenser coils of your AC system is a crucial step in maintenance. The condenser coils, located in the outdoor unit of your AC system, play a significant role in dissipating heat absorbed from the indoor air. Over time, these coils can accumulate dirt, dust, and debris, hindering their ability to efficiently release heat. Cleaning the condenser coils helps improve the overall performance and energy efficiency of your AC system.
Follow these steps to check and clean the condenser coils:
- Turn off your AC system: As with any maintenance procedure, ensure that the power to your AC unit is turned off for safety reasons.
- Access the condenser unit: Find the outdoor unit of your AC system, typically located at the side or back of your house. Remove any obstructions, such as leaves, grass, or debris, around the unit.
- Inspect the condenser coils: Carefully examine the condenser coils for any dirt, dust, or debris buildup. Use a flashlight if necessary to get a better view. If you notice heavy buildup or damage to the coils, consider seeking professional assistance.
- Clean the condenser coils: Using a garden hose or a coil-cleaning solution, gently spray water or apply the cleaning solution to the coils. Start from the top and work your way down to ensure thorough cleaning. Avoid using excessive pressure that can bend or damage the fragile fins. Consult the manufacturer’s instructions for any specific cleaning recommendations.
- Remove stubborn dirt and debris: For stubborn dirt or debris stuck on the coils, use a soft brush or a coil-fin comb to carefully dislodge and remove them. Take care not to damage the delicate fins while doing so.
- Clean the surrounding area: While cleaning the condenser coils, also clean the surrounding area to prevent any debris from entering the unit again. Remove any loose debris and trim vegetation around the unit to ensure adequate airflow.
- Allow the coils to dry: After cleaning, allow the condenser coils to dry completely before turning on your AC system. This will prevent any potential electrical issues or damage to the components.
- Turn on the AC system: Once the condenser coils are dry, you can turn on your AC system. Enjoy improved cooling performance and increased energy efficiency resulting from clean and well-maintained coils.
Regularly checking and cleaning the condenser coils of your AC unit is essential to ensure its efficiency and longevity. By removing dirt and debris, you allow the coils to function optimally, improving the overall cooling performance of your AC system.
Keep in mind that while cleaning the condenser coils is an essential maintenance task, some aspects of AC system maintenance are best left to professional technicians. If you encounter any issues or are uncertain about how to proceed, it is always advisable to seek professional assistance.
By incorporating this step into your AC maintenance routine, you can ensure that your system operates at peak performance and provides you with cool and comfortable air during the hot summer months.
Inspect and Tighten Electrical Connections
Inspecting and tightening electrical connections is an important step in AC maintenance that helps ensure the safe and efficient operation of your system. Over time, the vibrations and normal wear and tear of your AC unit can cause electrical connections to become loose or compromised. Loose connections can lead to improper voltage supply, increased energy consumption, and even pose a safety hazard. Therefore, it is essential to regularly inspect and tighten the electrical connections to maintain the integrity of your AC system.
Follow these steps to inspect and tighten electrical connections:
- Turn off the power: As with any electrical work, start by turning off the power to your AC unit at the main electrical panel. This step is crucial to avoid the risk of electric shock.
- Access the electrical panel: Locate the electrical panel near your AC unit. It is typically a gray metal box mounted on a wall or in a utility closet.
- Inspect the electrical connections: Carefully remove the cover of the electrical panel to access the internal components. Take a close look at the wires, terminals, and connectors for any signs of corrosion, fraying, or loose connections.
- Tighten any loose connections: If you identify a loose connection, use a screwdriver or a wrench to tighten the terminal screws or connectors. Ensure that you tighten the connections securely without overtightening, as this can cause damage as well.
- Check for damaged wires: Examine the wires for any signs of damage, such as cracks, insulation wear, or exposed conductors. If you notice any damage, it is advisable to contact a professional technician to address the problem.
- Replace damaged wires or connectors: If you discover any damaged wires or connectors, it is important to replace them promptly. Using damaged components can lead to electrical issues and compromise the safety of your AC system.
- Secure the electrical panel cover: After completing the inspection and tightening of the electrical connections, securely close the electrical panel cover to protect the internal components.
- Turn on the power: Restore power to your AC unit by switching on the breaker at the main electrical panel. Ensure that your system is functioning correctly and check for any error codes or warning lights that may indicate ongoing electrical issues.
Regularly inspecting and tightening electrical connections can help prevent electrical problems, reduce the risk of system malfunctions, and ensure the safe operation of your AC unit. However, if you are unsure about performing this task or encounter any complex electrical concerns, it is recommended to seek assistance from a qualified HVAC technician.
By incorporating this step into your overall AC maintenance routine, you can have peace of mind knowing that your AC system is operating with efficient electrical connections, enhancing its performance and prolonging its lifespan.
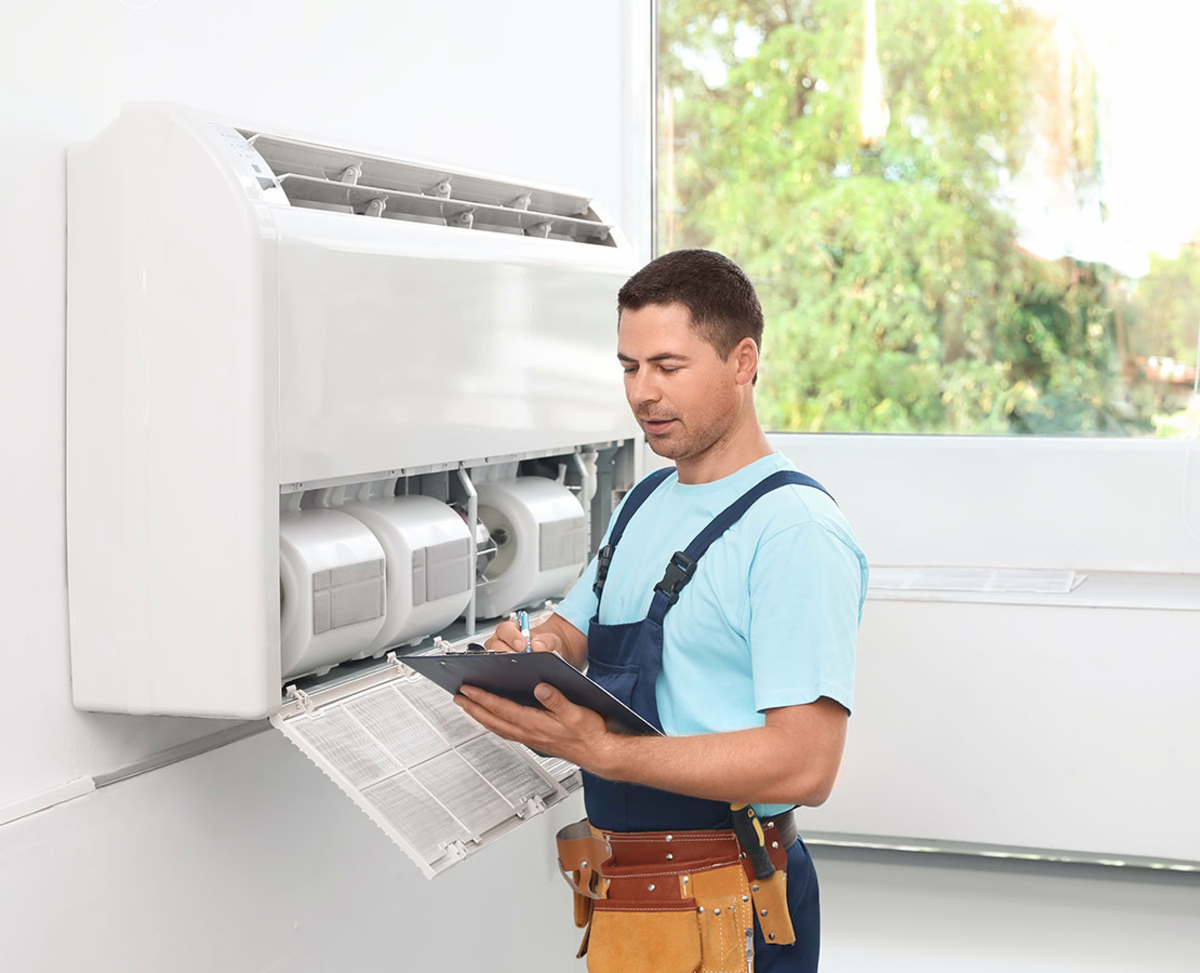
Regularly clean or replace the air filters in your AC unit to ensure proper airflow and efficiency. This can help prevent breakdowns and improve indoor air quality.
Lubricate Moving Parts
Lubricating the moving parts of your AC system is an essential step in maintenance that helps reduce friction, prevent wear and tear, and ensure smooth operation. The various components of your AC unit, such as motors, fans, and bearings, require proper lubrication to function efficiently and enhance the overall performance of your system. Regularly lubricating these moving parts can extend their lifespan and improve the energy efficiency of your AC system.
Follow these steps to lubricate the moving parts of your AC unit:
- Turn off the power: Start by turning off the power to your AC system at the electrical panel. This is crucial to prevent any accidents or injuries during the lubrication process.
- Refer to the manufacturer’s instructions: Consult the manufacturer’s manual or the documentation provided with your AC unit to identify the specific parts that require lubrication and the recommended type of lubricant to use.
- Locate the moving parts: Identify the moving parts in your AC system that require lubrication. This may include the fan motor, bearings, and other mechanical components.
- Clean the parts: Before applying lubricant, ensure that the moving parts are clean and free of any dirt or debris. Use a soft cloth or brush to gently remove any buildup that may hinder proper lubrication.
- Apply the lubricant: Using the recommended lubricant, carefully apply a few drops or a thin layer to the designated areas. Avoid over-lubricating, as excessive lubrication can attract more dirt and cause other issues.
- Rotate the parts: After applying the lubricant, manually rotate the moving parts a few times to allow the lubricant to spread evenly and ensure proper coverage. This will help distribute the lubricant and reduce friction.
- Wipe off excess lubricant: Use a clean cloth to wipe off any excess lubricant that may have accumulated on the surfaces. This will help prevent dust and debris from sticking to the lubricant.
- Turn on the power: Once you have completed the lubrication process and ensured that all excess lubricant is wiped off, you can turn on the power to your AC system. Verify that the moving parts are operating smoothly and without any unusual noises.
Proper lubrication of the moving parts in your AC system is essential to reduce friction and promote smooth operation. By reducing friction, you can minimize the strain on the components, increase energy efficiency, and extend the lifespan of your AC unit.
Remember, it is important to follow the manufacturer’s instructions and recommendations for lubricating specific parts of your AC system. If you are uncertain about the lubrication process or the appropriate lubricant to use, it is recommended to consult a professional technician.
By incorporating this step into your regular AC maintenance routine, you can ensure that the moving parts of your AC system are well-maintained, allowing for efficient and reliable performance throughout the cooling season.
Read more: What Tools Do You Need For HVAC
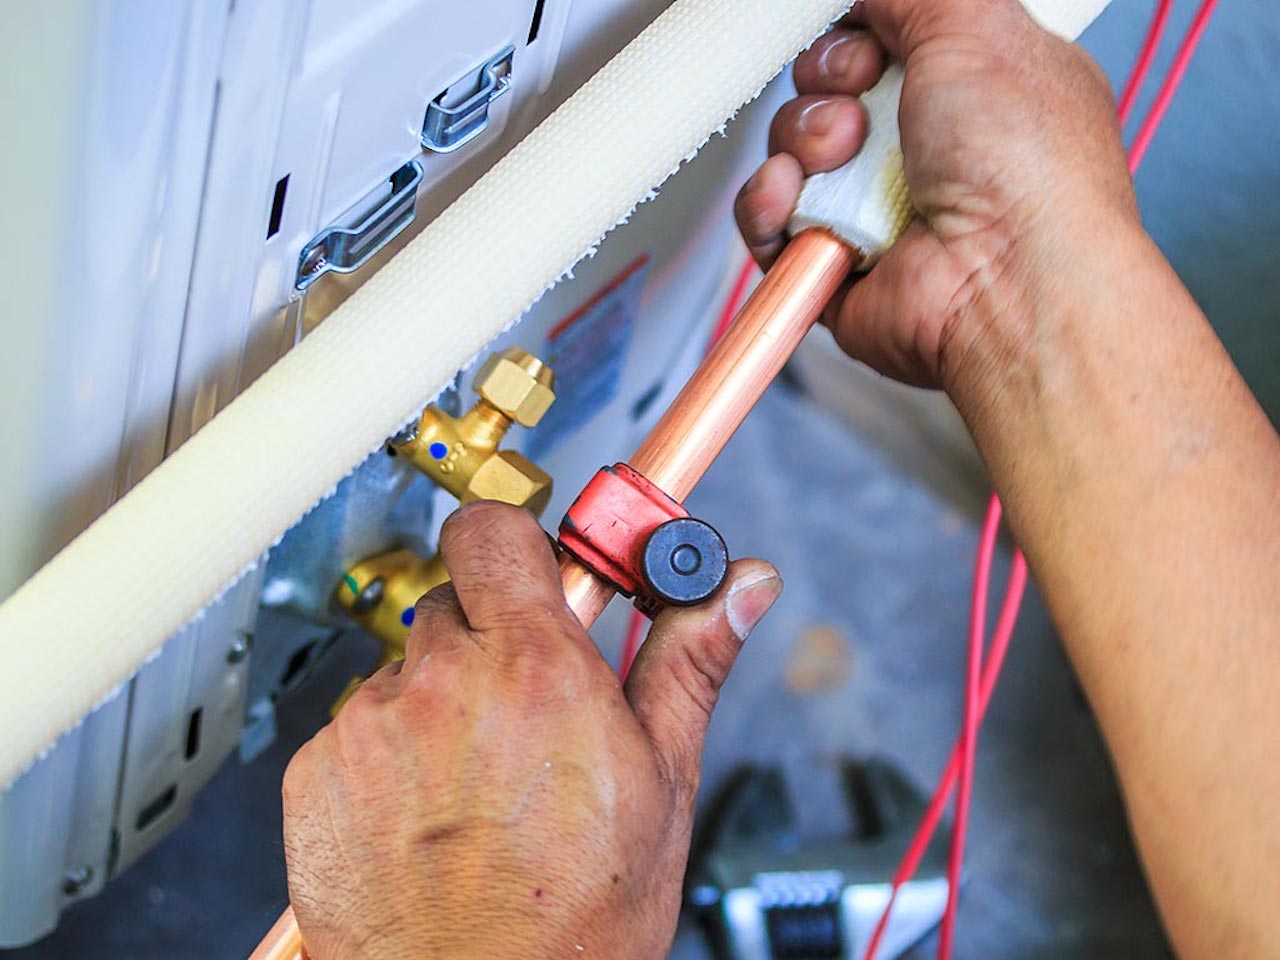
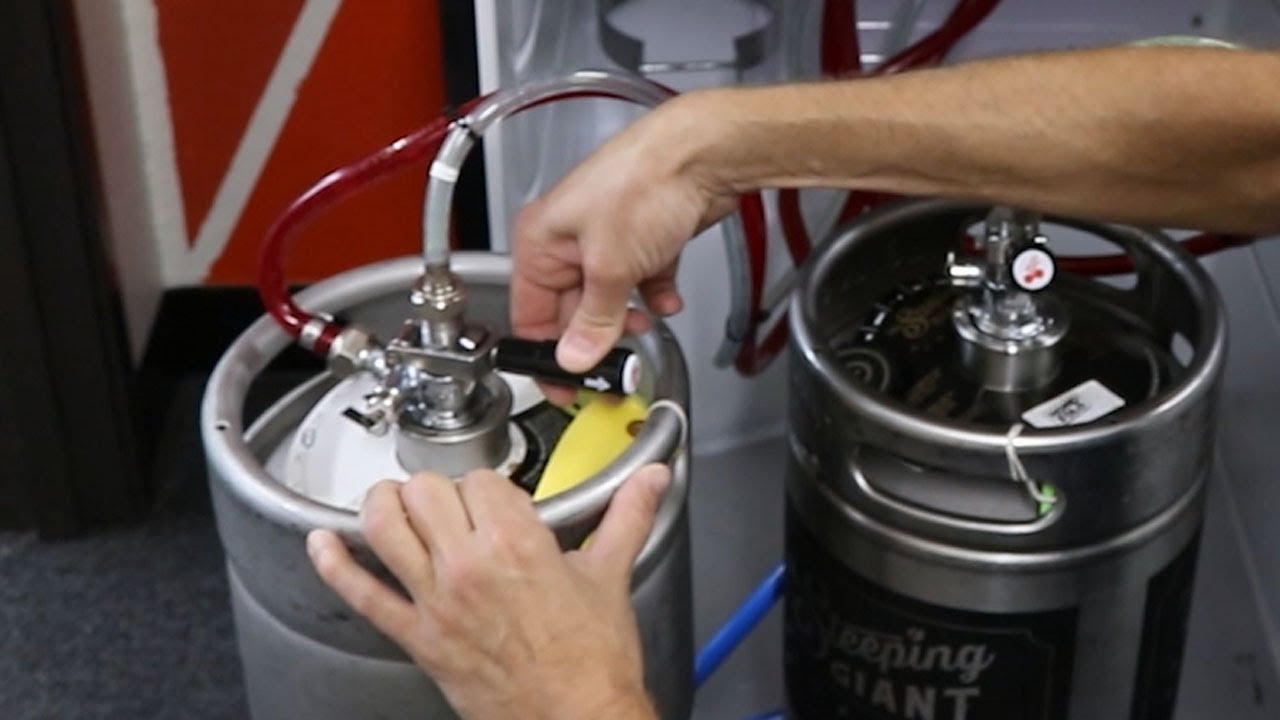
Check the Refrigerant Levels
Checking the refrigerant levels in your AC system is an important maintenance task that ensures proper cooling performance. Refrigerant is the substance responsible for absorbing heat from your indoor air and releasing it outside. Over time, refrigerant levels can become low due to leaks or other issues, which can result in reduced cooling efficiency and potential damage to your AC unit. Therefore, it is crucial to regularly check and maintain the appropriate refrigerant levels in your system.
Here are the steps to check the refrigerant levels in your AC system:
- Turn off the power: Begin by switching off the power to your AC unit at the electrical panel. This step is essential to prevent any accidents or injuries during the maintenance procedure.
- Locate the refrigerant lines: Identify the refrigerant lines that connect the indoor and outdoor units of your AC system. These lines are typically made of copper or aluminum and can be found near the AC compressor unit.
- Inspect the refrigerant lines: Carefully examine the refrigerant lines for any signs of damage, such as cracks, corrosion, or oil stains. These signs may indicate a refrigerant leak, which should be addressed by a professional technician.
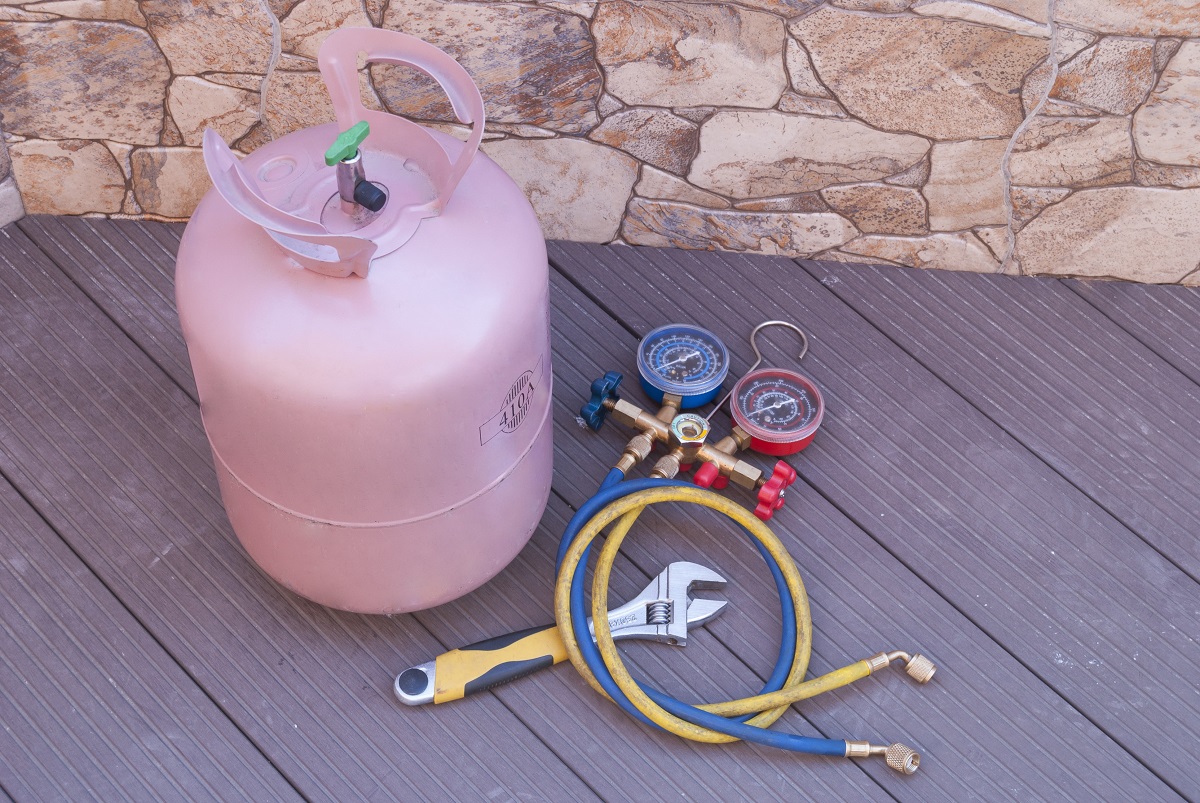
- Check the sight glass or pressure gauge: Some AC systems have a sight glass or pressure gauge that can help indicate the refrigerant level. Consult your AC unit’s manual or manufacturer’s instructions to locate and interpret the information provided by the sight glass or pressure gauge.
- Hire a professional technician for detailed check: While visual inspection can provide some insights, a more accurate assessment of refrigerant levels requires specialized equipment and expertise. It is advisable to hire a professional HVAC technician to perform a proper refrigerant level check using gauges and other measuring tools.
- Address low refrigerant levels: If the refrigerant levels are found to be low, it indicates a potential leak in your AC system. In this case, it is important to contact a professional technician to identify and repair the source of the leak. Once the leak is fixed, the technician can recharge the AC system with the appropriate amount of refrigerant.
- Turn on the power: After the refrigerant levels have been checked and any necessary repairs or recharging have been completed, you can safely turn on the power to your AC system. Monitor the cooling performance and ensure that the system is functioning properly.
Regularly checking the refrigerant levels in your AC system helps ensure that your unit operates at its optimal cooling capacity. By maintaining the appropriate refrigerant levels, you can enjoy efficient and effective cooling, lower energy consumption, and longer system lifespan.
Remember, refrigerant leak detection and handling should be performed by a professional technician. They have the expertise, tools, and knowledge to safely handle refrigerant and address any issues related to refrigerant levels in your AC unit.
Incorporating this step into your AC maintenance routine can help you identify and address potential problems early on, ensuring that your AC system operates at its best and keeps you cool during the hot summer months.
Clean or Replace the Blower Motor
The blower motor plays a crucial role in your AC system by circulating cool air throughout your home. Over time, the blower motor can accumulate dust, dirt, and debris, which can hinder its performance and reduce airflow. Regularly cleaning or replacing the blower motor is an important maintenance step to ensure efficient and reliable operation of your AC system.
Follow these steps to clean or replace the blower motor in your AC system:
- Turn off the power: Begin by switching off the power to your AC unit at the electrical panel. This step is necessary to prevent any accidents or injuries.
- Locate the blower motor: Find the blower motor, which is typically located inside the air handler unit or attached to the furnace. Refer to the manufacturer’s instructions or consult a professional technician if you are unsure about its location.
- Inspect the motor: Carefully examine the blower motor for any signs of dirt, dust, or debris buildup. Pay attention to the motor blades, housing, and other components. If the motor is damaged or shows signs of wear, it may need to be replaced instead of just cleaning it.
- Clean the motor: If the blower motor is dirty but still in good condition, you can clean it by removing the motor assembly from the air handler or furnace. Use a soft brush or a vacuum cleaner with a brush attachment to gently remove the dust and debris from the motor blades, housing, and other accessible parts. Take care not to dislodge any wires or damage the motor during the cleaning process.
- Replace the motor (if necessary): If the blower motor is damaged or shows signs of wear, it may need to be replaced. In this case, it is advisable to contact a professional technician who can assess the motor and recommend the appropriate replacement motor for your AC system.
- Reinstall the motor: After cleaning or replacing the blower motor, securely reinstall it back into the air handler or furnace, ensuring that all connections are properly reattached.
- Turn on the power: Once the blower motor is cleaned or replaced and properly installed, you can turn on the power to your AC system. Check for proper airflow and listen for any unusual noises coming from the blower motor.
Cleaning or replacing the blower motor of your AC system is essential to maintain optimal airflow, improve energy efficiency, and ensure consistent cooling performance. A clean blower motor helps prevent dust and debris from being circulated throughout your home and can extend the lifespan of your system.
If you are unsure about cleaning or replacing the blower motor or if you notice any significant damage or issues, it is recommended to seek professional assistance. HVAC technicians have the expertise and knowledge to handle blower motor cleaning, replacement, and other advanced maintenance tasks.
By including this step in your AC maintenance routine, you can keep the blower motor in top condition, allowing for efficient air circulation and reliable cooling throughout your home.
Inspect and Clean the Evaporator Coils
Inspecting and cleaning the evaporator coils is an important step in maintaining the efficiency and performance of your AC system. The evaporator coils are located inside the indoor unit of your AC system and are responsible for removing heat from the air. Over time, these coils can accumulate dirt, dust, and debris, reducing their ability to efficiently cool the air. Regularly inspecting and cleaning the evaporator coils can enhance the cooling efficiency and overall effectiveness of your AC system.
Follow these steps to inspect and clean the evaporator coils:
- Turn off the power: Begin by switching off the power to your AC unit at the electrical panel. This is a crucial safety measure to avoid any electrical accidents or injuries.
- Access the evaporator coil: Locate the access panel on the indoor unit of your AC system. The evaporator coil is typically behind this panel. Refer to the manufacturer’s instructions or consult a professional technician if you are unsure.
- Inspect the evaporator coil: Carefully examine the evaporator coil for any signs of dirt, dust, or debris buildup. Inspect both sides of the coil, checking for any visible blockages or restrictions that may hinder proper cooling.
- Clean the coils: If the evaporator coil is dirty, you can clean it using a soft brush or a vacuum cleaner with a brush attachment. Gently brush or vacuum the coil to remove the dust and debris. Avoid using excessive force that may damage the fins or coils.
- Use a coil cleaner (if needed): In some cases, especially if the evaporator coil is heavily soiled, you may need to use a commercially available coil cleaner. Follow the manufacturer’s instructions on how to apply the cleaner and rinse it off properly.
- Clean the condensate drain pan: While inspecting and cleaning the evaporator coils, check the condensate drain pan located underneath the coils. If you notice any water or algae buildup, clean the drain pan to maintain proper drainage and prevent clogs.
- Reinstall the access panel: Once you have completed cleaning the evaporator coils and the condensate drain pan, securely reattach the access panel to the indoor unit.
- Turn on the power: After ensuring that everything is properly reinstalled and secured, you can turn on the power to your AC system. Monitor the cooling performance to ensure it is functioning correctly without any issues.
Regularly inspecting and cleaning the evaporator coils in your AC system is vital to maintain efficient cooling and prevent potential issues. By removing dirt and debris, you allow the coils to transfer heat more effectively, resulting in improved cooling performance and energy efficiency.
If you encounter any difficulties or are uncertain about how to properly inspect and clean the evaporator coils or the condensate drain pan, it is advisable to seek professional assistance. HVAC technicians have the expertise and tools required to perform thorough coil cleaning and maintenance.
By including this step in your AC maintenance routine, you can ensure that the evaporator coils are clean and functioning optimally, allowing for consistent and efficient cooling in your home.
Clear the Condensate Drain Line
Clearing the condensate drain line is a vital step in AC maintenance that helps prevent clogs and water damage. As your AC system cools the air, it creates condensation, which is typically collected and drained through a condensate drain line. Over time, this drain line can become clogged with dirt, algae, or other debris, leading to water leaks or even potential damage to your AC system. Regularly clearing the condensate drain line helps maintain proper drainage and prevents blockages.
Follow these steps to clear the condensate drain line:
- Turn off the power: Start by turning off the power to your AC unit at the electrical panel. This is essential for your safety and prevents any electrical accidents.
- Locate the condensate drain line: Locate the condensate drain line, which is typically a PVC pipe connected to the indoor unit of your AC system. It may be in a basement, utility closet, or crawl space.
- Inspect the drain line: Examine the condensate drain line for any signs of clogs or blockages. Look for stagnant water, algae growth, or debris accumulation.
- Clear the line manually: If you observe a clog near the opening of the drain line, you can try to clear it manually. Use a wet/dry vacuum or a long, flexible brush to dislodge and extract any debris or obstructions. Be gentle to avoid damaging the drain line.
- Use a mixture of bleach and water: For a more thorough cleaning, create a mixture of one part bleach to ten parts water. Pour this mixture into the condensate drain line to help clear any algae or mold growth inside. Allow the mixture to sit for a few minutes.
- Flush the drain line: After the mixture has had time to work, flush the drain line with clean water to remove any loosened debris and ensure proper drainage. You can use a funnel or pour water directly into the opening of the drain line.
- Consider installing a condensate drain line cleanout: To make future maintenance easier, consider installing a condensate drain line cleanout. This allows for easier access to clean the line and prevent future clogs.
- Turn on the power: Once you have cleared the condensate drain line and ensured proper drainage, you can turn on the power to your AC system. Monitor the cooling performance and check for any signs of water leakage or drainage issues.
Regularly clearing the condensate drain line is essential in preventing water damage and the growth of mold or algae in your AC system. By maintaining clear and unobstructed drainage, you can ensure the proper functioning and longevity of your AC unit.
If you encounter significant clogs, excessive algae growth, or difficulty in clearing the condensate drain line, it is recommended to seek professional assistance. HVAC technicians have the expertise and tools necessary to handle more complex draining issues.
By incorporating this step into your AC maintenance routine, you can prevent water damage, maintain proper drainage, and ensure the efficient operation of your AC system.
Read more: What To Do If Your AC Freezes
Test and Adjust Thermostat Settings
Testing and adjusting thermostat settings is a crucial step in AC maintenance that helps optimize your cooling system’s performance and energy efficiency. The thermostat is the control center of your AC system, responsible for regulating the temperature and ensuring your home stays cool and comfortable. By testing and adjusting the thermostat settings, you can ensure accurate temperature control, improve energy savings, and maximize the effectiveness of your AC system.
Follow these steps to test and adjust thermostat settings:
- Turn off the power: Begin by turning off the power to your AC system at the electrical panel. This is important to avoid any electrical mishaps during the testing and adjustment process.
- Access the thermostat: Locate your thermostat and remove the faceplate to access the settings and controls. Refer to the manufacturer’s instructions if you are unsure how to remove the faceplate.
- Check the thermostat location: Evaluate the placement of your thermostat. Ensure that it is not exposed to direct sunlight, drafts, or other sources of heat or cold. Proper placement helps the thermostat provide accurate temperature readings.
- Calibrate the thermostat: Use an indoor thermometer to compare the temperature reading on the thermostat with the actual room temperature. If there is a noticeable difference, you may need to calibrate the thermostat. Consult the manufacturer’s instructions to learn how to perform a calibration, or consider hiring a professional technician to calibrate it for you.
- Adjust the temperature differentials: Temperature differentials represent the temperature range within which the AC system will cycle on and off to maintain the desired temperature. Adjusting the temperature differentials can help improve energy efficiency. Consult the manufacturer’s instructions or the settings menu on your thermostat to adjust the temperature differentials based on your preferences and environmental conditions.
- Program a schedule: If your thermostat allows for programming, take advantage of this feature to create a cooling schedule that aligns with your lifestyle. Set higher temperatures when you are away or asleep to conserve energy, and program lower temperatures for when you are at home and need cooling.
- Test the thermostat: After adjusting the settings, turn on the power to your AC system and test the thermostat’s functionality. Ensure that it accurately reads the room temperature and that the cooling system kicks in as expected.
- Monitor and make adjustments: Observe the performance of your AC system over a few days with the adjusted thermostat settings. Pay attention to the comfort level, energy consumption, and cooling efficiency. Make further adjustments if necessary to fine-tune the settings to your preferences.
Testing and adjusting thermostat settings allows you to optimize your AC system’s performance and energy usage, ensuring a comfortable living environment while minimizing energy waste.
If you encounter any difficulties during the testing or adjustment process, consult the manufacturer’s instructions or contact a professional technician for guidance and assistance. They can provide expert advice and help you optimize your thermostat settings for maximum efficiency.
By including this step in your AC maintenance routine, you can have better control over your cooling system, enjoy energy savings, and maintain optimal comfort throughout your home.
Conclusion
Regular AC maintenance is not only essential for optimal performance but also crucial for the longevity of your cooling system. By following a comprehensive maintenance routine, you can ensure that your AC unit operates efficiently, minimizes energy consumption, and provides consistent cooling comfort for years to come.
In this article, we have covered ten important steps for AC maintenance. We started by discussing the importance of maintenance, emphasizing how it enhances energy efficiency, improves air quality, and extends the lifespan of your AC system. We then highlighted common signs of AC problems, enabling you to identify issues early and take appropriate action.
We then walked you through the ten crucial steps for AC maintenance:
- Cleaning or replacing the air filters
- Clearing dust and debris from vents and ducts
- Checking and cleaning the condenser coils
- Inspecting and tightening electrical connections
- Lubricating moving parts
- Checking the refrigerant levels
- Cleaning or replacing the blower motor
- Inspecting and cleaning the evaporator coils
- Clearing the condensate drain line
- Testing and adjusting thermostat settings
By regularly performing these maintenance tasks, you can ensure that your AC system functions optimally, with enhanced energy efficiency, improved air quality, and increased overall performance. Remember, some maintenance procedures may require professional assistance, so don’t hesitate to seek expert help if needed.
By incorporating these AC maintenance steps into your routine, you can avoid costly repairs, enjoy reliable cooling performance, and promote the longevity of your AC system. Regular maintenance is a sound investment that pays off in the form of increased comfort, energy savings, and peace of mind.
Take the time to prioritize AC maintenance, and you’ll reap the benefits of a well-maintained cooling system that keeps you cool and comfortable, even during the hottest days of summer.
Frequently Asked Questions about What Need To Do For AC Maintenance
Was this page helpful?
At Storables.com, we guarantee accurate and reliable information. Our content, validated by Expert Board Contributors, is crafted following stringent Editorial Policies. We're committed to providing you with well-researched, expert-backed insights for all your informational needs.