Home>Home Maintenance>Why Isn’t My Air Conditioning Working?
Home Maintenance
Why Isn’t My Air Conditioning Working?
Modified: October 20, 2024
Experiencing problems with your air conditioning? Learn how to troubleshoot and fix common issues with our expert home maintenance tips.
(Many of the links in this article redirect to a specific reviewed product. Your purchase of these products through affiliate links helps to generate commission for Storables.com, at no extra cost. Learn more)
Introduction
There’s nothing more frustrating than coming home on a scorching summer day, expecting to be greeted by a cool and refreshing blast of air from your air conditioning unit, only to find out that it’s not working. As homeowners, we rely on our air conditioning systems to keep us comfortable and cool during the hot months, so when they fail to do their job, it can be quite the inconvenience.
Now, before you panic and start searching for an HVAC technician, there are a few steps you can take to troubleshoot the problem yourself. In this article, we will guide you through the process of identifying common issues and potential solutions to get your air conditioning system up and running again.
Keep in mind that while some problems can be easily resolved, others may require professional intervention. Safety should always be your top priority, so if you feel uncomfortable or unsure about performing any of the tasks mentioned in this article, it’s best to consult with a licensed HVAC technician.
With that said, let’s dive into the world of air conditioning troubleshooting and find out why your air conditioning isn’t working.
Key Takeaways:
- Keep your cool by checking the thermostat, cleaning or replacing air filters, and inspecting the power supply. These simple steps can often resolve common air conditioning issues and save you from unnecessary repairs.
- When in doubt, seek professional help. HVAC technicians have the expertise and tools to diagnose and repair complex air conditioning issues. Prioritize safety and consult experts for a cool and comfortable home.
Read more: Why Is My Car Air Conditioning Not Working
Checking the Thermostat
When your air conditioning system isn’t working correctly, the first step you should take is to check the thermostat. Sometimes, the issue lies with the thermostat settings rather than the actual functionality of the unit.
Start by checking the temperature setting on your thermostat. Ensure that it is set to a temperature that should trigger the air conditioning to turn on. If you have recently adjusted the temperature, give it a few minutes to see if the air conditioning kicks in.
Next, switch the thermostat to the “cool” mode. Make sure that the fan setting is set to “auto” rather than “on”. The “auto” setting allows the fan to run only when the air conditioning is actively cooling the air, while the “on” setting keeps the fan running constantly.
If the air conditioning still doesn’t turn on, check the battery of your thermostat. In some cases, a low battery can prevent the unit from functioning properly. Replace the battery if needed.
Additionally, inspect the thermostat for any visible signs of damage or loose connections. Sometimes, a faulty thermostat can be the reason behind your air conditioning woes. If you notice any issues, consider replacing the thermostat or calling a professional to assess the situation.
Remember, checking the thermostat is a simple first step that can potentially resolve the issue and save you from unnecessary repairs. However, if the air conditioning still isn’t working after checking the thermostat, move on to the next troubleshooting step.
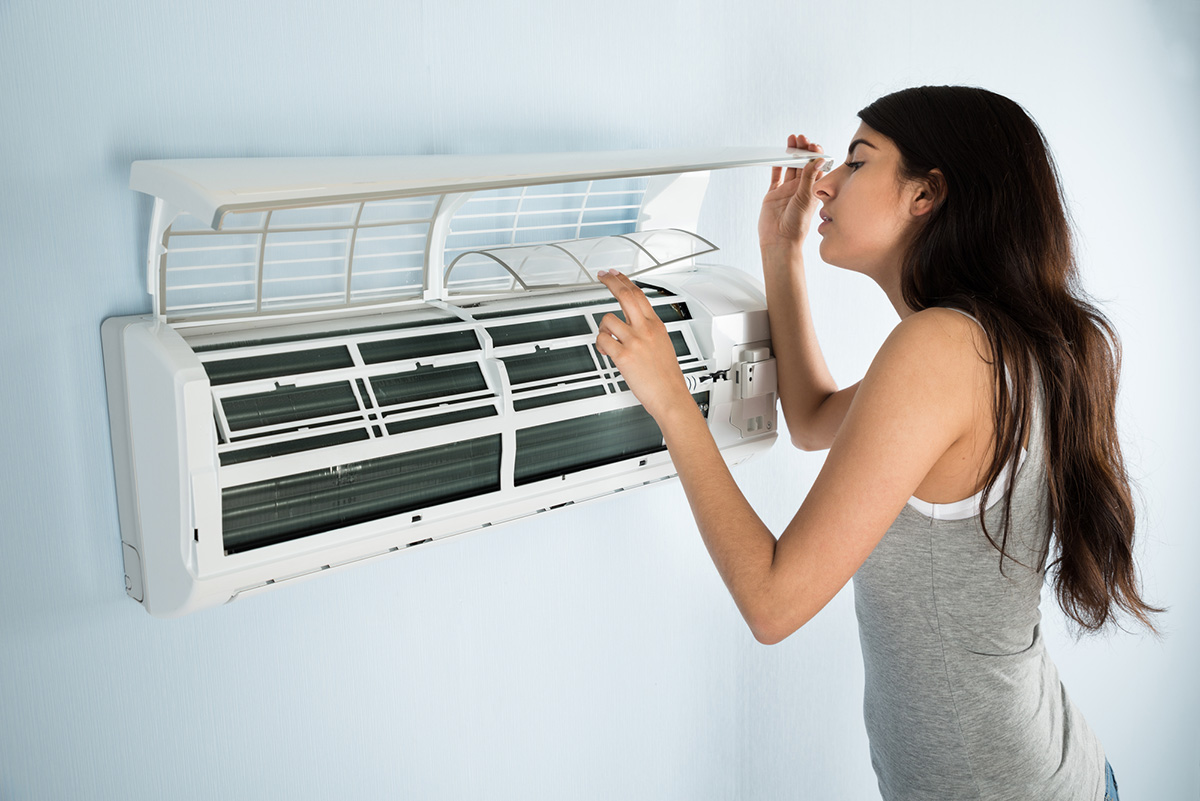
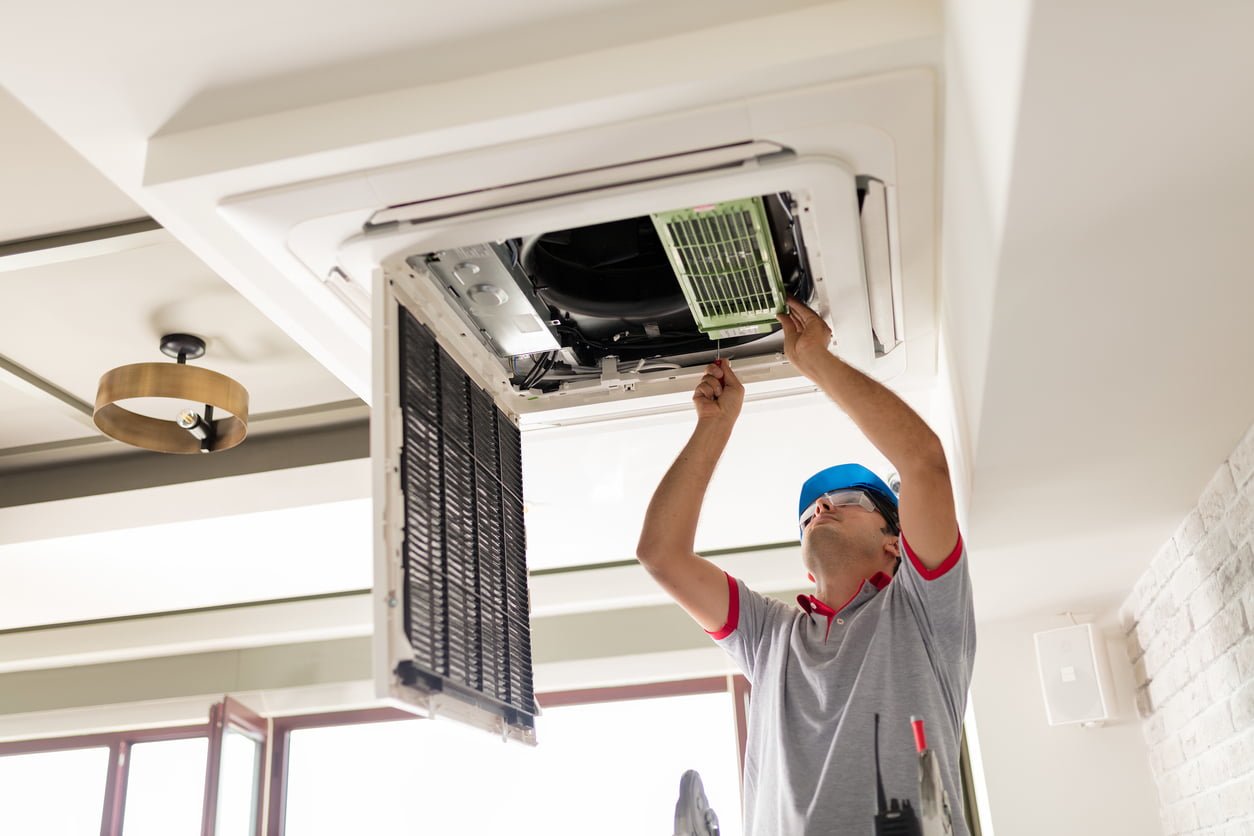
Examining the Air Filters
When your air conditioning system is struggling to cool your home effectively, one common culprit is dirty or clogged air filters. Over time, the air filters in your HVAC system can become filled with dust, dirt, and other debris, restricting proper airflow and hindering the cooling process.
Start by locating the air filters in your HVAC system. In most cases, the air filters are found near the return air duct or on the side or bottom of the air handler unit. Consult your system’s manual if you are unsure of their location.
Once you have located the air filters, examine their condition. If they appear dirty or clogged, it’s time to clean or replace them. Cleaning or replacing the air filters regularly is essential for the optimal performance of your air conditioning system.
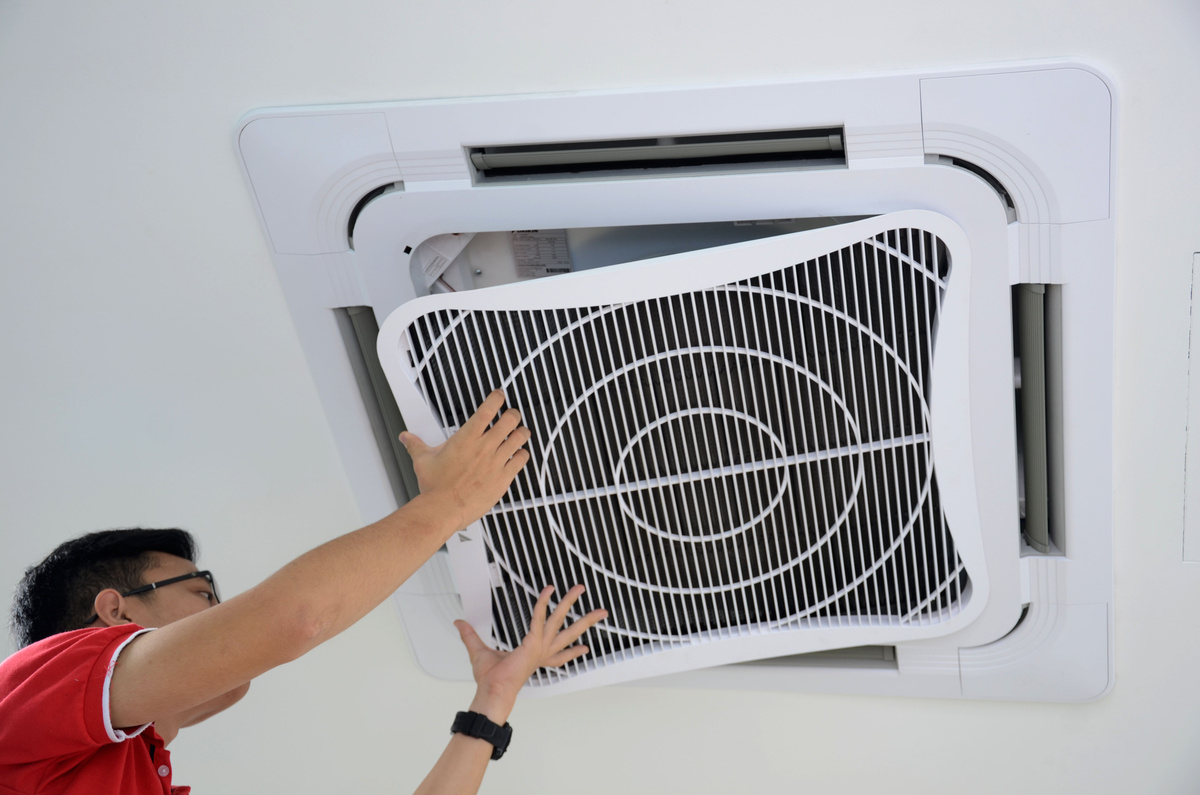
If you have reusable air filters, you can clean them by gently vacuuming off the accumulated dust and dirt. Be sure to follow the manufacturer’s instructions for proper cleaning techniques. After cleaning, allow the filters to dry completely before reinstalling them.
For disposable air filters, simply replace them with new ones. It’s recommended to use high-quality filters that are suitable for your specific HVAC system. These filters are designed to capture smaller particles and provide better protection against pollutants.
Regularly cleaning or replacing the air filters not only ensures proper airflow but also promotes better indoor air quality by removing dust, allergens, and other pollutants. This simple maintenance task can improve the overall efficiency of your air conditioning system and extend its lifespan.
Once you have cleaned or replaced the air filters, monitor your air conditioning system to see if the performance improves. If the airflow is still weak or the air conditioning is not functioning correctly, proceed to the next step of troubleshooting.
Inspecting the Power Supply
When your air conditioning system fails to turn on or operate, it’s essential to examine the power supply. Sometimes, the issue may be as simple as a tripped circuit breaker or a disconnected power source.
Start by checking the circuit breaker or fuse box that powers your air conditioning system. Look for any tripped breakers or blown fuses. If you find any, reset the breaker or replace the fuse and see if the air conditioning system turns on. Keep in mind that repeatedly tripping the breaker or blowing fuses may indicate a more significant problem that requires professional attention.
Next, inspect the power cord and ensure it is securely plugged into the electrical outlet. Sometimes, the cord can become dislodged or accidentally unplugged, causing the air conditioning system to lose power. Plug it back in securely and check if the unit starts functioning properly.
If your air conditioning system has a dedicated disconnect switch, usually located next to the outdoor condensing unit, check if it is flipped to the “on” position. This switch allows you to isolate power to the unit for maintenance purposes. Make sure it hasn’t been accidentally turned off.
While inspecting the power supply, also take a moment to look for any signs of damage to the wiring or electrical components. If you notice any frayed wires, exposed cables, or burnt areas, it’s best to call a professional electrician to assess and repair the issue. Tampering with electrical components can be dangerous and should be handled by a qualified professional.
Once you have ensured that the power supply to your air conditioning system is intact and functioning correctly, test the system to see if it starts operating as expected. If there are still issues, continue troubleshooting using the next steps.
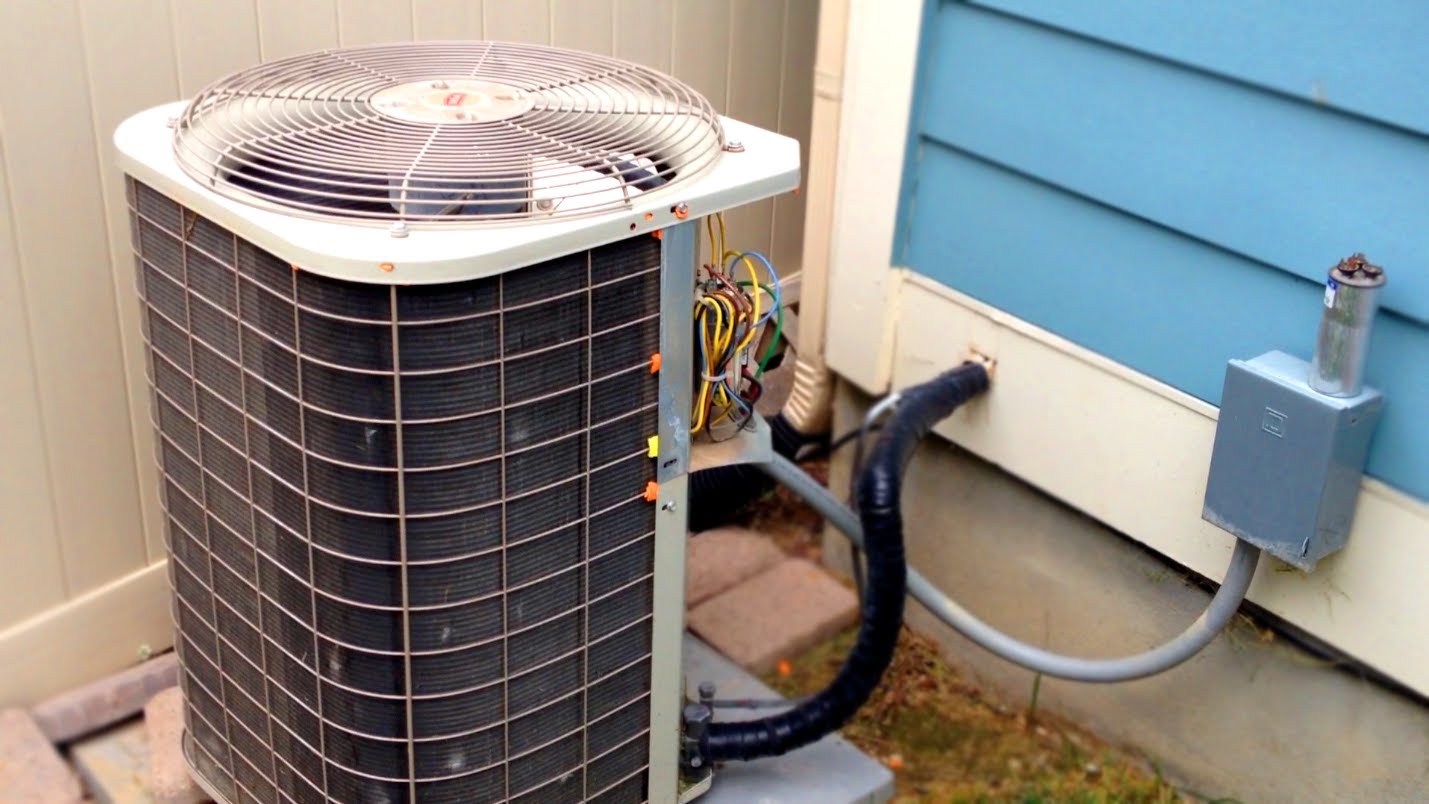
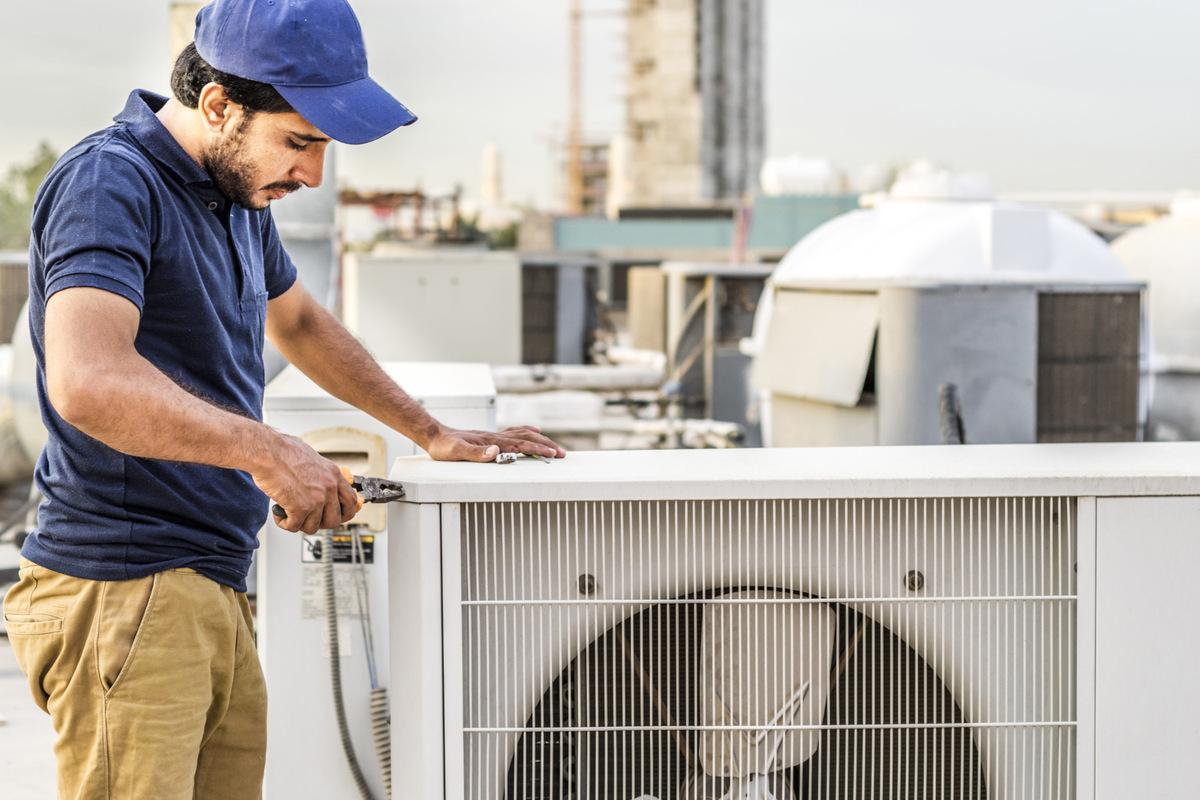
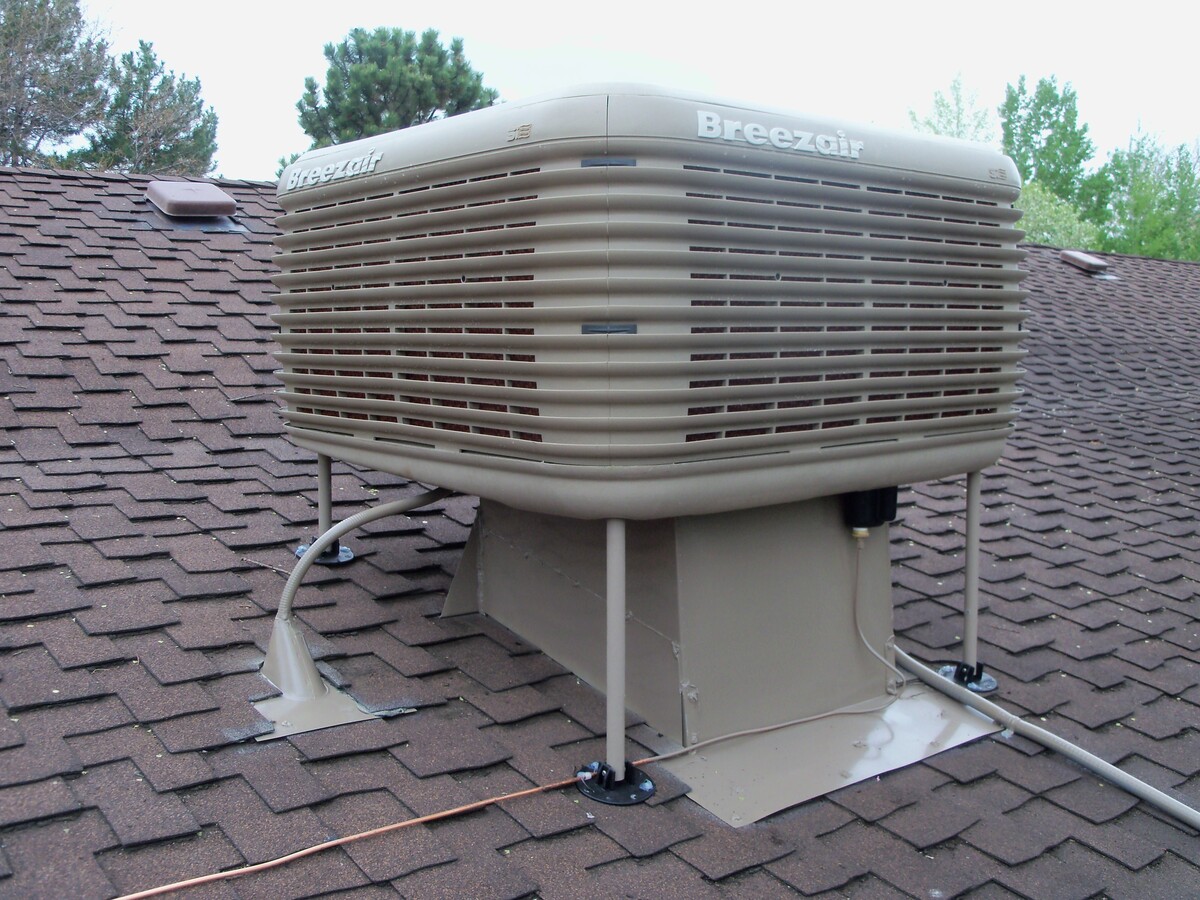
Evaluating the Condenser Unit
The condenser unit, located outside of your home, plays a crucial role in the cooling process. It houses the compressor and the condenser coils, which are responsible for releasing heat from the air in your home. If the condenser unit is not functioning correctly, it can affect the overall performance of your air conditioning system.
Start by visually inspecting the condenser unit. Check for any visible signs of damage, such as bent or damaged fins, debris, or obstructed airflow. Clear away any leaves, grass, or other debris that may be blocking the unit or inhibiting airflow.
Next, turn off the power supply to the condenser unit. You can do this by flipping the circuit breaker that controls the unit or by using the disconnect switch if one is present. Safety should always be a priority when working with electrical components.
Carefully remove the protective panel or grille from the condenser unit to access the interior. Take note of any loose wires, damaged components, or signs of wear and tear. It’s essential to call a professional HVAC technician if you notice anything suspicious or if you’re unsure about any aspect of the evaluation.
Examine the condenser coils for dirt, debris, or frost build-up. Dirty coils can impede heat transfer and reduce the efficiency of your air conditioning system. If you notice dirt or debris, use a soft brush or a vacuum cleaner with a brush attachment to gently remove the build-up. Avoid using excessive force or harsh chemicals, as this can damage the coils.
If you encounter frost or ice on the coils, it may indicate an underlying issue that requires professional attention, such as low refrigerant levels or a malfunctioning component. Contact a licensed HVAC technician to inspect and repair the problem.
Once you have completed your evaluation and maintenance of the condenser unit, restore power to the unit and test the air conditioning system. Observe the unit to see if the performance improves. If not, proceed to the next troubleshooting step.
Check the air filter in your air conditioning unit. A dirty filter can restrict airflow and cause the system to work harder, leading to potential malfunctions. Replace the filter regularly to keep your AC running smoothly.
Read more: Why Is My Air Conditioning Blowing Hot Air
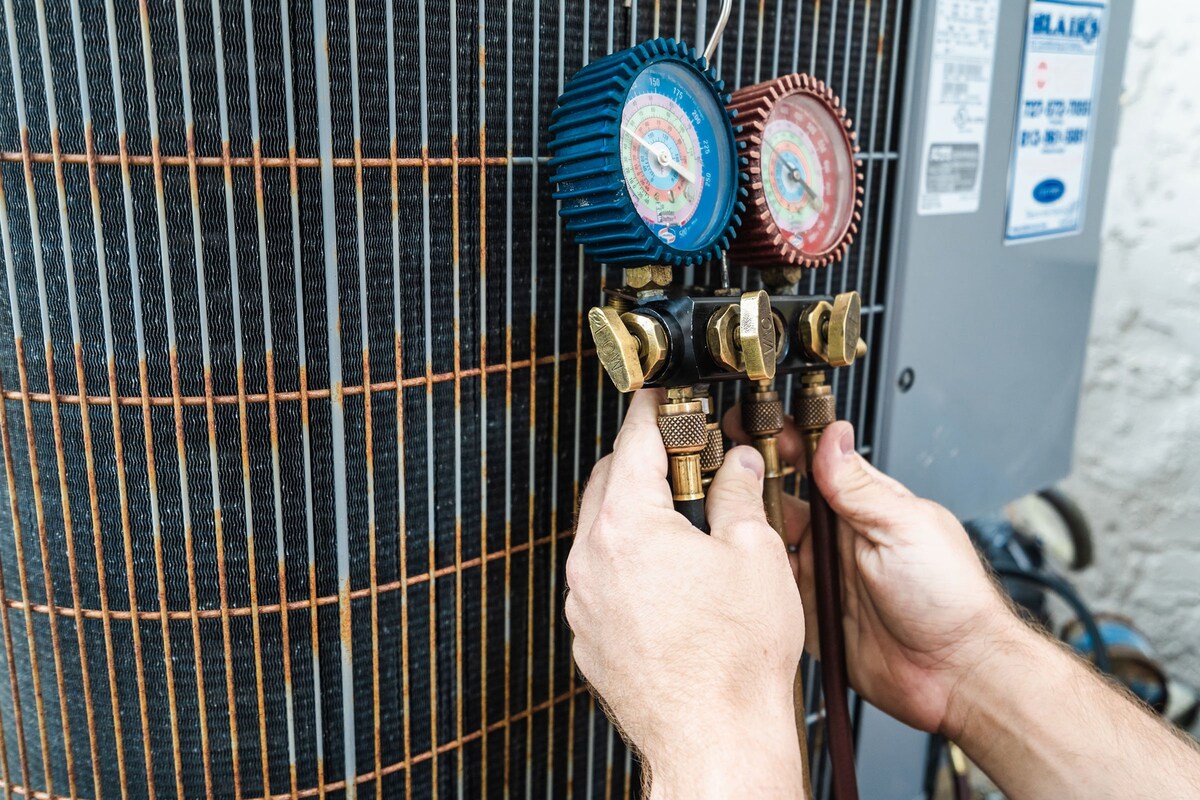
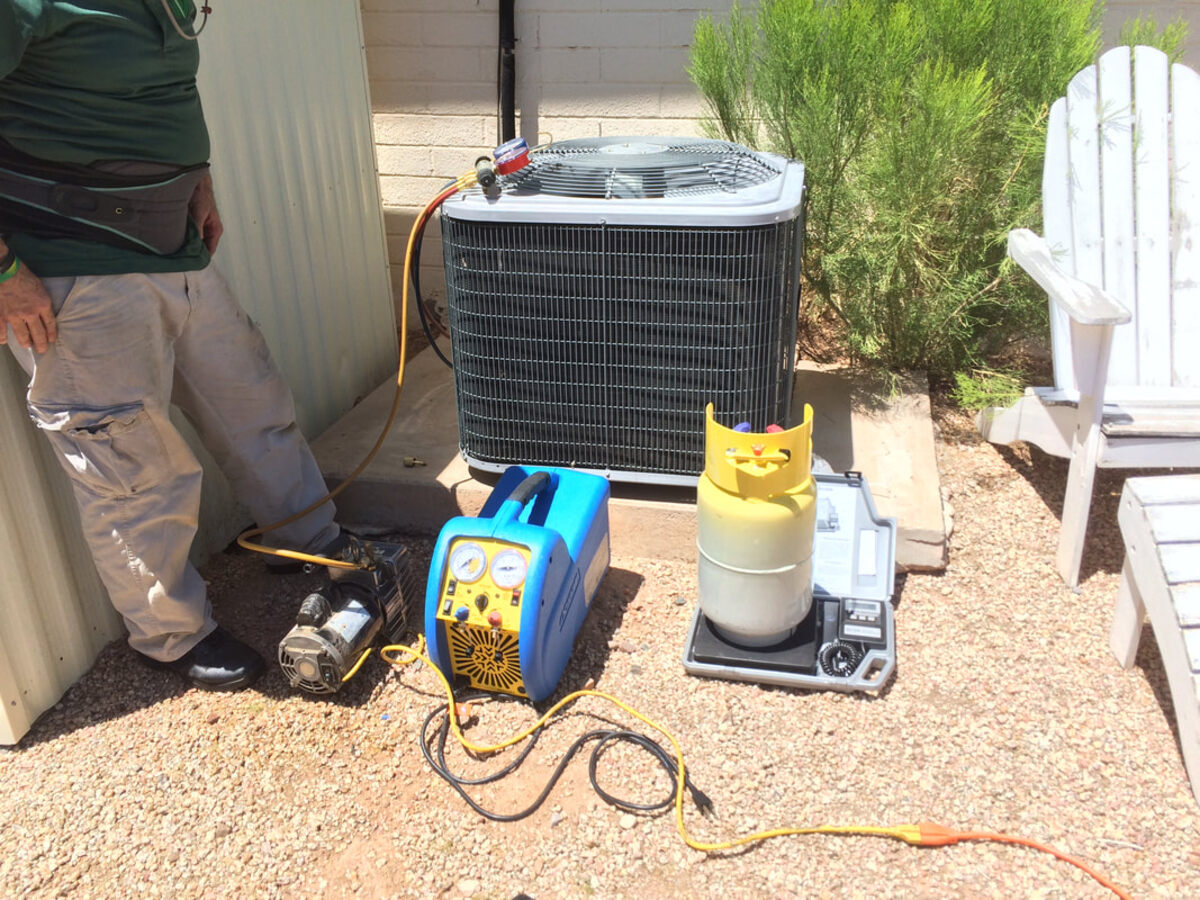
Assessing the Refrigerant Levels
Refrigerant is a crucial component of your air conditioning system. It is responsible for absorbing heat from the air and transferring it out of your home, ensuring efficient cooling. If your air conditioning system is low on refrigerant, it can lead to poor cooling performance and potential damage to the compressor.
Assessing the refrigerant levels requires specialized equipment and should be done by a licensed HVAC technician. However, there are a few signs that can indicate low refrigerant levels, helping you identify if this may be the cause of your air conditioning woes.
One common sign of low refrigerant is weak or warm airflow from the vents. If you notice that the air coming from the vents is not as cold as it used to be or if the airflow is significantly reduced, it is possible that your air conditioning system is low on refrigerant.
Another potential indicator is the presence of ice or frost on the evaporator coils. Low refrigerant levels can cause the coils to freeze up, hindering the cooling process. If you see ice accumulation on the coils, it is essential to have a professional assess the refrigerant levels and address any underlying issues.
Do not attempt to add refrigerant to your air conditioning system yourself. It requires specific knowledge and equipment to handle refrigerants safely. Contact a licensed HVAC technician who can properly assess and recharge the refrigerant levels if necessary.
Keep in mind that low refrigerant levels can indicate a refrigerant leak in your system. If a leak is present, it is crucial to have it repaired promptly by a professional. Continuously adding refrigerant without addressing the leak will only provide a temporary solution and can lead to further damage or reduced efficiency of your air conditioning system.
By having a licensed HVAC technician assess and address the refrigerant levels, you can ensure that your air conditioning system is functioning at its optimal level, providing you with reliable and efficient cooling.
Verifying the Ductwork
The ductwork in your home plays a crucial role in distributing cool air from your air conditioning system throughout the various rooms. If there are issues with the ductwork, such as leaks or blockages, it can hinder the proper airflow and impact the overall performance of your system.
Start by visually inspecting the exposed ductwork in your home, such as in the basement or attic. Look for any visible signs of damage, such as disconnected sections, holes, or loose connections. Seal any visible gaps or cracks using duct tape or mastic sealant, ensuring a tight and secure seal.
Next, check for blockages or obstructions in the ductwork. Sometimes, debris or objects can accumulate inside the ducts, impeding the airflow. Use a flashlight to look inside the ducts and remove any visible blockages. If you are unable to reach or identify the source of the blockage, it’s best to contact a professional HVAC technician for further inspection and cleaning.
Additionally, check the air vents in each room. Ensure that they are open and unobstructed by furniture, curtains, or other objects. Restricted airflow from the vents can impact the cooling efficiency of your air conditioning system. If you notice any vent covers that are damaged or missing, replace them to ensure proper airflow.
Leaky ductwork can cause cooled air to escape before it reaches your living spaces. To check for duct leaks, you can perform a simple test using a lit stick of incense or a smoke pencil. Hold the lit stick or pencil near the duct joints and connections. If you notice the smoke being pulled into the ducts or any noticeable air leakage, it’s an indication of a duct leak, and professional repairs may be needed.
Remember, ductwork issues can impact the overall efficiency and effectiveness of your air conditioning system. If you suspect significant ductwork problems or are unsure about how to address them, it’s always best to consult with a professional HVAC technician who can properly evaluate and repair any issues.
Seeking Professional Assistance
While some air conditioning issues can be resolved through simple troubleshooting steps, there are times when professional assistance is necessary. Seeking the help of a licensed HVAC technician can ensure that the underlying problems with your air conditioning system are properly diagnosed and repaired.
If you have gone through the troubleshooting steps mentioned earlier in this article and are still experiencing problems with your air conditioning system, it’s time to contact a professional. HVAC technicians have the knowledge, skills, and tools to identify and fix complex issues that may be beyond the scope of a DIY solution.
A professional HVAC technician can accurately diagnose the root cause of the problem and provide proper repairs or recommendations. They will have access to specialized equipment to test components, assess refrigerant levels, and evaluate the overall performance of your system.
When selecting an HVAC technician, it’s important to choose someone who is licensed, insured, and experienced in air conditioning repairs. Look for reputable companies with positive reviews and ask for recommendations from friends, family, or neighbors who have had satisfactory experiences with HVAC services.
During the service call, be prepared to provide detailed information about the issues you are experiencing with your air conditioning system. This can help the technician in the diagnostic process and expedite the repair process. Be open to asking questions and discussing any concerns you may have about the repairs or maintenance suggestions.
Keep in mind that professional assistance may come with a cost, but it can save you time, effort, and potential further damage to your system in the long run. Regular maintenance and inspections by professionals can also help keep your air conditioning system running efficiently and prevent future issues.
Remember, safety should always be a priority. If you encounter any electrical or mechanical components that you are not familiar with or unsure how to handle, it’s best to leave it to the professionals. Attempting DIY repairs without proper knowledge and experience can lead to injury or further damage to your air conditioning system.
By seeking professional assistance, you can ensure that your air conditioning system is in the hands of experts who will work to restore its functionality and keep you comfortable throughout the hot summer months.
Conclusion
When your air conditioning system is not working as expected, it can be a frustrating experience, especially during the hot summer months. However, by following a few simple troubleshooting steps, you can potentially identify and resolve the issue on your own.
Start by checking the thermostat settings and ensuring that they are properly configured. Examine the air filters and clean or replace them if necessary to improve airflow and maintain optimal cooling efficiency. Inspect the power supply, including circuit breakers, power cords, and disconnect switches, to ensure that there are no issues with the electrical connection.
Evaluate the condenser unit, both visually and by examining the coils for dirt or frost build-up. Assess the refrigerant levels, but always seek professional assistance to handle refrigerant-related tasks, as they require specialized equipment and knowledge. Finally, verify the condition of the ductwork and address any leaks or blockages that may be hindering airflow.
If after going through these troubleshooting steps, you are still experiencing problems with your air conditioning system, it’s time to seek professional assistance. HVAC technicians have the expertise and tools necessary to diagnose and repair complex issues, ensuring the optimal performance of your system.
Remember, regular maintenance and inspections by professionals can help prevent future problems and extend the lifespan of your air conditioning system. It’s important to prioritize safety and consult with experts when handling any electrical or mechanical components that you are not familiar with.
In conclusion, maintaining a properly functioning air conditioning system is essential for a comfortable and cool home. By troubleshooting common issues and seeking professional assistance when needed, you can ensure that your air conditioning system operates efficiently, providing you with the comfort you deserve during the hot summer months.
Frequently Asked Questions about Why Isn't My Air Conditioning Working?
Was this page helpful?
At Storables.com, we guarantee accurate and reliable information. Our content, validated by Expert Board Contributors, is crafted following stringent Editorial Policies. We're committed to providing you with well-researched, expert-backed insights for all your informational needs.