
Articles
Why Did My Air Fryer Stop Working
Modified: October 19, 2024
Discover common reasons why your air fryer suddenly stopped working and learn useful tips and articles to troubleshoot and fix the issue.
(Many of the links in this article redirect to a specific reviewed product. Your purchase of these products through affiliate links helps to generate commission for Storables.com, at no extra cost. Learn more)
Introduction
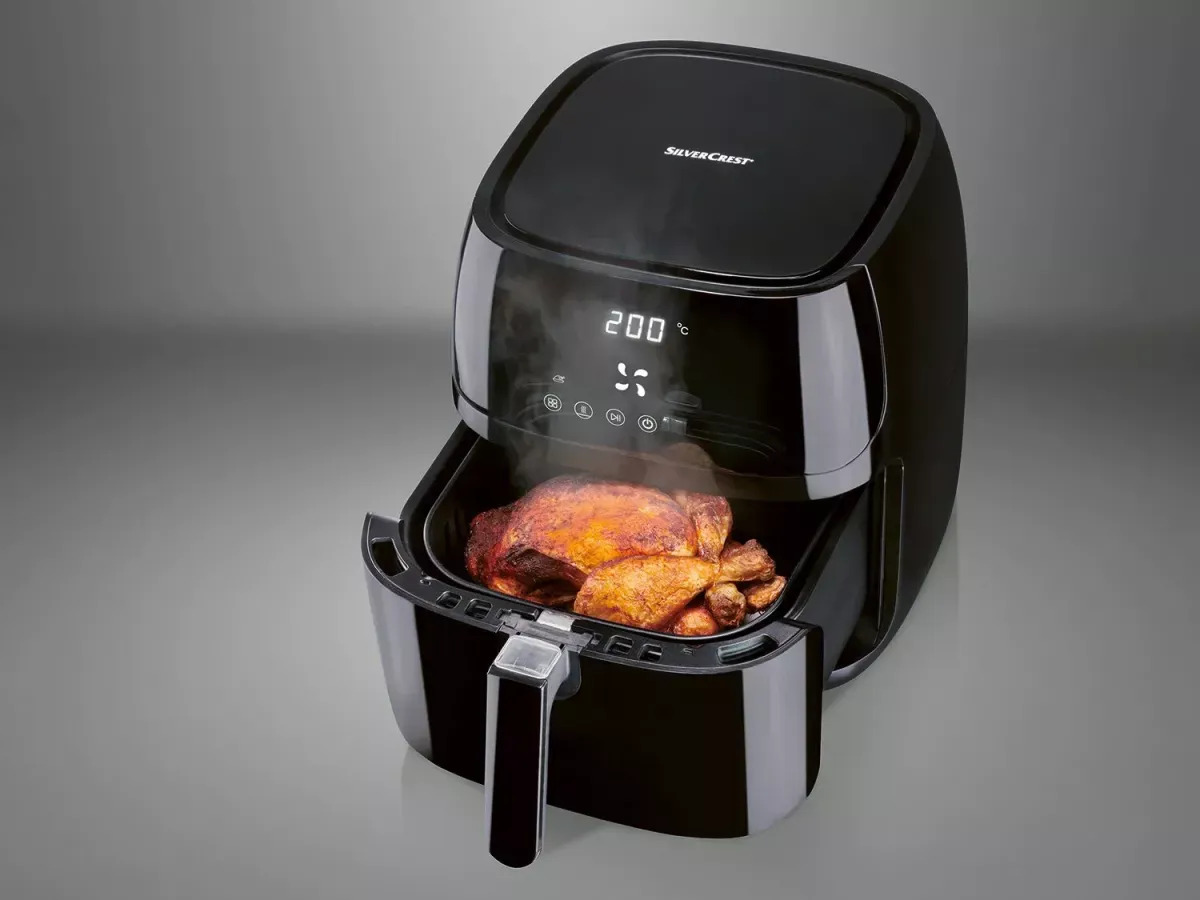
Air fryers have become increasingly popular in recent years as a healthier alternative to deep frying. These versatile kitchen appliances use rapidly circulating hot air to cook food, resulting in crispy and delicious dishes with significantly less oil. However, like any electronic device, air fryers can encounter malfunctions and stop working properly over time.
In this article, we will explore the common issues that can cause your air fryer to stop working and provide troubleshooting steps to help you get it back up and running. By understanding the potential problems and knowing how to address them, you can extend the lifespan of your air fryer and continue enjoying its many benefits.
So, why did your air fryer stop working? Let’s delve into some possible reasons and concrete solutions.
Key Takeaways:
- Ensure proper power supply, inspect the power cord, and address overheating, clogs, and control panel issues to troubleshoot and restore your air fryer’s functionality. Seek professional assistance for complex internal problems.
- Regularly clean air intake vents, optimize air circulation, and follow manufacturer’s guidelines to maintain your air fryer’s performance and extend its lifespan. Professional help is crucial for intricate internal repairs.
Common Issues with Air Fryers
Air fryers are generally reliable appliances, but there are a few common issues that can arise with regular use. Here are some of the most frequently encountered problems:
- Lack of Power Supply: Sometimes, the air fryer may not turn on or stop working due to a lack of power supply. This can be caused by a tripped circuit breaker or a power outage in your area.
- Faulty Power Cord: A damaged or frayed power cord can prevent your air fryer from receiving power and operating correctly. It is essential to inspect the power cord regularly for any signs of wear or damage.
- Overheating: Air fryers can overheat if used for extended periods or if the ventilation system is obstructed. This can lead to automatic shutdown or complete malfunction.
- Clogged Air Intake: A buildup of food particles or debris in the air intake vents can restrict proper airflow and cause the air fryer to stop working efficiently.
- Malfunctioning Control Panel: Issues with the control panel, such as unresponsive buttons or error messages, can prevent you from operating the air fryer effectively.
- Insufficient Air Circulation: If the air fryer’s fan or motor malfunctions, it can result in inadequate air circulation, leading to uneven cooking or the unit not working altogether.
- Internal Component Failure: Internal components, such as the heating element or thermostat, may fail over time, causing the air fryer to lose its functionality.
Now that we’ve identified some of the common issues with air fryers, let’s move on to the troubleshooting steps you can take to resolve these problems and get your air fryer back into working condition.
Lack of Power Supply
One of the foremost reasons why your air fryer may stop working is a lack of power supply. Before assuming that your air fryer is faulty, make sure to check the power source and verify if it is receiving electricity. Here are some troubleshooting steps you can take:
- Check the Power Outlet: Ensure that the power outlet you’re using is functional by plugging in another device or appliance. If the other device works, but the air fryer still doesn’t turn on, move on to the next step.
- Check the Circuit Breaker: Locate the circuit breaker for the kitchen or the specific area where your air fryer is plugged in. Check if the circuit breaker has tripped and reset it if necessary. After resetting the circuit breaker, try turning on the air fryer again.
- Power Outage: If there has been a recent power outage in your area, it is possible that the power supply has not been fully restored. In this case, wait for the power to come back on before attempting to use the air fryer.
- Try a Different Outlet: If you have confirmed that the power outlet is working correctly, try plugging in the air fryer into a different outlet. Sometimes, the original outlet may have an underlying electrical issue that prevents the air fryer from functioning.
- Use a Surge Protector: Air fryers, like any electronic device, can be susceptible to power surges. Consider plugging your air fryer into a surge protector to protect it from voltage fluctuations and ensure stable power supply.
By performing these troubleshooting steps, you can determine whether the lack of power supply is the culprit behind your air fryer not working. If the issue persists even after trying different outlets and ensuring a steady power source, it may be time to inspect the power cord for any potential damages or faults.
Faulty Power Cord
A damaged or faulty power cord can prevent your air fryer from receiving power and functioning properly. If you suspect that the power cord is the reason why your air fryer has stopped working, here are some troubleshooting steps you can take:
- Inspect the Power Cord: Carefully examine the entire length of the power cord for any visible signs of wear, fraying, or damage. If you notice any exposed wires or significant damage, it is crucial to replace the power cord immediately.
- Check the Connection: Ensure that the power cord is securely plugged into both the air fryer and the power outlet. Sometimes, a loose connection can cause intermittent power loss or prevent the air fryer from functioning altogether.
- Replace the Power Cord: If you determine that the power cord is indeed faulty, you will need to replace it. Contact the manufacturer or a certified service center to obtain a replacement power cord that is compatible with your air fryer model.
- Professional Assistance: If you are unsure about inspecting or replacing the power cord yourself, it is recommended to seek professional assistance. An authorized technician can safely handle the replacement and ensure that your air fryer is up and running again.
Always remember to unplug the air fryer from the power source before inspecting or replacing the power cord. Safety should be a top priority when dealing with electrical components. Using a faulty power cord can pose a significant risk of electrical shock or fire hazard.
By carefully examining the power cord and taking necessary measures to address any faults, you can eliminate a faulty power cord as the cause of your air fryer’s malfunctioning and potentially restore its functionality.
Overheating
Overheating is a common issue that can cause an air fryer to stop working. This can happen if the appliance is used for extended periods without a break or if the ventilation system becomes obstructed. Here are some troubleshooting steps to address the overheating problem:
- Allow the Air Fryer to Cool Down: If your air fryer suddenly shuts off or shows signs of overheating, turn it off and unplug it from the power source. Let it cool down for at least 30 minutes before attempting to use it again. This will allow the internal components to cool off and reset.
- Check the Ventilation: Ensure that the ventilation system of your air fryer is not blocked or clogged. Remove any obstructions such as food debris, oil residue, or other objects that may be blocking the air vents. Proper airflow is crucial for the air fryer to regulate its temperature effectively.
- Avoid Overloading: Overloading the air fryer basket with food can impede proper air circulation and lead to overheating. Make sure to follow the manufacturer’s recommendations regarding the maximum food capacity for your specific air fryer model. Overloading can result in uneven cooking and overheating.
- Cook in Batches: If you have a large amount of food to cook, it is best to do it in batches rather than overcrowding the air fryer. Cooking in smaller batches allows for better airflow and prevents the air fryer from working too hard and overheating.
- Keep the Air Fryer in a Well-Ventilated Area: Ensure that the air fryer is placed in a location with proper ventilation. Avoid placing it near walls, cabinets, or other appliances that can restrict the airflow and trap heat. A well-ventilated area will help prevent the air fryer from overheating.
By following these troubleshooting steps, you can address the issue of overheating and help your air fryer resume normal operation. However, if the problem persists or if you suspect a more serious internal issue, it is recommended to seek professional assistance from the manufacturer or a qualified technician.
Clogged Air Intake
A clogged air intake can disrupt the airflow in your air fryer, leading to inefficient operation or even a complete malfunction. If you suspect that the air intake vents are blocked, here are some troubleshooting steps to address this issue:
- Unplug the Air Fryer: Before attempting to clean the air intake vents, make sure to unplug the air fryer from the power source. This will prevent any accidents or electrical hazards while working on the appliance.
- Remove the Food Basket: Take out the food basket and set it aside. This step will provide better access to the air intake vents for cleaning.
- Inspect the Air Intake Vents: Carefully examine the air intake vents located on the sides or back of the air fryer. Look for any visible signs of food particles, grease, or other debris that may be blocking the airflow. Use a flashlight if needed to get a clear view of the vents.
- Clean the Vents: Use a soft brush or a toothbrush to gently remove any debris from the air intake vents. Be thorough but gentle to avoid damaging the vents. You can also use a vacuum cleaner with a brush attachment to suck out any stubborn particles.
- Wipe Down the Exterior: After cleaning the air intake vents, wipe down the exterior of the air fryer with a damp cloth to remove any grease or residue. This will help maintain the cleanliness and performance of the appliance.
- Reassemble and Test: Once you have completed the cleaning process, reassemble the air fryer by placing the food basket back into the appliance. Plug it back into the power source and test if the air fryer is functioning properly.
Regularly cleaning the air intake vents of your air fryer is essential to maintain its optimal performance and prevent any issues caused by clogs. By following these troubleshooting steps and keeping the air intake vents clean, you can ensure uninterrupted airflow and a properly functioning air fryer.
Malfunctioning Control Panel
A malfunctioning control panel can prevent you from operating your air fryer effectively. If you’re experiencing issues with unresponsive buttons, error messages, or a non-functioning control panel, here are some troubleshooting steps to address this problem:
- Power Cycle the Air Fryer: Turn off the air fryer and unplug it from the power source. Leave it unplugged for a few minutes to perform a power cycle. This can help reset the control panel and resolve minor glitches.
- Check for Loose Connections: Ensure that all the connections between the control panel and the main unit are secure. If there are any loose connections, gently reattach them and ensure they are properly in place.
- Reset the Control Panel: Some air fryers have a reset button or an option in the settings menu to reset the control panel. Refer to the user manual for your specific air fryer model and follow the instructions to perform a reset. This can help resolve software-related issues with the control panel.
- Clean the Control Panel: Use a soft, damp cloth to clean the control panel. Gently wipe away any dirt, debris, or food residue that may be causing the control panel to malfunction. Avoid using harsh chemicals or abrasive cleaners that may damage the panel.
- Update Firmware (if applicable): For air fryers with firmware capabilities, check if there are any available updates from the manufacturer. Updating the firmware can help address software bugs or compatibility issues that may affect the control panel’s performance.
- Contact the Manufacturer: If you have tried the above troubleshooting steps and the control panel still does not work, it may indicate a more significant issue. In such cases, it is recommended to contact the manufacturer or a certified service center for further assistance and potential repair.
By following these troubleshooting steps, you can often resolve issues related to a malfunctioning control panel. Remember to refer to the manufacturer’s instructions and guidelines specific to your air fryer model for the most accurate troubleshooting steps.
Having a properly functioning control panel is crucial for selecting cooking settings, adjusting time and temperature, and ensuring a smooth cooking experience with your air fryer.
Insufficient Air Circulation
Insufficient air circulation in your air fryer can lead to uneven cooking or even cause the appliance to stop working altogether. If you notice that your food isn’t cooking evenly or the air fryer is not functioning as it should, here are some troubleshooting steps to address the issue of insufficient air circulation:
- Check the Fan and Motor: Ensure that the fan and motor of the air fryer are functioning properly. Listen for any unusual noises or vibrations that may indicate a problem. If you suspect an issue with the fan or motor, it is recommended to seek professional assistance for repair or replacement.
- Remove Any Blockages: Inspect the air vents and internal components of the air fryer to check for any blockages. Accumulated food particles, grease, or debris can obstruct the airflow and prevent proper circulation. Clean the vents and remove any obstructions using a soft brush or a toothpick.
- Avoid Overcrowding: Overloading the air fryer with too much food can impede proper air circulation. Make sure to follow the manufacturer’s guidelines for the maximum food capacity of your specific air fryer model. Cook in smaller batches if needed to allow for better airflow.
- Use the Air Fryer Rack or Trays: If your air fryer comes with additional racks or trays, utilize them to maximize the space and improve air circulation. These accessories help elevate the food and allow hot air to circulate more evenly around the items being cooked.
- Place the Air Fryer in a Well-Ventilated Area: Ensure that the air fryer is placed in a location with adequate ventilation. Avoid placing it near walls, cabinets, or other appliances that may obstruct the airflow. Good ventilation helps air circulate freely, improving the performance of the air fryer.
By taking these troubleshooting steps, you can address the issue of insufficient air circulation in your air fryer. However, if the problem persists or if there are underlying issues with the fan or motor, it is recommended to seek professional assistance from the manufacturer or a certified technician.
Proper air circulation is essential for achieving evenly cooked and crispy results with your air fryer. By ensuring adequate airflow, you can optimize the performance of the appliance and enjoy delicious meals every time.
Internal Component Failure
If your air fryer has experienced internal component failure, it can lead to various operational issues and cause the appliance to stop working altogether. Internal components such as the heating element, thermostat, or other electrical parts can wear out over time or be subjected to unexpected malfunctions. Here are some troubleshooting steps to address internal component failure:
- Unplug the Air Fryer: Before attempting any troubleshooting or inspection, always unplug the air fryer from the power source for safety purposes.
- Perform a Functionality Test: Check if any specific functions or components of the air fryer are not working as intended. For example, if the air fryer fails to heat up, it may indicate a problem with the heating element.
- Refer to the User Manual: Consult the user manual provided by the manufacturer for information on troubleshooting internal component issues. The manual may include specific instructions or steps for diagnosing and addressing common internal failures.
- Contact the Manufacturer: If you suspect internal component failure and are unable to resolve the issue on your own, it is recommended to contact the manufacturer directly. They can provide guidance, recommend authorized service centers, or advise on potential repairs or replacements.
- Professional Assistance: In some cases, diagnosing and repairing internal component failures may require specialized knowledge and tools. If you’re not comfortable or experienced in handling technical repairs, it’s best to contact a qualified technician or service center to assess and repair the air fryer.
It’s important to note that internal component failure may sometimes require professional intervention or replacement of parts. Attempting to repair complex internal components on your own may void the warranty or cause further damage to the air fryer. Therefore, it’s always best to seek assistance from authorized professionals or the manufacturer.
By following these troubleshooting steps and seeking expert help if needed, you can address internal component failures and potentially restore the functionality of your air fryer.
Check the power source and make sure the air fryer is plugged in properly. If it still doesn’t work, try resetting the appliance by unplugging it for a few minutes and then plugging it back in. If the issue persists, contact the manufacturer for further assistance.
Read more: Why Did My Blender Stop Working
Troubleshooting Steps
If your air fryer has stopped working or is experiencing issues, here are some general troubleshooting steps you can take to identify and resolve the problem:
- Check the Power Source: Ensure that the air fryer is properly plugged into a functioning power outlet. Verify that there is power in the outlet by plugging in another device.
- Inspect the Power Cord: Examine the power cord for any signs of damage, such as fraying or cuts. If you notice any issues, consider replacing the power cord.
- Allow the Air Fryer to Cool Down: If the air fryer has been in use for an extended period, it may have overheated. Turn off the appliance and let it cool down before attempting to use it again.
- Clean the Air Intake: Check for any blockages in the air intake vents that may restrict proper airflow. Remove any debris or food particles that may be obstructing the vents.
- Reset the Control Panel: If the control panel is unresponsive or showing error messages, try resetting it. Refer to the user manual for instructions on how to perform a reset or contact the manufacturer for assistance.
- Improve Air Circulation: Ensure that there is sufficient space around the air fryer for proper ventilation. Avoid placing it near walls or other appliances that may impede airflow.
- Check for Internal Component Failure: If none of the above steps resolve the issue, it is possible that there is an internal component failure. Refer to the user manual for information on how to diagnose and address specific component failures, or contact the manufacturer for support.
- Seek Professional Assistance: If you are unsure or uncomfortable with troubleshooting or repairing the air fryer yourself, it is best to contact the manufacturer or a certified service center for assistance. They will have the expertise and tools to diagnose and fix any issues.
Remember to always follow safety precautions and unplug the air fryer before performing any troubleshooting or maintenance tasks. It’s also important to consult the user manual for model-specific instructions and guidelines.
By systematically going through these troubleshooting steps, you can often identify and resolve common issues with your air fryer, allowing you to enjoy its benefits once again.
Check the Power Source
When your air fryer stops working, the first troubleshooting step is to check the power source. Here are some steps to follow:
- Verify Power Outlet Functionality: Plug a different device or appliance into the same power outlet to check if it is working. If the other device works, move on to the next step.
- Check the Power Cable: Inspect the power cable for any visible damage, such as cuts, fraying, or kinks. If you notice any issues, it may be necessary to replace the power cable.
- Ensure Proper Connection: Check that the power cable is securely plugged into both the air fryer and the power outlet. Confirm that there are no loose connections or disconnections.
- Unplug and Plug Back In: Sometimes, simply unplugging the air fryer from the power outlet and plugging it back in can help establish a proper connection and resolve any temporary power issues.
- Try a Different Power Outlet: If the power source seems to be functioning correctly, try plugging the air fryer into a different power outlet. It is possible that the original outlet has an electrical problem.
- Use a Surge Protector: Consider using a surge protector or a power strip with surge protection to safeguard your air fryer from electrical surges that can cause power interruptions or damage the appliance.
By performing these steps, you can determine if the power source is the reason why your air fryer has stopped working. If the issue persists, there may be a different underlying problem, and further troubleshooting or professional assistance may be needed.
Ensure that you prioritize safety when dealing with electrical components. Always unplug the air fryer before inspecting the power source or making any adjustments.
Addressing power source-related issues can often resolve common problems and get your air fryer back up and running efficiently.
Inspect the Power Cord
If your air fryer is not functioning properly, it’s important to inspect the power cord to ensure it is not the cause of the issue. Follow these steps to inspect the power cord:
- Unplug the Air Fryer: Before inspecting the power cord, make sure to unplug the air fryer from the power source for safety purposes.
- Examine the Power Cord: Carefully inspect the entire length of the power cord for any visible signs of damage or wear. Look for cuts, fraying, or exposed wires.
- Bend and Flex Test: Gently bend and flex the power cord along its length to check for any weak spots or areas where the cord may have been damaged internally. If you notice any irregularities or the cord feels brittle, it may need to be replaced.
- Check the Connections: Ensure that the power cord is securely connected both to the air fryer and the power outlet. Ensure there are no loose connections or disconnections that may be causing a power interruption.
- Test with a Different Power Cord: If you have access to another power cord that is compatible with your air fryer, try connecting the air fryer with the alternate cord to see if it resolves the issue. This will help determine if the power cord itself is faulty.
- Consider Replacement: If you notice any significant damage, fraying, or suspect the power cord is the cause of the problem, it is recommended to replace it. Contact the manufacturer or an authorized service center to obtain a compatible replacement power cord.
- Professional Assistance: If you are unsure about inspecting or replacing the power cord on your own, it is best to seek professional assistance from the manufacturer or a certified technician.
Remember to prioritize safety throughout the inspection process. Always unplug the air fryer before handling or inspecting the power cord, and avoid using the appliance if there are any visible signs of damage or irregularities.
By thoroughly inspecting the power cord and addressing any issues, you can determine if it is the cause of the problem and take appropriate steps to ensure the safe and proper functioning of your air fryer.
Allow the Air Fryer to Cool Down
If your air fryer suddenly shuts off or shows signs of overheating, it’s crucial to allow it to cool down before attempting to use it again. Here are the steps to follow:
- Turn Off the Air Fryer: Immediately turn off the air fryer if you notice any signs of overheating or if it has shut off unexpectedly. This will help prevent further damage and ensure safety.
- Unplug the Air Fryer: After turning off the appliance, unplug it from the power source. This will completely disconnect the air fryer from the electrical supply.
- Leave it Undisturbed: Allow the air fryer to sit undisturbed for at least 30 minutes or until it has cooled down completely. This time will vary depending on the extent of overheating.
- Open the Lid: Once the air fryer has cooled down, open the lid to allow heat to escape more quickly. This will help speed up the cooling process.
- Clean the Air Fryer: While the air fryer is cooling down, take the opportunity to clean the interior and remove any food particles or residue that may have contributed to the overheating. Refer to the user manual for specific cleaning instructions.
- Inspect for Damage: Once the air fryer has cooled down and is clean, inspect it for any visible signs of damage or malfunction. Look for loose components, burnt wires, or unusual odors that may indicate a more serious issue.
- Restart the Air Fryer: After ensuring that the air fryer is completely cool and clean, you can plug it back into the power source, close the lid, and attempt to restart it. If it powers on and operates normally, it should be safe to use again.
Overheating can occur due to various reasons, such as extended use, blocked ventilation, or internal malfunctions. Allowing the air fryer to cool down not only prevents further damage but also gives you the opportunity to clean it and ensure it’s in optimal working condition.
If the air fryer continues to overheat even after allowing it to cool down, it’s advisable to seek professional assistance from the manufacturer or a certified technician to identify and address the underlying cause of the problem.
Read more: Why Did My Electric Toothbrush Stop Working
Clean the Air Intake
A clogged air intake can restrict proper airflow in your air fryer, leading to inefficient performance or even causing the appliance to stop working. To address this issue, follow these steps to clean the air intake:
- Unplug the Air Fryer: Before cleaning the air intake, make sure to unplug the air fryer from the power source for safety purposes.
- Remove the Food Basket: Take out the food basket and set it aside. This will provide better access to the air intake vents for cleaning.
- Inspect the Air Intake Vents: Carefully examine the air intake vents located on the sides or back of the air fryer. Look for any visible signs of food particles, grease, or debris that may be blocking the airflow.
- Brush Away Debris: Use a soft-bristle brush, such as a clean paintbrush or a toothbrush, to gently brush away any debris or food particles from the air intake vents. Pay attention to any stubborn or hard-to-reach areas.
- Vacuum the Vents: If there are stubborn particles or dust in the air intake vents, use a vacuum cleaner with a brush attachment to gently suction out the debris. This will help ensure a thorough cleaning.
- Wipe Down the Exterior: After cleaning the air intake vents, wipe down the exterior of the air fryer with a damp cloth or sponge. Remove any grease, food residue, or fingerprints from the surface.
- Reassemble and Test: Once you have completed the cleaning process, reassemble the air fryer by placing the food basket back into the appliance. Plug it back into the power source and test if the air fryer is functioning properly.
Regularly cleaning the air intake vents of your air fryer is essential to maintain optimal airflow and prevent any obstruction. This will ensure that your air fryer operates efficiently and delivers evenly cooked, delicious meals every time.
Remember to unplug the air fryer from the power source before cleaning, and never immerse the appliance in water. Refer to the user manual for any specific cleaning instructions provided by the manufacturer.
By following these steps and keeping the air intake vents clean, you can optimize the performance of your air fryer and prolong its lifespan.
Reset the Control Panel
If you’re experiencing issues with the control panel of your air fryer, such as unresponsive buttons or error messages, performing a reset can often help resolve the problem. Follow these steps to reset the control panel:
- Turn Off the Air Fryer: Make sure the air fryer is turned off and unplugged from the power source before performing the reset.
- Locate the Reset Button or Option: Check the user manual or the control panel of your specific air fryer model to locate the reset button or reset option.
- Press and Hold the Reset Button: If your air fryer has a physical reset button, press and hold it for a few seconds. If there is no reset button, navigate through the control panel menu to find the reset option.
- Wait for the Reset Process: Keep the reset button or reset option pressed for a few seconds until you see the control panel display resetting or the air fryer indicating that the process is complete.
- Power Cycle the Air Fryer: After the reset process is complete, turn off the air fryer and unplug it from the power source. Wait for a few minutes, then plug it back in and turn it on to power cycle the air fryer.
- Test the Control Panel: Once the air fryer has restarted, test the control panel by pressing various buttons and checking their responsiveness. Ensure that the error message is no longer displayed, if applicable.
Performing a reset can help clear any temporary glitches or software errors that may be affecting the control panel’s functionality. It essentially restores the control panel to its default settings.
If the control panel continues to exhibit issues or error messages even after the reset, refer to the user manual for specific troubleshooting steps or contact the manufacturer for further assistance.
Always follow safety precautions, unplug the air fryer before performing a reset, and be cautious while navigating the control panel to avoid unintentional changes to other settings.
By resetting the control panel, you give your air fryer a fresh start and increase the chances of resolving any issues that may be hindering its performance.
Improve Air Circulation
Proper air circulation is essential for the optimal performance of your air fryer. If you notice uneven cooking or that your air fryer is not working efficiently, it may be due to insufficient airflow. Here are some steps to improve air circulation:
- Ensure Adequate Space: Make sure there is enough space around the air fryer for air to circulate freely. Avoid placing it too close to walls, cabinets, or other appliances that can obstruct the airflow.
- Use the Correct Pan/Basket: Use the recommended pan or basket that came with your air fryer. These accessories are designed to allow proper airflow and even cooking. Using different or oversized pans can hinder air circulation.
- Avoid Overcrowding: Do not overcrowd the basket or tray with food. Overloading the air fryer can restrict airflow and result in uneven cooking. Cook in smaller batches if needed to ensure proper air circulation.
- Elevate Food: Elevate the food using the accessories provided with your air fryer, such as racks or trays. This helps promote better airflow around the food and ensures more consistent cooking.
- Arrange Food Evenly: When placing food in the air fryer, arrange it evenly to facilitate proper airflow. Avoid piling food on top of each other, as this can obstruct the air circulation and lead to uneven cooking.
- Keep Vents Clear: Regularly clean the air vents on your air fryer to prevent any buildup of food particles or debris. Blocked vents can impede airflow, causing the appliance to work less efficiently.
- Preheat the Air Fryer: Preheating the air fryer for a few minutes before adding the food can help create a more consistent cooking environment, allowing the hot air to circulate effectively from the start.
- Follow the Manufacturer’s Instructions: Always refer to the user manual and follow the manufacturer’s instructions for proper usage and cooking recommendations. Each air fryer model may have specific guidelines to ensure optimal air circulation and cooking performance.
By implementing these steps, you can improve the air circulation in your air fryer and achieve more consistent and evenly cooked results. It is important to maintain proper airflow for efficient cooking and to prevent any potential issues related to uneven cooking or overheating.
Remember to clean and maintain your air fryer regularly to promote good air circulation and prolong its lifespan. Regular maintenance will help ensure that your air fryer continues to deliver delicious and evenly cooked meals with every use.
Seek Professional Assistance
If you have tried troubleshooting steps and your air fryer is still not working properly, it may be time to seek professional assistance. Here are a few scenarios where professional help may be necessary:
- Complex Internal Issues: If you suspect that the problem with your air fryer lies within its internal components, such as the heating element, thermostat, or motor, it is recommended to consult a professional technician. These components require specialized knowledge and tools to diagnose and repair.
- Manufacturer Support: If your air fryer is still under warranty, it’s advisable to contact the manufacturer for assistance. They may provide troubleshooting guidance or direct you to an authorized service center for repairs.
- Certified Service Centers: Engaging a certified service center ensures that your air fryer is handled by technicians with expertise in repairing and maintaining the specific brand and model. They will have access to genuine replacement parts and accurate diagnostic tools.
- Safety Concerns: If you have encountered any issues with the power supply, power cord, or other electrical components, it’s best to rely on professional assistance to avoid potential hazards. They can safely inspect and repair any electrical problems.
- Efficiency and Longevity: Seeking professional assistance for repairs can ensure that the underlying cause of the problem is properly identified and rectified. This helps not only in restoring the functionality of the air fryer but also in extending its lifespan.
When seeking professional assistance, keep all relevant documents, such as warranties, receipts, and service manuals, readily available. Provide accurate information about the problem you’re facing to help the technician diagnose and resolve the issue effectively.
Remember, attempting to fix complex issues yourself or seeking help from unauthorized technicians may void the warranty or cause further damage to the appliance. It’s best to rely on trained professionals who specialize in air fryer repairs.
By seeking professional assistance, you can ensure that your air fryer is in capable hands and potentially save time and effort in resolving the issue at hand.
After figuring out why your air fryer gave up, why not master using one? Our next guide offers handy air fryer tips to ensure crispy, delicious meals every time. Whether you're new to air frying or looking to brush up on your skills, this article is packed with insights to get the most out of your device. Don't miss it!
Frequently Asked Questions about Why Did My Air Fryer Stop Working
Was this page helpful?
At Storables.com, we guarantee accurate and reliable information. Our content, validated by Expert Board Contributors, is crafted following stringent Editorial Policies. We're committed to providing you with well-researched, expert-backed insights for all your informational needs.


0 thoughts on “Why Did My Air Fryer Stop Working”