Home>Home Maintenance>Why Is My Air Conditioning Leaking Water
Home Maintenance
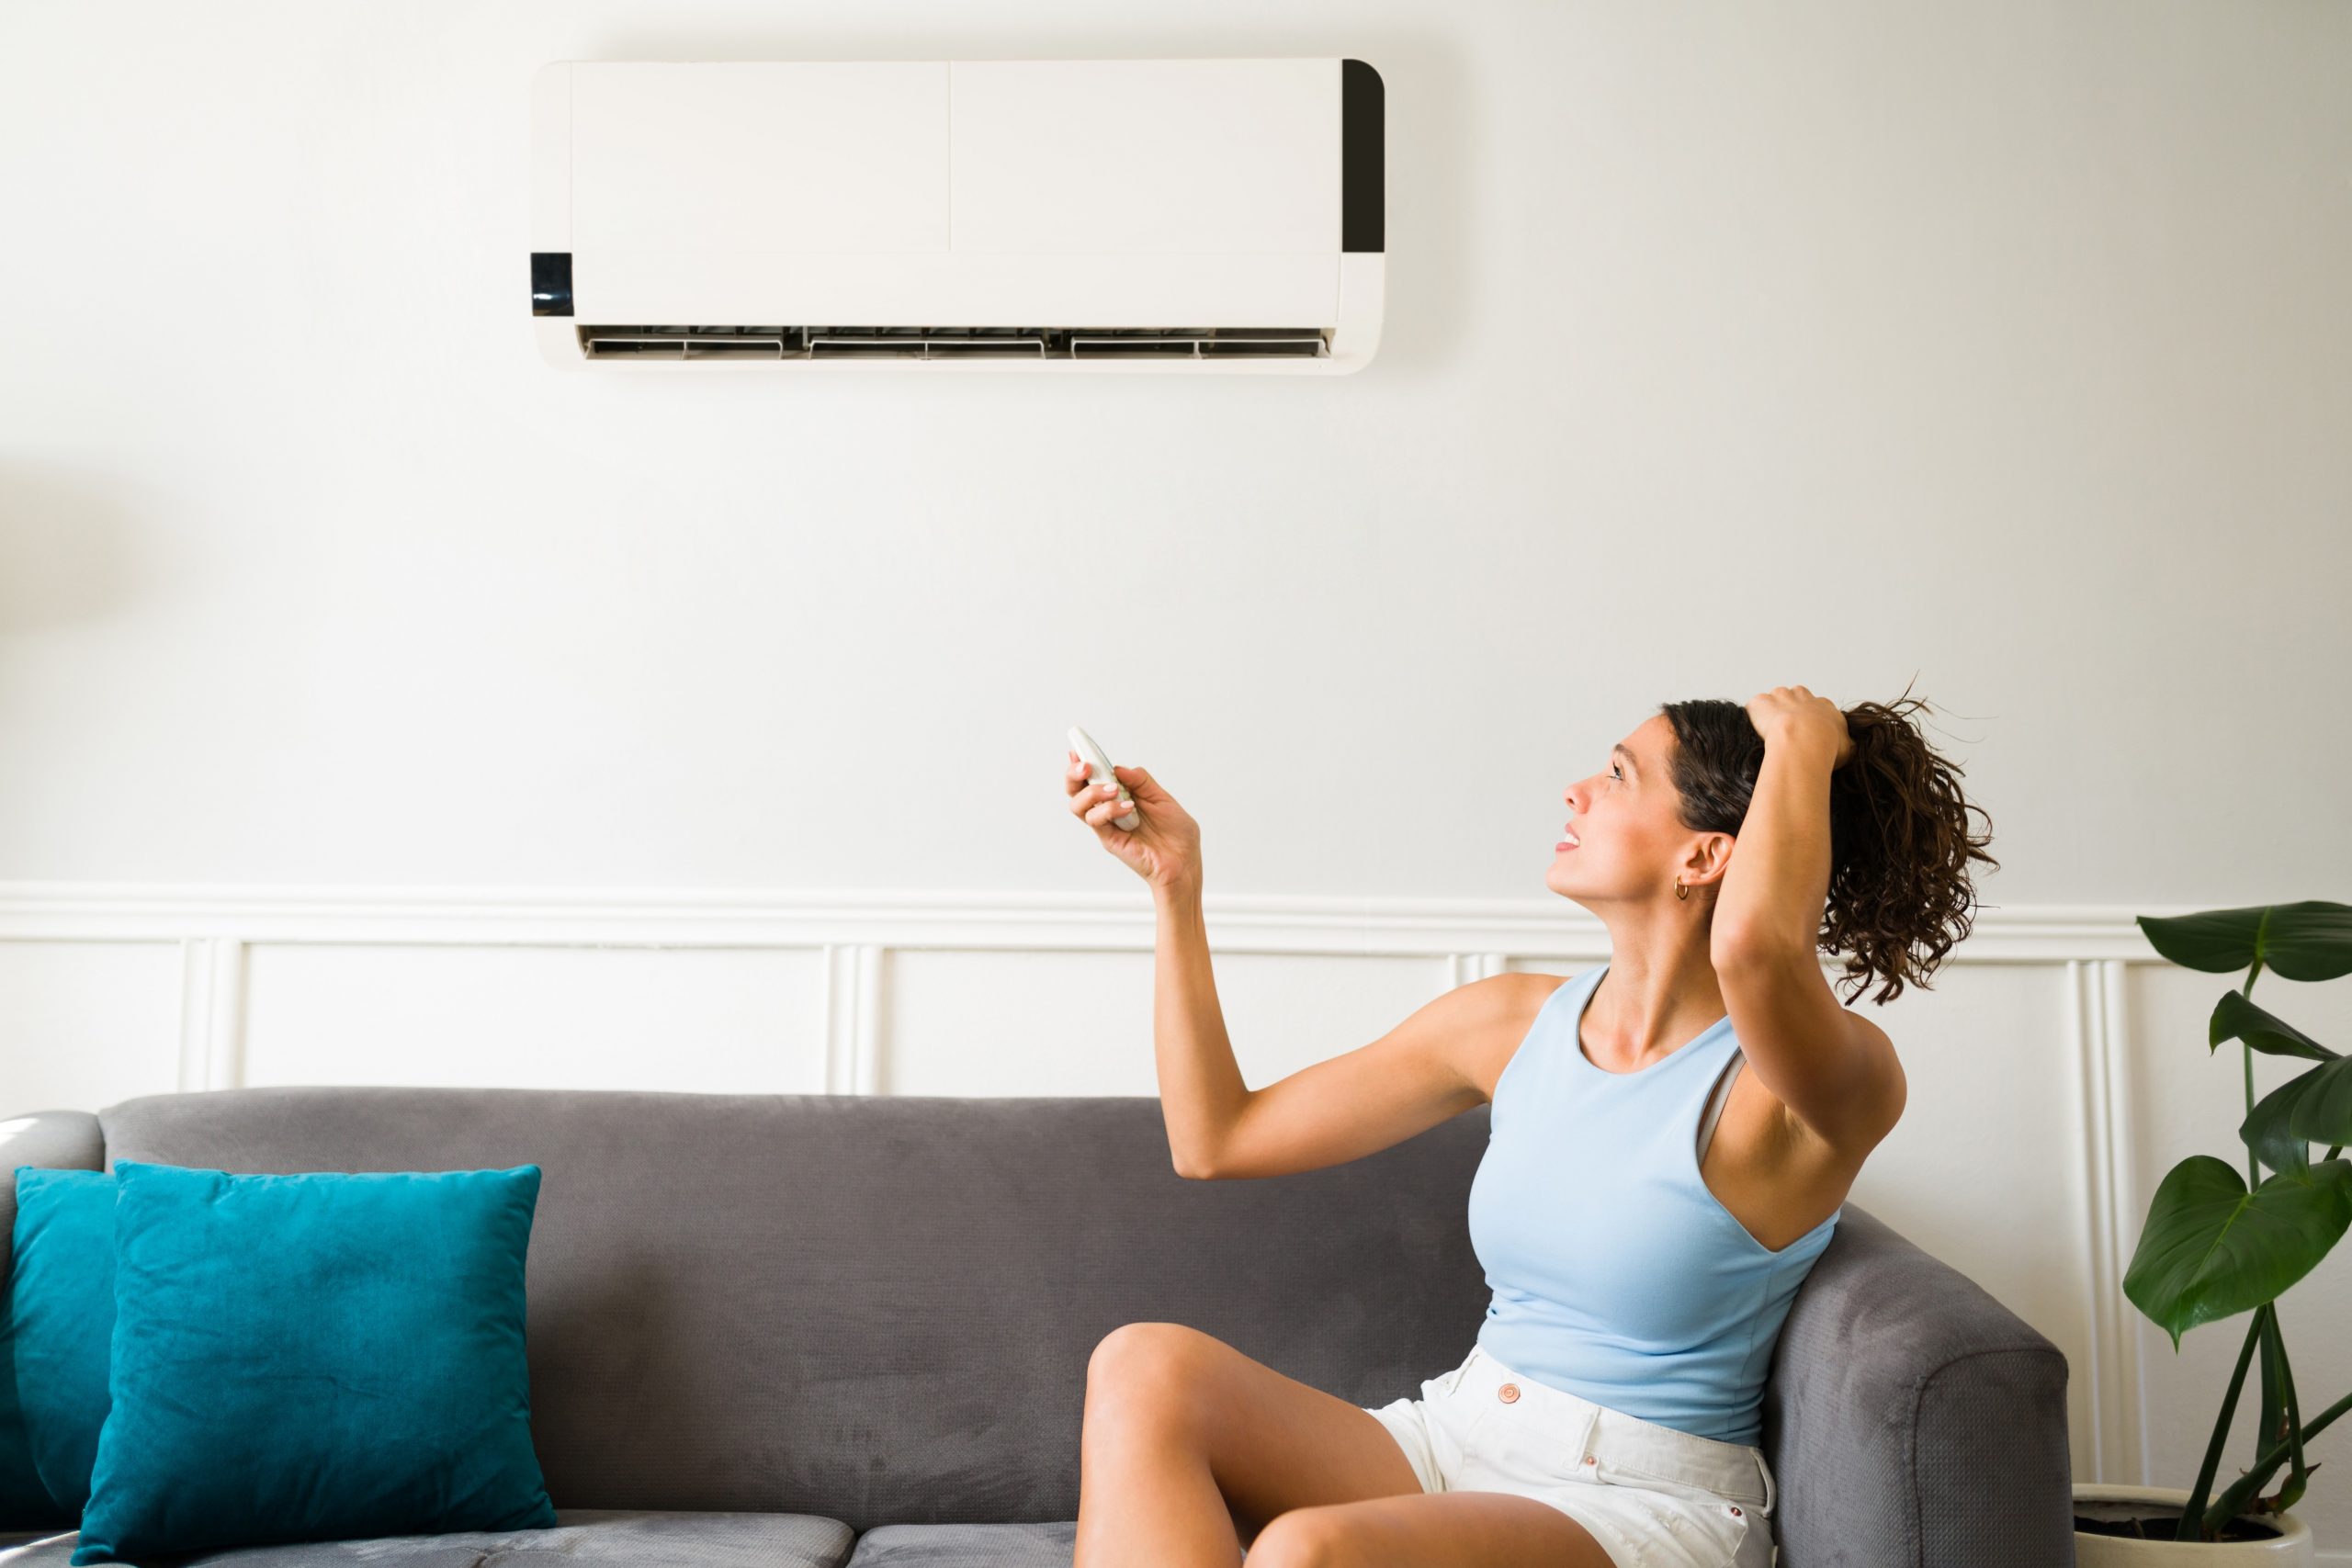
Why Is My Air Conditioning Leaking Water
Modified: March 6, 2024
Discover the reasons behind your air conditioning unit leaking water and how to fix it with our comprehensive home maintenance guide.
(Many of the links in this article redirect to a specific reviewed product. Your purchase of these products through affiliate links helps to generate commission for Storables.com, at no extra cost. Learn more)
Introduction
Welcome to a comprehensive guide on understanding why your air conditioning system is leaking water. Air conditioners play a crucial role in maintaining a comfortable and cool indoor environment, especially during hot summer months. However, it can be quite frustrating to discover water leaking from your AC unit, causing potential damage and inconvenience.
In this article, we will delve into the common causes of water leakage from air conditioners and provide practical solutions to fix the issue. By understanding the different factors that contribute to water leaks, you will be better equipped to identify and resolve the problem, ensuring the long-term efficiency and functionality of your AC system.
Before we delve into the potential causes of water leakage, let’s take a moment to understand the basics of how your air conditioning system works. This knowledge will give you a better grasp of the potential issues that may arise and will help you troubleshoot more effectively.
An air conditioning system operates by removing heat and humidity from the indoor air, leaving behind cool and dehumidified air. This cooling process primarily occurs in the evaporator coil, located in the indoor unit of the AC system. During operation, warm indoor air passes over the evaporator coil, and the refrigerant inside the coil absorbs the heat, resulting in the cooling of the air.
As the warm air passes over the chilled coil, water vapor in the air condenses into liquid form on the coil surface. This liquid water is then collected and channeled out of the system through a drain line, usually connected to a condensate pan and eventually leading to an exterior drain or a drain pump. However, in some cases, issues may arise that cause the water to leak from the AC unit instead of being properly drained away.
Now that we have a basic understanding of how air conditioners work, let’s explore the common causes of water leakage and how to address them. By following these troubleshooting steps, you can prevent further damage to your system and ensure the efficient operation of your air conditioning unit.
Key Takeaways:
- Regularly changing air filters and cleaning condensate drain lines can prevent water leakage from your AC unit, ensuring efficient cooling and avoiding potential damage.
- Seeking professional help for refrigerant recharging and condensate pan maintenance can address water leakage issues and prolong the lifespan of your air conditioning system.
Understanding Your Air Conditioning System
Before diving into the causes of water leakage, it’s important to have a solid understanding of the different components that make up your air conditioning system. This knowledge will help you identify and troubleshoot issues more effectively.
An air conditioning system typically consists of two main units – the indoor unit and the outdoor unit. The indoor unit, also known as the evaporator unit, is responsible for cooling and dehumidifying the air. It contains the evaporator coil, which is crucial in removing heat and moisture from the indoor air.
The outdoor unit, also known as the condenser unit, houses components such as the condenser coil, compressor, and fan. The condenser coil is responsible for releasing the heat absorbed from the indoor air, while the compressor circulates the refrigerant between the indoor and outdoor units, facilitating the cooling process.
When your air conditioner is turned on, the compressor in the outdoor unit pressurizes the refrigerant and sends it to the indoor unit. The refrigerant travels through the evaporator coil, absorbing heat from the indoor air, and then returns to the outdoor unit to release the heat. This continuous cycle helps maintain a comfortable indoor temperature.
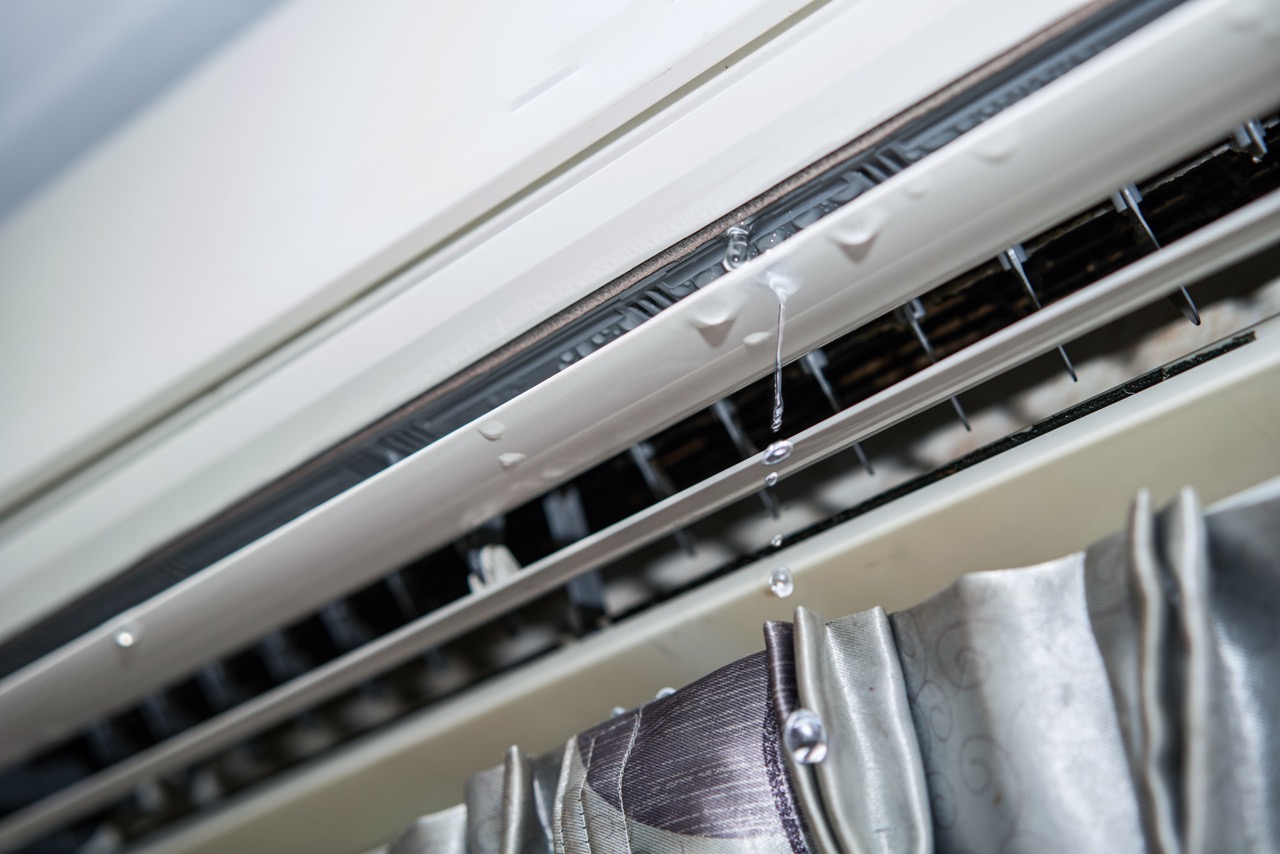
During the cooling process, condensation forms on the evaporator coil as the warm air passes over it. This condensation drips down into a condensate pan located below the coil. From there, the water is directed to a condensate drain line and carried away from the unit.
Understanding the basic functioning of your air conditioning system allows you to pinpoint potential issues when water leakage occurs. Now, let’s explore the common causes of water leakage from your AC unit and how to address them.
Common Causes of Water Leakage
Water leakage from your air conditioning system can be caused by various factors. Identifying the root cause is essential in order to address the issue and prevent further damage. Here are some common reasons why your AC unit may be leaking water:
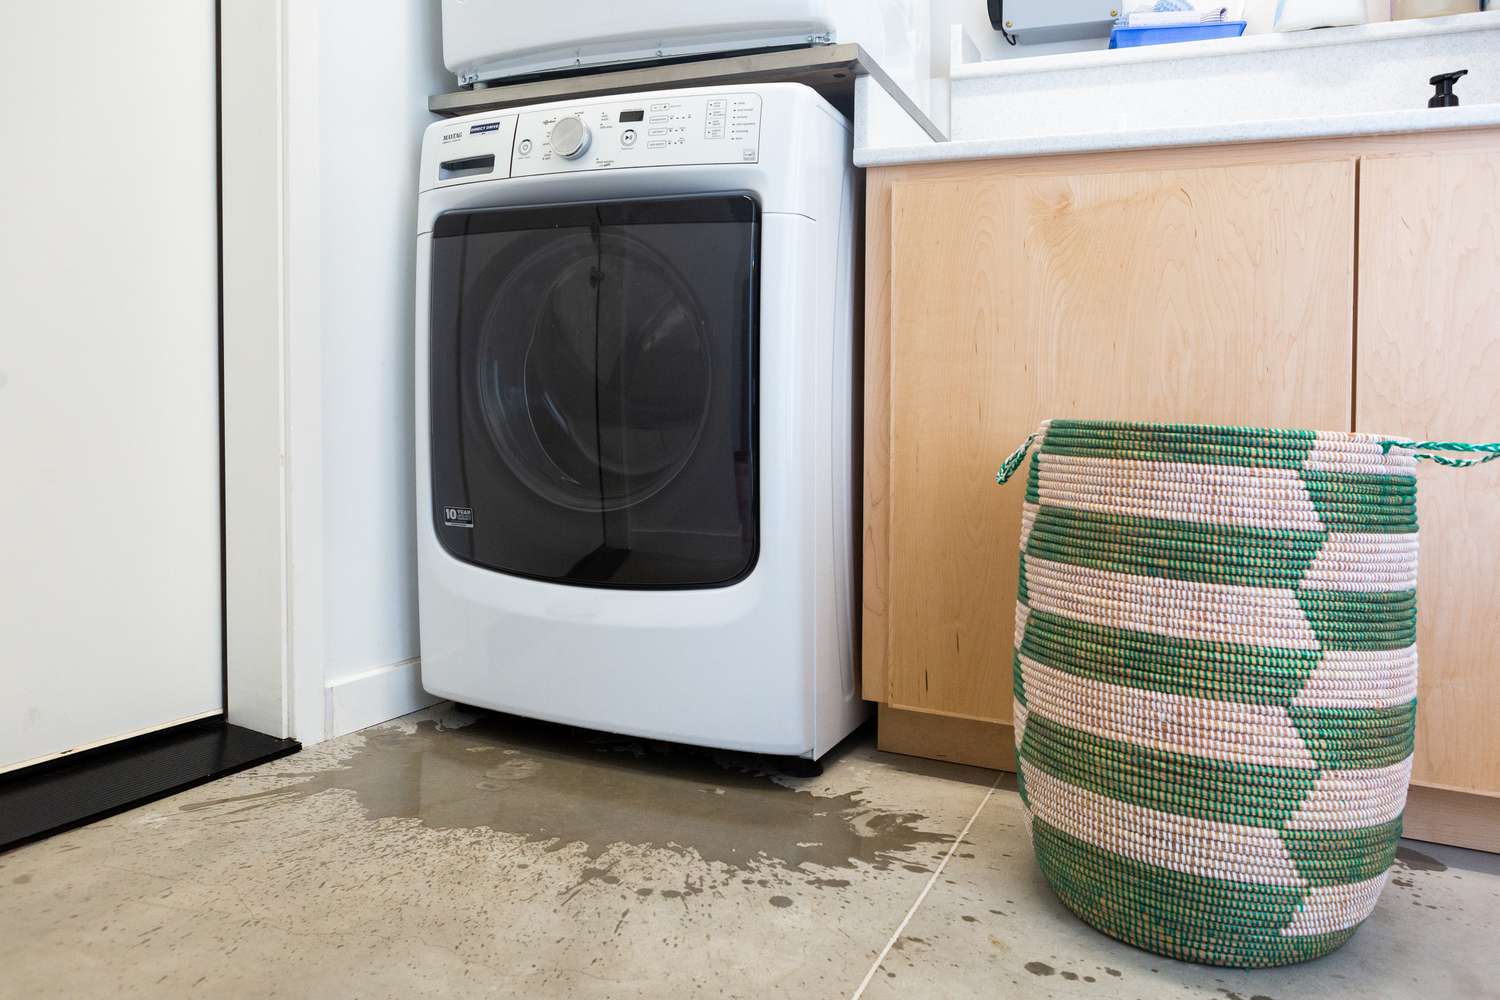
- Clogged condensate drain line: Over time, the condensate drain line can become clogged with dirt, dust, or algae, obstructing the proper flow of water. This can cause the condensate pan to overflow, resulting in water leakage from the AC unit.
- Dirty air filters: When the air filters in your AC system are clogged with dirt and debris, it restricts airflow and reduces the system’s efficiency. This can lead to the evaporator coil becoming too cold, causing excess condensation and potential water leakage.
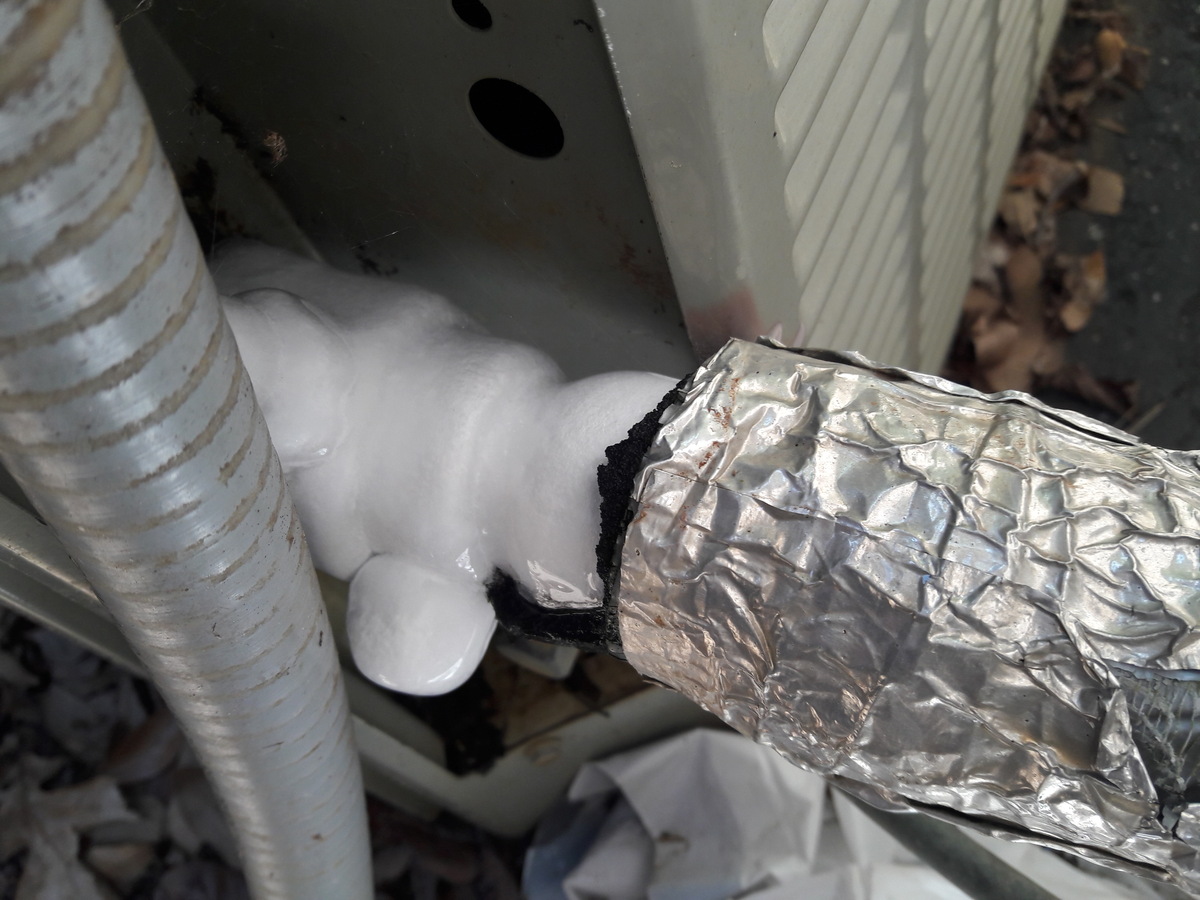
- Low refrigerant levels: Refrigerant is responsible for facilitating the cooling process in your air conditioning system. If the refrigerant levels are too low, it can cause the evaporator coil to freeze up. When the coil eventually thaws, it can result in water dripping and leaking from the unit.
- Damaged or blocked condensate pan: The condensate pan collects the water that drips from the evaporator coil. If the pan is damaged or improperly aligned, it may not collect the water efficiently, leading to leaks. Additionally, a blocked condensate pan due to debris or microbial growth can also cause water to overflow.
- Improper installation or maintenance: If your air conditioning system was not installed correctly or if it has not been properly maintained, it can contribute to water leakage. Poor installation can result in incorrect drainage connections, while lack of regular maintenance can lead to issues such as dirty coils and clogged drain lines.
These are the most common causes of water leakage from air conditioning systems. It’s important to address these issues promptly to prevent further damage to your AC unit and maintain its efficiency. In the following sections, we will discuss how to fix a leaking air conditioner and preventive maintenance tips to avoid future water leakage.
Clogged Condensate Drain Line
A clogged condensate drain line is one of the most common causes of water leakage in air conditioning systems. Over time, dirt, dust, debris, and even algae can accumulate in the drain line, obstructing the flow of water. When the drain line becomes clogged, the condensate pan fills up, causing water to overflow and leak from the AC unit.
Fortunately, unclogging the condensate drain line is a relatively simple task that can be done with some basic tools. Here is a step-by-step guide to help you unclog the condensate drain line:
- Turn off the air conditioner: Before attempting any maintenance or repairs, make sure to turn off the power to your air conditioning system. This will prevent any accidents or injuries during the process.
- Locate the drain line: The condensate drain line is usually a PVC pipe located near the indoor unit of your AC system. It may be connected to a condensate pan or directly to the evaporator coil. Use a flashlight if needed to locate the drain line.
- Clear the access point: Often, there is an access point near the drain line that allows you to inspect and clean it. Remove the cap or cover from the access point to gain access to the drain line.
- Flush the drain line: Take a wet-dry vacuum or a small plumbing snake and carefully insert it into the drain line. Gently push the vacuum or snake into the line to dislodge any blockages. Alternatively, you can use a mixture of equal parts vinegar and water to flush out the drain line. Pour the solution into the access point and let it sit for a few minutes before flushing it out with clean water.
- Check for proper drainage: After unclogging the drain line, turn on your air conditioner to ensure that it is draining properly. You should see water flowing through the drain line and exiting the system without any leaks.
- Reassemble and clean up: Once you have confirmed that the drain line is clear and the water is draining properly, replace the access point cover. Take a few moments to clean up any water or debris that may have spilled during the unclogging process.
Regularly cleaning the condensate drain line can help prevent future clogs and water leakage. You can do this by pouring a mixture of vinegar and water down the drain line every few months to keep it clear from debris and microbial growth. Additionally, ensuring your air filters are clean can also prevent debris from entering the drain line.
If you are unsure or uncomfortable with unclogging the condensate drain line yourself, it is always best to seek the assistance of a professional HVAC technician. They have the expertise and tools to efficiently unclog the drain line and ensure the proper functioning of your air conditioning system.
Dirty Air Filters
Dirty air filters can cause a variety of issues with your air conditioning system, including water leakage. When the filters become clogged with dirt, dust, and debris, the airflow through the system is restricted. As a result, the evaporator coil may become too cold, causing excess condensation and potentially leading to water leakage from the AC unit.
Regularly changing and cleaning your air filters is an important maintenance task that can prevent various problems, including water leaks. Here are the steps to changing your air filters:
- Turn off the air conditioner: Before changing the air filters, make sure to turn off the power to your AC unit. This will ensure your safety during the process.
- Locate the air filters: The air filters are typically located in the return air duct, which is usually near the indoor unit of your air conditioning system. Refer to your system’s manual or consult with a professional if you are unsure of their location.
- Remove the old air filters: Carefully slide out the old air filters from their housing. Take note of the size and type of filter so you can purchase the correct replacements.
- Clean or replace the air filters: If your air filters are reusable, gently vacuum or wash them according to the manufacturer’s instructions. If they are disposable, simply discard the old filters and replace them with new ones of the same size and type.
- Reinstall the air filters: Slide the cleaned or new air filters back into their housing, ensuring they are properly aligned with the arrows indicating the correct airflow direction.
- Turn on the air conditioner: Once the air filters are securely in place, turn on the power to your AC unit. Proper airflow will resume, reducing the risk of water leakage caused by a frozen evaporator coil.
Regularly changing your air filters, typically every one to three months, depending on factors such as indoor air quality and household pets, is essential for maintaining the efficiency and performance of your air conditioning system. In addition to preventing water leakage, clean filters also improve indoor air quality and extend the lifespan of your AC unit.
If you have a particularly dirty or dusty environment, it may be necessary to change your air filters more frequently. Additionally, consider upgrading your filters to ones with a higher MERV (Minimum Efficiency Reporting Value) rating for better filtration.
Remember, when changing or cleaning your air filters, it is important to follow the manufacturer’s instructions and safety guidelines. If you are unsure or uncomfortable with performing this maintenance task yourself, you can always seek the assistance of an HVAC professional.
Read more: Why Is My Water Pump Leaking
Low Refrigerant Levels
Low refrigerant levels in your air conditioning system can lead to various issues, including water leakage. Refrigerant is responsible for absorbing heat from the indoor air, and when levels are insufficient, the evaporator coil may become too cold. This can cause excess condensation, leading to water dripping and potentially causing leaks from the AC unit.
If you suspect that low refrigerant levels are the cause of water leakage, it is important to have a professional HVAC technician inspect and recharge the refrigerant. Here is what you can expect during the process:
- Turn off the air conditioner: Before any inspection or service, ensure that the power to your air conditioning system is turned off to prevent accidents or injuries.
- Contact HVAC professionals: Reach out to reputable HVAC technicians who specialize in air conditioning systems. They will have the expertise and tools required to inspect and recharge the refrigerant in your AC unit.
- Refrigerant leak detection: The technician will first check for any refrigerant leaks in your system. This is crucial as simply recharging the refrigerant without addressing the underlying leak will only provide a temporary solution.
- Repairing the leak: If the technician finds a refrigerant leak, they will proceed to repair it before recharging the system. The specific repair process will depend on the location and severity of the leak.
- Recharging the refrigerant: Once the leak is repaired, the technician will recharge the refrigerant to the recommended levels. This will involve connecting gauges to the system and carefully injecting the appropriate amount of refrigerant.
- Testing and inspection: After recharging the refrigerant, the technician will conduct tests to ensure that there are no further leaks and that the system is operating properly.
It is important to note that refrigerant leaks should be taken seriously and addressed promptly. Not only can low refrigerant levels lead to water leakage, but they can also cause your air conditioner to operate inefficiently and potentially damage the compressor. Therefore, it is crucial to rely on professional help for this issue.
Remember, refrigerant handling requires specialized knowledge and equipment. It is illegal for individuals without proper certification to handle refrigerants, so be sure to hire licensed HVAC technicians to service your air conditioning system.
By addressing low refrigerant levels and fixing any leaks, you can ensure that your air conditioning system operates efficiently, prevents water leakage, and maintains a comfortable indoor environment.
Damaged or Blocked Condensate Pan
A damaged or blocked condensate pan can be another common cause of water leakage from your air conditioning system. The condensate pan is responsible for collecting the water that drips from the evaporator coil. If the pan is damaged, improperly aligned, or blocked, it may not collect the water efficiently, leading to leaks.
If you suspect that a damaged or blocked condensate pan is causing water leakage, here are steps you can take to address the issue:
- Turn off the air conditioner: Prior to any maintenance or repairs, ensure that the power to your air conditioning system is turned off for your safety.
- Locate the condensate pan: The condensate pan is typically located below the evaporator coil, either within the indoor unit or in a separate compartment. Consult your system’s manual or contact a professional if you’re unsure of its exact location.
- Inspect the pan for damage: Carefully examine the condensate pan for any cracks, holes, or other signs of damage. A damaged pan may need to be repaired or replaced to prevent further water leakage.
- Clear any blockages: If the condensate pan is not damaged but appears to be blocked, carefully remove any debris or obstructions. This may include dust, dirt, or microbial growth that can prevent proper water drainage.
- Ensure proper alignment: Sometimes, a misaligned condensate pan can prevent water from properly draining into the pan. Adjust and align the pan, ensuring it is securely positioned beneath the evaporator coil.
- Turn on the air conditioner: Once the pan has been inspected, repaired (if necessary), and cleared of any blockages, turn on the power to your AC unit. Monitor the system for proper drainage and check for any signs of water leakage.
If you are unsure about inspecting or repairing the condensate pan yourself, it is recommended to seek the assistance of a professional HVAC technician. They have the necessary expertise and tools to accurately diagnose and address any issues with the condensate pan.
Regular maintenance, such as cleaning the condensate pan and ensuring it remains free from blockages, can help prevent future water leakage. Additionally, scheduling routine maintenance visits with a professional technician can ensure that any potential problems with the condensate pan are promptly addressed.
By maintaining a properly functioning condensate pan, you can prevent water leakage, avoid potential damage to your air conditioning system, and enjoy a comfortable indoor environment.
Improper Installation or Maintenance
Improper installation or lack of regular maintenance can contribute to water leakage from your air conditioning system. If your AC unit was not installed correctly or if it has not been properly maintained, it can lead to various issues that can cause water leaks. Let’s explore these factors in more detail:
1. Installation: A proper installation is crucial for the efficient and effective operation of your air conditioning system. If the installation is not done correctly, it can result in improper drainage connections, inadequate insulation, or poor airflow. These factors can contribute to condensation build-up and ultimately lead to water leakage. If you suspect that improper installation is the cause of water leakage, it is best to consult with a professional HVAC technician to assess and fix any installation issues.
2. Maintenance: Regular maintenance is essential to keep your air conditioning system in optimal condition. Neglecting maintenance tasks can result in dirty coils, clogged filters, and blocked drain lines — all of which can lead to water leakage. Here are some key maintenance tasks that can help prevent water leaks:
- Cleaning the coils: Over time, dust and debris can accumulate on the evaporator and condenser coils, affecting their performance. Regularly cleaning these coils can improve airflow and prevent excessive condensation build-up.
- Clearing the drain lines: The condensate drain lines can become clogged with dirt, dust, and algae. Regularly flushing these lines with vinegar and water or using a wet-dry vacuum can help ensure proper drainage and prevent water leaks.
- Checking the insulation: Proper insulation around the air conditioning system’s components is crucial to prevent condensation and water leakage. Inspect the insulation regularly and replace any damaged or deteriorated insulation.
- Scheduling professional inspections: Regular maintenance visits by a professional HVAC technician are highly recommended. They can identify and address any potential issues before they escalate, helping to prevent water leaks and other problems.
By ensuring proper installation and conducting regular maintenance, you can significantly reduce the risk of water leakage from your air conditioning system. If you suspect that improper installation or lack of maintenance is the cause of water leaks, it is advisable to consult with an HVAC professional who can evaluate the system and make any necessary repairs or adjustments.
Remember, prevention is key when it comes to water leakage. By taking proactive measures and investing in professional installation and regular maintenance, you can enjoy a well-functioning air conditioning system that provides efficient cooling without any water leakage issues.
Check the condensate drain line for clogs or blockages. Use a wet/dry vacuum to clear any debris and ensure proper drainage. This can help prevent water from leaking out of your air conditioning unit.
How to Fix a Leaking Air Conditioner
Experiencing a leaking air conditioner can be a frustrating and potentially damaging issue. However, there are steps you can take to address the problem and prevent further damage. Here’s a guide on how to fix a leaking air conditioner:
- Turn off the air conditioner: As soon as you notice water leakage, turn off the power to your air conditioning system. This will prevent any potential hazards and reduce the risk of further damage.
- Identify the source of the leak: Thoroughly inspect your air conditioning system to pinpoint the source of the water leakage. Common areas to check include the condensate drain line, air filters, condensate pan, and connections between components.
- Unclog the condensate drain line: If the condensate drain line is clogged, use a wet-dry vacuum or a plumbing snake to remove blockages. Alternatively, you can flush the line with a mixture of equal parts vinegar and water to clear any debris or algae.
- Change the air filters: If dirty air filters are causing the issue, replace them with clean ones of the appropriate size and type. Clean air filters help maintain proper airflow and prevent excessive condensation.
- Check for refrigerant leaks: If low refrigerant levels are causing the water leakage, it’s crucial to have a professional HVAC technician inspect and recharge the refrigerant. They will also address any refrigerant leaks and ensure the proper functioning of the system.
- Inspect the condensate pan: Examine the condensate pan for damage or misalignment. Repair or replace the pan as needed to ensure proper water collection and drainage.
- Ensure proper installation and maintenance: Consider having an HVAC professional assess your air conditioning system for any installation or maintenance issues. Improper installation or lack of proper upkeep can contribute to water leaks, so it’s important to address these areas as well.
- Monitor the system: After performing the necessary repairs and maintenance, turn on the air conditioner and monitor it closely. Ensure that water is properly draining, and there are no signs of further leakage.
If you are uncertain or uncomfortable performing any of these steps, it is best to seek the assistance of a professional HVAC technician. They have the expertise and tools to accurately diagnose and fix the issue, ensuring the long-term efficiency and functionality of your air conditioning system.
Remember, regular maintenance and preventive measures can significantly reduce the likelihood of water leakage. It is advisable to schedule regular professional maintenance visits and keep up with routine tasks such as changing air filters, cleaning coils, and clearing drain lines. By taking proactive steps, you can minimize the risk of water leaks and enjoy a comfortable and hassle-free cooling experience.
Read more: Why Is My Freezer Leaking Water
Step-by-Step Guide to Unclog the Condensate Drain Line
One of the common causes of water leakage from an air conditioning system is a clogged condensate drain line. When the drain line becomes blocked with dirt, debris, or algae, it can cause the condensate pan to overflow, resulting in water leakage. Here is a step-by-step guide to help you unclog the condensate drain line:
- Turn off the air conditioner: Before starting any maintenance or repair work, ensure that the power to your air conditioning system is turned off. This will prevent any accidents and ensure your safety.
- Locate the condensate drain line: The condensate drain line is typically a PVC pipe connected to the indoor unit of your air conditioning system. It is commonly located near the evaporator coil. Use a flashlight if needed to locate the drain line.
- Clear the access point: Look for an access point along the drain line, usually covered with a cap or a removable cover. Remove the cap or cover to access the drain line.
- Prepare the necessary tools: You will need either a wet-dry vacuum or a plumbing snake to unclog the drain line. Choose the tool that you feel more comfortable using and that is appropriate for your drain line.
- Use a wet-dry vacuum: If using a wet-dry vacuum, connect the hose to the vacuum and carefully insert it into the drain line. Create a tight seal around the opening to ensure maximum suction. Turn on the vacuum and allow it to draw out the blockage from the drain line.
- Use a plumbing snake: If using a plumbing snake, carefully insert the snake into the drain line and gently push it through the clog. Rotate the snake if necessary to dislodge any debris. Once the blockage is cleared, carefully withdraw the snake from the drain line.
- Flush the drain line: After removing the blockage, it is important to flush the drain line to ensure it is completely clear. You can pour a mixture of equal parts vinegar and water down the drain line or use clean water to ensure any remaining debris is flushed away.
- Check for proper drainage: Turn on the air conditioner and observe the drain line. You should see a steady flow of water as it drains properly. Monitor the system for any signs of further leakage.
- Reassemble and clean up: Once you have confirmed that the condensate drain line is clear and water is draining properly, replace the access point cap or cover. Take a moment to clean up any water or debris that may have spilled during the unclogging process.
Regularly maintaining the condensate drain line by cleaning it every few months can help prevent future clogs and water leakage. Additionally, ensuring your air filters are clean can also prevent debris from entering the drain line and causing blockages.
If you are unsure or uncomfortable with unclogging the condensate drain line yourself, it is always best to seek the assistance of a professional HVAC technician. They have the expertise and tools to efficiently unclog the drain line and ensure the proper functioning of your air conditioning system.
Remember, regular maintenance and preventive measures can go a long way in preventing water leakage. By following this step-by-step guide and staying on top of maintenance tasks, you can keep your air conditioning system in optimal condition and reduce the chances of water leaks.
Changing Air Filters for Better AC Performance
Regularly changing the air filters in your air conditioning system is crucial for maintaining optimal performance and preventing potential issues such as water leakage. Dirty air filters can restrict airflow, decrease energy efficiency, and impact the overall performance of your AC unit. Here is why changing air filters is important and how to do it effectively:
Why is Changing Air Filters Important?
1. Improved Air Quality: Air filters help capture dust, pollen, pet dander, and other airborne particles, improving the indoor air quality of your home. This is especially beneficial for individuals with allergies or respiratory conditions.
2. Enhanced Energy Efficiency: Clean air filters allow for proper airflow within your AC system. When the airflow is unrestricted, your air conditioner can operate more efficiently, saving energy and reducing utility costs.
3. Extended Lifespan of Your AC Unit: A clogged or dirty air filter can strain your AC system, potentially leading to premature wear and tear. By regularly changing the air filters, you can help extend the lifespan of your AC unit.
4. Prevention of Water Leakage: As mentioned earlier, dirty air filters can cause the evaporator coil to become too cold, leading to excess condensation and potential water leakage. By keeping the air filters clean, you can prevent this issue.
How to Change Air Filters
1. Turn off the air conditioner: Before changing the air filters, ensure that the power to your AC system is turned off for safety.
2. Locate the air filters: The air filters are typically located in the return air duct, which is usually near the indoor unit of your air conditioning system. Refer to your system’s manual or consult with a professional if you are unsure of their location.
3. Remove the old air filters: Carefully slide out the old air filters from their housing. Take note of the size and type of filter so that you can purchase the correct replacements.
4. Clean or replace the air filters: If you have reusable filters, gently vacuum or wash them according to the manufacturer’s instructions. If they are disposable, simply discard the old filters and replace them with new ones of the same size and type.
5. Reinstall the air filters: Slide the cleaned or new air filters back into their housing, ensuring they are properly aligned with the arrows indicating the correct airflow direction.
6. Turn on the air conditioner: Once the air filters are securely in place, turn on the power to your AC unit. Proper airflow will resume, improving cooling efficiency and reducing the risk of water leakage.
How Often to Change Air Filters
The frequency of air filter changes depends on various factors, including the type of filter, indoor air quality, and usage of your AC system. As a general guideline:
- Disposable filters: Typically, disposable filters should be changed every 1 to 3 months.
- Permanent/washable filters: These filters can be cleaned and reused. Follow the manufacturer’s instructions, but generally, they should be cleaned every 1 to 3 months.
- High-efficiency filters: These filters provide advanced filtration and may have a longer lifespan. Check the manufacturer’s recommendations for the specific type of high-efficiency filter you are using.
However, it’s important to note that these are general guidelines, and actual filter change intervals may vary based on individual circumstances. It’s always a good idea to inspect your air filters regularly and change them as needed.
By regularly changing your air filters, you can improve the performance and efficiency of your air conditioning system while preventing potential issues such as water leakage. If you have any doubts or difficulties, you can always consult with an HVAC professional for guidance and assistance.
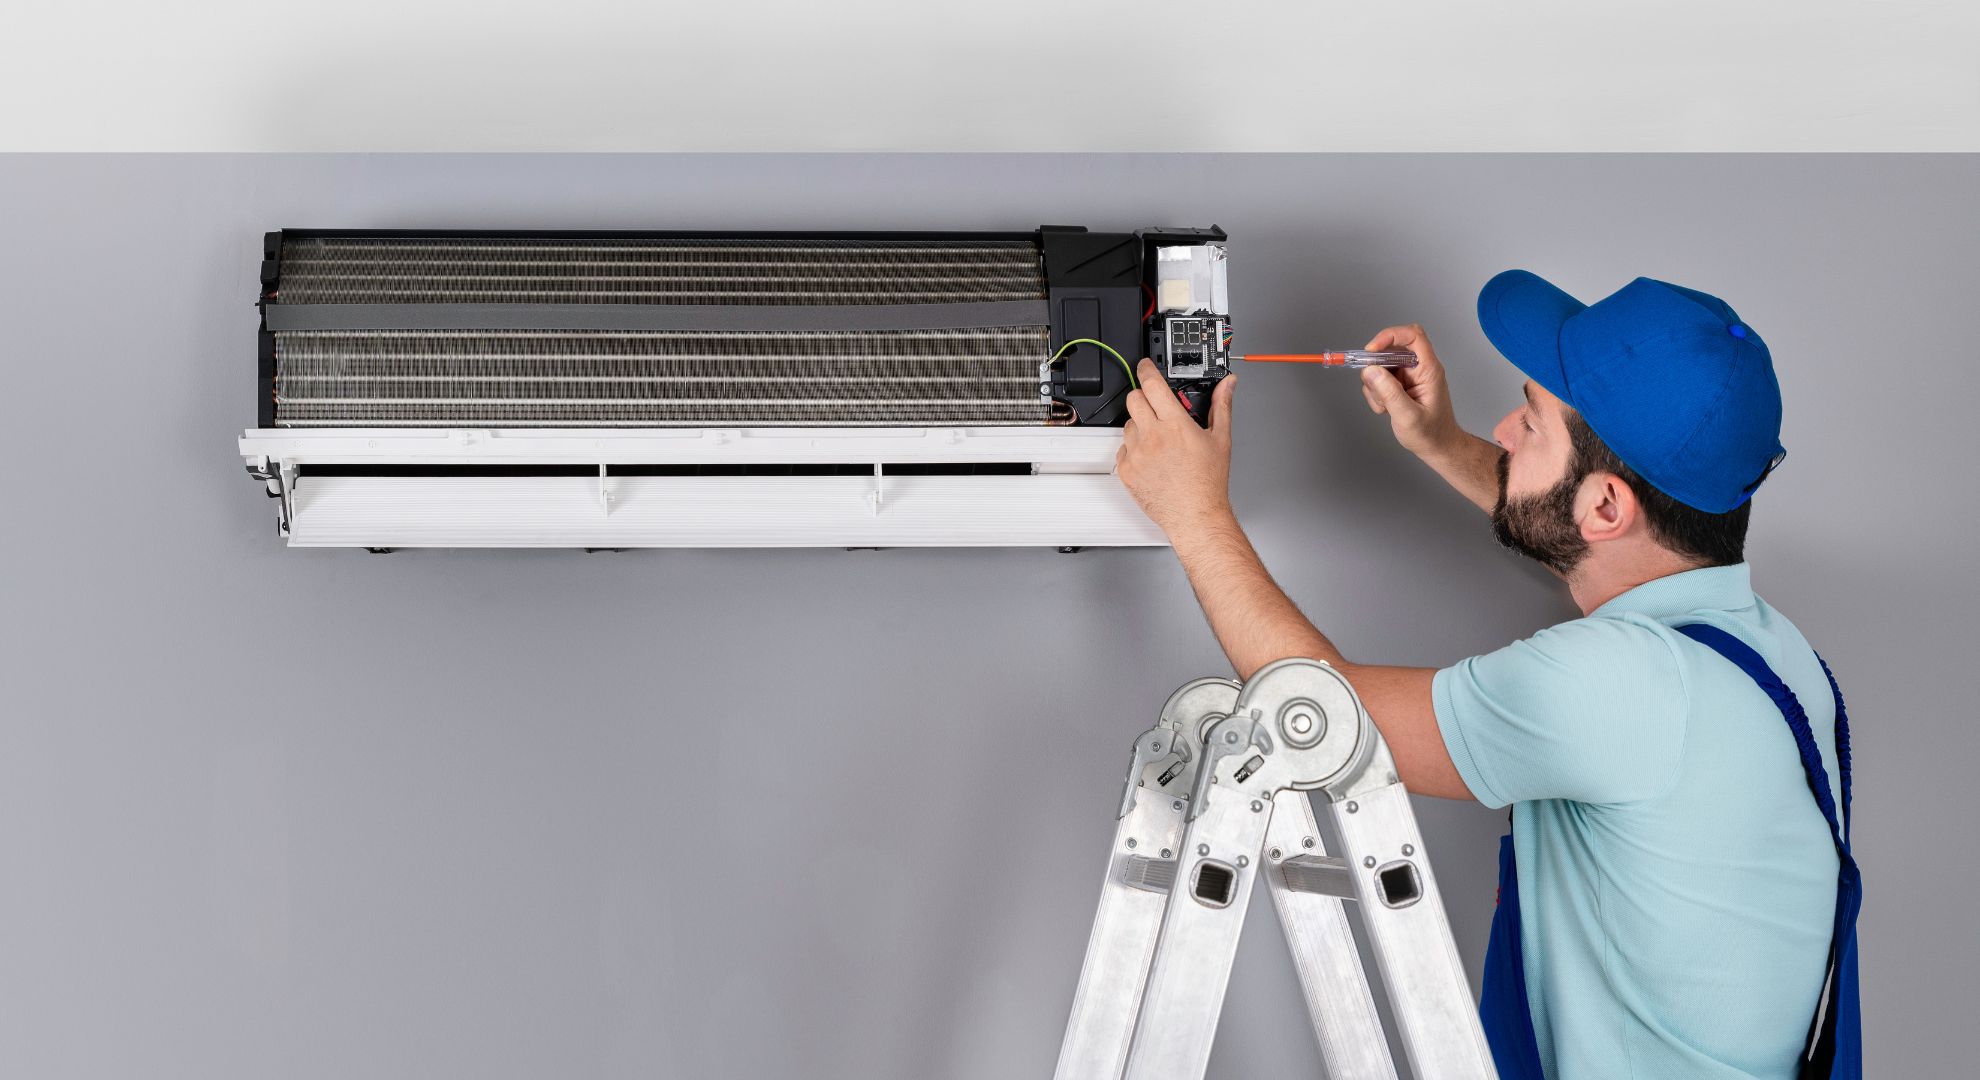
Calling a Professional for Refrigerant Recharging
Low refrigerant levels in your air conditioning system can result in various issues, including water leakage. Refrigerant is a crucial component that facilitates the cooling process in your AC unit. If you suspect low refrigerant levels are causing water leaks, it’s important to call a professional HVAC technician to inspect and recharge the refrigerant. Here are the reasons why it’s necessary and what to expect when seeking professional help:
Importance of Professional Refrigerant Recharging
1. Expertise and Experience: HVAC professionals have the necessary expertise and experience to accurately diagnose and address refrigerant-related issues. They are trained in handling refrigerants, identifying leaks, and ensuring proper recharging of the system.
2. Correct Diagnostic Procedures: Low refrigerant levels can be caused by leaks, improper installation, or other underlying issues. Professionals use specific diagnostic tools and techniques to identify the root cause of the problem, ensuring an appropriate solution.
3. Prolonged System Lifespan: Adequate refrigerant levels are crucial for the optimal performance and longevity of your air conditioning system. By allowing professionals to recharge the refrigerant, you can help extend the lifespan of your AC unit and prevent potential damage.
4. Efficient and Safe Procedure: Handling refrigerant requires specialized knowledge and equipment. HVAC professionals have the necessary tools and take proper safety precautions during the recharging process to ensure efficient and safe operation of your system.
What to Expect from a Professional Refrigerant Recharge
1. Contact HVAC professionals: Reach out to reputable HVAC technicians who specialize in air conditioning systems. Explain the symptoms, including water leakage, and schedule a service call.
2. Refrigerant leak detection: The technician will perform a thorough inspection of your AC system to identify any refrigerant leaks. This step is crucial because simply recharging the refrigerant without addressing the leaks would provide only a temporary solution.
3. Repairing the leak: If the technician finds a refrigerant leak, they will proceed to repair it before recharging the system. The repair process will depend on the location and severity of the leak. Repairing the leak will prevent future refrigerant loss and further damage to the system.
4. Recharging the refrigerant: Once the leak is repaired, the technician will recharge the refrigerant to the recommended levels. They will connect gauges to the system, carefully inject the appropriate amount of refrigerant, and monitor the pressure to ensure optimal performance.
5. Testing and inspection: After recharging the refrigerant, the technician will conduct tests to ensure there are no further leaks and that the system is operating properly. They will also check for proper airflow, temperature, and overall performance.
Maintenance and Preventive Measures
Regular maintenance, including professional inspections and maintenance visits, is important to prevent refrigerant leaks and maintain optimal system performance. HVAC professionals can help identify potential issues early on, address them promptly, and provide recommendations for preventive measures to keep your air conditioning system in good working condition.
If you suspect low refrigerant levels or are experiencing water leakage from your air conditioning system, it is advisable to seek the assistance of a professional HVAC technician. They have the knowledge, skills, and tools necessary for accurately diagnosing the issue, repairing any leaks, and recharging the refrigerant, ensuring the efficient and effective operation of your AC system.
Cleaning or Replacing the Condensate Pan
The condensate pan plays a crucial role in collecting and draining the water that accumulates from the condensation process in your air conditioning system. If you notice water leakage, a damaged or improperly functioning condensate pan may be the culprit. Cleaning or replacing the condensate pan can help resolve this issue. Here’s what you need to know:
Cleaning the Condensate Pan
1. Turn off the air conditioner: Before starting any maintenance or repair work, make sure to turn off the power to your air conditioning system for safety.
2. Locate the condensate pan: The condensate pan is typically located below the evaporator coil, either within the indoor unit or in a separate compartment. Refer to your system’s manual or contact a professional if you’re unsure of its exact location.
3. Inspect the pan for damage: Carefully examine the condensate pan for any cracks, holes, or signs of damage. Additionally, check for proper alignment within the unit. If there are minor cracks or holes, you may be able to repair them using an epoxy sealant specifically designed for HVAC applications.
4. Clean the condensate pan: If the pan is dirty or contains debris, remove it and clean it thoroughly. Use a mild detergent or a mixture of warm water and vinegar to clean both the interior and exterior of the pan. Scrub gently with a soft brush to remove any dirt or microbial growth. Rinse the pan with clean water to ensure all cleaning agents are removed.
5. Clear any blockages: Check for any blockages within the drain opening or outlet of the condensate pan. Use a small brush or cloth to remove any debris that may be obstructing the proper flow of water.
6. Reinstall the condensate pan: Once the pan is clean and free from blockages, carefully place it back into its original position, ensuring it is properly aligned and securely fitted within the unit.
Replacing the Condensate Pan
If the condensate pan is severely damaged or cannot be repaired, it may need to be replaced. Here’s what to do:
1. Turn off the air conditioner: Ensure that the power to your air conditioning system is turned off before proceeding with any maintenance or replacement work.
2. Locate a compatible condensate pan: Measure the dimensions of your existing condensate pan and search for a replacement of the same size and specifications. You can consult the system’s manual or seek advice from a professional to help you find the right pan.
3. Remove the damaged pan: Unscrew any fasteners or brackets that hold the condensate pan in place. Gently detach the pan from the unit, taking care not to damage any surrounding components.
4. Install the new pan: Place the new condensate pan into the unit, ensuring it fits properly and aligns with the drain opening. Secure the pan with the appropriate fasteners or brackets, following the manufacturer’s instructions.
5. Turn on the air conditioner: Once the new pan is securely installed, turn on the power to your air conditioning system. Monitor for proper drainage and check for any signs of leakage.
Regular maintenance, such as cleaning the condensate pan and ensuring it remains free from blockages, is essential for preventing water leakage. Additionally, scheduling routine maintenance visits with a professional technician can ensure that any potential problems with the condensate pan are promptly identified and addressed.
By cleaning or replacing the condensate pan as needed, you can ensure proper water collection and drainage, reducing the risk of water leakage and maintaining the efficient operation of your air conditioning system.
Regular Maintenance Tips to Prevent Water Leakage
Regular maintenance is key to keeping your air conditioning system in optimal condition and preventing water leakage. By following these maintenance tips, you can minimize the risk of water leaks and ensure the efficient operation of your AC unit:
- Change air filters regularly: Dirty air filters can restrict airflow and lead to a variety of issues, including water leakage. Check your air filters monthly and replace them every 1 to 3 months, or as recommended by the manufacturer. Clean filters improve airflow and prevent excessive condensation.
- Clean evaporator and condenser coils: Over time, dust and debris can accumulate on the evaporator and condenser coils, reducing their efficiency. Regularly clean these coils using a soft brush or vacuum cleaner. This will improve heat transfer and prevent excess condensation.
- Unclog the condensate drain line: The condensate drain line can become clogged with dirt, dust, or algae, leading to water leakage. Clean the drain line every few months using a wet-dry vacuum or a mixture of vinegar and water. This prevents blockages and ensures proper drainage.
- Inspect and clean the condensate pan: Regularly inspect the condensate pan for any damage or debris. Clean the pan using mild detergent or vinegar and water mixture whenever necessary. This helps prevent water overflow and potential leakage.
- Check for refrigerant leaks: Low refrigerant levels can cause the evaporator coil to freeze up and result in water leakage. If you suspect a refrigerant leak, contact a professional HVAC technician to inspect and repair any leaks and recharge the refrigerant.
- Ensure proper insulation: Check the insulation around the air conditioning system’s components, including the refrigerant lines. Proper insulation prevents condensation and potential water leakage. Replace any damaged or deteriorated insulation as needed.
- Schedule professional maintenance visits: Regular maintenance by a professional HVAC technician is crucial for preventing potential issues and detecting any hidden problems. Schedule annual or bi-annual maintenance visits to have your AC system inspected, cleaned, and tuned-up.
- Keep the area around the outdoor unit clear: Ensure that the outdoor unit of your air conditioner is clear of debris, vegetation, and obstructions. This allows for proper airflow and prevents moisture buildup around the unit.
- Monitor the system: Keep an eye out for any signs of water leakage, unusual noises, or performance issues. Promptly address any problems by contacting a professional technician to avoid further damage.
By following these regular maintenance tips, you can minimize the risk of water leakage, prolong the lifespan of your air conditioning system, and ensure consistent and efficient performance. However, if you encounter persistent water leakage or are unsure about performing maintenance tasks yourself, it is best to consult with a professional HVAC technician for assistance.
Remember, prevention is always better than dealing with costly repairs or water damage. By investing time and effort into regular maintenance, you can enjoy a reliable and efficient air conditioning system that keeps your home cool and comfortable without any water leakage issues.
Conclusion
Water leakage from your air conditioning system can be a frustrating and potentially damaging issue. However, by understanding the common causes of water leakage and following regular maintenance practices, you can prevent and address this problem effectively.
In this comprehensive guide, we explored various factors that can contribute to water leakage, such as clogged condensate drain lines, dirty air filters, low refrigerant levels, damaged or blocked condensate pans, and improper installation or maintenance. By identifying and addressing these issues, you can maintain the efficiency and functionality of your air conditioning system while avoiding water leaks.
Regular maintenance is crucial in preventing water leakage. Tasks like changing air filters regularly, cleaning evaporator and condenser coils, unclogging condensate drain lines, inspecting and cleaning condensate pans, and checking for refrigerant leaks are essential for ensuring the proper functioning of your AC unit.
Additionally, it’s important to understand when to seek professional assistance. Some tasks, such as refrigerant recharging or complex repairs, should be left to experienced HVAC technicians who possess the necessary expertise and tools for the job.
Remember, prevention is key. By incorporating regular maintenance into your routine and promptly addressing any signs of water leakage or other issues, you can maintain the efficiency and longevity of your air conditioning system while enjoying a comfortable indoor environment.
Now that you have a comprehensive understanding of the causes and solutions for water leakage from your air conditioning system, you are equipped with the knowledge to take proactive steps and ensure the optimal performance of your AC unit. So go ahead, implement these tips, and enjoy uninterrupted cooling and peace of mind.
Frequently Asked Questions about Why Is My Air Conditioning Leaking Water
Was this page helpful?
At Storables.com, we guarantee accurate and reliable information. Our content, validated by Expert Board Contributors, is crafted following stringent Editorial Policies. We're committed to providing you with well-researched, expert-backed insights for all your informational needs.