Home>Ideas and Tips>Upgrading Your Home’s Exterior With DIY Solar Tube Skylights
Ideas and Tips
Upgrading Your Home’s Exterior With DIY Solar Tube Skylights
Published: August 30, 2024
Enhance your home's natural lighting with DIY solar tube skylights. Discover cost-effective, energy-efficient solutions for brighter interiors.
(Many of the links in this article redirect to a specific reviewed product. Your purchase of these products through affiliate links helps to generate commission for Storables.com, at no extra cost. Learn more)
Introduction
When it comes to enhancing the natural lighting in your home, there are several options available, each with its own set of advantages and disadvantages. Among these, solar tube skylights stand out as a practical and cost-effective solution for bringing daylight into interior spaces without the need for extensive structural modifications. In this article, we will delve into the world of solar tube skylights, exploring their functionality, installation process, and the benefits they offer over traditional skylights.
What are Solar Tube Skylights?
Solar tube skylights, also known as sun tunnels or daylight pipes, are designed to channel natural light from the roof into interior spaces. Unlike traditional skylights that require significant structural changes and often come with higher installation costs, solar tubes are relatively small and can be easily installed between roof rafters.
How Solar Tubes Work
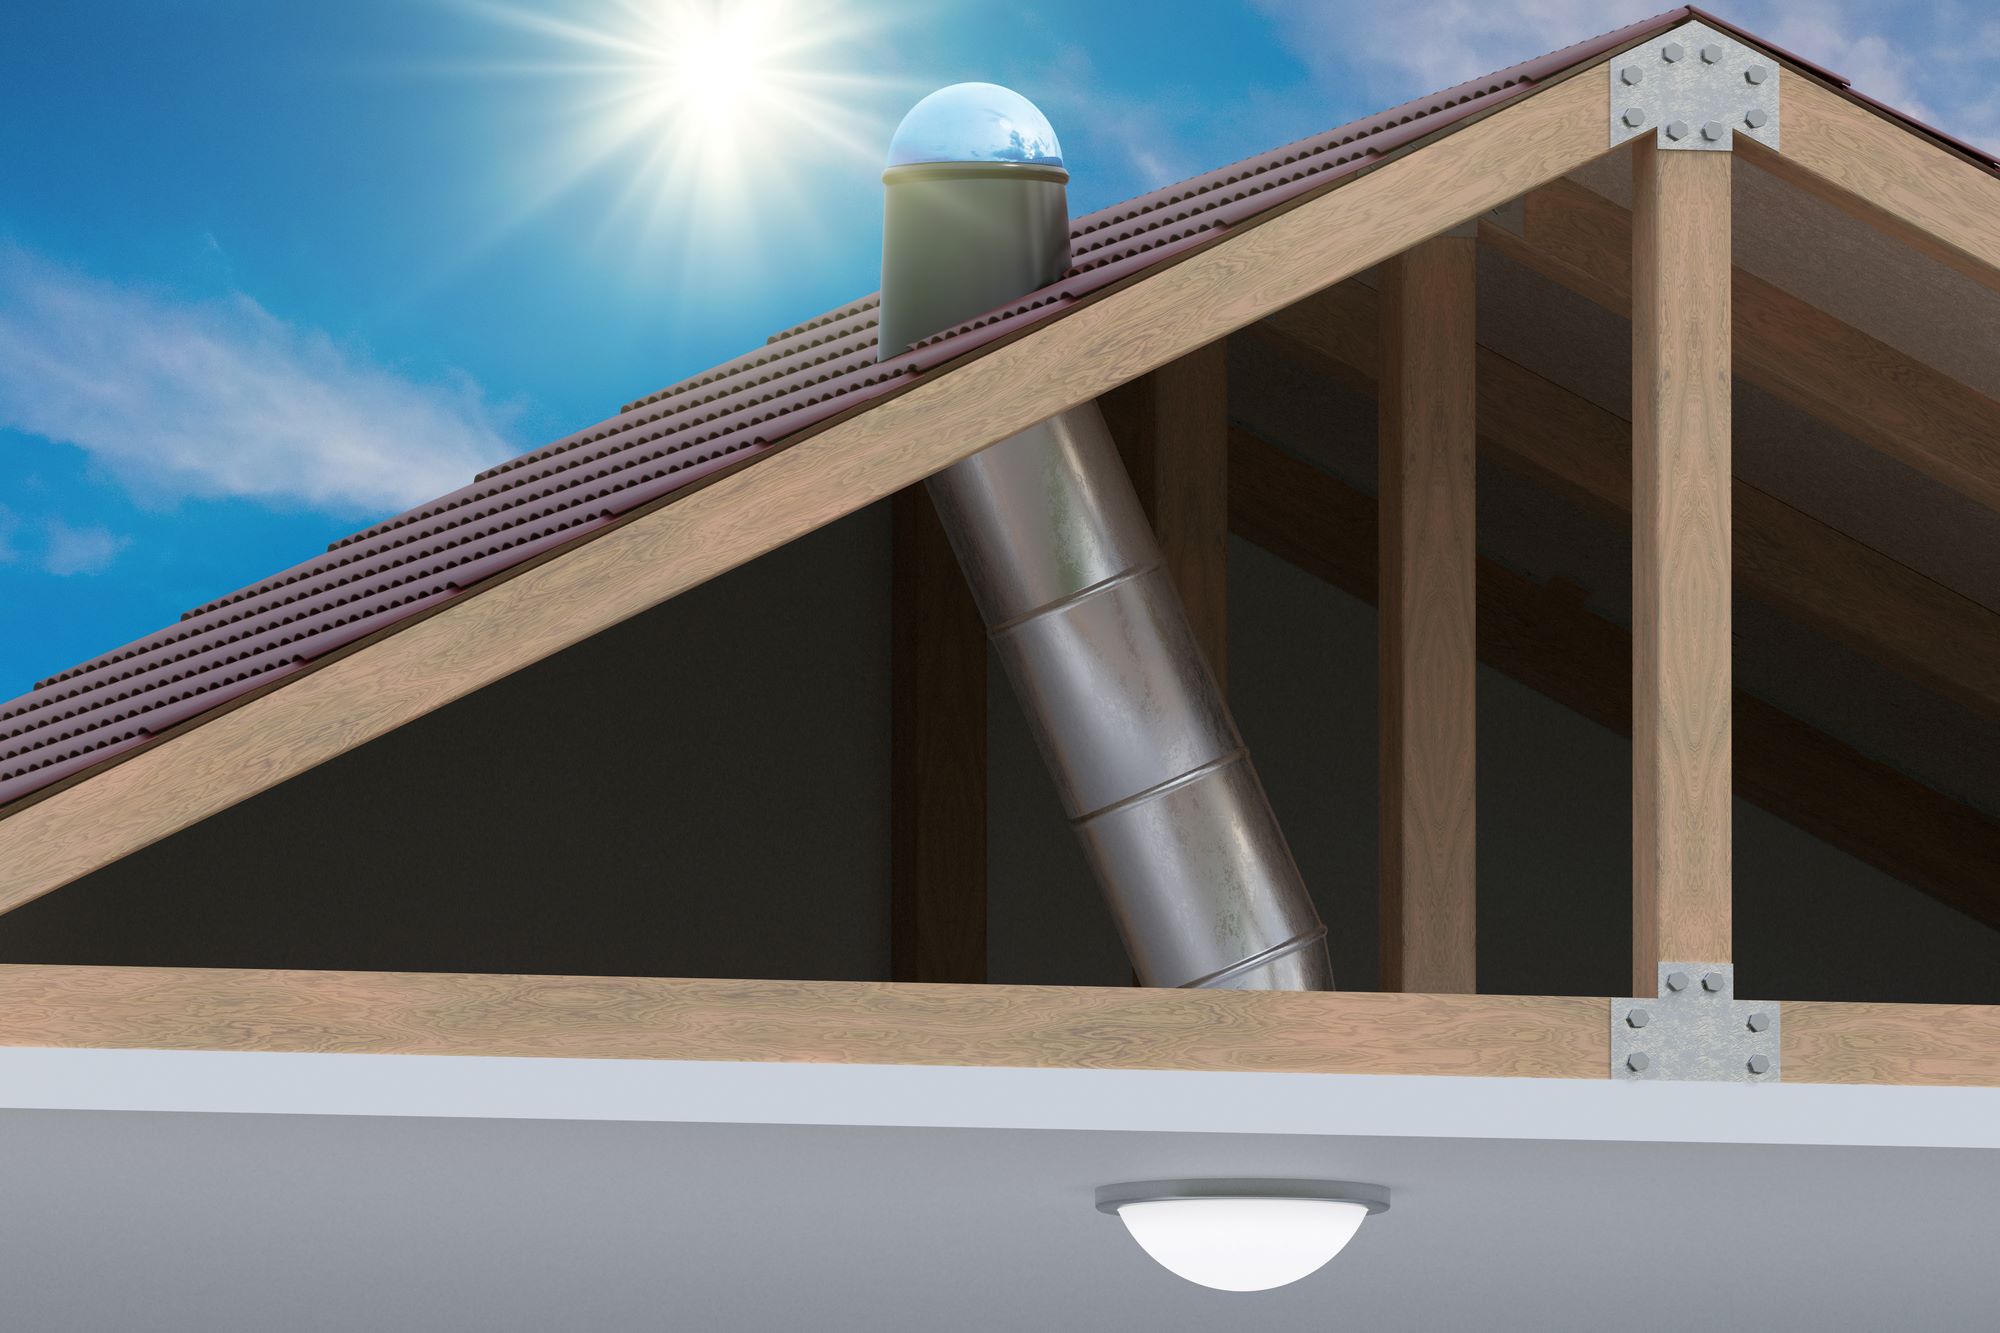
The basic components of a solar tube skylight include:
- Clear Acrylic Dome: This is the part that captures sunlight on the roof.
- Reflective Metal Tube: This tube runs from the roof to the interior ceiling, amplifying and directing the light.
- Diffuser: Located at the end of the tube, this diffuser disperses the light evenly throughout the room.
When sunlight enters the clear acrylic dome on your roof, it is reflected by the metal tube and directed through the diffuser to illuminate the interior space. This process allows for efficient transmission of natural light without the need for electricity, making it an energy-efficient option.
Advantages of Solar Tube Skylights
Cost-Effectiveness
One of the primary advantages of solar tube skylights is their affordability. The cost of installation is significantly lower compared to traditional skylights. While a traditional skylight can cost anywhere from $1,500 to $2,500 for installation, solar tubes typically range from $300 to $750 for a DIY kit or professional installation.
Read more: Which Is Better Solar Tube Or Skylight
Ease of Installation
Solar tubes are designed to be user-friendly and can be installed by homeowners with basic DIY skills. They require minimal structural modifications and can be easily placed between existing roof rafters. This makes them an ideal choice for those who want to enhance their home's lighting without the hassle of extensive renovations.
Energy Efficiency
By harnessing natural light, solar tubes reduce the need for artificial lighting. This not only saves energy but also reduces your carbon footprint. Additionally, since they do not allow for heat gain or loss like traditional skylights do, they provide a more stable indoor climate.
Versatility
Solar tubes are versatile and can be used in various interior spaces such as hallways, laundry areas, closets, and bathrooms. They are particularly beneficial for small, dark areas where installing windows is impractical.
Comparison with Traditional Skylights
Cost
One of the most significant differences between solar tubes and traditional skylights is the cost. As mentioned earlier, solar tubes are much more affordable than traditional skylights. This makes them an attractive option for homeowners on a budget or those who want to make quick improvements without breaking the bank.
Installation Complexity
Traditional skylights require more complex installations involving the creation of a shaft from the ceiling to the roof. This process can be time-consuming and often necessitates professional assistance. In contrast, solar tubes come with pre-assembled components that can be easily installed by homeowners with basic DIY skills.
Heat Loss and Gain
Traditional skylights can lead to significant heat loss during winter months and heat gain during summer months due to their large size and direct exposure to the elements. Solar tubes minimize these issues by channeling light through a reflective tube without exposing the interior space directly to external conditions.
Aesthetic Appeal
While traditional skylights offer an expansive outdoor view, solar tubes do not provide this feature. However, many homeowners find that the lack of an external view is a minor trade-off for the practical benefits of enhanced natural lighting without the associated costs and complexities.
Step-by-Step Installation Guide
Installing solar tube skylights is relatively straightforward and can be completed with basic tools and materials. Here’s a step-by-step guide to help you get started:
Step 1: Choose Your Location
Identify the area where you want to install the solar tube. Consider spaces that are currently dark or poorly lit, such as hallways or laundry rooms.
Step 2: Measure Your Space
Measure the length and width of the space where you plan to install the solar tube. This will help you determine which size of solar tube is best suited for your needs.
Step 3: Prepare Your Roof
Locate the spot on your roof where you want to install the solar tube. Ensure that there is enough space between the rafters to accommodate the tube.
Step 4: Cut Holes in Roof and Ceiling
Using a drill or saw, cut holes in both the roof and ceiling to accommodate the solar tube. The hole on the roof should be slightly larger than the one on the ceiling to allow for easy installation.
Step 5: Install Top Collar
Place the top collar of the solar tube onto the roof hole. Secure it with flashing material to prevent water from entering.
Step 6: Install Lower Portion
Insert the lower portion of the solar tube into the ceiling hole. Ensure it is securely fastened using screws or clips provided with the kit.
Step 7: Seal Tunnel Seams
Seal any gaps or seams around the solar tube using caulk or sealant to prevent light leakage.
Step 8: Install Diffuser
Attach the diffuser at the end of the solar tube to disperse light evenly throughout the room.
Step 9: Add Trim Ring
Install a trim ring around the diffuser to cover any gaps and provide a clean finish.
Popular Brands and Models
Several brands offer high-quality solar tube skylights that are known for their performance and durability. Here are some popular options:
Velux Sun Tunnel Skylights
Velux offers a range of sun tunnel skylights with rigid or flexible tubes in various sizes. These skylights are known for their ease of installation and energy efficiency. Prices start at around $250 and can go up to $650 depending on size and complexity.
Solatube Models
Solatube is another well-known brand that offers a variety of solar tube skylights. Their models are sleek, provide warm light, and some come with solar LED night lights. Velux models are particularly popular for their aesthetic appeal and functionality.
Final Thoughts
Solar tube skylights offer a practical and cost-effective way to enhance natural lighting in your home. Their ease of installation, energy efficiency, and versatility make them an attractive option for homeowners looking to upgrade their home's exterior without breaking the bank. While they may not provide the expansive outdoor view that traditional skylights offer, many find that the benefits outweigh this minor drawback. Whether you're looking to brighten up a hallway or laundry room, solar tubes are definitely worth considering.
By following the step-by-step guide outlined above and choosing the right brand and model for your needs, you can successfully install solar tube skylights in your home. This will not only improve the aesthetic appeal but also enhance the functionality of your interior spaces by harnessing natural light efficiently.
Key Takeaways
- Cost-Effective: Solar tubes are significantly cheaper than traditional skylights.
- Easy Installation: They can be installed by homeowners with basic DIY skills.
- Energy Efficient: They reduce the need for artificial lighting and minimize heat loss/gain.
- Versatile: Suitable for various interior spaces including hallways, laundry areas, closets, and bathrooms.
- Popular Brands: Velux and Solatube offer high-quality models with different features.
In conclusion, solar tube skylights are an excellent choice for anyone looking to upgrade their home's exterior with minimal effort and expense. By understanding their functionality, advantages, and installation process, you can make an informed decision about whether solar tubes are right for you.
Was this page helpful?
At Storables.com, we guarantee accurate and reliable information. Our content, validated by Expert Board Contributors, is crafted following stringent Editorial Policies. We're committed to providing you with well-researched, expert-backed insights for all your informational needs.


0 thoughts on “Upgrading Your Home’s Exterior With DIY Solar Tube Skylights”