Home>Ideas and Tips>Upgrading Your Home’s Exterior With DIY Window Boxes

Ideas and Tips
Upgrading Your Home’s Exterior With DIY Window Boxes
Modified: October 27, 2024
Enhance your home's curb appeal with DIY window boxes. Learn how to build, customize, and maintain beautiful planters for a vibrant exterior.
(Many of the links in this article redirect to a specific reviewed product. Your purchase of these products through affiliate links helps to generate commission for Storables.com, at no extra cost. Learn more)
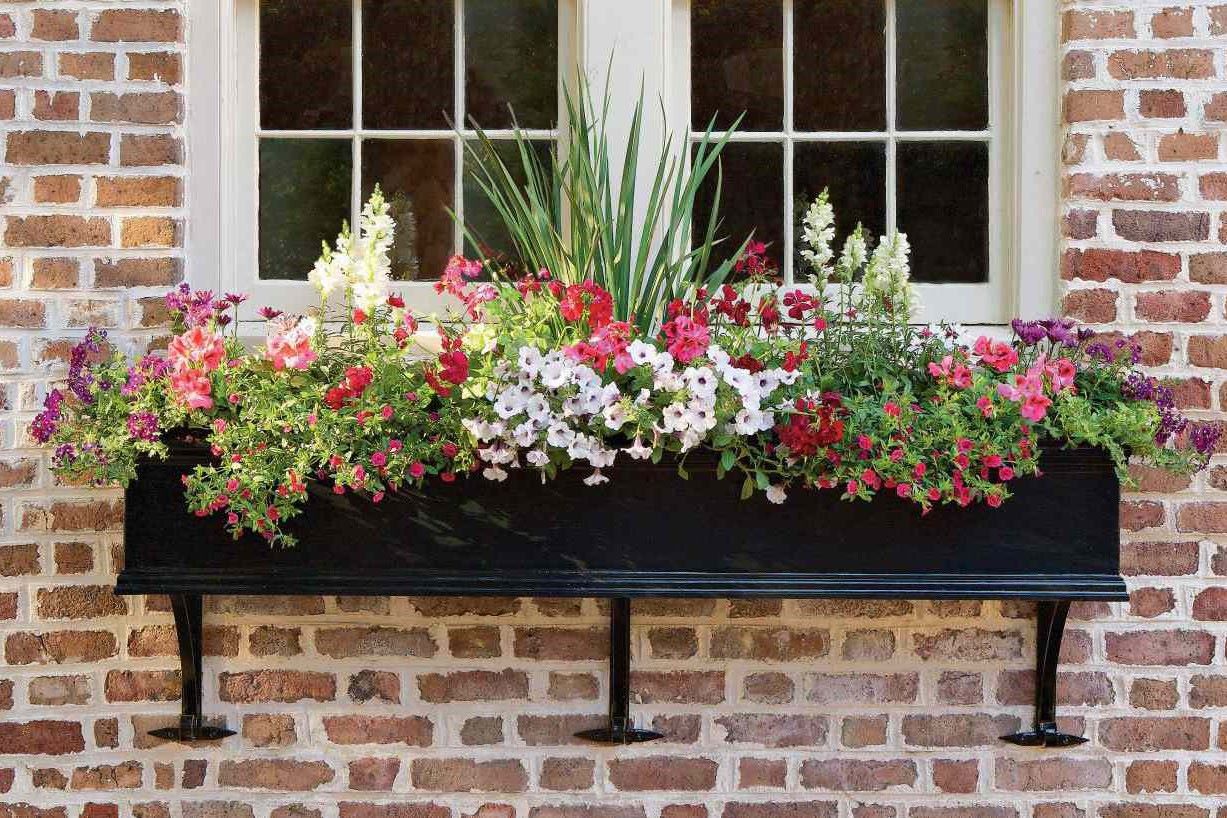
Adding a touch of elegance and charm to your home's exterior is easier than you think, especially with the help of DIY window boxes. These versatile planters not only enhance the aesthetic appeal of your house but also provide a beautiful spot for lush plants and vibrant flowers to thrive. In this article, we will guide you through the process of building and installing your own DIY window boxes, highlighting the benefits, materials needed, and step-by-step instructions to ensure a successful project.
The Benefits of DIY Window Boxes
Before diving into the project, it's essential to understand why DIY window boxes are such a great idea. Here are some of the key benefits:
1. Enhanced Curb Appeal
A well-designed window box can significantly boost your home's curb appeal. The addition of colorful flowers or herbs adds a pop of color that immediately catches the eye, making your house stand out in a positive way.
2. Easy Maintenance
One of the best things about DIY window boxes is how easy they are to maintain. With minimal watering and occasional pruning, you can keep your plants looking their best without much hassle.
3. Customization
When you build your own window box, you have the freedom to customize it to match the style of your home. Whether you prefer a rustic look or something more modern, you can choose materials and designs that fit perfectly with your exterior decor.
4. Cost-Effective
Building your own window box is a cost-effective way to enhance your home's exterior. You can use affordable materials like cedar or pine, and the project itself is relatively simple, requiring minimal specialized tools or expertise.
5. Environmental Benefits
Planting flowers or herbs in window boxes not only adds beauty but also contributes to a healthier environment. Herbs like basil and rosemary can be used in cooking, while flowers like petunias and geraniums attract pollinators and add fragrance to the air.
Choosing the Right Materials
To ensure that your DIY window box lasts for years to come, it's crucial to choose the right materials. Here are some recommendations:
1. Cedar
Cedar is an excellent choice for building window boxes because it is highly durable and resistant to rot and insects. It also has a natural aroma that repels pests, making it a great option for outdoor projects.
2. Pine
Pine is another affordable option that works well for window boxes. While it may not be as durable as cedar, it can still provide a beautiful and rustic look when stained or painted.
3. Trim
For added detail and to hide seams, use trim made from materials like pine or cedar. This will give your window box a clean and polished look.
4. Drill Bits and Screws
Pre-drill holes before screwing them in to prevent the wood from splitting. Use exterior-grade screws that are specifically designed for outdoor use to ensure durability.
Tools Needed
Before starting your project, make sure you have all the necessary tools:
- Hammer
- Miter Saw
- Drill and Drill Bits
- Tape Measure
- Clamps
- Brad Nailer (optional)
- Paintbrush and Paint Roller (for painting)
- Palm Sander and Sandpaper (for smoothing out the wood)
- Exterior Wood Glue
- Mold & Mildew Primer (optional)
Step-by-Step Instructions
Now that you have your materials and tools ready, let's move on to the step-by-step instructions for building your DIY window box:
Step 1: Measure the Window
Measure the size of your window carefully. This will help you determine how long your window box needs to be. Make sure to include any trim or molding that might affect the dimensions.
Step 2: Cut the Length
Measure and cut the length of the boards according to your measurements. Place one board on the bottom and add a line of wood glue along the edge. Stand up the second board on the long edge to meet up with the board on the bottom and drill to create the front of the box.
Step 3: Measure and Cut End Boards
Make end boards by taking your two-sided window box and measuring the width and height of each end where you want the wood piece to go. Cut two pieces, ensuring there are no slight discrepancies in size.
Place end boards in place and secure them with screws. Add another line of glue along the long edge of the bottom board before standing up the third 1×8 board on the long edge to meet up with it.
Step 4: Add Trim
Measure and cut trim around two short sides and one long side using a miter saw, then cut corners at 45-degree angles for a clean finish. Nail trim into place using a hammer and finishing nails or a brad nailer.
For added bulk at the top, rip down remaining 1×8 boards into two-inch wide pieces and nail them to the top of your window box.
Step 5: Paint
Congratulations You've built your planter box Now it's time to paint it. Choose an exterior paint that matches your home's color scheme or goes well with the style you're aiming for. Apply two coats of paint after priming with mold & mildew primer if desired.
Allow each coat to dry completely before adding additional layers.
Step 6: Drill Drainage Holes
Using a 1/4 inch drill bit, drill drainage holes on the bottom of your box about every six inches apart. This ensures that excess water can escape, preventing root rot and keeping your plants healthy.
Hanging Your Window Box
Once your window box is built and painted, it's time to hang it. Here are some tips for different types of exterior surfaces:
For Vinyl Siding:
Attach L-brackets directly onto vinyl siding using screws specifically designed for vinyl surfaces. Then hang your window box securely onto these brackets.
For Wood Siding:
Screw cleats onto wood siding first before attaching your window box using screws or nails.
For Stucco:
Use anchors specifically designed for stucco surfaces when attaching cleats or brackets before hanging your window box securely.
For Brick:
Attach cleats onto brick using masonry anchors before hanging your window box securely onto these cleats.
Tips for Maintenance
While building your DIY window box is relatively easy, maintaining it requires some care:
- Watering: Water plants regularly but avoid overwatering which can lead to root rot.
- Pruning: Prune plants regularly to keep them looking their best and encourage healthy growth.
- Cleaning: Clean debris off regularly using a soft brush or cloth.
- Repainting: Repaint every few years if necessary depending on weather conditions affecting color retention.
Conclusion
Adding a DIY window box is an excellent way to upgrade your home's exterior while enhancing its curb appeal significantly without breaking the bank or requiring extensive expertise in carpentry or gardening By following these steps carefully while choosing suitable materials like cedar or pine along with necessary tools such as miter saws drills clamps etc., you'll end up having beautiful functional planters adding charm vitality reflecting success stability achieved through hard work dedication towards beautifying living spaces making them truly special places where memories are created cherished lifelong!
Remember every small improvement contributes significantly towards creating more enjoyable fulfilling living spaces reflecting care attention put into all aspects life including success stability provided family members loved ones surrounding us daily basis
Was this page helpful?
At Storables.com, we guarantee accurate and reliable information. Our content, validated by Expert Board Contributors, is crafted following stringent Editorial Policies. We're committed to providing you with well-researched, expert-backed insights for all your informational needs.



0 thoughts on “Upgrading Your Home’s Exterior With DIY Window Boxes”