Home>Interior Design>Halloween Craft Ideas: 12 Stylish And Spooky Displays

Interior Design
Halloween Craft Ideas: 12 Stylish And Spooky Displays
Modified: October 20, 2024
Get inspired by these stylish and spooky interior design Halloween craft ideas, featuring 12 unique displays perfect for setting a hauntingly stylish atmosphere.
(Many of the links in this article redirect to a specific reviewed product. Your purchase of these products through affiliate links helps to generate commission for Storables.com, at no extra cost. Learn more)
Introduction
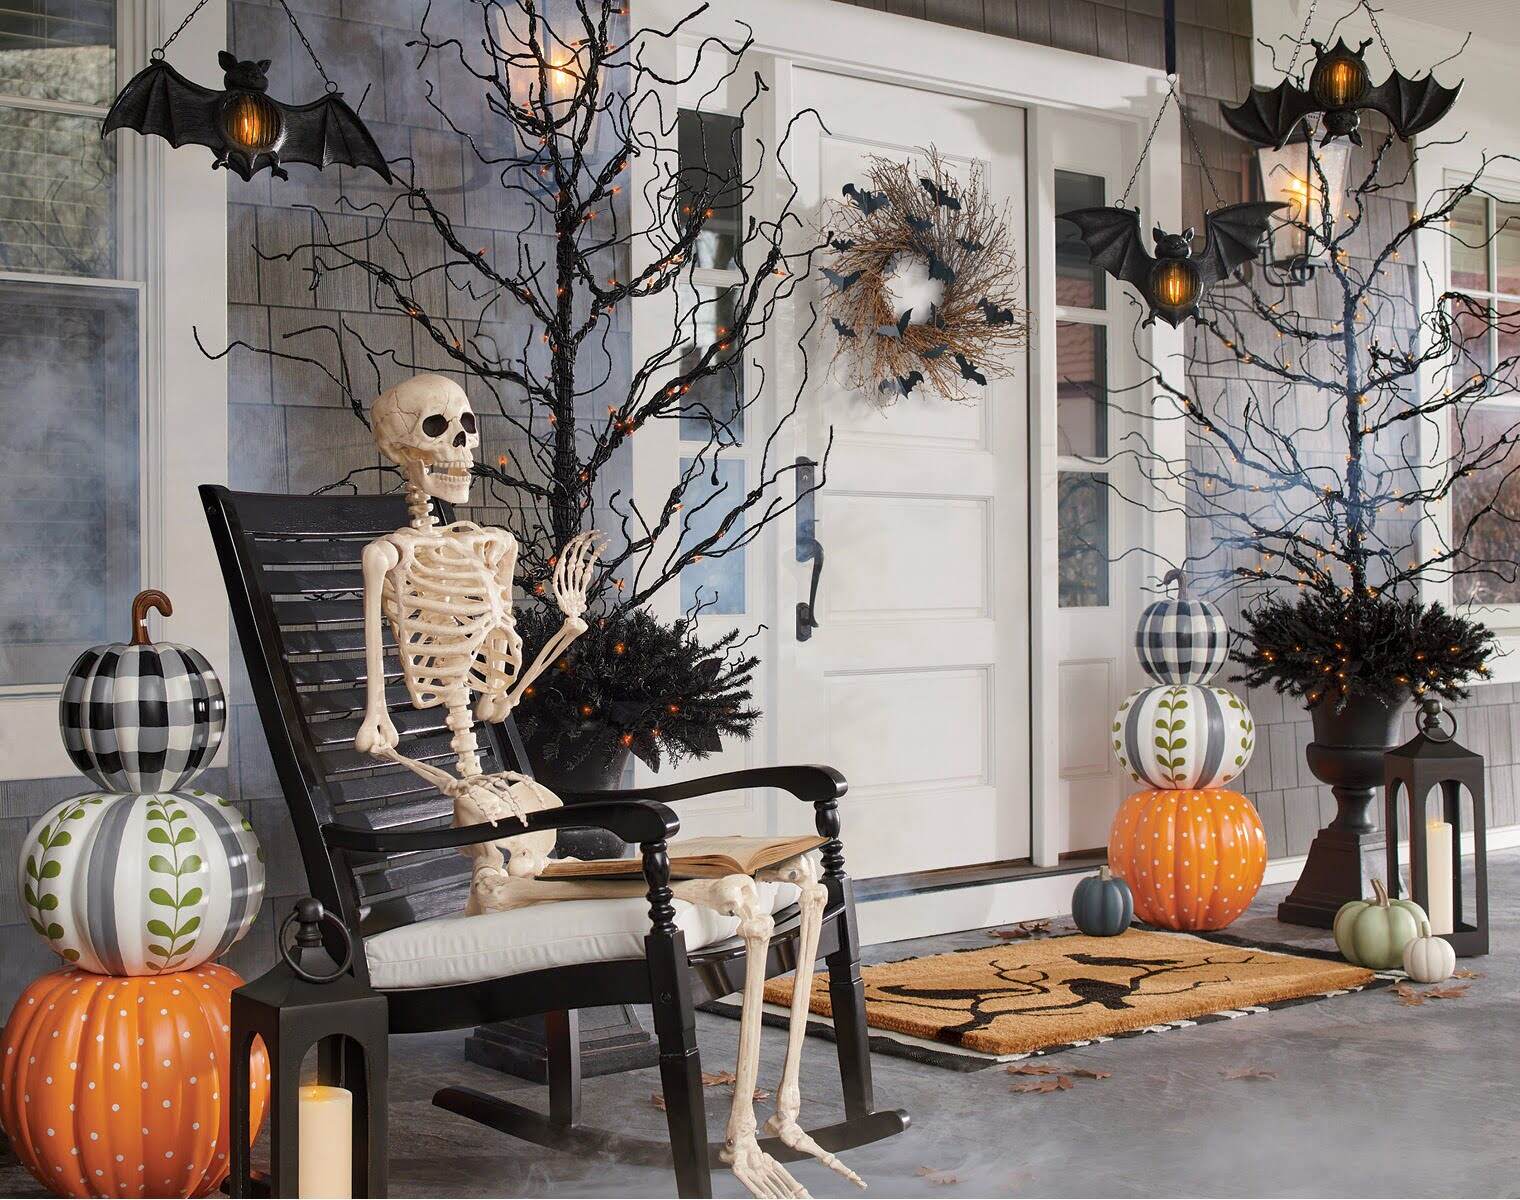
Halloween is a time for fun, fright, and creativity. Whether you’re hosting a Halloween party or simply want to spook up your home decor, incorporating stylish and spooky displays is a must. From haunted house displays to ghostly garlands, there are endless possibilities to transform your space into a Halloween wonderland.
In this article, we will explore 12 craft ideas that will help you create stylish and spooky Halloween displays. These ideas range from simple DIY projects to elaborate centerpieces, so you can find something that suits your skill level and style. Let’s dive in!
Key Takeaways:
- Transform your home into a Halloween wonderland with 12 craft ideas, from haunted house displays to witch hat tree toppers. Embrace creativity and spookiness to captivate your guests and create a truly immersive experience.
- Infuse your Halloween displays with creativity and a human-like touch to captivate your guests and create a truly immersive experience. Let your imagination run wild as you bring these Halloween craft ideas to life.
Haunted House Display
Create a spine-chilling haunted house display that will be the centerpiece of your Halloween decorations. Start by making a miniature haunted house using cardboard or plywood. Paint it black and add details like windows, doors, and even spooky cobwebs.
Once your haunted house is complete, set it up on a table or shelf. Add eerie lights to illuminate the windows and create a haunting glow. You can also use dry ice to create a fog-like effect around the house, adding an extra eerie touch.
Enhance the haunted house display by adding mini figurines of ghosts, witches, and vampires. Scatter fake spider webs around the structure to give it an abandoned look. You can even incorporate sound effects like creaking doors or howling wind to make the display more immersive.
To complete the haunted house display, create a backdrop using dark-colored fabric or paper. Hang it behind the haunted house to add depth and create the illusion of a haunting scene. You can even project creepy images onto the backdrop for an added spooky effect.
This haunted house display will be a standout feature of your Halloween decor, capturing the imagination of guests and creating a truly enchanting atmosphere.
Creepy Cemetery Scene
Transform your outdoor space or a cozy corner of your home into a chilling cemetery scene for Halloween. Begin by setting the stage with a backdrop of gravestones. You can use foam or cardboard to create tombstones of varying shapes and sizes. Paint them a weathered gray or black color and add spooky phrases or names.
Next, create a spooky atmosphere by adding dry leaves, twigs, and moss to mimic a decaying cemetery. Scatter them around the tombstones to give a realistic effect. You can also place old lanterns or candles on top of the graves to cast eerie shadows.
To enhance the eerie ambiance, incorporate fake skeletons partially buried in the ground. You can find inexpensive plastic skeletons at Halloween stores or create your own using papier-mâché. Posit them in different positions, such as crawling out of a grave or leaning against a tombstone.
Add a finishing touch to your creepy cemetery scene by hanging ghostly figures from nearby trees or porch ceilings. Use sheer white fabric or cheesecloth to create ethereal spirits that sway in the wind. This will add a haunting element to your display and create a spine-chilling atmosphere.
Remember to strategically place dimly lit lanterns or candles around the area to cast eerie shadows on the tombstones and create a spooky glow. This will add an extra layer of mystery and bring your creepy cemetery scene to life.
Whether displayed indoors or outdoors, a creepy cemetery scene is sure to be a Halloween showstopper that will leave your guests with goosebumps.
Witch’s Cauldron Centerpiece
Add a touch of witchy charm to your Halloween decor with a witch’s cauldron centerpiece. This centerpiece will serve as a focal point for your table or mantle, adding a spooky and enchanting vibe to your space.
Start by finding a large cauldron or pot. You can opt for a real cauldron if you prefer an authentic look, or you can use a black kettle or pot as a budget-friendly alternative. Make sure the cauldron is clean and in good condition.
Once you have your cauldron, fill it with a variety of spooky and mystical elements. Begin with a base layer of dry ice or fog machine to create the illusion of a bubbling potion. The eerie smoke will add an extra eerie touch to your centerpiece.
Next, add props and decorations to create a potion-filled cauldron. Place plastic snakes, insects, and eyeballs inside to add a creepy factor. You can also add colorful stones, glass marbles, or beads to represent magical ingredients. Consider adding a few small bottles labeled with labels like “Bat Wings” or “Witch’s Brew” for an extra touch of authenticity.
Add height and dimension to your centerpiece by placing a large stirring stick or wooden spoon inside the cauldron. Position it so that it appears to be stirring the concoction. You can also drape ivy or black fabric around the cauldron to create a witchy aesthetic.
To complete the witch’s cauldron centerpiece, surround it with flickering candles or LED tea lights to create a magical glow. Consider using black or purple candles for an additional spooky effect. This will create a bewitching ambiance and add an enchanting touch to your Halloween decor.
The witch’s cauldron centerpiece is not only visually striking but also serves as a conversation starter and a memorable addition to your Halloween festivities.
Ghostly Garland
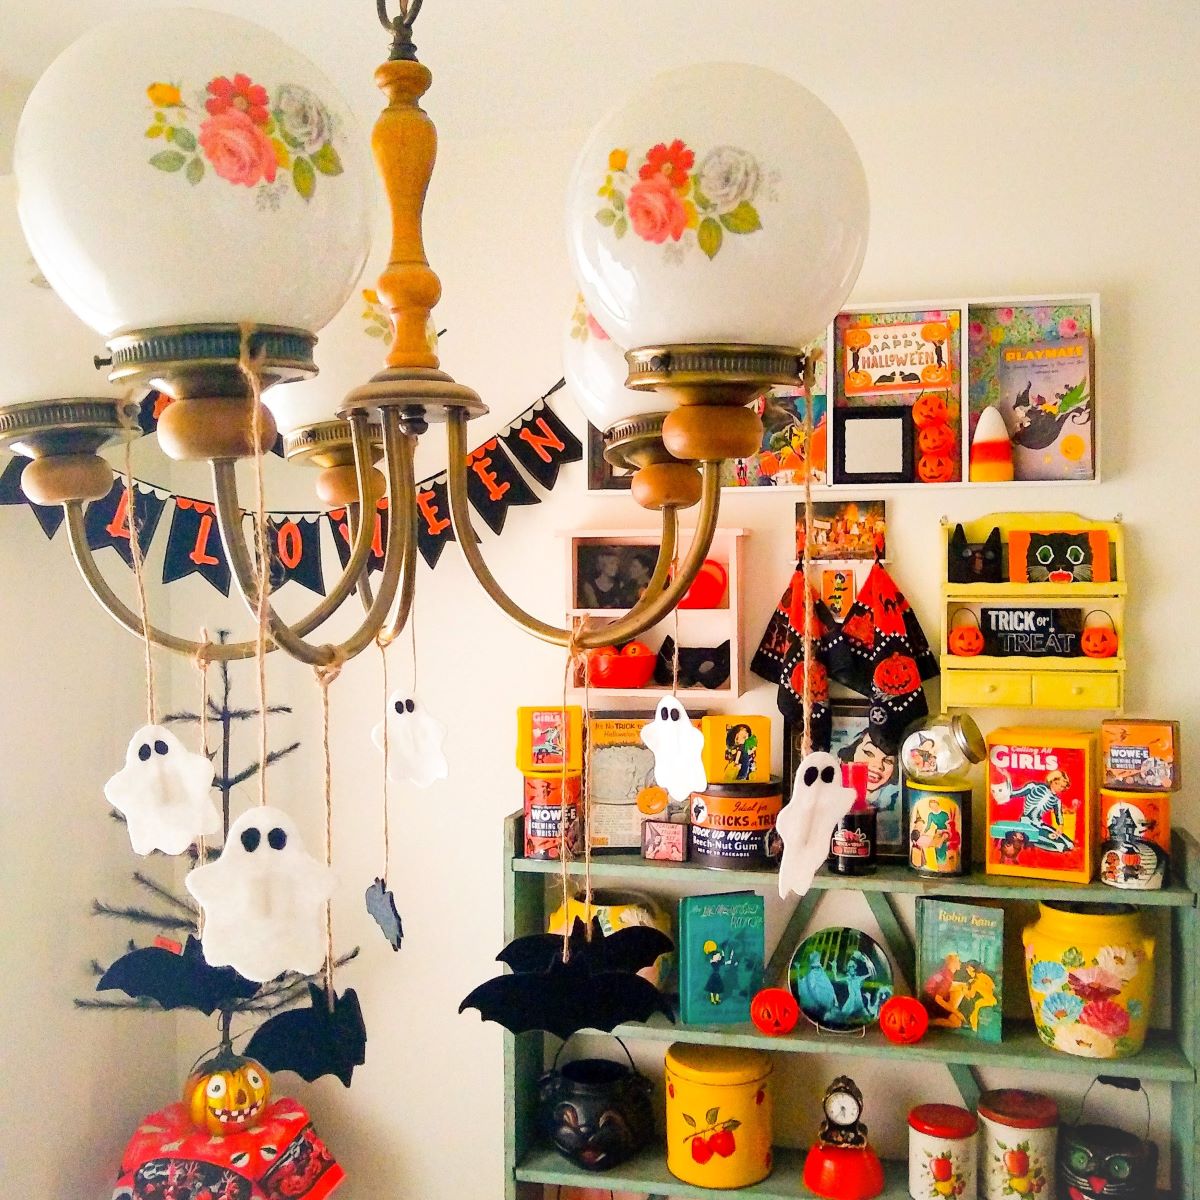
Add a whimsical and ghostly element to your Halloween decorations with a ghostly garland. This simple craft idea is easy to make and can be hung across doorways, mantles, or walls to create a spooky effect.
To create a ghostly garland, you will need white or light-colored fabric, scissors, string or ribbon, and a black marker. Begin by cutting out ghost shapes from the fabric. You can create different sizes and shapes to add variety to your garland.
Once you have cut out your ghost shapes, use the black marker to draw eyes and a mouth on each ghost. You can make them whimsical, scary, or even give them funny expressions. This will add character and personality to your ghostly garland.
Next, attach the ghosts to a string or ribbon. You can use glue or small safety pins to secure them in place. Be sure to leave enough space between each ghost to allow them to hang freely and sway in the air.
Hang your ghostly garland across doorways, mantles, or walls. You can also drape it from the ceiling to create a floating effect. The movement of the ghosts and the contrast between the white fabric and the black marker will create a playful yet eerie ambiance in your space.
For an extra touch, you can incorporate fairy lights into your ghostly garland. String them along with the ghosts to add a soft glow and create a magical atmosphere. This will enhance the ghostly effect and make your garland stand out even more.
A ghostly garland is a charming and spooky addition to your Halloween decor that will add a touch of whimsy and playfulness to your space.
Read more: How To Decorate Living Room For Halloween
Mummy Door Wreath
Add some mummified charm to your front door with a DIY mummy door wreath. This unique and creative Halloween craft will make a statement and greet guests with a spooky touch.
To make a mummy door wreath, you will need a foam wreath form, white gauze or cheesecloth, googly eyes, and a glue gun. Begin by wrapping the foam wreath form with the gauze or cheesecloth, leaving gaps to create the appearance of bandages. Secure the end of the fabric with hot glue.
Continue wrapping the wreath form, crisscrossing the fabric and varying the thickness of the bandages. Leave some parts loose and unravelled to achieve an authentic mummy look. Make sure to secure any loose ends with hot glue.
Once you have finished wrapping the wreath, use the glue gun to attach googly eyes to create the mummy’s eyes. Place them at the top or in the center of the wreath, depending on your desired aesthetic.
For an extra spooky touch, you can add faux spiders or other small Halloween decorations to the mummy wreath. Position them among the bandages, as if they are crawling out. This will add depth and interest to your wreath.
Hang the mummy door wreath on your front door using a wreath hanger or a festive ribbon. The contrasting textures of the gauze or cheesecloth and the googly eyes will create a visually appealing and attention-grabbing focal point for your Halloween decor.
Not only is the mummy door wreath a creative and unique Halloween craft, but it also adds a touch of spookiness to your home’s exterior. It’s a great way to welcome trick-or-treaters and set the stage for a memorable Halloween experience.
Spooky Spiderweb Lanterns
Elevate the eerie ambiance of your Halloween decorations with spooky spiderweb lanterns. These hauntingly beautiful lanterns will cast a ghostly glow and create a web of intrigue in your space.
To create spooky spiderweb lanterns, you will need plain white or black paper lanterns, black craft paint, a paintbrush, and string or thin black ribbon. Begin by painting a series of intersecting lines on the lantern to create the spiderweb pattern. Start with a vertical line and then add diagonal lines to create the web effect. Allow the paint to dry completely.
Next, attach string or thin black ribbon to the top of the lantern to create a handle for hanging. You can tie it around the metal frame of the lantern or use tape or glue for added security.
For an extra touch of spookiness, you can embellish the spiderweb lanterns with plastic spiders or spider-shaped cutouts. Attach them to the lantern using adhesive or tie them with black ribbon. This will add depth and dimension to your lantern and enhance the creepy crawler theme.
Hang the spiderweb lanterns indoors or outdoors for a stunning and haunting effect. They can be grouped together in varying sizes or hung individually for a more subtle touch. When lit from within, the spiderweb pattern will cast eerie shadows and create a mesmerizing atmosphere.
For an added wow factor, consider incorporating LED tea lights or fairy lights inside the lanterns. The soft glow will enhance the spiderweb pattern and add a magical touch to your spooky display.
Spooky spiderweb lanterns are an easy and creative craft idea that will add a touch of mystery and intrigue to your Halloween decor. They are perfect for creating an eerie ambiance during Halloween parties or as a haunting addition to your everyday home decor.
Get creative with materials like black paper, cardboard, and LED lights to create stylish and spooky Halloween displays. Incorporate elements like bats, spiders, and skeletons for an extra eerie touch.
Jack-o’-Lantern Votives
Illuminate your Halloween festivities with charming Jack-o’-Lantern votives. These miniature pumpkins turned candle holders will add a warm and whimsical glow to your Halloween decor.
To create Jack-o’-Lantern votives, you will need small pumpkins or gourds, a carving knife or pumpkin carving kit, tea light candles, and a spoon for scooping out the insides. Begin by gently cutting off the top of each pumpkin, creating a lid. Set the lids aside.
Using a spoon, scoop out the seeds and pulp from inside the pumpkin, creating a hollow space to hold the tea light candle. Be sure to clean out the pumpkin thoroughly, removing any excess debris or strings.
Next, carve faces onto the pumpkins using a carving knife or pumpkin carving tools. Get creative with your designs, making spooky or silly faces depending on your desired aesthetic. You can create traditional Jack-o’-Lantern faces or try out more intricate patterns.
Once you have carved your Jack-o’-Lantern faces, insert a tea light candle into each pumpkin, ensuring that it is securely placed in the hollowed-out space. Light the candles to create a warm and flickering glow.
Arrange your Jack-o’-Lantern votives on a tabletop, mantel, or any surface that needs an extra Halloween touch. You can group them together for a charming display or scatter them throughout your space for a more whimsical effect.
For an added touch of flair, consider using LED tea lights instead of traditional wax candles. This will provide a safer option, especially if you have children or pets around. LED tea lights also come in flickering varieties, creating a realistic candle-like effect.
Jack-o’-Lantern votives are a delightful and classic addition to your Halloween decor. They add a nostalgic charm and evoke the spirit of traditional Halloween festivities. Their warm glow will create a cozy and inviting atmosphere for your Halloween celebrations.
Bat Swarm Wall Art
Create a dramatic and spooky atmosphere with bat swarm wall art. This DIY Halloween craft idea will add a touch of mystery and depth to your walls, transforming them into a haunting scene.
To make bat swarm wall art, you will need black cardstock or construction paper, scissors, adhesive tabs or double-sided tape, and a wall or surface to display your artwork. Begin by drawing bat shapes on the cardstock, or you can find bat templates online and print them out. Cut out the bat shapes carefully.
Arrange the bat cutouts in a cluster or “swarm” formation on a clean and empty wall or surface. Play around with different arrangements until you find the desired effect. Use adhesive tabs or double-sided tape to attach the bats to the wall, ensuring they stick securely.
For added dimension, consider folding the wings of some bats slightly or bending them at different angles. This will create a 3D effect and give the illusion that the bats are in mid-flight.
If you want to take your bat swarm wall art to the next level, incorporate additional elements like silhouettes of trees or the moon. Cut these shapes out of black cardstock and place them strategically around the bat swarm. This will enhance the ambiance and create a more immersive Halloween scene.
For an extra touch, you can also add small LED lights or fairy lights behind the bats to create a twinkling effect. This will add a magical and ethereal element to your bat swarm wall art.
Bat swarm wall art is a versatile and visually striking Halloween decoration. It can be displayed in various areas of your home, including the entryway, staircase, or even as a backdrop for a Halloween party. The contrast of the black bats against a light-colored wall creates a captivating focal point and adds a touch of darkness to your Halloween decor.
Read more: How To Store 12X12 Paper
Potion Bottles and Apothecary Jars
Add a touch of enchantment and intrigue to your Halloween decor with potion bottles and apothecary jars. These eerie and whimsical decorations will transport your space into a mystical laboratory, perfect for a Halloween-themed display.
To create potion bottles and apothecary jars, you will need a variety of glass bottles and jars in different shapes and sizes. Look for antique-looking bottles or repurpose old glass containers for an authentic feel. Clean them thoroughly before use.
Next, you can fill the bottles and jars with different colored liquids to represent various magical potions. Consider using food coloring, water, and a few drops of dish soap to create a viscous and mystical concoction. Experiment with different colors like green, purple, or deep red to evoke an otherworldly vibe.
Add labels to the bottles and jars to give them an authentic apothecary look. You can print out labels with spooky names like “Witch’s Brew,” “Dragon’s Blood,” or “Eye of Newt” and attach them to the bottles using adhesive. You can also embellish the labels with additional details like spiderwebs or aging effects using tea bags or coffee stains.
To enhance the overall aesthetic, fill the apothecary jars with additional elements like dried herbs, faux insects, small bones or feathers. These items will give a sense of authenticity and add to the charm of the display.
Arrange the potion bottles and apothecary jars on a shelf, a mantel, or a dedicated display table. Group them together, varying the heights and sizes, to create an eye-catching arrangement. Consider incorporating flickering LED candles or fairy lights around the display to add an enchanting glow.
Potion bottles and apothecary jars are not only visually captivating, but they also inspire the imagination and spark curiosity. They make for an excellent conversation starter and provide an opportunity to engage your guests in a Halloween-themed narrative. Whether used as a standalone decoration or as part of a larger display, these mystical elements are a must-have for any Halloween enthusiast.
Skeleton Hand Candleholders
Add a touch of macabre elegance to your Halloween decor with skeleton hand candleholders. These hauntingly beautiful creations will create a spine-chilling ambiance, perfect for a spooky and sophisticated Halloween display.
To make skeleton hand candleholders, you will need skeletal hand props or plastic skeleton hands, candleholders or small jars, and adhesive or hot glue. Start by selecting the appropriate size of skeletal hand props that will fit your candleholders or jars.
Attach the skeletal hands to the candleholders using adhesive or hot glue. Make sure to secure them firmly to ensure they stay in place. You can position the hands in different ways – holding the candleholder from the sides, reaching up from the bottom, or even grasping the edges. Get creative and experiment with various positions to achieve the desired effect.
If you cannot find skeletal hand props, you can create your own by using wire, tape, and paper mache. Mold the wire into the shape of a skeleton hand, wrap it with tape to add structure, and then cover it with paper mache to create the bone-like texture. Once it’s dry, paint it with shades of white, gray, or black to achieve a realistic skeletal appearance.
Place the candles inside the candleholders or jars, making sure they are secure and stable. Choose tapered candles, pillar candles, or even LED tea lights, depending on the size of your candleholders and the desired effect.
Arrange the skeleton hand candleholders on a table, mantel, or as part of a Halloween centerpiece. Group them together or display them individually to create a striking visual impact. You can also incorporate other spooky elements like faux cobwebs, black lace, or dark-colored fabric to enhance the eerie ambiance around the candleholders.
When lit, the candles will cast a flickering glow through the skeleton hand candleholders, creating an eerie and atmospheric effect. The combination of the skeletal hands and the warm candlelight will add a touch of sophistication and intrigue to your Halloween decor.
Skeleton hand candleholders are a unique and attention-grabbing addition to your Halloween decorations. They effortlessly blend creepy and elegant elements, making them both a statement piece and a conversation starter.
Black Cat Silhouette Window Decor
Create an eye-catching and bewitching display with black cat silhouette window decor. This Halloween craft idea will add a touch of mystery and playfulness to your home, captivating the attention of passersby.
To make black cat silhouette window decor, you will need black craft paper, scissors, a pencil, tape or adhesive, and a window or glass surface. Start by drawing a cat silhouette on the black craft paper. If you’re not confident in your drawing skills, you can print out a cat silhouette template and trace it onto the paper.
Once you have the cat silhouette, carefully cut it out using scissors, making sure to follow the outline precisely. Repeat this process to create multiple cat silhouettes, depending on the size and desired impact of your window display.
Using tape or adhesive, attach the black cat silhouettes to the window or glass surface. Arrange them in different positions and angles to create a playful and dynamic scene. You can have the cats sitting, jumping, or even peeking out from behind curtains.
To enhance the spooky effect, you can also add glowing eyes to the cat silhouettes. Cut out small circles from yellow or green translucent paper and carefully stick them onto the cats’ faces using adhesive. When lit from inside your home, these glowing eyes will add an eerie and captivating touch to the display.
For an extra touch of creativity, consider incorporating other Halloween-themed elements like bats, moons, or witches’ hats alongside the cat silhouettes. This will create a layered and visually striking window decor that will grab attention day and night.
Black cat silhouette window decor is a simple yet impactful Halloween decoration. It adds a touch of whimsy and intrigue to your home’s exterior, inviting curiosity from both children and adults. Passersby will be enchanted by the playfulness and mystery created by the cat silhouettes, making it a delightful addition to your Halloween festivities.
Witch Hat Tree Topper
Elevate the spookiness factor of your Christmas tree with a witch hat tree topper. This fun and unconventional twist on a traditional tree topper will add a touch of witchy charm to your holiday decor.
To create a witch hat tree topper, you will need a large black witch hat, some wire or a sturdy string, and a secure base or attachment mechanism. Begin by ensuring that your witch hat is clean and free of any dust or debris.
Once your witch hat is prepped, decide on the placement of the topper on your Christmas tree. Use wire or a sturdy string to create a loop or attachment point at the top of the hat. This will allow you to securely fasten the hat to the tree.
If your Christmas tree has a sturdy top branch, you can carefully place the hat on it and use wire or string to tie it securely in place. If your tree doesn’t have a suitable branch, you can use a tree topper stand or a custom-made attachment piece that will hold the hat in position.
As an optional step, you can further embellish the witch hat tree topper with ribbons, bows, or even LED lights. Add touches of color or festive accents that complement the rest of your tree decorations. Get creative and personalize your witch hat topper to match your unique style and theme.
The witch hat tree topper will add a whimsical and enchanting element to your Christmas tree. It serves as a delightful conversation starter and is sure to impress your guests. Your tree will stand out with its unique and memorable topper, making it a highlight of your holiday festivities.
Read also: 12 Incredible Bella Toaster For 2025
Conclusion
Halloween is a time of creativity and spookiness, and incorporating stylish and eerie displays into your home decor is a wonderful way to embrace the spirit of the season. From haunted house displays to witch hat tree toppers, there are endless possibilities to transform your space into a Halloween wonderland.
In this article, we have explored 12 craft ideas that will help you create captivating and memorable Halloween displays. These ideas range from simple DIY projects like ghostly garlands to more intricate creations like skeleton hand candleholders. Each craft idea adds its own unique touch of Halloween charm and allows you to showcase your creativity.
Whether you’re hosting a Halloween party or simply want to add some seasonal flair to your home, these craft ideas will inspire you and transform your space. From the spooky and macabre to the whimsical and playful, there’s something for everyone’s taste and style.
Remember to infuse your Halloween displays with creativity and a human-like touch to captivate your guests and create a truly immersive experience. And don’t forget to optimize your content for search engine visibility by naturally incorporating relevant keywords throughout the article. This will help increase the visibility of your Halloween craft ideas and attract more readers.
So, have fun unleashing your inner interior designer and let your imagination run wild as you bring these Halloween craft ideas to life. Whether it’s turning your home into a haunted house, adorning your windows with spooky silhouettes, or adding a touch of whimsy with ghostly garlands, these craft ideas are sure to make your Halloween celebrations truly memorable. Happy crafting and have a spooktacular Halloween!
Frequently Asked Questions about Halloween Craft Ideas: 12 Stylish And Spooky Displays
Was this page helpful?
At Storables.com, we guarantee accurate and reliable information. Our content, validated by Expert Board Contributors, is crafted following stringent Editorial Policies. We're committed to providing you with well-researched, expert-backed insights for all your informational needs.


0 thoughts on “Halloween Craft Ideas: 12 Stylish And Spooky Displays”