Articles
How To Clean Gutters On 2 Story House
Modified: October 20, 2024
Learn how to clean gutters on a 2 story house with our informative articles. Find step-by-step guides and expert tips to ensure a seamless gutter cleaning process.
(Many of the links in this article redirect to a specific reviewed product. Your purchase of these products through affiliate links helps to generate commission for Storables.com, at no extra cost. Learn more)
Introduction
Keeping your gutters clean and free of debris is an important maintenance task for any homeowner. While it may seem like a mundane chore, neglecting your gutters can lead to serious problems such as water damage, foundation issues, and even pest infestations. Regularly cleaning your gutters is especially crucial for two-story houses, as accessing and maintaining the gutters on a higher level requires extra care and attention.
In this article, we will walk you through the step-by-step process of cleaning gutters on a two-story house, ensuring that your gutters are clear and functioning properly. We will cover everything from assessing the condition of your gutters to safely removing debris and flushing the system. By following these guidelines, you can save yourself from costly repairs and maintain the integrity of your home.
Before we dive into the specifics of cleaning gutters on a two-story house, let’s take a moment to understand why regular gutter maintenance is crucial.
Key Takeaways:
- Regularly cleaning gutters on a two-story house is crucial for preventing water damage, foundation issues, and pest infestations. Proper maintenance saves money and maintains the integrity of your home.
- Prioritizing safety, assessing gutter condition, and using the right tools are essential for effective gutter cleaning. Regular maintenance is key to preventing costly repairs and protecting your home.
Why Clean Gutters?
Gutters play a vital role in protecting your home from water damage. They are designed to collect rainwater from your roof and direct it away from your foundation, preventing water from seeping into your home or causing structural issues. However, over time, gutters can become clogged with leaves, twigs, dirt, and other debris. When this happens, water cannot flow freely through the gutter system, leading to a range of problems.
First and foremost, clogged gutters can cause water to overflow, resulting in water pooling around the foundation of your home. This excess moisture can weaken the foundation, leading to cracks, shifting, and even structural damage. Additionally, stagnant water can attract pests like mosquitoes and contribute to the growth of mold and mildew, creating an unhealthy living environment.
Another consequence of neglected gutters is the potential for water infiltration into your attic or walls. When water cannot properly drain from the roof, it can find its way into your home, causing leaks and water damage. This can lead to costly repairs, including fixing damaged ceilings, walls, and insulation.
Furthermore, clogged gutters can create ice dams during the winter months. As water freezes in the gutters, it can block the flow of subsequent melting snow and ice, causing water to back up and potentially seep into your roof or attic. Ice dams can also lead to the formation of icicles, which pose a safety hazard to pedestrians below.
Regularly cleaning your gutters not only prevents these issues but also extends their overall lifespan. By removing debris and ensuring proper water flow, you can avoid unnecessary wear and tear on your gutters, downspouts, and fascia. This, in turn, saves you money in the long run by avoiding costly repairs or replacements.
Now that we understand the importance of cleaning gutters, let’s move on to the tools and materials you’ll need for the job.
Tools and Materials Needed
Before you begin cleaning the gutters on your two-story house, it’s important to gather the necessary tools and materials to ensure a safe and efficient process. Here is a list of what you will need:
- Ladder: A sturdy ladder is essential for reaching and working on the gutters. Opt for an extension ladder that is tall enough to comfortably reach the second story of your home.
- Gloves: Protect your hands from debris and sharp edges by wearing heavy-duty work gloves. This will also provide a better grip when handling gutter cleaning tools.
- Goggles: Safety goggles are recommended to shield your eyes from any loose debris that may fall from the gutters.
- Gutter Scoop: A gutter scoop or small trowel-like tool is ideal for removing leaves, twigs, and other debris from the gutters. Look for one with a curved shape that fits easily into the gutter channels.
- Gutter Brush: A gutter brush is a useful tool for scrubbing away stubborn dirt and grime from the gutters. Choose a brush with stiff bristles that can effectively clean the gutters without causing damage.
- Bucket or Bag: Have a bucket or bag on hand to collect the debris as you clean the gutters. This will help keep the area tidy and make disposal easier.
- Garden Hose: A garden hose with a spray nozzle attachment will be used to flush out the gutters and ensure proper water flow. Make sure you have enough hose length to reach all areas of the gutter system.
- Gutter Guards (Optional): If you want to minimize future gutter maintenance, consider installing gutter guards. These protective covers prevent debris from clogging the gutters while still allowing water to flow freely.
By having these tools and materials ready, you’ll be well-equipped to tackle the task of cleaning your gutters on a two-story house. However, before you begin, it’s important to follow proper safety precautions, which we’ll discuss in the next section.
Safety Precautions
When it comes to cleaning gutters on a two-story house, safety should be your top priority. Working at heights can be dangerous, so it’s important to take the necessary precautions to ensure your well-being. Here are some safety guidelines to follow:
- Use a sturdy ladder: Ensure that your ladder is in good condition, properly extended, and securely positioned on a level surface. If possible, have someone hold the ladder steady while you climb.
- Wear protective gear: Put on work gloves to protect your hands from debris and sharp edges. Wear safety goggles to shield your eyes from any falling particles.
- Check the weather conditions: Avoid cleaning gutters during rainy or windy weather, as this can make the ladder and gutters slippery and increase the risk of falling.
- Notify someone: Let someone know that you will be working on your gutters, especially if you are doing it alone. In case of an accident or emergency, they will be aware of your activity.
- Secure the ladder: Make sure the ladder is properly anchored and secure before climbing. Consider using ladder stabilizers or having a spotter to hold the base of the ladder for added stability.
- Take breaks: Cleaning gutters can be physically demanding, so remember to take breaks to rest and hydrate. Avoid overexertion and listen to your body’s signals.
- Avoid overreaching: Position yourself properly on the ladder and avoid leaning too far to reach debris. It’s better to move the ladder and work within a comfortable range.
- Use proper ladder techniques: Maintain three points of contact with the ladder (such as two feet and one hand) and avoid standing or leaning on the top two rungs.
By following these safety precautions, you can minimize the risks associated with cleaning gutters on a two-story house. Now that you are aware of the necessary safety measures, let’s move on to the step-by-step process of cleaning your gutters.
Step 1: Assessing the Condition of Your Gutters
Before diving into the cleaning process, it’s important to assess the condition of your gutters. This will help you identify any areas that may need repair or additional attention during the cleaning process. Follow these steps to assess your gutters:
- Inspect the gutters from the ground: Begin by walking around your house and visually inspecting the gutters from ground level. Look for any signs of sagging, detachment, or damage.
- Check for leaks: On a dry day, run water through your gutters using a garden hose. Watch for any leaks or overflowing water, as this may indicate clogs or damage in the system.
- Examine the downspouts: Check the downspouts for any blockages or obstructions. Ensure that they are securely attached to the gutters and that water flows freely through them.
- Look for signs of erosion: Inspect the areas around your home’s foundation for any signs of erosion caused by water overflowing from the gutters. This could indicate that your gutters are not effectively redirecting water away from your foundation.
- Inspect fascia and soffits: Take a close look at the fascia and soffits (the boards behind the gutters) as they can be prone to rot and damage. Address any issues you find before proceeding with the cleaning process.
Taking the time to assess your gutters will allow you to identify any potential problems and address them accordingly. If you notice significant damage or if you’re unsure about any repairs needed, it’s advisable to consult a professional gutter cleaning service or a qualified contractor.
Once you have thoroughly assessed the condition of your gutters, you’re ready to move on to the next step: gathering the necessary equipment.
Step 2: Gathering the Necessary Equipment
Now that you have assessed the condition of your gutters, it’s time to gather all the necessary equipment and materials for the cleaning process. By having everything ready, you can work efficiently and effectively. Here’s what you’ll need:
- Ladder: Choose a sturdy and stable ladder that is tall enough to reach the gutters on the second story of your house. Ensure that the ladder is in good condition and can safely support your weight.
- Gloves: Wear heavy-duty work gloves to protect your hands from debris, sharp edges, and potential contaminants that may be present in the gutters.
- Safety goggles: It’s important to wear safety goggles to protect your eyes from any falling debris or particles that may be dislodged during the cleaning process.
- Gutter scoop or small trowel: Use a gutter scoop or small trowel-like tool to remove leaves, twigs, and other debris from the gutters. Look for a tool with a curved shape that fits easily into the gutter channels.
- Gutter brush: A gutter brush with stiff bristles can be used to scrub away stubborn dirt and grime from the gutters. Make sure the brush is long enough to reach all areas of the gutters comfortably.
- Bucket or bag: Have a bucket or bag on hand to collect the debris as you clean the gutters. This will help keep the area tidy and make disposal easier when you’re finished.
- Garden hose with spray nozzle attachment: Use a garden hose with a spray nozzle attachment to flush out the gutters and ensure proper water flow. Make sure you have enough hose length to reach all areas of the gutter system.
- Gutter guards (optional): If you have gutter guards installed, make sure you have any necessary tools or materials to temporarily remove and reinstall them during the cleaning process.
Having all the equipment and materials ready before you start cleaning will save you time and ensure a smoother workflow. It’s also essential to wear appropriate clothing that allows for movement and flexibility, as you may need to maneuver on the ladder and navigate tight spaces.
With your equipment at the ready, you’re now prepared to move on to the next step: setting up a stable ladder.
Step 3: Setting up a Stable Ladder
Setting up a stable ladder is crucial for safety when cleaning gutters on a two-story house. Follow these steps to ensure a stable and secure ladder setup:
- Choose a suitable ladder: Select a sturdy and reliable ladder that is tall enough to reach the gutters on the second story. Extension ladders are typically the best choice for this task.
- Inspect the ladder: Before use, thoroughly inspect the ladder for any signs of damage, such as cracked or loose rungs. Ensure that all locking mechanisms are in place and working correctly.
- Find a stable surface: Place the ladder on a level and solid surface to ensure stability during use. If the ground is uneven, use ladder leveling accessories or dig out a small trench to create a more even footing.
- Position the ladder properly: Position the ladder at an appropriate angle. For extension ladders, follow the 4-to-1 rule: for every four feet in height, the base of the ladder should be one foot away from the wall.
- Secure the ladder: Secure the top of the ladder using ladder stabilizers, ladder mitts, or something similar to keep the ladder from damaging the gutter or slipping sideways during use.
- Use leg leveling devices: If necessary, use leg leveling devices or adjustable ladder feet to ensure that all ladder legs are firmly in contact with the ground or surface.
- Have a spotter: If possible, have someone hold the base of the ladder to provide additional stability and assist in case of an emergency or if you need to pass tools or debris.
- Maintain three points of contact: As you climb and work on the ladder, always maintain three points of contact, such as two feet and one hand, to ensure stability and prevent falls.
Remember, ladder safety is of the utmost importance. Never stand on the top two rungs of the ladder, lean out too far, or overreach while on the ladder. Take your time to set up the ladder properly and ensure it is secure before climbing.
With the ladder set up safely, you’re ready to move on to the next step: clearing debris from the roof.
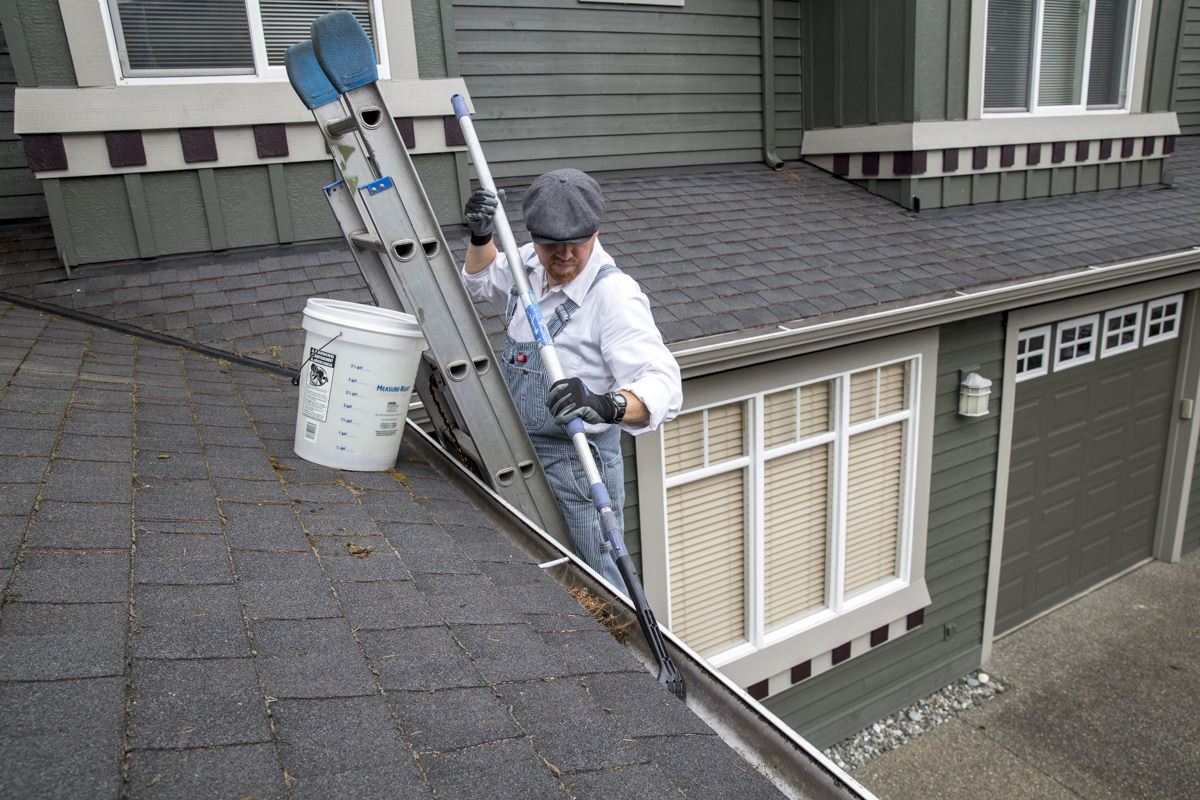
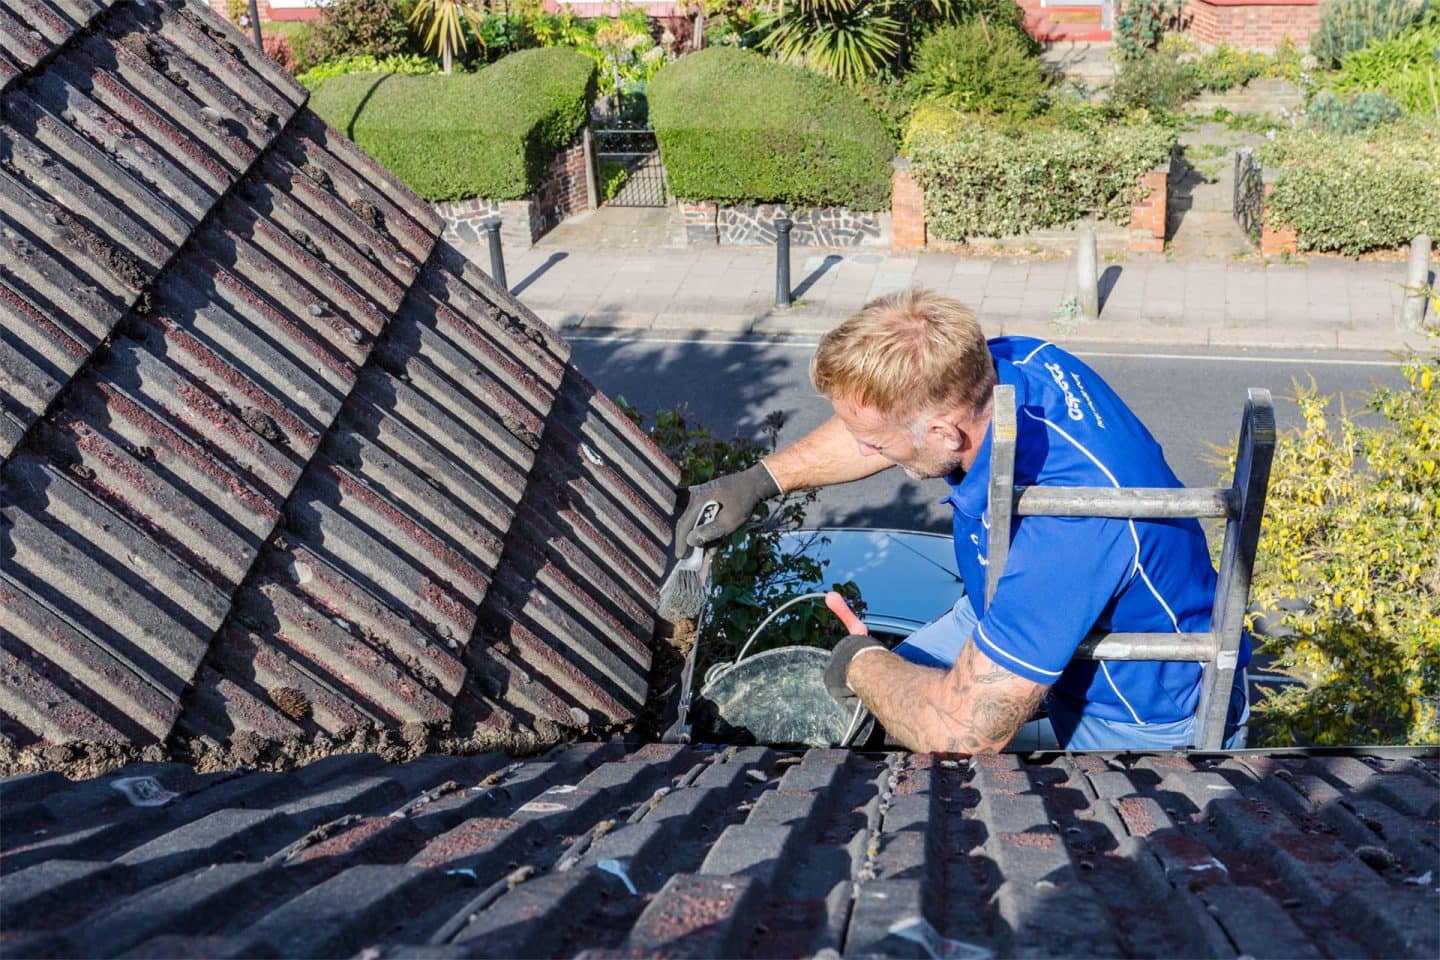
Use a sturdy ladder and have someone spot you. Scoop out debris by hand or use a gutter scoop. Flush with a hose to remove remaining dirt. Check for leaks or damage.
Step 4: Clearing Debris from the Roof
Clearing debris from the roof is an important step in the gutter cleaning process for a two-story house. This step ensures that there is no loose debris that can find its way into the gutters and cause blockages. Follow these steps to clear debris from the roof:
- Put on safety gear: Before accessing the roof, put on your work gloves and safety goggles to protect yourself from any debris or hazards.
- Securely climb to the roof: Using the ladder that you set up in the previous step, climb to the roof and take caution with every step.
- Inspect the roof for debris: Once on the roof, carefully walk around and inspect the surface for any leaves, twigs, branches, or other debris. Pay close attention to valleys, near chimneys, and around skylights, as these areas are prone to debris accumulation.
- Safely remove debris: Use a broom or a roof rake to gently sweep or pull the debris towards the edge of the roof. Be careful not to damage the roofing material or dislodge any shingles.
- Dispose of the debris: As you clear the debris from the roof, either place it in a designated container or carefully toss it down onto a tarp or drop cloth on the ground. This will help keep the area clean and make the disposal process easier.
- Repeat as necessary: Continue inspecting and clearing debris from the rest of the roof following the same process. Take your time to ensure that you have removed all visible debris.
Clearing debris from the roof is an essential step to help prevent clogs in your gutters and ensure proper water flow. Once you have cleared the roof, you can move on to the next step: removing debris from the gutters.
Remember to exercise caution and maintain your balance while on the roof. If you are not comfortable or confident in your ability to safely navigate the roof, it’s best to seek professional assistance.
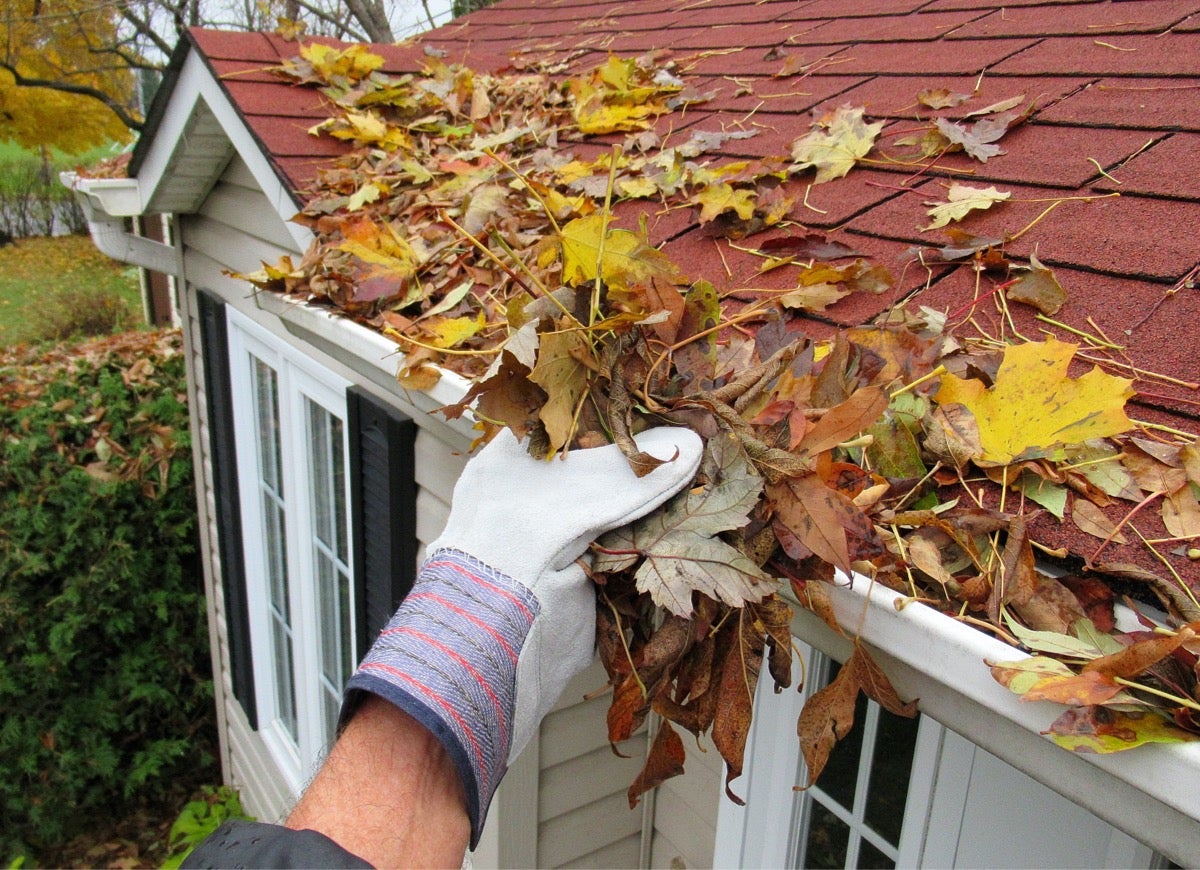
Step 5: Removing Debris from the Gutters
Now that you have cleared the debris from the roof, it’s time to focus on removing the accumulated debris from the gutters. This step is crucial to ensure that the gutters can effectively channel water away from your home. Follow these steps to properly remove debris from the gutters:
- Position yourself safely: Stand on the ladder, ensuring that it is securely positioned and stable. Take care not to lean too far or overreach while working.
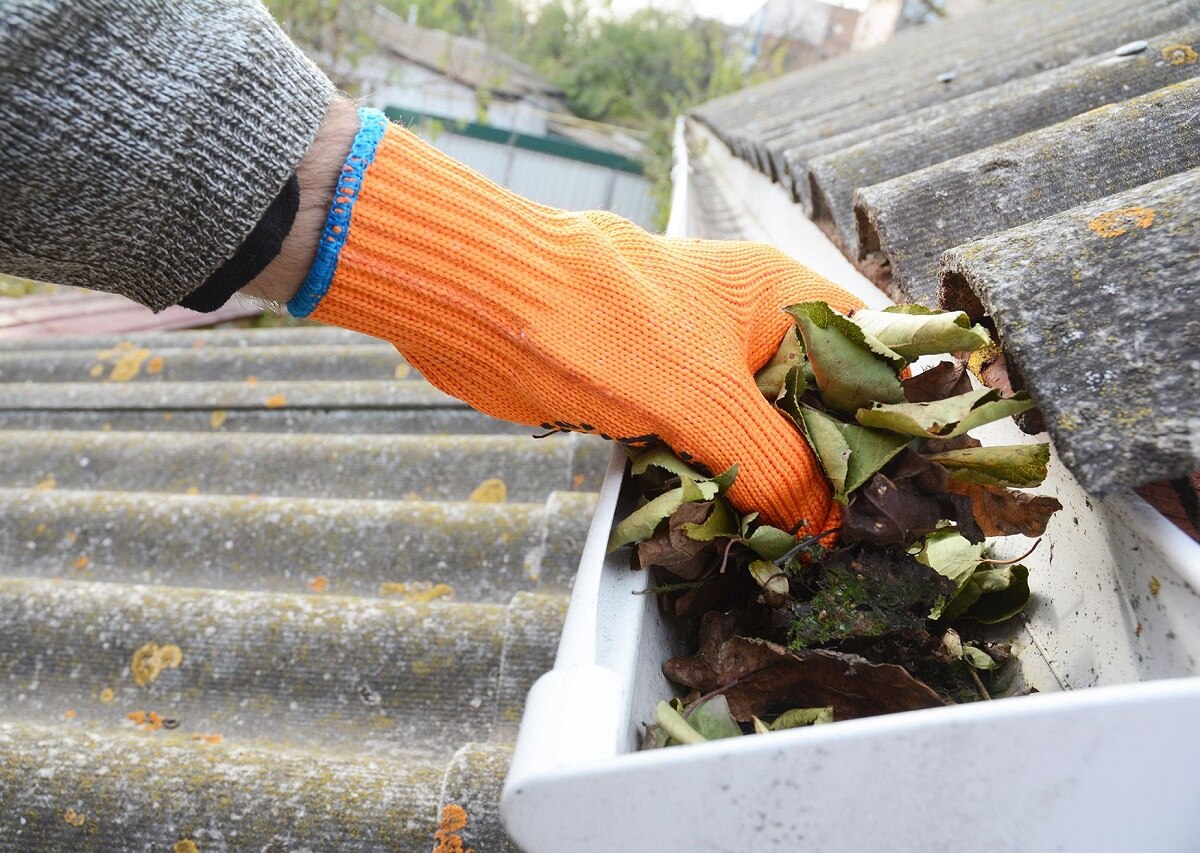
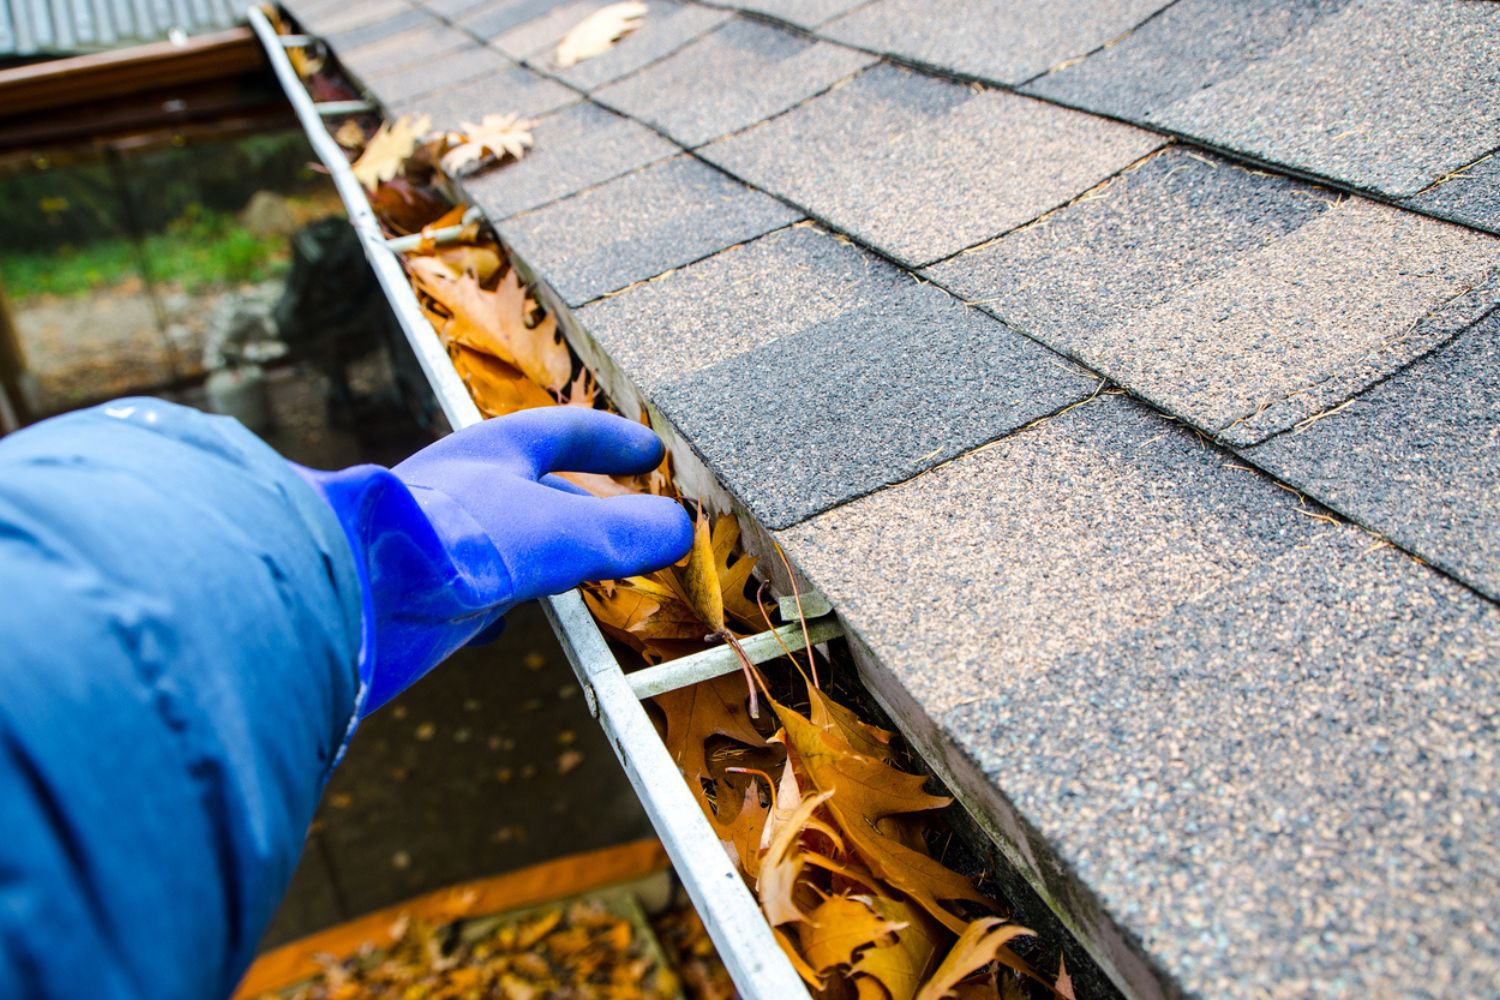
- Start at the downspout: Begin removing the debris from the gutters at the downspout. Use your hands, a gutter scoop, or a small trowel to scoop out the accumulated leaves, twigs, and dirt.
- Work towards the end: Slowly work your way along the gutters, moving towards the end opposite the downspout. Use the gutter scoop or your hands to gather and remove any debris you encounter.
- Inspect gutters as you go: As you clear the debris, take the opportunity to inspect the gutters for any signs of damage, such as rust, leaks, or loose sections. Note any areas that may require repair or further attention.
- Dispose of debris: Place the debris directly into a bucket or bag that you have on hand for easy disposal. Be mindful not to drop the debris onto the ground or into the downspout, as this may cause clogs elsewhere.
- Clean hard-to-reach areas: For areas that are difficult to reach by hand, use a gutter brush to scrub away stubborn dirt and grime. Make sure to scrub both the bottom of the gutter and the inside walls.
- Regularly check the downspout: Throughout the process, check the downspout for any blockages. If you notice a blockage, use a garden hose with a spray nozzle attachment to flush it out.
- Continue until all debris is removed: Continue removing debris from the gutters until you have successfully cleared all visible obstructions.
Removing debris from the gutters is an important step in maintaining their functionality and preventing clogs. Take your time and be thorough to ensure that all debris is removed. Once you have cleared the gutters, you can proceed to the next step: flushing the gutters with water.
Remember to always exercise caution, maintain your balance on the ladder, and follow proper ladder safety practices throughout the process.
Read more: How To Design A Small Two-Story House
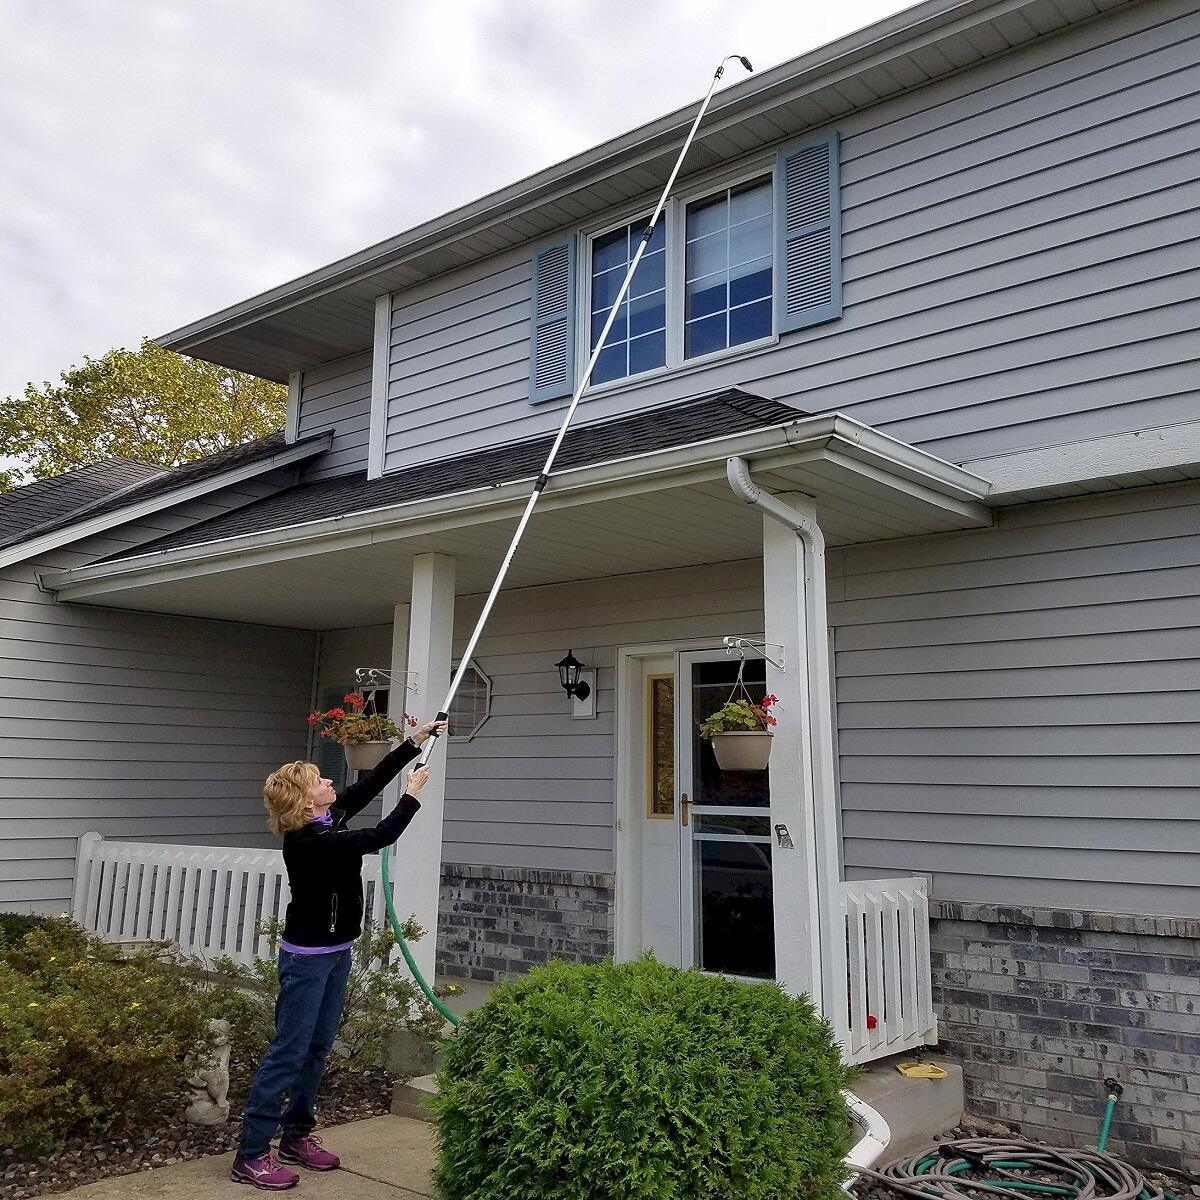
Step 6: Flushing the Gutters with Water
After removing the debris from the gutters, it’s crucial to flush them with water to ensure proper flow and clear any remaining residue. Flushing the gutters will help remove smaller particles and allow water to flow freely through the system. Follow these steps to flush the gutters with water:
- Prepare the garden hose: Connect a spray nozzle attachment to your garden hose and ensure that it is securely attached. Make sure the hose is long enough to reach all areas of the gutter system.
- Position yourself safely: Stand on the ladder, maintaining a secure footing, with the garden hose in hand.
- Start at the downspout: Begin by directing the water flow into the downspout. Use a medium-intensity spray to avoid damaging the gutter or downspout.
- Work your way along the gutters: Gradually move along the gutters, directing the water towards the opposite end from the downspout. Allow the water to flow through the gutter channels, flushing out any remaining debris or dirt.
- Check for proper water flow: Pay attention to the water flow from the downspout. Ensure that water is freely flowing and not backing up or pooling in any areas. This indicates that the downspout is clear and that the gutters are functioning properly.
- Inspect for leaks or blockages: As you flush the gutters, closely inspect for any leaks or blockages. If you notice any issues, note them for repair or further inspection.
- Continue until the water runs clear: Flush each section of the gutter system until the water running through the gutters appears clear and free from debris.
Flushing the gutters with water is an essential step to ensure that they are clear and functioning optimally. Once you have completed this step, you can proceed to the next step: inspecting the downspouts.
Always exercise caution and stay aware of your balance on the ladder while working with water. Keep in mind that wet gutters and a slippery ladder pose additional risks.
Step 7: Inspecting the Downspouts
Inspecting the downspouts is a critical step in the gutter cleaning process. The downspouts play a crucial role in directing water away from your home’s foundation. Follow these steps to inspect the downspouts:
- Position yourself safely: Stand on the ladder, ensuring that it is stable and secure. Take caution to maintain your balance throughout the inspection.
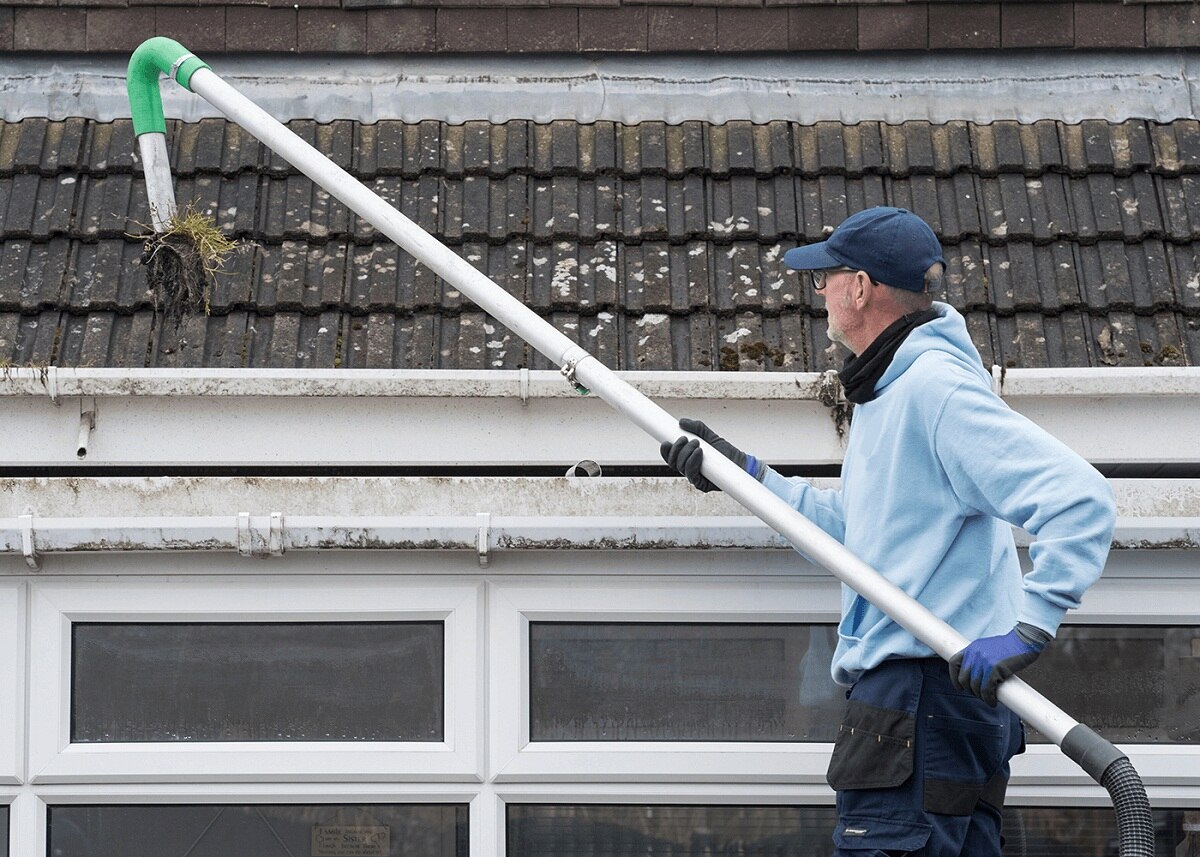
- Check for blockages: Begin by visually inspecting the downspouts for any visible blockages, such as leaves, debris, or nests. If you notice any blockages, carefully remove them using a pole, pipe cleaner, or garden hose with a spray nozzle attachment.
- Ensure proper water flow: Run water through the downspouts using the garden hose and spray nozzle attachment. Observe the water flow and ensure it is steady and unobstructed. Watch for any signs of water backing up or overflowing, as this may indicate a blockage further down the downspout.
- Inspect for leaks or damage: While water is flowing through the downspouts, inspect for any leaks or signs of damage. Look for cracks, loose joints, or water escaping from anywhere other than the designated downspout opening.
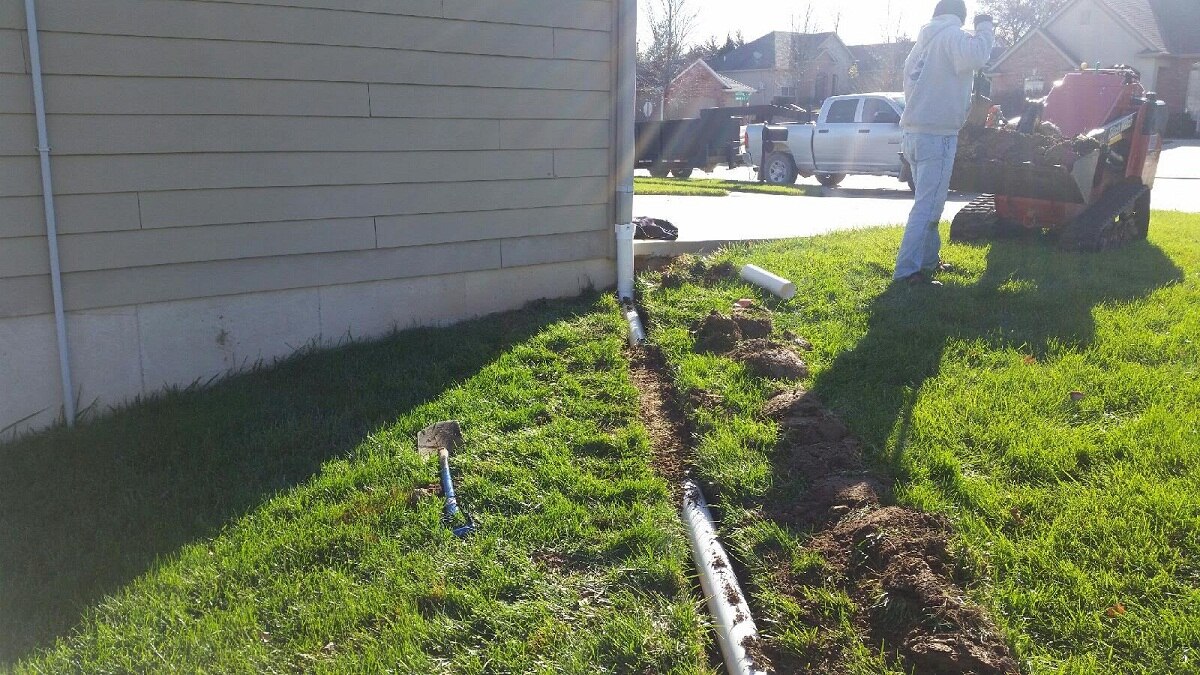
- Check downspout extensions: If your downspouts have extensions to direct water further away from your foundation, inspect them to ensure they are properly attached and functioning. Look for any damage or signs of deterioration, such as cracks or clogs.
- Note any needed repairs: Take note of any issues or repairs needed. This may include replacing damaged portions of downspouts, repairing leaks, or installing additional extensions if necessary.
Inspecting the downspouts is essential to ensure that water is being effectively directed away from your home and foundation. By addressing any blockages or damage, you can help prevent costly water damage and maintain the integrity of your gutter system.
Once you have completed the inspection of the downspouts, you can proceed to the next step: cleaning up and disposing of debris.
Remember to exercise caution while inspecting downspouts, as you will be working at an elevated level on the ladder.
Step 8: Cleaning Up and Disposing of Debris
Cleaning up and properly disposing of the debris is the final step in the gutter cleaning process. By tidying up the area and disposing of the debris responsibly, you ensure a clean and safe environment. Follow these steps to clean up and dispose of debris:
- Collect debris from the ground: Gather any debris that may have fallen onto the ground during the cleaning process. Use a rake, broom, or your gloved hands to collect the debris into a pile.
- Bag or bucket the debris: Place the collected debris into a bag or bucket that you have designated for disposal. If there is a significant amount of debris, separate it into multiple bags or containers for easier handling.
- Seal the bags tightly: Ensure that the bags are securely sealed to prevent any loose debris from escaping or causing a mess. Double-bagging can help provide added protection against tearing or leaking.
- Safely dispose of the debris: Check your local regulations or guidelines for proper disposal of the debris. You may be able to dispose of it in your regular trash collection, or you may need to take it to a nearby composting facility or green waste disposal site.
- Clean the surrounding area: Use a broom or rake to sweep or gather any remaining debris from the ground around the gutters. This helps prevent debris from being washed back into the gutters during future rainstorms.
- Inspect the work area: Before descending the ladder, take a moment to inspect the area to ensure you haven’t overlooked any debris or missed any areas that require further attention.
By thoroughly cleaning up and properly disposing of the debris, you complete the gutter cleaning process and leave your surroundings clean and organized.
Remember to always practice safe disposal methods in accordance with local regulations and guidelines. Keeping your gutters clean not only protects your home but also contributes to the overall aesthetics and functionality of your property.
Now that you have completed the cleaning process and cleaned up the area, you can take pride in a job well done!
Conclusion
Cleaning the gutters on a two-story house is an essential maintenance task that helps protect your home from water damage, foundation issues, and other potential problems. By following the step-by-step process outlined in this article, you can effectively clean your gutters and ensure their proper functioning.
Starting with an assessment of your gutters’ condition, you can identify any areas that require repair or additional attention. Gathering the necessary tools and materials ensures that you have everything you need for the job. Prioritizing safety precautions, such as setting up a stable ladder and wearing appropriate protective gear, is critical for your well-being.
Clearing debris from the roof and gutters and flushing them with water removes blockages and ensures optimal water flow. Inspecting the downspouts helps verify that water is directed away from your home’s foundation. Finally, cleaning up and properly disposing of the debris completes the process, leaving your surroundings clean and tidy.
Regular maintenance of your gutters is key to preventing costly repairs and damage to your home. It is recommended to clean your gutters at least twice a year, preferably in the spring and fall, to remove accumulated debris. However, if you live in an area with heavy tree cover or experience frequent storms, more frequent cleaning may be necessary.
Remember to exercise caution throughout the gutter cleaning process and know your limits. If you’re uncomfortable with heights or unable to safely perform the tasks involved, it’s always a good idea to seek professional assistance.
By taking the time to clean your gutters on a two-story house, you’re investing in the long-term well-being and protection of your home. Properly maintained gutters ensure that rainwater flows away, reducing the risk of water damage and keeping your home safe and sound.
So, don’t neglect your gutters! With the information provided in this article, you’re now equipped with the knowledge and guidance to successfully clean the gutters on your two-story house. Happy cleaning!
Now that you're familiar with the nitty-gritty of cleaning gutters on your two-story abode, why not consider who can handle this task for you? While DIY projects are rewarding, hiring professionals for gutter cleaning can save time and ensure safety. Our next article delves into various service providers who specialize in keeping your gutters in top shape. Whether you're busy with other responsibilities or prefer not to climb ladders, understanding your options for professional gutter upkeep is a smart move. Check out our detailed guide on selecting the right service for your needs.
Frequently Asked Questions about How To Clean Gutters On 2 Story House
Was this page helpful?
At Storables.com, we guarantee accurate and reliable information. Our content, validated by Expert Board Contributors, is crafted following stringent Editorial Policies. We're committed to providing you with well-researched, expert-backed insights for all your informational needs.


0 thoughts on “How To Clean Gutters On 2 Story House”