Articles
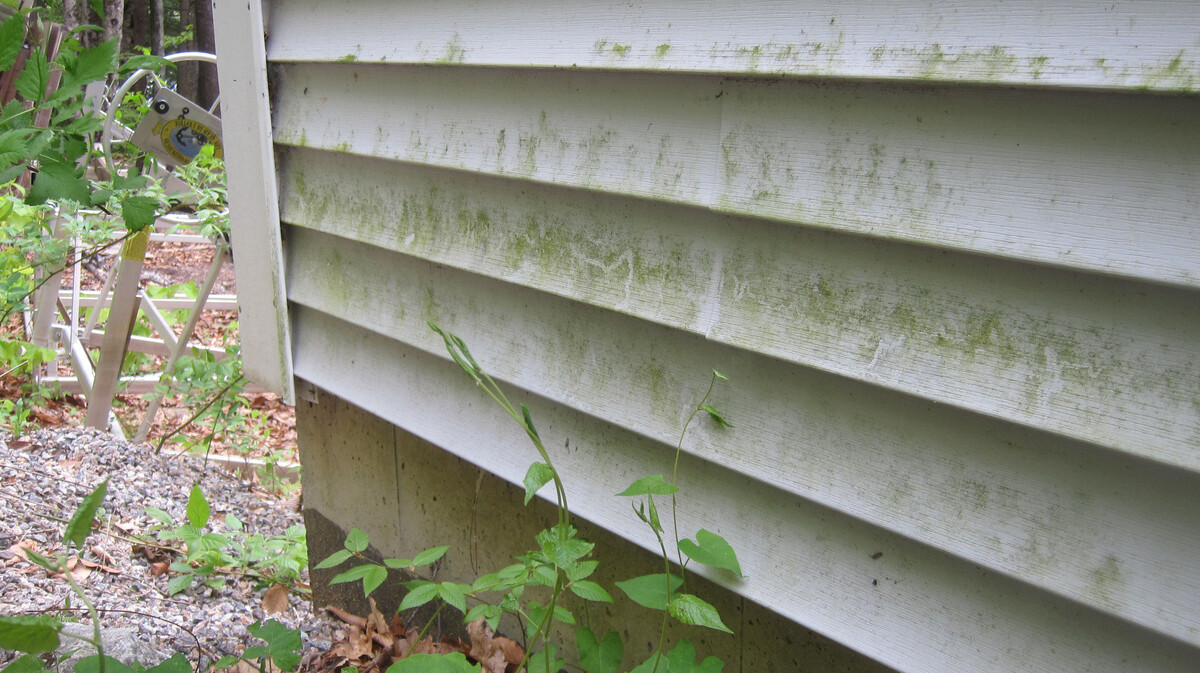
How To Clean Mold Off Siding
Modified: August 25, 2024
Learn effective techniques and solutions for removing mold from siding in this comprehensive guide. Browse through our informative articles for expert tips and advice.
(Many of the links in this article redirect to a specific reviewed product. Your purchase of these products through affiliate links helps to generate commission for Storables.com, at no extra cost. Learn more)
Introduction
Welcome to this comprehensive guide on how to clean mold off siding. Mold is a common issue that can plague the exterior of houses, causing unsightly stains and potential damage. If left untreated, it can also pose health risks to you and your family. Therefore, it is important to address mold growth as soon as it is identified.
In this article, we will walk you through a step-by-step process to effectively remove mold from your siding and prevent its recurrence. We will also discuss the necessary materials you will need and provide some helpful tips along the way.
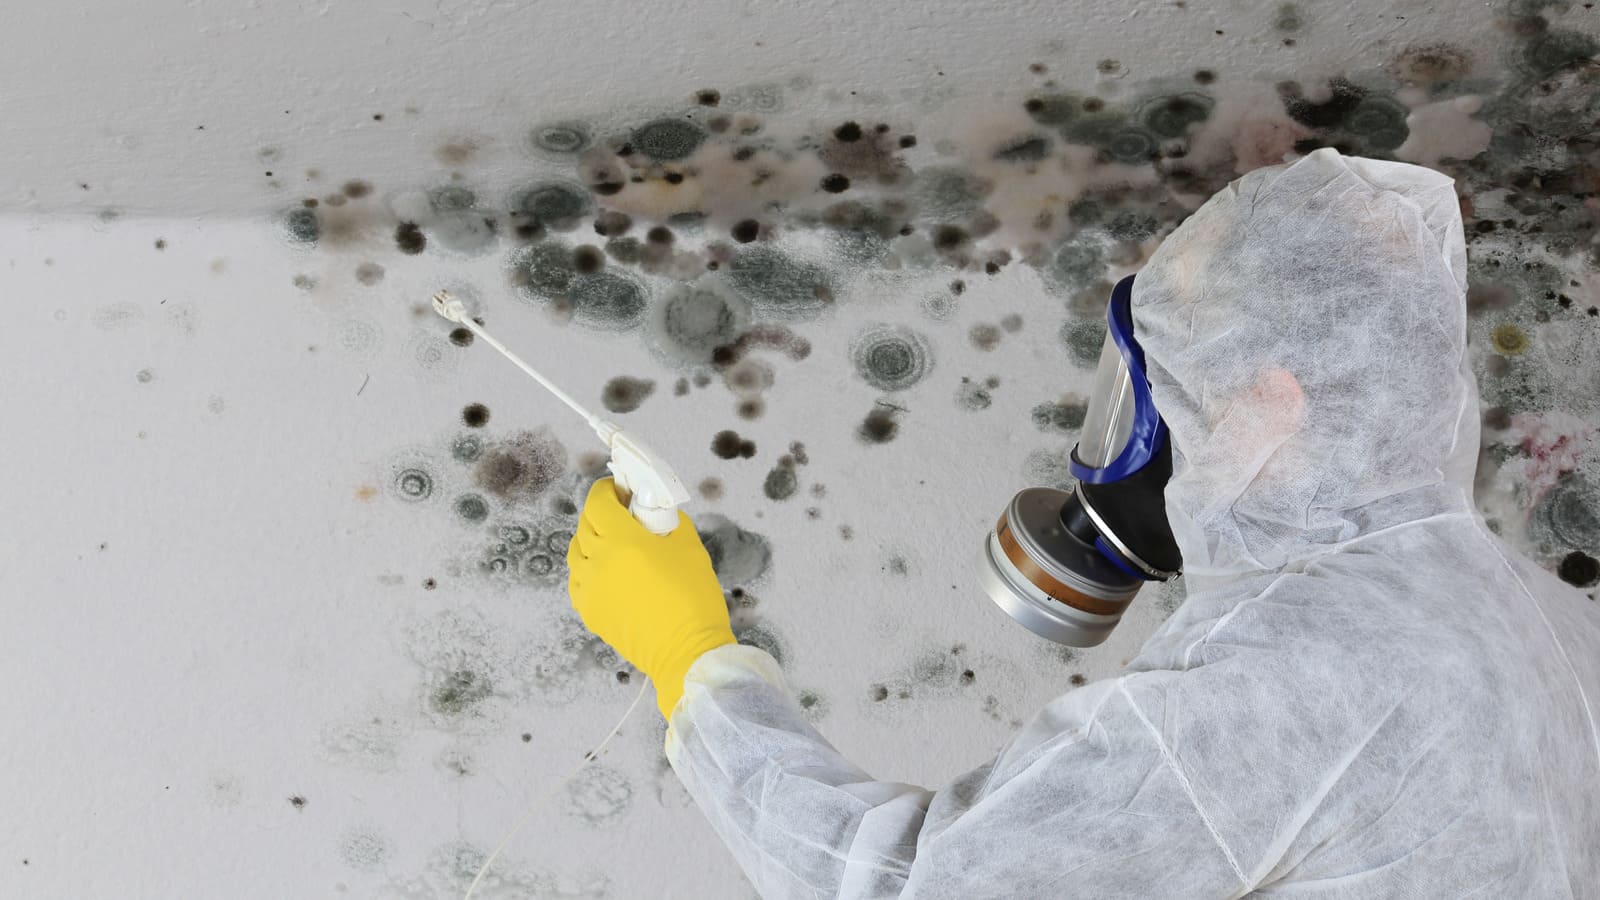
Before we dive into the cleaning process, it is vital to note that proper safety precautions should be followed when dealing with mold. Wear appropriate protective gear, such as gloves, goggles, and a mask, to avoid direct contact with the mold and its spores. Additionally, ensure proper ventilation in the work area by opening windows or using fans.
Now, let’s get started on learning how to clean mold off your siding and restore the beauty of your home!
Key Takeaways:
- Proper assessment, preparation, and thorough cleaning are essential for effectively removing mold from siding. Follow the step-by-step process and preventive measures to maintain a clean and mold-free exterior.
- Regular maintenance, vigilant inspection, and preventive measures can help prevent future mold growth on siding. By addressing water issues, maintaining ventilation, and cleaning the siding, you can preserve the beauty and integrity of your home.
Read more: How To Get Green Mold Off Siding
Step 1: Assessing the Mold Situation
Before you begin the process of cleaning mold off your siding, it is crucial to assess the extent of the mold growth. This will help you determine the appropriate cleaning methods and materials needed.
First, visually inspect the siding for any signs of mold, which may appear as dark spots or discoloration. Pay close attention to areas that are prone to moisture, such as shaded areas, corners, and near downspouts. Mold is more likely to develop in humid and damp environments.
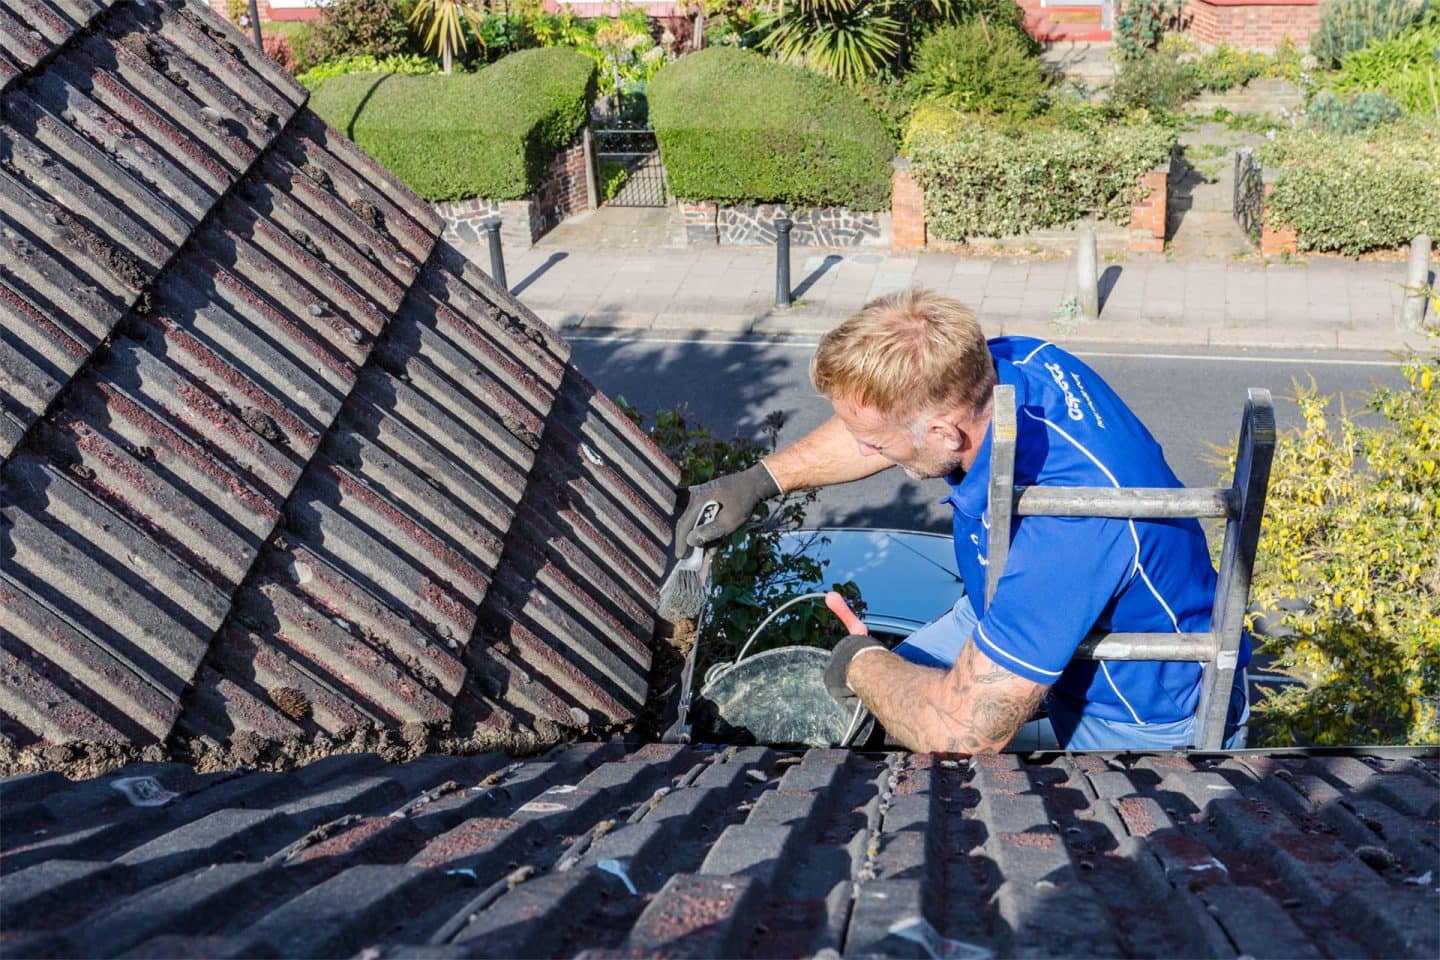
If you notice that the mold growth is limited to a small area, such as a few patches or spots, you may be able to handle the cleaning process yourself. However, if the mold has spread extensively or if you are dealing with a severe mold infestation, it is recommended to seek professional assistance.
In addition to assessing the extent of the mold growth, it is important to identify the type of siding material you have. Different siding materials, such as vinyl, wood, or brick, may require different cleaning techniques and solutions. Consult the manufacturer’s recommendations or seek professional advice if you are unsure.
Lastly, consider the weather conditions before starting the cleaning process. Mold should not be cleaned on a rainy or windy day, as it can spread the spores and make the cleaning process more challenging. Choose a dry and calm day to ensure the best results.
Once you have assessed the mold situation, you can proceed with gathering the necessary materials for the cleaning process. We will cover this in the next step.
Step 2: Gathering the Necessary Materials
Before you can begin cleaning the mold off your siding, it is important to gather the necessary materials. Having the right tools and products on hand will make the process more efficient and effective.
Here are the materials you will need:
- Protective Gear: Ensure you have the proper protective gear, including gloves, goggles, and a mask, to avoid direct contact with the mold and protect yourself from any potential health risks.
- Cleaning Solution: Depending on the type of siding material you have, you may need a specific cleaning solution. For most types of siding, a mixture of mild detergent and water is sufficient. However, for more stubborn mold or specific siding materials, such as wood, there are specialized cleaning products available. Consult the manufacturer’s recommendations or seek professional advice to choose the appropriate cleaning solution.
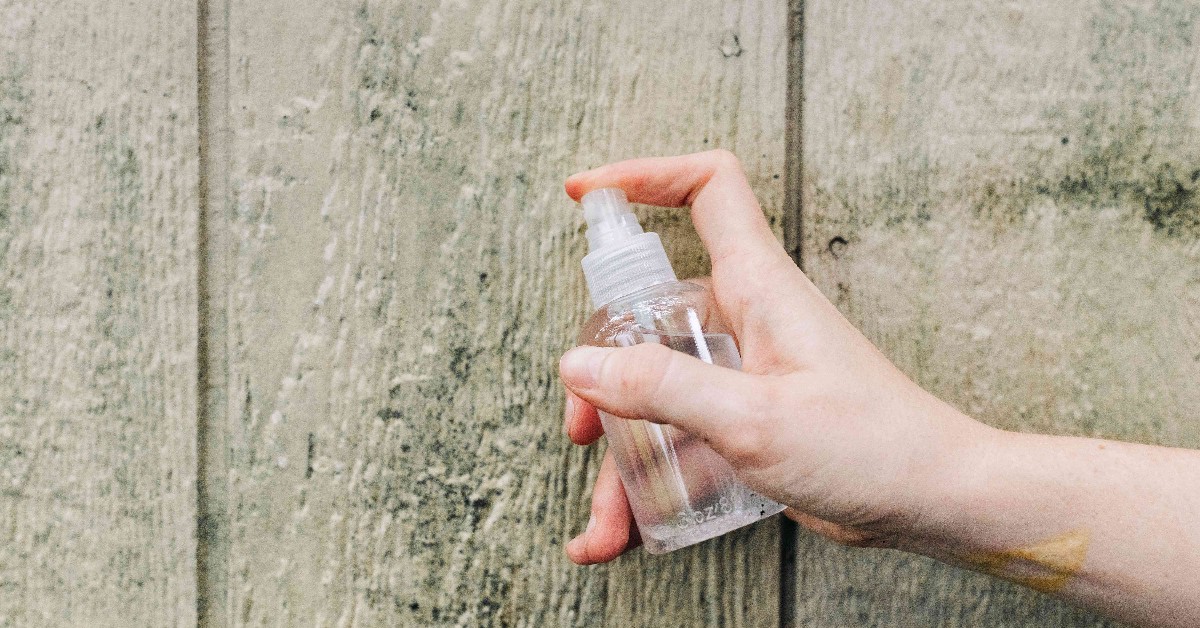
- Bucket or Spray Bottle: You will need a container, such as a bucket or a spray bottle, to mix and hold the cleaning solution. This will allow you to easily apply it to the affected areas.
- Soft-Bristled Brush or Sponge: A soft-bristled brush or sponge will be used to scrub the mold off the siding. Avoid using harsh brushes or abrasive materials, as they may damage the siding surface.
- Hose or Pressure Washer: You will need a hose or a pressure washer to rinse off the cleaning solution and remove any remaining mold residue. If using a pressure washer, be cautious and adjust the water pressure to prevent damage to the siding.
- Ladder: Depending on the height of your siding, you may need a ladder to reach higher areas safely. Ensure the ladder is stable and securely positioned before climbing.
- Tarp or Drop Cloth (optional): If you want to protect the surrounding areas from the cleaning solution or any fallen debris, you can lay down a tarp or a drop cloth.
Once you have gathered all the necessary materials, you are ready to move on to the next step: preparing the work area.
Step 3: Preparing the Work Area
Preparing the work area before you start cleaning the mold off your siding is essential to ensure a smooth and safe cleaning process. Here are some steps to follow:
- Remove any obstacles: Clear the area around the siding of any furniture, plants, or other objects that could obstruct your access or get in the way during the cleaning process.
- Protect nearby plants and surfaces: Cover any nearby plants or delicate surfaces with a tarp or plastic sheeting to prevent them from being damaged by the cleaning solution or falling debris.
- Close windows and doors: Close all nearby windows and doors to prevent the cleaning solution and mold spores from entering your home.
- Turn off outdoor electrical sources: If there are any outdoor electrical sources, such as lights or outlets near the work area, turn them off or disconnect them to avoid any potential hazards.
- Pre-soak the siding (optional): If the mold growth is particularly heavy or stubborn, you can pre-soak the affected areas with plain water before applying the cleaning solution. This will help loosen the mold and make it easier to remove.
- Secure the work area: If you are using a ladder to reach higher areas, ensure it is placed on a stable and level surface. Have someone hold the ladder or use ladder stabilizers to increase stability. Use caution and always prioritize your safety.
- Follow safety guidelines: Review and follow any safety guidelines provided by the manufacturer of the cleaning solution or any other tools you are using to ensure a safe and effective cleaning process.
By taking the time to prepare the work area properly, you can minimize potential risks and ensure a more efficient cleaning process. Once the work area is prepared, you can move on to the next step: preparing the cleaning solution.
Step 4: Preparing the Cleaning Solution
Before you can begin cleaning the mold off your siding, it is important to prepare the appropriate cleaning solution. The right cleaning solution will help eliminate mold effectively while being safe for your siding material.
Here’s how to prepare the cleaning solution:
- Dilute mild detergent: If you are using a mild detergent, such as dish soap or laundry detergent, start by diluting it in a bucket of warm water. Follow the manufacturer’s instructions for the appropriate ratio of detergent to water.
- Other cleaning solutions: If you are using a specialized cleaning product, follow the instructions provided on the packaging. Some products may require a specific dilution or mixing process.
- Avoid harsh chemicals: It is important to note that harsh chemicals, such as bleach or ammonia, should be avoided when cleaning mold off siding. These chemicals can damage the siding material and pose health risks.
- Test the solution (optional): Before applying the cleaning solution to the entire siding, it is recommended to test a small, inconspicuous area to ensure it does not cause any discoloration or damage. Wait for a few minutes after applying the solution and then rinse it off to check the results.
Remember, different siding materials may have different cleaning requirements. Refer to the manufacturer’s instructions or seek professional advice if you are unsure of the appropriate cleaning solution for your specific siding material.
Once you have prepared the cleaning solution, you are now ready to move on to the next step: applying the cleaning solution to the siding.
Read more: How To Clean Mold Off Blinds
Step 5: Applying the Cleaning Solution to the Siding
Now that you have prepared the cleaning solution, it’s time to apply it to the siding to remove the mold. Follow these steps to effectively apply the solution:
- Starting from the bottom: Begin applying the cleaning solution at the bottom of the affected area and work your way up. This will prevent the solution from dripping onto the already cleaned sections.
- Use a brush or sponge: Dip a soft-bristled brush or sponge into the cleaning solution and gently scrub the mold-infested areas. Apply light pressure and make circular or back-and-forth motions to loosen and remove the mold.
- Focusing on heavily affected areas: Pay extra attention to areas with more stubborn mold growth. Spend more time and effort on these spots to ensure thorough cleaning.
- Avoid excessive saturation: While it is important to wet the siding with the cleaning solution, try to avoid excessively saturating it. Excessive moisture can seep into the siding material and lead to potential damage.
- Work in small sections: Break the siding into manageable sections and work on one section at a time. This will ensure that the cleaning solution remains effective and does not dry out before you can scrub it off.
- Reapply the solution if needed: If the mold is particularly stubborn, you may need to reapply the cleaning solution and let it sit for a few minutes before scrubbing again. This additional time can help break down the mold further for easier removal.
Remember to take breaks as needed and pace yourself during the cleaning process, especially if it is a large area. This will prevent fatigue and ensure that you can maintain the same level of thoroughness throughout the task.
Once you have applied the cleaning solution and scrubbed the mold off the siding, it’s time to move on to the next step: rinsing the siding.
To clean mold off siding, mix a solution of 1 part bleach to 3 parts water and scrub the affected areas with a brush. Rinse thoroughly with water afterwards. Always wear protective gear when working with bleach.
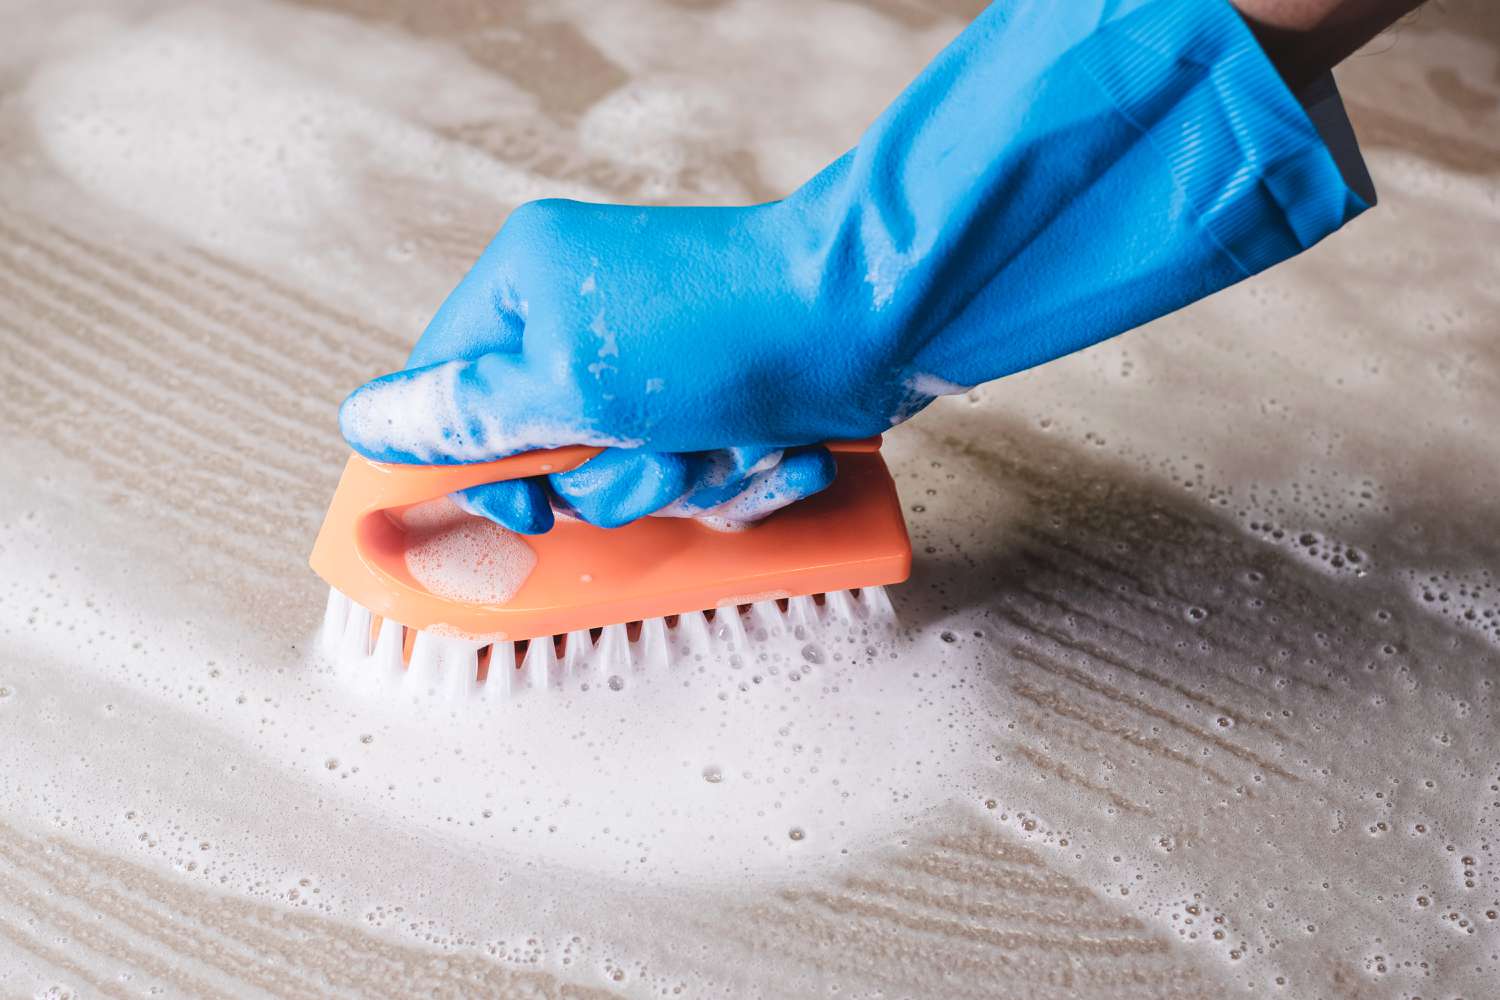
Step 6: Scrubbing the Mold Off
Now that you have applied the cleaning solution to the mold-infested siding, it’s time to tackle the task of scrubbing the mold off. This step is crucial to successfully remove the mold and restore the cleanliness of your siding. Follow these steps to effectively scrub the mold off:
- Choose the right tool: Select a soft-bristled brush or sponge to scrub the mold off the siding. Avoid using harsh brushes or abrasive materials, as they can damage the siding surface.
- Start from the bottom: Begin scrubbing the siding from the bottom and work your way up. This will prevent the cleaning solution from dripping onto the already cleaned areas.
- Apply moderate pressure: Apply moderate pressure while scrubbing the mold-infested areas. Be thorough but gentle to avoid damaging the siding material.
- Use circular or back-and-forth motions: Make circular or back-and-forth motions with the brush or sponge to effectively agitate and remove the mold. This motion helps loosen the mold from the surface.
- Pay attention to stubborn spots: Focus on areas with more stubborn mold growth. Spend a little extra time and effort on these spots to ensure complete removal.
- Rinse the brush or sponge: After scrubbing each section, rinse the brush or sponge to remove any accumulated mold and cleaning solution. This prevents spreading the mold to other sections.
- Reapply the cleaning solution if necessary: If you encounter areas where the mold is not easily coming off, you may need to reapply the cleaning solution and let it sit for a few minutes before scrubbing again. This allows for further breakdown of the mold.
Continue scrubbing the mold off the siding in small sections until you have covered the entire affected area. Cleaning larger sections at a time will help ensure consistent results.
Remember to take breaks as needed and pace yourself throughout the process. This will prevent fatigue and allow you to maintain the same level of thoroughness from start to finish.
Once you have successfully scrubbed the mold off the siding, it’s time to move on to the next step: rinsing the siding.
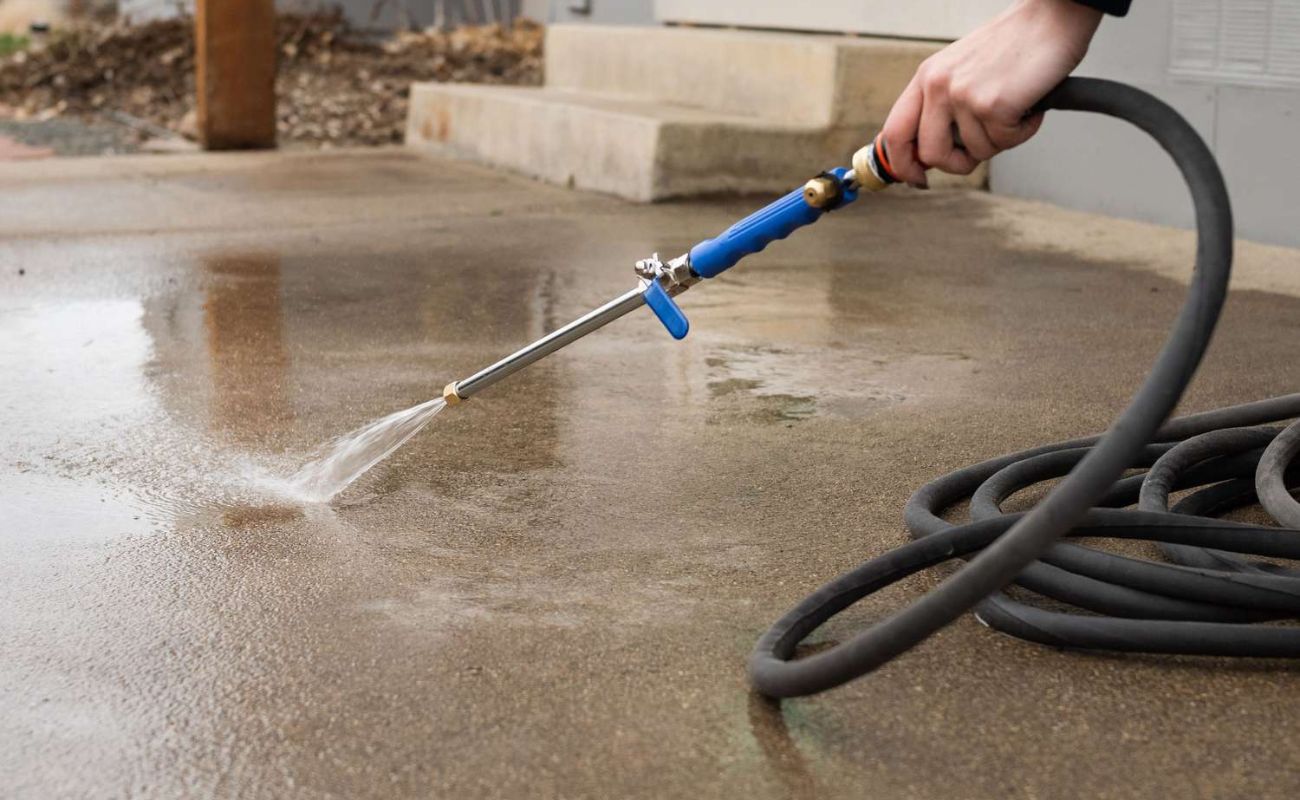
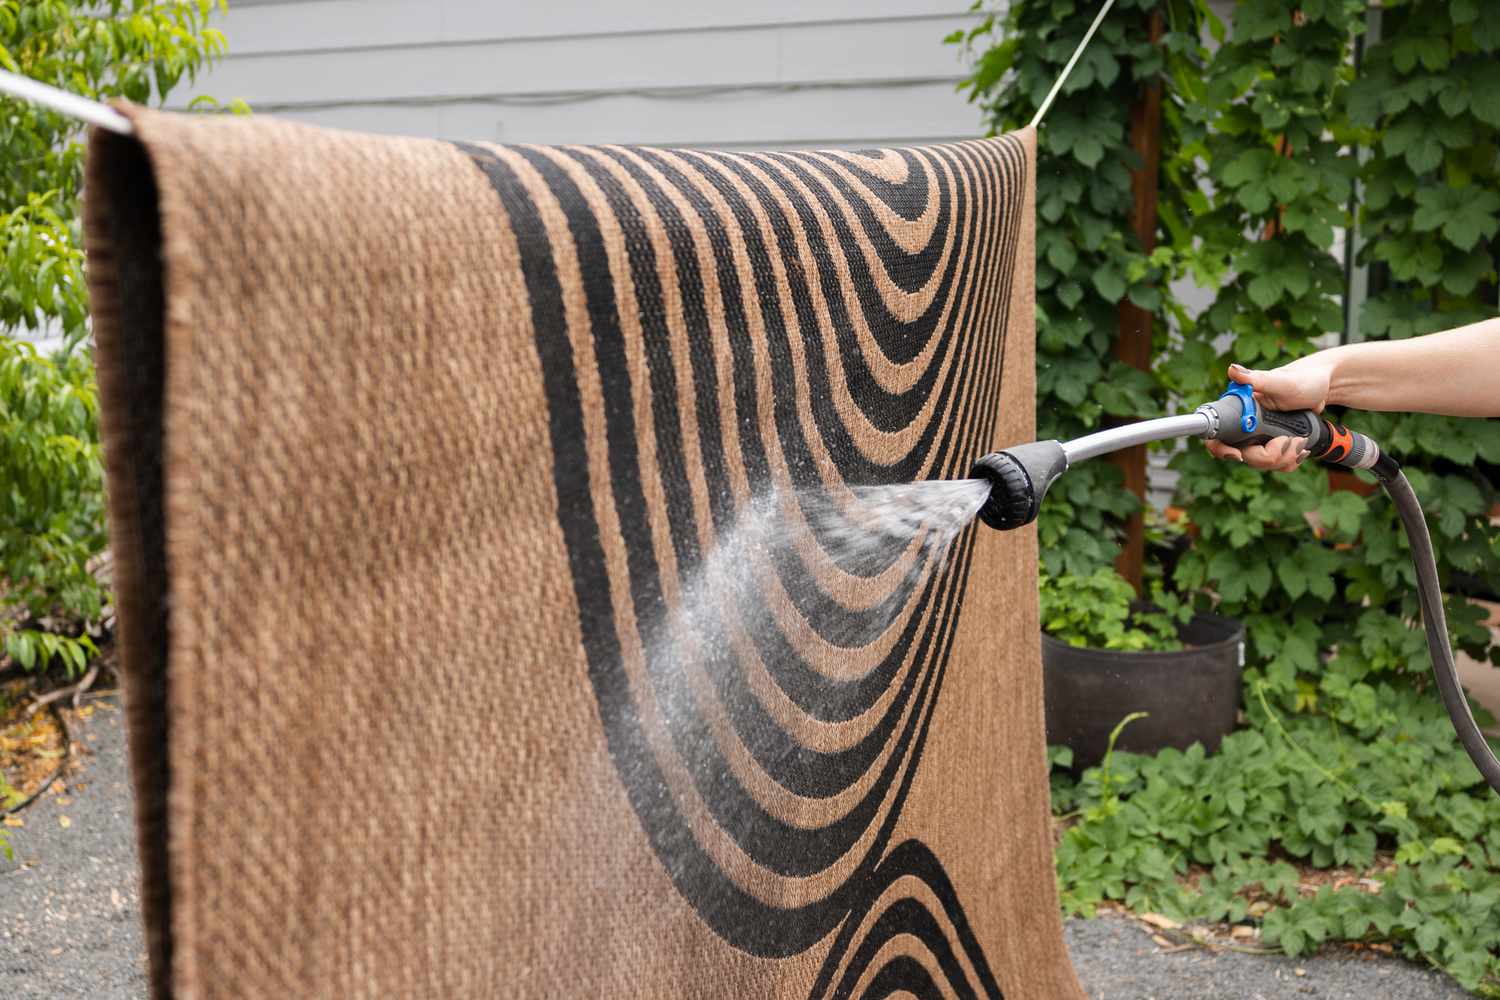
Step 7: Rinsing the Siding
After scrubbing the mold off the siding, it’s important to thoroughly rinse the surface to remove any residual cleaning solution and loosened mold particles. Proper rinsing will ensure that your siding is clean and free from any harmful substances. Follow these steps to effectively rinse the siding:
- Prepare the hose or pressure washer: Attach a nozzle with a gentle spray setting to your garden hose or set up your pressure washer with a low-pressure setting. This will help prevent any damage to the siding.
- Start from the top: Begin rinsing the siding from the top and work your way down. This allows the water to naturally flow downward and wash away the cleaning solution and mold residue.
- Hold the hose or pressure washer at an angle: Hold the hose or pressure washer at a 45-degree angle to the siding. This ensures that the water flows along the surface rather than directly into the siding, minimizing the risk of water damage.
- Move in a sweeping motion: Move the hose or pressure washer in a sweeping motion from side to side as you rinse each section. This helps ensure even coverage and thorough removal of any remaining cleaning solution and mold particles.
- Pay attention to crevices and corners: Focus on crevices, corners, and other hard-to-reach areas where mold may hide. Use a tighter spray pattern or a brush to agitate these areas and dislodge any lingering mold.
- Continue rinsing until water runs clear: Continue rinsing each section of the siding until the water runs clear, indicating that all cleaning solution and mold residue have been removed.
- Inspect the siding: After rinsing, visually inspect the siding to ensure that all mold has been successfully removed. If you spot any remaining mold, you may need to repeat the cleaning and rinsing process.
Take your time and be thorough when rinsing the siding to ensure a clean and mold-free surface. Proper rinsing is crucial in preventing mold recurrence and maintaining the integrity of your siding.
Once you have completed the rinsing process, it’s time to move on to the next step: drying and inspecting the siding.
Step 8: Drying and Inspecting the Siding
After rinsing the siding, it is important to properly dry and inspect the surface to ensure that no moisture is trapped, which can lead to mold growth in the future. By following these steps, you can effectively dry and inspect your siding:
- Allow sufficient air circulation: Ensure that the area is well-ventilated to promote faster drying. Open windows, doors, and any vents nearby to encourage air circulation.
- Let the siding air dry: Allow the siding to air dry naturally. This process may take a few hours or longer, depending on the weather conditions.
- Use a towel or cloth (optional): If you prefer, you can use a clean, dry towel or cloth to gently pat the siding and absorb any excess moisture. However, avoid rubbing or applying excessive pressure, as this may cause damage to the siding.
- Inspect for any remaining mold: Once the siding is dry, closely inspect the surface for any potential signs of remaining mold. Check for any discolored spots or areas that may indicate mold growth.
- Address any lingering mold: If you spot any remaining mold, you may need to repeat the cleaning process or consider seeking professional assistance to ensure complete mold removal.
- Examine for damage: While inspecting the siding, also look for any signs of damage, such as cracks, chips, or deterioration. Address any structural issues as needed to maintain the integrity of your siding.
- Maintain regular inspections: Moving forward, make it a habit to regularly inspect your siding for any signs of mold or damage. Early detection will allow you to address any issues promptly and prevent further damage.
Completing the drying and inspection process ensures that your siding is thoroughly cleaned and in good condition. By remaining vigilant and addressing any issues as they arise, you can help prolong the lifespan of your siding and maintain its aesthetic appeal.
With the drying and inspection complete, it’s time to move on to the final step: preventing future mold growth.
Read more: How To Clean Mold Off Curtains
Step 9: Preventing Future Mold Growth
Now that you have successfully cleaned and inspected your siding, it’s important to take preventive measures to avoid future mold growth. By implementing these preventative methods, you can maintain a mold-free exterior and protect the integrity of your siding:
- Maintain proper ventilation: Ensure that the area around your siding has proper ventilation to prevent excess moisture buildup. Keep plants and shrubs trimmed to allow for air circulation.
- Address water issues promptly: Inspect your gutters, downspouts, and other drainage systems regularly to ensure they are functioning properly. Clear any clogs or debris to prevent water from pooling near the siding.
- Direct water away from the siding: Ensure that the landscaping and grading around your home slope away from the foundation. This helps prevent water from pooling near the siding and seeping into the walls.
- Regularly clean and maintain the siding: Schedule regular cleaning and maintenance of your siding to prevent dirt, debris, and organic matter from accumulating. Regularly remove any leaves, pollen, or other materials that can trap moisture and provide a conducive environment for mold growth.
- Inspect and repair any damage: Regularly inspect your siding for any cracks, gaps, or damage. Seal or repair these areas promptly to prevent moisture intrusion and potential mold growth.
- Consider applying a mold-resistant coating: If you live in an area with high humidity or are prone to frequent mold growth, you may want to consider applying a mold-resistant coating to your siding. These coatings can help inhibit mold growth and make it easier to clean in the future.
By following these preventive measures, you can minimize the chances of mold regrowth and maintain the cleanliness and integrity of your siding for years to come.
Congratulations! You have successfully completed the step-by-step process of cleaning mold off your siding and learned how to prevent future mold issues. Regular maintenance and vigilance will help you keep your siding in optimal condition and preserve the beauty of your home.
Thank you for reading this comprehensive guide. If you have any further questions or need assistance, feel free to reach out or consult a professional for advice.
Conclusion
Cleaning mold off siding is an essential task to maintain the appearance and integrity of your home. By following the step-by-step process outlined in this guide, you can effectively remove mold and prevent its recurrence.
Assessing the mold situation, gathering the necessary materials, and preparing the work area are vital initial steps. Once prepared, you can proceed with preparing the cleaning solution and applying it to the siding. Scrubbing the mold off with a soft-bristled brush or sponge, followed by thorough rinsing, ensures a clean surface.
After completing the cleaning process, it’s important to dry and inspect the siding to verify that all mold has been removed and address any potential damage. Taking preventive measures, such as maintaining proper ventilation, addressing water issues, and regularly cleaning and maintaining the siding, will help prevent future mold growth.
Remember, safety is paramount when dealing with mold. Always wear appropriate protective gear, follow manufacturer’s guidelines for cleaning solutions, and seek professional assistance if needed.
By maintaining a proactive approach and addressing mold growth promptly, you can protect your home from the damaging effects of mold and enjoy a clean and healthy living environment.
Thank you for following this comprehensive guide on how to clean mold off siding. If you have any further questions or need assistance, don’t hesitate to reach out or consult a professional for advice. Happy cleaning!
Frequently Asked Questions about How To Clean Mold Off Siding
Was this page helpful?
At Storables.com, we guarantee accurate and reliable information. Our content, validated by Expert Board Contributors, is crafted following stringent Editorial Policies. We're committed to providing you with well-researched, expert-backed insights for all your informational needs.


0 thoughts on “How To Clean Mold Off Siding”