
Articles
How To Cook Garlic Bread In Air Fryer
Modified: October 19, 2024
Looking for articles on how to cook garlic bread in an air fryer? Discover delicious recipes and step-by-step instructions in this comprehensive guide.
(Many of the links in this article redirect to a specific reviewed product. Your purchase of these products through affiliate links helps to generate commission for Storables.com, at no extra cost. Learn more)
Introduction
Welcome to the delicious world of garlic bread! If you’re a fan of this mouthwatering and aromatic dish, then you’re in for a treat. In this article, we’ll explore the art of cooking garlic bread in an air fryer. This modern cooking appliance offers a convenient and efficient way to achieve a crispy exterior and a soft, buttery interior.
Garlic bread has long been a beloved side dish or appetizer, often accompanying pasta dishes, soups, or salads. Traditionally prepared in the oven, the introduction of air fryers has revolutionized the way we cook garlic bread. With its rapid air circulation and even heat distribution, an air fryer can yield beautifully toasted bread with a fraction of the cooking time.
By using an air fryer to cook garlic bread, you can enjoy all the flavors and textures you love, while also benefiting from the convenience and reduced cooking time. Whether you’re hosting a dinner party or craving a quick and tasty snack, the air fryer will become your go-to kitchen tool for delectable garlic bread.
In the following sections, we’ll explore the benefits of cooking garlic bread in an air fryer, guide you through choosing the right garlic bread, and provide step-by-step instructions on preparing and cooking the garlic bread in the air fryer. We’ll also share some useful tips and variations, so you can experiment and create your own delectable twists on this classic dish. So, let’s get started and learn how to cook garlic bread to perfection in an air fryer!
Key Takeaways:
- Cooking garlic bread in an air fryer offers faster cooking time, a healthier option, and versatile flavor possibilities. Enjoy the perfect crispy exterior and soft interior with reduced energy usage.
- Choose high-quality garlic bread, prepare it with flavorful ingredients, and cook it to perfection in the air fryer. Experiment with creative variations and enjoy the delightful aroma and taste of homemade garlic bread.
Read more: How To Roast Garlic In Air Fryer
Benefits of Cooking Garlic Bread in an Air Fryer
When it comes to cooking garlic bread, using an air fryer has several advantages over traditional methods. Let’s explore some of the key benefits:
1. Faster Cooking Time
One of the main benefits of using an air fryer is the significant reduction in cooking time. While traditional oven-baked garlic bread can take anywhere from 10 to 15 minutes, an air fryer can cook it in as little as 5 minutes. This is because the hot air circulation in the air fryer helps to cook the bread more quickly and evenly.
2. Crispy Exterior, Soft Interior
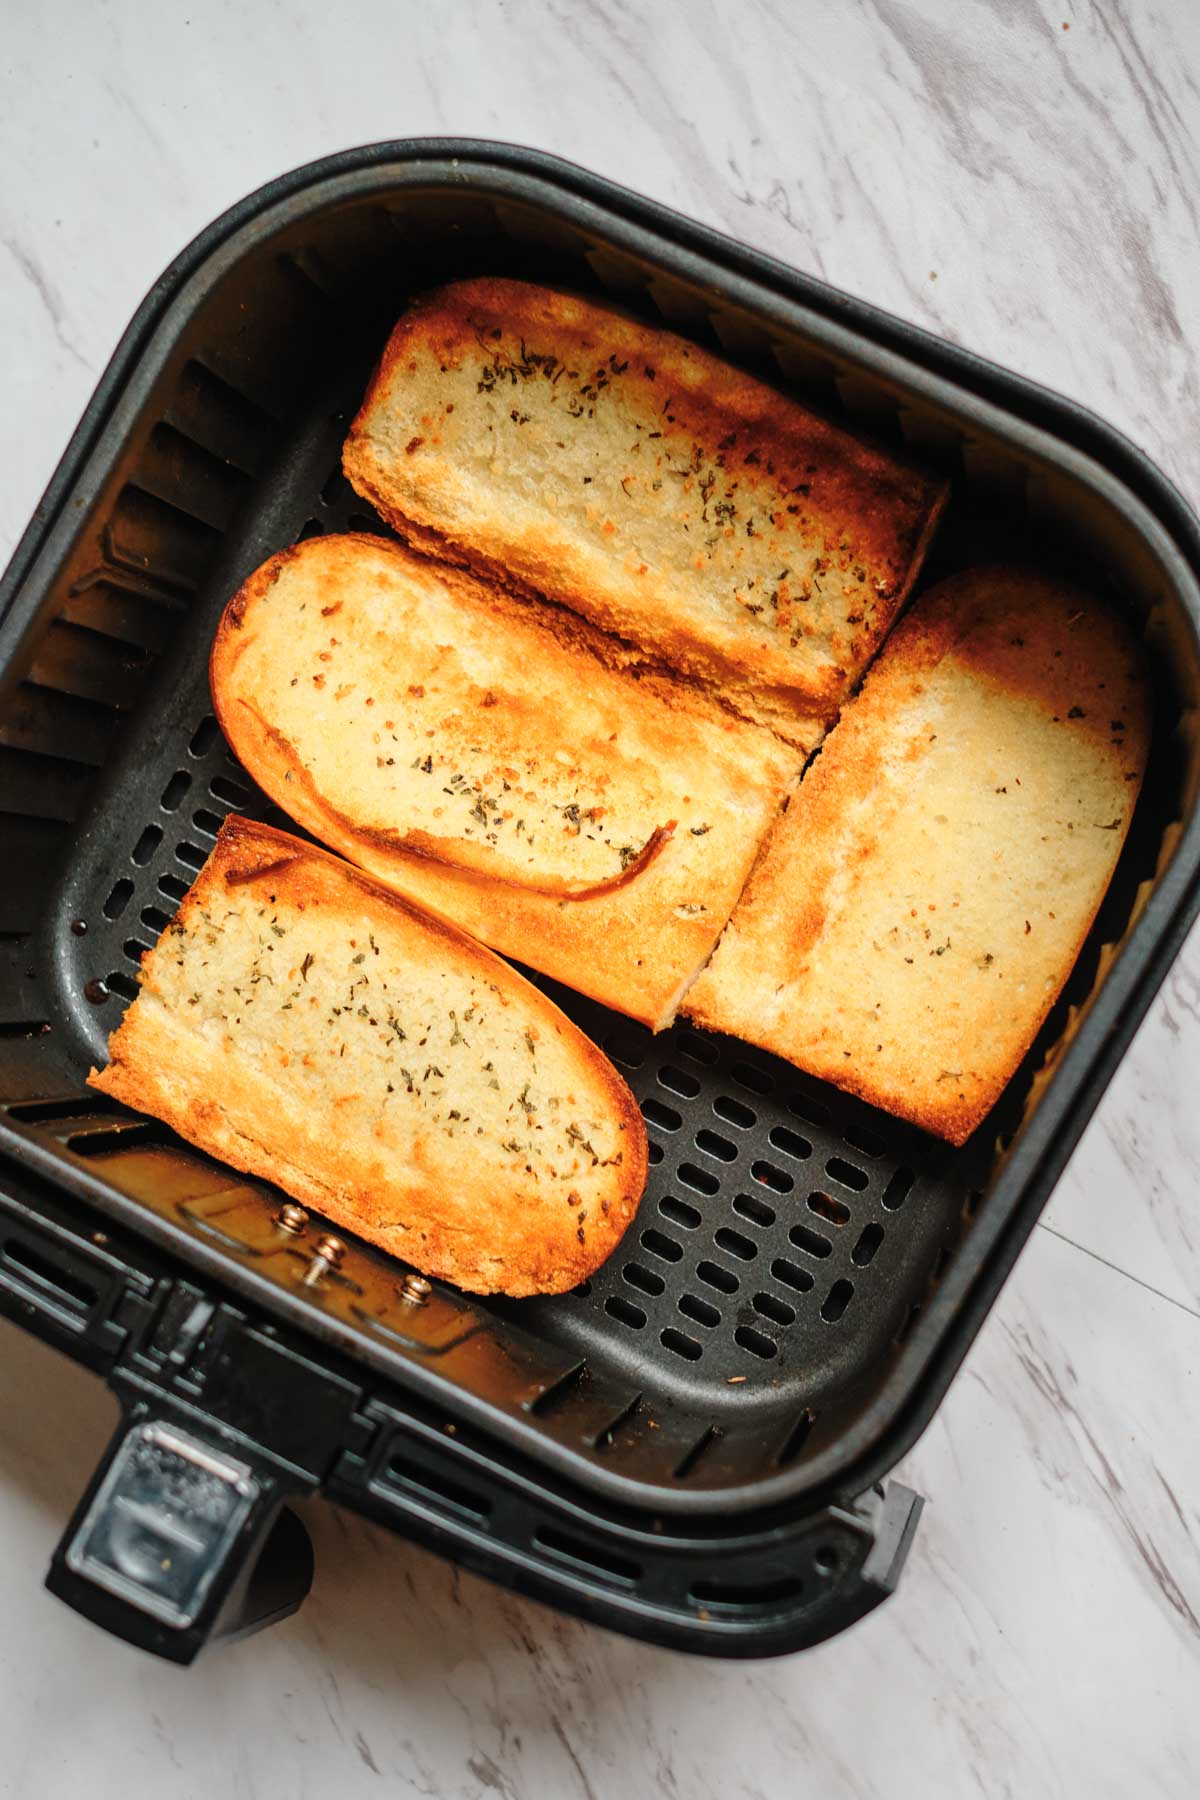
An air fryer is excellent at creating the perfect texture for garlic bread. It uses convection cooking to circulate hot air around the bread, resulting in a crispy exterior with a soft and fluffy interior. This combination of textures adds an extra layer of enjoyment to every bite.
3. Healthier Option
Compared to traditional deep-frying methods, cooking garlic bread in an air fryer requires little to no oil. This makes it a healthier alternative without compromising on taste and texture. With an air fryer, you can achieve the same golden brown and crunchy result with significantly fewer calories and less fat.
Read more: How To Grill Chicken In Air Fryer
4. Energy-Efficient
An air fryer is designed to use less energy compared to a traditional oven. This not only helps reduce your electricity bills but also makes it an eco-friendly cooking option. The quick preheating and efficient cooking process of the air fryer mean you can enjoy garlic bread without wasting unnecessary energy.
5. Versatility
While we’re focusing on garlic bread in this article, it’s worth mentioning that an air fryer is a multifunctional kitchen appliance. In addition to garlic bread, you can use it to prepare a variety of other dishes, from crispy fries and chicken wings to roasted vegetables and even desserts. Investing in an air fryer will expand your culinary possibilities and make your cooking experience more enjoyable.
With these benefits in mind, it’s clear why an air fryer is a fantastic tool for cooking garlic bread. The quick cooking time, the perfect texture, the healthier option, energy efficiency, and versatility make it an ideal choice for anyone who loves the taste and aroma of freshly toasted garlic bread.
Choosing the Right Garlic Bread
When it comes to selecting the perfect garlic bread for your air fryer, there are a few factors to consider. Here are some tips to help you choose the right garlic bread:
1. Freshness
Look for freshly-baked garlic bread or frozen garlic bread that has not expired. Freshness plays a crucial role in the overall taste and texture of the bread. If you’re purchasing pre-packaged garlic bread, check the expiration date to ensure it hasn’t surpassed its freshness.
Read more: How To Reheat Shrimp In Air Fryer
2. Quality of Ingredients
Pay attention to the quality of the ingredients used in the garlic bread. Look for bread that is made with real butter, fresh garlic, and high-quality seasonings. This will elevate the flavor profile of your garlic bread and create a more enjoyable eating experience.
3. Type of Bread
Consider the type of bread you prefer for your garlic bread. Common choices include French bread, ciabatta, baguette, or even a traditional garlic loaf. Each type of bread will add its unique characteristics to the final product. Choose a bread with a slightly sturdy crust to ensure it holds up well in the air fryer.
4. Sliced or Whole?
Determine if you prefer sliced garlic bread or a whole loaf. Sliced garlic bread is convenient and allows for easier portioning, while a whole loaf gives you the flexibility to cut it into any shape or size you desire.
5. Additional Flavors
Consider if you want your garlic bread to have any additional flavors. Some varieties include cheese, herbs, or even a sprinkle of Parmesan on top. These extra flavors can add complexity and enhance the overall taste of the garlic bread.
By keeping these factors in mind, you can choose the perfect garlic bread that suits your preferences and enhances the final result when cooked in the air fryer. Remember, the quality of the bread and its ingredients will greatly impact the flavor and texture, so choose wisely to make your garlic bread a culinary delight.
Read more: How To Dehydrate Fruit In Air Fryer
Preparing the Air Fryer
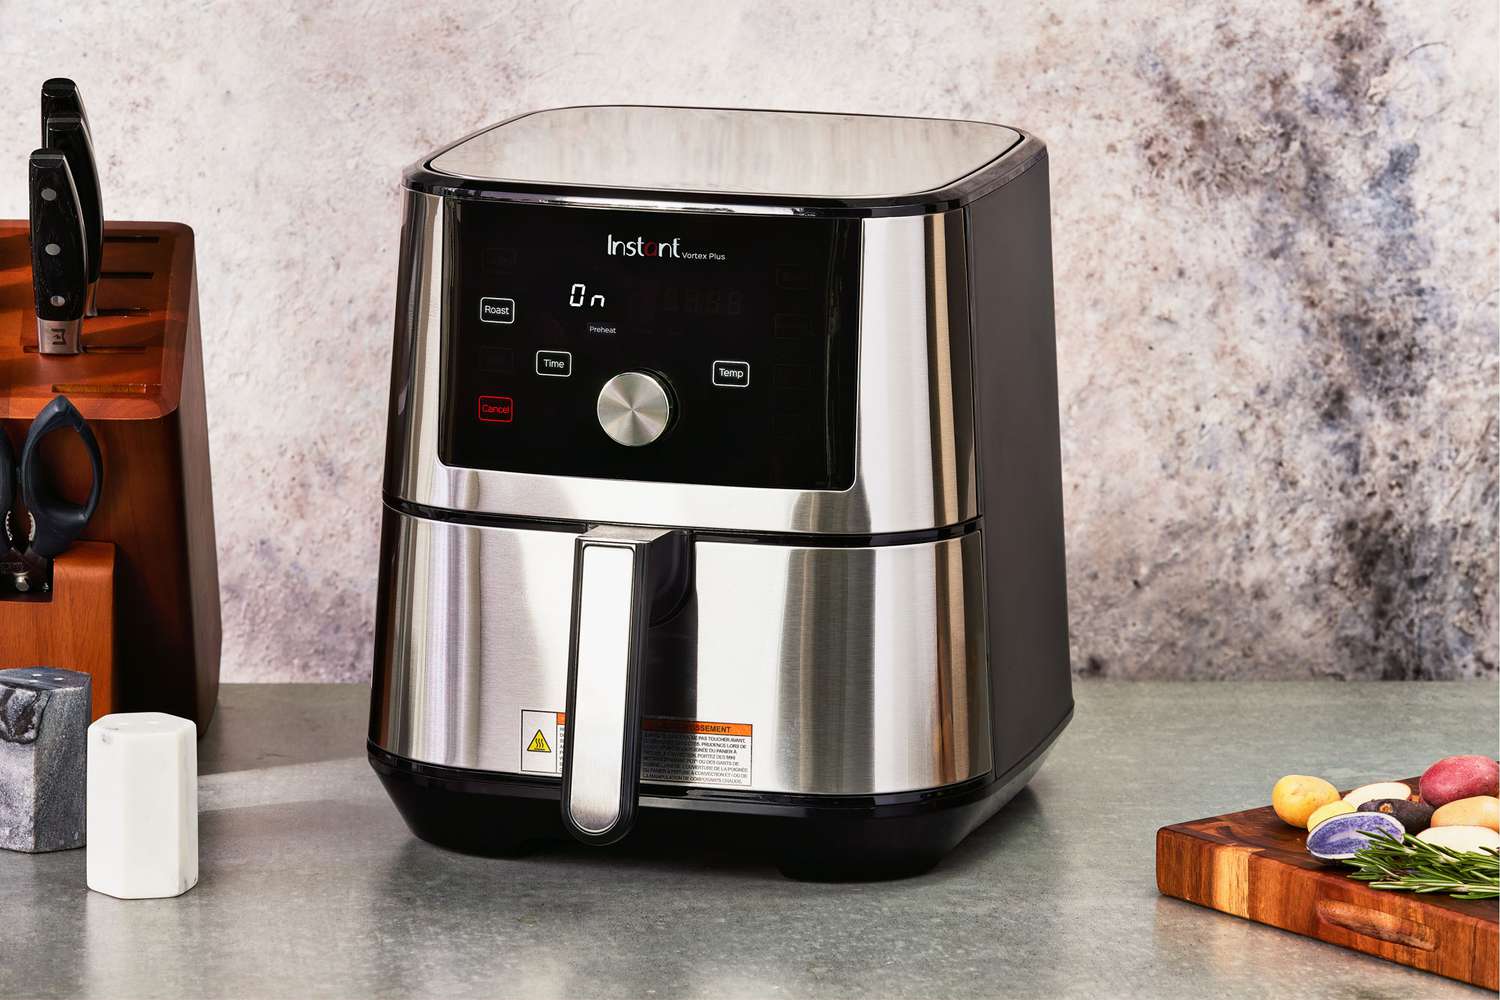
Before you start cooking your delicious garlic bread in the air fryer, it’s important to properly prepare the appliance. Here are the steps to get your air fryer ready:
1. Read the Manual
First and foremost, familiarize yourself with the user manual of your specific air fryer model. Different air fryers may have unique features and settings, so it’s essential to understand how to operate and set up your particular appliance.
2. Cleaning
Make sure your air fryer is clean and free from any residue or crumbs leftover from previous cooking sessions. Refer to the manual for specific cleaning instructions, as some parts may be removable and dishwasher-safe, while others require gentle hand washing.
3. Preheating
Preheating the air fryer is an important step to ensure even cooking and optimal results. Set the temperature according to the garlic bread package instructions or your desired cooking temperature. Preheat the air fryer for a few minutes, typically around 3 to 5 minutes, to allow it to reach the desired temperature.
Read more: How To Cook Squash In Air Fryer
4. Check the Accessories
Ensure that all the necessary accessories for your air fryer are in place. This may include a baking tray or rack, a grill pan, or baking molds. Some air fryers come with these accessories, while others may require you to purchase them separately. Place the appropriate accessory in the air fryer basket or tray.
5. Adjust the Cooking Time and Temperature
Refer to the garlic bread packaging for the recommended cooking time and temperature. Adjust the settings on your air fryer accordingly. Keep in mind that air fryers tend to cook faster than traditional ovens, so you may need to reduce the cooking time slightly. Also, remember to preheat the air fryer before adding the garlic bread.
Once you’ve completed these steps, your air fryer is now ready to cook the garlic bread to perfection. Preparing the air fryer properly ensures that you’ll achieve crispy and evenly cooked garlic bread every time. Now, let’s move on to the exciting part – preparing the garlic bread itself!
Preparing the Garlic Bread
Now that your air fryer is preheated and ready to go, it’s time to prepare the garlic bread itself. Follow these steps to ensure a delicious and flavorful result:
1. Gather Your Ingredients
Make sure you have all the necessary ingredients handy. Typically, garlic bread consists of bread slices, butter or margarine, minced garlic, and herbs such as parsley or oregano.
Read more: How To Cook Zucchini In Air Fryer
2. Soften the Butter
If you’re using solid butter or margarine, let it sit at room temperature for a few minutes to soften. This will make it easier to mix with the garlic and spread evenly on the bread.
3. Add the Garlic and Herbs
In a small bowl, mix together the softened butter, minced garlic, and herbs of your choice. Stir well until all the ingredients are evenly combined. This garlic-herb butter will be the flavorful spread for your garlic bread.
4. Slice the Bread
If you are using a whole loaf, slice it into individual pieces of your desired thickness. Ensure that the slices are not too thin, as they need to withstand the air frying process without becoming overly crispy or burnt.
5. Spread the Garlic Butter
Take each bread slice and spread a generous amount of the garlic-herb butter mixture on one side. Ensure that the butter mixture is evenly distributed and covers the entire surface of the bread.
Read more: How To Turn On Air Fryer
6. Optional: Add Cheese or Extra Toppings
If you prefer cheesy garlic bread, you can sprinkle grated cheese or place sliced cheese on top of the buttered side. Additionally, you can get creative and add other toppings such as sliced tomatoes, onions, or even cooked bacon for added flavor and texture.
7. Assemble the Bread
If you’re making individual slices, place the bread slices with the buttered side facing up. If you’re using a whole loaf, reassemble the slices to form a loaf shape. This will ensure that the garlic butter stays on top and gets evenly cooked in the air fryer.
Now that your garlic bread is prepared and ready to go, let’s move on to the exciting part – cooking it in the air fryer!
Cooking the Garlic Bread in an Air Fryer
Now comes the moment of truth—cooking the prepared garlic bread in the air fryer. Follow these steps for perfectly cooked and delicious garlic bread:
1. Preheat the Air Fryer
If you haven’t preheated your air fryer yet, do so now according to the manufacturer’s instructions. Preheating ensures that the garlic bread cooks evenly and achieves that desirable crispy exterior.
2. Arrange the Garlic Bread
Place the prepared garlic bread slices or the assembled loaf into the air fryer basket or onto the baking tray. Ensure that there is enough space between the slices or loaf for the hot air to circulate and cook the bread evenly.
3. Set the Time and Temperature
Refer to the garlic bread packaging or recipe for the recommended cooking time and temperature. Adjust the settings on your air fryer accordingly. As a general guideline, cook the garlic bread at around 350°F (175°C) for 5 to 8 minutes, or until the bread is crispy and golden brown.
4. Monitor the Cooking Process
Keep an eye on the garlic bread as it cooks. The air fryer’s transparent lid allows you to observe the bread without interrupting the cooking process. If necessary, rotate the tray or flip the bread slices halfway through the cooking time to ensure even browning on both sides.
5. Check for Doneness
Once the cooking time is complete, carefully remove a slice of garlic bread or test the center of the loaf for doneness. The bread should be crispy on the outside, with a soft and buttery interior. If it needs a bit more time, return it to the air fryer for an additional minute or two.
Read more: How To Make A Baked Potato In Air Fryer
6. Let it Cool
Remove the cooked garlic bread from the air fryer and allow it to cool for a few minutes. This will prevent any burns and allow the flavors to develop further. Be cautious as the bread will be hot right out of the air fryer.
7. Serve and Enjoy!
Once the garlic bread is cool enough to handle, it’s time to serve and enjoy! It pairs perfectly with pasta dishes, soups, salads, or even on its own as a delightful snack. Serve it as a side dish at dinner parties, or savor it for a quick and flavorful midday bite.
Cooking garlic bread in an air fryer is a hassle-free and efficient process. With a shorter cooking time and a crispy, golden result, you’ll be able to enjoy your favorite garlic bread in no time. Now that the garlic bread is cooked, it’s time to gather around and indulge in its irresistible aroma and flavors.
Serving and Enjoying the Garlic Bread
The moment has arrived to savor the aroma and taste of the perfectly cooked garlic bread. Here are some suggestions on how to serve and enjoy this delightful culinary creation:
1. Plating and Presentation
Transfer the cooked garlic bread to a serving platter or individual plates. You can arrange the slices neatly or stack them in an inviting and appetizing way. Garnish with fresh parsley or sprinkle some grated Parmesan cheese on top to elevate the presentation.
Read more: How Long To Cook Shrimp In The Air Fryer
2. Pairing with Main Dishes
Garlic bread pairs exceptionally well with a variety of main dishes. Serve it alongside pasta dishes such as spaghetti, lasagna, or fettuccine Alfredo. It also complements soups, stews, and salads, adding a savory and satisfying element to your meal.
3. Dipping Sauces and Spreads
If you want to enhance the flavors even further, offer a selection of dipping sauces or spreads. Marinara sauce, pesto, or even a garlic aioli can add an extra layer of deliciousness to your garlic bread. Place the sauces in small bowls or ramekins for easy dipping.
4. Family-style Sharing
When serving garlic bread at family gatherings or parties, consider placing it at the center of the table for everyone to share. This encourages a sense of togetherness and allows everyone to help themselves to as many slices as they desire.
5. Enjoy as a Snack
Garlic bread is not only a fantastic side dish; it also makes for a tasty snack on its own. Enjoy it while it’s still warm for that extra satisfaction. Whether you’re watching a movie, hosting a game night, or simply craving a flavorful bite, a plate of garlic bread will never disappoint.
Read more: How To Make Popcorn In Air Fryer
6. Experiment with Variations
Don’t be afraid to get creative and experiment with different flavors and toppings. You can sprinkle some chili flakes for a spicy kick, drizzle balsamic glaze for a tangy twist, or even add some diced vegetables for a touch of freshness. Let your taste buds guide you and discover your own unique variations of garlic bread.
Remember to enjoy the garlic bread while it’s still warm and fresh. Take a bite, savor the crunchy and buttery exterior, and enjoy the burst of garlic and herb-infused flavors. Whether you’re sharing it with friends and family or enjoying it all by yourself, garlic bread is sure to be a crowd-pleaser.
Now that you know how to serve and enjoy the garlic bread, it’s time to share this delectable treat with your loved ones or indulge in its deliciousness for a satisfying snack.
Tips and Variations for Cooking Garlic Bread in an Air Fryer
Now that you’re familiar with the process of cooking garlic bread in an air fryer, let’s explore some helpful tips and creative variations to take your garlic bread game to the next level:
Tips:
1. Adjust the Cooking Time: Every air fryer is different, so keep an eye on the garlic bread as it cooks and adjust the cooking time as needed. You may need to add or subtract a minute or two to achieve the desired level of crispiness.
2. Don’t Overcrowd the Air Fryer: Give the garlic bread slices or loaf enough space in the air fryer to ensure proper air circulation. Overcrowding can result in uneven cooking and soggy bread.
3. Use Parchment Paper: If you’re concerned about the garlic butter mixture dripping onto the air fryer basket, you can line it with parchment paper for easy cleanup and to prevent any sticking.
4. Experiment with Seasonings: Feel free to get creative with your garlic bread seasoning. Add a dash of crushed red pepper flakes for a touch of heat, sprinkle some dried basil for an Italian flair, or try a sprinkle of garlic salt for an extra punch of flavor.
5. Reheat Leftovers: If you have any leftover garlic bread, you can easily reheat it in the air fryer for a few minutes to restore its crispy texture. Just be sure to monitor it closely to avoid overcooking.
Variations:
1. Cheese Lover’s Garlic Bread: Add a generous layer of shredded mozzarella or a slice of your favorite melty cheese on top of the garlic butter before air frying. The result is a gooey and cheesy delight.
2. Herb-infused Garlic Bread: Add finely chopped fresh herbs like rosemary, thyme, or basil to the garlic butter mixture for a burst of aromatic flavors. This adds a refreshing twist to the classic garlic bread.
3. Garlic Parmesan Breadsticks: Cut the garlic bread into thinner strips before air frying to create delicious garlic Parmesan breadsticks. Sprinkle grated Parmesan cheese and parsley over the buttered slices before cooking for an irresistible treat.
4. Garlic Bread Bruschetta: Prepare the garlic bread as usual, then top it with diced ripe tomatoes, fresh basil, and a drizzle of balsamic glaze after it’s cooked. This variation adds a delightful tanginess to the garlic bread.
5. Stuffed Garlic Bread: Slice the bread horizontally, spread the garlic butter inside, and add fillings such as mozzarella cheese, cooked bacon, or sautéed mushrooms. Close the loaf back up, secure with toothpicks, and air fry for a decadent and flavorful stuffed garlic bread.
These tips and variations will help you create delicious and customized garlic bread creations in your air fryer. Don’t be afraid to get creative and experiment with different flavors and ingredients to suit your preferences. The beauty of cooking garlic bread in an air fryer is that you have the freedom to explore and discover new and exciting combinations.
So go ahead, unleash your creativity, and enjoy the tasty results of your homemade garlic bread masterpieces!
Read more: How Long To Bake Potato In Air Fryer
Conclusion
Cooking garlic bread in an air fryer is a quick, convenient, and delicious way to satisfy your cravings. The benefits of using an air fryer, such as faster cooking time and a crispy exterior with a soft interior, make it an ideal kitchen tool for preparing garlic bread. By choosing the right garlic bread, preparing it with flavorful ingredients, and cooking it in the air fryer, you can create a mouthwatering dish that will impress your taste buds and guests.
Whether you enjoy garlic bread as a side dish, a snack, or as a complement to main courses, the versatility of this dish is unmatched. It pairs well with a variety of dishes, from pasta to soups to salads. Plus, you can easily customize your garlic bread by experimenting with different toppings, spices, and cheeses.
With the tips and variations provided, you have the flexibility to tailor your garlic bread to your liking. Adjust the cooking time and temperature, try different seasonings, or explore creative variations to make each batch of garlic bread unique and exciting.
So, why not elevate your garlic bread game and make use of the air fryer sitting in your kitchen? It’s time to indulge in the delightful aroma, crispy texture, and flavorful garlic and herb-infused goodness of homemade garlic bread.
Remember to gather your ingredients, prepare the air fryer, spread the garlic butter, cook the bread to perfection, and serve it with style. Whether you’re hosting a dinner party, enjoying a meal with family, or simply treating yourself, garlic bread cooked in an air fryer is sure to please everyone’s taste buds.
So go ahead, let the air fryer work its magic, and savor the delightful experience of perfectly cooked garlic bread. Get creative, have fun, and enjoy the incredible flavors that this beloved dish has to offer. Your friends and family will be impressed, and your taste buds will thank you!
Frequently Asked Questions about How To Cook Garlic Bread In Air Fryer
Was this page helpful?
At Storables.com, we guarantee accurate and reliable information. Our content, validated by Expert Board Contributors, is crafted following stringent Editorial Policies. We're committed to providing you with well-researched, expert-backed insights for all your informational needs.

0 thoughts on “How To Cook Garlic Bread In Air Fryer”