Articles
How To Dehydrate Fruit In Air Fryer
Modified: October 20, 2024
Discover how to easily dehydrate fruit in your air fryer with this informative article. Learn the tips and tricks for preserving fruit's natural sweetness.
(Many of the links in this article redirect to a specific reviewed product. Your purchase of these products through affiliate links helps to generate commission for Storables.com, at no extra cost. Learn more)
Introduction
Welcome to the world of dehydrating fruit with an air fryer! Dehydrating fruit is a fantastic way to preserve its natural flavors and enjoy them even when the fruit is out of season. And with the help of an air fryer, the process becomes even more convenient and efficient.
In this article, we will guide you through the step-by-step process of dehydrating fruit in an air fryer, allowing you to create delicious and nutritious dried fruit snacks right in the comfort of your own home.
But why choose an air fryer for dehydrating fruit? Air fryers are known for their ability to circulate hot air around the food, resulting in crispy textures while maintaining the food’s moisture. This makes them an excellent tool for dehydrating fruits, as it helps to remove the moisture while preserving the fruit’s natural flavors and nutrients.
From apples and bananas to strawberries and mangoes, the possibilities for dehydrating fruit in an air fryer are endless. Not only does dehydrated fruit make for a delicious snack on its own, but it can also be used in various recipes such as granola bars, trail mix, or even as a topping for yogurt and cereal.
Before we dive into the process, it’s important to note that the dehydrating time may vary depending on the type of fruit, thickness of slices, and the air fryer model you’re using. It’s always a good idea to check the manufacturer’s instructions for recommended temperatures and times for dehydrating fruit in your specific air fryer.
Are you ready to embark on this dehydrating adventure with your air fryer? Let’s get started with step one: selecting and preparing the fruit.
Key Takeaways:
- Dehydrating fruit in an air fryer is a convenient way to preserve natural flavors and nutrients, resulting in delicious and crispy snacks for year-round enjoyment.
- With the ability to efficiently remove moisture while maintaining flavor, an air fryer is a versatile tool for creating healthy homemade snacks and ingredients for various recipes.
Read more: How To Dehydrate Fruit In A Dehydrator
Step 1: Selecting and Preparing the Fruit
The first step in dehydrating fruit in an air fryer is selecting the right fruits and preparing them for the process. Here’s what you need to do:
- Selecting the Fruit: Choose ripe and fresh fruits for optimal flavor and texture. Some popular options for dehydrating include apples, bananas, berries, peaches, and mangoes. Consider the sweetness and firmness of the fruit when making your selection.
- Washing and Drying: Thoroughly wash the fruits under running water to remove any dirt or residue. Pat them dry with a clean kitchen towel or paper towels.
- Peeling and Coring (if necessary): For fruits like apples or peaches, you may choose to peel and core them before slicing. This step is optional and depends on personal preference and the type of fruit being used.
- Slicing the Fruit: Slice the fruit into evenly-sized pieces to promote even drying. It’s recommended to slice the fruit to a thickness of about ¼ inch, but you can adjust it based on your preference.
Once you have prepared the fruit, it’s time to move on to step two: preheating the air fryer.
Step 2: Preheating the Air Fryer
Before you start dehydrating fruit in your air fryer, it’s essential to preheat the appliance. Preheating ensures that the air fryer reaches the desired temperature quickly and consistently, which is crucial for efficient dehydration. Here’s how you can preheat your air fryer:
- Plug in the Air Fryer: Make sure your air fryer is plugged into a power source and ready for use.
- Adjust the Temperature: Set the temperature on your air fryer to the recommended temperature for fruit dehydration. Generally, a temperature of 125-135°F (50-57°C) is suitable for most fruits.
- Preheating Time: Depending on your specific air fryer model, the preheating time can vary. On average, it takes about 5-10 minutes for the air fryer to reach the desired temperature.
During the preheating process, the air fryer will start to warm up, and you can move on to the next step of slicing the fruit. Preheating ensures that the fruit will be exposed to a consistent heat source, resulting in efficient and even dehydration.
Once the air fryer has reached the desired temperature, it’s time to move on to step three: slicing the fruit.
Step 3: Slicing the Fruit
Now that your air fryer is preheated and ready to go, it’s time to slice the fruit. Slicing the fruit into uniform pieces ensures even dehydration and consistent results. Here’s how to slice the fruit for dehydrating:
- Prepare a Cutting Board and Knife: Place a clean cutting board on your kitchen counter and get a sharp knife. The knife should be suitable for slicing through the fruit without applying excessive pressure.
- Peel or Trim (if desired): If you prefer to remove the peel or trim any blemishes from the fruit, do so before slicing. However, remember that leaving the peel intact can add additional flavor and texture to the dried fruit.
- Slice Evenly: Using a steady hand, slice the fruit into uniform pieces. Depending on your preference, you can slice the fruit into rounds, strips, or chunks. Aim for a thickness of about ¼ inch for consistent drying.
- Remove Seeds or Pits: For fruits like apples or peaches, remove the core or pits as you slice them. This step ensures that the dehydrated fruit pieces are free of any unwanted seeds or hard parts.
As you slice the fruit, place it in a bowl or on a tray for easy transfer to the air fryer. Once you have finished slicing, it’s time to move on to step four: placing the fruit in the air fryer.
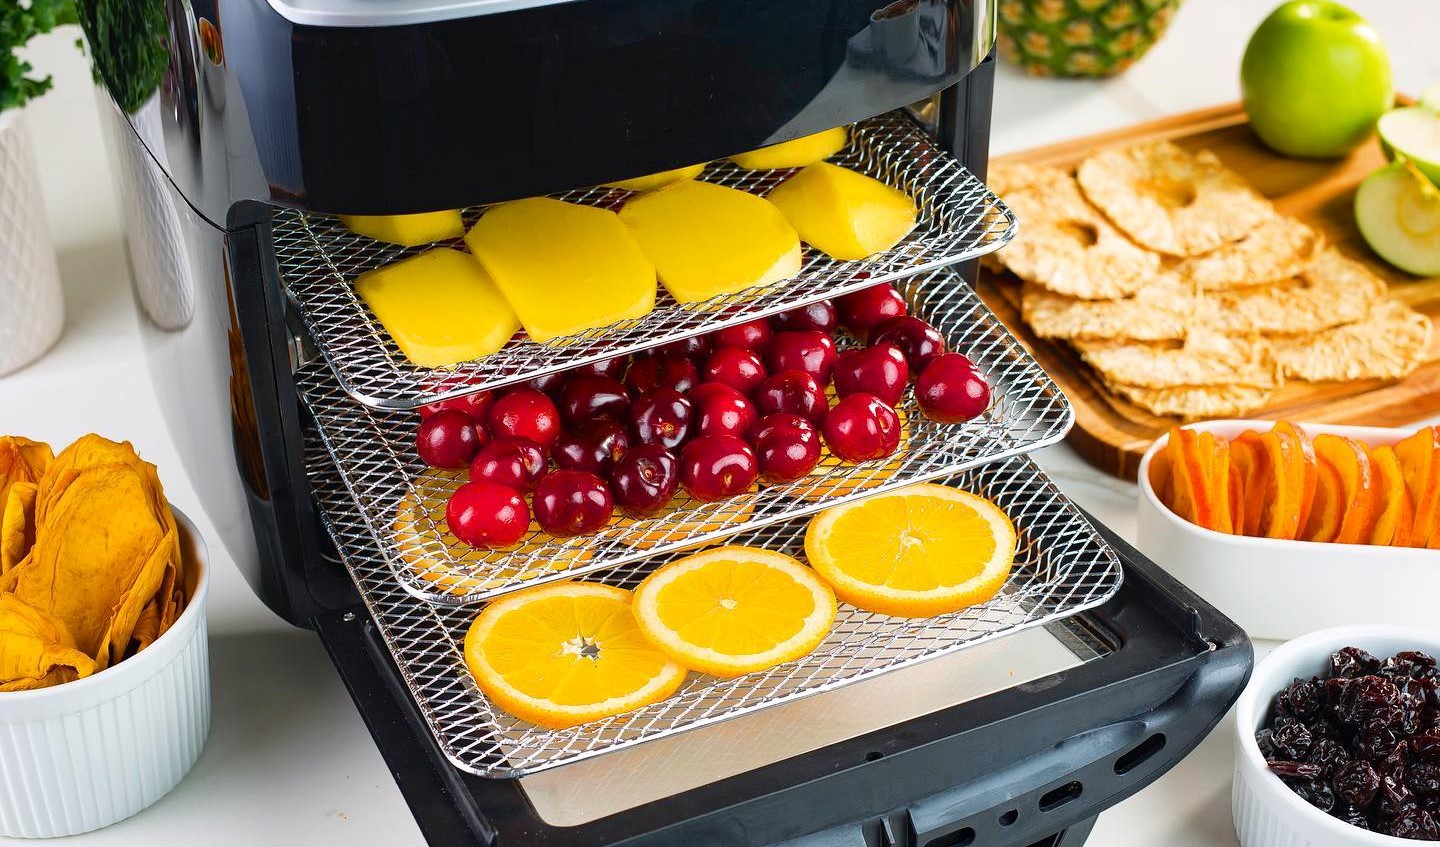
Step 4: Placing the Fruit in the Air Fryer
Now that you have sliced the fruit, it’s time to transfer them to the air fryer for dehydration. Here’s how you can properly place the fruit in the air fryer:
- Prepare the Air Fryer Basket: If your air fryer comes with a removable basket or tray, make sure it is clean and dry. If needed, lightly coat the basket with a non-stick cooking spray to prevent sticking.
- Arrange the Fruit: Carefully place the fruit slices in a single layer on the air fryer basket. Avoid overcrowding to ensure proper airflow and dehydration.
- Leave Space Between Slices: Make sure to leave some space between the fruit slices to allow for proper circulation of hot air. This helps to prevent the fruit from sticking together and promotes even drying.
- Adjust Slices (if necessary): If any slices overlap or touch, gently adjust them to maintain a single layer. This will ensure that each slice dehydrates evenly.
Once you have arranged the fruit slices in a single layer in the air fryer, it’s time to move on to step five: setting the temperature and time for dehydration.
When dehydrating fruit in an air fryer, make sure to slice the fruit evenly to ensure consistent drying. Also, preheat the air fryer to help speed up the dehydration process.
Read more: How To Dehydrate Basil In Air Fryer
Step 5: Setting the Temperature and Time
Setting the right temperature and time is crucial for successful fruit dehydration in an air fryer. Different fruits may require slightly different settings, so it’s important to adjust accordingly. Here’s how you can set the temperature and time:
- Refer to the Air Fryer Manual: Consult your air fryer’s manual or instructions to determine the recommended temperature and time for dehydrating fruit. This information may vary depending on the model and brand of your air fryer.
- Temperature: Set the air fryer temperature to the recommended temperature for fruit dehydration. Typically, temperatures ranging from 125-135°F (50-57°C) work well for most fruits.
- Time: Set the timer for the initial drying time, usually between 2-4 hours. Remember that the drying time may vary depending on the fruit’s thickness, moisture content, and the desired level of crispness.
- Adjust as Needed: If you prefer your dried fruit to be more or less crispy, you can adjust the time accordingly. Regularly check the progress of the fruit while it is drying to determine if any adjustments need to be made.
It’s important to note that dehydrating times can vary based on factors such as fruit type, slice thickness, and air fryer model. Keep an eye on the fruit during the drying process, especially towards the end, to prevent over-drying or burning.
Now that you have set the temperature and time for dehydrating, it’s time to move on to step six: the actual process of dehydrating the fruit.
Step 6: Dehydrating the Fruit
With the temperature and time set, it’s time to start the process of dehydrating the fruit in the air fryer. Here’s what you need to do:
- Turn on the Air Fryer: Make sure the air fryer is plugged in and turned on. The heating element will start to emit hot air.
- Place the Basket in the Air Fryer: Carefully place the air fryer basket with the sliced fruit inside the air fryer. Ensure it is positioned correctly.
- Start the Dehydration Process: Close the air fryer and start the dehydration process by pressing the appropriate buttons or setting the timer on the air fryer.
- Avoid Disturbing the Fruit: Once the dehydrating process has begun, it’s best to avoid disturbing the fruit unnecessarily. Opening the air fryer too frequently can lead to heat loss and uneven drying.
During the dehydrating process, the hot air circulating inside the air fryer will slowly remove the moisture from the fruit slices. This will result in shriveled and dried fruit with an intensified flavor. The exact drying time can vary depending on factors such as fruit type, thickness of the slices, and desired level of dryness.
Now that the fruit is dehydrating, it’s time to move on to step seven: checking for the desired texture of the fruit.
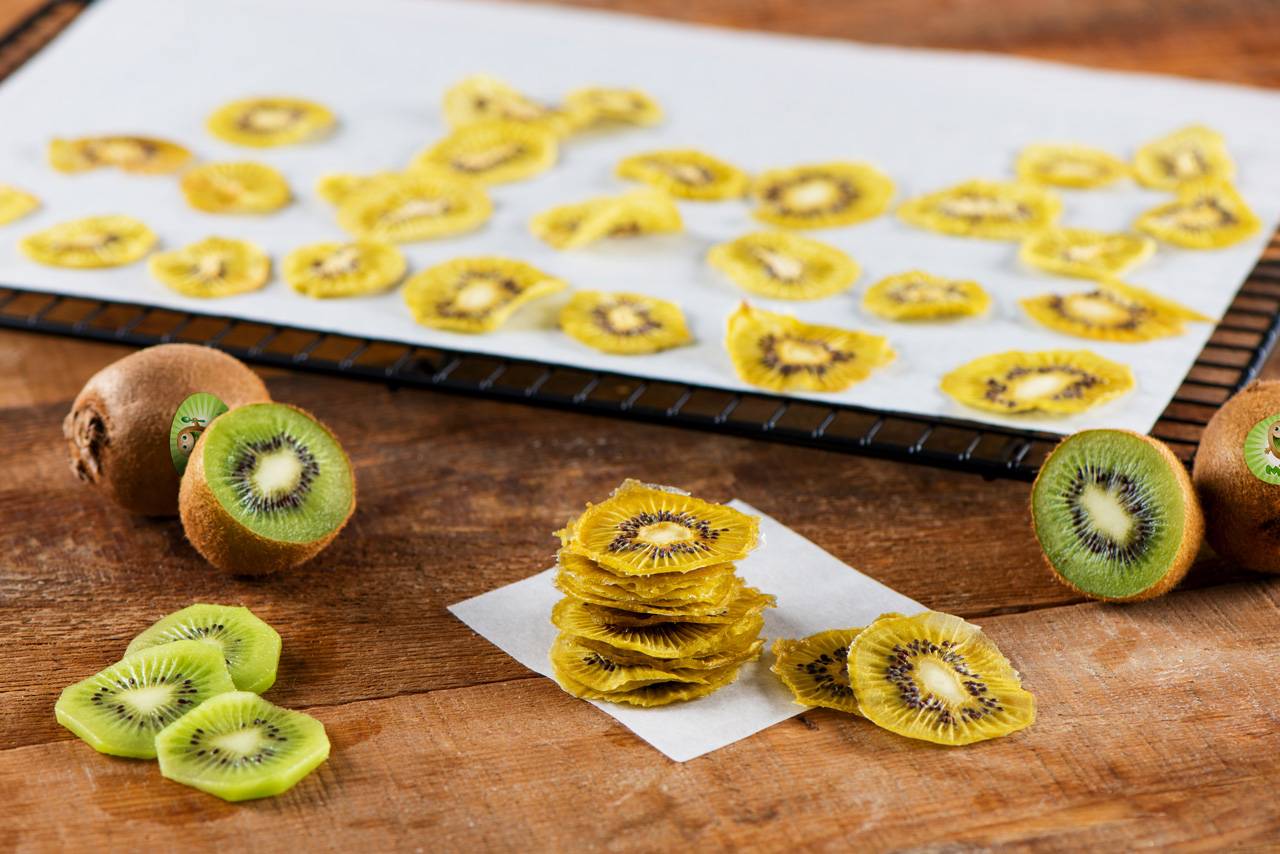
Step 7: Checking for Desired Texture
As the fruit is dehydrating in the air fryer, it’s important to periodically check for the desired texture. This step ensures that the fruit is dried to your preferred level of crispness. Here’s what you need to do:
- Pause or Adjust the Timer: Carefully pause the timer or adjust it to avoid unnecessary interruptions while checking the fruit’s texture. Some air fryers may have a pause button, while others may require you to manually adjust the time.
- Check a Few Slices: Carefully open the air fryer and select a few slices to check. Use tongs or a spatula to remove them from the air fryer basket.
- Observe the Texture: Examine the selected fruit slices to determine the level of dryness. If the slices are still too moist and chewy, they need more time to dehydrate. If they are crispy and dry, they can be considered done or close to the desired texture.
- Continue Dehydrating (if necessary): If the fruit slices require additional drying, place them back in the air fryer basket and continue the dehydration process. Adjust the timer as needed.
Remember that the drying time can vary based on factors such as fruit type, thickness of slices, and personal preference. Check the fruit periodically and adjust the drying time accordingly until you achieve the desired texture.
Once the fruit has reached the desired texture, it’s time to move on to the final step: removing and storing the dehydrated fruit.
Step 8: Removing and Storing the Dehydrated Fruit
After the fruit has reached the desired texture, it’s time to remove it from the air fryer and store it properly to maintain its freshness and flavor. Here’s what you need to do:
- Turn off the Air Fryer: Once the fruit is dried to your liking, turn off the air fryer and unplug it from the power source.
- Cool Down: Allow the dehydrated fruit to cool down inside the air fryer for a few minutes. This will ensure that they are safe to handle when removing.
- Remove the Fruit: Use tongs or a spatula to carefully remove the dehydrated fruit slices from the air fryer basket. Place them on a cooling rack or a plate to cool completely.
- Check for Remaining Moisture: Before storing the fruit, ensure that there is no residual moisture left. Press down on a few dried fruit slices to check for any softness or pliability. If there is any moisture or softness, they need further drying.
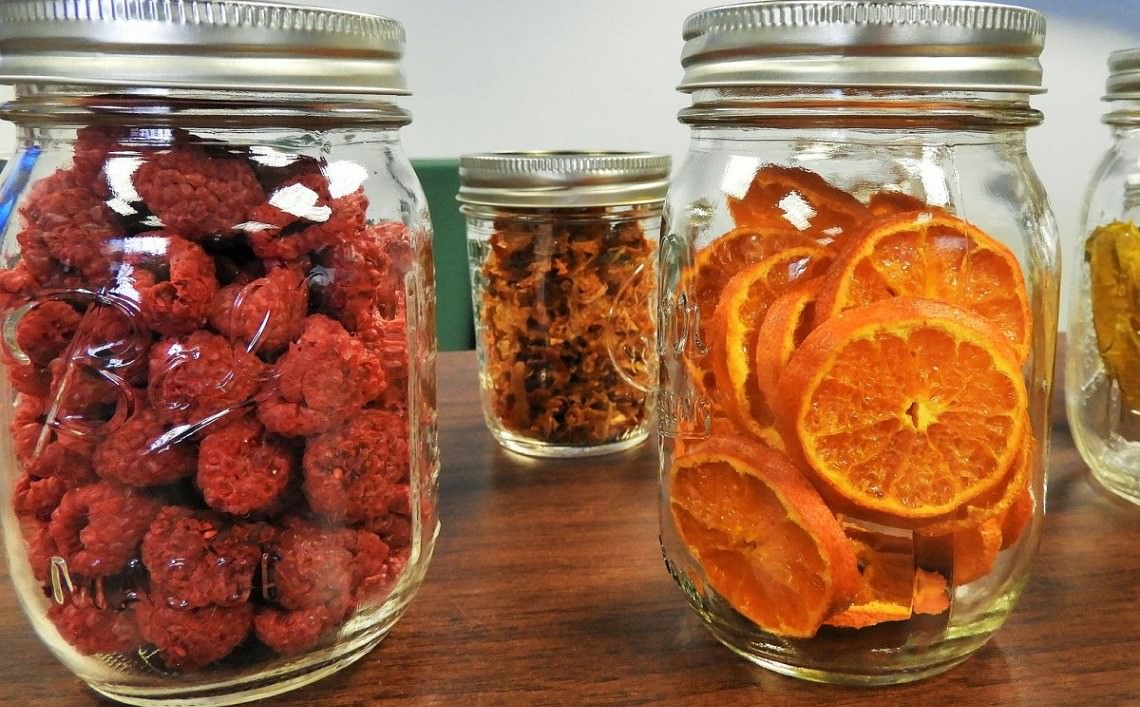
- Store in Airtight Containers: Once the dehydrated fruit is completely cooled and free of any moisture, transfer them to airtight containers or resealable bags. This will help to maintain their freshness and prevent moisture absorption.
- Label and Date: Remember to label the containers with the name of the fruit and the date of dehydration. This will help you keep track of the freshness and shelf-life of the dehydrated fruit.
- Store in a Cool, Dry Place: Store the containers of dehydrated fruit in a cool, dry place away from direct sunlight. Proper storage conditions will ensure that the fruit stays crispy and delicious for a longer period.
By following these steps, you can successfully remove and store the dehydrated fruit, allowing you to enjoy them as a healthy snack or use them in various recipes whenever you desire.
Dehydrated fruit can last for several months when stored properly. However, keep an eye out for any signs of spoilage, such as mold or off-putting odors, and discard any fruit that appears to be spoiled.
Congratulations! You have successfully completed the process of dehydrating fruit in an air fryer. Now you can enjoy the delicious and nutritious homemade dried fruit snacks any time you want!
Discover the joy of preserving the flavors of your favorite fruits and enjoy healthy, homemade snacks with the convenience of an air fryer. Happy snacking!
Note: The processes and temperatures mentioned in this article are general guidelines. Please consult your specific air fryer’s manual for precise instructions and adjust the settings accordingly.
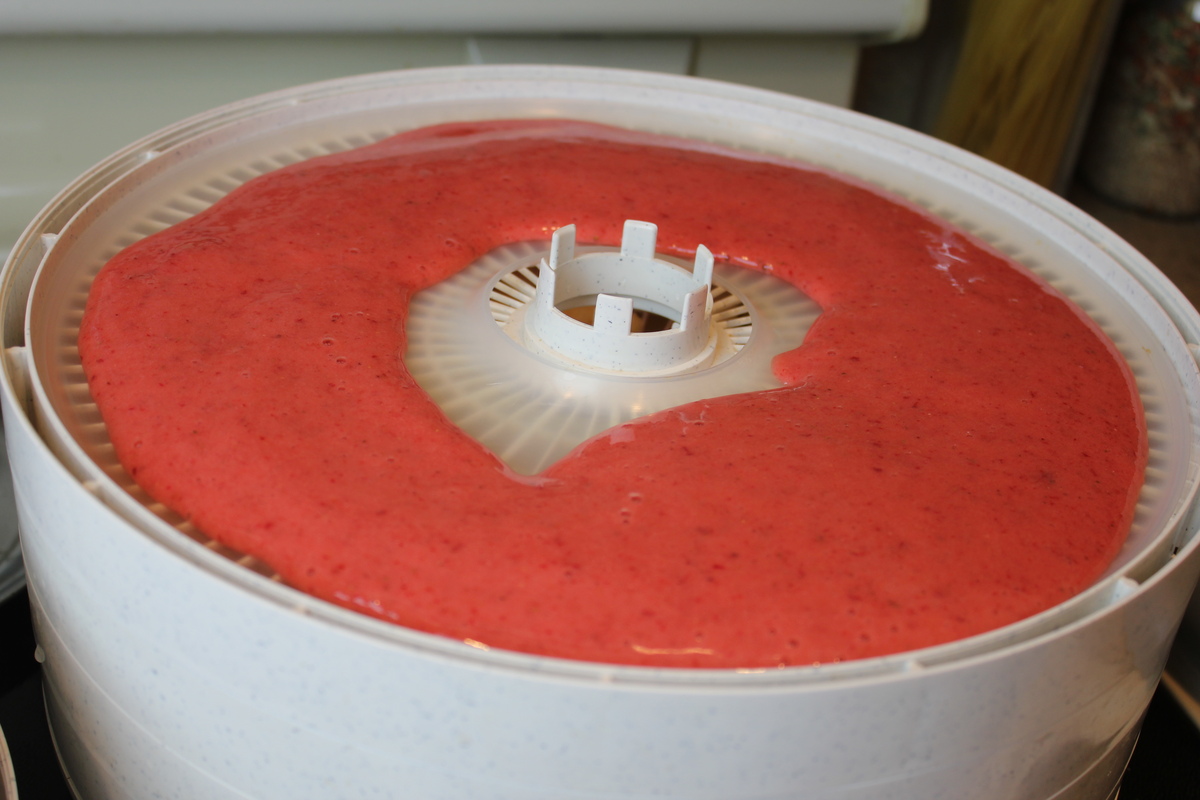
Read more: How To Make Fruit Leather In A Dehydrator
Conclusion
Dehydrating fruit in an air fryer is a simple and convenient way to preserve the natural flavors and nutrients of your favorite fruits. With the ability to circulate hot air and remove moisture, the air fryer ensures efficient and even dehydration, resulting in delicious and crispy dried fruit snacks.
In this article, we walked through the step-by-step process of dehydrating fruit in an air fryer. We discussed the importance of selecting fresh and ripe fruits, preparing them by washing and slicing, and preheating the air fryer to the recommended temperature. We then learned about placing the fruit in the air fryer, setting the temperature and time, and periodically checking for the desired texture.
After dehydrating the fruit to perfection, we covered the final step of removing and storing the dehydrated fruit. By ensuring they are completely cooled and free from any residual moisture, and storing them in airtight containers in a cool, dry place, you can enjoy the crispy and flavorful snacks for months to come.
Dehydrated fruit is not only a healthy and delicious snack on its own but also a versatile ingredient in various recipes. From granola bars and trail mix to yogurt toppings and baked goods, you’ll find endless possibilities to incorporate your homemade dehydrated fruit in your culinary creations.
So, why not explore the world of dehydrated fruit with your air fryer and enjoy the benefits of this simple preservation method? It’s a fantastic way to savor the flavors of your favorite fruits year-round and elevate your snacking experience.
Remember to experiment with different fruits, slice thicknesses, and drying times to find your preferred texture and flavor. With a little practice and creativity, you’ll become a master at dehydrating fruit in no time!
Have fun, and happy dehydrating!
Frequently Asked Questions about How To Dehydrate Fruit In Air Fryer
Was this page helpful?
At Storables.com, we guarantee accurate and reliable information. Our content, validated by Expert Board Contributors, is crafted following stringent Editorial Policies. We're committed to providing you with well-researched, expert-backed insights for all your informational needs.


0 thoughts on “How To Dehydrate Fruit In Air Fryer”