Articles
How To Display Old Hand Tools
Modified: August 28, 2024
Learn how to display and preserve your collection of old hand tools with our informative articles. Discover the best techniques and ideas to showcase your vintage tools.
(Many of the links in this article redirect to a specific reviewed product. Your purchase of these products through affiliate links helps to generate commission for Storables.com, at no extra cost. Learn more)
Introduction
Hand tools have been used by humans for centuries to accomplish tasks and create objects. From woodworking to metalwork, these tools have played a crucial role in our history. For many enthusiasts, collecting and displaying old hand tools is a way to appreciate the craftsmanship and ingenuity of those who came before us.
In this article, we will dive into the world of old hand tools and explore various methods for displaying them. Whether you have a small collection of vintage tools or a treasure trove of family heirlooms, there is a display method for every style and space.
Before we delve into the specifics of how to display old hand tools, it’s important to understand the different types of tools you may come across. Hand tools can include anything from hammers and chisels to saws and planes. They can range in age, condition, and material, each with its own unique story to tell.
When it comes to collecting hand tools, some enthusiasts focus on a specific type, such as woodworking tools or blacksmithing tools, while others enjoy the diversity of a mixed collection. The choice is entirely up to you and what sparks your interest.
Once you have gathered your collection, the next step is to properly clean and restore the tools. Over time, old hand tools can accumulate rust, grime, and dirt, which not only detracts from their aesthetic appeal but can also affect their functionality. Cleaning and restoring your tools will not only preserve their beauty but also ensure they are in good working condition.
Choosing the right display method is also an important consideration. Wall mount displays, shadow boxes, and tool chests are just a few options to showcase your collection. Each method offers its own unique advantages, allowing you to highlight the tools’ beauty and craftsmanship while keeping them organized and protected.
If you’re feeling creative, you can even build your own DIY display rack. This allows you to customize the design and size to perfectly fit your collection and space. Whether you’re a beginner woodworker or a seasoned DIYer, building a display rack can be a rewarding project in itself.
Lastly, we will share some tips for properly displaying your hand tools. From proper lighting to organization, these tips will ensure that your collection is showcased in the best possible way.
So, if you’re ready to dive into the world of old hand tools and create a visually stunning display, let’s get started!
Key Takeaways:
- Embrace the history and craftsmanship of old hand tools by gathering, cleaning, and displaying them with care. Share their stories and create visually stunning displays to inspire others.
- Whether through a wall mount, shadow box, tool chest, or DIY rack, displaying old hand tools is a journey of creativity and passion. Preserve their heritage and functionality while sharing their stories with the world.
Read more: Why Do Old Hand Tools Stink
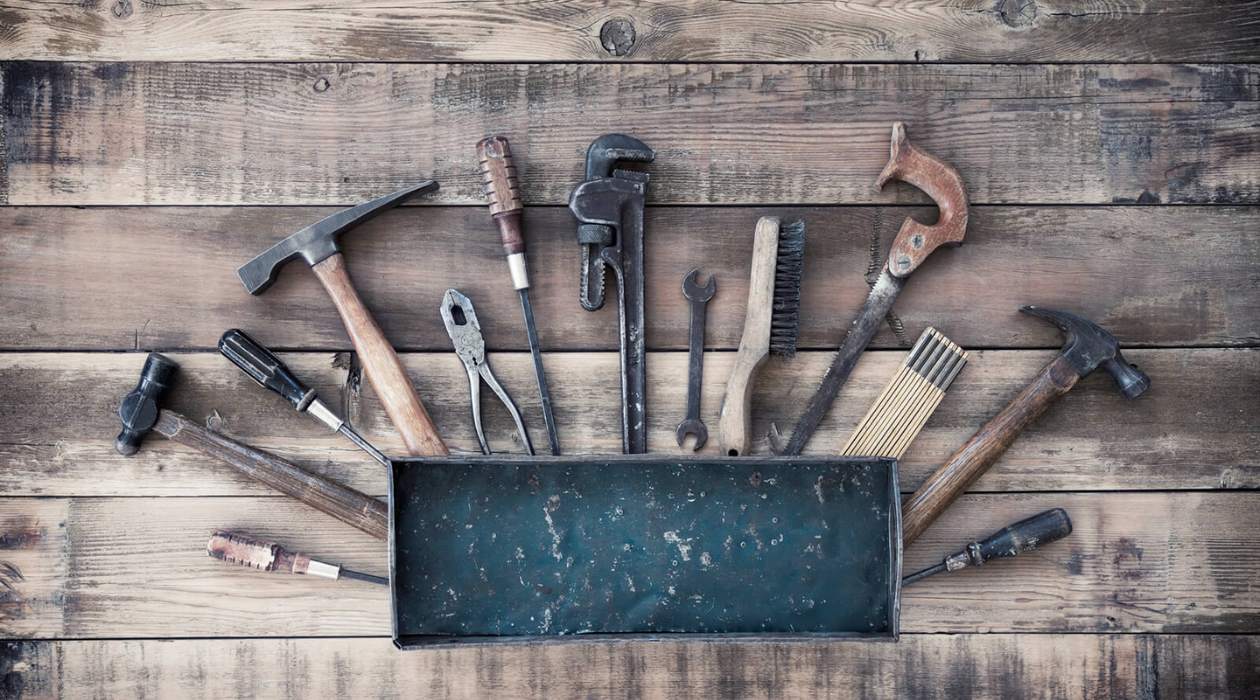
Gathering Old Hand Tools
When it comes to gathering old hand tools, there are several avenues you can explore. Here are a few tips to help you start your collection:
- Antique Stores and Flea Markets: Antique stores and flea markets are treasure troves for finding vintage hand tools. Browse through these places to discover hidden gems, from unique and rare tools to everyday essentials.
- Online Auctions and Marketplaces: The internet has made it easier than ever to find and purchase old hand tools. Online auction sites like eBay and marketplaces like Etsy can provide access to a wide range of tools from sellers around the world.
- Estate Sales and Garage Sales: Estate sales and garage sales offer a chance to find tools that have been passed down through generations. Keep an eye out for these sales in your local community and you may stumble upon well-loved tools with rich histories.
- Networking with Other Collectors: Connect with other hand tool enthusiasts through local clubs or online forums. Not only will you gain valuable knowledge and insights, but you may also come across opportunities to buy or trade tools with fellow collectors.
- Family Heirlooms: Ask your family members if they have any old hand tools tucked away in their basements or garages. You might be surprised to find out that your ancestors were skilled craftsmen or had a passion for DIY projects.
As you start your collection, consider the condition, age, and rarity of the tools. Some collectors focus on pristine tools in excellent condition, while others appreciate the character and patina that comes with age. Be mindful of your budget and collect tools that resonate with your interests and preferences.
Additionally, learning about the history and background of the tools can add a deeper level of appreciation. Research the manufacturers, the time period in which the tools were made, and the techniques used to craft them. This knowledge will not only enrich your collection but also provide interesting stories to share with others.
Remember, building a collection of old hand tools is a journey. It’s a process of exploration, discovery, and learning. Take your time, enjoy the hunt, and soon you’ll have a fascinating collection of tools from the past.
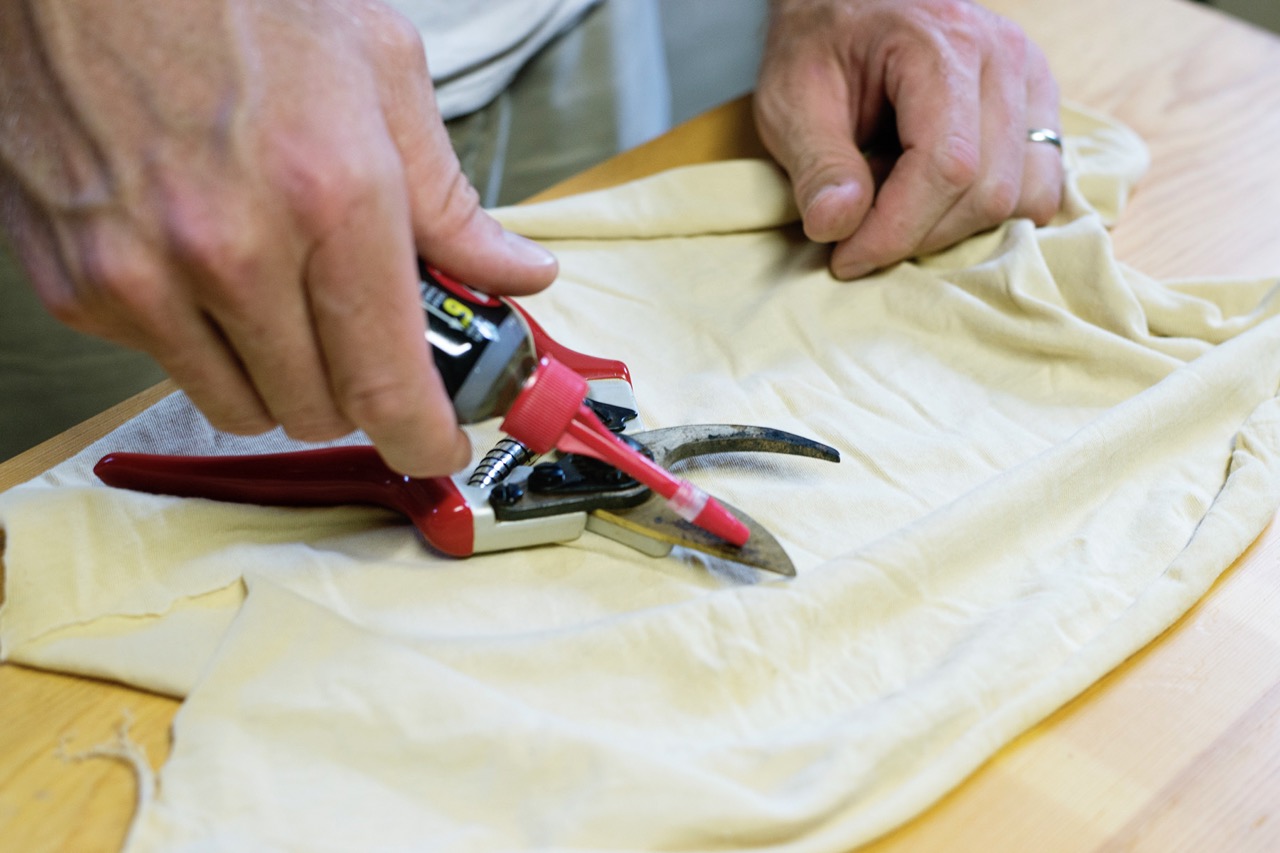
Cleaning and Restoring Hand Tools
Once you have gathered your collection of old hand tools, it’s important to clean and restore them to ensure their longevity and functionality. Here are some steps to help you clean and restore your hand tools:
- Remove Rust: Rust is a common issue with old hand tools. To remove rust, start by scrubbing the tool with a wire brush or steel wool. For stubborn rust, use a rust remover solution or a mixture of vinegar and water. After removing the rust, dry the tool thoroughly to prevent further rusting.
- Clean Dirt and Grime: Dirt and grime can accumulate on the surface of hand tools over time. Use a mild detergent and warm water to clean the tools. Gently scrub with a soft brush or sponge to remove any dirt and grime. Rinse the tools thoroughly and dry them completely.
- Sharpen Blades: Many hand tools have blades that may need sharpening. Use a sharpening stone or a honing guide to sharpen the blades. Follow the manufacturer’s instructions or consult online tutorials for guidance on the proper technique for sharpening specific tools.
- Apply Lubrication: Applying lubrication to your hand tools is essential for smooth operation and preventing rust. Use a lubricant appropriate for the tool, such as oil for metal parts and grease for moving parts. Apply a small amount of lubricant and distribute it evenly using a cloth or a brush.
- Handle Restoration: If the handles of your hand tools are worn or damaged, consider restoring them. Sand the handles gently to remove any roughness or splinters. Apply a coat of wood finish or sealant to protect the handles and enhance their appearance. If needed, replace the handles completely with new ones.
It’s important to note that some older hand tools, especially those with historical value or collectible status, may require professional restoration. If you’re unsure about restoring a particular tool, consult with a professional restorer or a knowledgeable collector for guidance.
While cleaning and restoring your hand tools, handle them with care to avoid any injuries. Wear protective gloves and eyewear, and work in a well-ventilated area if using chemicals. Take your time and be patient as the restoration process may be time-consuming, but the end result will be worth it.
By cleaning and restoring your old hand tools, you not only improve their appearance but also ensure their functionality and preserve their value. Properly cared for tools can last for generations, allowing future enthusiasts to appreciate their craftsmanship and history.
Choosing a Display Method
Once you have cleaned and restored your old hand tools, the next step is to choose a display method that showcases their beauty and craftsmanship. Here are a few popular display methods to consider:
- Wall Mount Display: Wall mount displays are a classic and versatile option. They allow you to hang your tools on a wall, creating a visually appealing and organized display. You can use hooks, pegboards, or custom-made racks to securely hang the tools. Arrange them in a way that highlights their unique features and creates a visually balanced composition.
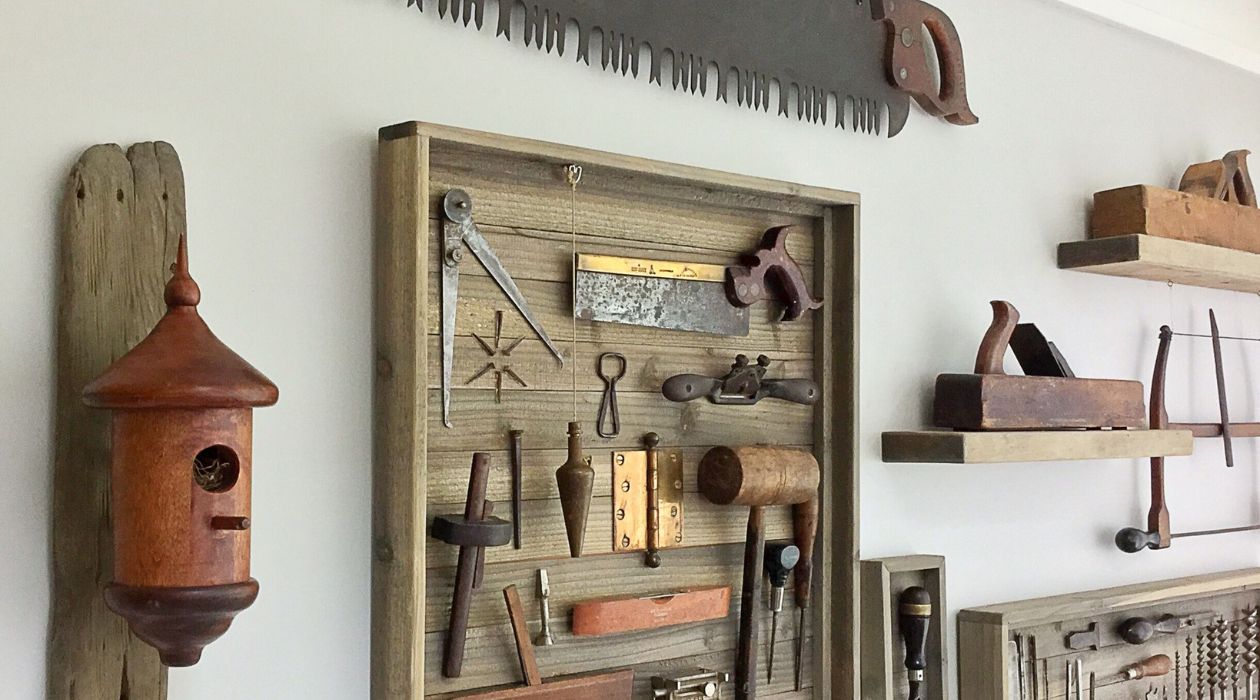
- Shadow Box Display: Shadow boxes provide a more enclosed and protected display option. They are shallow, framed boxes with a glass front that allows you to showcase your hand tools while protecting them from dust and damage. Arrange the tools in the shadow box, ensuring they are securely positioned. Consider adding labels or a plaque to provide additional information about the tools.
- Tool Chest Display: If you have a collection of smaller hand tools, a tool chest can be an ideal display option. Tool chests are wooden or metal chests with multiple compartments or drawers. Arrange your tools in an organized manner inside the chest, allowing you to showcase them while also providing practical storage.
- Creating a DIY Display Rack: If you have a knack for woodworking or enjoy DIY projects, consider creating a custom display rack. This allows you to design a display rack that perfectly fits your collection and complements your space. You can choose the materials, size, and layout to create a personalized display that showcases your tools in a unique way.
When choosing a display method, consider the size and weight of your hand tools, as well as the available space in your home or workshop. Ensure that the display method you choose can safely hold and display your tools without the risk of them falling or getting damaged.
It’s also worth considering the aesthetic appeal of the display method. Choose a style and design that enhances the overall look of your tools while also blending well with your existing decor. You want your display to be visually pleasing and harmonious with its surroundings.
Remember to regularly dust and clean your display to keep your hand tools looking their best. Displaying your collection not only allows you to appreciate their beauty but also serves as a conversation starter and a source of inspiration for others who share your passion for hand tools.
Ultimately, the choice of display method is a personal one. Whether you opt for a wall mount display, a shadow box, a tool chest, or a DIY display rack, the goal is to create a visually stunning display that showcases the craftsmanship and history of your old hand tools.
Wall Mount Display
A wall mount display is a classic and popular method for showcasing your collection of old hand tools. It allows you to create a visually appealing and organized display while utilizing the vertical space on your walls. Here are some tips to help you create a stunning wall mount display:
- Selecting the Right Wall: Choose a wall in your home or workshop that provides enough space and visibility for your tools. Consider a wall that is easily accessible and well-lit to maximize the impact of your display.
- Choosing the Display Method: There are several options for displaying your hand tools on the wall. You can use hooks, pegboards, custom-made racks, or even repurpose old shelves or cabinets. The choice depends on the size and weight of your tools, as well as your personal preference.
- Arranging the Tools: Arrange your tools in a way that showcases their unique features and creates visual interest. Start with the larger or more visually striking tools as focal points and build around them. Consider grouping tools by type or function for a cohesive display.
- Spacing and Balance: Pay attention to the spacing and balance of your display. Allow enough room between tools so that each can be appreciated individually. Aim for a balanced composition, ensuring that the display doesn’t look cluttered or overwhelming.
- Securing the Tools: It’s important to securely hang your tools on the wall to prevent accidents and damage. Use sturdy hooks or racks that are appropriate for the weight and size of your tools. Test the stability of the hooks or racks before hanging the tools to ensure they can support the weight.
- Add Labels or Descriptions: Consider adding labels or descriptions to provide additional information about the tools. This can enhance the educational aspect of your display and pique the interest of viewers. You can use small plaques, labels, or even create a separate display board with information about each tool.
- Lighting: Proper lighting can significantly enhance the visual impact of your wall mount display. Use adjustable spotlights or track lighting to highlight specific tools or sections of your display. Experiment with different lighting angles and intensities to achieve the desired effect.
- Regular Maintenance: Dust and clean your tools and display regularly to ensure they remain in pristine condition. This not only preserves the beauty of the tools but also prevents dust buildup and discourages pests from making a home in your display.
A wall mount display not only showcases the craftsmanship and history of your hand tools but also adds a unique decorative element to your space. It becomes a focal point and a conversation starter for visitors who are intrigued by the history and functionality of these tools.
Remember, the wall mount display is an opportunity to express your creativity and showcase your personal style. Experiment with different layouts, materials, and arrangements to create a display that truly reflects your appreciation for old hand tools.
Whether you’re a seasoned collector or just starting your journey, a well-executed wall mount display can turn your collection of old hand tools into a captivating piece of art.
Consider using shadow boxes or display cases to showcase your old hand tools. This will protect them from dust and damage while still allowing them to be admired.
Read more: What Are Old Hand Tools Made Out Of
Shadow Box Display
A shadow box display is a unique and elegant way to showcase your collection of old hand tools. It provides a more enclosed and protective display method, while still allowing you to appreciate the beauty and craftsmanship of your tools. Here are some tips on creating a stunning shadow box display:
- Choose the Right Shadow Box: Select a shadow box that is spacious enough to accommodate your tools. Consider the depth of the shadow box to ensure that your tools fit comfortably without getting crowded. Look for a shadow box with a glass front to protect your tools from dust and damage.
- Arrange the Tools Strategically: Arrange your tools inside the shadow box in a visually appealing manner. Consider the size, shape, and visual impact of each tool as you position it. Try different arrangements until you find a composition that highlights the unique features of each tool.
- Add Background Elements: Enhance the visual impact of your shadow box display by adding background elements. You can use a piece of fabric, patterned paper, or even a small painting as a backdrop. This added layer of visual interest can help emphasize the beauty of your tools.
- Securely Mount the Tools: To keep your tools in place within the shadow box, use adhesive putty or small hooks to secure them. This will prevent them from shifting or falling when the shadow box is opened or moved. Ensure that the adhesive or hooks are strong enough to hold the weight of the tools securely.
- Consider Adding Labels: To provide additional information about each tool in your display, add small labels or descriptions. These can be placed below or next to each tool, providing viewers with insights into the history, function, or significance of the tool. Use small plaques, labels, or even handwritten descriptions to add a personal touch.
- Lighting: Illuminate your shadow box display with the right lighting to make your tools stand out. LED strip lights or small spotlights can be placed strategically to highlight specific tools or areas within the shadow box. Experiment with different lighting angles and intensities to achieve the desired effect.
- Hang or Display Your Shadow Box: Once you have created your shadow box display, decide whether you want to hang it on the wall or display it on a shelf or tabletop. Securely mount the shadow box using appropriate hardware if you choose to hang it. Alternatively, use easels or special display stands to keep it upright on a surface.
- Regular Maintenance: Dust and clean your shadow box display regularly to keep it looking its best. Use a soft cloth or brush to gently remove any dust or debris from the tools and the glass front. Avoid using harsh chemicals or abrasive cleaners that may damage the tools or the shadow box.
A shadow box display not only protects your old hand tools but also creates a visually stunning presentation that adds a touch of elegance to your space. It invites viewers to take a closer look and appreciate the intricate details and craftsmanship of your collection.
Whether you display your shadow box on a wall, shelf, or tabletop, it becomes a captivating focal point that sparks conversations and curiosity. Your shadow box display tells a story about the history and significance of each tool, making it more than just a collection—it becomes a work of art.
Tool Chest Display
A tool chest display is a practical and visually appealing way to showcase your collection of old hand tools. It not only allows you to display your tools but also provides organized storage. Here are some tips on creating an impressive tool chest display:
- Select the Right Tool Chest: Choose a tool chest that suits the size and number of your tools. Consider the material, such as wood or metal, and the number of compartments or drawers. Look for a tool chest that is sturdy, well-constructed, and provides ample space for your tools.
- Clean and Prepare the Tool Chest: Before placing your tools in the chest, clean and prepare the interior. Wipe down the surfaces with a clean cloth to remove any dust or debris. If necessary, line the bottom of the drawers or compartments with fabric or foam to protect the tools from scratches or movement.
- Organize Your Tools: Arrange your tools in a logical and organized manner within the tool chest. Group tools with similar functions or sizes together, ensuring that they are easily accessible and visible. Consider using dividers or small containers to keep the tools separated and prevent them from moving around.
- Create a Pleasing Visual Composition: Arrange the tools in a way that creates a visually appealing composition. Consider the shapes, sizes, and colors of the tools as you position them. Experiment with different layouts until you achieve a balanced and aesthetically pleasing display.
- Add Labels or Descriptions: To provide additional information about each tool, consider adding labels or descriptions. You can attach labels or tags to the handles of the tools, or create a separate booklet with information about each tool. This adds an educational element to your display and helps viewers better appreciate the significance of each tool.
- Consider Customization: Personalize your tool chest display by adding custom touches. You can paint the exterior of the tool chest to match your personal style or the decor of the room. You can also add decorative hardware or embellishments to give your tool chest a unique and eye-catching look.
- Keep the Tool Chest Well-Maintained: Regularly clean and maintain your tool chest to ensure its longevity and the preservation of your tools. Dust the exterior and interior regularly to prevent the accumulation of dirt and debris. Lubricate any moving parts or hinges to ensure smooth operation.
- Display and Accessorize: Decide on the best location to display your tool chest. You can place it on a workbench, shelf, or on the floor, depending on the size and weight. Consider adding a small work surface or a display stand beside the tool chest to create a functional and visually appealing setup.
A tool chest display not only showcases your old hand tools but also provides convenient storage and organizational benefits. It allows you to keep your tools protected and easily accessible, while also adding a touch of vintage charm to your space.
Whether you’re a woodworking enthusiast or an avid collector, a tool chest display not only visually impresses but also highlights the historical significance and craftsmanship of your hand tools. It becomes a focal point in your workshop or living space, inviting others to appreciate the beauty and functionality of these vintage treasures.
Creating a DIY Display Rack
If you have a creative streak or enjoy do-it-yourself projects, creating a custom display rack is a fantastic way to showcase your collection of old hand tools. Designing and building your own display rack allows you to tailor it to your specific needs and preferences. Here are some tips to help you create a DIY display rack:
- Determine the Design and Size: Start by deciding on the design and size of your display rack. Consider the number of tools in your collection, the available space in your home or workshop, and the visual impact you want to achieve. You can create a simple wall-mounted rack, a freestanding floor rack, or a tabletop display stand.
- Select the Materials: Choose materials that are suitable for your design and consistent with the aesthetics you want to achieve. Common materials for a DIY display rack include wood, metal, or a combination of both. Consider the structural integrity, durability, and stability of the materials you choose.
- Gather the Tools: Ensure you have the necessary tools to build your display rack. This may include a saw, drill, screwdriver, sandpaper, measuring tape, and appropriate fasteners (screws, nails, or brackets), depending on your chosen design and materials.
- Plan and Measure: Plan out the dimensions and layout of your display rack before starting the construction. Measure the size of your tools and spaces for proper spacing and positioning. Accuracy in planning and measuring will help you create a display rack that fits your tools perfectly.
- Cut and Assemble: Follow your design and measurements to cut the required pieces of wood or metal. Use appropriate assembly techniques such as screws, nails, or brackets to securely join the pieces together. Ensure the display rack is stable and can support the weight of your tools.
- Sand and Finish: Once the display rack is assembled, sand any rough edges or surfaces to create a smooth finish. Apply a finish or paint of your choice to enhance the appearance of the display rack. Consider using a clear coat or stain to highlight the natural beauty of the wood or a color that complements your space.
- Arrange and Mount the Tools: Place your collection of hand tools on the display rack. Group them by type, size, or function to create an organized and visually appealing arrangement. Ensure that each tool is securely mounted or positioned, using hooks, racks, or holders that are appropriate for their size and weight.
- Consider Additional Details: Add extra features or embellishments to personalize your DIY display rack. You could incorporate hooks or pegs to hang smaller tools, add a dedicated spot for displaying labels or descriptions, or even attach a small magnet strip for displaying metal tools magnetically.
- Regular Maintenance: Periodically check and maintain your DIY display rack to ensure its stability and the safety of your tools. Tighten any loose screws or fasteners, and dust or clean the display rack as needed to keep it looking its best.
Creating your own DIY display rack not only showcases your collection of old hand tools but also adds a touch of your personality and craftsmanship to the display itself. It becomes a unique and custom piece that highlights your creativity and passion for hand tools.
Whether you’re a beginner or an experienced DIY enthusiast, building a DIY display rack can be a rewarding project. It allows you to showcase your tools in a way that perfectly fits your collection and complements your space, becoming a source of pride and admiration for both your tools and your craftsmanship.
Tips for Properly Displaying Hand Tools
Properly displaying your collection of hand tools not only enhances their visual appeal but also ensures their longevity and accessibility. Here are some tips to help you create a stunning and functional display:
- Proper Lighting: Good lighting is essential to showcase your hand tools. Use natural light or adjustable LED spotlights to highlight specific tools or areas of your display. Experiment with different lighting angles and intensities to find the best way to enhance the details and craftsmanship of your tools.
- Consider the Space: Assess the available space where you plan to display your hand tools. Choose a display method and size that fits the space appropriately. Avoid overcrowding the display, as it can make it difficult to appreciate each tool individually. Consider the overall balance and aesthetic of the space when deciding on the display arrangement.
- Grouping and Categorizing: Group your hand tools based on their type, function, or historical significance. This not only creates a sense of order but also helps viewers appreciate the diversity and purpose of each tool. Consider using labels or descriptive plaques to provide additional information about each group or specific tools.
- Rotate the Display: If you have a large collection of hand tools, consider rotating the display periodically. This allows you to showcase different tools at different times, preventing your display from becoming stagnant. It also adds an element of surprise and interest for those who admire your collection regularly.
- Keeping Tools Accessible: Ensure that your hand tools are easily accessible. Avoid displaying tools too high or too low, as it may be challenging to reach or view them comfortably. Consider ergonomics and ease of handling when positioning your tools for display. This allows you to admire and use them when needed without risk of damage or injury.
- Preservation and Maintenance: Take steps to preserve the condition of your hand tools. Regularly clean and inspect them for any signs of rust or damage. Store them in a clean and dry environment to prevent moisture or humidity from causing deterioration. Consider using silica gel packets or anti-corrosion products to safeguard against rust.
- Educational Touches: Add educational elements to your display to enlighten viewers about the history and significance of your hand tools. This could include descriptive labels, historical information, or interactive components. Encourage viewers to engage with your collection and learn more about the tools, fostering a deeper appreciation for their craftsmanship and purpose.
- Rethinking Functional Tools: Many functional tools, such as hand planes or chisels, can also serve as decorative pieces in your display. Don’t limit yourself to solely showcasing collectibles. Consider incorporating tools that you regularly use, as they can add a touch of authenticity and interest to your display.
- Share Your Knowledge: Take the opportunity to share your knowledge and passion for hand tools. Whether you’re hosting a gathering or receiving guests, be prepared to explain the history, purpose, and techniques associated with your collection. Engage with others who share your interest, creating an enriching experience for all.
By following these tips, you can create a visually stunning, informative, and accessible display that showcases the craftsmanship and heritage of your hand tools. It becomes a source of inspiration, education, and admiration for both you and those who have the pleasure of experiencing your collection.
Read more: How Old Should Kids Be To Use Hand Tools
Conclusion
Displaying a collection of old hand tools is not just about showcasing their beauty and craftsmanship, but also about preserving their history and sharing their stories with others. Whether you choose a wall mount display, a shadow box, a tool chest, or a DIY rack, the goal is to create a visually stunning display that reflects your passion for hand tools.
Gathering old hand tools can be an exciting journey of exploration and discovery. Antique stores, flea markets, online auctions, and even family heirlooms can be sources of unique and valuable pieces. Consider the condition, age, and rarity of the tools as you expand your collection.
Cleaning and restoring your hand tools will not only enhance their appearance but also ensure their functionality. Remove rust, clean dirt and grime, sharpen blades, and apply lubrication to keep your tools in the best condition possible.
When it comes to displaying your hand tools, consider the available space and choose a display method that suits your collection and personal style. A wall mount display allows you to utilize vertical space, while a shadow box provides a protected and enclosed display option. A tool chest combines display and storage, and a DIY rack offers a customized and creative solution.
Remember to properly arrange your tools, create visual compositions, and ensure their security within the display. Lighting, labeling, and regular maintenance are key factors in presenting your tools effectively and preserving their condition.
Properly displaying your hand tools invites others to appreciate the history, craftsmanship, and functionality of these unique artifacts. Share your knowledge and passion with others, allowing them to gain a deeper understanding and appreciation for the tools.
Whether you’re a seasoned collector or just starting out, the joy of displaying your collection lies in the stories that each tool tells. From vintage woodworking tools to rusty blacksmithing hammers, your display becomes a testament to the innovation and craftsmanship of past generations.
So, gather your old hand tools, clean and restore them with care, and embark on a journey to create a captivating display that celebrates the heritage and artistry of these timeless tools.
Frequently Asked Questions about How To Display Old Hand Tools
Was this page helpful?
At Storables.com, we guarantee accurate and reliable information. Our content, validated by Expert Board Contributors, is crafted following stringent Editorial Policies. We're committed to providing you with well-researched, expert-backed insights for all your informational needs.


0 thoughts on “How To Display Old Hand Tools”