Articles
How To Identify Rough-In Plumbing In Basement
Modified: October 20, 2024
Learn how to easily identify rough-in plumbing in your basement with our informative articles.
(Many of the links in this article redirect to a specific reviewed product. Your purchase of these products through affiliate links helps to generate commission for Storables.com, at no extra cost. Learn more)
Introduction
When it comes to home remodeling or renovation projects, the basement often presents a unique set of challenges. One important aspect that needs to be considered is the identification of rough-in plumbing in the basement. Rough-in plumbing refers to the initial installation of plumbing pipes and drains before the walls and floors are completed. It serves as the foundation for the entire plumbing system in the basement.
Identifying rough-in plumbing in the basement is crucial for several reasons. Firstly, it allows you to plan the layout of your basement effectively. By knowing the location of the plumbing pipes and drains, you can design the space accordingly, taking into account factors such as the positioning of fixtures, appliances, and storage areas.
In addition to layout planning, identifying rough-in plumbing in the basement is essential for any future plumbing modifications or repairs. If you are planning to add a bathroom, laundry room, or kitchenette in the basement, knowing the location of the existing plumbing can save you time, money, and potential headaches during the construction process.
Furthermore, understanding the rough-in plumbing in your basement can help you prevent potential issues such as leaks, pipe damage, or clogs. Being aware of the placement and condition of the pipes allows you to monitor and maintain them properly, ensuring the functionality and longevity of your plumbing system.
In this article, we will walk you through the steps to identify rough-in plumbing in the basement. Whether you are a homeowner embarking on a basement renovation project or a contractor looking to ensure accurate plumbing installations, these methods will help you gain insight into the plumbing system beneath your basement floor.
Key Takeaways:
- Identifying rough-in plumbing in the basement is crucial for efficient planning, cost savings, and maintaining a functional and reliable plumbing system. It allows for successful renovations, avoids mishaps, and ensures a well-designed basement space.
- Visual inspection, checking blueprints, and seeking professional help are essential steps in identifying rough-in plumbing. These methods provide valuable insights, accurate results, and expert guidance for basement renovation projects.
Read more: What Is A Rough In Plumbing
Importance of Identifying Rough-In Plumbing in Basement
Identifying rough-in plumbing in the basement is of utmost importance when planning any remodeling or renovation projects. Here are some key reasons why:
1. Planning the Layout: By knowing the location of the rough-in plumbing, you can effectively plan the layout of your basement. This includes determining the positioning of fixtures such as sinks, toilets, showers, and laundry connections. Understanding where the plumbing lines are located can help you optimize the use of space and ensure that everything is properly connected.
2. Adding Functional Spaces: If you are considering adding a bathroom, kitchenette, or laundry room in the basement, identifying rough-in plumbing is crucial. Knowing the existing plumbing lines can help you determine the feasibility of your project and make informed decisions about the placement of fixtures. It can also save you from costly mistakes and ensure that the new spaces function properly.
3. Avoiding Costly Mistakes: Without identifying rough-in plumbing, you risk damaging existing pipes and drains during construction. Accidentally drilling into a water line or blocking a drain can lead to costly repairs and delays in your project. By knowing the precise location of the plumbing lines, you can work around them and prevent potential accidents.
4. Ensuring Proper Drainage: The correct placement of rough-in plumbing ensures that water flows efficiently and away from your basement. It helps maintain a proper slope for drainage, preventing water from pooling or causing structural damage. Identifying the location of the drains and their connections can help you address any drainage issues and ensure effective water management in your basement.
5. Future Modifications and Repairs: Identifying rough-in plumbing in the basement allows you to plan for any future modifications or repairs. Whether you want to add additional plumbing fixtures or upgrade your existing plumbing system, having a clear understanding of the initial plumbing installation can streamline the process and save you time and money.
6. Maintenance and Troubleshooting: Knowing the layout of the rough-in plumbing in your basement can assist with maintenance and troubleshooting. If you experience any plumbing issues, being aware of the location of the pipes and drains can help you diagnose and resolve the problem more efficiently. It also allows you to perform regular maintenance tasks, such as clearing clogs or inspecting pipes for leaks.
Overall, identifying rough-in plumbing in the basement is essential for efficient planning, cost savings, and maintaining a functional and reliable plumbing system. By understanding the layout and connections, you can ensure successful renovations, avoid potential mishaps, and enjoy a well-designed basement space.
Steps to Identify Rough-In Plumbing in Basement
Identifying rough-in plumbing in the basement requires a systematic approach to ensure accuracy. Here are the steps you can follow:
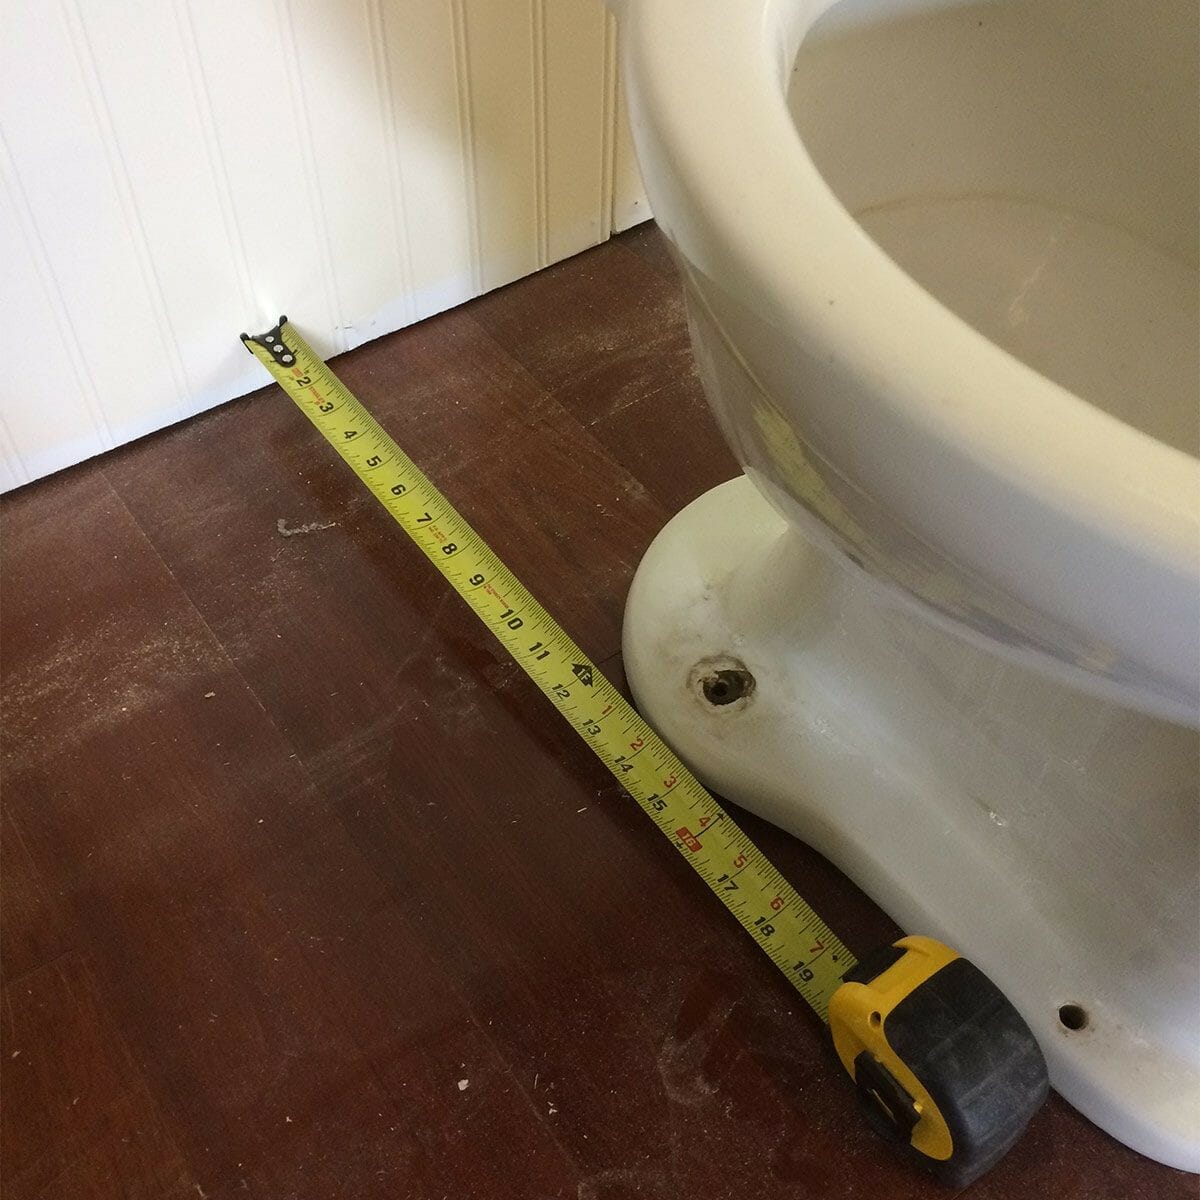
- Visual Inspection: Start by visually inspecting your basement. Look for any exposed pipes, drains, or cleanouts. These are often found near the floor, walls, or ceiling. Take note of their locations and trace them to identify their connections and routes through the basement.
- Check Blueprints or Building Plans: If you have access to the blueprints or building plans of your home, review them to locate the rough-in plumbing. These documents often indicate the placement and size of the plumbing lines. Pay attention to any symbols or labels that represent the pipes, such as “P” for plumbing or “DW” for dishwasher.
- Seek Professional Help: If you are uncertain or unable to locate the rough-in plumbing yourself, consider hiring a professional plumber or contractor with experience in basement plumbing. They have the expertise and tools to accurately identify the plumbing lines and provide valuable insights for your project.
- Use a Plumbing Locator Device: A plumbing locator device, such as an electronic pipe locator, can be beneficial in finding hidden or buried plumbing lines. These devices use electromagnetic signals or ground-penetrating radar to detect the presence and location of the pipes beneath the basement floor. Consult a professional or rent the equipment if needed.
- Consult Building Codes: Familiarize yourself with the local building codes and regulations regarding plumbing installations. This information can give you a general idea of where the rough-in plumbing is typically placed in basements. Building codes may vary, so be sure to follow the guidelines specific to your area.
- Ask Previous Homeowner or Builder: If you have recently purchased the house or have access to information about the previous homeowners or builders, reach out to them. They may have valuable knowledge about the rough-in plumbing in the basement, including the types of pipes used and their locations.
By following these steps, you can gain a clear understanding of the rough-in plumbing in your basement. Remember to take accurate measurements and mark the locations to assist you during the planning and construction process. This knowledge will enable you to make informed decisions and ensure successful plumbing installations in your basement.
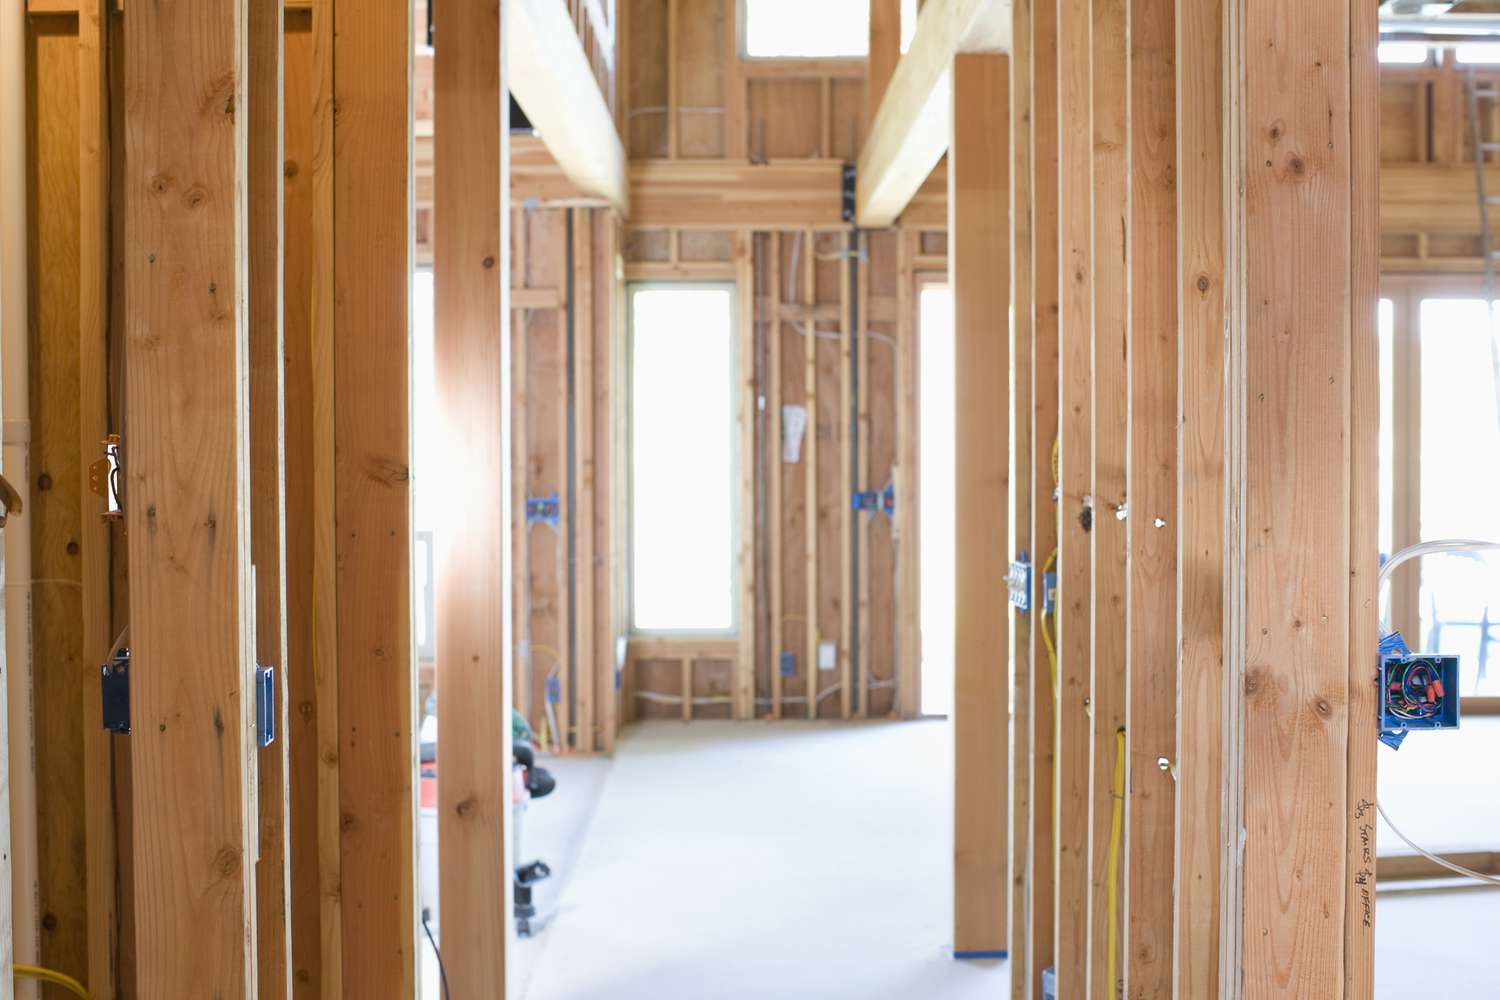
Visual Inspection
Visual inspection is an essential step in identifying rough-in plumbing in the basement. By carefully examining the visible areas of your basement, you can gather valuable information about the location and layout of the plumbing lines. Here’s how to conduct a thorough visual inspection:
- Look for Exposed Pipes: Start by scanning the basement for any exposed pipes. These pipes are usually located near the walls, floors, or ceilings. Look for pipes that lead to fixtures like sinks, toilets, and showers. Note the positions and paths of these pipes.
- Check for Drains and Cleanouts: Look for floor drains and cleanouts, which are access points to the sewer or drainage system. These are commonly found in basements, especially near washing machines, utility sinks, or floor drains. Take note of their positions as they can indicate the presence of connecting plumbing lines.
- Observe Plumbing Vent Pipes: Plumbing vent pipes are vertical pipes that extend through the roof to allow sewer gases to escape. In basements, you may find vent pipes protruding through the ceiling or walls. These pipes can help you trace the path of the plumbing lines and identify their connections.
- Inspect Utility Room or Mechanical Room: If your basement has a dedicated utility room or mechanical room, explore this area thoroughly. Check for water heaters, boilers, or other plumbing-related equipment. The presence of these appliances can give you clues about the plumbing lines leading to and from them.
- Trace Water Supply Lines: Follow the visible water supply lines to determine where they originate. They typically connect to the main water supply line coming into the house. By tracing these lines, you can get an idea of where the rough-in plumbing is located.
- Mentally Map the Plumbing Configuration: As you visually inspect the basement, mentally map out the plumbing configuration. Note the relationships between different fixtures, pipes, and drains. This will help you understand how the plumbing system is interconnected and aid in identifying the rough-in plumbing.
During the visual inspection, it’s essential to pay attention to any changes in pipe size or location. These changes can indicate the transition from rough-in plumbing to the plumbing that serves fixtures in the basement. Keep a record of your observations and take measurements if necessary.
While visual inspection can provide valuable insights, it may not uncover all the details about the rough-in plumbing. In some cases, the pipes may be hidden behind walls, in the basement ceiling, or beneath the floor. If you encounter any challenges or need more precise information, consider consulting a professional plumber or using specialized equipment to locate hidden plumbing lines.
By conducting a thorough visual inspection, you can gain a good understanding of the rough-in plumbing in your basement. This knowledge will prove invaluable as you plan your basement renovation or remodeling project and ensure an efficient and successful plumbing installation.
Look for exposed pipes and drains in the basement, typically near the floor and walls. These are likely the rough-in plumbing for future fixtures.
Check Blueprints or Building Plans
Checking the blueprints or building plans of your home is a valuable step in identifying rough-in plumbing in the basement. These documents provide a detailed layout of the plumbing system, showing the placement and configuration of the pipes, drains, and fixtures. Here’s how to effectively utilize blueprints or building plans:
- Locate the Blueprints: If you have access to the blueprints or building plans of your home, gather them for reference. These documents are typically provided by the builder or architect and provide a visual representation of the plumbing system.
- Identify the Plumbing Symbols: Familiarize yourself with the plumbing symbols used in the blueprints. These symbols represent different plumbing fixtures, pipes, and drains. Common symbols include “P” for plumbing, “WC” for toilet, “LAV” for lavatory (sink), and “SHWR” for shower.
- Review the Basement Floor Plan: Focus on the basement floor plan in the blueprints. This plan provides an overhead view of the basement layout and outlines the location of walls, rooms, and plumbing lines. Look for labeled symbols or lines indicating the rough-in plumbing.
- Check Sections and Elevations: In addition to the floor plan, examine the sections and elevations in the blueprints. These sections provide a cross-sectional view of the basement, showing the vertical placement of the plumbing lines, such as those hidden within the walls or beneath the floor.
- Note the Pipe Sizes and Routes: Pay attention to the labels and dimensions in the blueprints. These details provide information about the size and routing of the plumbing pipes. Note the sizes of the pipes and their connections to other fixtures or main lines.
- Consult the Plumbing Legend: The blueprints often include a plumbing legend or key that explains the symbols and abbreviations used in the plans. Refer to this legend to ensure you correctly interpret the plumbing symbols and understand their meanings.
If you don’t have the original blueprints or building plans, you may be able to obtain them from the local building department or contact the builder or architect who worked on your home. Some plans may also be available digitally through online resources or home improvement platforms.
Keep in mind that blueprints or building plans may not always provide precise details about the current condition of the plumbing in your basement. Over time, modifications or renovations may have altered the original plumbing configuration. Nevertheless, the blueprints serve as a valuable starting point for identifying the rough-in plumbing and gaining insight into the initial plumbing design of your basement.
By carefully reviewing the blueprints or building plans, you can gather important information about the rough-in plumbing in your basement. This knowledge will assist you in planning your basement renovation and ensure that any additions or modifications align with the existing plumbing system.
Read more: How To Rough In Plumbing For Slab
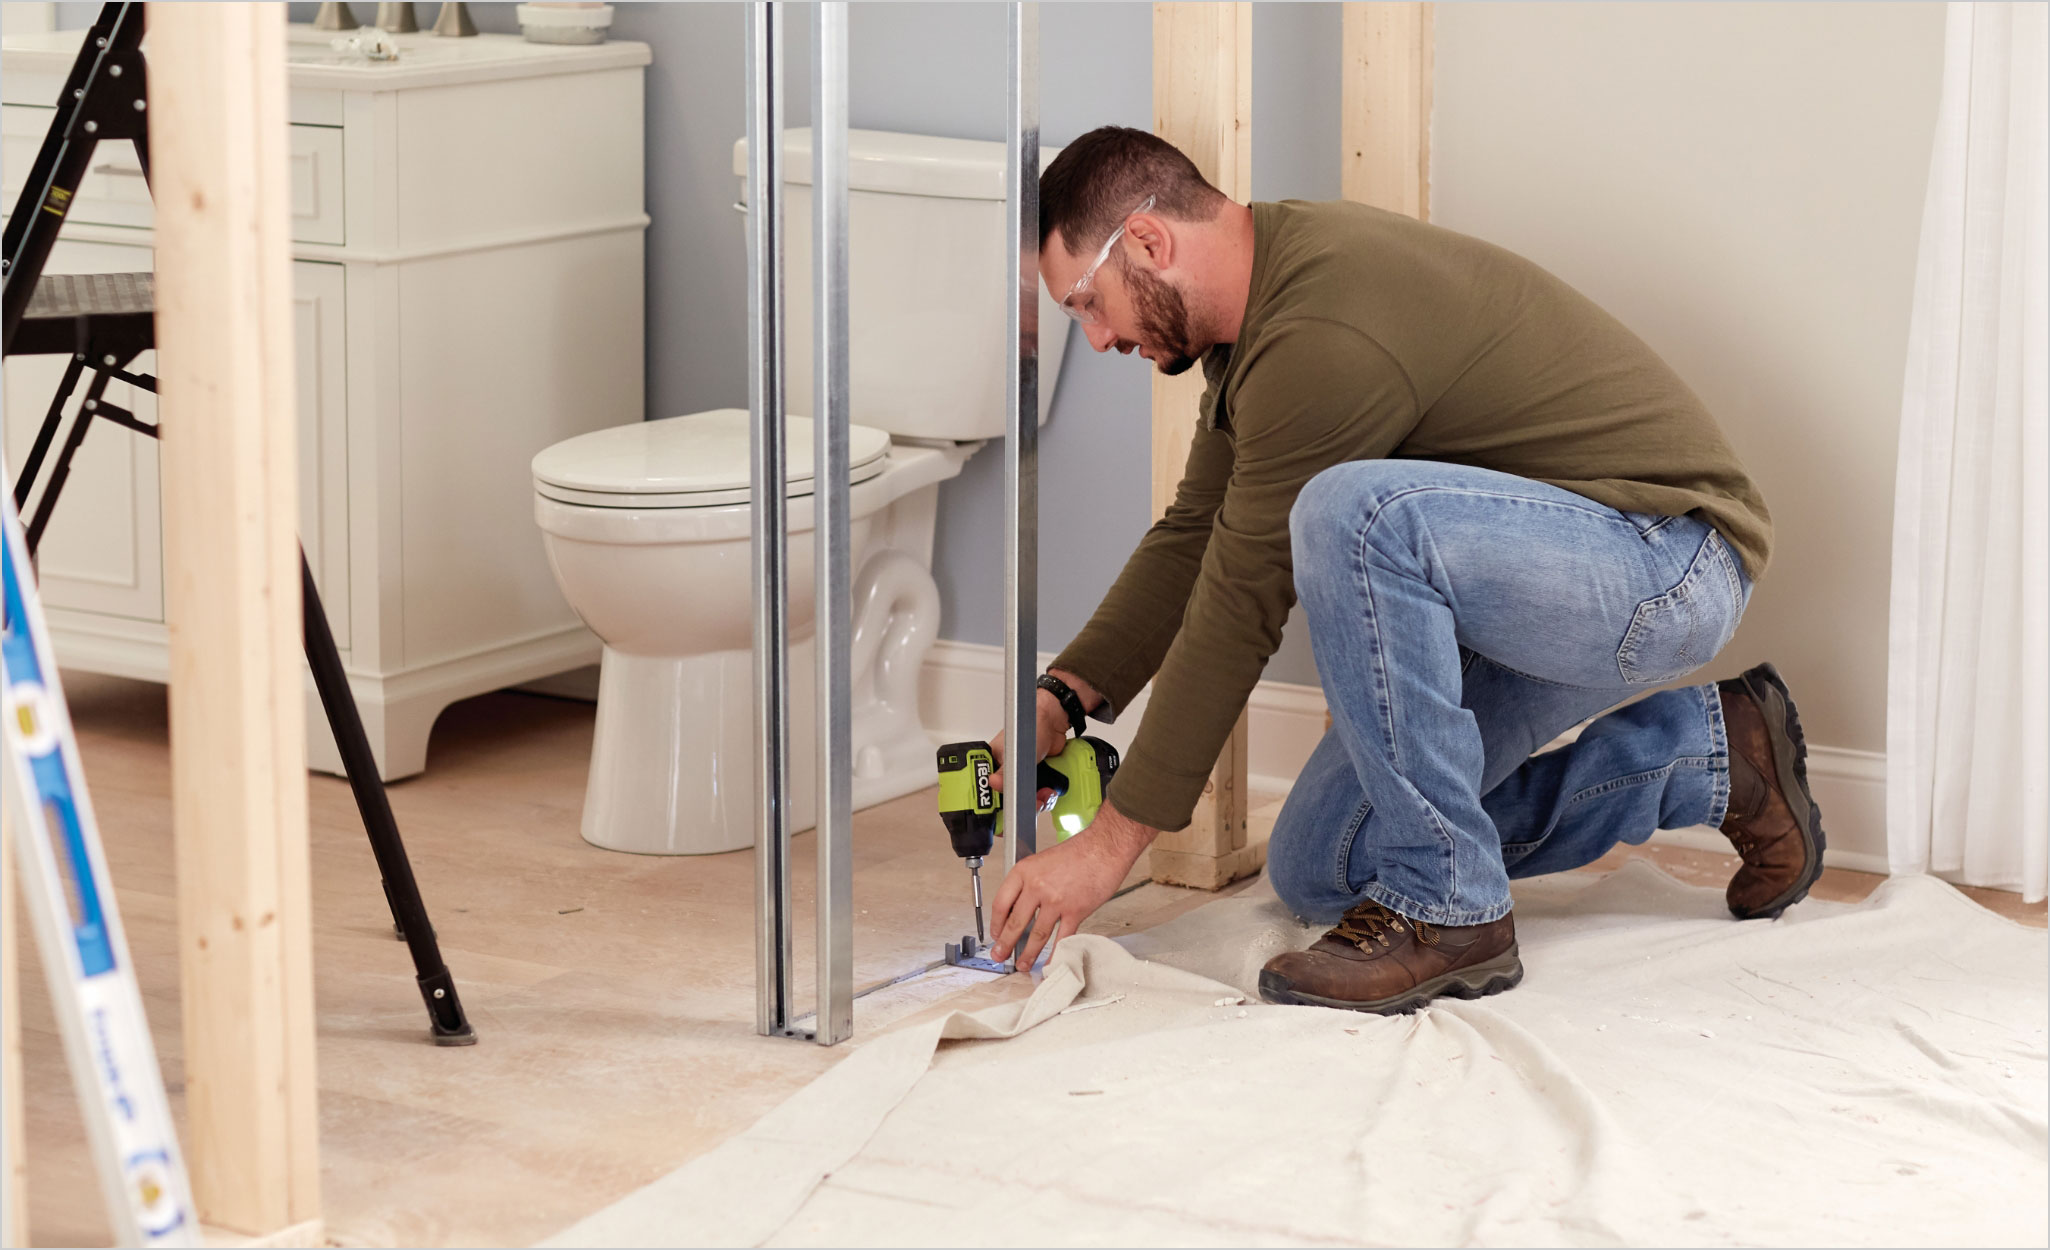
Seek Professional Help
When it comes to identifying rough-in plumbing in the basement, seeking professional help can provide valuable expertise and ensure accurate results. Professional plumbers or contractors with experience in basement plumbing can offer insights and guidance that may be challenging to obtain on your own. Here’s why you should consider seeking professional help:
- Expert Knowledge and Experience: Professional plumbers have in-depth knowledge and experience in identifying plumbing systems. They are familiar with different plumbing configurations and can quickly assess the layout of the rough-in plumbing in your basement. Their expertise allows them to accurately locate pipes, drains, and connections.
- Specialized Equipment: Professionals have access to specialized equipment that can aid in locating hidden or buried plumbing lines. Equipment like electronic pipe locators or ground-penetrating radar can provide precise information about the location and depth of the pipes beneath the basement floor. This technology helps ensure accurate identification of the rough-in plumbing.
- Preventing Costly Mistakes: Hiring a professional can help you avoid costly mistakes during your basement renovation. They can help you identify potential issues or complications that may arise when connecting new fixtures or modifying the existing plumbing. Their knowledge can save you time, money, and frustration in the long run.
- Compliance with Building Codes: Professionals are well-versed in local building codes and regulations regarding plumbing installations. They can ensure that the rough-in plumbing in your basement meets the required standards. Compliance with building codes is crucial to avoid potential legal and safety issues down the line.
- Mitigating Risks: Identifying rough-in plumbing in the basement may involve certain risks, such as damaging existing pipes or disrupting the structural integrity of the basement. Professional plumbers have the skills and expertise to handle these situations safely and effectively, reducing the risks associated with DIY identification attempts.
- Efficiency and Time Savings: Professionals can complete the task of identifying rough-in plumbing efficiently and accurately. Their experience allows them to work faster and more effectively than someone without specialized knowledge. By hiring a professional, you can save time and focus on other aspects of your basement renovation project.
To find a reliable professional plumber or contractor, seek recommendations from friends, family, or neighbors who have undertaken similar projects. You can also consult online directories or platforms that offer verified reviews and ratings of plumbing professionals in your area. Make sure to interview potential candidates to ensure they have experience with basement plumbing and are properly licensed and insured.
While seeking professional help may entail an additional cost, the expertise, peace of mind, and accurate results you gain outweigh the investment. By engaging a professional, you can confidently move forward with your basement renovation, knowing that the rough-in plumbing is correctly identified and ready for any modifications or additions you have planned.
Conclusion
Identifying rough-in plumbing in the basement is a crucial step in any basement renovation or remodeling project. By understanding the layout and configuration of the plumbing system, you can effectively plan the use of space, avoid costly mistakes, and ensure a functional and reliable plumbing system in your basement.
In this article, we have explored the importance of identifying rough-in plumbing and provided you with several methods to achieve this. We discussed the significance of planning the layout, adding functional spaces, preventing mistakes, and enabling future modifications and repairs. By identifying the rough-in plumbing, you can maintain proper drainage, troubleshoot issues, and save time and money on future plumbing projects.
We discussed the steps involved in identifying the rough-in plumbing, such as visual inspection, checking blueprints or building plans, seeking professional help, using plumbing locator devices, consulting building codes, and reaching out to previous homeowners or builders. Each step plays a significant role in gaining insight into the plumbing system in your basement.
Visual inspection allows you to physically locate exposed pipes, drains, and cleanouts, providing initial information about the rough-in plumbing. Checking blueprints or building plans offers a detailed overview of the plumbing system, including the placement and configuration of pipes, drains, and fixtures. Seeking professional help ensures accurate identification with expert knowledge, specialized equipment, and compliance with building codes.
In conclusion, identifying rough-in plumbing in the basement is a crucial aspect of any basement renovation or remodeling project. It provides a solid foundation for effective planning, prevents costly mistakes, and allows for future modifications and repairs. By following the steps outlined in this article and utilizing the available resources, you can successfully identify the rough-in plumbing in your basement and create a functional and well-designed space.
Frequently Asked Questions about How To Identify Rough-In Plumbing In Basement
Was this page helpful?
At Storables.com, we guarantee accurate and reliable information. Our content, validated by Expert Board Contributors, is crafted following stringent Editorial Policies. We're committed to providing you with well-researched, expert-backed insights for all your informational needs.


0 thoughts on “How To Identify Rough-In Plumbing In Basement”