
Articles
How To Do Pex Plumbing
Modified: August 27, 2024
Learn how to do PEX plumbing with these informative articles. Find step-by-step guides, tips, and tricks to successfully complete your PEX plumbing projects.
(Many of the links in this article redirect to a specific reviewed product. Your purchase of these products through affiliate links helps to generate commission for Storables.com, at no extra cost. Learn more)
Introduction
Welcome to the world of Pex plumbing! If you’re planning a plumbing project and wondering what options you have, Pex plumbing is definitely worth considering. Pex, which stands for cross-linked polyethylene, is a flexible and durable piping material that has become increasingly popular in residential and commercial plumbing applications. In this article, we will explore the basics of Pex plumbing and guide you through the process of installing a Pex plumbing system.
Pex plumbing offers several advantages over traditional plumbing materials like copper or PVC. First and foremost, it is highly flexible, allowing for easy installation even in tight spaces. Pex is available in various lengths and can be bent to navigate around obstacles, reducing the need for excessive fittings and joints. The flexibility of Pex plumbing also means that it is less prone to freezing and bursting, making it an excellent choice for colder climates.
Another advantage of Pex plumbing is its resistance to corrosion and scale build-up. Unlike copper pipes that can corrode over time, Pex pipes are unaffected by minerals and chemicals present in water. This not only ensures cleaner water but also extends the lifespan of the plumbing system. Additionally, Pex plumbing is quieter compared to metal pipes, as it reduces the noise caused by water flow and expands and contracts with temperature changes.
Now that we understand the benefits of Pex plumbing, let’s dive into the tools and materials you’ll need to get started on your Pex plumbing project. Having the right equipment and supplies is essential to ensure a successful installation and long-lasting plumbing system.
Key Takeaways:
- Pex plumbing offers flexibility, durability, and resistance to corrosion, making it an excellent choice for DIY enthusiasts and professionals. Proper planning, precise cutting, and secure connections are essential for a successful installation.
- Troubleshooting common Pex plumbing issues, such as leaks and reduced water flow, can be addressed with simple yet effective solutions. Consulting a professional plumber for guidance ensures the longevity and performance of your Pex plumbing system.
Read more: Why Is Pex Plumbing Bad
Understanding Pex Plumbing
Pex plumbing is a modern alternative to traditional plumbing materials like copper or PVC. It is made from cross-linked polyethylene, a flexible and durable material that is suitable for both hot and cold water applications. Pex plumbing can be used for various plumbing systems, including supply lines, radiant floor heating, and even potable water distribution.
One of the key features of Pex plumbing is its flexibility. Pex pipes can be easily bent and curved to fit around obstacles, reducing the need for extensive fittings and joints. This flexibility also makes Pex plumbing highly resistant to freezing and bursting, which is especially beneficial in colder regions.
Pex pipes come in different colors to distinguish between hot and cold water lines. Red pipes are typically used for hot water, while blue pipes are used for cold water. This color-coding makes it easier to identify and differentiate the two systems during installation and maintenance.
When it comes to connecting Pex pipes, there are two primary methods: crimp fittings and push-to-connect fittings. Crimp fittings require the use of a crimping tool to secure the fittings to the pipe. Push-to-connect fittings, on the other hand, can be connected by simply inserting the pipe into the fitting, eliminating the need for any special tools.
Pex plumbing provides excellent durability and resistance to corrosion. Unlike copper pipes, which may corrode over time and develop leaks, Pex pipes are immune to corrosive elements commonly found in water, ensuring a longer lifespan for your plumbing system. The smooth interior of Pex pipes also helps to resist scale build-up, maintaining optimal water flow and reducing the risk of clogs.
Pex plumbing systems are also relatively easy to install, even for DIY enthusiasts. With proper preparation, cutting, and measuring, as well as the right tools and fittings, you can successfully install a Pex plumbing system in your home or commercial building.
In the next sections, we will discuss the tools and materials needed for a Pex plumbing project and guide you through the step-by-step installation process.
Tools and Materials Needed
Before you embark on your Pex plumbing project, it’s essential to gather all the necessary tools and materials. Having the right equipment ensures a smooth installation process and helps achieve professional-quality results. Here are the tools and materials you’ll need:
Tools:
- Pex Tubing Cutter: This specialized tool is designed to make clean and precise cuts on Pex pipes. Look for a cutter that is compatible with the diameter of your Pex tubing.
- Crimping Tool: If you’re using crimp fittings to connect your Pex pipes, a crimping tool is essential. This tool compresses the copper rings around the pipe and fitting to create a secure connection.
- Expansion Tool: For installations using expansion fittings, an expansion tool is required. This tool expands the Pex pipe and allows the fitting to slide onto the expanded section for a snug fit.
- Deburring Tool: To ensure clean and smooth pipe ends, a deburring tool is necessary. This tool is used to remove any rough edges or burrs that may interfere with proper fitting connections.
- Pipe Support: Depending on the specific installation requirements, you may need pipe support brackets or straps to secure the Pex pipes in place.
- Torch and Heat Shield: If you’ll be making soldered connections to copper pipes, a torch and heat shield are necessary for soldering the joints.
- Tape Measure: A tape measure is essential for accurately measuring and cutting the Pex pipes to the required length.
- Pipe Reamer: This tool is used to expand the inner diameter of the Pex pipe, facilitating the insertion of fittings.
- Adjustable Wrench: An adjustable wrench is handy for tightening and adjusting fittings.
- Marker or Pencil: Use a marker or pencil to mark the measurements and cut lines on the Pex pipe.
Materials:
- Pex Tubing: The main component of your Pex plumbing system, Pex tubing is available in various sizes and types, such as Pex-A, Pex-B, and Pex-C. Choose the type and size suitable for your specific application.
- Pex Fittings: Depending on your project needs, you’ll need a variety of Pex fittings, such as elbows, tees, couplings, and valves. Make sure the fittings are compatible with the type of Pex tubing you’re using.
- Crimp Rings or Expansion Rings: If you’re using crimp or expansion fittings, you’ll need the corresponding rings. These rings secure the fittings to the Pex pipes.
- Support Brackets or Straps: To secure the Pex pipes in place, you may need support brackets or straps.
- Teflon Tape: If you’ll be making threaded connections, Teflon tape can help create a leak-free seal.
It’s important to ensure that all the tools and materials are of high quality and meet the required specifications. Having everything ready before starting the installation will save you time and prevent any unnecessary delays.
Now that you have a good grasp of the tools and materials needed, let’s move on to the preparation steps for your Pex plumbing project.
Read more: When Did Pex Plumbing Come Out
Preparation Steps
Proper preparation is key to a successful Pex plumbing installation. Before you start working on your project, it’s crucial to follow these preparation steps:
1. Plan and Design:
Begin by planning and designing your Pex plumbing system. Determine the layout of the pipes, including the location of fixtures, valves, and other connections. This step will help you estimate the amount of Pex tubing and fittings you’ll need. Take into consideration any building or plumbing codes that apply to your area.
2. Shut off the Water:
Prior to any plumbing work, shut off the main water supply to avoid accidents and leaks. Locate the shut-off valve and turn it clockwise until the water flow stops completely. Relieve any pressure in the system by opening faucets and drains.
3. Measure and Cut Pex Tubing:
Using a tape measure, determine the required length for each section of Pex tubing. Make accurate marks on the tubing with a marker or pencil. Use a Pex tubing cutter to make clean, straight cuts at the marked locations.
Read more: How To Insulate PEX Pipe In An Attic
4. Clean the Pex Ends:
After cutting the Pex tubing, use a deburring tool to remove any rough edges or burrs from the cut ends. This ensures a smooth connection with the fittings and prevents leaks.
5. Prepare Fittings:
If you’re using crimp fittings, slide a crimp ring onto the end of the Pex tubing. Insert the fitting into the tubing until it reaches the mark. Position the crimp ring about 1/8 inch from the end of the Pex tubing, then use a crimping tool to compress the ring onto the tubing securely. For expansion fittings, simply slide the fitting onto the expanded end of the Pex tubing and ensure a snug fit.
6. Support the Pex Tubing:
Depending on the installation requirements, use support brackets or straps to secure the Pex tubing in place. This will prevent any sagging or movement once the system is in use.
7. Check for Leaks:
Before turning on the water supply, visually inspect all connections to ensure they are tight and properly sealed. If using crimp fittings, you may also want to perform a pressure test to check for any leaks. Close all the faucets and valves, then turn on the water supply and monitor the system for leaks or drips.
Following these preparation steps will lay a solid foundation for your Pex plumbing installation. Once you’ve completed these tasks, you’re ready to move on to cutting and measuring the Pex tubing.
Read more: How To Do Clawfoot Tub Plumbing
Cutting and Measuring Pex Tubing
Accurate cutting and measuring of Pex tubing is essential for a precise and efficient plumbing installation. Follow these steps to cut and measure Pex tubing:
1. Measure the Required Length:
Using a tape measure, measure the distance between the fittings or connection points where the Pex tubing will be installed. Make sure to account for any turns or bends in the tubing. Add a few extra inches to the measured length to allow for adjustments and ensure proper fitting connections.
2. Mark the Tubing:
Once you have determined the required length of the Pex tubing, mark it using a marker or pencil. Make a straight and visible mark on the tubing that will guide you during the cutting process. Ensure that the mark is perpendicular to the length of the tubing for an accurate cut.
3. Secure the Tubing:
Hold the marked section of the Pex tubing securely in place. Use one hand to steady the tubing, while the other hand operates the cutting tool. This will provide stability and prevent the tubing from moving or twisting during the cutting process.
Read more: How Do I Get Into Plumbing
4. Use a Pex Tubing Cutter:
With the Pex tubing held firmly, align the cutting tool with the marked line on the tubing. Position the tool perpendicular to the tubing for a clean and straight cut. Squeeze the handles of the cutter firmly and rotate it around the tubing in a smooth motion. Maintain steady pressure to ensure a clean and precise cut.
5. Inspect the Cut End:
After completing the cut, inspect the end of the Pex tubing to ensure a clean and undamaged cut. Use a deburring tool to remove any rough edges or burrs that may interfere with fitting connections. Slide the deburring tool around the cut end in a circular motion to smooth out any imperfections.
6. Repeat for Multiple Cuts:
If you need to make multiple cuts on the Pex tubing, repeat the above steps for each section. Take care to measure, mark, and cut accurately, ensuring that all the cuts are consistent and properly aligned.
Remember, precision is key when cutting and measuring Pex tubing. Taking the time to make accurate cuts will result in a professional-looking installation and ensure secure and leak-free connections. Once you have cut and measured the Pex tubing, you can proceed to connect the tubing with fittings using the appropriate method.
Connecting Pex Tubing with Fittings
Connecting Pex tubing with fittings is a crucial step in your plumbing project and requires careful attention to ensure secure and leak-free connections. There are two primary methods for connecting Pex tubing with fittings: crimp fittings and push-to-connect fittings. Let’s explore each method in detail.
Read more: How To Insulate PEX Pipes In A Crawl Space
Crimp Fittings:
If you’re using crimp fittings, follow these steps to connect Pex tubing:
1. Slide the Crimp Ring:
Slide a crimp ring onto the end of the Pex tubing. Ensure that the crimp ring is positioned about 1/8 inch from the end of the tubing. This spacing provides enough room for the fitting to slide onto the tubing without interfering with the crimp ring.
2. Insert the Fitting:
Insert the fitting into the marked end of the Pex tubing until it reaches the mark or stop point. Make sure the fitting is fully inserted and seated securely within the tubing.
3. Position the Crimp Ring:
While holding the fitting in place, slide the crimp ring toward the fitting until it is positioned about 1/8 inch from the end of the Pex tubing. Ensure that the crimp ring is centered and aligned properly for an even crimp.
4. Crimp the Ring:
Using a crimping tool, position it over the crimp ring and squeeze the handles firmly. The tool will compress the crimp ring onto the Pex tubing and fitting, creating a secure and watertight connection. Repeat this step for each crimp fitting in your plumbing system.
Push-to-Connect Fittings:
If you’re using push-to-connect fittings, the process is simpler:
1. Ream the Pex Tubing:
Use a pipe reamer to expand the inner diameter of the Pex tubing. This step allows for easier insertion of the fitting into the tubing.
2. Insert the Fitting:
Insert the fitting into the reamed end of the Pex tubing. Ensure that the fitting is fully inserted and seated securely within the tubing. Push the fitting until it reaches the mark or stop point on the tubing.
3. Check for Proper Connection:
Ensure that the fitting is securely connected to the Pex tubing. Give it a gentle tug to verify that it is properly seated and will not disconnect during use. Push the tubing and fitting assembly into the desired position.
Regardless of the method you choose, it’s important to use the appropriate fittings designed for Pex tubing. This ensures compatibility and a reliable connection. Make sure to follow the manufacturer’s instructions and guidelines for the specific fittings you’re using. It’s also recommended to perform a pressure test on the connections before closing up walls or covering the plumbing system to check for any leaks.
With the Pex tubing connected to the fittings, the next step is to install the Pex plumbing system in your home or commercial building. We will cover the installation process in the next section.
Installing Pex Plumbing Systems
Installing a Pex plumbing system requires careful planning and execution to ensure a reliable and efficient plumbing system. The following steps will guide you through the installation process:
1. Determine the Route:
Decide on the route for your Pex plumbing system, considering factors such as accessibility, pipe support, and minimizing the number of fittings or connections. This will help optimize the flow and efficiency of your plumbing system.
Read more: How To Install Pex Pipe To Bathroom Sink
2. Secure the Tubing:
Use support brackets or straps to secure the Pex tubing in place. This prevents them from sagging or moving once the plumbing system is in use. Ensure that the supports are properly spaced to prevent stress or strain on the tubing.
3. Connect the Shut-off Valves:
Install shut-off valves at appropriate locations, such as near fixtures or appliances. These valves allow individual sections of your plumbing system to be shut off without affecting the rest of the system. Ensure the valves are easily accessible for maintenance and repairs.
4. Connect to the Water Supply:
If you are connecting to an existing water supply line, use a transition fitting to connect the Pex tubing to the main water supply. Depending on the type of fitting, follow the manufacturer’s instructions to ensure a secure connection.
5. Branch off to Fixtures:
Using tees or branching fittings, extend the Pex tubing to connect to fixtures such as sinks, toilets, showers, or appliances. Use the appropriate fittings for each connection, whether it’s a crimp fitting or a push-to-connect fitting. Ensure that all connections are properly secured and leak-free.
Read more: How Do You Install Shower Plumbing
6. Install Pressure Regulators and Water Hammer Arrestors (if needed):
Depending on your plumbing system requirements, consider installing pressure regulators to maintain optimal water pressure and water hammer arrestors to prevent pipe damage caused by sudden pressure surges. These additional components can help prolong the lifespan of your plumbing system.
7. Insulate Exposed Pex Tubing (if needed):
If any part of your Pex plumbing system is located in unconditioned areas, such as crawl spaces or exterior walls, consider insulating the exposed tubing. This will help prevent freezing and ensure the longevity of your plumbing system.
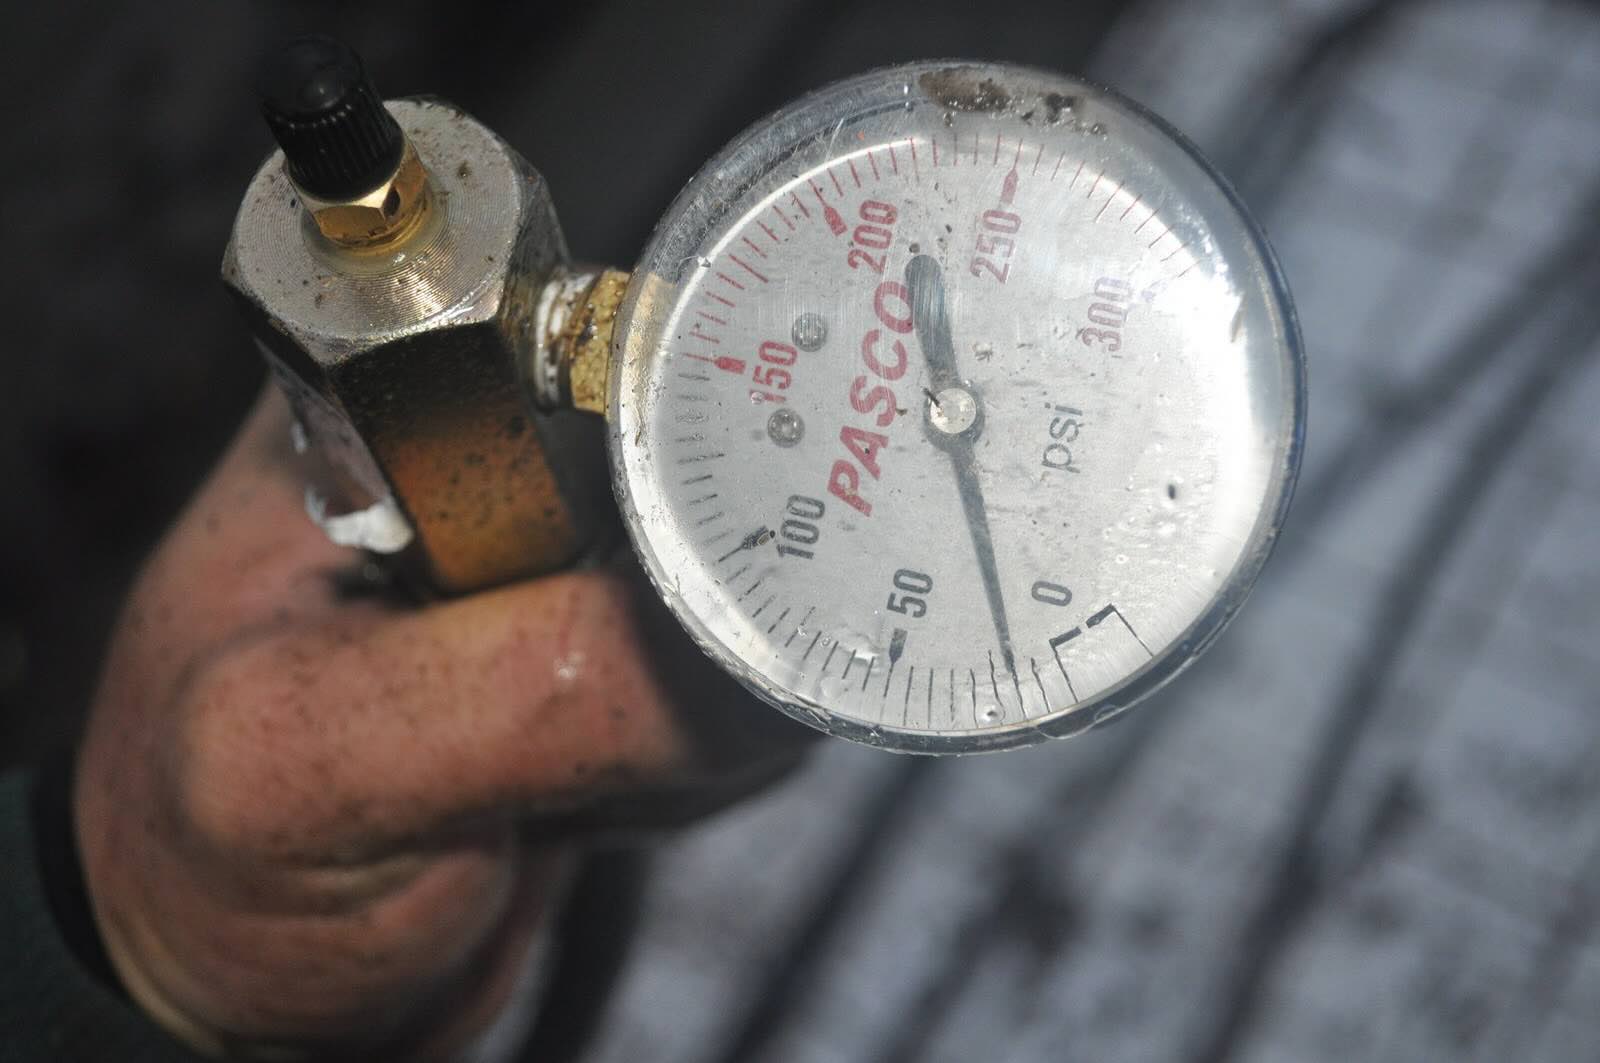
8. Pressure Test and Inspect:
Before closing up walls or covering the plumbing system, it’s crucial to perform a pressure test. Close all the shut-off valves and connect a pressure gauge to the system. Pressurize the system to the recommended pressure and monitor it for any drops indicating leaks. Inspect all connections for leaks and make any necessary adjustments.
By following these steps, you can confidently install your Pex plumbing system. However, it’s important to consult local building codes and regulations and, if necessary, seek professional assistance to ensure compliance and safety.
With your Pex plumbing system successfully installed and pressure-tested, you can move on to troubleshooting any potential issues that may arise. We will explore some common troubleshooting tips in the next section.
Pressure Testing and Inspecting Connections
Pressure testing and inspecting the connections of your Pex plumbing system are crucial steps to ensure the integrity and reliability of your installation. Here’s a guide on how to perform pressure testing and inspect your connections:
Read more: Why Do They Call It A Plumb Bob
1. Gather the Required Equipment:
Before starting the pressure testing process, make sure you have the necessary equipment on hand. You will need a pressure gauge, a pressure regulator (if necessary), and plugs or caps to seal off open ends of the plumbing system.
2. Close All Shut-off Valves:
Make sure all shut-off valves in your Pex plumbing system are closed. This includes the main shut-off valve for the entire system, as well as individual shut-off valves for isolated sections.
3. Attach the Pressure Gauge:
Select a convenient access point in your plumbing system and attach the pressure gauge to it. This access point should allow you to monitor the pressure within the system. Most commonly, the pressure gauge is attached to a hose bib or a designated test port.
4. Pressurize the System:
Using a bicycle pump, compressor, or other suitable pressurizing device, slowly increase the pressure within the plumbing system. Be cautious not to exceed the maximum pressure rating specified for your Pex tubing and fittings. Refer to the manufacturer’s guidelines for the recommended test pressure.
Read more: How Do Home Inspectors Check Plumbing
5. Monitor Pressure Stability:
Once you have pressurized the system, monitor the pressure gauge for stability. It should remain steady without any noticeable drop for a designated period, typically around 15-30 minutes. If the pressure drops significantly during this time, it indicates the presence of a leak.
6. Inspect Connections:
While conducting the pressure test, visually inspect all connections in your Pex plumbing system. Pay close attention to fittings, joints, and any exposed connections. Look for signs of leakage, such as water drips or moisture around fittings. Additionally, check for any visible cracks or irregularities in the Pex tubing itself.
7. Address Leaks:
If you detect any leaks during the pressure test, it’s essential to address them promptly. Start by tightening any loose connections. If the leak persists, you may need to replace the fitting, adjust the crimp, or reinsert the tubing into the push-to-connect fitting. Remember to release the pressure before making any adjustments or repairs.
8. Repeat the Test if Needed:
If you make any adjustments or repairs to address leaks, repeat the pressure test to ensure that the system is now leak-free. It’s crucial to have all connections secure and watertight before proceeding with the final installation steps.
By conducting a proper pressure test and inspecting the connections, you can identify and address any potential issues before closing up walls or covering the plumbing system. This helps ensure a reliable and leak-free Pex plumbing installation.
Now that you’ve successfully pressure-tested and inspected your Pex plumbing system, you can proceed with confidence, knowing that your connections are secure and your system is ready for use. In the next section, we will explore some helpful troubleshooting tips for common Pex plumbing issues.
Read more: How Many Plumbing Vents Do You Need
Tips for Troubleshooting Pex Plumbing Issues
While Pex plumbing systems are known for their durability and reliability, occasional issues may arise. Here are some helpful tips for troubleshooting common Pex plumbing problems:
1. Leaks:
If you have identified a leak in your Pex plumbing system, start by ensuring that the fitting connections are tight. If a crimp connection is leaking, you may need to re-crimp the connection using a crimping tool. For push-to-connect fittings, make sure the tubing is fully inserted and seated securely. If necessary, replace the fitting with a new one. It’s important to address leaks promptly to prevent any water damage and maintain the integrity of your plumbing system.
2. Reduced Water Flow:
If you notice a decrease in water flow, it could be due to mineral build-up or debris in the Pex tubing or fixtures. Start by removing and cleaning any aerators or filters on faucets or showerheads. If the issue persists, consider flushing the plumbing system by disconnecting and flushing out individual sections of Pex tubing. It’s also a good idea to check the main water supply and any shut-off valves to ensure they are fully opened.
3. Noisy Pipes:
If you hear banging or knocking noises when using your Pex plumbing system, it may be due to water hammer. Water hammer occurs when water flow is suddenly halted or changes direction, causing pressure fluctuations. Installing water hammer arrestors at appropriate locations can help mitigate this issue. Additionally, reinforcing or securing the Pex tubing with support brackets or straps can reduce vibration and minimize noise.
4. Freezing Pipes:
In colder climates, frozen Pex pipes can be a concern. To prevent freezing, ensure that all Pex tubing is adequately insulated, especially in unconditioned areas such as crawl spaces or exterior walls. Insulating the pipes helps maintain the temperature and prevents them from freezing and potentially bursting. If you suspect frozen pipes, take immediate action by applying gentle heat to thaw the pipes, such as using a hairdryer or wrapping them with heat tape.
5. Inadequate Pressure:
If you’re experiencing low water pressure in your Pex plumbing system, start by checking the water pressure at the main water supply. If the pressure is low there, you may need to contact your water utility provider. If the issue is isolated to certain fixtures, check for any clogs or debris in the aerators or filters. Clean or replace them as needed. In some cases, a pressure regulator may be necessary to regulate and maintain optimal water pressure throughout your plumbing system.
Remember, if you encounter any plumbing issue that you’re unsure how to handle, it’s always wise to consult with a professional plumber. They can provide expert advice, identify the root cause of the problem, and recommend appropriate solutions.
By using these troubleshooting tips, you can address common Pex plumbing issues and maintain the performance and longevity of your plumbing system. Finally, let’s conclude our journey into the world of Pex plumbing.
Conclusion
Congratulations on completing this comprehensive guide to Pex plumbing! We have covered everything from understanding the basics of Pex plumbing to the tools and materials needed for installation, as well as the crucial steps of cutting and measuring Pex tubing, connecting it with fittings, and pressure testing the system. We also provided tips for troubleshooting common Pex plumbing issues.
Pex plumbing offers numerous advantages, including flexibility, durability, resistance to corrosion, and ease of installation. It has become a preferred choice for many homeowners and professionals alike. With the right knowledge and tools, you can confidently embark on your own Pex plumbing project.
Remember to plan and design your system carefully, ensuring proper measurement and cutting of Pex tubing. Connect the tubing with fittings using the appropriate method, whether it’s crimp fittings or push-to-connect fittings. Secure the tubing in place, inspect connections, and perform a thorough pressure test to confirm the integrity of your installation.
In the event of any issues, such as leaks, reduced water flow, or noisy pipes, use the troubleshooting tips provided to address the problem effectively. Don’t hesitate to seek professional help if needed, as they can offer valuable expertise and guidance.
By choosing Pex plumbing and following the steps outlined in this guide, you can have confidence in the durability and performance of your plumbing system. Enjoy the benefits of a reliable, efficient, and long-lasting Pex plumbing installation in your home or commercial space.
Thank you for joining us on this Pex plumbing journey, and we wish you success in your upcoming projects. Happy plumbing!
Frequently Asked Questions about How To Do Pex Plumbing
Was this page helpful?
At Storables.com, we guarantee accurate and reliable information. Our content, validated by Expert Board Contributors, is crafted following stringent Editorial Policies. We're committed to providing you with well-researched, expert-backed insights for all your informational needs.

0 thoughts on “How To Do Pex Plumbing”