Articles
How Do You Install Shower Plumbing
Modified: August 28, 2024
Learn how to install shower plumbing with our informative articles. Get expert tips and step-by-step instructions to ensure a successful installation.
(Many of the links in this article redirect to a specific reviewed product. Your purchase of these products through affiliate links helps to generate commission for Storables.com, at no extra cost. Learn more)
Introduction
Installing shower plumbing may seem like a daunting task, but with the right materials and a bit of guidance, you can easily accomplish this home improvement project. Whether you’re replacing old plumbing or installing a completely new shower, following the correct steps will ensure a successful installation and a functional shower. In this article, we will guide you through the process of installing shower plumbing, from gathering the necessary materials to adding the finishing touches.
Before you begin, it’s important to familiarize yourself with the basic components of shower plumbing. These include the shower head, shower faucet, hot and cold water supply lines, and drain pipe. Understanding how these elements work together will help you navigate the installation process more effectively.
Additionally, it is crucial to prioritize safety during any plumbing project. Be sure to turn off the water supply to avoid any accidents or damage. If you are uncertain about any aspect of the installation process, it is wise to consult a professional plumber.
Now that we’ve covered the necessary precautions, let’s dive into the steps involved in installing shower plumbing. Whether you’re a seasoned DIY enthusiast or a beginner, this guide will provide you with the knowledge and confidence you need to successfully complete your shower plumbing installation.
Key Takeaways:
- Installing shower plumbing requires gathering materials, shutting off the water supply, removing old fixtures, and carefully installing new components. Prioritize safety, follow instructions, and enjoy your newly functional shower space.
- Successful installation involves testing for leaks, adjusting water flow, adding finishing touches, and enjoying the fruits of your DIY labor. Remember to consult a professional if needed and take pride in your accomplishment!
Read more: How Do You Install A Shower Tile
Gathering Materials
Before you begin the installation process, it’s important to gather all the necessary materials. Having everything you need readily available will make the installation go much smoother. Here is a list of essential materials you will need:
- Shower kit or individual components (shower head, faucet, handles, etc.)
- Pipe wrench
- Teflon tape
- Plumber’s putty or silicone caulk
- PVC pipes and fittings
- Adjustable wrench
- Hacksaw or pipe cutter
- Measuring tape
- Screwdriver
- Plumber’s tape
- Bucket and towels
Make sure to choose high-quality materials that are suitable for your specific shower setup. Consider factors such as the type of shower head and faucet you prefer, as well as the type of plumbing system you have in your home.
It’s also a good idea to double-check your measurements and ensure that you have the correct pipe sizes and fittings. This will help prevent any issues during the installation process. Additionally, if you are unsure about the specific materials you need, consult a plumbing expert or refer to the manufacturer’s instructions.
Once you have gathered all the necessary materials, you are ready to proceed with the next steps in the installation process.
Shutting Off Water Supply
Before you begin any work on your shower plumbing, it is crucial to shut off the water supply to avoid any leaks or accidents. Here are the steps to safely shut off the water:
- Locate the main water shut-off valve in your home. This is usually found near the water meter or where the main water line enters your house.
- Turn the shut-off valve clockwise (right) to close it. This will fully shut off the water supply to your entire house.
- Once the main water supply is turned off, open a faucet or two in your house to drain out any remaining water in the pipes. This will help prevent any water from flowing when you disconnect the shower plumbing.
It’s important to note that shutting off the main water supply will cut off the water to your entire home, so plan your schedule accordingly. Make sure to inform everyone in the household about the water shutdown to avoid any inconveniences.
Remember, safety comes first. Always exercise caution when working with plumbing and water supply systems.
Once the main water supply is shut off, you can proceed to the next step of removing the old shower plumbing.
Removing Old Shower Plumbing
Before you can install new shower plumbing, you’ll need to remove the old plumbing fixtures. Here are the steps to effectively remove the old shower plumbing:
- Start by removing the shower head. Use a pipe wrench to grip the shower arm (the pipe that connects the shower head to the wall) and twist it counterclockwise to loosen and disconnect it.
- Next, remove the faucet handles and trim plates. Depending on the type of faucet you have, this may involve unscrewing them or removing a retaining nut using an adjustable wrench or screwdriver.
- If you have a tub spout, remove it using a pipe wrench or adjustable pliers. Twist it counterclockwise to unscrew and detach it from the wall pipe.
- Once the fixtures are removed, you can move on to disconnecting the supply lines. Using a wrench, carefully loosen the nuts that connect the hot and cold water supply lines to the faucet. Make sure to have a bucket and towels handy to catch any water that may drip or leak during this process.
- Lastly, depending on the configuration of your shower plumbing, you may need to remove any remaining pipes or fittings. Use a pipe cutter or hacksaw to carefully cut through and remove any PVC or copper pipes that are no longer needed.
When removing the old plumbing, be mindful of any caulking or putty that may be securing the fixtures to the wall. Use a putty knife or utility knife to carefully scrape away any excess caulk or putty before proceeding with the installation of the new plumbing.
With the old shower plumbing successfully removed, you are now ready to move on to the next step of installing the new shower plumbing.
When installing shower plumbing, make sure to properly measure and cut the pipes to the correct length before soldering them together. This will ensure a secure and leak-free connection.
Installing New Shower Plumbing
With the old shower plumbing removed, it’s time to install the new shower plumbing. Follow these steps for a successful installation:
- Start by installing any necessary support brackets or studs. These will provide stability and support for the plumbing fixtures. Follow manufacturer instructions and local building codes for specific requirements.
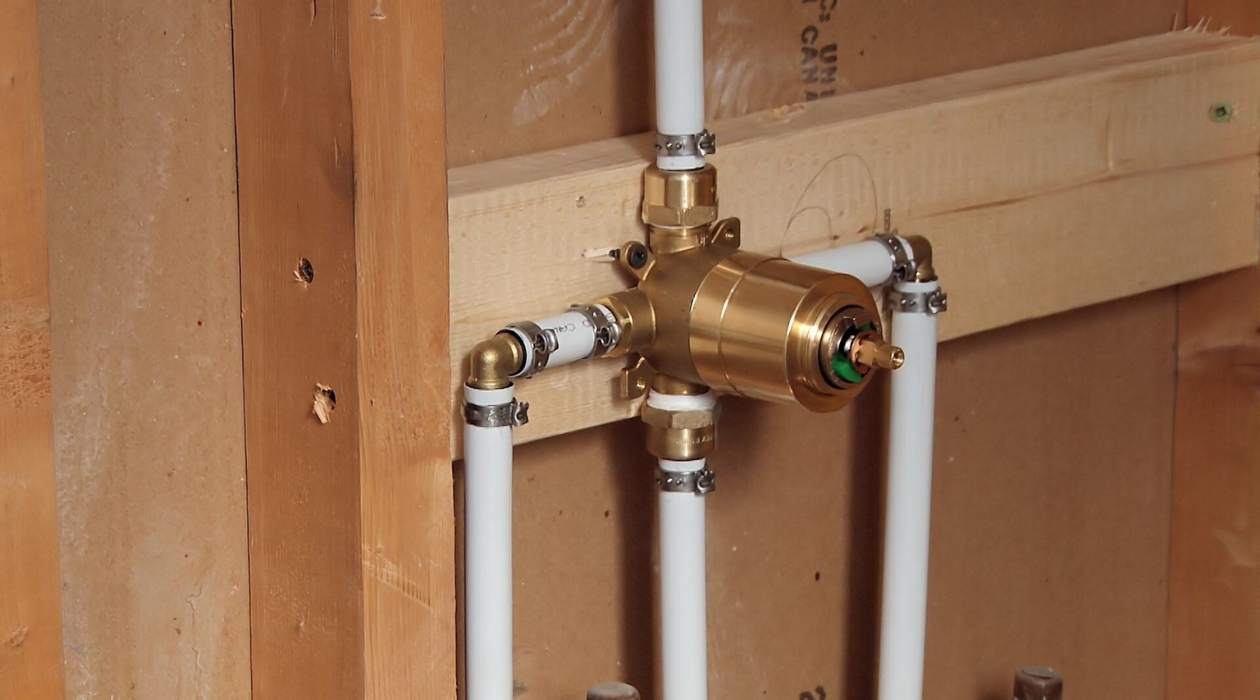
- Connect the new shower faucet to the hot and cold water supply lines using the appropriate fittings. Apply plumber’s tape to the threads of the fittings to ensure a tight, leak-free connection.
- If your shower’s plumbing requires the use of PVC pipes, measure, cut, and dry-fit the pipes with the appropriate fittings. Use a pipe cutter or hacksaw to make precise cuts. Make sure the pipes are properly aligned and connected with solvent cement or PVC primer and glue. Allow sufficient time for the cement or glue to dry according to the manufacturer’s instructions.
- If your shower plumbing uses copper pipes, prepare the pipes by cleaning the ends with emery cloth or a pipe cleaning brush. Apply flux paste to the cleaned ends and use a propane torch to solder the fittings in place. Ensure a proper connection and allow the soldered joints to cool and solidify before moving on to the next step.
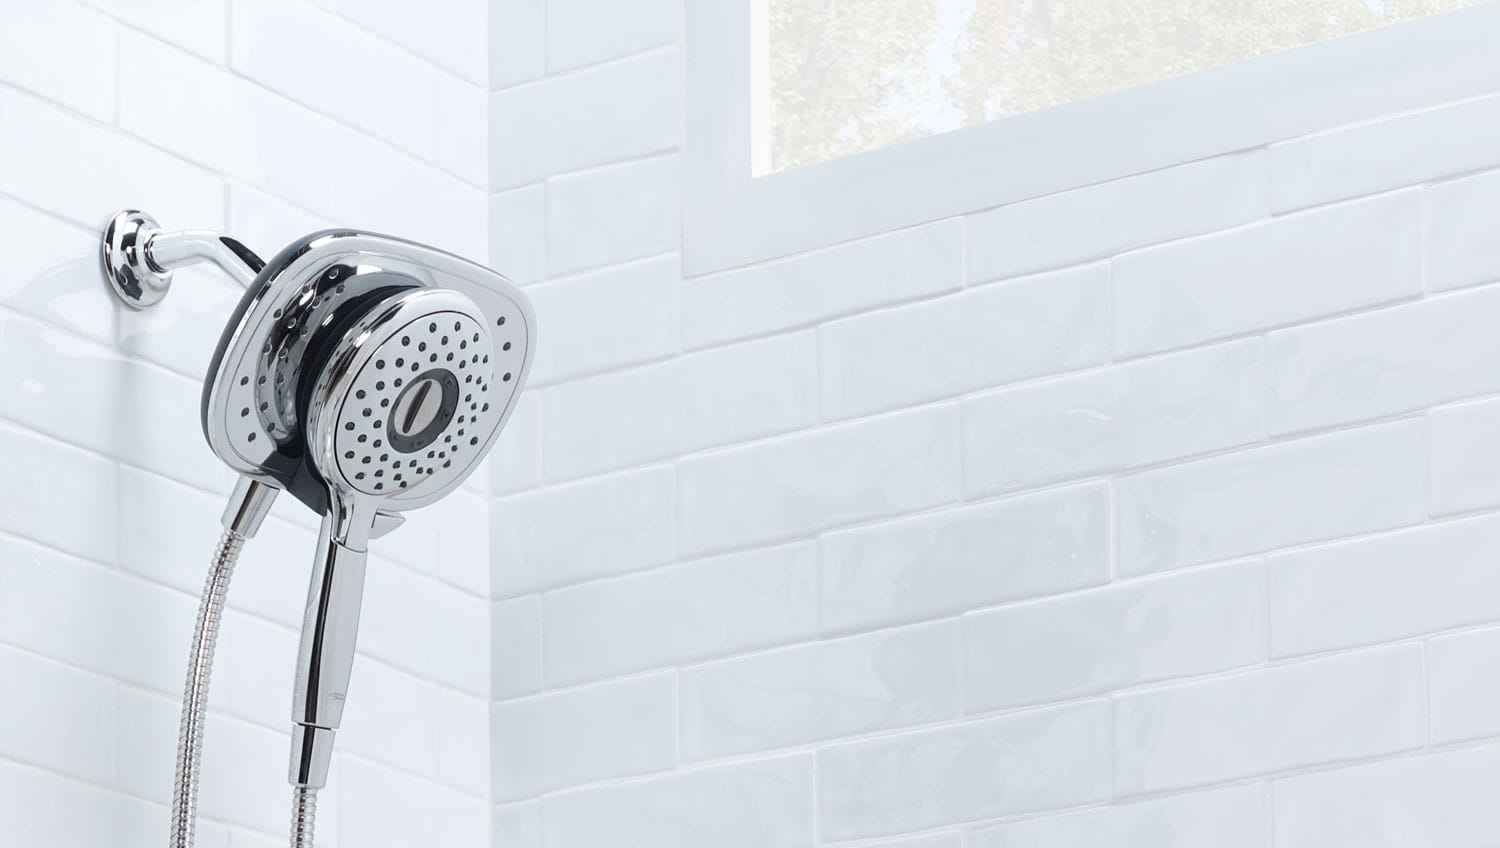
- Install the new shower head by screwing it onto the shower arm. Use plumber’s tape to create a watertight seal between the shower arm and the shower head.
- Attach the tub spout, if applicable, by screwing it onto the wall pipe. Use plumber’s tape to ensure a secure connection.
Throughout the installation process, regularly check for any leaks. Turn on the water supply to test the connections and inspect for any drips or leaks. Tighten any fittings as needed to ensure a secure and leak-free installation.
Note that the specific installation instructions may vary depending on the shower plumbing kit or components you are using. Always refer to the manufacturer’s instructions for accurate and detailed installation guidelines.
Once the new shower plumbing is successfully installed, you can move on to the next step of connecting the shower head and faucet.
Read more: How To Replace Shower Plumbing
Connecting Shower Head and Faucet
Connecting the shower head and faucet is a crucial step in completing the installation of your new shower plumbing. Follow these steps to ensure a secure and functional connection:
- Start by applying plumber’s tape to the threads of the shower arm and faucet connections. This will create a tight seal and prevent any leaks.
- Screw the shower head onto the shower arm in a clockwise direction until it is securely tightened. Use a cloth or pipe wrench to provide extra grip if necessary, being careful not to scratch the finishes.
- Next, connect the shower faucet handles and trim plates. Depending on the type of faucet you have, this may involve screwing them on or securing them with retaining nuts using an adjustable wrench or screwdriver.
- Once the faucet handles and trim plates are in place, turn on the water supply to test for any leaks. Allow the water to run for a few minutes and inspect the connections for any signs of dripping or leakage.
If you detect any leaks, carefully tighten the connections until the leaks stop. Be cautious not to overtighten and potentially damage the fixtures or pipes.
It’s important to remember that some shower faucets may require additional steps and connections, such as the installation of a mixing valve or diverter. Refer to the manufacturer’s instructions for your specific shower faucet to ensure a proper and complete installation.
Once you have successfully connected the shower head and faucet, it’s time to move on to the final steps of testing and adding finishing touches.
Testing and Finishing Touches
After installing the new shower plumbing and connecting the shower head and faucet, it’s essential to test the system and make any necessary adjustments. Follow these final steps to ensure your shower is fully functional and ready to use:
- Turn on the water supply and let the water run for a few minutes. Check for any leaks around the connections and fixtures. If you notice any leaks, tighten the connections or apply plumber’s tape as needed.
- Adjust the temperature and water flow using the shower handles. Ensure that hot and cold water mix properly and that the water pressure is to your liking. Make any necessary adjustments by following the manufacturer’s instructions for your specific shower faucet.
- Inspect the caulking around the shower fixtures. Apply fresh caulk or silicone sealant around the edges to create a watertight seal and give your shower a professional finish. Smooth the caulk with a caulking tool or your finger for a neat appearance.
- Clean up any excess debris or materials from the installation process, such as pipe shavings or dust. Use a damp cloth or sponge to wipe down the shower walls and surfaces.
- Finally, test the functionality of the shower head, faucet, and any additional features such as a hand shower or body jets. Adjust the shower settings to make sure they work properly and provide a satisfying shower experience.
Once you have completed these steps, your new shower plumbing installation is complete! Enjoy the comfort and convenience of your newly installed shower.
It’s important to periodically check for any signs of leaks or malfunctions in your shower plumbing. If you encounter any issues or need maintenance in the future, consult a professional plumber for assistance.
Congratulations on successfully installing your shower plumbing and creating a refreshing and functional shower space!
Conclusion
Installing shower plumbing may seem like a daunting task, but with the right materials, knowledge, and guidance, it can be a rewarding home improvement project. By following the step-by-step instructions outlined in this article, you can successfully install new shower plumbing and create a functional and enjoyable shower experience.
Remember to gather all the necessary materials before getting started, shut off the water supply to ensure safety, and remove the old plumbing fixtures carefully. Then, proceed with the installation of the new shower plumbing, making sure to properly connect the shower head and faucet. Test the system for any leaks or issues, and make necessary adjustments for optimal performance.
Don’t forget the finishing touches, such as applying fresh caulking and cleaning up any debris. Once everything is complete, enjoy the comfort and convenience of your newly installed shower.
It’s important to note that if you are unsure about any aspect of the installation process or encounter any difficulties, it is always wise to consult a professional plumber for assistance. They have the expertise to address any challenges and ensure a successful installation.
With your new shower plumbing in place, you can look forward to refreshing showers and a beautiful, functional bathroom. Take pride in your DIY accomplishment, and be sure to keep up with proper maintenance and periodic checks to ensure the longevity of your plumbing system.
Thank you for joining us on this journey of installing shower plumbing. We hope this article has provided valuable insights and guidance for your project. Happy showering!
Now that you've tackled installing your shower plumbing, why not step up your skills with our guide on installing a shower or tub faucet? Perfect for those looking to spruce up their bathroom, this guide offers clear, handy tips for a seamless upgrade. Also, if a full bathroom makeover is on your mind, understanding the timeline is crucial. Our detailed breakdown on how long bathroom renovations take will help you plan effectively, ensuring your project stays on track without unexpected delays.
Frequently Asked Questions about How Do You Install Shower Plumbing
Was this page helpful?
At Storables.com, we guarantee accurate and reliable information. Our content, validated by Expert Board Contributors, is crafted following stringent Editorial Policies. We're committed to providing you with well-researched, expert-backed insights for all your informational needs.


0 thoughts on “How Do You Install Shower Plumbing”