
Articles
How To Fix A Whirlpool Dryer
Modified: September 1, 2024
Learn how to fix a Whirlpool dryer with these helpful articles. Find step-by-step instructions and troubleshooting tips to get your dryer working again.
(Many of the links in this article redirect to a specific reviewed product. Your purchase of these products through affiliate links helps to generate commission for Storables.com, at no extra cost. Learn more)
Introduction
Welcome to our comprehensive guide on how to fix a Whirlpool dryer! Whirlpool dryers are known for their durability and reliability, but even the best appliances can experience problems from time to time. The good news is that many common issues can be easily resolved with a little troubleshooting and some basic repair skills.
In this article, we will walk you through the step-by-step process of diagnosing and fixing common problems with Whirlpool dryers. Whether your dryer is not heating, not starting, making strange noises, or experiencing any other issues, this guide will provide you with the knowledge and tools you need to get your dryer back in working order.
Before we begin, it’s important to note that safety should always be your top priority when working with any electrical appliance. Make sure to unplug your dryer from the power source before attempting any repairs. If you are not confident in your abilities or the issue seems complex, it is always best to consult a professional technician.
Now, let’s gather our tools and materials and dive into the world of Whirlpool dryer repair!
Key Takeaways:
- Prioritize safety and gather the necessary tools and materials before attempting to fix your Whirlpool dryer. Regular maintenance and troubleshooting can help resolve common issues and prolong the appliance’s lifespan.
- From checking the power supply to inspecting and replacing components like the heating element and blower wheel, DIY troubleshooting and repairs can restore your Whirlpool dryer’s optimal functionality. If in doubt, seek professional assistance.
Tools and Materials Needed
Before you start troubleshooting and fixing your Whirlpool dryer, it’s important to gather the necessary tools and materials. Here’s a list of what you’ll need:
- Work gloves
- Safety goggles
- Multimeter
- Screwdriver set (flathead and Phillips)
- Needle-nose pliers
- Socket set
- Putty knife
- Vacuum cleaner or lint brush
- Replacement parts (if needed)
Having these tools on hand will make the repair process smoother and more efficient. It’s always a good idea to have a variety of screwdriver sizes and types as different screws may be used throughout your dryer. The multimeter will help you test electrical components and identify any faults.
Additionally, it’s essential to have replacement parts readily available in case you need to replace any components in your Whirlpool dryer. Some common parts that may need replacement include the heating element, thermal fuse, door switch, drive belt, and blower wheel.
Make sure to double-check the model number of your Whirlpool dryer before purchasing replacement parts to ensure compatibility. You can usually find the model number on a sticker inside the dryer door or on the back of the appliance.
Once you have all the necessary tools and materials, you’re ready to begin troubleshooting and repairing your Whirlpool dryer. Remember to always prioritize safety and take proper precautions while working on any electrical appliance.
Safety Precautions
When working with any electrical appliance, including your Whirlpool dryer, it’s crucial to prioritize safety to avoid any accidents or injuries. Here are some important safety precautions to keep in mind:
- Disconnect the power: Before you start any repairs, make sure to unplug your dryer from the power source or turn off the circuit breaker that supplies electricity to the appliance. This step will prevent any potential electric shock.
- Use protective gear: Wear work gloves and safety goggles to protect your hands and eyes while handling the dryer and its components. This will help safeguard you from any sharp edges or flying debris.
- Work in a well-ventilated area: If you need to work on your dryer indoors, ensure that the area is well-ventilated to prevent the accumulation of fumes or dust particles. Open windows or use a fan to improve ventilation.
- Take precaution with moving parts: Some parts of the dryer, such as the motor and drive belt, can be hazardous if not handled properly. Make sure to turn off the dryer and disconnect it from the power source before working on these components.
- Refer to the user manual: Consult your Whirlpool dryer’s user manual for specific safety instructions and guidelines. The manual will provide you with important information about your specific model and any precautions you should take while working on it.
- Ask for help if needed: If you’re unsure about any aspect of the repair or feel uncomfortable handling certain parts, it’s best to seek assistance from a professional technician. They have the knowledge and experience to handle complex repairs safely.
Always prioritize your safety and take the necessary precautions while working on your Whirlpool dryer. Following these guidelines will minimize the risks associated with electrical repairs and ensure a safe and successful repair process.
Common Issues with Whirlpool Dryers
Whirlpool dryers are known for their reliability, but like any appliance, they can experience occasional issues. Here are some common problems you may encounter with your Whirlpool dryer:
- No heat or insufficient heat: If your dryer isn’t heating up or is producing insufficient heat, it could be due to a faulty heating element, thermal fuse, or thermostat.
- Not starting: If your dryer is unresponsive and won’t start, it may be due to a defective door switch, timer, or start switch.
- Noisy operation: Strange noises coming from your dryer can indicate a problem with components such as the blower wheel, drum rollers, or idler pulley.
- Overheating: If your dryer is overheating or shutting off unexpectedly, it may be due to a malfunctioning thermostat or clogged vent.
- Poor drying performance: If your clothes are still damp after a cycle, it could be due to a clogged lint filter, blocked vent, or malfunctioning moisture sensor.
- Drum not spinning: If the drum of your dryer isn’t spinning, it could be due to a broken belt, motor issue, or faulty idler pulley.
- Excessive vibration: If your dryer is vibrating excessively or shaking during operation, it may be due to an imbalance or worn-out drum support rollers.
Identifying the specific issue with your Whirlpool dryer is the first step towards resolving the problem. By understanding the common problems that can occur, you can efficiently troubleshoot and repair your dryer, saving both time and money.
In the following sections, we will guide you through step-by-step instructions on diagnosing and fixing these common issues with your Whirlpool dryer. Remember to refer to your specific model’s user manual for additional troubleshooting tips and instructions.
Step-by-Step Guide to Fixing a Whirlpool Dryer
Now that we’ve covered the common issues with Whirlpool dryers, let’s dive into the step-by-step process of fixing them. Follow these instructions to troubleshoot and repair your Whirlpool dryer:
- Check Power Supply: Ensure that your dryer is properly plugged in and receiving power. Check the circuit breaker or fuse to make sure there are no issues with the electrical supply.
- Inspect the Door Switch: If your dryer is not starting, the door switch may be faulty. Use a multimeter to test the continuity of the switch. If it’s defective, replace it.
- Examine the Thermal Fuse: A blown thermal fuse can cause the dryer to stop working. Use a multimeter to check the continuity of the fuse. If it’s open, replace it with a new one.
- Clean the Lint Filter: A clogged lint filter can restrict airflow and lead to poor drying performance or overheating. Clean the filter thoroughly, removing any trapped lint or debris.
- Inspect and Replace the Heating Element: If your dryer is not producing heat, the heating element may be defective. Follow the manufacturer’s instructions to access and replace the heating element.
- Check the Drive Belt: A broken or loose drive belt can cause the drum to stop spinning. Inspect the belt for any signs of wear or damage. Replace as necessary.
- Test the Motor: If the drum is not spinning, the motor may be faulty. Use a multimeter to check the continuity of the motor windings. If there’s no continuity, replace the motor.
- Inspect and Replace the Blower Wheel: A worn-out or damaged blower wheel can cause excessive noise or poor airflow. Remove the front or rear panel to access the blower wheel and replace if necessary.
- Troubleshooting Other Problems: If none of the above steps resolve the issue, consult your user manual or seek professional help. Complex problems may require the expertise of a qualified technician.
Remember to always refer to your Whirlpool dryer’s user manual for specific instructions on disassembly, diagnosing issues, and replacing parts. Follow safety precautions throughout the repair process and be mindful of handling electrical components.
By following these steps and utilizing basic repair skills, you can troubleshoot and fix many common issues with your Whirlpool dryer. However, if you’re not comfortable with DIY repairs or the problem persists, it’s always recommended to contact a professional technician for assistance.
Check Power Supply
When your Whirlpool dryer is not working at all, the first step is to check the power supply. Follow these steps to ensure that your dryer is properly plugged in and receiving power:
- Verify the power cord: Check that the power cord is securely connected to both the dryer and the power outlet. Make sure there are no loose connections or frayed wires. If any damage is detected, replace the cord.
- Check the circuit breaker: Locate the circuit breaker panel in your home. Look for any tripped circuit breakers that may be affecting the dryer’s power supply. Reset any tripped breakers by switching them off and then back on again.
- Inspect the fuse box: If your home uses fuses instead of circuit breakers, check the fuse box to see if any fuses have blown. Replace any blown fuses with new ones of the same rating.
- Test the power outlet: Use a voltage tester or a multimeter to check the power outlet for voltage. Insert the probes into the slots of the outlet and check for a reading of 240 volts. If no voltage is detected, there may be an issue with the outlet or electrical wiring. Contact a qualified electrician to resolve the problem.
- Consider power interruptions: If your dryer suddenly stopped working, there might have been a power outage or a temporary interruption in your home’s power supply. Check if other electrical appliances in your home are working properly to determine if the issue is isolated to the dryer.
By systematically checking the power supply and eliminating potential issues, you can verify if the problem lies with the power source or if further troubleshooting is required. If the power supply is not the cause of the problem, move on to the next step in the troubleshooting process.
It’s important to prioritize safety throughout the repair process. Remember to unplug your dryer from the power source before conducting any tests or inspections. If you’re unsure about any steps or encounter any difficulties, consult your user manual or contact a qualified technician for assistance.
Inspect the Door Switch
If your Whirlpool dryer is not starting or turning on, one possible culprit could be a faulty door switch. The door switch is a safety mechanism that prevents the dryer from operating when the door is open. Follow these steps to inspect the door switch:
- Unplug the dryer: Before working on the dryer, disconnect it from the power source to ensure your safety.
- Locate the door switch: The door switch is typically located on the front panel of the dryer. It is activated by a small button or lever that is pressed when the door is closed.
- Inspect the door switch visually: Look for any obvious signs of damage, such as a broken lever or loose wiring. If you notice any damage, the door switch will need to be replaced.
- Test the door switch for continuity: Use a multimeter set to the continuity or resistance mode. With the dryer still unplugged, disconnect the wires connected to the door switch. Place the multimeter probes on the terminals of the switch and check for continuity. If there is no continuity when the switch button is pressed, the door switch is likely faulty and needs to be replaced.
- Replace the door switch: If the door switch is determined to be faulty, you can order a replacement part from a Whirlpool authorized dealer or an appliance parts store. Follow the manufacturer’s instructions to install the new door switch.
- Reassemble and test the dryer: Once the new door switch is installed, reattach any wires and carefully reassemble the dryer. Plug it back into the power source and test if the dryer starts properly when the door is closed.
The door switch is an essential safety component, so it’s important to ensure it’s functioning correctly. By inspecting and testing the door switch, you can determine if it is the cause of the problem and replace it if necessary.
Remember to always prioritize safety and disconnect the dryer from the power source before conducting any inspections or repairs. If you’re unsure about any steps or encounter difficulties, consult your user manual or contact a qualified technician for assistance.
Examine the Thermal Fuse
If your Whirlpool dryer is not heating up or not functioning properly, a potential culprit could be a blown thermal fuse. The thermal fuse is a safety device that cuts off power to the heating element if the dryer overheats. Follow these steps to examine the thermal fuse:
- Unplug the dryer: Before inspecting or working on any components of the dryer, make sure to disconnect it from the power source.
- Locate the thermal fuse: The thermal fuse is usually located on the blower housing or near the heating element assembly. Refer to your user manual or use online resources to identify its exact location for your specific Whirlpool dryer model.
- Check for visual signs of a blown fuse: Visually inspect the thermal fuse for any signs of damage, such as a visible break in the fuse or a scorched appearance. If there are any visible signs of damage, the thermal fuse will need to be replaced.
- Test the thermal fuse for continuity: Using a multimeter set to the continuity or resistance mode, detach the wires connected to the thermal fuse. Place the probes of the multimeter on the terminals of the fuse and check for continuity. If there is no continuity, it indicates that the thermal fuse has blown and needs to be replaced.
- Replace the thermal fuse: If the thermal fuse is determined to be faulty, you can purchase a replacement part from a Whirlpool authorized dealer or an appliance parts store. Follow the manufacturer’s instructions to install the new thermal fuse.
- Reassemble and test the dryer: Once the new thermal fuse is installed, reattach any wires and carefully reassemble the dryer. Plug it back into the power source and test if the dryer now heats up and functions properly.
The thermal fuse is a vital component in preventing overheating and protecting your dryer from potential damage. By examining and testing the thermal fuse, you can identify if it is the cause of the issue and replace it if necessary.
Remember to always prioritize safety and disconnect the dryer from the power source before conducting any inspections or repairs. If you’re unsure about any steps or encounter difficulties, consult your user manual or contact a qualified technician for assistance.
Clean the lint trap and exhaust vent regularly to prevent blockages and improve dryer efficiency.
Clean the Lint Filter
Regularly cleaning the lint filter is essential for proper airflow and efficient drying performance in your Whirlpool dryer. Over time, lint and debris can accumulate on the filter, reducing airflow and causing potential issues. Follow these steps to clean the lint filter:
- Locate the lint filter: The lint filter is typically located on the top or inside the door opening of the dryer. It is a mesh screen or a fabric filter that traps lint and debris during the drying process.
- Remove the lint filter: Gently pull out the lint filter from its housing. Be cautious not to damage the filter or the surrounding parts.
- Clear the lint from the filter: Use your fingers or a soft brush to remove any lint build-up on the filter. Make sure to remove all lint and debris, including any that may be trapped in the corners or crevices of the filter.
- Clean the filter with water (if necessary): If the lint filter is greasy or clogged with fabric softener residue, you can rinse it under warm water and gently scrub it with a soft brush to remove any stubborn build-up. Allow the filter to dry completely before reinstalling it.
- Inspect the filter housing: While the lint filter is removed, take a moment to inspect the filter housing, the area where the filter sits. Remove any visible lint or debris from the housing using a vacuum cleaner or a lint brush.
- Reinstall the lint filter: Once the lint filter and housing are clean and dry, carefully place the filter back into its housing. Ensure that it fits snugly and securely in place.
Cleaning the lint filter regularly not only improves drying performance but also helps prevent lint accumulation and reduces the risk of dryer fires. Make it a habit to clean the lint filter after every drying cycle to maintain optimal performance.
In addition to cleaning the lint filter, it’s also important to check and clean the vent hose and vent duct periodically. Over time, lint can accumulate in these areas, leading to reduced airflow and potential hazards. Refer to your user manual for instructions on cleaning the venting system or consider hiring a professional vent cleaning service for a thorough cleaning.
By cleaning the lint filter regularly, you can ensure proper airflow and efficient performance, prolong the lifespan of your Whirlpool dryer, and reduce potential problems.
Inspect and Replace Heating Element
If your Whirlpool dryer is not heating up, one possible cause could be a faulty heating element. The heating element is responsible for generating heat inside the dryer to dry your clothes. Here’s how you can inspect and replace the heating element:
- Unplug the dryer: Ensure that the dryer is disconnected from the power source before proceeding with any inspection or repair.
- Locate the heating element: The heating element is typically located behind the dryer drum. Consult your user manual or refer to the manufacturer’s instructions to identify the specific location of the heating element in your dryer model.
- Access the heating element: Depending on your dryer model, you may need to remove the dryer’s front or rear panel, or lift the top lid to access the heating element. Follow the manufacturer’s instructions or refer to online resources for guidance on accessing the heating element in your particular Whirlpool dryer model.
- Inspect the heating element visually: Check the heating element for any signs of damage or visible breaks. Look for any burned areas or metal components that appear broken or separated. If you notice any damage, the heating element will need to be replaced.
- Test the heating element for continuity: Using a multimeter set to the continuity or ohms mode, check the heating element for continuity. Disconnect the wires connected to the heating element and place the multimeter probes on its terminals. If there is no continuity, it indicates a faulty heating element that needs to be replaced.
- Replace the heating element: If you determine that the heating element is defective, you can purchase a replacement part from a Whirlpool authorized dealer or an appliance parts store. Follow the manufacturer’s instructions to install the new heating element accurately.
- Reassemble and test the dryer: After installing the new heating element, reattach any wires and carefully reassemble the dryer. Plug it back into the power source and test if the dryer now heats up properly.
The heating element is a critical component for the proper functioning of your dryer. By inspecting and testing the heating element, you can identify if it is the cause of the heating issue and replace it if necessary.
Remember to always prioritize safety and disconnect the dryer from the power source before conducting any inspections or repairs. If you’re unsure about any steps or encounter difficulties, consult your user manual or contact a qualified technician for assistance.
Check the Drive Belt
If your Whirlpool dryer drum is not spinning, the drive belt may be broken or loose. The drive belt is responsible for rotating the drum, so it’s essential to inspect it for any issues. Follow these steps to check the drive belt:
- Unplug the dryer: Ensure that the dryer is disconnected from the power source to avoid any potential accidents.
- Access the drive belt: Depending on your dryer model, you may need to remove the dryer’s front or rear panel to access the drive belt. Consult your user manual or refer to the manufacturer’s instructions for guidance on accessing the drive belt in your specific Whirlpool dryer model.
- Inspect the drive belt: Check the condition of the drive belt for any signs of wear, damage, or looseness. Look for cracks, fraying, or a broken belt. If the belt appears worn or broken, it will need to be replaced.
- Test the tension of the drive belt: Push the belt with your finger. It should feel firm and have a bit of tension. If the belt feels loose or easily slips off the drum or motor pulleys, it needs to be tightened or replaced.
- Replace the drive belt: If the drive belt is damaged or loose, you can order a replacement part from a Whirlpool authorized dealer or an appliance parts store. Follow the manufacturer’s instructions to install the new drive belt properly.
- Reassemble and test the dryer: After installing the new drive belt, reattach any panels or components that were removed. Plug the dryer back into the power source and test if the drum spins properly when the dryer is turned on.
The drive belt plays a crucial role in rotating the drum of your dryer. By checking and replacing the drive belt if necessary, you can restore the drum’s spinning functionality and ensure smooth operation.
Always prioritize safety and unplug the dryer from the power source before conducting any inspections or repairs. If you’re unsure about any steps or encounter difficulties, consult your user manual or contact a qualified technician for assistance.
Test the Motor
If your Whirlpool dryer drum is not spinning or turning on, the motor may be the culprit. Testing the motor will help determine if it is functioning properly or if it needs to be replaced. Follow these steps to test the motor:
- Unplug the dryer: To ensure your safety, disconnect the dryer from the power source before proceeding with any testing or repair.
- Access the motor: Depending on your dryer model, you may need to remove the dryer’s front or rear panel to access the motor. Refer to your user manual or consult online resources for guidance specific to your Whirlpool dryer model.
- Identify the motor: Locate the motor, which is typically found near the drum and drive belt. It is responsible for powering the drum’s rotation.
- Test the motor windings: Set a multimeter to the resistance or ohms mode. Disconnect the wires connected to the motor and place the multimeter probes on the motor’s windings. Consult your user manual or online resources to determine the appropriate resistance values for your specific dryer model. If there’s no continuity or if the readings are outside the specified range, it indicates a faulty motor that needs to be replaced.
- Inspect for physical damage: While testing the motor, visually inspect it for any signs of physical damage, such as burnt wires, loose connections, or broken parts. If any damage is detected, the motor may need to be replaced.
- Replace the motor: If the motor fails the continuity test or shows signs of physical damage, it’s necessary to replace it. Order a replacement motor from a Whirlpool authorized dealer or an appliance parts store. Follow the manufacturer’s instructions to install the new motor correctly.
- Reassemble and test the dryer: After installing the new motor, reattach any panels or components that were removed. Plug the dryer back into the power source and test if the drum spins properly and the motor operates smoothly when the dryer is turned on.
The motor is a critical component in powering the drum’s rotation in your dryer. By testing and replacing the motor if needed, you can restore the drum’s spinning functionality and ensure your dryer operates effectively.
Remember to prioritize safety by unplugging the dryer before conducting any inspections or repairs. If you’re uncertain about any steps or face difficulties, consult your user manual or contact a qualified technician for assistance.
Inspect and Replace the Blower Wheel
If your Whirlpool dryer is making unusual noises or experiencing poor airflow, a worn-out or damaged blower wheel may be the cause. The blower wheel is responsible for circulating air inside the dryer. Here’s how you can inspect and replace the blower wheel:
- Unplug the dryer: Before inspecting or working on any components of the dryer, ensure that it is disconnected from the power source for safety purposes.
- Locate the blower wheel: The blower wheel is typically located near the front or rear of the dryer, depending on your model. Consult your user manual or refer to the manufacturer’s instructions to identify the exact location of the blower wheel in your Whirlpool dryer.
- Inspect the blower wheel visually: Examine the blower wheel for any signs of wear, damage, or debris accumulation. Look for cracks, chips, or missing blades. If you notice any issues, the blower wheel will need to be replaced.
- Clean the blower wheel: Use a vacuum cleaner or a lint brush to remove any lint, dust, or debris that may have accumulated on the blower wheel. This will help improve airflow and reduce noise caused by obstructions.
- Replace the blower wheel: If the blower wheel is damaged or worn-out, it will need to be replaced. Purchase a replacement blower wheel from a Whirlpool authorized dealer or an appliance parts store. Follow the manufacturer’s instructions to install the new blower wheel correctly.
- Reassemble and test the dryer: After installing the new blower wheel, reattach any panels or components that were removed. Plug the dryer back into the power source and test if the unusual noises have ceased and if the airflow has improved.
The blower wheel plays a crucial role in circulating air and maintaining optimal dryer performance. By inspecting and replacing the blower wheel as needed, you can restore proper airflow and minimize noise issues.
It’s important to prioritize safety and unplug the dryer from the power source before conducting any inspections or repairs. If you’re unsure about any steps or encounter difficulties, consult your user manual or contact a qualified technician for assistance.
Troubleshooting Other Problems
If you’ve followed the previous steps and your Whirlpool dryer is still experiencing issues, there may be other problems that require troubleshooting. Here are a few additional troubleshooting steps to consider:
- Check the venting system: A clogged or restricted venting system can cause your dryer to overheat, take longer to dry clothes, or not heat up at all. Ensure that the vent hose is free of lint and debris and that the vent duct is clean and unobstructed.
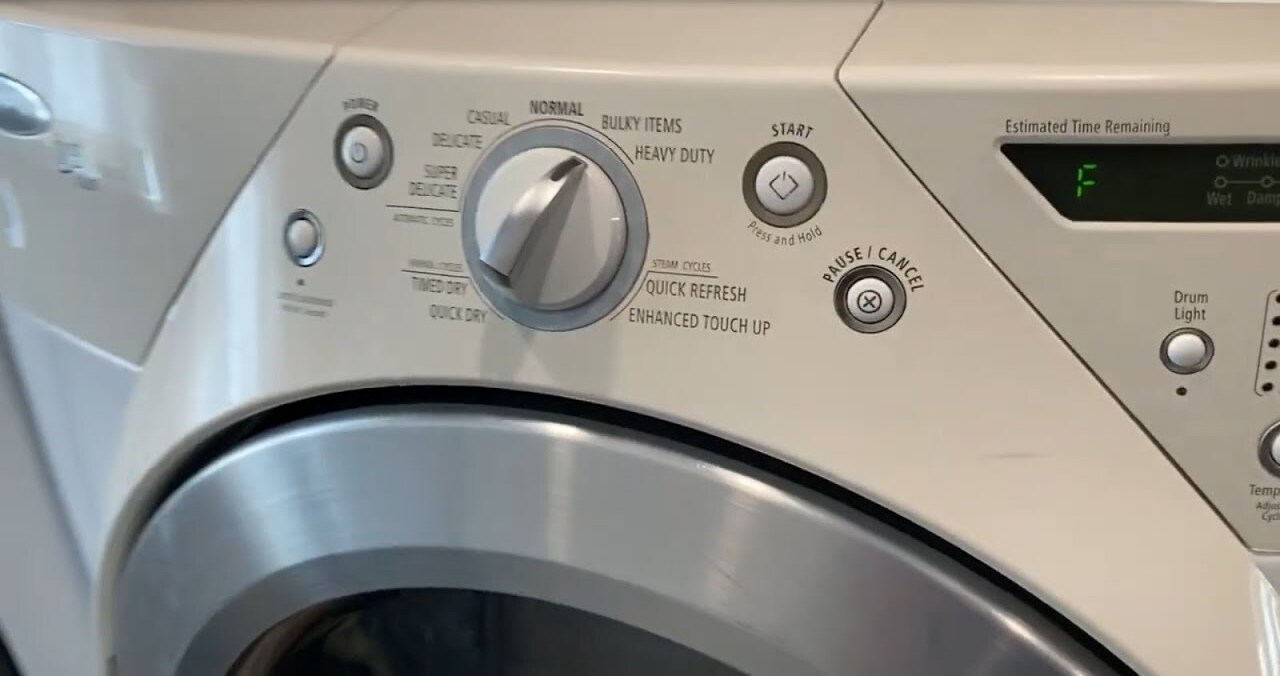
- Inspect the controls and settings: Verify that the dryer’s controls and settings are properly adjusted. Make sure that the timer or control knobs are functioning correctly and that the selected drying options are appropriate for your laundry needs.
- Examine the moisture sensor: If your dryer has a moisture sensor, ensure that it is clean and free of any residue or build-up. A dirty sensor can disrupt the drying cycle and cause the dryer to stop prematurely.
- Check the gas supply (gas dryers): If you have a gas dryer that is not heating up, ensure that the gas supply valve is open and that there are no gas leaks. If you suspect a gas leak, turn off the gas supply immediately and contact a professional for assistance.
- Look for error codes or diagnostic modes: Some Whirlpool dryers have error codes or diagnostic modes that can help pinpoint the issue. Consult your user manual or online resources for instructions on accessing and interpreting error codes or entering diagnostic modes specific to your dryer model.
- Consider other mechanical issues: If none of the troubleshooting steps resolve the problem, there may be underlying mechanical issues that require professional expertise. Contact a qualified technician to inspect and diagnose the dryer for any complex mechanical problems.
Keep in mind that troubleshooting and repairing complex issues may require advanced knowledge and expertise. If you’re unsure about any steps or encounter difficulties, it’s best to consult your user manual or seek the assistance of a qualified technician who can accurately diagnose and resolve the problem.
By thoroughly troubleshooting and addressing potential issues, you can increase the chances of resolving any problems with your Whirlpool dryer and ensure its optimal performance.
Conclusion
Congratulations! You have now completed our comprehensive guide on how to fix a Whirlpool dryer. By following the step-by-step instructions provided, you have gained valuable knowledge and skills to troubleshoot and repair common issues with your Whirlpool dryer.
We began by discussing the importance of safety precautions to ensure a secure working environment. We then identified common issues that can occur with Whirlpool dryers, including no heat, not starting, unusual noises, and poor drying performance.
Throughout the guide, we walked you through various troubleshooting steps, such as checking the power supply, inspecting the door switch, examining the thermal fuse, cleaning the lint filter, inspecting and replacing the heating element, checking the drive belt, testing the motor, and inspecting and replacing the blower wheel.
We also provided additional troubleshooting tips for addressing other potential problems and highlighted the importance of proper maintenance, such as keeping the venting system clean and ensuring that controls and settings are adjusted correctly.
Remember, while this guide aims to empower you to tackle common issues with your Whirlpool dryer, it’s important to know your limits. If at any point you feel uncomfortable or unsure about a repair task, it’s always best to consult a professional technician who can provide expert assistance.
By employing the knowledge and skills gained from this guide, you’ve taken a significant step towards resolving issues with your Whirlpool dryer and restoring its optimal functionality. Maintaining your dryer in good working condition will not only ensure efficient drying but also prolong its lifespan.
We hope this guide has been helpful to you. Thank you for choosing Whirlpool and happy fixing!
Frequently Asked Questions about How To Fix A Whirlpool Dryer
Was this page helpful?
At Storables.com, we guarantee accurate and reliable information. Our content, validated by Expert Board Contributors, is crafted following stringent Editorial Policies. We're committed to providing you with well-researched, expert-backed insights for all your informational needs.

0 thoughts on “How To Fix A Whirlpool Dryer”