Articles
How To Get Moisture Out Of The Basement
Modified: October 20, 2024
Learn effective methods and techniques to remove moisture from your basement with these informative articles. Start creating a dry and healthy environment today!
(Many of the links in this article redirect to a specific reviewed product. Your purchase of these products through affiliate links helps to generate commission for Storables.com, at no extra cost. Learn more)
Introduction
Having a moisture problem in your basement can be a frustrating and potentially damaging issue. Excess moisture can lead to mold growth, musty odors, and even structural damage if left untreated. However, with the right knowledge and steps, you can effectively remove moisture from your basement and create a dry and healthy space.
In this article, we will explore the common causes of moisture in basements, how to assess the severity of the issue, and the steps you can take to get moisture out of your basement. By understanding the root causes and implementing proper moisture removal techniques, you can reclaim your basement and ensure it remains dry and free from potential hazards.
So, let’s dive in and learn how to tackle the moisture problem in your basement!
Key Takeaways:
- Understanding the source of moisture and assessing its severity are crucial first steps in effectively removing moisture from your basement. By addressing common causes and implementing targeted solutions, you can create a dry and healthy environment.
- Implementing proactive measures such as fixing plumbing leaks, installing a vapor barrier, improving drainage, ensuring proper ventilation, using a dehumidifier, and waterproofing walls are essential for removing moisture and preventing future issues in your basement.
Read more: How To Get Basement Smell Out Of Basement
Understanding the Source of Moisture
Before you can effectively remove moisture from your basement, it’s crucial to understand where it’s coming from. Identifying the source of moisture will help you address the root cause and prevent further issues down the line.
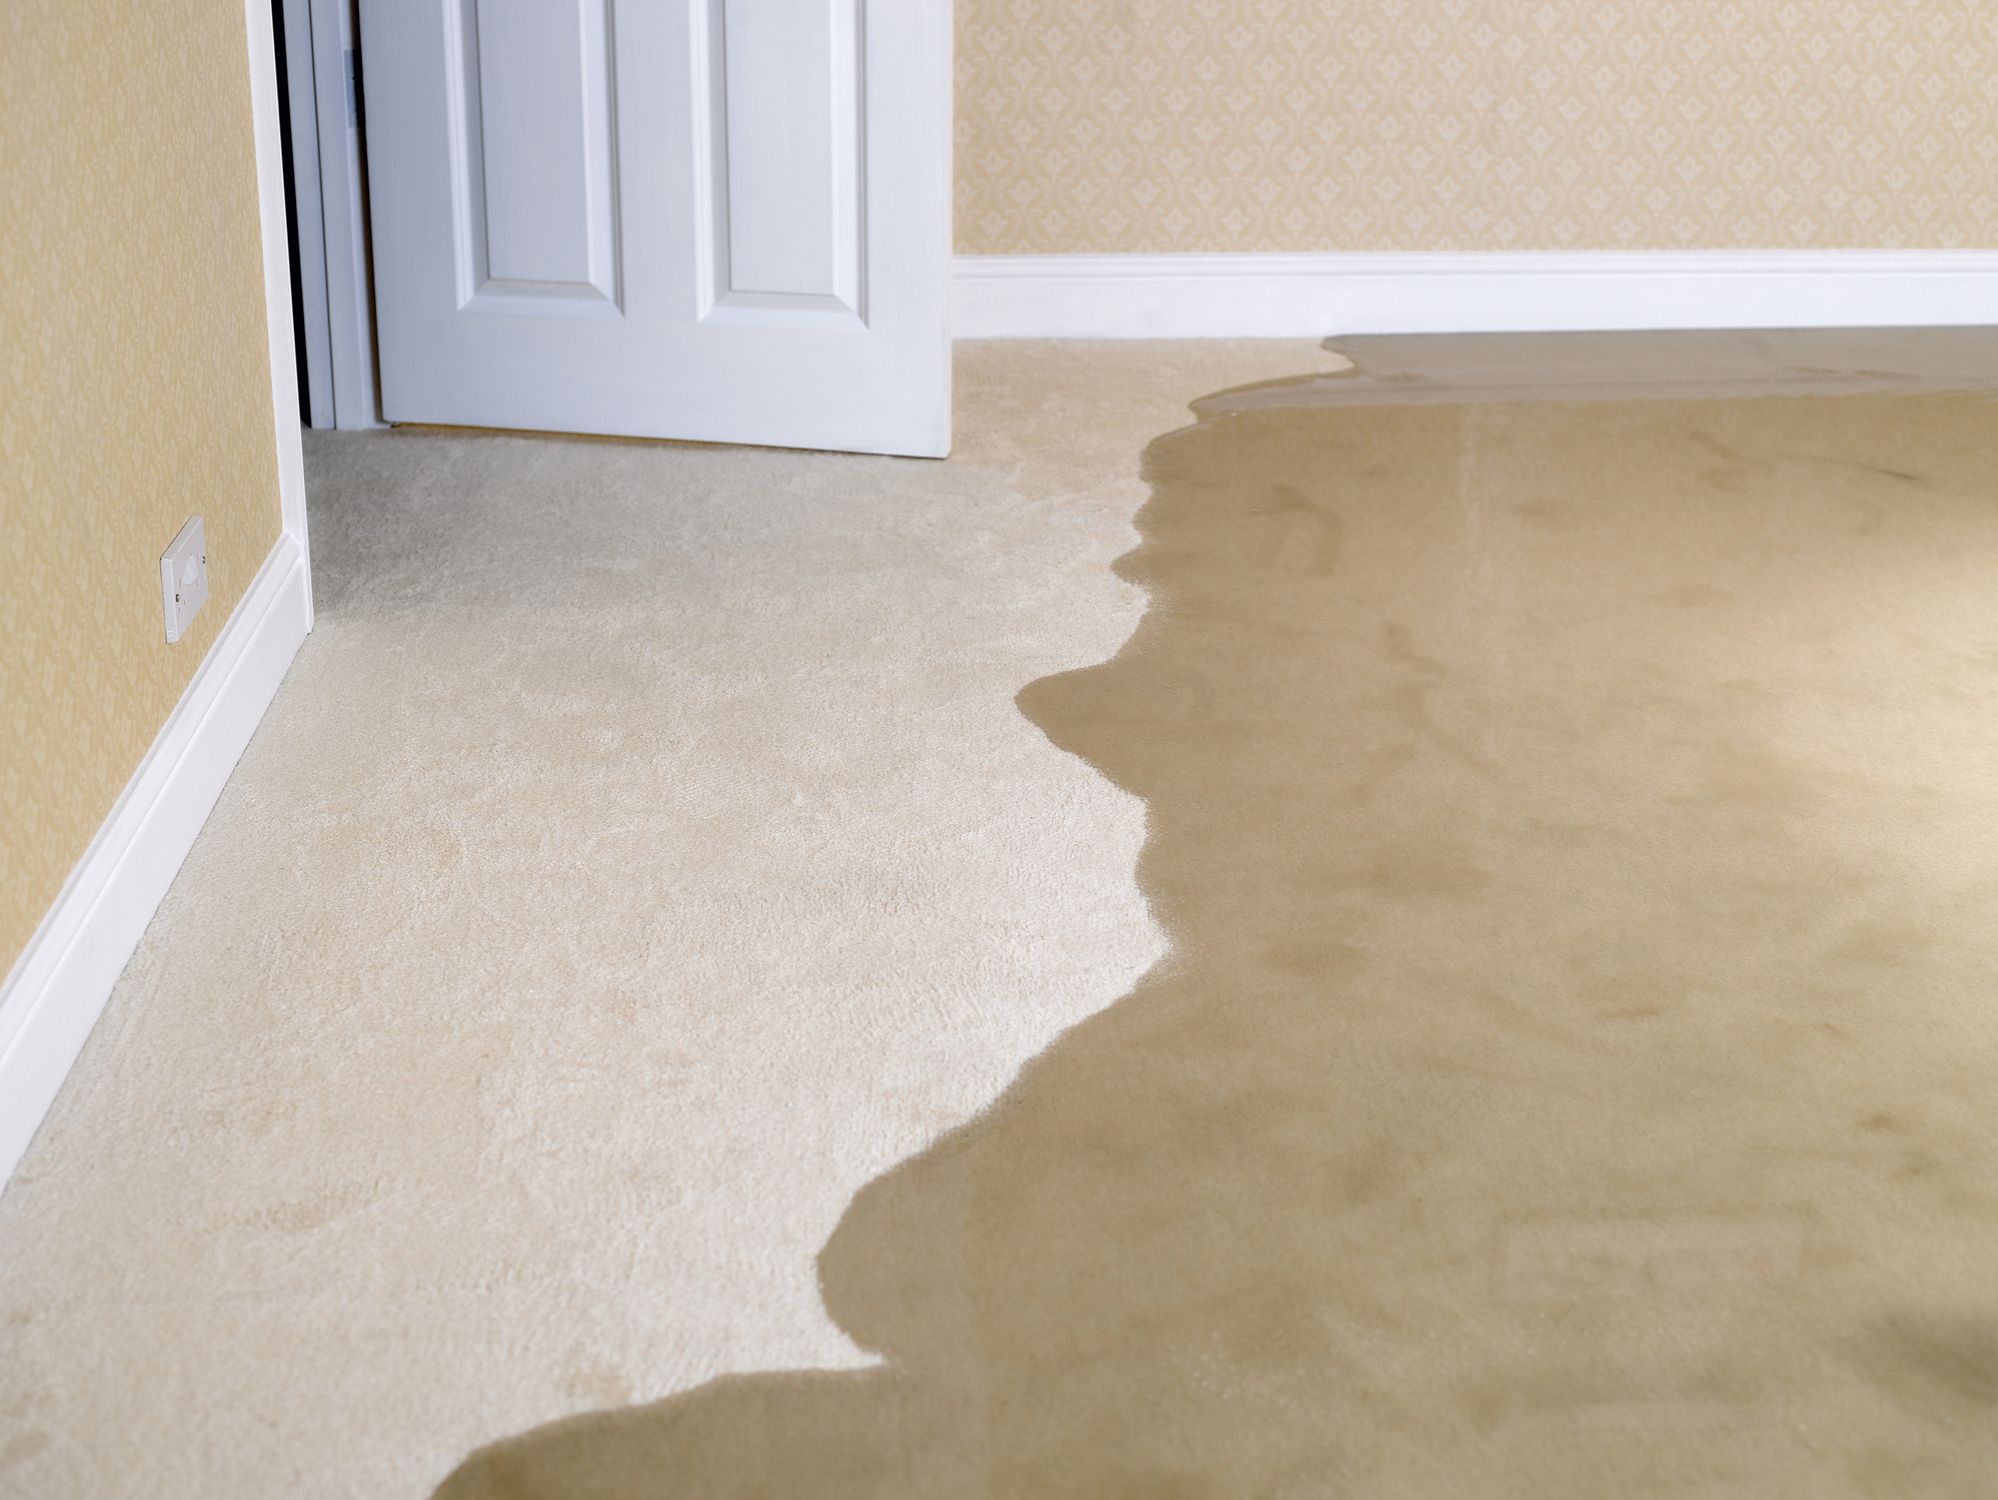
One common source of moisture in basements is water infiltration from the surrounding soil. This can occur due to poor drainage, high water table levels, or cracks in the foundation walls. When the soil becomes saturated, water can seep through the foundation and into the basement.
Another source of moisture is condensation. If your basement lacks proper ventilation and air circulation, warm humid air from outside can condense on cool surfaces, leading to moisture buildup. This is particularly common in basements with limited natural light or enclosed spaces where air movement is restricted.
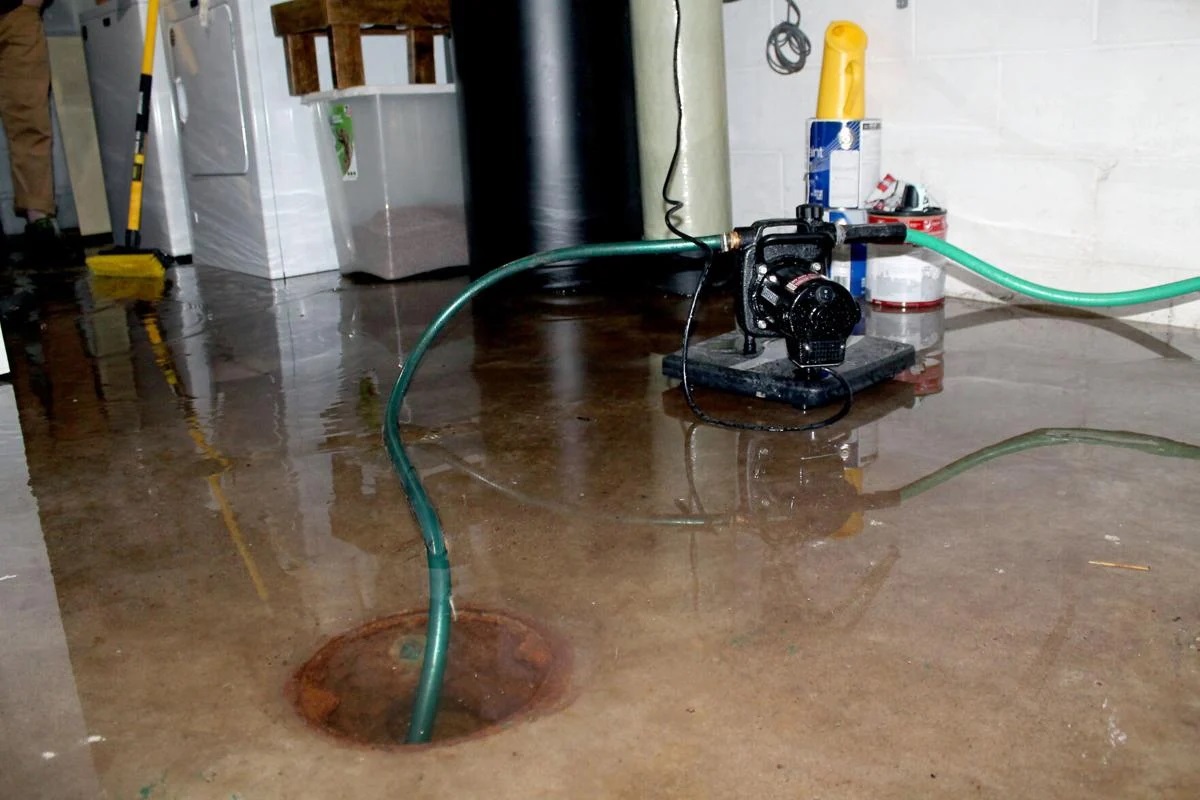
Additionally, plumbing leaks can contribute to basement moisture. A leaky pipe or faulty plumbing fixture can introduce a significant amount of water into the basement, leading to dampness and potential water damage.
Understanding the source of moisture in your basement is the first step in effectively removing it. By identifying the root cause, you can implement targeted solutions to address the issue and prevent further problems.
Assessing the Severity of Moisture in the Basement
Once you’ve identified the source of moisture in your basement, it’s important to assess the severity of the issue. This will help you determine the appropriate course of action and prioritize which methods to use for removing moisture.
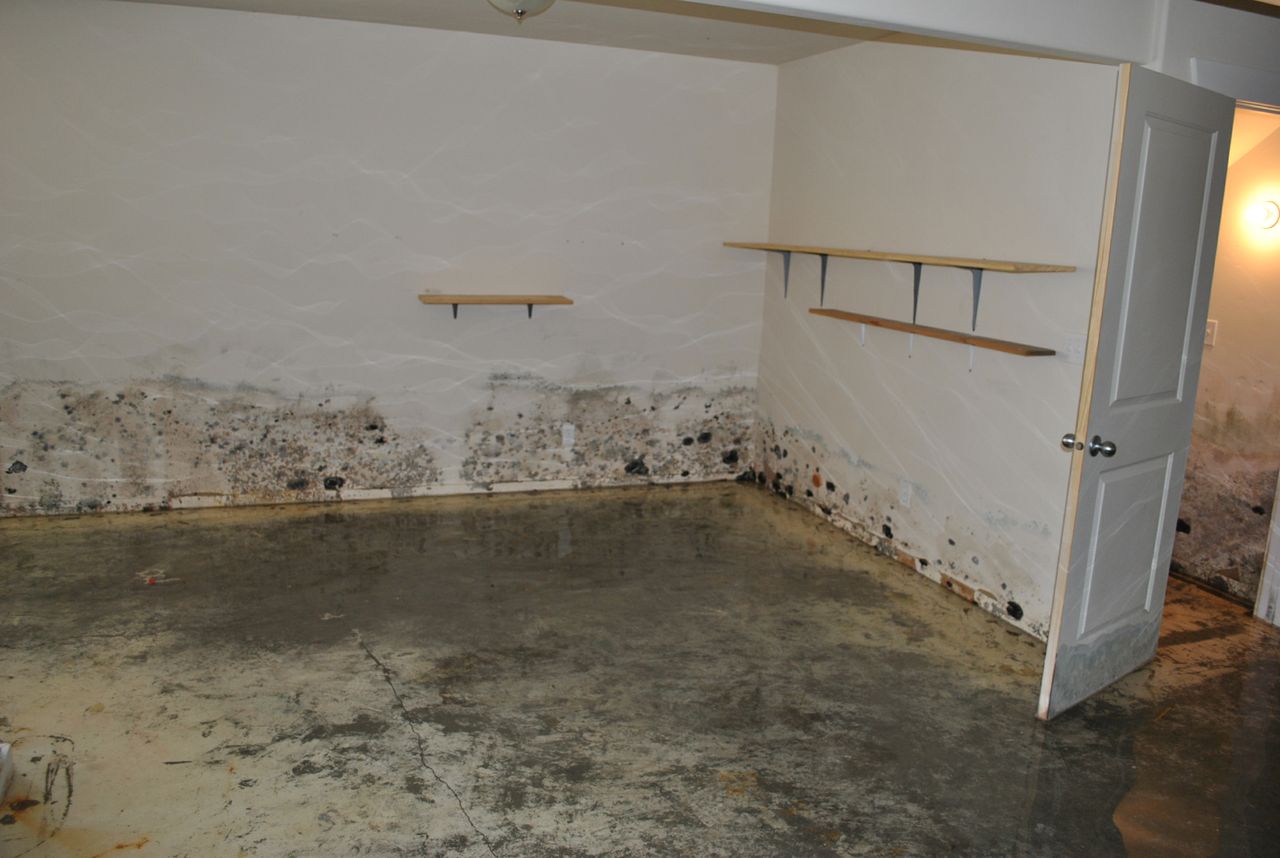
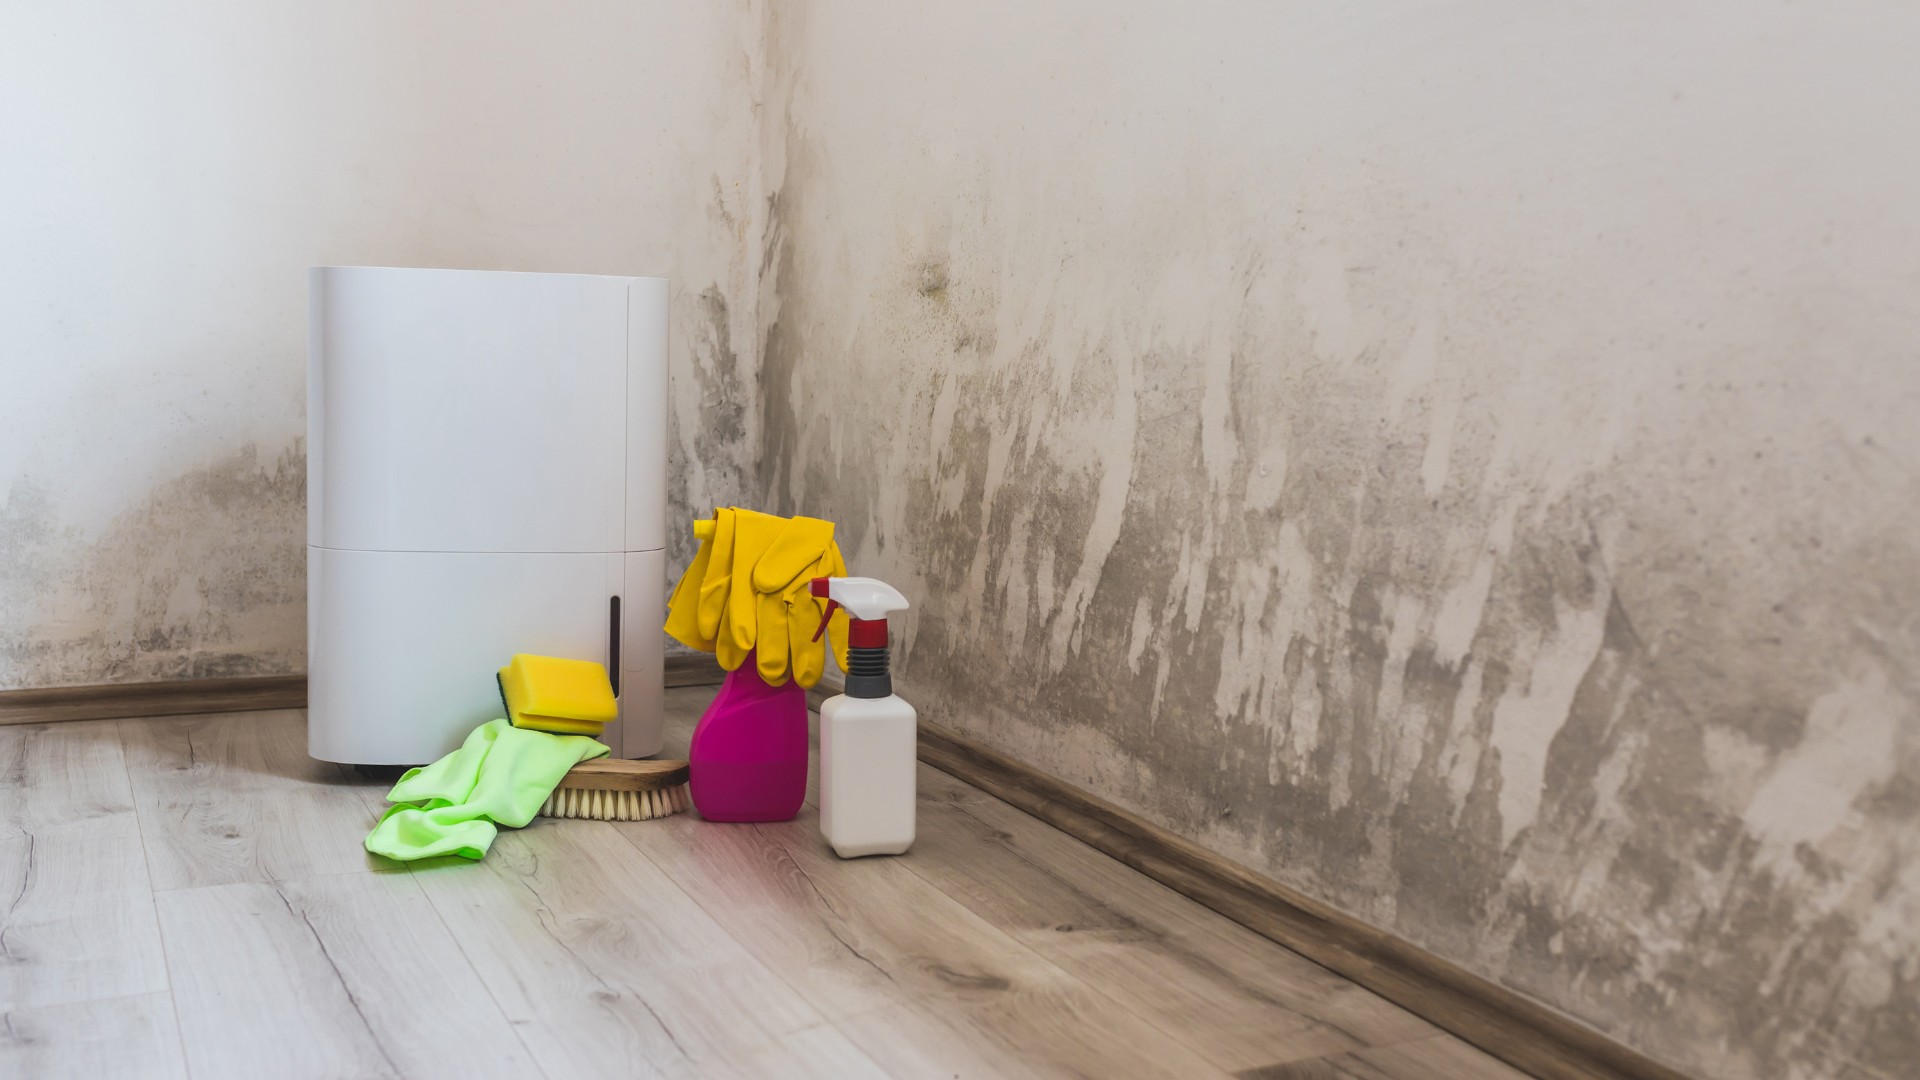
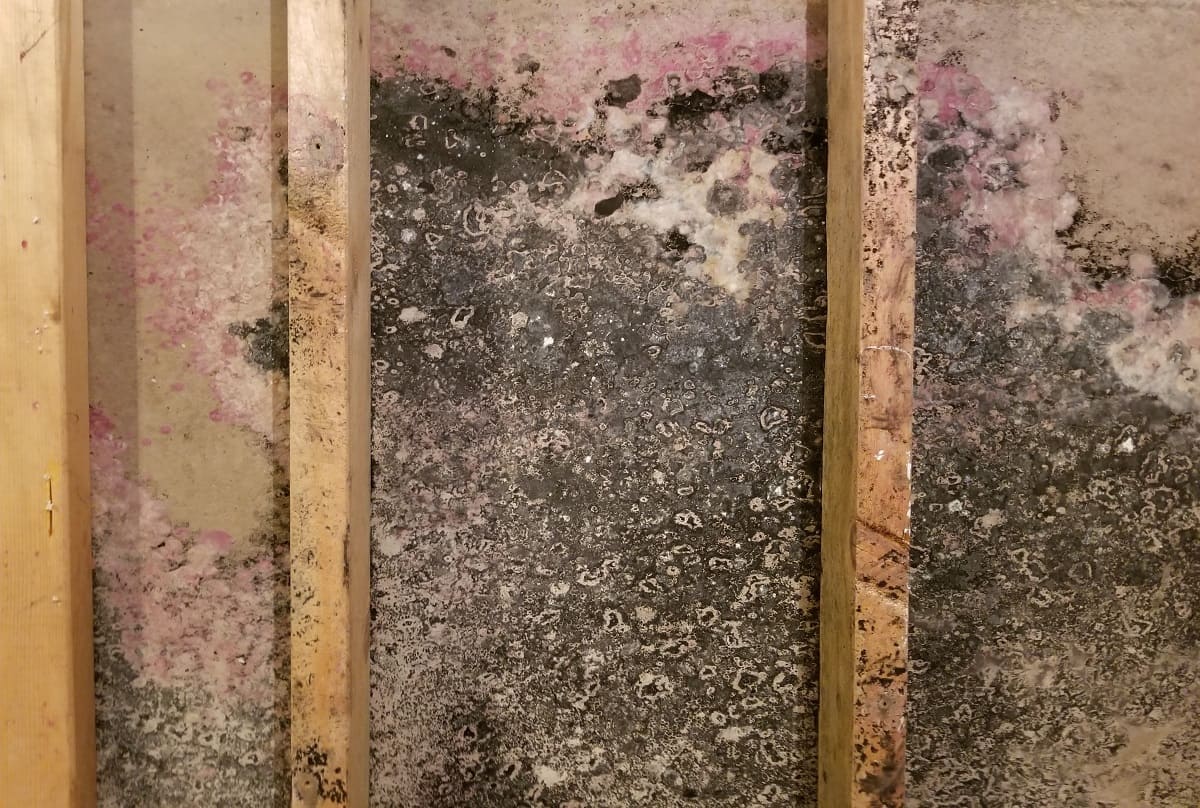
One way to assess the severity of moisture is by visually inspecting the basement. Look for signs of water damage, such as puddles, damp spots, or discoloration on the walls or floor. Take note of any musty odors, which can indicate the presence of mold or mildew.
Another method is to use a moisture meter. A moisture meter measures the moisture levels in different areas of the basement. By taking readings at various locations, you can identify areas of high moisture and determine the overall extent of the problem.
It’s also worth considering the climate and weather conditions in your area. If you live in a region with high humidity or frequent rainfall, the moisture issue in your basement may be more severe compared to areas with drier climates.
Lastly, assess the impact of the moisture on your basement and your home. Determine if the moisture is confined to a small area or if it has spread to a larger portion of the basement. Consider any damage that has occurred, such as deteriorating walls or flooring.
By thoroughly assessing the severity of moisture in your basement, you can better understand the scope of the problem and make informed decisions about the most effective methods for removing moisture.
Common Causes of Moisture in the Basement
Moisture problems in basements can stem from various sources. Understanding these common causes will help you address the root of the issue and prevent moisture buildup in the future.
1. Poor drainage: If the soil around your foundation does not drain properly, it can lead to excess moisture seeping through the walls and into the basement. Poorly designed or clogged gutters and downspouts can contribute to this problem by allowing water to pool around the foundation.
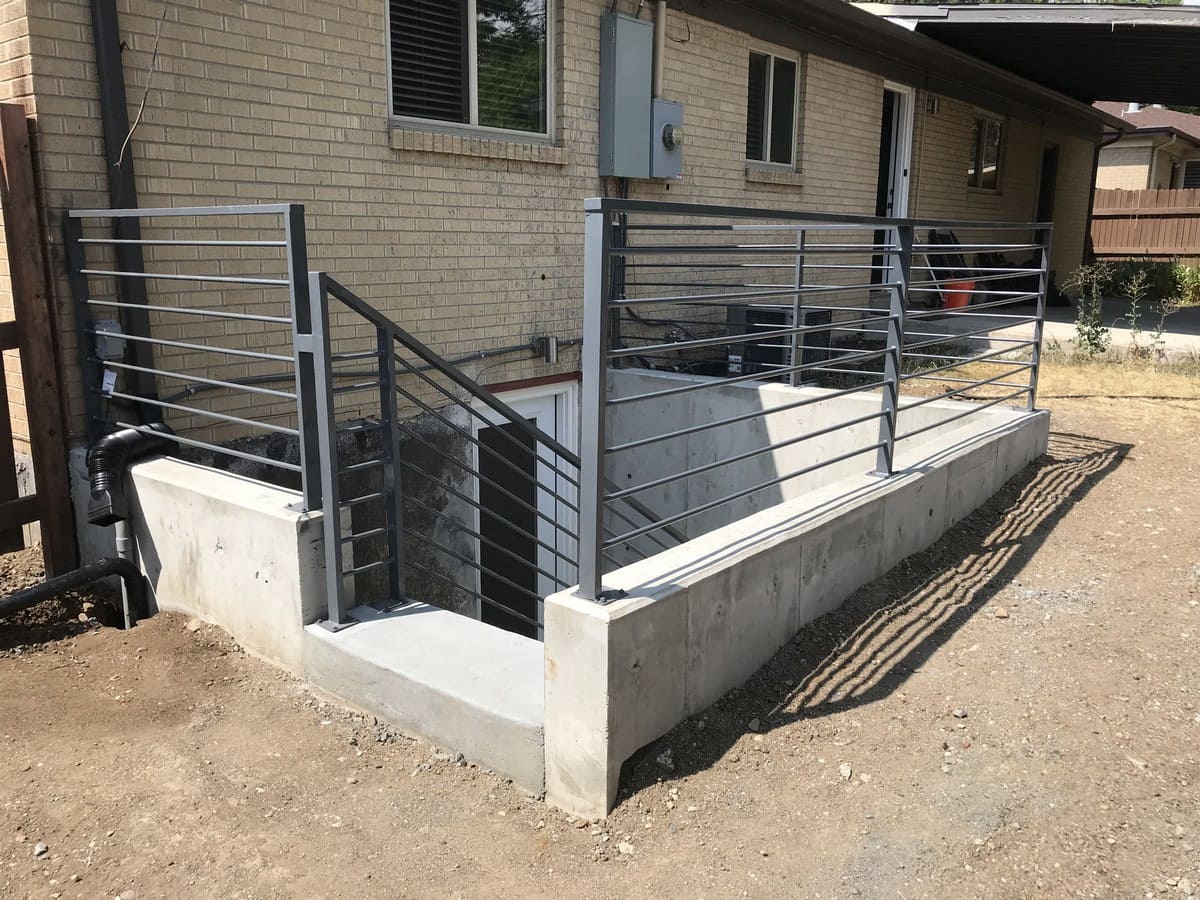
2. Cracks in the foundation: Over time, the foundation of a building may develop cracks, allowing water to enter the basement. These cracks can result from structural settling, hydrostatic pressure, or freeze-thaw cycles. It’s essential to inspect your foundation regularly and seal any cracks to prevent moisture infiltration.
3. High water table: In some cases, the level of the groundwater table may be above the basement floor, causing water to seep in through the concrete or between the joint spaces. This can be particularly challenging to address, as it may require professional solutions like installing a sump pump or French drain.
4. Inadequate waterproofing: If your basement lacks proper waterproofing measures, such as a moisture barrier or waterproof paint, it becomes susceptible to moisture intrusion. Without these protective layers, water can easily penetrate the walls, floors, and foundation, leading to dampness and mold growth.
5. Plumbing leaks: Leaky pipes or plumbing fixtures in the basement can introduce significant amounts of water. Even minor leaks, such as a dripping faucet or a leaking water heater, can contribute to moisture buildup and create a conducive environment for mold and mildew.
By identifying these common causes of moisture in the basement, you can take proactive steps to address them and prevent future issues. Addressing the underlying causes will not only remove existing moisture but also help maintain a dry and healthy basement environment.
Steps to Remove Moisture from the Basement
Now that you understand the source and common causes of moisture in the basement, it’s time to take action and remove the excess moisture. Follow these steps to effectively eliminate moisture and create a dry and healthy basement environment:
-
Read more: How To Fix Moisture In Basement
Identify and Fix any Plumbing Leaks
Start by inspecting your basement for any plumbing leaks. Check pipes, faucets, and water heaters for signs of moisture or dripping water. If you spot a leak, promptly repair or replace the affected components to prevent further water infiltration.
-
Install a Vapor Barrier
A vapor barrier is a plastic or foil sheeting that acts as a barrier between the soil and the basement walls and floor. Install a vapor barrier to prevent moisture from seeping through the concrete. This will help reduce humidity levels in the basement.
-
Improve Drainage around the Foundation
Ensure that the soil around your foundation has proper drainage to redirect water away from the basement. Clean and unclog gutters and downspouts, directing water at least a few feet away from the foundation. Consider grading the soil away from the foundation as well.
-
Ensure Proper Ventilation and Air Circulation
Poor ventilation and lack of air circulation can contribute to moisture buildup. Open windows and doors when weather permits to promote airflow. If necessary, consider installing vents or fans to improve ventilation in the basement.
-
Read more: How To Get A Bat Out Of The Basement
Use a Dehumidifier
A dehumidifier can effectively remove excess moisture from the air in your basement. Choose a dehumidifier with sufficient capacity for the size of your basement and operate it regularly to maintain optimal humidity levels.
-
Waterproof the Basement Walls
If you have persistent moisture issues, consider waterproofing the basement walls. This may involve applying a waterproofing paint or sealant to create a protective barrier against water penetration.
By following these steps, you can effectively remove moisture from your basement and prevent future problems. Remember to address the root causes of moisture and implement appropriate solutions to maintain a dry and healthy basement environment.
Identify and Fix any Plumbing Leaks
One of the first steps to remove moisture from your basement is to identify and fix any plumbing leaks. Leaky pipes or fixtures can introduce a significant amount of water into your basement, leading to dampness and potential water damage.
To identify plumbing leaks, thoroughly inspect your basement for signs of moisture or dripping water. Check pipes, faucets, and water heaters for any visible leaks or signs of corrosion. Look for water stains or damp spots on walls, floors, and ceilings.
If you find a leak, it’s crucial to fix it promptly to prevent further water infiltration. Depending on the severity of the leak and your plumbing skills, you may choose to fix it yourself or hire a professional plumber.
Here are some common methods to fix plumbing leaks:
- Tighten fittings: If the leak is coming from a loose fitting, use a wrench or pliers to tighten it. Be careful not to overtighten and cause additional damage.
- Replace washers: Leaky faucets are often caused by worn-out rubber washers. Turn off the water supply, disassemble the faucet, and replace the faulty washer with a new one.
- Repair or replace pipes: If the leak is coming from a damaged or corroded pipe, you may need to repair or replace the affected section. This may require cutting out the damaged portion and installing a new pipe or using pipe repair clamps.
- Contact a professional: For complex plumbing issues or if you’re unsure about your plumbing skills, it’s best to contact a licensed plumber. They have the expertise and tools to handle more extensive repairs and ensure a proper fix.
Remember, addressing and fixing plumbing leaks is essential for preventing further moisture infiltration into your basement. By promptly identifying and repairing leaks, you can eliminate a significant source of moisture and maintain a dry and healthy basement environment.
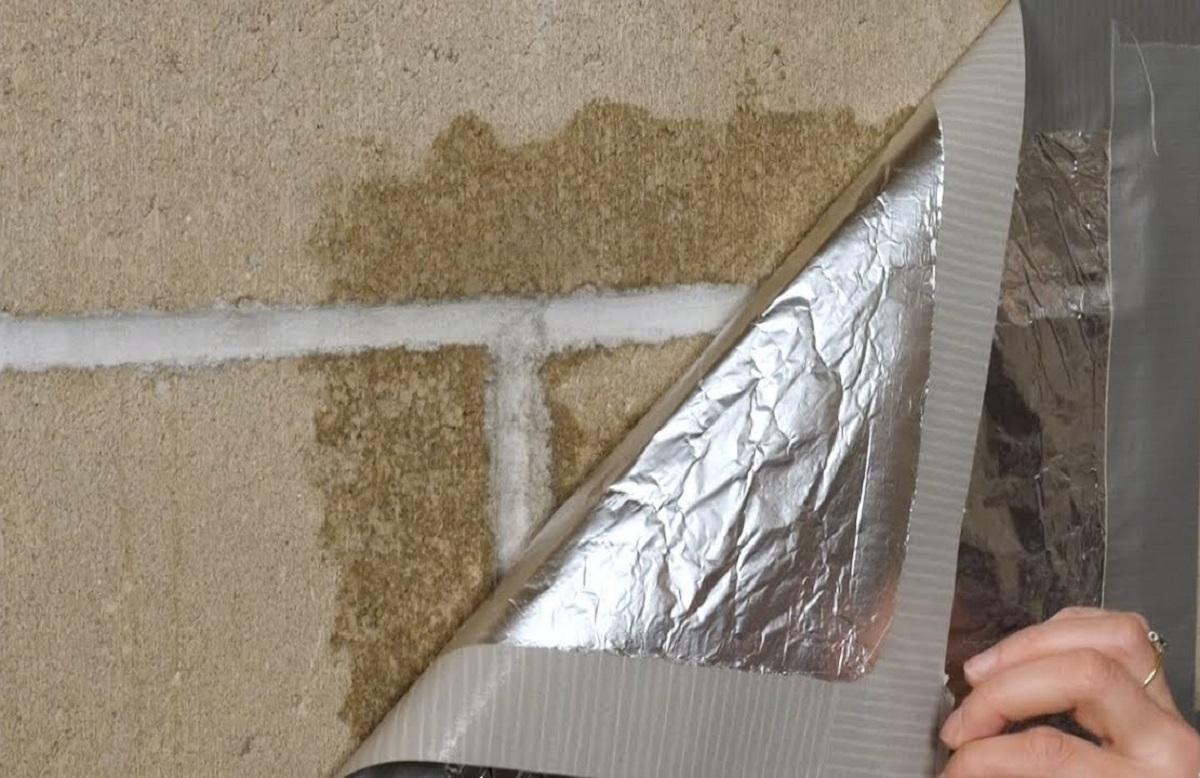
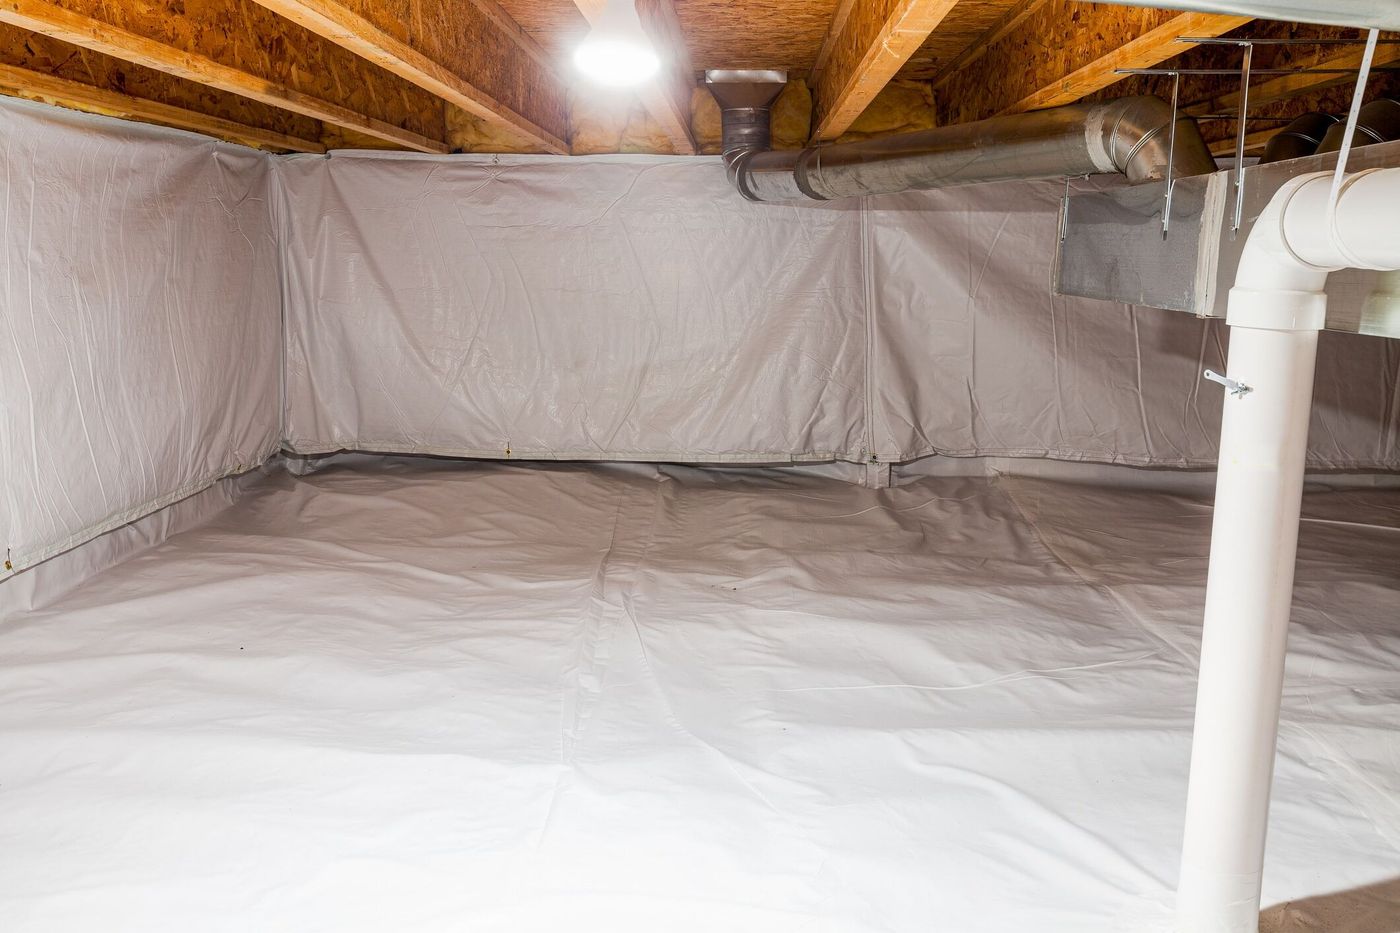
Install a Vapor Barrier
Installing a vapor barrier is an effective way to prevent moisture from seeping through the walls and floor of your basement. A vapor barrier acts as a protective layer, preventing moisture from infiltrating the basement space.
A vapor barrier is typically made of plastic or foil sheeting and is installed on the interior side of the basement walls and floor. When properly installed, it creates a barrier that blocks moisture vapor from passing through the concrete.
Here’s how to install a vapor barrier in your basement:
- Prepare the surfaces: Start by cleaning the walls and floor of your basement. Remove any dirt, dust, or loose debris. Make sure the surfaces are smooth and dry before proceeding.
- Choose the right material: Select a high-quality vapor barrier material suitable for your basement. The material should be durable, moisture-resistant, and meet industry standards for vapor transmission. Plastic sheeting or foil-based products are commonly used for this purpose.
- Measure and cut the sheets: Measure the height and length of each wall segment and floor space. Cut the vapor barrier sheets accordingly, leaving some excess material at the top and bottom for adjustments.
- Apply the vapor barrier: Start by applying the vapor barrier to the walls. Begin at one end and attach the sheet using adhesive or construction tape. Smooth out any wrinkles or air bubbles as you go along. Repeat the process for the remaining walls. For the floor, lay the sheets side by side and overlap the edges, securing them with tape or adhesive.
- Seal the seams: To ensure an airtight seal, use a special vapor barrier tape to seal the seams between the sheets. This will prevent moisture from seeping through gaps or joints in the barrier.
- Finish the installation: Trim any excess material and tidy up the edges. Consider adding a finishing touch, such as baseboards or molding, to enhance the appearance of the vapor barrier installation.
Installing a vapor barrier can significantly reduce moisture infiltration into your basement, helping to maintain a dry and healthy environment. It’s a relatively simple and cost-effective solution that provides long-term protection against moisture-related issues.
Improve Drainage around the Foundation
Poor drainage around the foundation can contribute to moisture problems in the basement. When water accumulates near the foundation, it can seep into the basement through cracks, gaps, or porous materials. Improving the drainage around your foundation is crucial for preventing moisture infiltration.
Here are some steps you can take to improve drainage and redirect water away from the foundation:
- Clean and unclog gutters and downspouts: Clear any debris, leaves, or dirt that may be blocking the gutters and downspouts. This allows rainwater to flow freely, preventing overflow and water pooling near the foundation.
- Extend downspouts: Ensure that your downspouts extend at least 5-10 feet away from the foundation. Use downspout extensions or splash blocks to redirect water away from the house. This prevents water from accumulating near the foundation and reduces the risk of moisture seepage.
- Grade the soil away from the foundation: Ensure that the soil around your foundation slopes away from the house. This helps direct surface water away from the foundation instead of pooling around it. Gradually slope the soil at a minimum of 6 inches over the first 10 feet.
- Consider installing a French drain: If you have persistent drainage issues, installing a French drain can be an effective solution. A French drain consists of a perforated pipe surrounded by gravel, which collects and redirects water away from the foundation.
- Managing landscaping: Avoid planting large shrubs or trees too close to the foundation. Their root systems can cause soil displacement and interfere with drainage. Also, make sure that any flower beds or garden areas are sloped away from the house to prevent water from pooling.
By improving the drainage around your foundation, you can effectively reduce the risk of moisture infiltration into your basement. Redirecting water away from the foundation helps create a dry and moisture-free environment, minimizing the chances of water-related damage or mold growth.
Ensure Proper Ventilation and Air Circulation
Proper ventilation and air circulation are important for controlling moisture levels in the basement. Without adequate airflow, stagnant air can contribute to moisture buildup and create a conducive environment for mold and mildew growth. Implementing strategies to improve ventilation and air circulation can help remove excess moisture and maintain a dry basement.
Consider the following steps to ensure proper ventilation and air circulation:
- Open windows and doors: When weather permits, open windows and doors in the basement to allow fresh air to circulate. This helps reduce humidity levels and promotes the exchange of stale air with fresh air from the outside.
- Install vents or fans: If natural ventilation is limited, consider installing vents or fans to improve air circulation. Place them strategically in areas prone to moisture buildup, such as near laundry machines or areas with poor airflow.
- Use exhaust fans: Install an exhaust fan in the bathroom or kitchen if these areas are located in the basement. Exhaust fans help remove excess moisture produced from activities like cooking or showering, preventing it from lingering in the air and causing humidity issues.
- Check and clean HVAC systems: Ensure that your heating, ventilation, and air conditioning (HVAC) system is functioning properly. Regularly clean or replace air filters to maximize airflow efficiency and remove potential allergens or contaminants from the air.
- Remove obstructions: Keep the area around vents, ducts, and air returns clear of obstructions. Blocking these areas can hinder proper airflow and ventilation, leading to trapped moisture.
- Consider a basement window well: If your basement has small windows or limited natural light, consider installing window wells. These enclosures allow more daylight into the basement, which helps reduce humidity levels and improve air quality.
Proper ventilation and air circulation are important for maintaining a dry and healthy basement environment. By implementing these strategies, you can effectively remove moisture, prevent mold growth, and promote a comfortable living space.
Make sure your gutters and downspouts are clear to prevent water from pooling around your foundation. Consider using a dehumidifier to remove excess moisture from the air in your basement.
Use a Dehumidifier
A dehumidifier is a valuable tool for removing excess moisture from the air in your basement. It works by drawing in humid air, condensing the moisture, and then releasing dry air back into the room. Using a dehumidifier can help control humidity levels, prevent condensation, and inhibit the growth of mold and mildew.
Follow these steps to effectively use a dehumidifier in your basement:
- Choose the right size dehumidifier: Consider the size and square footage of your basement when purchasing a dehumidifier. Look for one that is appropriately sized to effectively remove moisture from the space. Check the product specifications for the recommended room size and moisture removal capacity.
- Position the dehumidifier: Place the dehumidifier in a central location in your basement. Ensure that it is positioned away from walls and furniture to allow proper airflow. Keep the unit elevated, such as on a sturdy table or shelf, to prevent it from being damaged by any water that may accumulate on the basement floor.
- Set the desired humidity level: Most dehumidifiers allow you to set a desired humidity level. Ideally, maintain a humidity level between 30% and 50%. Adjust the settings based on the humidity levels in your basement and the recommended range for your specific needs.
- Regularly empty and clean the water reservoir: Dehumidifiers collect the extracted moisture in a water reservoir. Regularly check and empty the reservoir to prevent overflow. Also, periodically clean the reservoir to prevent the growth of mold or bacteria. Follow the manufacturer’s instructions for proper cleaning and maintenance.
- Maintain the dehumidifier: Keep the dehumidifier running consistently, especially during periods of high humidity. This ensures continuous moisture removal from the air. Regularly check and clean the air filters to maintain efficient operation. Replace or clean the filters as recommended by the manufacturer.
- Monitor and adjust as needed: Regularly monitor the humidity levels in your basement using a hygrometer. If the humidity level remains consistently high, consider adjusting the dehumidifier settings or incorporating additional moisture removal methods to effectively control humidity.
Using a dehumidifier is an effective way to remove excess moisture and prevent dampness in your basement. By maintaining optimal humidity levels, you can create a comfortable and mold-free space for your family to enjoy.
Waterproof the Basement Walls
Waterproofing the basement walls is a proactive measure to prevent moisture infiltration and protect the foundation of your home. By creating a barrier against water penetration, you can ensure a dry and healthy basement environment.
Here are the steps to effectively waterproof your basement walls:
- Identify any existing issues: Before you begin the waterproofing process, inspect the basement walls for any existing cracks, gaps, or areas of moisture penetration. Seal any visible cracks or gaps with an appropriate sealant or waterproofing material.
- Clean the walls: Thoroughly clean the basement walls, removing any dirt, debris, or loose materials. A clean surface will help the waterproofing material adhere properly.
- Choose a waterproofing product: Select a high-quality waterproofing product that is suitable for your basement walls. There are various options available, including waterproof paint, sealants, or waterproofing membranes.
- Apply the waterproofing material: Follow the manufacturer’s instructions to apply the chosen waterproofing product to the basement walls. This may involve brushing, rolling, or spraying the material onto the walls. Ensure even coverage and pay attention to corners, edges, and any vulnerable areas.
- Allow proper drying time: Depending on the type of waterproofing product used, allow sufficient drying time for the material to fully cure. Follow the recommended drying time provided by the manufacturer before moving on to the next steps.
- Consider additional protective measures: To enhance the effectiveness of the waterproofing, you may want to consider adding additional protective measures. This could include installing a drainage system, such as a perimeter drain or a sump pump, to redirect water away from the foundation.
- Maintain the waterproofing: Regularly inspect the basement walls for any signs of wear or damage to the waterproofing. Address any issues promptly to ensure ongoing protection against moisture infiltration. Additionally, monitor the basement for any signs of moisture or water intrusion and take immediate action if any problems arise.
Waterproofing your basement walls is an investment in the long-term protection and preservation of your home. It can help prevent water damage, mold growth, and structural issues caused by moisture. By taking these steps, you can create a waterproof barrier, ensuring a dry and secure basement space.
Read more: How To Get Rid Of Moisture In The Attic
Conclusion
Moisture in the basement can be a persistent and troublesome issue, but with the right knowledge and steps, it can be effectively resolved. By understanding the source of moisture and assessing the severity of the problem, you can implement targeted solutions to remove moisture and prevent future issues.
Identifying and fixing any plumbing leaks, installing a vapor barrier, improving drainage around the foundation, ensuring proper ventilation and air circulation, using a dehumidifier, and waterproofing the basement walls are all key steps in the process of removing moisture from your basement.
Each of these steps plays a crucial role in creating a dry and healthy basement environment. By addressing the root causes of moisture and implementing appropriate solutions, you can prevent water damage, mold growth, and structural issues. Regular maintenance and vigilance are also important to ensure the effectiveness of these moisture removal methods.
Remember, the key to successfully removing moisture from your basement is to be proactive and take necessary steps to prevent moisture infiltration. By doing so, you can enjoy a dry and comfortable basement space that adds value to your home.
Now that you have a comprehensive understanding of how to get moisture out of your basement, it’s time to start implementing these strategies and reclaim your basement as a dry, healthy, and enjoyable part of your home.
Frequently Asked Questions about How To Get Moisture Out Of The Basement
Was this page helpful?
At Storables.com, we guarantee accurate and reliable information. Our content, validated by Expert Board Contributors, is crafted following stringent Editorial Policies. We're committed to providing you with well-researched, expert-backed insights for all your informational needs.

0 thoughts on “How To Get Moisture Out Of The Basement”