Articles
How To Frame Out Basement Walls
Modified: October 20, 2024
Learn how to frame out basement walls with our informative articles. Get step-by-step instructions and expert tips for a successful basement remodeling project.
(Many of the links in this article redirect to a specific reviewed product. Your purchase of these products through affiliate links helps to generate commission for Storables.com, at no extra cost. Learn more)
Introduction
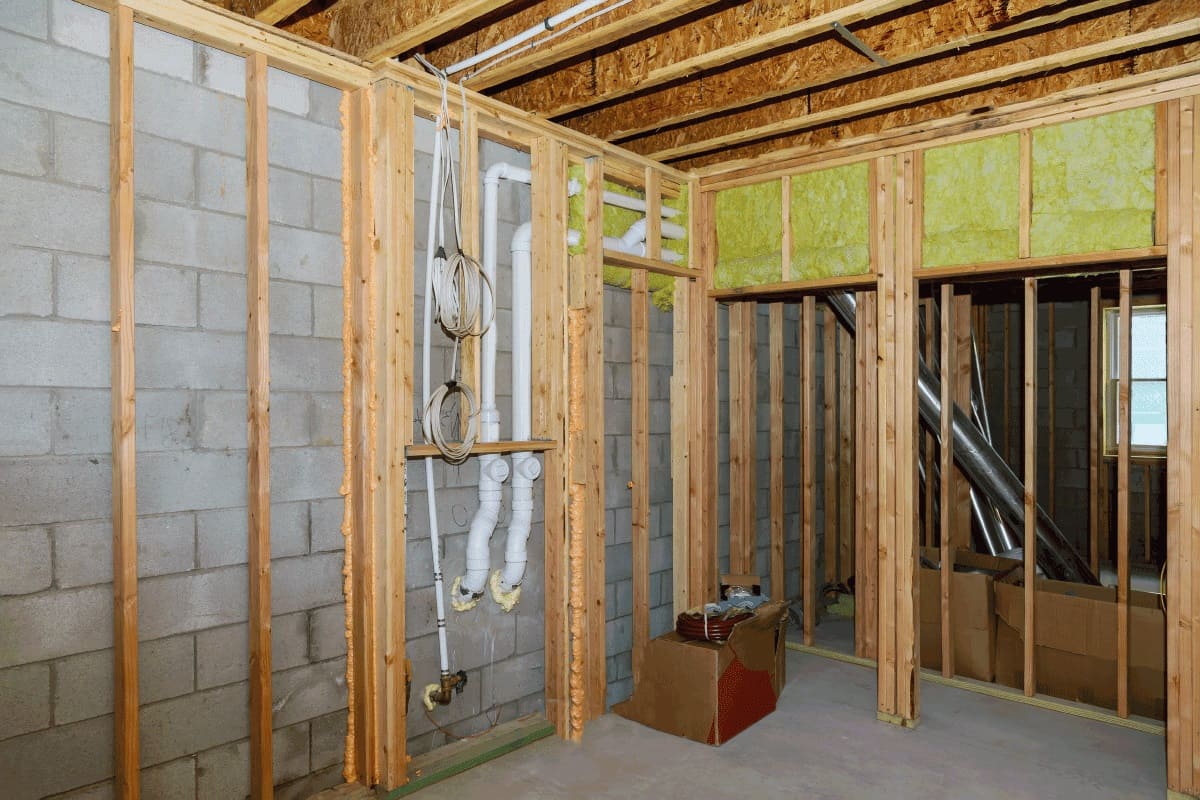
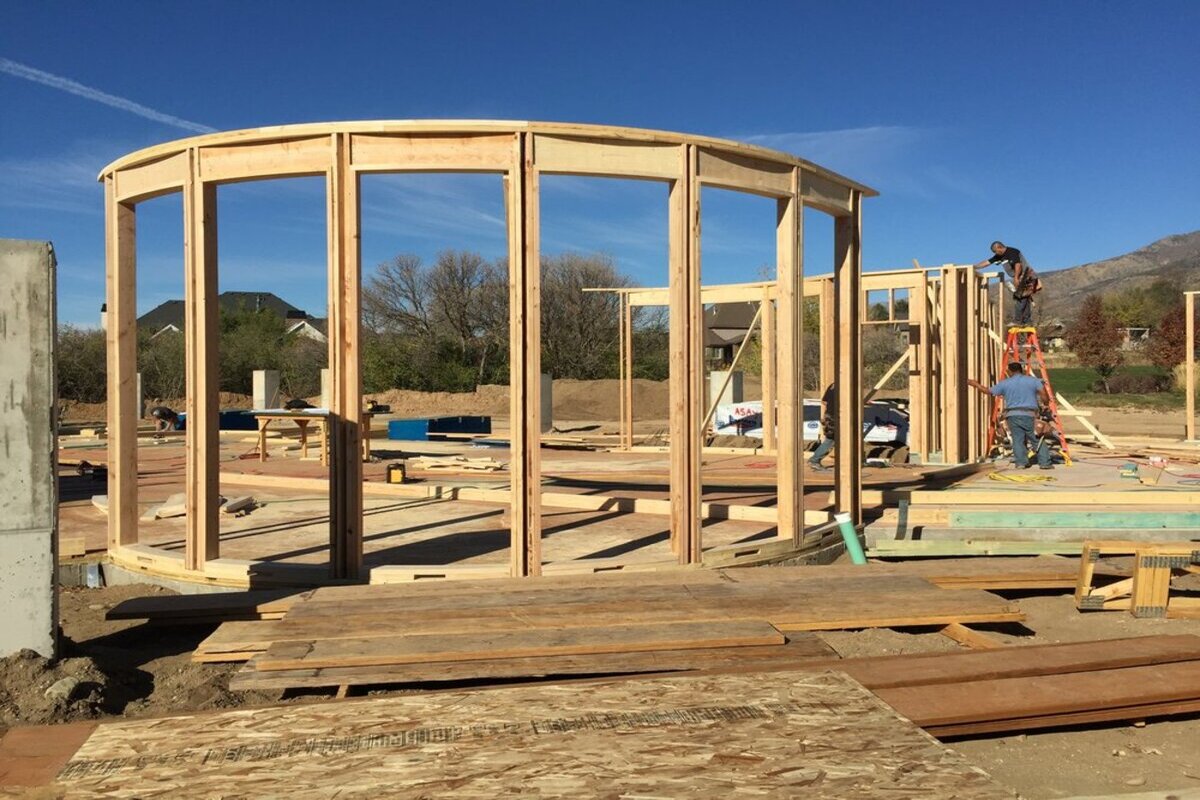
When it comes to finishing a basement, framing out the walls is an essential step. Not only does it provide structural support, but it also creates a framework for hanging drywall, installing insulation, and adding electrical wiring. By properly framing the basement walls, you can transform an unused, dark space into a functional and inviting part of your home.
In this article, we will guide you through the process of framing out basement walls, step by step. Whether you are a seasoned DIY enthusiast or a beginner, you can follow these instructions to successfully frame your basement walls and create a solid foundation for your basement renovation.
Before we dive into the steps, it is important to note that safety should always be a top priority. Make sure to wear appropriate protective gear, such as safety goggles and gloves, and use caution when working with power tools.
Now, let’s get started with the first step, which is gathering the necessary tools and materials.
Key Takeaways:
- Transform your basement into a functional living space by following the step-by-step process to frame out the walls, ensuring structural support, insulation, and electrical wiring for a successful renovation.
- Prioritize safety, gather necessary tools, and follow building codes to create a solid foundation for your basement renovation. From measuring and marking to finishing touches, framing out basement walls is manageable and rewarding with the right guidance.
Step 1: Gather the Necessary Tools and Materials
Before you begin framing out your basement walls, it’s important to gather all the necessary tools and materials. Having everything you need on hand will make the process much smoother and more efficient. Here are the essential tools and materials you will need:
- Measuring tape
- Pencil or marker
- Level
- Hammer
- Nails
- Screwdriver or drill
- Screws
- Saw
- Stud finder
- Insulation materials
- Drywall or sheathing
- Electrical wiring
Make sure to have the appropriate sizes and quantities of each tool and material, depending on the dimensions of your basement walls.
It’s also a good idea to wear safety goggles and gloves to protect yourself while working with tools and building materials.
Before you start the framing process, double-check that you have all the necessary tools and materials. Having them within reach will save you time and prevent any unnecessary interruptions during the process.
Once you have everything you need, you can move on to the next step: measuring and marking the wall layout.
Step 2: Measure and Mark the Wall Layout
Before you start framing out the basement walls, it’s crucial to measure and mark the wall layout. This step will ensure that your walls are accurately positioned and aligned.
To begin, use a measuring tape to determine the dimensions of the walls. Measure the length and height of each wall that you plan on framing. Take note of any obstructions, such as pipes or electrical outlets, and consider how they will affect the layout of your walls.
With your measurements in hand, use a pencil or marker to mark the wall locations on the basement floor. Start by marking the locations of the corners and then connect the dots to create straight lines. Make sure the lines are level by using a level tool.
If you plan on dividing your basement into separate rooms or areas, mark the locations where the walls will intersect. This will help you determine where to install additional studs for added stability.
Remember to take into account any building codes or regulations that may apply to your area. Some locations require specific spacing between studs or certain dimensions for basement walls. By adhering to these guidelines, you can ensure that your framed walls will meet the necessary standards.
Once you have measured and marked the wall layout, you’re ready to move on to the next step: installing the bottom plate.
Step 3: Install the Bottom Plate
With the wall layout marked, it’s time to install the bottom plate. The bottom plate serves as a base for the wall frame and provides stability and support.
To install the bottom plate, begin by measuring and cutting a length of pressure-treated lumber or a similar material to fit the length of your wall. Ensure that it is level with the marked line on the floor.
Once you have the correct length, use a drill or a hammer and nails to secure the bottom plate to the basement floor. Make sure the plate is firmly attached and level. You can use concrete screws or nails specifically designed for securing wood to concrete.
If your basement has a concrete floor, you may need to use a hammer drill to create pilot holes for the screws or nails. Be sure to wear appropriate safety gear when working with power tools.
After installing the bottom plate, you can move on to the next step: installing the top plate.
Note: If your basement has a wooden subfloor instead of concrete, you can secure the bottom plate directly to the subfloor using screws or nails.
Step 4: Install the Top Plate
After installing the bottom plate, it’s time to move on to installing the top plate. The top plate serves as the upper boundary of the wall frame and provides stability.
To install the top plate, measure and cut a piece of lumber or similar material to match the length of your wall. Ensure that it is level with the corresponding marked line on the ceiling.
Once you have the correct length, use a drill or a hammer and nails to secure the top plate to the ceiling. Make sure it is firmly attached and level. If you are attaching it to ceiling joists, use screws or nails specifically designed for this purpose.
If your ceiling doesn’t have joists, or if you need extra support, you may need to install blocking between the ceiling joists. Blocking refers to horizontal pieces of lumber installed between joists to provide additional support for the top plate. Measure, cut, and install the blocking at regular intervals along the length of the wall.
After installing the top plate, your wall frame is starting to take shape. The bottom and top plates, along with the marked walls on the floor and ceiling, will serve as guides for the rest of the framing process.
With the bottom and top plates securely in place, you can move on to the next step: installing the studs.
Read more: How To Get Basement Smell Out Of Basement
Step 5: Install the Studs
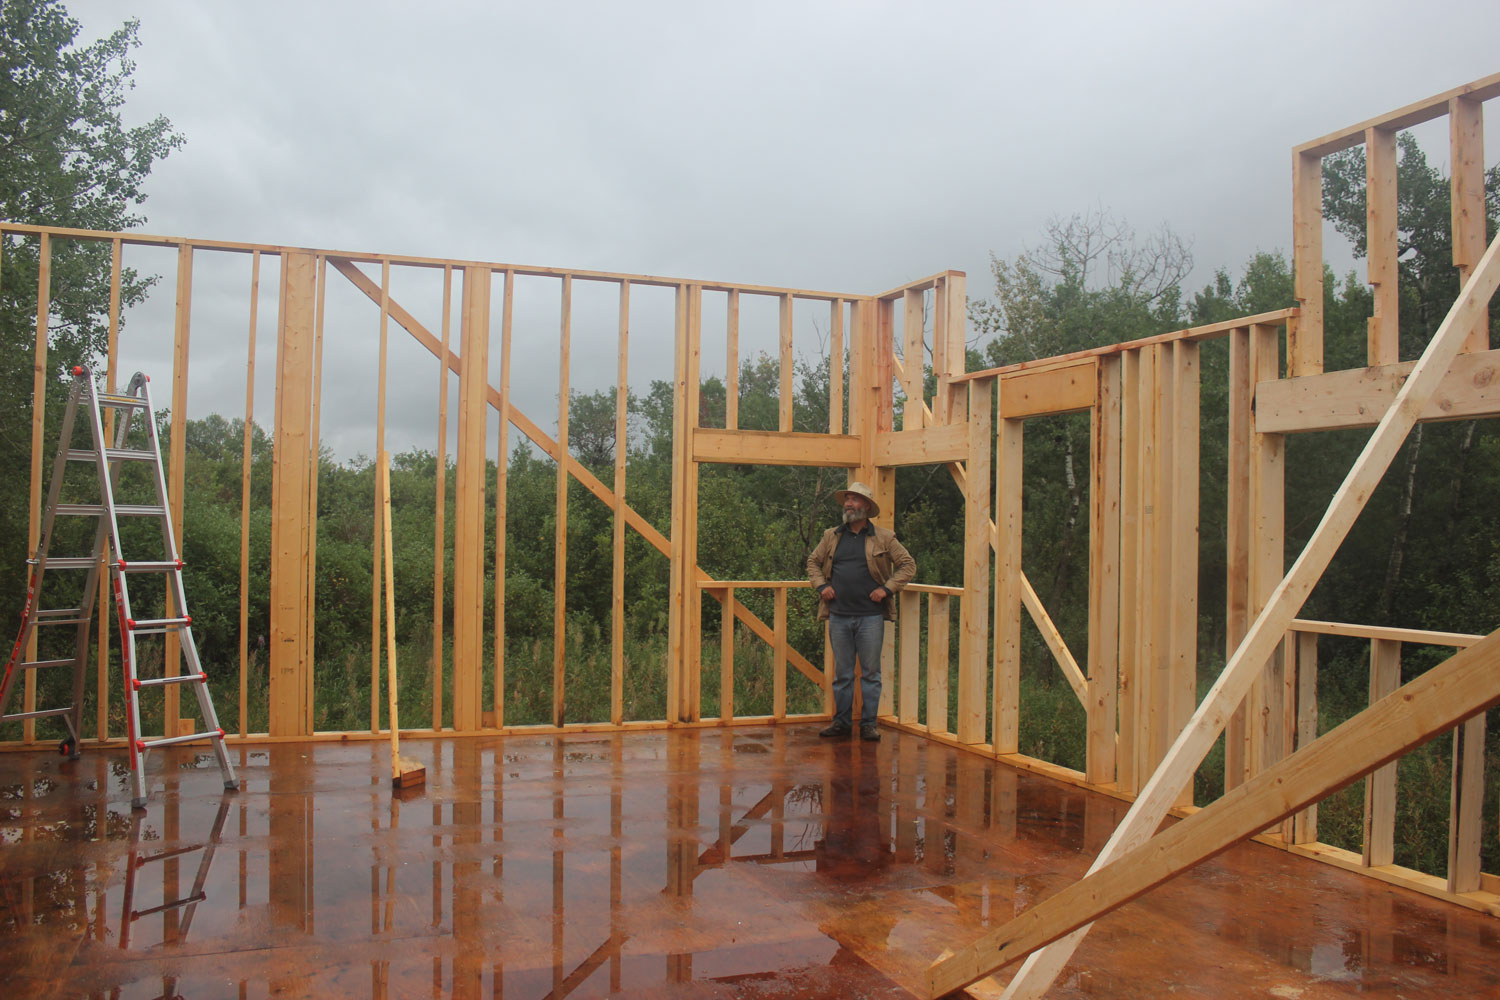
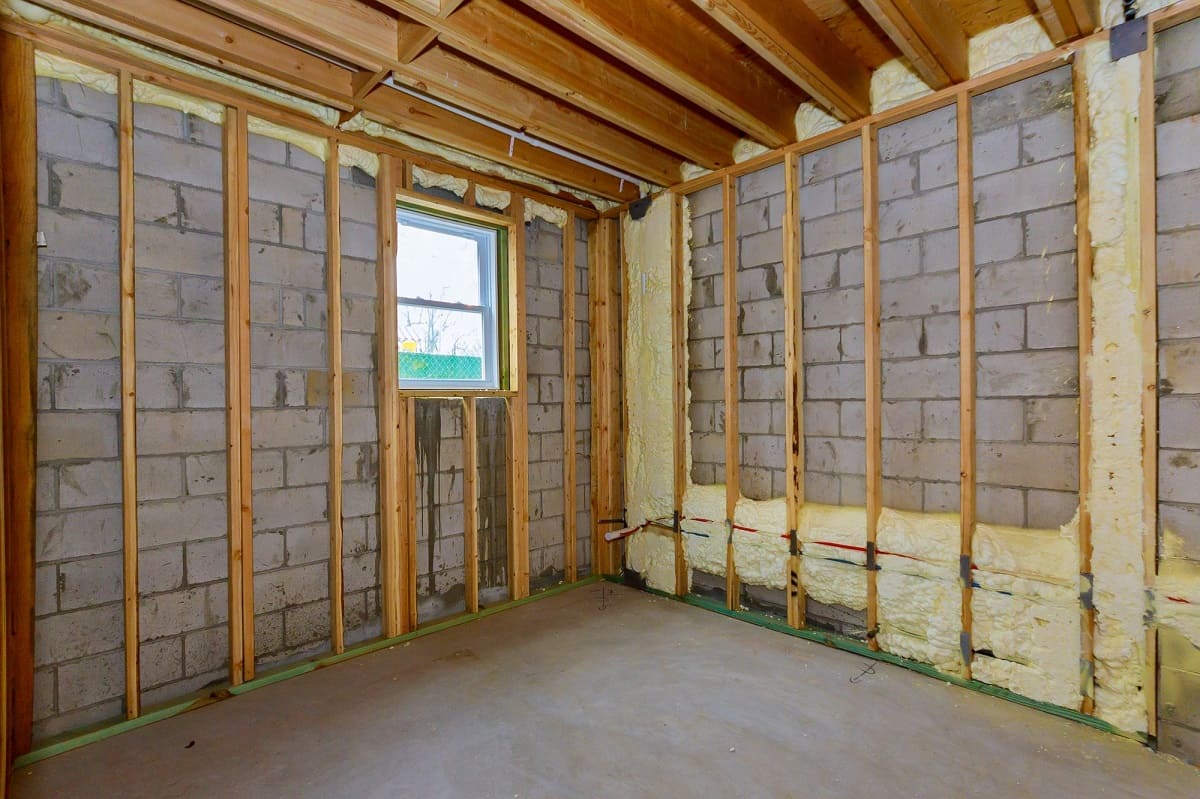
With the bottom and top plates in place, it’s time to install the studs. The studs will form the vertical framework of the wall and provide structural support.
Start by measuring the distance between the bottom and top plates, subtracting the thickness of the two plates. This will give you the length of the studs needed for your walls.
Using a saw, cut the studs to the appropriate length. Remember to account for any openings, such as doorways or windows, by measuring and cutting the studs accordingly.
Next, position the first stud against the bottom plate and align it with the marked lines on the floor and ceiling. Make sure it is plumb, meaning it is perfectly vertical, by using a level. Secure the stud to the plates by nailing or screwing through the plates and into the sides of the stud. Repeat this process with the remaining studs, evenly spacing them along the wall.
If your basement walls are longer than the length of a single stud, you will need to install multiple studs end-to-end to create a continuous wall frame. Make sure the ends of adjacent studs are properly aligned and fully supported by the top and bottom plates. Use additional blocking if necessary to reinforce the connections between the studs.
Remember to leave spaces for doorways or windows as needed, ensuring that the required rough openings are maintained.
As you progress, periodically check for plumb and level to ensure the wall frame is straight and aligned. This will ensure a solid and straight base for your finished walls.
With the studs installed, your wall frame is taking shape. Now it’s time to move on to the next step: securing the electrical wiring.
When framing out basement walls, be sure to use pressure-treated lumber to prevent moisture damage. This will help ensure the longevity and stability of your basement walls.
Step 6: Secure the Electrical Wiring
Once the wall frame is in place, it’s essential to secure the electrical wiring before proceeding with further construction. This step ensures that the wiring is safely installed and easily accessible for electrical outlets, switches, and fixtures.
Start by mapping out the locations for electrical outlets, switches, and any other electrical components you plan on incorporating into your basement walls. Determine the appropriate heights for these fixtures and mark their positions on the studs.
Next, carefully measure and cut holes in the studs at the marked positions. These holes should be large enough to accommodate electrical boxes or conduits, allowing for easy installation and future access.
Begin by running the electrical wiring through the walls, starting from the main electrical panel. Follow electrical codes and regulations regarding wire gauge and proper wiring techniques.
Use appropriate wiring fasteners, such as staples or plastic clips, to secure the wiring to the studs. Ensure that the wiring is positioned away from potential hazards, such as plumbing or insulation.
As you install the wiring, be sure to leave enough slack to reach the electrical boxes or conduits. Avoid pulling the wires too tightly, as it can cause damage or problems during installation and future repairs.
Once the wiring is secure, install electrical boxes at the marked locations and connect the wiring to the appropriate terminals. Be sure to follow the proper wiring connections and safety guidelines. If you are unsure about electrical work, it is recommended to consult a professional electrician.
Remember to leave access points for future repairs or additions by installing removable panels or covers over the electrical boxes.
By securing the electrical wiring at this stage, you ensure a safe and efficient electrical system for your finished basement.
Now that the wiring is in place, you can proceed to the next step: insulating the walls.
Step 7: Insulate the Walls
Insulating the walls is a crucial step to ensure energy efficiency and temperature control in your basement. Proper insulation will help keep the space comfortable and reduce energy costs.
Begin by selecting the appropriate insulation material for your walls. Common options include fiberglass batts, rigid foam insulation, or spray foam insulation. Consider the R-value of the insulation, which measures its thermal resistance, and choose the appropriate thickness for your climate zone.
Starting at the corner of the wall, carefully measure the height between the bottom and top plates. Cut the insulation material to fit the length of the wall, leaving a small gap at the top and bottom for air circulation.
Insert the insulation between the wall studs, pressing it firmly and ensuring a snug fit. Make sure the insulation is properly aligned with no gaps or compressions. If needed, use a utility knife to trim the insulation to the correct size.
Continue this process for each wall, working around any obstructions such as electrical outlets, switches, or plumbing pipes. Cut openings in the insulation to fit around these obstacles, ensuring a tight seal.
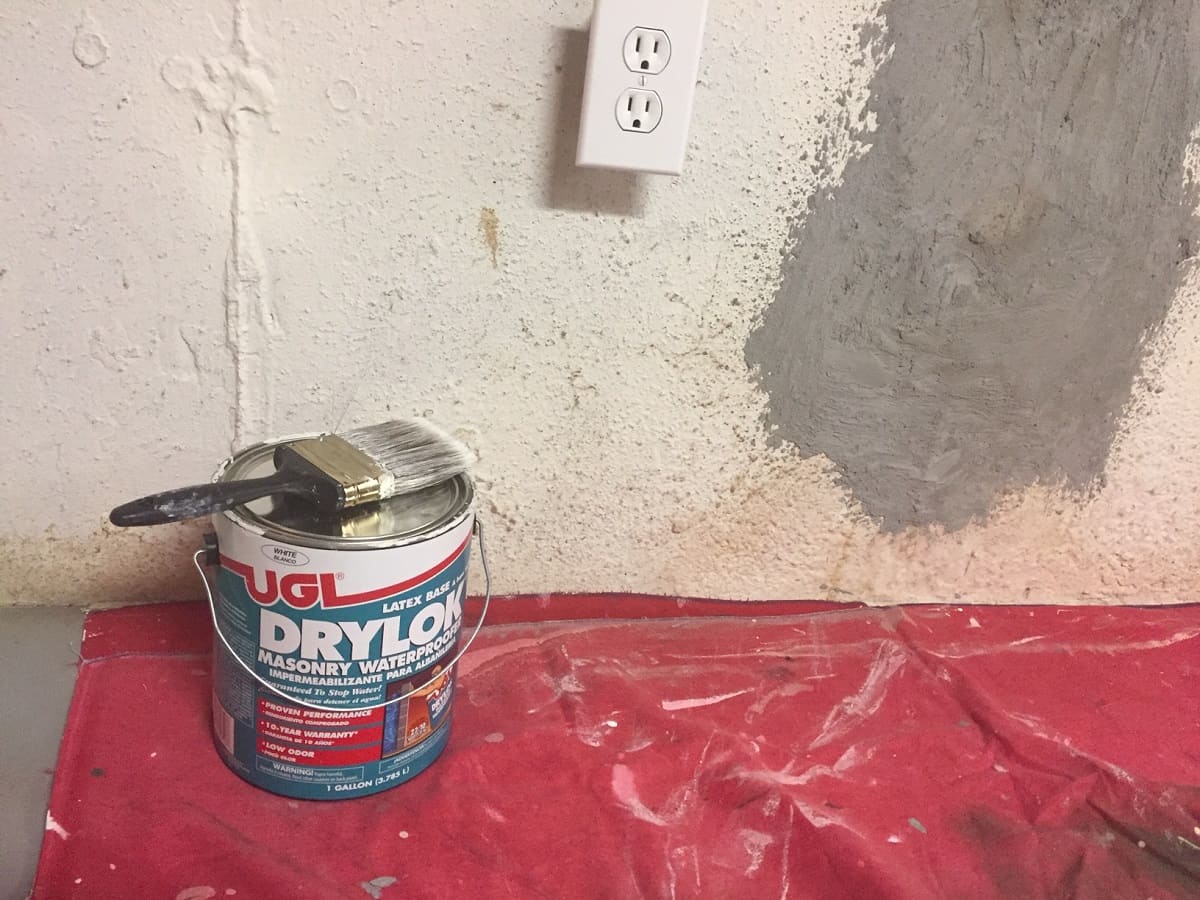
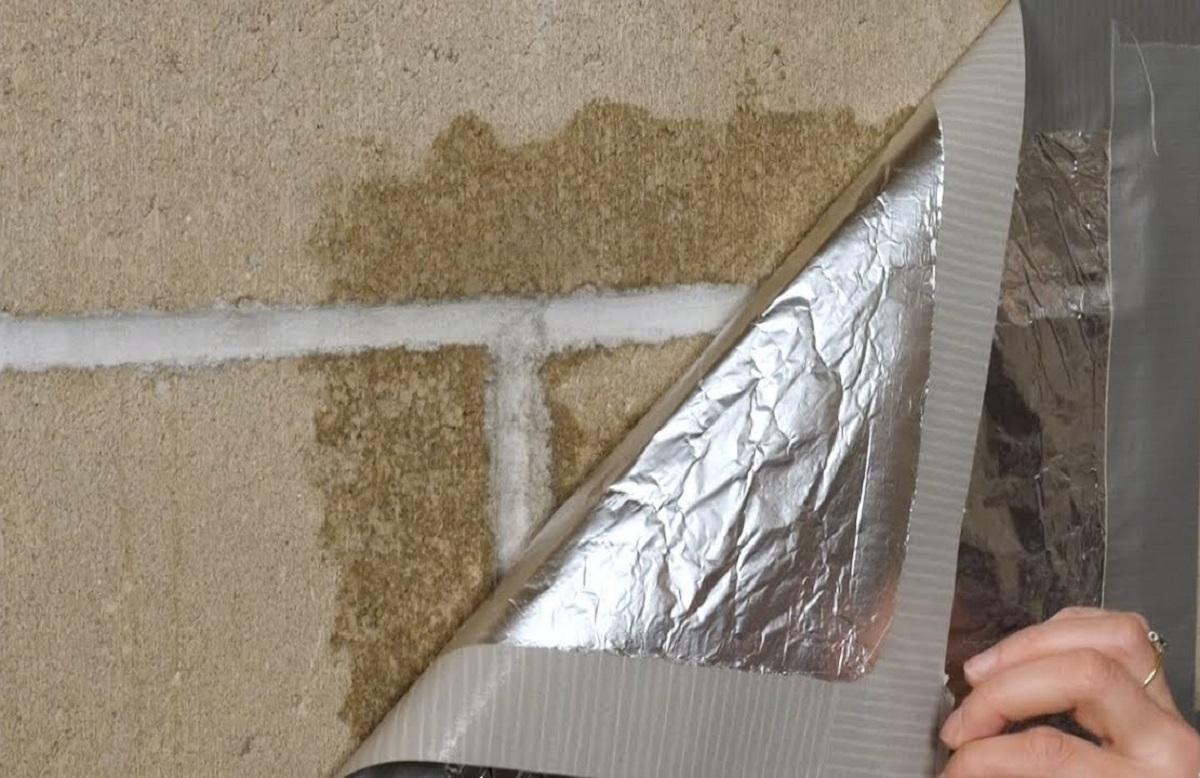
For improved insulation performance, you can also install a vapor barrier over the insulation. A vapor barrier helps control moisture and can prevent condensation from forming within the walls.
Secure the vapor barrier to the studs using staples or adhesive, ensuring a complete seal around the edges. Overlap the seams by a few inches and tape them securely to create a continuous barrier.
Insulating the walls will not only improve energy efficiency but also provide soundproofing benefits, reducing noise transfer between rooms or from outside sources.
Once the walls are insulated, you can move on to the next step: installing sheathing or drywall.
Step 8: Install Sheathing or Drywall
With the walls insulated, it’s time to install sheathing or drywall to provide a finished surface. Sheathing and drywall not only complete the look of the walls but also add structural integrity and fire resistance.
If you choose to install sheathing, start by measuring and cutting the sheathing panels to fit the dimensions of the walls. Place the panels vertically against the framed walls and secure them using nails or screws. Ensure that the panels are flush with the edges of the stud framing.
Leave a small gap, typically 1/8 inch, between each panel to allow for expansion. Secure the sheathing at regular intervals along the studs to ensure a stable and secure attachment.
On the other hand, if you prefer to install drywall, measure and cut the drywall sheets to fit the dimensions of the walls. Position the sheets horizontally and align the edges with the center of the studs. Leave a small gap between each sheet for expansion, typically 1/4 inch, and secure the drywall to the studs using drywall screws. Be sure to countersink the screws slightly below the surface of the drywall.
For added strength and stability, apply a layer of construction adhesive to the back of the sheathing or drywall before securing it to the studs. This will ensure a strong bond between the panels and the framing.
If needed, cut openings in the sheathing or drywall to fit around electrical outlets, switches, or any other fixtures on the walls. Use a utility knife or a drywall saw for precise cuts.
After installing the sheathing or drywall, inspect the walls for any imperfections or gaps. Fill any gaps or seams with joint compound and apply tape over the seams to create a smooth and seamless finish.
Once the sheathing or drywall is installed and finished, you’re one step closer to completing your basement walls. But before you put on the final touches, there’s one more crucial step to consider: finishing the walls.
Read more: How To Dry Out Basement
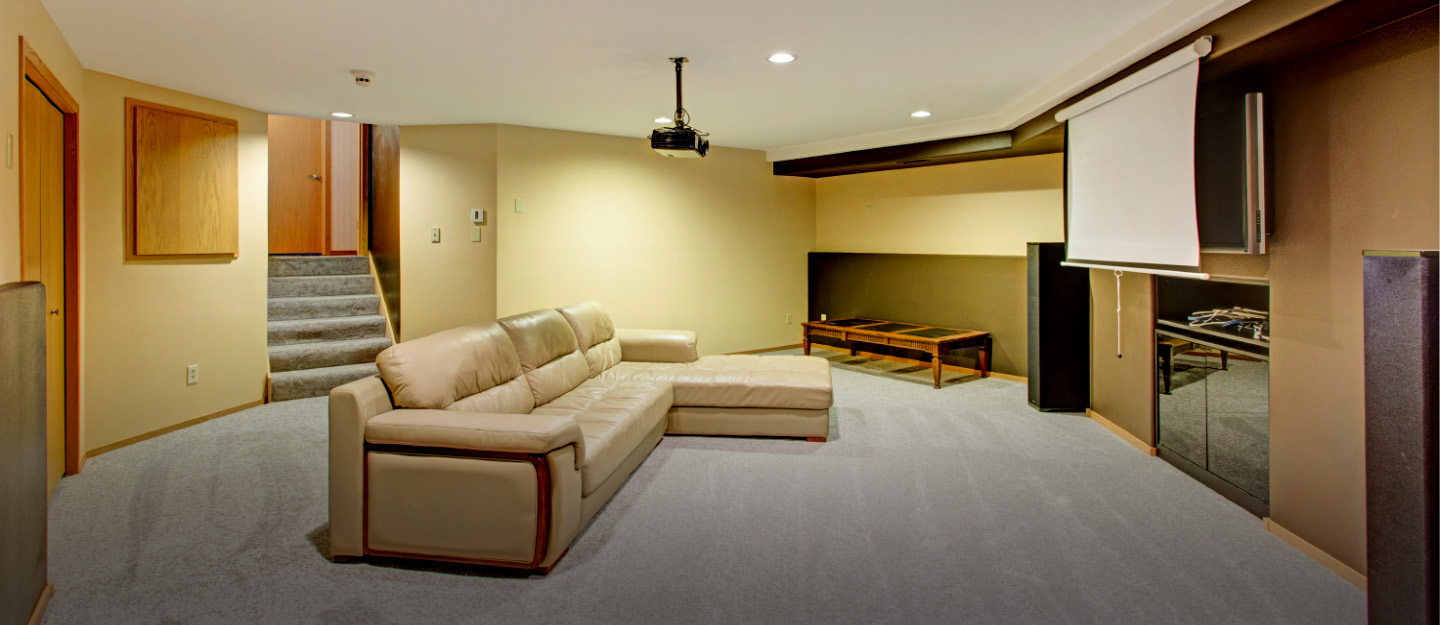
Step 9: Finish the Walls
The final step in framing out your basement walls is finishing them to create a polished and visually appealing space. This step involves adding texture, paint, or any other desired finishing touches to complete the transformation of your basement.
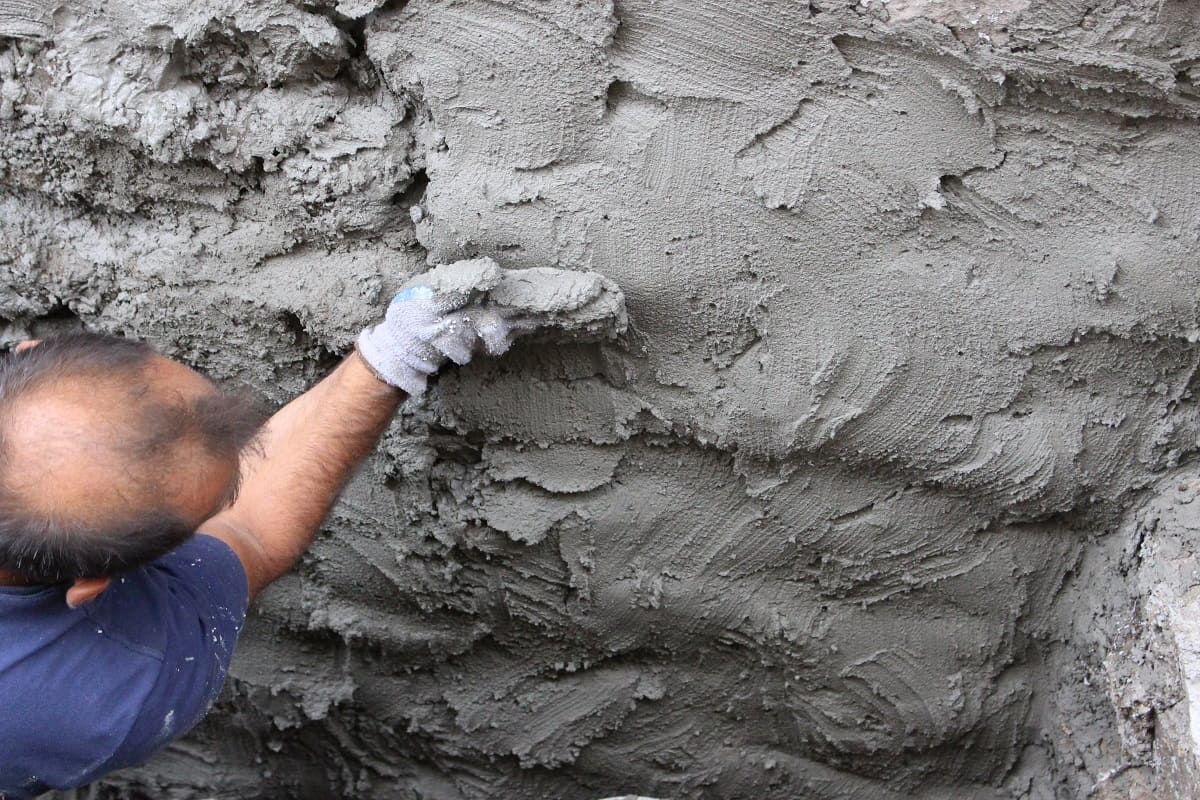
If you prefer a smooth and sleek look, you can apply a skim coat of joint compound over the entire surface of the drywall. This will help create a seamless appearance and fill in any imperfections or uneven areas.
Once the joint compound is dry, sand the walls to achieve a smooth finish. Use a sanding block or an electric sander with fine-grit sandpaper to gently sand the walls, removing any roughness or inconsistencies.
After sanding, it’s time to prime the walls. Apply a coat of primer to the entire surface, which will help seal the drywall and provide a base for the paint to adhere to. Follow the manufacturer’s instructions for drying time and application techniques.
Once the primer is dry, you can apply your chosen paint color to the walls. Use a roller or a paintbrush to apply the paint evenly, starting from the top and working your way down. Apply multiple coats if necessary, allowing sufficient drying time between each coat.
If you prefer a textured look, you can explore different techniques such as stucco, faux finishes, or sponge painting to add depth and visual interest to your walls. These techniques can help disguise any minor imperfections and create a unique and personalized look.
Additionally, you can consider adding wainscoting, decorative trim, or wallpaper to enhance the aesthetics of your basement walls. These options allow for customization and can add a touch of elegance or personality to the space.
Once the walls are finished to your satisfaction, take a step back and admire the transformation you’ve achieved. Your basement has now been fully framed, insulated, and finished, ready for you to enjoy and utilize the newfound living space.
Remember to allow ample time for all applied materials to dry or cure before proceeding with any additional construction or furnishing.
Congratulations on successfully framing out your basement walls! Your hard work and attention to detail have paid off, resulting in a beautiful and functional space within your home.
Now, it’s time to sit back, relax, and enjoy your newly framed basement walls!
Note: The process and specific materials used for finishing the walls may vary depending on individual preferences and local building codes or regulations.
Conclusion
Framing out basement walls is a crucial step in transforming an unused space into a functional and inviting part of your home. It not only provides structural support but also creates a framework for insulation, electrical wiring, and finishing materials. By following the step-by-step process outlined in this article, you can successfully frame out your basement walls and create a solid foundation for your basement renovation.
Throughout the framing process, it’s important to prioritize safety by wearing appropriate protective gear and using caution when working with power tools. Adhering to building codes and regulations is also essential to ensure your walls meet the required standards.
Gathering the necessary tools and materials, measuring and marking the wall layout, and installing the bottom and top plates are crucial starting points. From there, installing the studs, securing electrical wiring, insulating the walls, and adding sheathing or drywall contribute to a structurally sound and energy-efficient space. Finally, finishing the walls with texture, paint, or other personalized touches completes the transformation.
Remember to take your time throughout the process, double-check measurements, and ensure proper insulation and electrical installation. Whether you’re a seasoned DIY enthusiast or a beginner, framing out basement walls can be both rewarding and manageable with the right tools, materials, and step-by-step guidance.
Now that you have the knowledge and understanding of how to frame out basement walls, you can confidently embark on your basement renovation project. So roll up your sleeves, gather your tools, and get ready to create a beautiful space that you and your family will enjoy for years to come.
Frequently Asked Questions about How To Frame Out Basement Walls
Was this page helpful?
At Storables.com, we guarantee accurate and reliable information. Our content, validated by Expert Board Contributors, is crafted following stringent Editorial Policies. We're committed to providing you with well-researched, expert-backed insights for all your informational needs.


0 thoughts on “How To Frame Out Basement Walls”