Home>Gardening & Outdoor>Outdoor Recreation & Activities>How To Disassemble Little Tikes Trampoline
Outdoor Recreation & Activities
How To Disassemble Little Tikes Trampoline
Modified: October 18, 2024
Learn how to safely disassemble your Little Tikes trampoline with our step-by-step guide. Keep your outdoor-recreation-and-activities area organized and secure.
(Many of the links in this article redirect to a specific reviewed product. Your purchase of these products through affiliate links helps to generate commission for Storables.com, at no extra cost. Learn more)
Introduction
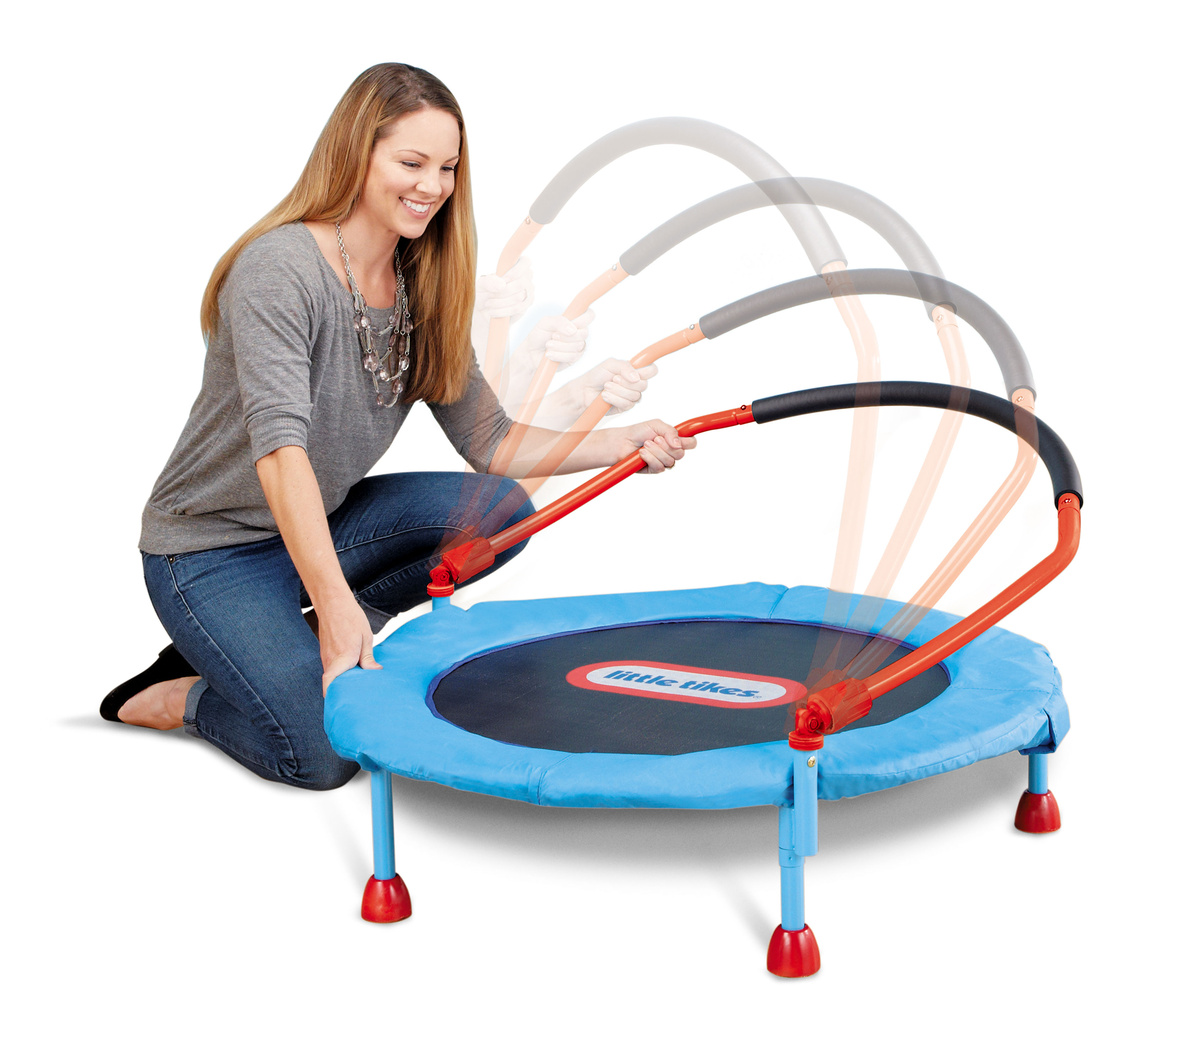
Disassembling a Little Tikes trampoline is a straightforward process that allows for easy storage or transportation. Whether you're relocating, storing it for the winter, or simply need to clear space, knowing how to take apart your trampoline can be incredibly useful. In this guide, we'll walk you through the step-by-step process of disassembling a Little Tikes trampoline. By following these instructions, you'll be able to safely and efficiently dismantle your trampoline, ensuring that it remains in top condition for future use.
Taking apart a trampoline may seem daunting at first, but with the right tools and a systematic approach, it can be a manageable task. Before you begin, it's important to gather all the necessary tools and materials to ensure a smooth disassembly process. This guide will provide detailed instructions on each step, from preparing the work area to cleaning and storing the disassembled parts. By the end of this tutorial, you'll have the knowledge and confidence to disassemble your Little Tikes trampoline with ease. Let's get started!
Key Takeaways:
- Disassembling a Little Tikes trampoline is a manageable task with the right tools and systematic approach. It allows for convenient storage and transportation, contributing to the trampoline’s maintenance and longevity.
- By following the step-by-step guide, you can confidently dismantle and care for your trampoline, ensuring it remains in top condition for future use. Properly organizing and labeling the disassembled parts sets the stage for a smooth reassembly process.
Tools and Materials Needed
Before you begin disassembling your Little Tikes trampoline, it’s essential to gather the appropriate tools and materials. Having the right equipment at hand will streamline the disassembly process and ensure that you can tackle each step effectively. Here’s a list of the tools and materials you’ll need:
- Socket Wrench: A socket wrench will be essential for removing the bolts and nuts that hold the trampoline frame together.
- Spring Pulling Tool: This specialized tool will make it easier to detach the springs from the frame and jumping mat.
- Flathead Screwdriver: A flathead screwdriver can be used to pry apart certain components and assist in the disassembly process.
- Step Ladder: Depending on the size of your trampoline, a step ladder may be necessary to reach higher areas safely.
- Storage Container or Bags: Prepare storage containers or bags to keep the disassembled parts organized and protected from damage.
- Cleaning Supplies: Have cleaning supplies on hand to wipe down the components and ensure they are free of dirt and debris before storage.
- Assistance: While not a physical tool, having a helping hand can significantly ease the disassembly process, especially when handling larger trampoline components.
By ensuring that you have these tools and materials ready, you’ll be well-prepared to begin the disassembly process without interruptions. With everything in place, you can proceed with confidence, knowing that you have the necessary resources to dismantle your Little Tikes trampoline efficiently and safely.
Step 1: Prepare the Work Area
Before diving into the disassembly process, it’s crucial to set up a suitable work area that facilitates a smooth and organized dismantling of your Little Tikes trampoline. By preparing the work area effectively, you can minimize potential obstacles and ensure a safe environment for the disassembly process. Here’s how to prepare your work area:
- Choose a Spacious Location: Select a well-lit and spacious area where you can lay out the trampoline components without feeling cramped. This will allow ample room for maneuvering and organizing the disassembled parts.
- Clean the Area: Clear the designated space of any debris, obstacles, or tripping hazards. A clean work area will prevent accidents and make it easier to spot small trampoline components during disassembly.
- Protect the Floor: If you’re working on a hard surface, consider placing a protective layer, such as a tarp or old blanket, to prevent scratches or damage to the trampoline components and the floor.
- Gather Necessary Tools and Materials: Ensure that all the tools and materials listed in the previous section are within reach. Having everything readily available will eliminate the need to search for items mid-disassembly.
- Enlist Assistance if Needed: If the trampoline is large or heavy, consider enlisting the help of a friend or family member to assist with certain steps, especially when handling the frame and legs.
By taking the time to prepare the work area thoughtfully, you’ll create an environment conducive to a successful trampoline disassembly. A well-organized and hazard-free workspace will set the stage for a seamless dismantling process, allowing you to proceed with the subsequent steps confidently and efficiently.
Step 2: Remove the Safety Enclosure
The safety enclosure is a crucial component of the Little Tikes trampoline, designed to provide added protection for users while jumping. When disassembling the trampoline, removing the safety enclosure is the next logical step after preparing the work area. Follow these steps to safely detach the safety enclosure:
- Unhook the Enclosure Poles: Start by unhooking the enclosure poles from the trampoline frame. Depending on the model, the poles may be secured with clips, straps, or a locking mechanism. Carefully release each pole to free the safety enclosure from the frame.
- Detach the Netting: Once the poles are unhooked, carefully detach the netting from the frame. Take your time to avoid damaging the netting or the attachment points. Gently release any clips or fastenings securing the netting in place.
- Fold and Store the Enclosure Components: As you remove the netting, fold it neatly to prevent tangling or snagging. Store the enclosure poles and netting in a designated area, ensuring they remain together for reassembly. Keeping the components organized will simplify the process when it’s time to put the trampoline back together.
By following these steps, you can effectively remove the safety enclosure from your Little Tikes trampoline. Properly storing the enclosure components will ensure that they remain in good condition and are readily available when you decide to reassemble the trampoline. With the safety enclosure safely detached, you can proceed to the next phase of the disassembly process with confidence.
Step 3: Disassemble the Frame
With the safety enclosure removed, the next stage of disassembling your Little Tikes trampoline involves dismantling the frame. This step requires careful attention to detail to ensure that the frame components are safely separated and ready for storage. Follow these steps to disassemble the trampoline frame:
- Remove the Frame Pads: Start by unzipping or unfastening the frame pads that cover the trampoline frame. Carefully detach the pads and set them aside for cleaning and storage. Ensure that the pads are kept together and labeled for easy reassembly.
- Loosen and Remove Frame Bolts: Use a socket wrench to loosen and remove the bolts that secure the frame sections together. Depending on the trampoline model, there may be multiple bolts located around the frame. Keep the bolts organized and consider placing them in a labeled bag for safekeeping.
- Separate Frame Sections: Once the bolts are removed, carefully separate the frame sections. Enlist the help of a friend or family member if necessary, especially if the frame is large or heavy. Lay out the frame sections in an organized manner, ensuring that they are protected from damage.
- Clean and Store the Frame Components: Before storing the frame sections, wipe them down with a damp cloth to remove any dirt or debris. Ensure that the components are fully dry before storing them in a designated area. Keeping the frame sections clean will help maintain their condition for future use.
By following these steps, you can effectively disassemble the frame of your Little Tikes trampoline. Properly organizing and storing the frame components will streamline the reassembly process when the time comes to put the trampoline back together. With the frame safely dismantled, you can proceed to the next phase of the disassembly process with confidence.
When disassembling a Little Tikes trampoline, start by removing the safety net and poles, then disassemble the frame and legs. Keep track of all the parts and hardware to make reassembly easier.
Read also: 13 Best Little Tikes 3′ Trampoline For 2025
Step 4: Remove the Jumping Mat and Springs
As you progress through the disassembly of your Little Tikes trampoline, the next crucial step involves removing the jumping mat and springs. This phase requires careful attention to ensure that the components are handled safely and are ready for storage. Follow these steps to effectively remove the jumping mat and springs:
- Release Tension from the Springs: Using a spring pulling tool, carefully release the tension from the springs by disconnecting them from the frame hooks. Work methodically around the trampoline, gradually releasing the tension from each spring to prevent sudden movement or potential injury.
- Remove the Springs: Once the tension is released, carefully remove each spring from its attachment point on the frame and jumping mat. Keep the removed springs organized and consider storing them in a labeled container or bag to prevent misplacement.
- Detach the Jumping Mat: With the springs removed, carefully detach the jumping mat from the frame. Depending on the trampoline model, the jumping mat may be secured with clips or fastenings. Take your time to avoid damaging the mat during removal.
- Clean and Store the Jumping Mat and Springs: Before storing the jumping mat and springs, ensure that they are free of dirt and debris. Wipe down the jumping mat with a damp cloth and allow it to air dry. Store the jumping mat and springs in a clean, dry area to maintain their condition for future use.
By following these steps, you can safely remove the jumping mat and springs from your Little Tikes trampoline. Properly organizing and storing these components will facilitate a smooth reassembly process when the time comes to put the trampoline back together. With the jumping mat and springs safely removed, you can proceed to the next phase of the disassembly process with confidence.
Step 5: Detach the Legs
As you near the completion of disassembling your Little Tikes trampoline, the next crucial step involves detaching the legs from the frame. This phase requires careful attention to ensure that the legs are safely removed and ready for storage. Follow these steps to effectively detach the legs:
- Inspect the Leg Attachments: Examine how the legs are attached to the frame. Depending on the trampoline model, the legs may be secured with bolts, screws, or a locking mechanism. Ensure that you understand the attachment method before proceeding with removal.
- Unfasten the Leg Attachments: Using the appropriate tools, unfasten the bolts, screws, or locking mechanism that secure the legs to the frame. Work methodically, ensuring that all attachments are fully loosened before attempting to remove the legs.
- Detach the Legs: Once the attachments are unfastened, carefully detach the legs from the frame. Enlist the help of a friend or family member if necessary, especially if the trampoline is large or heavy. Lay out the legs in an organized manner, ensuring that they are protected from damage.
- Clean and Store the Legs: Before storing the legs, wipe them down with a damp cloth to remove any dirt or debris. Ensure that the legs are fully dry before storing them in a designated area. Keeping the legs clean will help maintain their condition for future use.
By following these steps, you can effectively detach the legs from your Little Tikes trampoline. Properly organizing and storing the legs will streamline the reassembly process when the time comes to put the trampoline back together. With the legs safely removed, you can proceed to the final phase of the disassembly process with confidence.
Step 6: Clean and Store the Parts
After successfully disassembling your Little Tikes trampoline, the final step involves cleaning and storing the various components to ensure they remain in optimal condition for future use. Properly cleaning and organizing the disassembled parts will streamline the reassembly process and preserve the longevity of your trampoline. Follow these steps to clean and store the parts effectively:
- Clean Each Component: Thoroughly clean each disassembled component, including the frame sections, jumping mat, springs, legs, safety enclosure, and any other removable parts. Use a damp cloth to wipe off any dirt, debris, or moisture, ensuring that the components are completely dry before storage.
- Inspect for Damage: While cleaning, inspect each component for any signs of damage or wear. Address any issues promptly, whether it involves repairing tears in the jumping mat, replacing worn-out springs, or tightening loose bolts and attachments.
- Organize and Label: Keep the disassembled parts organized and labeled for easy identification during reassembly. Utilize storage containers, bags, or designated areas to keep each component separate and prevent misplacement or confusion.
- Store in a Dry Area: Find a clean, dry area for storing the trampoline components. Ensure that the storage space is free from moisture and protected from extreme temperatures to prevent damage to the parts.
- Protect the Safety Enclosure: If applicable, take extra care to store the safety enclosure components, such as the netting and poles, in a manner that prevents tangling and damage. Consider using a dedicated storage bag or container for these parts.
- Secure Bolts and Fastenings: Keep all bolts, screws, and small hardware in a labeled container to prevent loss and facilitate an organized reassembly process. Ensure that these small components are stored in a secure and easily accessible location.
By following these steps, you can effectively clean and store the disassembled parts of your Little Tikes trampoline. Properly caring for the components during storage will contribute to the trampoline’s longevity and ensure a smooth reassembly process when the time comes to put it back together. With the parts safely cleaned and stored, you can conclude the disassembly process with the confidence that your trampoline components are well-maintained and ready for future use.
Conclusion
Disassembling a Little Tikes trampoline is a manageable task when approached with the right tools, a systematic process, and attention to detail. By following the step-by-step guide provided in this tutorial, you have gained the knowledge and confidence to dismantle your trampoline safely and efficiently. The process of disassembly not only allows for convenient storage and transportation but also contributes to the maintenance and longevity of your trampoline.
Throughout the disassembly process, you prepared the work area, removed the safety enclosure, disassembled the frame, removed the jumping mat and springs, detached the legs, and cleaned and stored the parts. Each step was designed to ensure that the trampoline components are well-maintained and ready for future use. By organizing and labeling the disassembled parts, you have set the stage for a smooth reassembly process when the time comes to put your trampoline back together.
Remember to keep all bolts and small hardware in a secure and easily accessible location to prevent loss and facilitate an organized reassembly. Additionally, inspect the components for any signs of damage or wear, addressing any issues promptly to ensure that your trampoline remains in top condition.
As you conclude the disassembly process, take pride in your ability to effectively dismantle and care for your Little Tikes trampoline. Whether you’re storing it for the winter, relocating, or simply clearing space, the knowledge and skills you’ve acquired will serve you well in maintaining your trampoline for years to come.
With the disassembly complete, you can look forward to the day when you’ll reassemble your trampoline and continue to enjoy the fun and excitement it brings to your outdoor activities. Until then, rest assured that your trampoline components are safely stored and well-maintained, ready for the next adventure.
Frequently Asked Questions about How To Disassemble Little Tikes Trampoline
Was this page helpful?
At Storables.com, we guarantee accurate and reliable information. Our content, validated by Expert Board Contributors, is crafted following stringent Editorial Policies. We're committed to providing you with well-researched, expert-backed insights for all your informational needs.


0 thoughts on “How To Disassemble Little Tikes Trampoline”