Articles
How To Insulate Outside Faucet
Modified: March 1, 2024
Learn how to properly insulate your outside faucet with these helpful articles. Protect your pipes from freezing and avoid costly repairs.
(Many of the links in this article redirect to a specific reviewed product. Your purchase of these products through affiliate links helps to generate commission for Storables.com, at no extra cost. Learn more)
Introduction
When it comes to cold weather, one of the most vulnerable areas of your home is the outside faucet. Exposed to the elements, these faucets are prone to freezing and bursting, causing costly damage to your plumbing system. To prevent this from happening, it’s important to insulate your outside faucet properly.
In this article, we will guide you through the step-by-step process of insulating your outside faucet. Whether you’re a seasoned DIYer or just starting out, this guide will provide you with the knowledge and tools needed to protect your faucet from winter’s icy grip.
Insulating your outside faucet not only helps prevent freezing and bursting but also prolongs the life of your plumbing system. By taking the necessary precautions, you can avoid costly repairs and ensure that your water supply remains uninterrupted during the colder months.
Before we dive into the details, let’s take a look at why you should prioritize insulating your outside faucet.
Key Takeaways:
- Protect your outside faucet from freezing and bursting by insulating it with a faucet cover and pipe insulation. This simple DIY task can prevent costly repairs and ensure a continuous water supply during winter.
- Insulating your outside faucet not only safeguards your plumbing system but also contributes to a more sustainable and eco-friendly household by reducing water waste. Take the necessary steps to protect your faucet and enjoy uninterrupted access to water.
Read more: How To Lock An Outside Water Faucet
Why Should You Insulate Your Outside Faucet?
Insulating your outside faucet is crucial for several reasons. Here are the main benefits:
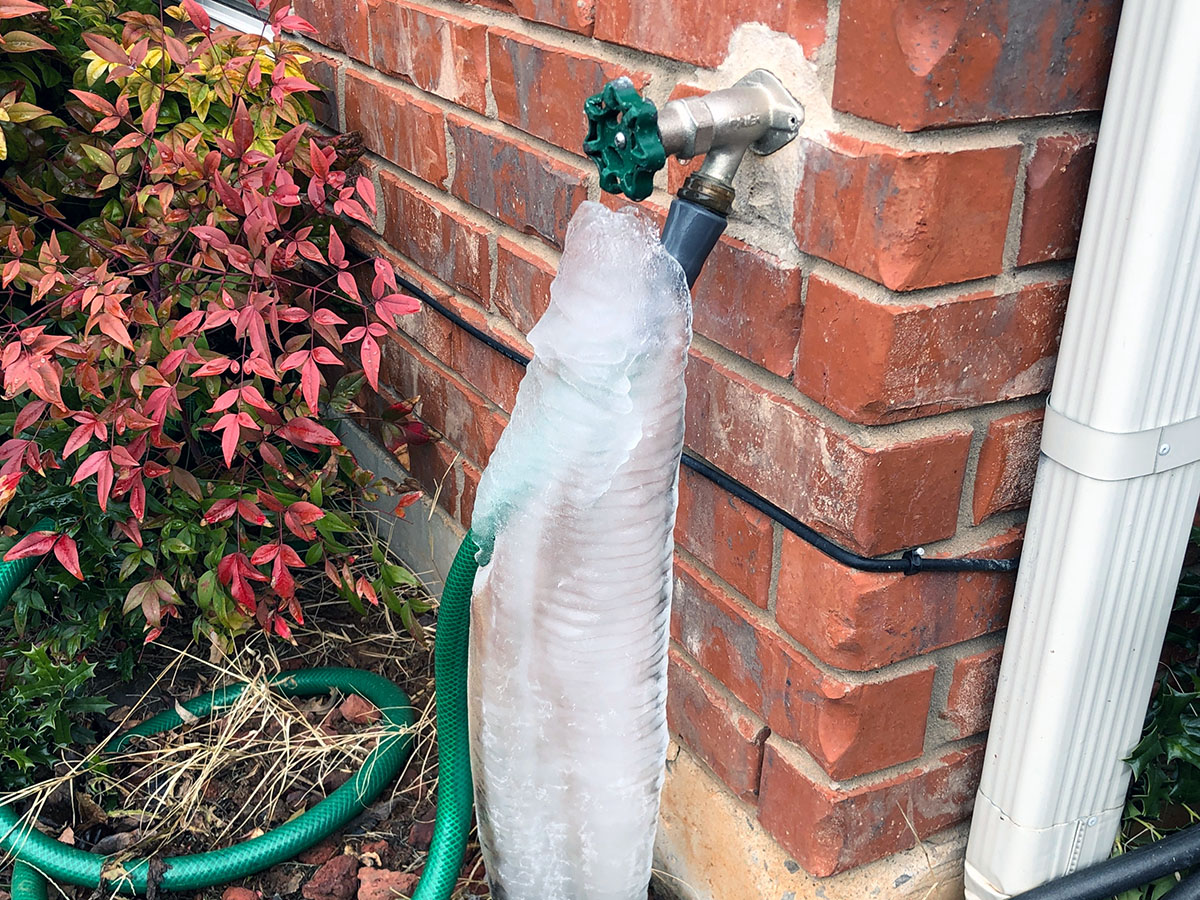
- Prevent Freezing and Bursting: The primary reason to insulate your outside faucet is to prevent freezing. During colder temperatures, the water inside the faucet and exposed pipes can freeze, causing them to expand and potentially burst. This can lead to water damage and costly repairs.
- Protect Your Plumbing System: Insulating your outside faucet helps protect your entire plumbing system. When a faucet bursts, the damage can extend beyond the faucet itself. It can affect the connected pipes, valves, and even the main water supply line. By insulating the faucet, you create a barrier that helps maintain a stable temperature and prevent freezing throughout the system.
- Prolong Faucet Lifespan: Insulated faucets have a longer lifespan compared to those left exposed to the elements. By protecting the faucet from freezing and bursting, you can avoid the need for frequent repairs or replacements, ultimately saving you time and money.
- Maintain Water Supply: A frozen or burst faucet can disrupt your water supply, leaving you without access to water until it is fixed. Insulating your outside faucet ensures a continuous water supply even during freezing temperatures.
- Eco-Friendly Solution: By preventing leaks and burst pipes, you also reduce water waste. Insulating your outside faucet contributes to a more sustainable and eco-friendly household.
Considering these benefits, it’s clear that insulating your outside faucet is a worthwhile investment. With just a few simple steps, you can protect your plumbing system, extend the lifespan of your faucet, and avoid costly repairs.
Materials Needed
Before you begin insulating your outside faucet, gather the following materials:
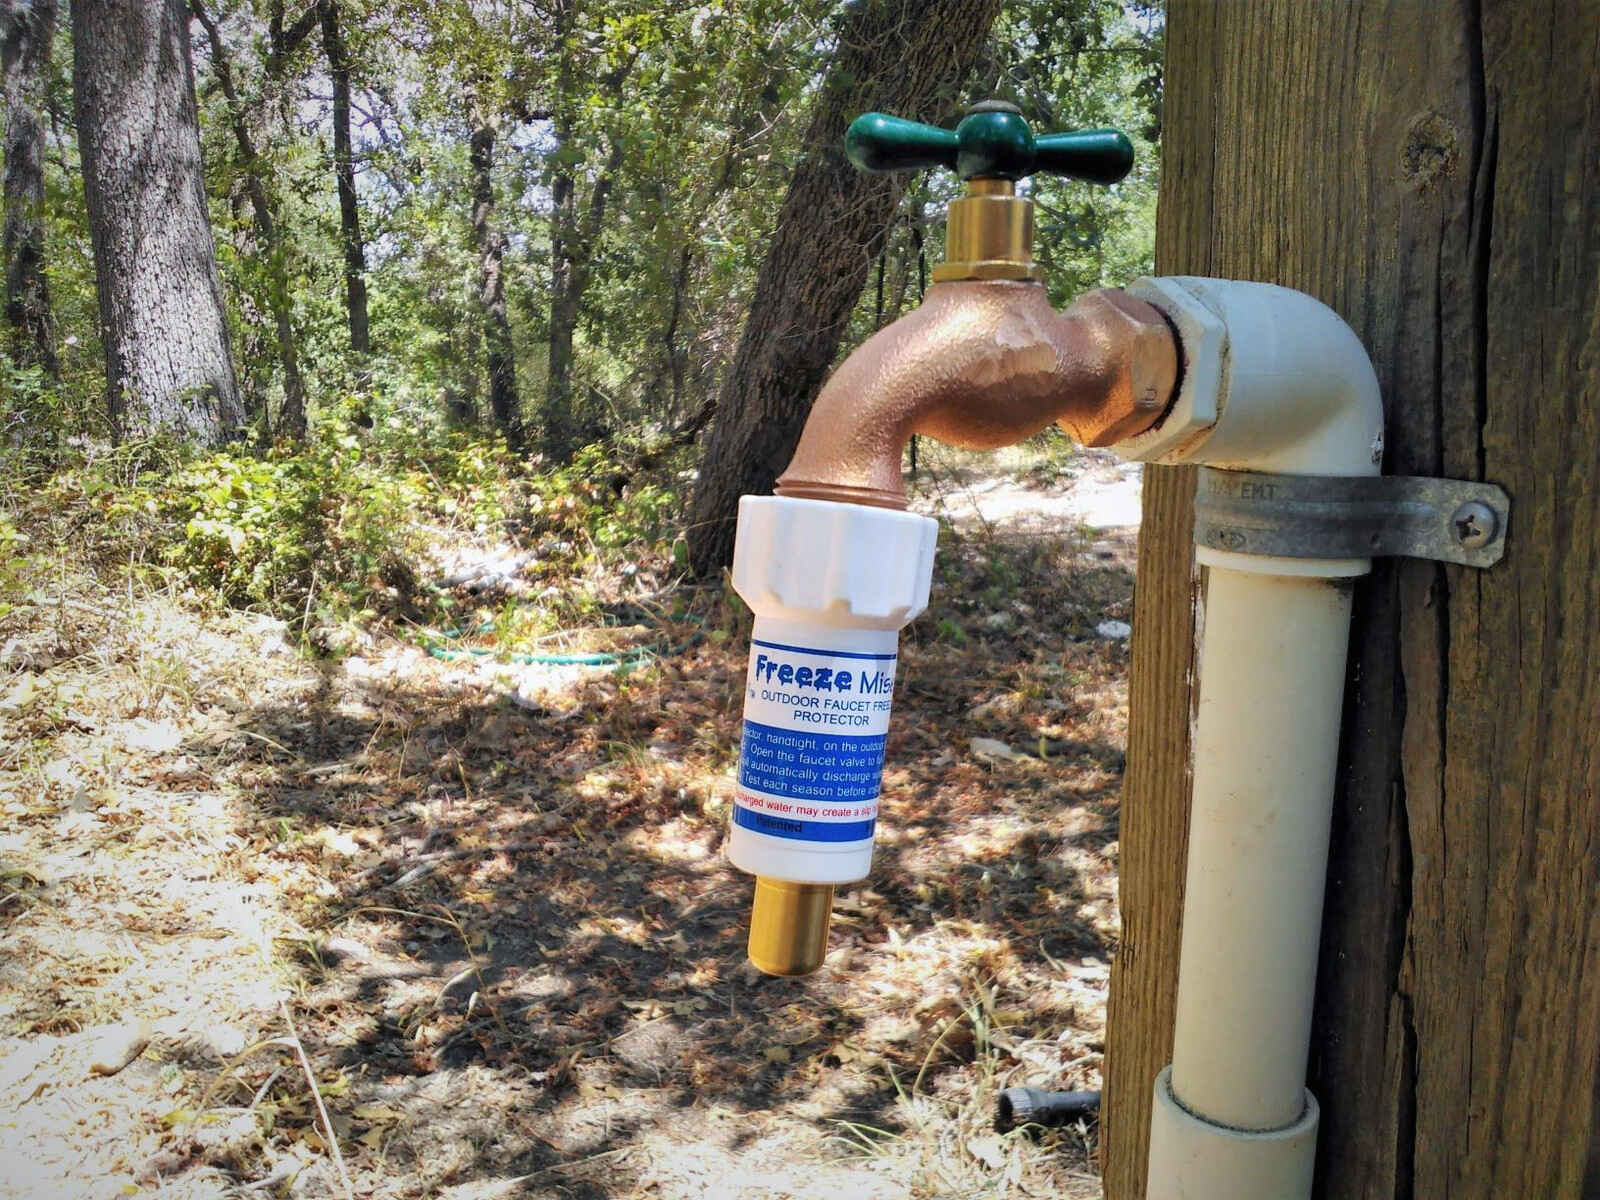
- Faucet Cover: Purchase a faucet cover specifically designed for outdoor use. These covers are made from insulating materials and can be easily attached to your faucet to provide protection from the cold.
- Pipe Insulation: You will need pipe insulation to insulate the exposed pipe leading to the faucet. Pipe insulation is available in various sizes and types, such as foam or rubber. Choose the appropriate insulation based on your pipe diameter.
- Insulation Tape: Insulation tape is used to secure the pipe insulation and ensure a tight seal. It helps prevent heat loss and keeps the insulation in place.
- Adjustable Wrench: An adjustable wrench will be necessary for disconnecting and reattaching any attachments, such as hoses or sprayers, to the faucet.
- Screwdriver: Depending on the type of faucet cover you have, you may need a screwdriver to install it securely.
- Waterproof Sealant: Waterproof sealant is optional but recommended. It can be used to seal any small gaps or cracks around the faucet or pipe where cold air could potentially enter.
Make sure you have all these materials on hand before you start the insulation process. This will help ensure a smooth and efficient installation.
Step 1: Turn off the Water Supply
Before you begin insulating your outside faucet, the first step is to turn off the water supply. This is crucial to prevent any water flow while you work on the faucet.
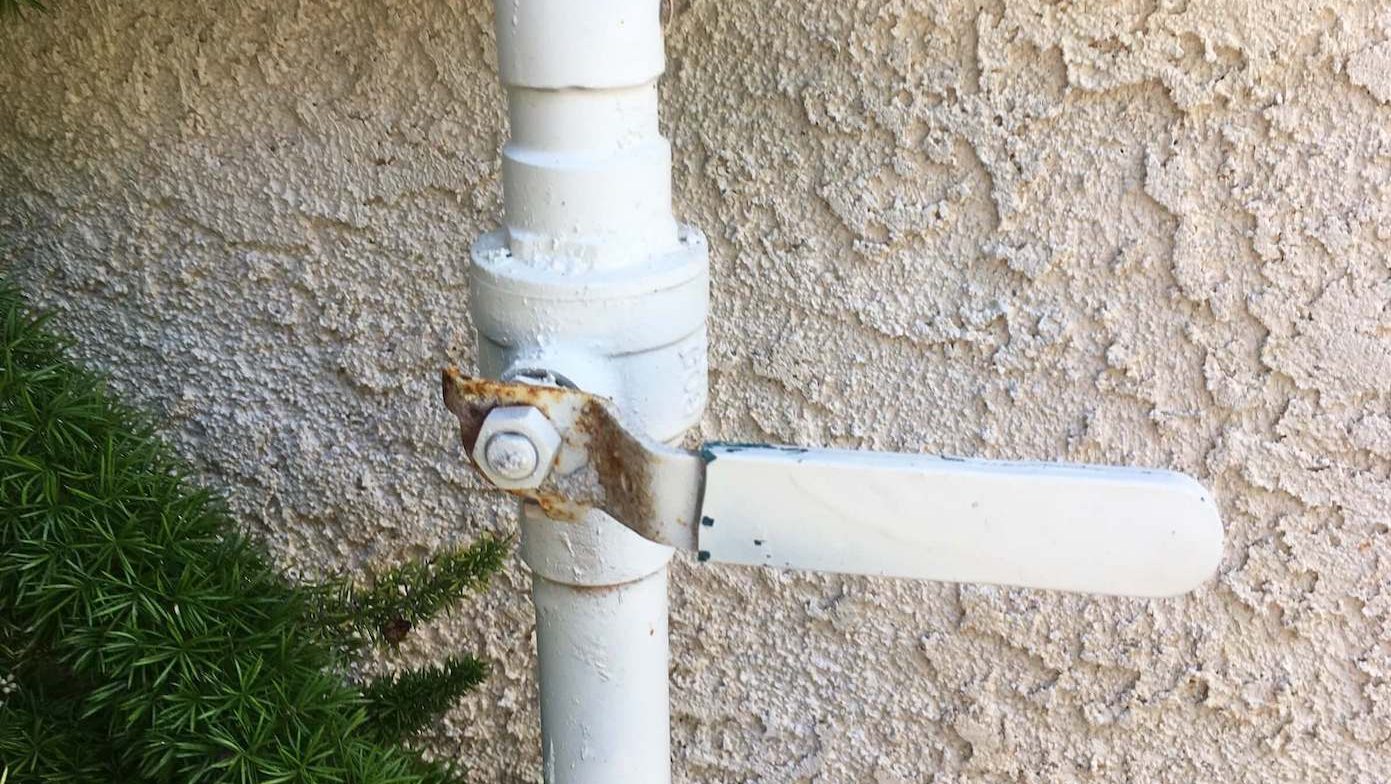
Locate the shut-off valve for your outside faucet. This is typically found inside your home, near the area where the faucet is installed. Turn the valve clockwise to shut off the water supply to the faucet.
If there is no dedicated shut-off valve for your outside faucet, you may need to shut off the main water supply to your home. Locate the main shut-off valve, usually located near the water meter or where the water line enters your home. Turn the valve clockwise until it is fully closed.
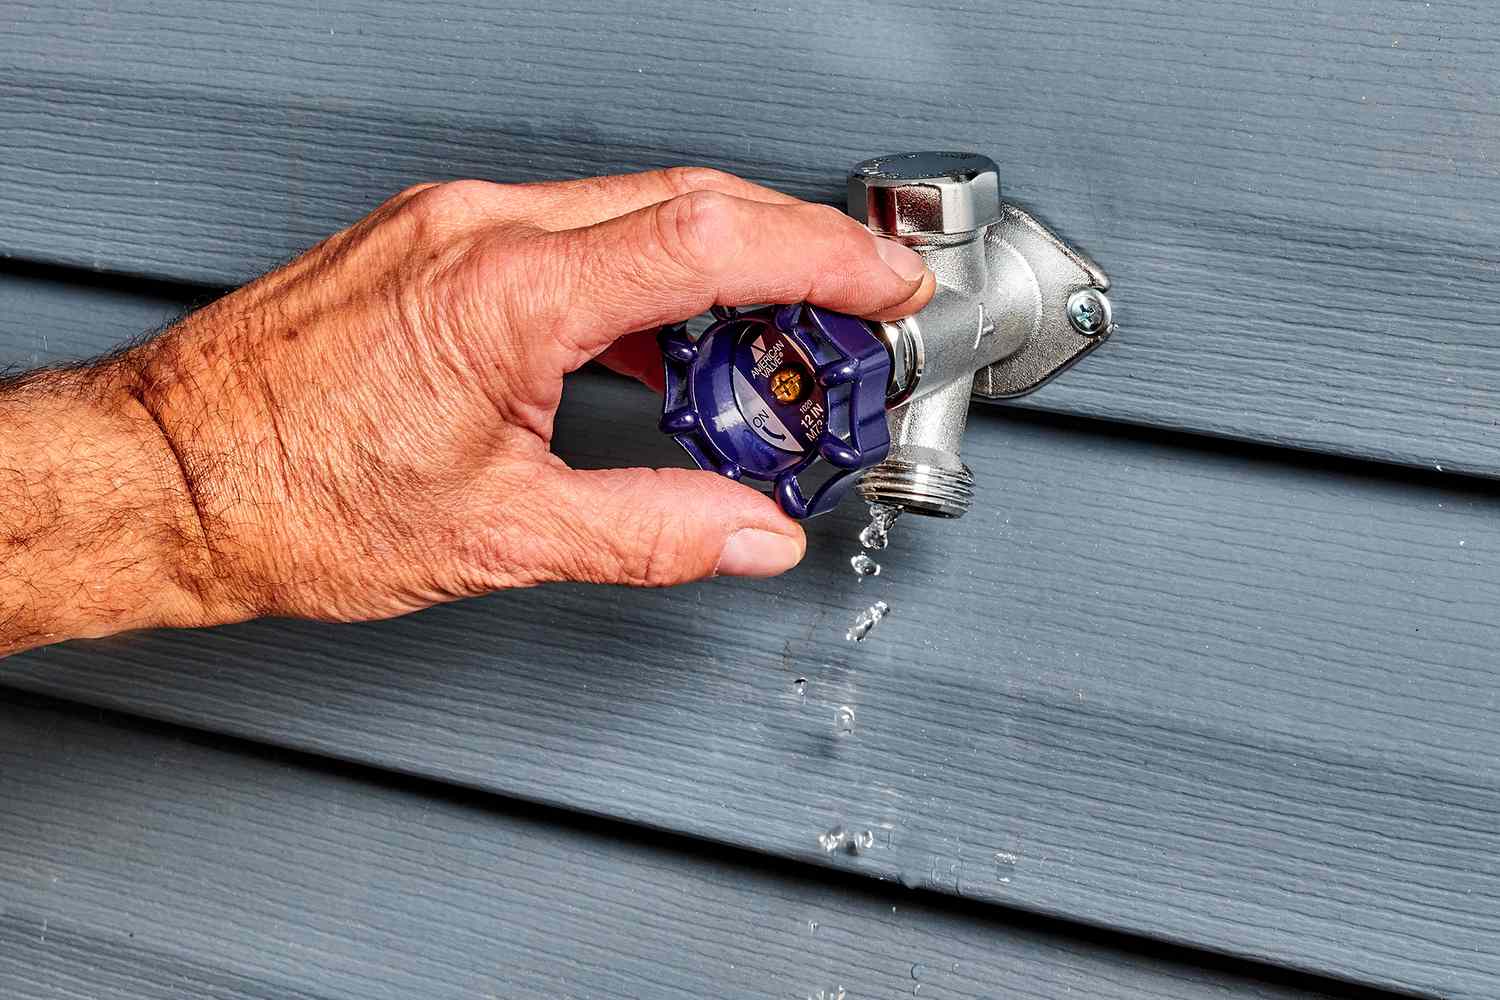
Once the water supply is turned off, open the outside faucet by turning the handle counterclockwise to release any remaining water pressure in the system. This will help drain the pipes and ensure that no water is left inside.
Now that the water supply is turned off and the faucet is open, you can move on to the next step of draining the faucet.
Step 2: Drain the Faucet
After turning off the water supply and opening the outside faucet, the next step is to drain any remaining water from the faucet and pipes. This is important to prevent any water from freezing and causing damage during the insulation process.
To drain the faucet, locate the drain valve or bleeder cap on the side or bottom of the faucet. It is usually a small screw-like object. With a bucket or container ready to catch the water, slowly unscrew the drain valve or bleeder cap. This will allow the water to flow out of the faucet.
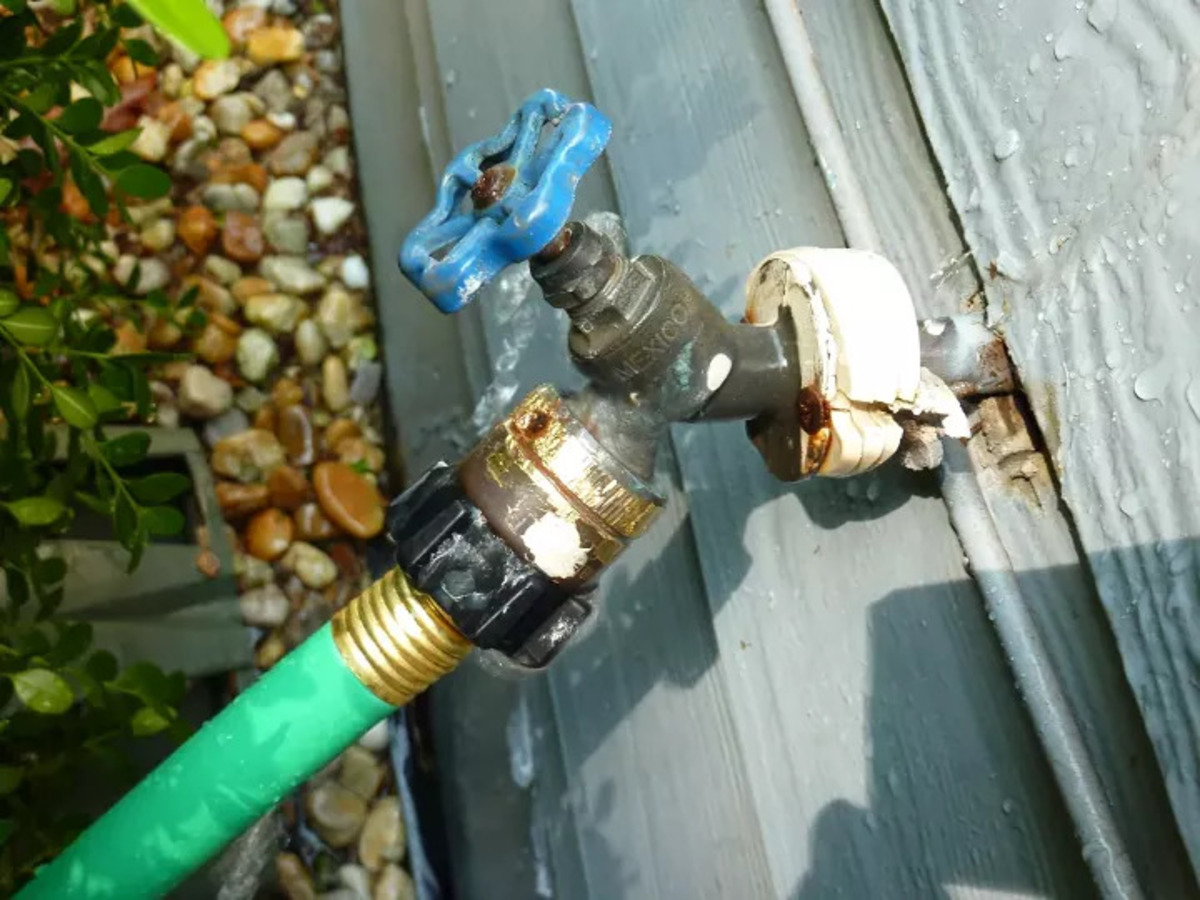
Alternatively, if your faucet does not have a drain valve or bleeder cap, you can disconnect any attachments, such as hoses or sprayers, from the faucet. This will allow the water to flow out when the faucet is opened.
Once you have opened the drain valve or removed any attachments, wait until the water stops flowing and the faucet is fully drained. This may take a few minutes, depending on the amount of water in the system.
Once the faucet is drained, close the drain valve or reattach any removed attachments. Make sure all connections are secure.
By draining the faucet, you ensure that there is no remaining water that could freeze and potentially damage the plumbing system during the insulation process.
Read more: How To Replace An Outside Faucet
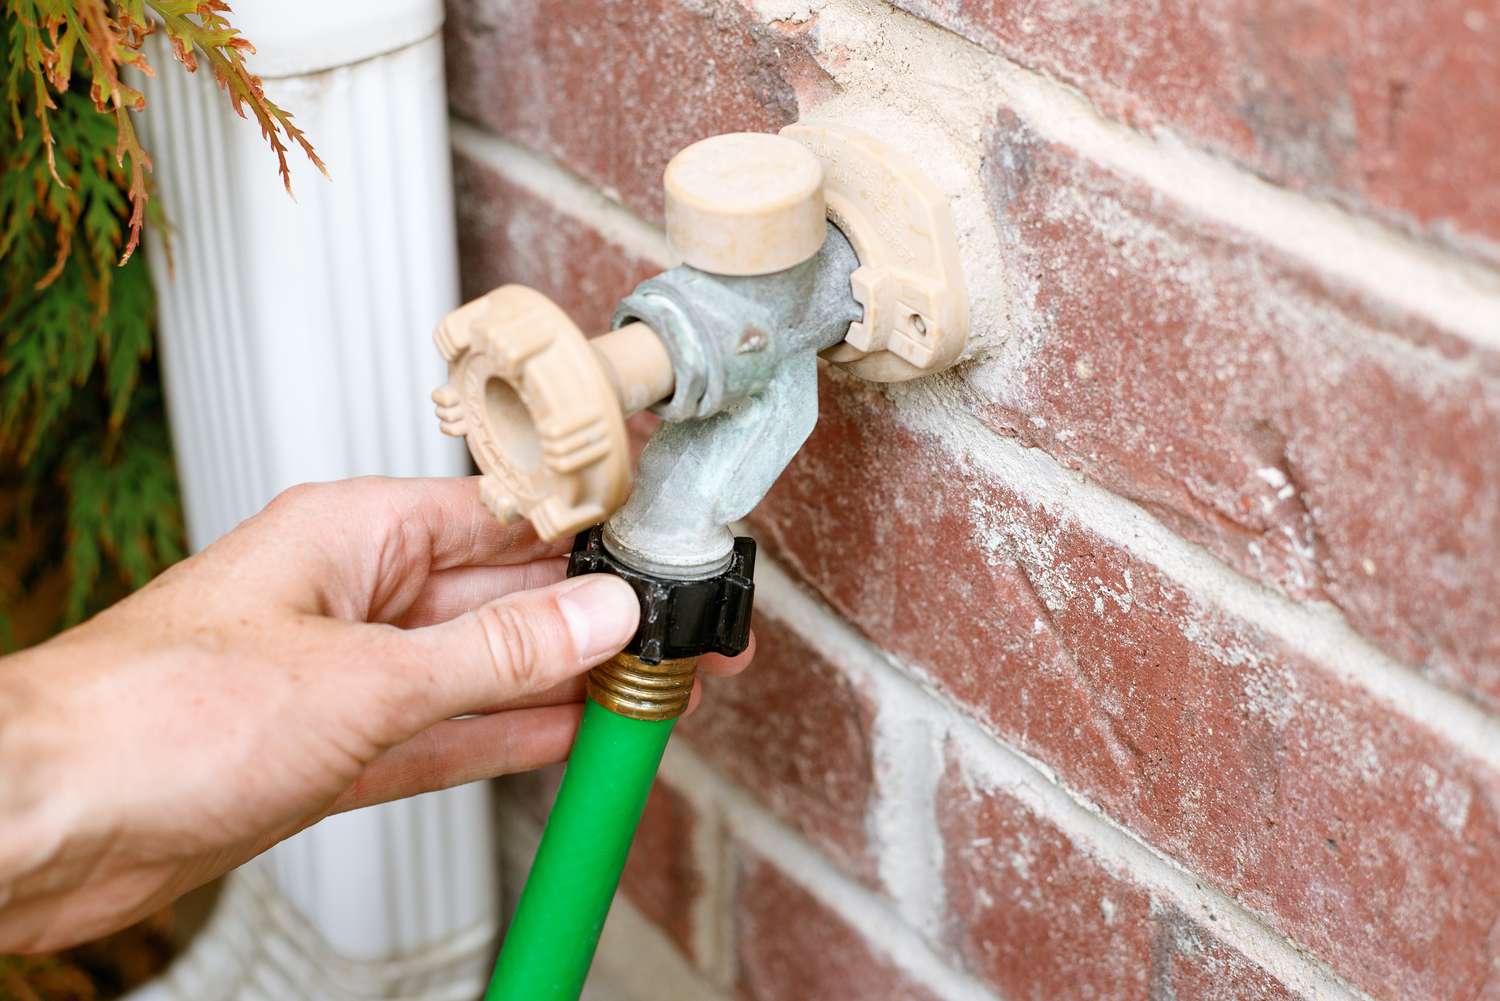
Step 3: Disconnect any Attachments
Before proceeding with the insulation process, it’s important to disconnect any attachments, such as hoses or sprayers, from the outside faucet. This will allow you to properly insulate the faucet without any obstructions.
Start by turning off the water supply to the attachment, if applicable. Some attachments may have their own separate shut-off valves, while others may require you to turn off the main water supply.
Once the water supply is turned off, use an adjustable wrench to loosen the connections between the attachment and the outside faucet. Turn the wrench counterclockwise to loosen the fittings until the attachment can be easily removed.
Be careful not to force or damage the fittings while disconnecting the attachment. If necessary, use a bit of penetrating oil to loosen stubborn connections.
Once the attachment is detached from the faucet, inspect it for any signs of damage or wear. If needed, clean or repair the attachment before reconnecting it after the insulation process is complete.
By disconnecting any attachments, you ensure that the entire outside faucet is accessible for insulation. This will help provide full coverage and protection against freezing temperatures.
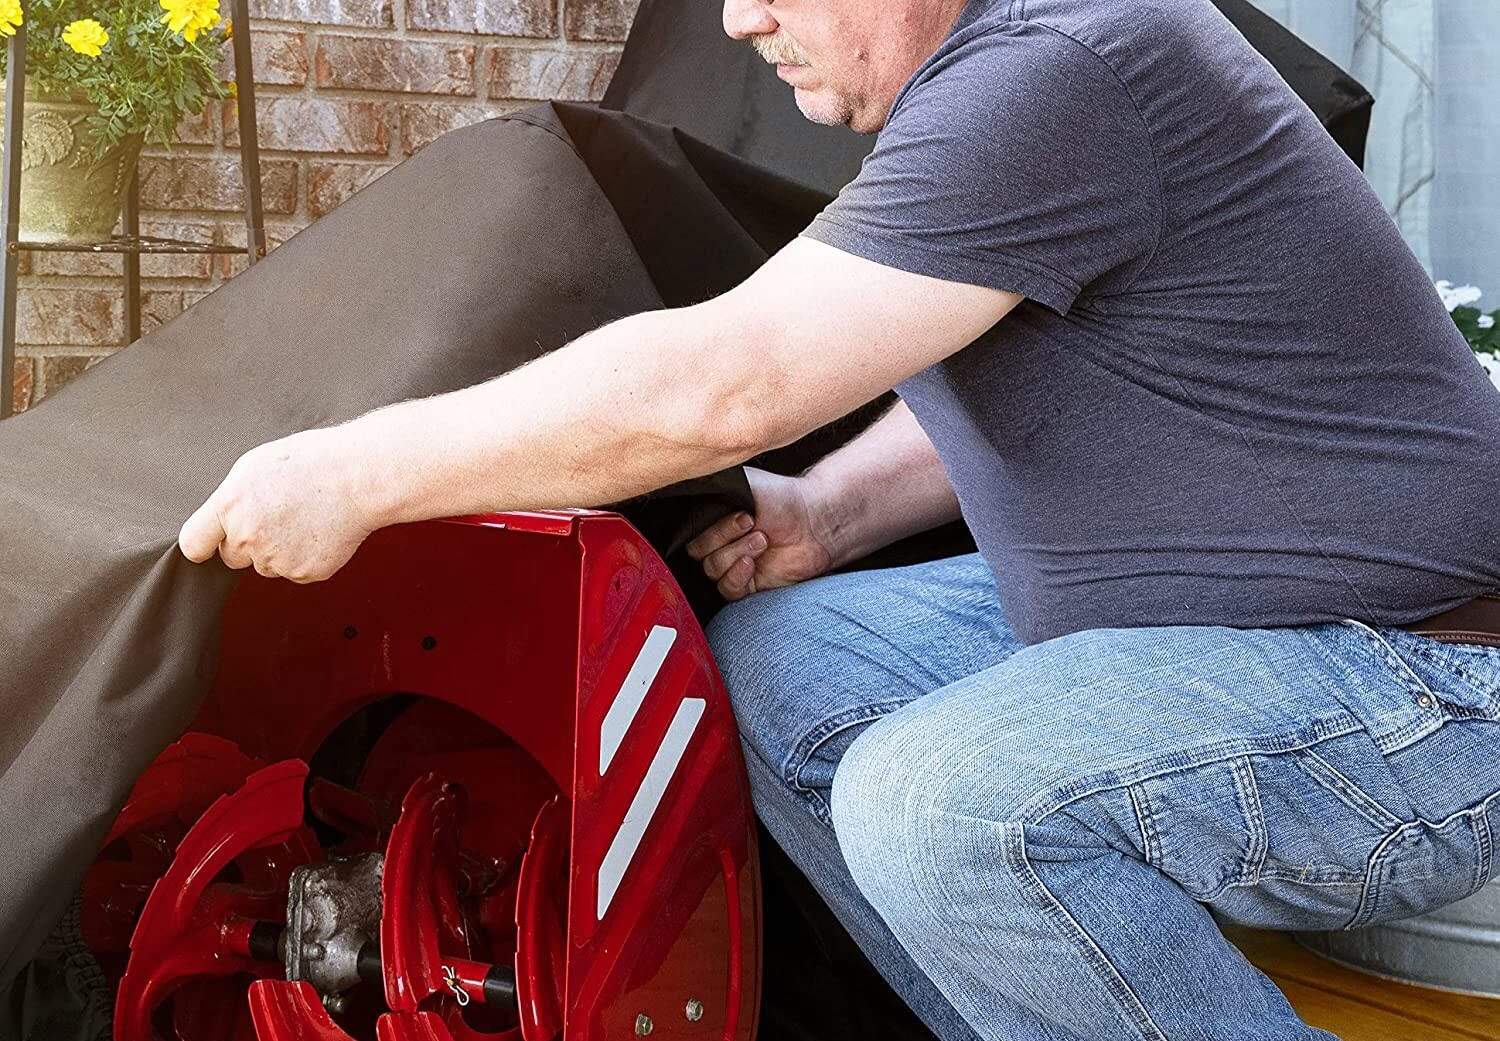
When insulating an outside faucet, use a faucet cover or wrap the faucet with insulation material to protect it from freezing temperatures. Make sure to also disconnect and drain any hoses connected to the faucet.
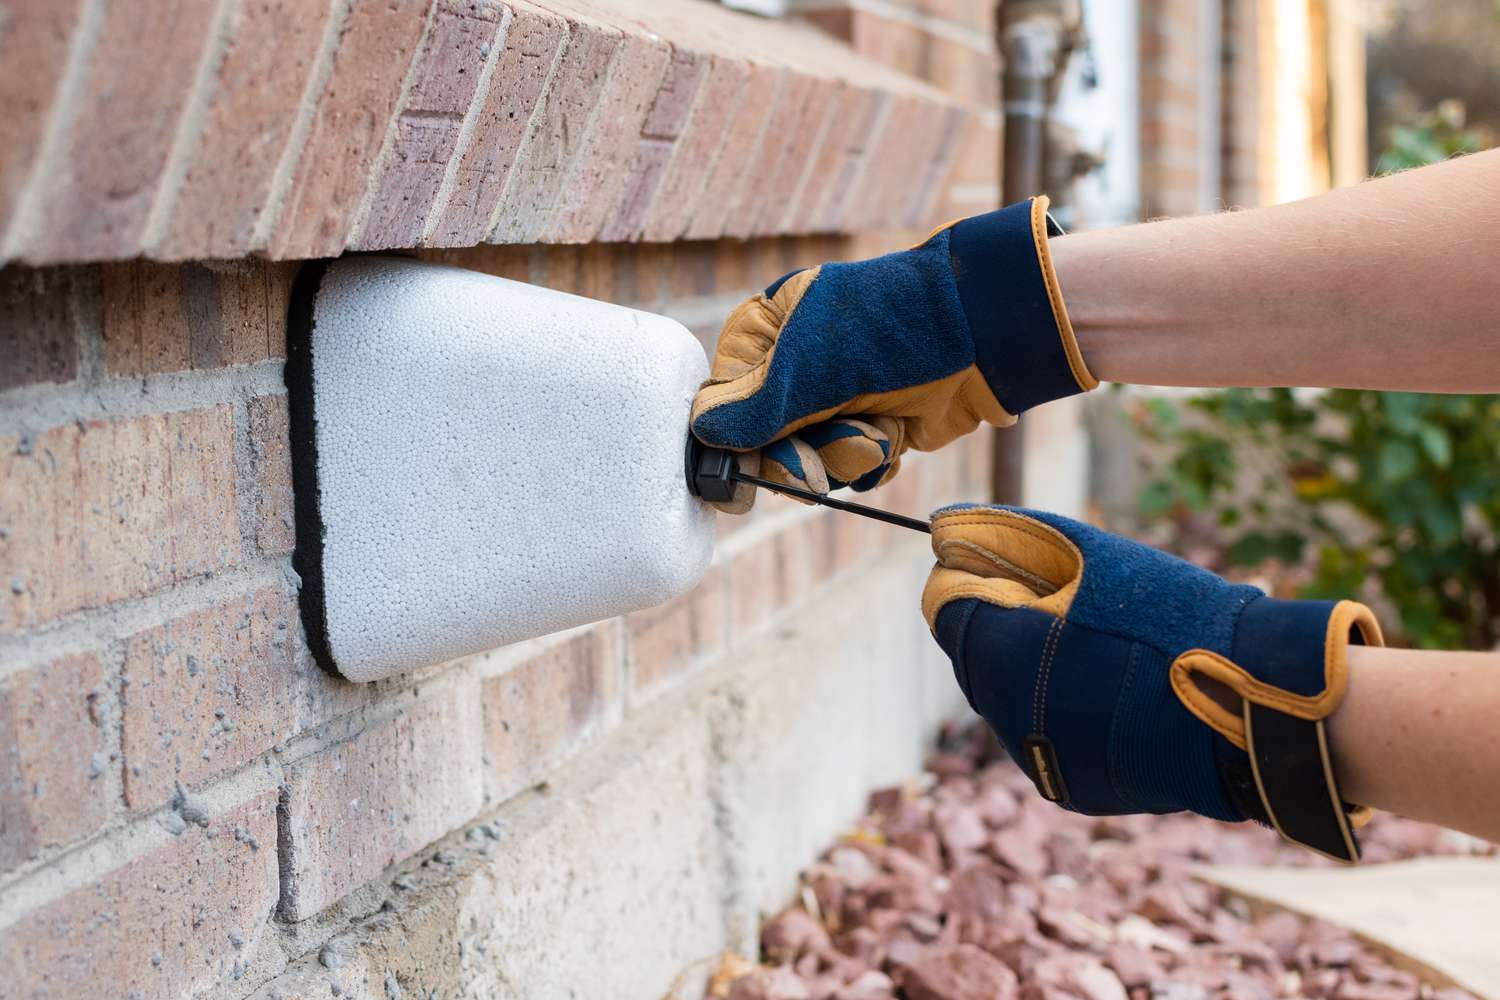
Step 4: Install the Faucet Cover
Now that you have prepared the outside faucet by turning off the water supply and disconnecting any attachments, it’s time to install the faucet cover. The faucet cover is an essential component of the insulation process, providing a layer of protection against cold temperatures.
Choose a faucet cover that is specifically designed for outdoor use and suitable for the size of your faucet. These covers are typically made of insulating materials, such as foam or plastic, and come in various shapes and sizes.
Start by positioning the faucet cover over the outside faucet. Ensure that the cover fully encloses the faucet and extends down to cover the exposed pipe.
Some faucet covers may have built-in straps or fasteners that allow you to secure them in place. Follow the instructions provided with the cover to attach it securely to the faucet. This will help prevent the cover from being dislodged by wind or other external factors.
If your faucet cover does not have straps or fasteners, you can use insulation tape or a sturdy waterproof tape to secure the cover in place. Wrap the tape around the faucet cover and the pipe to create a tight seal.
Make sure the faucet cover is tightly secured and there are no gaps or openings where cold air can enter. This will help maintain an insulated environment around the faucet.
By installing the faucet cover, you create a protective barrier that helps prevent freezing and insulates the faucet from cold temperatures. This is a crucial step in safeguarding your outside faucet during winter.
Step 5: Secure the Cover
Now that the faucet cover is installed, it’s important to secure it properly to ensure it stays in place throughout the winter season. This will provide continuous protection for your outside faucet against freezing temperatures.
Check the straps or fasteners on the faucet cover, if applicable. Make sure they are tightened securely around the faucet and the cover is snugly fitted.
If your faucet cover does not have built-in straps or fasteners, you can use insulation tape or a sturdy waterproof tape to secure the cover in place. Wrap the tape tightly around the faucet cover and the pipe several times to create a tight seal.
Pay attention to any gaps or openings where cold air could potentially enter. Use additional insulation tape to seal these gaps, ensuring a complete and secure cover.
Inspect the cover to ensure it is properly aligned and in position. Make any necessary adjustments to ensure full coverage of the faucet and exposed pipe.
Test the stability of the cover by gently tugging on it. It should remain firmly in place without any signs of slipping or loosening.
Finally, give the cover a visual inspection to ensure there are no tears or damages that could compromise its effectiveness. If you notice any issues, consider replacing the cover to maintain proper insulation.
By securely fastening the cover, you provide an additional layer of protection and help maintain insulation around the outside faucet. This will help prevent freezing and potential damage to your plumbing system.
Step 6: Insulate the Pipe
Insulating the exposed pipe leading to the outside faucet is an essential step in protecting it from freezing temperatures. By insulating the pipe, you create a barrier that helps maintain a stable temperature and prevent freezing.
Start by measuring the length of the exposed pipe that needs to be insulated. Take into account any bends or curves in the pipe.
Once you have the measurement, select the appropriate pipe insulation material based on the pipe diameter. Pipe insulation can be found in foam or rubber form and is available in various sizes.
Cut the pipe insulation to the measured length using a utility knife. Make a straight and clean cut to ensure a proper fit.
Next, carefully open the pipe insulation and place it around the exposed pipe. Ensure that the insulation completely covers the pipe without any gaps or openings.
Check the fit of the insulation and make any necessary adjustments. It should fit snugly around the pipe, without being overly compressed or loose.
If there are any joints or connections in the pipe, use additional insulation pieces or insulation tape to cover those areas. This will provide complete coverage and prevent cold air from entering.
Once the pipe insulation is in place, use insulation tape to secure it and ensure a tight seal. Wrap the tape around the pipe insulation, overlapping each wrap slightly to create a secure seal.
Ensure that the insulation tape is tightly wrapped and there are no gaps or openings where cold air can enter. This will help maintain a consistent temperature and prevent freezing.
By properly insulating the exposed pipe, you provide an additional layer of protection for your outside faucet. This step is crucial in preventing freezing and potential damage to your plumbing system.
Read more: How To Fix An Outside Faucet
Step 7: Check for Leaks
After insulating the outside faucet and pipe, it’s important to check for any potential leaks. Even with proper insulation, leaks can still occur and compromise the effectiveness of the insulation.
Start by turning on the water supply to the outside faucet. Slowly and carefully, open the faucet to allow water to flow through the system.
Observe the faucet and the surrounding area for any signs of leaks. Look for dripping water, wet spots, or any unusual moisture. Pay close attention to the connections between the faucet, pipe, and the insulation.
If you notice any leaks, tighten the connections using an adjustable wrench. Ensure that the fittings are properly secured and there are no loose or damaged parts.
Inspect the insulation around the pipe for any signs of water seepage or dampness. If you discover any leaks or wet areas, it may indicate a problem with the insulation. Address these issues promptly to prevent further damage.
Make sure to also check for leaks inside your home, particularly in the area where the shut-off valve for the outside faucet is located. Check for any water stains, dampness, or signs of a leaky pipe.
If you encounter any significant leaks that you are unable to fix on your own, it is advisable to consult a professional plumber for assistance.
By checking for leaks, you ensure that the insulation is effective and that your outside faucet is properly protected. Addressing leaks promptly can help prevent water damage and maintain the integrity of your plumbing system.
Step 8: Test the Faucet
After insulating and checking for leaks, it’s important to test the outside faucet to ensure proper functionality. Testing the faucet will confirm that everything is in working order and ready for the colder months.
Start by closing the faucet and turning off the water supply to the outside faucet. This will prevent any accidental water flow during the testing process.
Once the water supply is turned off, open the faucet and let it run for a few seconds. This will help flush out any remaining water in the system and ensure that the faucet is empty.
Next, close the faucet and turn on the water supply to the outside faucet. Slowly open the faucet and let the water flow. Check for any signs of leaks or irregular water pressure.
Observe the flow of the water and ensure that it is steady. If you notice any fluctuations in water pressure or unusual sounds, it may indicate a problem with the plumbing system. In this case, consult a professional plumber for further inspection.
Test any attachments or accessories that were disconnected earlier, such as hoses or sprayers. Ensure that they are properly reattached and functioning correctly.
Check for any signs of water pooling or dripping around the faucet or pipe. If you spot any issues, make the necessary adjustments to prevent further leaking.
By testing the faucet, you can verify that the insulation and plumbing system are working properly. This step gives you peace of mind knowing that your outside faucet is ready to withstand the cold weather and avoid potential damage.
Conclusion
Insulating your outside faucet is a crucial step in protecting your plumbing system from freezing temperatures and potential damage. By following the step-by-step process outlined in this article, you can effectively safeguard your outside faucet and ensure uninterrupted access to water throughout the winter season.
Start by turning off the water supply and draining the faucet to eliminate any remaining water. Disconnect any attachments to provide full access to the faucet for insulation. Install a faucet cover designed for outdoor use to provide an additional layer of protection.
Secure the cover properly to prevent it from being dislodged by wind or external factors. Insulate the exposed pipe leading to the faucet using the appropriate pipe insulation material. Make sure to check for any leaks and address them promptly.
Finally, test the faucet to ensure proper functionality and water flow. By taking these steps, you can prevent freezing, burst pipes, and costly repairs.
Remember, maintaining your outside faucet’s insulation is an ongoing process. Regularly inspect the cover, insulation, and connections to ensure they remain intact and effective. If you encounter any issues or concerns, do not hesitate to seek professional assistance.
By insulating your outside faucet, you protect your plumbing system, prolong the lifespan of the faucet, and maintain a continuous water supply during colder months. Don’t overlook this important maintenance task and enjoy peace of mind knowing your outside faucet is well protected.
Frequently Asked Questions about How To Insulate Outside Faucet
Was this page helpful?
At Storables.com, we guarantee accurate and reliable information. Our content, validated by Expert Board Contributors, is crafted following stringent Editorial Policies. We're committed to providing you with well-researched, expert-backed insights for all your informational needs.

0 thoughts on “How To Insulate Outside Faucet”