Articles
How To Make A 220V Extension Cord
Modified: September 1, 2024
Learn how to make a safe and durable 220V extension cord with this informative article. Find step-by-step instructions and expert tips.
(Many of the links in this article redirect to a specific reviewed product. Your purchase of these products through affiliate links helps to generate commission for Storables.com, at no extra cost. Learn more)
Introduction
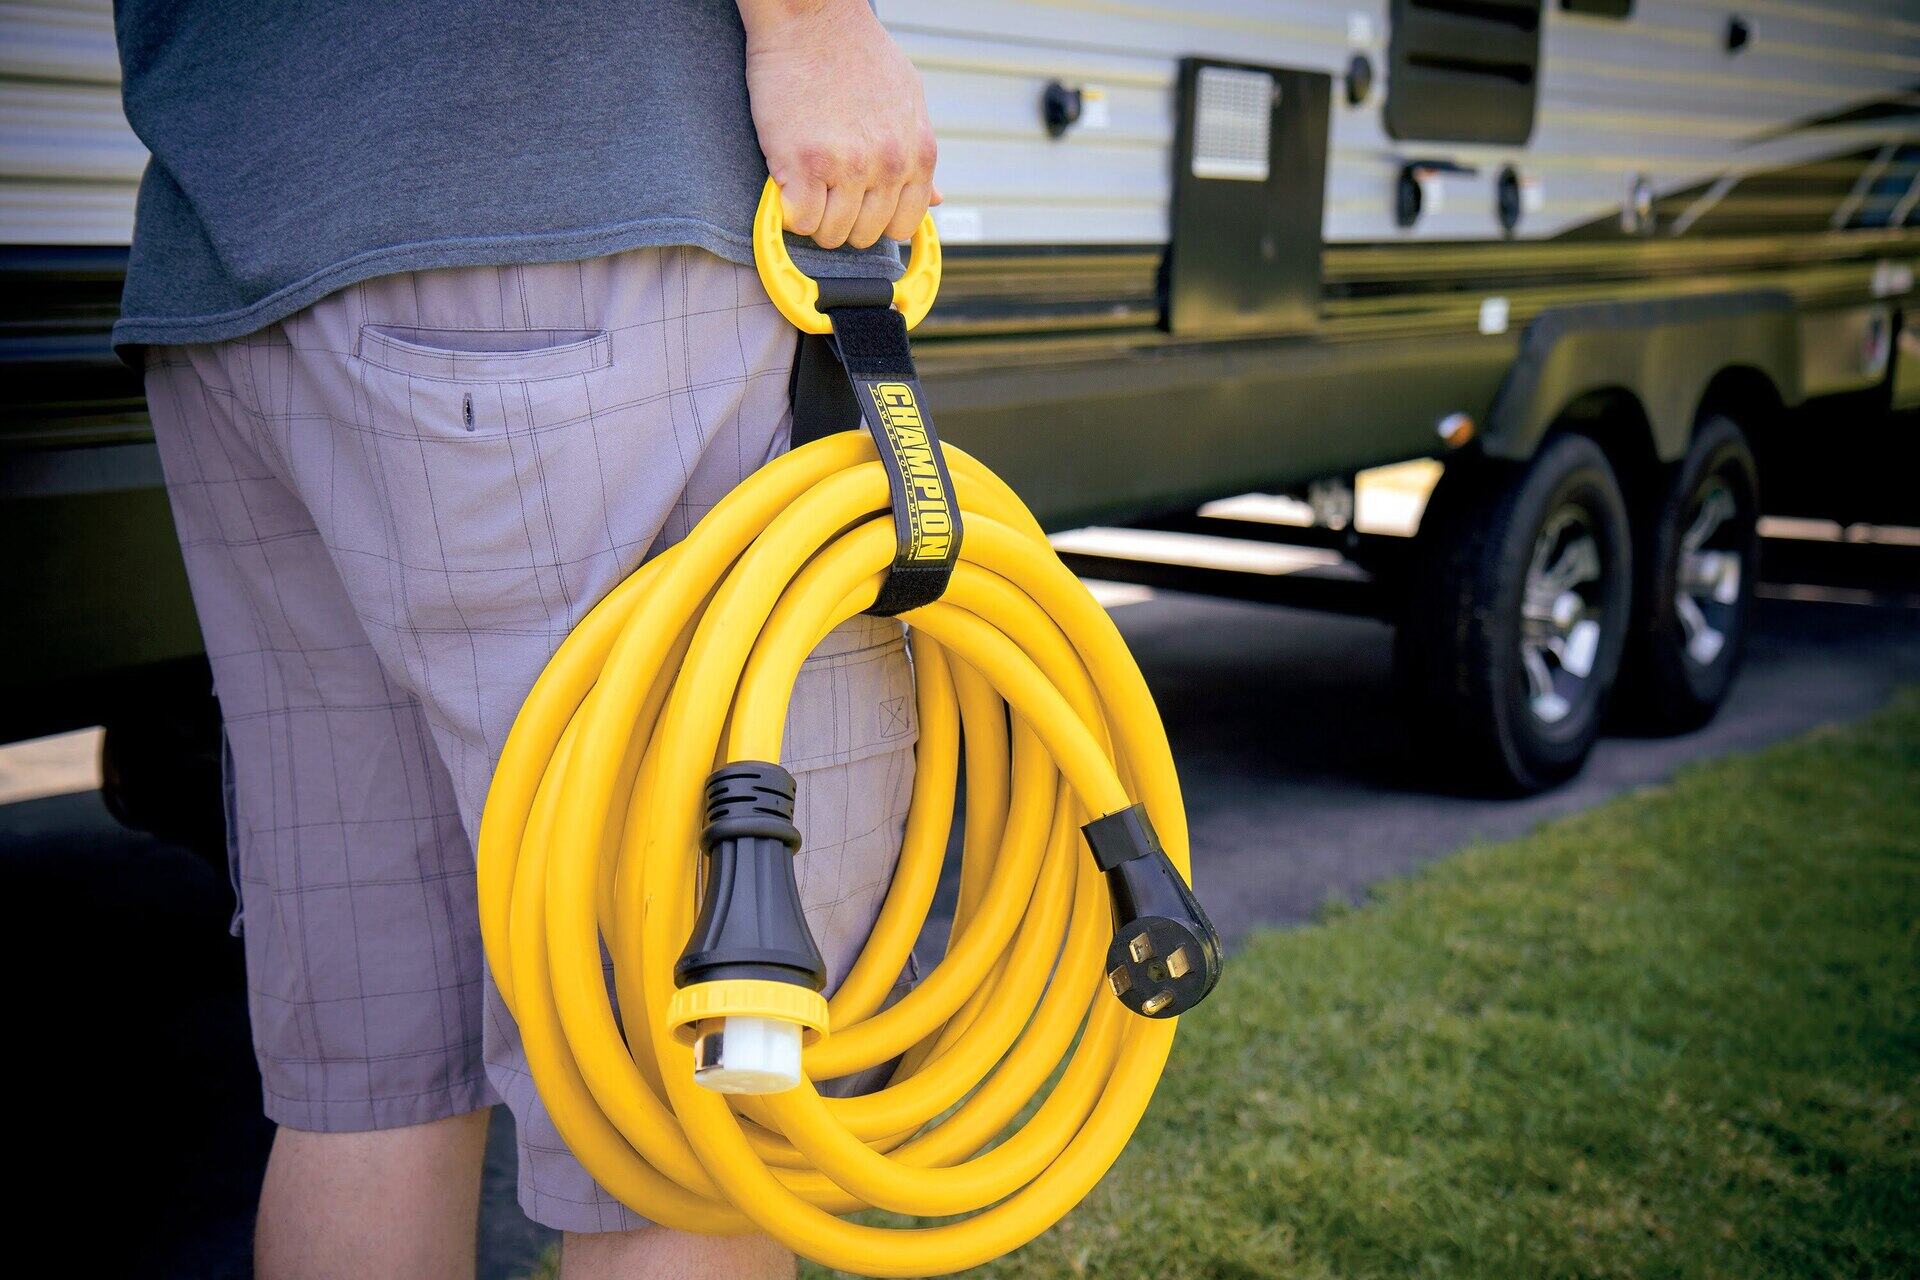
Extension cords are essential tools in many households and workplaces. They allow us to extend the reach of power outlets when we need to plug in devices or appliances that are far away from the nearest socket. While most extension cords are designed for standard 120V power, there may be situations where you need a higher voltage extension cord, such as a 220V extension cord.
Using a 220V extension cord requires some knowledge and precautions to ensure safety and maintain proper functionality. This article will guide you through the process of making a 220V extension cord with proper safety measures in place.
It’s important to note that working with electrical wiring can be dangerous, especially when dealing with higher voltage levels. If you’re not experienced or comfortable with electrical work, it’s highly recommended to seek the assistance of a qualified professional.
In this article, we will cover the steps involved in making a 220V extension cord, along with the necessary materials and tools you’ll need. By the end, you’ll have the knowledge and confidence to create a safe and reliable 220V extension cord that suits your specific needs.
Key Takeaways:
- Prioritize safety when making a 220V extension cord by following crucial precautions, selecting the right wire gauge, and choosing the correct plug and socket configuration.
- Ensure a safe and reliable 220V extension cord by accurately measuring, cutting, stripping, and connecting the cable, and testing and inspecting the completed cord for functionality and safety.
Read more: How Long Can A 220V Extension Cord Be
Understanding Safety Precautions
Prior to embarking on the process of creating a 220V extension cord, it is crucial to understand and adhere to important safety precautions. Working with electricity can pose serious risks, so taking the necessary precautions will help to prevent accidents and ensure your safety.
Here are some essential safety measures to keep in mind:
- Disconnect the power: Before you start working on any electrical wiring, make sure to turn off the power supply to the area where you’ll be working. This can be done by switching off the circuit breaker or unplugging the main power source. This step is vital to prevent electrocution while handling wires and connectors.
- Wear protective gear: Protect yourself by wearing appropriate safety gear, such as insulated gloves, safety goggles, and non-conductive footwear. These will reduce the risk of injury from electrical shocks or any debris that may result from the construction process.
- Ensure proper insulation: Insulation is key to preventing electrical shocks and short circuits. Make sure that the wires you use for the extension cord are rated for the voltage you’ll be working with, and double-check that they are in good condition, without any visible damage or exposed wires.
- Follow the manufacturer’s instructions: When using plugs, sockets, and connectors, carefully read and follow the manufacturer’s instructions. Improper installation or use can lead to overheating, arcing, and other dangerous situations.
- Keep the cord away from heat sources: Avoid placing the 220V extension cord near heat sources or flammable materials that may lead to a fire hazard. Make sure the cord is positioned in a well-ventilated area to prevent overheating.
- Regularly inspect the extension cord: After completing the construction of your 220V extension cord, regularly inspect it for any signs of wear or damage. If you notice any frayed wires, exposed insulation, or loose connections, discontinue use and repair or replace the cord immediately.
By following these safety precautions, you will significantly reduce the risk of electrical hazards and ensure a safe working environment. Remember, electricity can be dangerous, so it’s better to prioritize safety above all else.
Materials and Tools Required
Before you begin creating your 220V extension cord, it’s important to gather all the necessary materials and tools. Having everything prepared beforehand will make the construction process smoother and more efficient. Here is a list of the materials and tools you’ll need:
Materials:
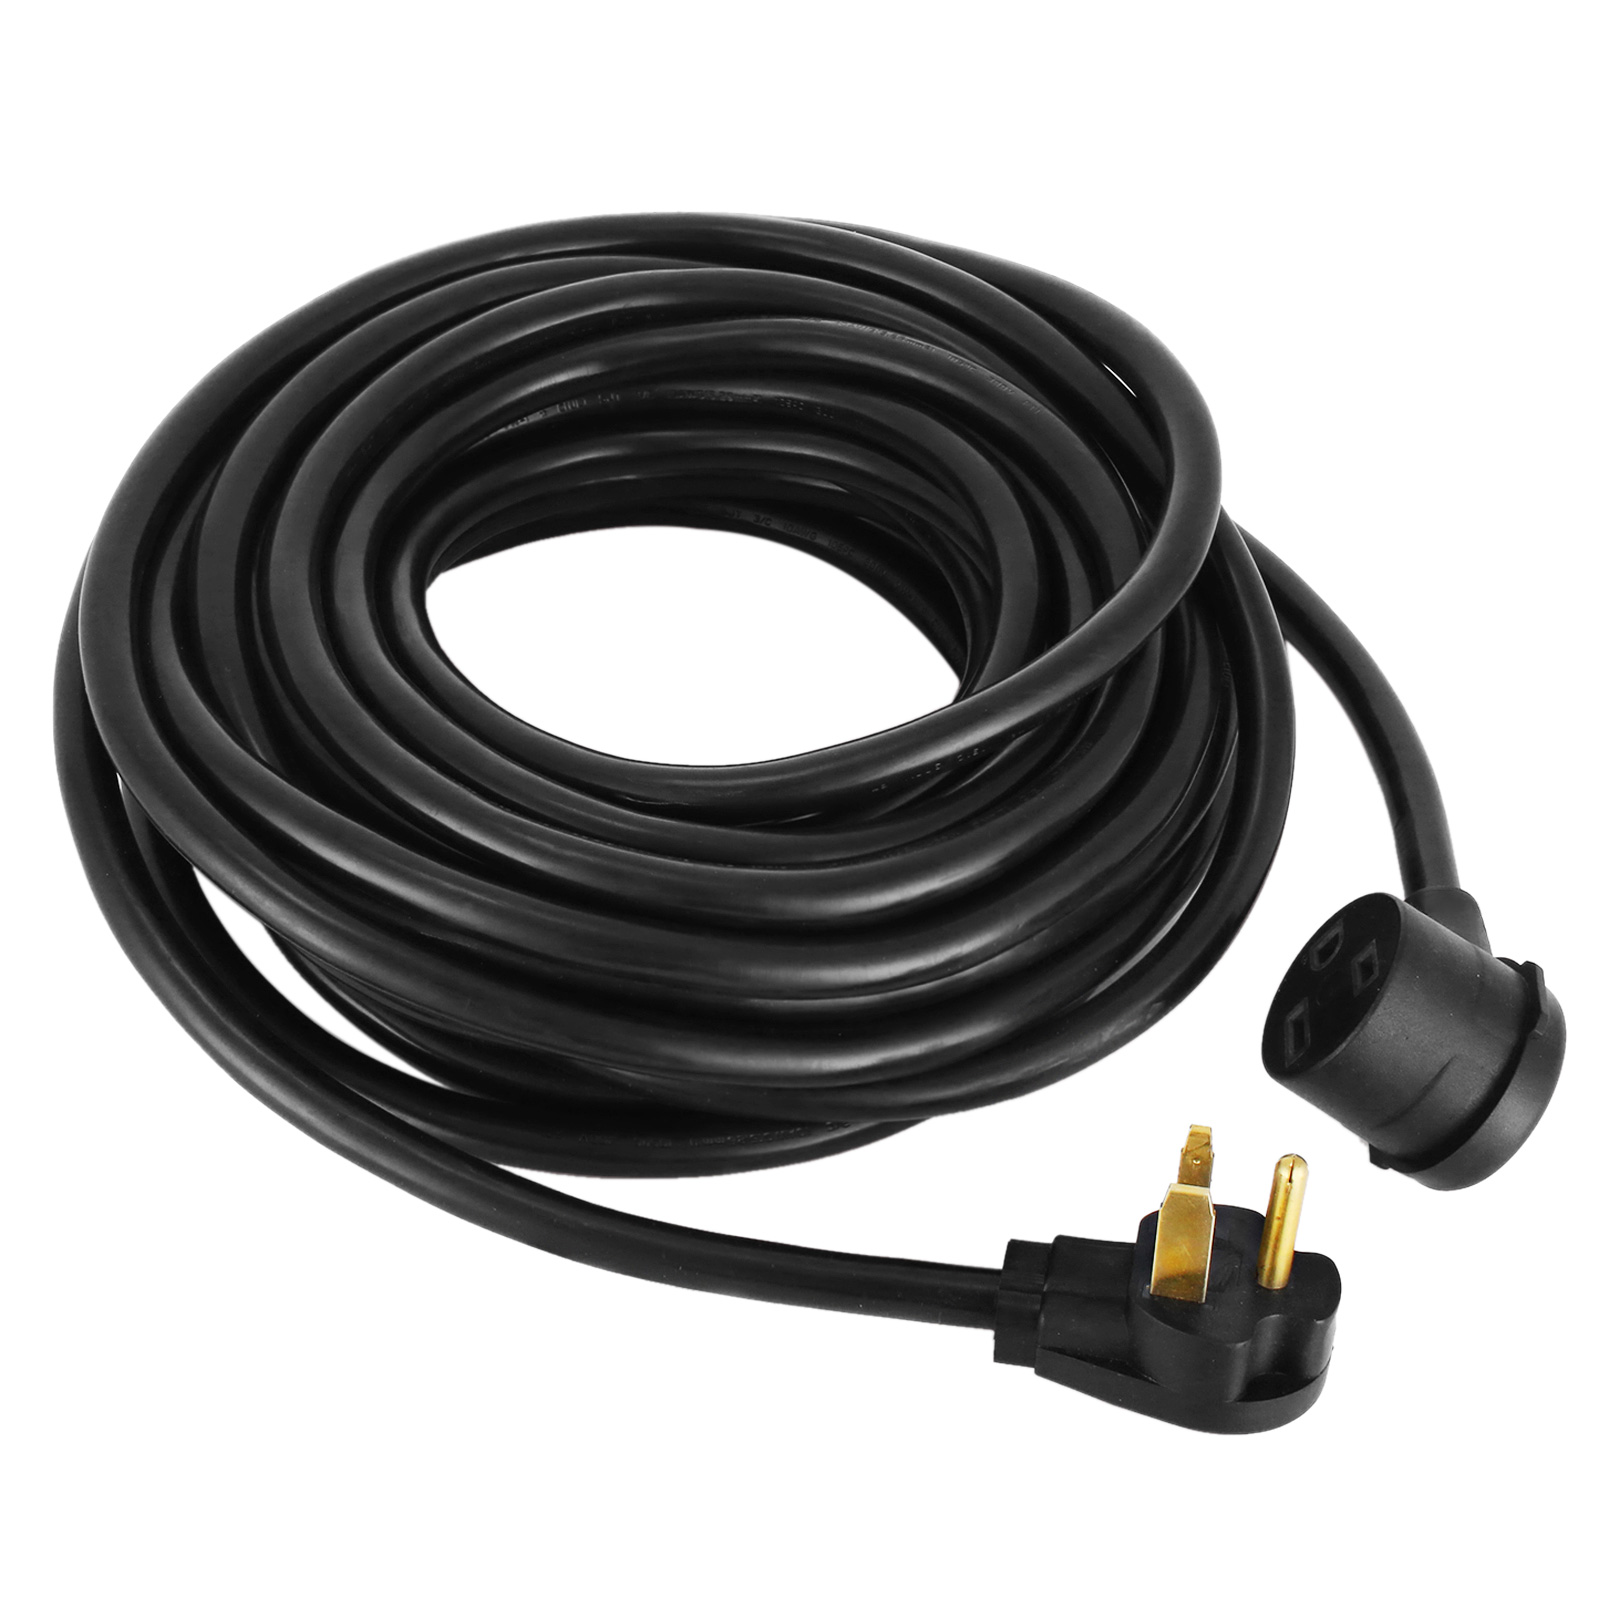
- Power cable – Make sure to choose a power cable that is rated for 220V and meets the desired length requirements for your extension cord.
- 220V plug – Select a plug that matches the type and configuration required for your specific power outlet. Make sure it is compatible with the power cable you have chosen.
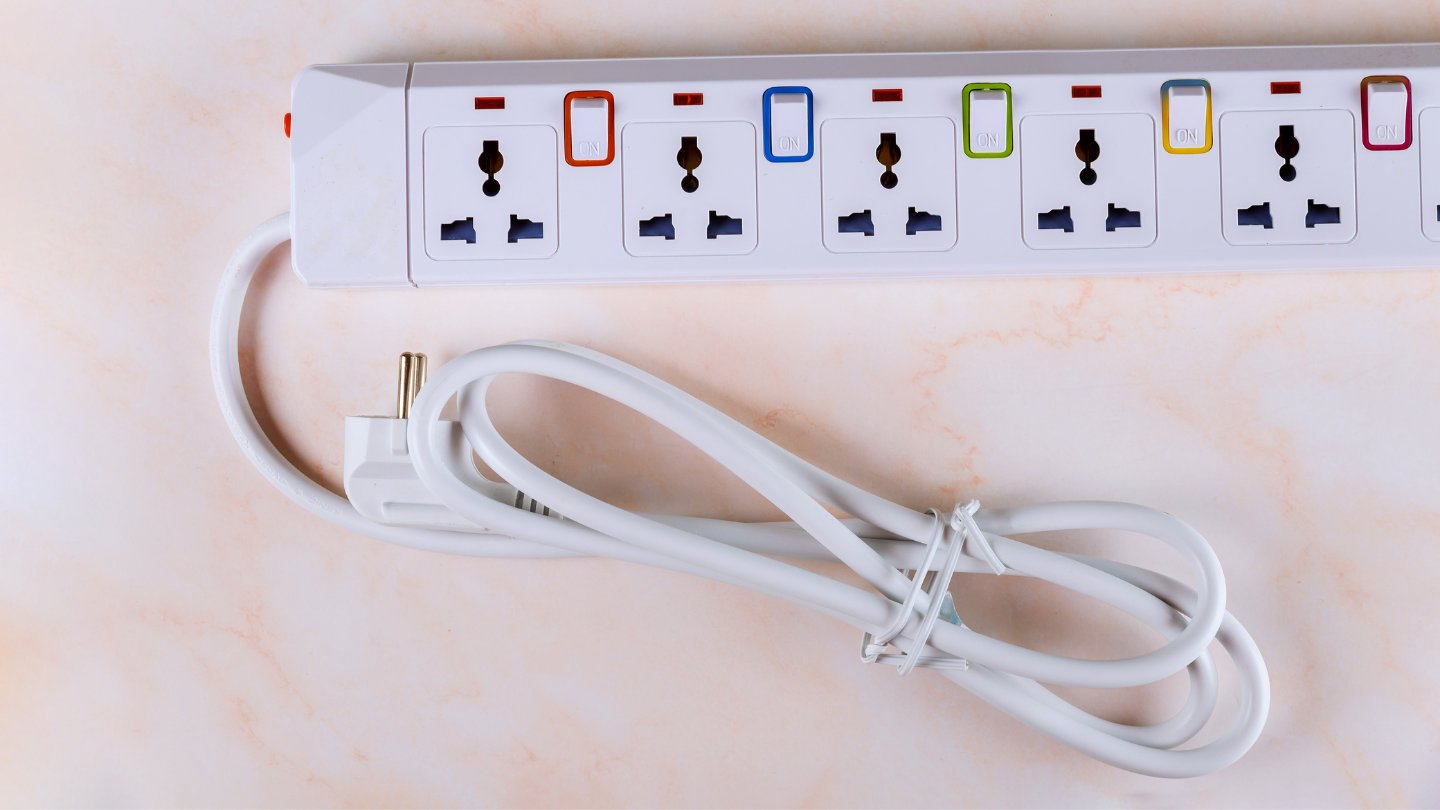
- 220V socket – Choose a socket that corresponds to the plug you have selected. It should also be rated for 220V.
- Heat shrink tubing – This tubing will be used to provide insulation and secure the connections.
- Electrical tape – Use electrical tape to provide additional insulation and secure the wiring.
- Wire strippers – These tools are essential for removing the insulation from the power cable wires.
- Wire cutters – Wire cutters will be needed to cut the power cable to the desired length.
- Screwdriver – A screwdriver will be required to connect the wires to the plug and socket.
- Heat gun or lighter – This is needed to shrink the heat shrink tubing and ensure a tight seal.
Tools:
- Measuring tape or ruler – Use this to measure the length of the power cable.
- Marker or pen – This is needed to mark the spots where the power cable will be cut.
- Utility knife – A utility knife is useful for cutting the power cable.
- Multimeter – A multimeter is optional but highly recommended for testing and detecting any issues with the wiring.
- Wire connectors – Wire connectors are useful for joining wires securely within the plug and socket.
By having all these materials and tools ready before you begin, you can ensure a smooth and efficient construction process for your 220V extension cord. Remember to always exercise caution when working with electricity and follow the manufacturer’s instructions for the materials and tools you are using.
Read also: 13 Amazing Hair Dryer 220V For 2025
Step 1: Assessing Power Needs
The first step in creating a 220V extension cord is to assess your power needs. Determine the specific devices or appliances that you will be connecting to the extension cord and their power requirements. This information will guide you in selecting the appropriate wire gauge and plug/socket configuration for your extension cord.
Start by checking the power requirements of the devices you plan to connect. This information is usually indicated on a label or plate attached to the device or in its user manual. Look for the voltage rating (in this case, 220V) and the power consumption (in watts or amps).
Once you have the power consumption data, add up the power requirements for all the devices you will be connecting. This will give you a total power consumption figure that will help you determine the appropriate wire gauge for your extension cord. It is essential to choose a wire gauge that can handle the maximum power load without overheating or risking electrical faults.
Refer to a wire gauge chart to determine the appropriate wire size based on the power consumption and the length of the extension cord you require. The longer the extension cord, the thicker the wire gauge required to ensure minimal voltage drop and proper power delivery. Select a wire gauge that matches or exceeds the calculated requirements.
By accurately assessing your power needs, you can ensure that your 220V extension cord is capable of providing the necessary power to your devices without any issues. Remember that using an insufficient wire gauge can lead to overheating, voltage drop, and potential damage to your devices or the extension cord itself.
Once you have determined the appropriate wire gauge, you can proceed to select the plug and socket configurations that match your specific power needs and the existing power outlets. This will ensure compatibility and a secure connection.
Step 2: Selecting the Appropriate Wire Gauge
Choosing the correct wire gauge is crucial to ensure the safe and efficient operation of your 220V extension cord. The wire gauge determines the maximum current capacity of the cord and helps prevent overheating, voltage drop, and potential damage to your devices or the cord itself.
When selecting the wire gauge, consider both the maximum power load and the length of the extension cord. The longer the cord, the higher the resistance and the greater the voltage drop. To compensate for this, a thicker wire gauge is required to minimize voltage loss and maintain proper power delivery.
Wire gauge is measured using the American Wire Gauge (AWG) system, where the lower the number, the thicker the wire. Common wire gauge sizes for 220V extension cords include 12 gauge, 10 gauge, and even 8 gauge for longer distances or extremely high power loads.
To determine the appropriate wire gauge, refer to a wire gauge chart that takes into consideration the power requirements and the length of the extension cord. These charts will provide specific recommendations based on these factors.
For example, if your power consumption requires a 12-gauge wire and your extension cord will be approximately 25 feet long, ensure that you select a 12-gauge wire suitable for that length. Choosing a smaller wire gauge may result in voltage drop, reduced power output, and potential overheating.
It’s always better to err on the side of caution and select a slightly larger wire gauge if you’re unsure about the exact power requirements or cord length. This will ensure that your extension cord can handle any potential increases in power consumption or accommodate longer distances if needed in the future.
Remember to check local regulations and safety standards to ensure compliance with wire gauge requirements and electrical codes in your area.
By selecting the appropriate wire gauge, you can ensure that your 220V extension cord operates safely and effectively, providing reliable power to your devices without any significant voltage drop or overheating issues.
Step 3: Choosing the Correct Plug and Socket
Choosing the correct plug and socket configuration is a crucial step in creating a 220V extension cord. The plug and socket must match the power requirements of your devices and be compatible with the existing power outlets.
The first consideration is the plug configuration. Different regions and countries have their own standards for plug types and pin arrangements. Ensure that the plug you choose aligns with the power outlets in your location. Common plug types for 220V include NEMA 6-15, NEMA 6-20, and IEC 60309.
Next, determine the amperage rating of the plug and socket. The amperage rating indicates the maximum current the plug and socket can safely handle. Choose a plug and socket rated for the expected power consumption of your devices, ensuring that it exceeds the total current draw to prevent overheating and potential damage.
Consider the build quality and durability of the plug and socket. Look for components made from sturdy materials that can withstand frequent plugging and unplugging. Reliable connections and secure fittings are essential for proper electrical conductivity and safety.
It’s also worth considering additional features such as built-in surge protection or grounding options. Surge protection safeguards your devices against voltage spikes, while grounding adds an extra layer of safety by diverting electrical currents away from your equipment in case of a fault.
Finally, evaluate the compatibility of the plug and socket with your selected wire gauge. Ensure that the connectors can accommodate the size of the wire and provide a secure and reliable connection. Some connectors require special crimping tools or soldering techniques for proper installation, so be prepared to follow the manufacturer’s instructions.
Always verify that the plug and socket combination is rated for 220V and compatible with the wire gauge you have selected. This ensures a safe and reliable extension cord that can handle the required power load without any issues.
By choosing the correct plug and socket, you can create a 220V extension cord that is compatible with your devices and power outlets, providing a secure connection and allowing you to utilize your electrical equipment with ease.
Step 4: Measuring and Cutting the Cable
Once you have selected the appropriate wire gauge and chosen the correct plug and socket configuration, it’s time to measure and cut the cable for your 220V extension cord. Accurate measurements and clean cuts ensure a precise and professional-looking final product.
Here are the steps to measure and cut the cable:
- Measure the desired length: Use a measuring tape or ruler to determine the length you need for your extension cord. Take into account the distance between the power outlet and the devices you will be connecting, as well as any necessary slack for flexibility.
- Mark the spots for cutting: Once you have determined the length, mark the spots on the cable where you will make the cuts. Use a marker or pen to avoid confusion and ensure accuracy.
- Prepare a clean and stable cutting surface: Find a stable work surface where you can safely cut the cable. Ensure that the area is clear of any obstructions and that you have enough space to work comfortably.
- Secure the cable: Use clamps or other means to secure the cable in place before cutting. This will prevent any movement or slipping during the cutting process, ensuring a straight and clean cut.
- Cut the cable: Using a utility knife or wire cutters, carefully cut the cable at the marked spots. Apply even pressure and make a clean, straight cut. Take caution not to damage the internal wires or the insulation of the cable.
- Inspect the cut ends: After cutting the cable, inspect the ends to ensure they are clean and free from frayed wires or sharp edges. Trim any uneven or jagged portions if needed.
Remember to follow safety precautions when cutting the cable. Keep your fingers away from the blade, use appropriate tools, and wear protective gear to prevent any injuries.
By measuring and cutting the cable accurately, you will have the desired length for your 220V extension cord, allowing you to connect your devices effectively and without any unnecessary slack.
When making a 220V extension cord, always use the appropriate gauge wire for the length of the cord to ensure it can handle the voltage and current without overheating.
Read also: 11 Superior 220V Induction Cooktop For 2025
Step 5: Stripping the Cable and Preparing the Ends
After measuring and cutting the cable for your 220V extension cord, the next step is to strip the insulation from the ends of the cable and prepare them for connection to the plug and socket. Properly stripped and prepared ends ensure a secure and reliable electrical connection.
Here’s how to strip the cable and prepare the ends:
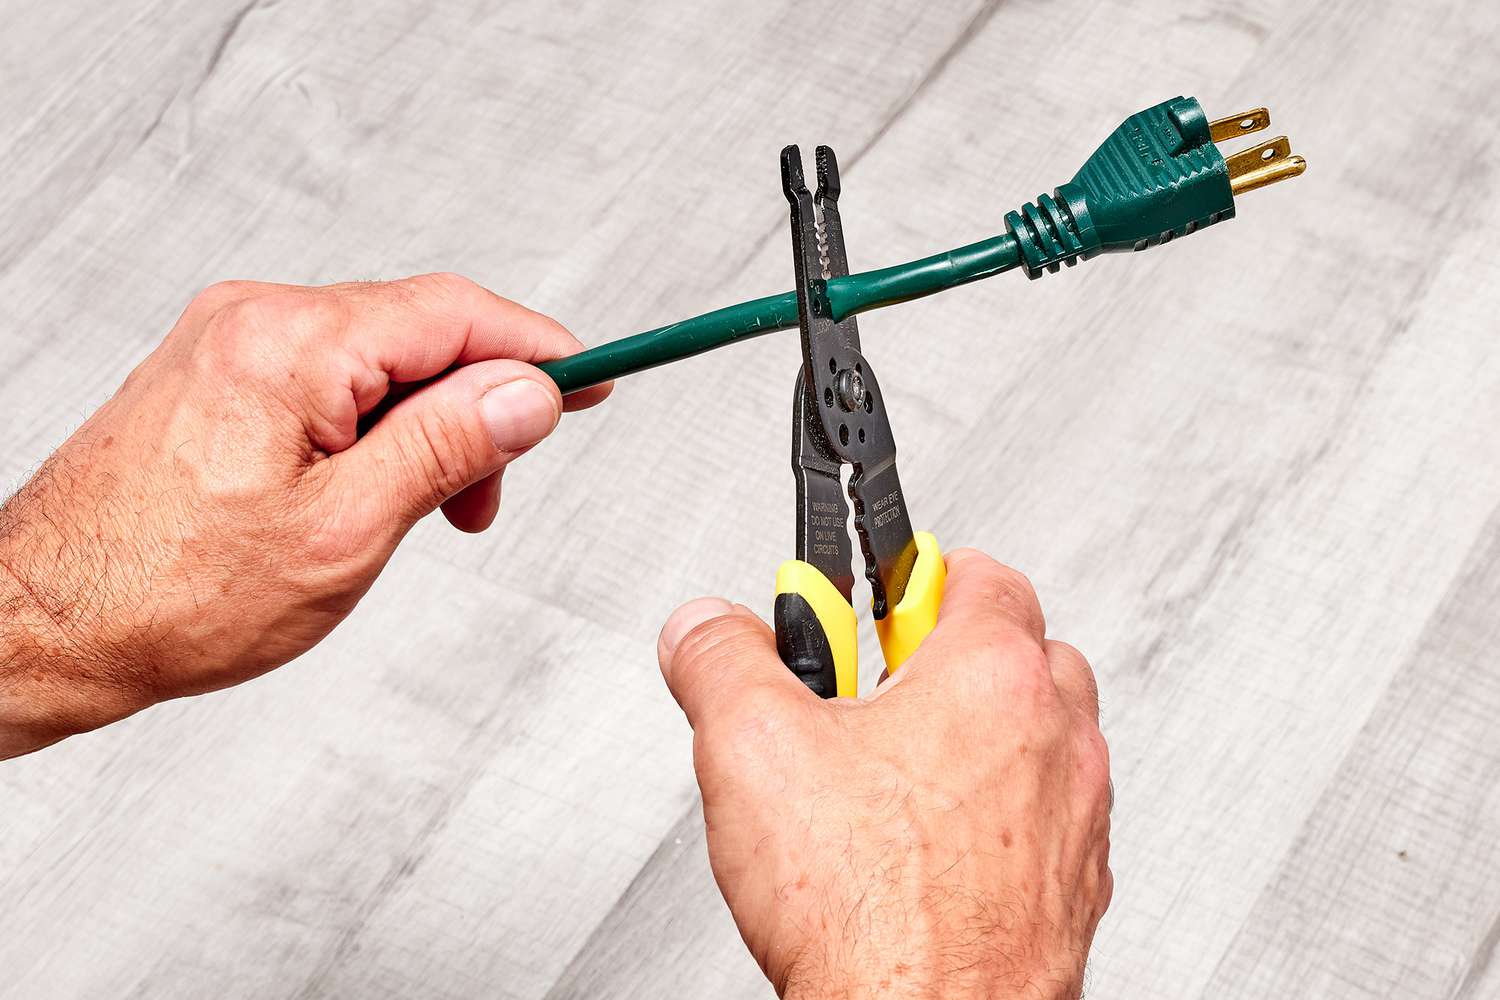
- Gather the necessary tools: You will need a pair of wire strippers or a utility knife specifically designed for stripping insulation.
- Identify the insulation length: Refer to the manufacturer’s instructions or a wire gauge chart to determine the recommended length to strip the insulation from the cable ends. This is typically indicated by markings on the wire strippers or a measurement guide on the tool.
- Align the cable end with the stripping tool: Place the end of the cable into the appropriate notch on the wire strippers or utility knife. Ensure that it is aligned correctly to avoid cutting into the wires.
- Apply pressure and rotate: Gently squeeze the wire strippers or utility knife, applying enough pressure to score the insulation. Rotate the tool around the cable, turning it multiple times to create a clean incision around the circumference of the cable.
- Remove the insulation: After creating the incision, carefully pull the stripped portion of the insulation away from the cable. Be cautious not to accidentally cut into the wires or leave any jagged edges.
- Inspect the exposed wires: Once the insulation is removed, inspect the exposed wires to ensure they are intact and not damaged. Trim any frayed edges or strands if necessary.
- Repeat for the other end: Repeat the process of stripping and preparing the other end of the cable for connection to the opposite end of the extension cord.
It’s important to note that the wires should be stripped to the correct length specified by the plug and socket manufacturer. Failing to strip the insulation to the appropriate length may result in loose connections or exposed wires, which can lead to poor electrical conductivity, short circuits, or electrical hazards.
By properly stripping the insulation and preparing the ends of the cable, you create a clean and secure foundation for connecting the wires to the plug and socket in the next steps of constructing your 220V extension cord.
Step 6: Connecting the Plug and Socket
Now that you have stripped and prepared the ends of the cable for your 220V extension cord, it’s time to connect the plug and socket. Properly connecting these components ensures a secure and reliable electrical connection.
Follow these steps to connect the plug and socket:
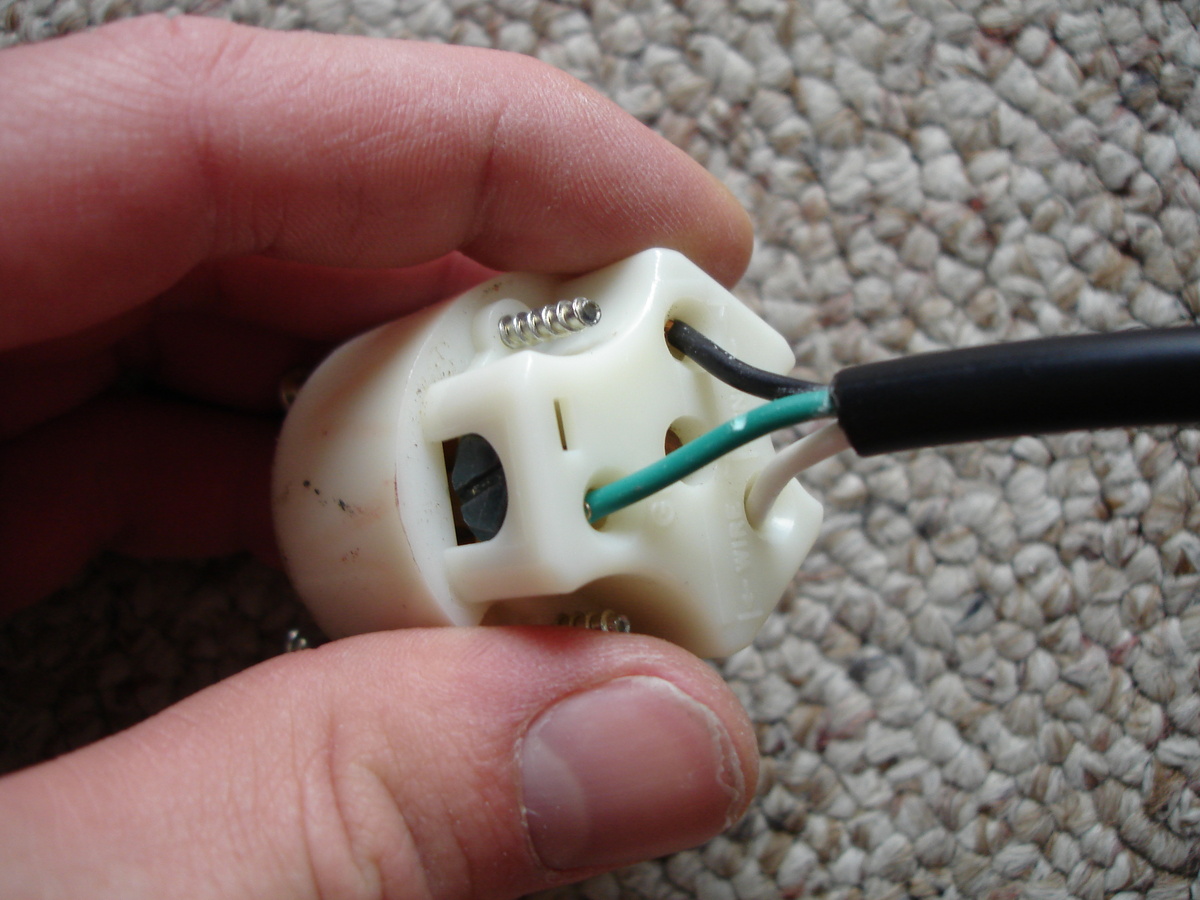
- Identify the wiring configuration: Each plug and socket may have a specific wiring configuration, so it’s important to identify which wire connects to which terminal. Refer to the manufacturer’s instructions or the markings on the plug and socket for guidance.
- Thread the cable through the plug/socket: Insert the stripped ends of the cable through the appropriate openings in the plug and socket, ensuring that enough of the wire goes through to reach the terminals.
- Prepare the wires for connection: If necessary, twist the individual strands of each wire to ensure they are tightly bound together. Trim any excess wire length if needed, leaving enough to reach the terminals without becoming strained or exposed outside the connector housing.
- Connect the wires to the terminals: For each wire, connect it to the corresponding terminal on the plug or socket. Follow the wiring configuration provided by the manufacturer, which may involve screw terminals, push-in connectors, or crimp connectors. Make sure the connections are secure and tight.
- Test the connections: After connecting the wires to the terminals, give them a gentle tug to ensure they are firmly attached. Inspect the connections to ensure there are no loose wires or exposed conductors.
- Secure the plug and socket: Once the connections are secure, close and secure the housing of the plug and socket, following the manufacturer’s instructions. This may involve tightening screws, snapping the housing shut, or using additional securing mechanisms provided.
It’s crucial to ensure that the wiring is done correctly and matches the wiring configuration of the plug and socket. Mistakes in the wiring can result in improper electrical connections, power interruptions, or even electrical hazards.
After connecting the plug and socket, visually inspect the entire extension cord for any exposed wires, loose connections, or signs of damage. Repair or replace any components that appear faulty or compromised.
Remember, if you are uncertain about the wiring or connection process, it’s always best to consult a qualified electrician or seek professional assistance.
By correctly connecting the plug and socket, you can create a safe and functional 220V extension cord that facilitates the efficient and reliable delivery of power to your devices.
Step 7: Testing and Inspecting the Extension Cord
After completing the construction of your 220V extension cord, it’s essential to test and inspect it to ensure it is safe and in proper working condition. Testing and inspection help identify any potential issues or faults that could pose a risk to your safety or the performance of your devices.
Here are the steps to test and inspect your extension cord:
- Disconnect the power: Before testing or inspecting the extension cord, make sure it is unplugged from the power source. This eliminates the risk of electric shock while handling or examining the cord.
- Visual inspection: Carefully examine the entire length of the extension cord, checking for any signs of damage, such as frayed wires, exposed conductors, or broken insulation. Pay close attention to the connections at the plug and socket, ensuring they are securely fastened and properly insulated.
- Check the plug and socket: Inspect the plug and socket for any loose or damaged parts. Ensure that no pins or terminals are bent or broken. Make sure the plug and socket fit tightly together without any gaps or wobbling.
- Resistance testing: To verify the continuity of the wires and connections, use a multimeter or a continuity tester to measure the electrical resistance across the plug pins. Ensure that there is low resistance, indicating a solid electrical pathway.
- Perform a functionality test: Connect your devices to the extension cord and plug it into a power source. Turn on the devices and observe their performance. Check for any unusual behavior or abnormal heating of the cord or the plugs.
- Test for voltage drop: Use a voltmeter to measure the voltage at the power source end and the device end of the extension cord while the devices are running. Ensure that the voltage drop is within an acceptable range based on your power needs and wire gauge.
- Perform periodical inspections: It’s important to regularly inspect your 220V extension cord to identify any signs of wear and tear or damage. Check the cord before each use and replace it if there are any visible issues or if it fails any of the tests.
If any problems or irregularities are detected during the testing and inspection process, it’s crucial to address them promptly. Repair or replace any damaged components, such as plugs, sockets, or wires, before using the extension cord again.
Always remember to prioritize safety when using electrical equipment. If you are uncertain about the testing and inspection process or encounter any significant concerns, it’s advisable to consult a qualified electrician or seek professional assistance.
By thoroughly testing and inspecting your 220V extension cord, you can ensure a safe and reliable power supply for your devices, giving you peace of mind while using your electrical equipment.
Conclusion
Creating a 220V extension cord requires careful planning, attention to detail, and adherence to safety precautions. By following the steps outlined in this guide, you can construct a safe and reliable extension cord that meets your power needs.
Throughout the process, remember to prioritize safety. Take necessary precautions such as disconnecting the power, wearing appropriate protective gear, and carefully inspecting your work for any potential hazards. If you’re unsure about any step or lack experience with electrical work, it’s always recommended to seek the help of a qualified professional.
When assessing your power needs, choose the appropriate wire gauge that can handle the maximum power load without significant voltage drop. Select the right plug and socket configuration that matches your devices and existing power outlets. Measure and cut the cable accurately to achieve the desired cord length.
Properly strip the cable and prepare the ends, ensuring clean and secure connections. Connect the plug and socket following the specified wiring configuration and test the completed extension cord for functionality, continuity, and voltage drop. Regularly inspect and maintain the extension cord to identify any signs of wear or damage.
By taking these steps and complying with safety standards, you can have confidence in the performance and reliability of your 220V extension cord.
Remember, electrical work can be dangerous, and it’s crucial to prioritize safety at all times. If you encounter any issues or have doubts about the construction process, consult a professional electrician to ensure a safe outcome.
Creating your own 220V extension cord can provide you with the flexibility to power your devices and appliances where standard power outlets may not reach. With the knowledge and skills gained from this guide, you can enjoy the convenience and versatility of a customized extension cord for your specific power needs.
Frequently Asked Questions about How To Make A 220V Extension Cord
Was this page helpful?
At Storables.com, we guarantee accurate and reliable information. Our content, validated by Expert Board Contributors, is crafted following stringent Editorial Policies. We're committed to providing you with well-researched, expert-backed insights for all your informational needs.


0 thoughts on “How To Make A 220V Extension Cord”