Articles
How To Make A Fort In The Living Room
Modified: October 20, 2024
Learn how to create an amazing fort in your living room with our helpful articles. Discover tips, tricks, and inspiration for building the perfect hideaway.
(Many of the links in this article redirect to a specific reviewed product. Your purchase of these products through affiliate links helps to generate commission for Storables.com, at no extra cost. Learn more)
Introduction
Remember the excitement of building a fort as a child? Creating a cozy hideaway in the living room, using blankets and pillows to construct a secret world of imagination and adventure. Well, a fort-building session is not just for kids anymore! In fact, it can be a fun and nostalgic activity for adults too.
Whether you want to reminisce about your childhood days or simply add a touch of whimsy to your living space, building a fort in the living room is a creative and enjoyable way to spend your time. It can be a delightful escape from the stresses of everyday life or a cozy spot for movie nights and lazy afternoons.
In this article, we will guide you through the process of making a fort in your living room. From choosing the right materials to adding the final touches, we will provide you with all the steps and tips you need to construct the perfect fort.
So, let’s dive in and rediscover the joy of building a fort!
Key Takeaways:
- Rediscover the joy of childhood by building a cozy fort in your living room. Follow the steps to create a magical oasis for relaxation, movie nights, and imaginative adventures.
- Gather blankets, pillows, and creative flair to construct a whimsical fort. Add personal touches, soft lighting, and entertainment for a cozy haven that sparks joy and creativity.
Read more: How To Make A Fort With Pillows And Blankets
Materials Needed
Before you embark on your fort-building adventure, it’s essential to gather the necessary materials. Here’s a list of items you’ll need:
- Blankets and Sheets: Select a variety of blankets and sheets of different sizes and textures. This will give your fort a cozy and personalized feel.
- Pillows: Gather a collection of pillows to use as cushions and support for your fort’s structure.
- Furniture: Use existing furniture like chairs, coffee tables, and sofas as a foundation for your fort. These will provide stability and structure to your creation.
- Clips or Clothespins: These will come in handy for securing the blankets and sheets together.
- Ropes or Bungee Cords: You may need these to add extra support or hang up your fort’s walls and ceilings.
- Flashlights or String Lights: To create a magical ambiance within your fort, bring in some soft lighting options. Use flashlights or string lights to add a cozy and enchanting touch.
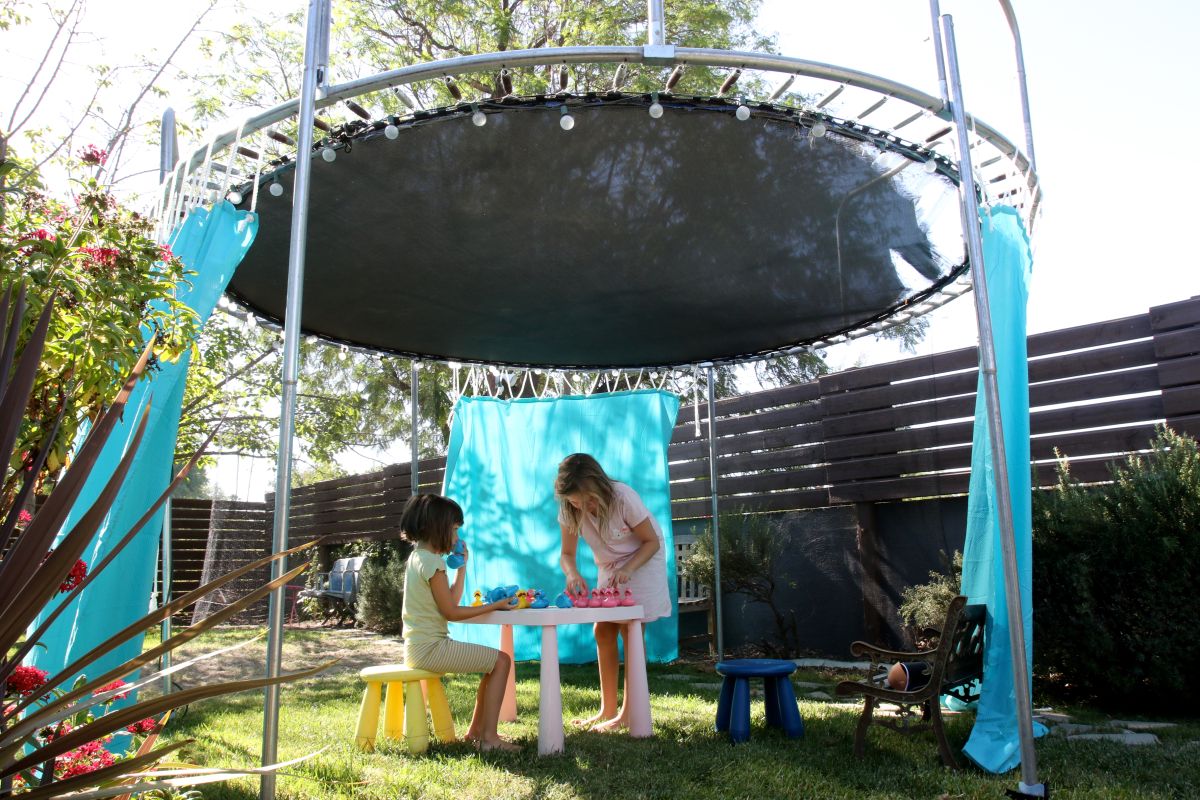
- Optional Extras: Consider bringing in additional items to enhance your fort experience. This can include cushions, cozy rugs, stuffed animals, books, board games, snacks, and whatever else sparks joy and creativity.
Make sure to gather all these materials before you start building your fort. It will save you time and keep the momentum going during the construction process.
Now that you have your materials ready, let’s move on to the next step: clearing the space for your fort.
Step 1: Clearing the Space
Before you start building your fort, it’s important to clear the space in your living room. Remove any furniture, objects, and clutter that might hinder the construction process.
Start by moving the larger furniture pieces to the sides of the room or temporarily relocating them to create an open area for your fort. You’ll need enough room to spread out your blankets and pillows and build the structure of your fort.
Clear the floor as well, ensuring there are no sharp objects or tripping hazards that could pose a safety risk. Vacuum or sweep the area to remove any dust or debris that may affect the cleanliness and comfort of your fort.
Once the space is clear and clean, you can move on to the next step: gathering the blankets and pillows.
Pro tip: If you’re concerned about potentially damaging your furniture or floor, you can lay down a protective layer such as a large sheet or tarp before starting the fort-building process.
Step 2: Gathering Blankets and Pillows
Now that you have a cleared space, it’s time to gather the blankets and pillows that will form the foundation of your fort. Select a variety of blankets and sheets in different sizes and textures to create a cozy and inviting atmosphere.
Start by draping a large blanket over the furniture you plan to use as the main structure of your fort. This will serve as the base for your fort’s walls and ceiling. Make sure the blanket is secure and taut by tucking it under the furniture or using clips/clothespins to hold it in place.
Next, layer additional blankets and sheets over the main blanket, extending them outwards to create the walls of your fort. Use pillows to prop up the blankets and create a sturdy structure. You can place them along the edges of the fort or stack them creatively to add support and comfort.
Be adventurous with your arrangements! Experiment with different combinations of blankets, sheets, and pillows to create unique shapes and cozy nooks within your fort. Aim for a balance between comfort and stability.
If you’re using chairs or other furniture as part of your fort, drape blankets over them and secure them using clips or clothespins. This will create additional walls and entrances for your fort.
Remember, the goal is to create a space that is both comfortable and visually appealing. The softness of the blankets and pillows combined with the whimsical appearance will transport you into a world of imagination.
Once you’ve gathered and arranged all your blankets and pillows, it’s time to move on to the next step: creating the base of your fort.
Step 3: Creating the Base
Now that you have your blankets and pillows arranged, it’s time to focus on creating a sturdy base for your fort. The base will provide stability and support for the walls and roof of your structure.
Start by ensuring that the furniture pieces you selected as the foundation of your fort are stable and secure. If necessary, adjust their positions or add additional support using books or sturdy objects.
Next, take a moment to assess the layout of your fort. Consider how you want the space to be divided and the entrances and exits you’d like to create. This will help you decide where to position your base and how to connect the different elements of your fort together.
To create a base, you can use a combination of blankets, sheets, and pillows. Place them strategically on the floor, overlapping and connecting them to form a solid foundation. Ensure that they are stable and won’t shift or move easily.
If you have chosen to build your fort on a carpet, you can tuck the edges of the blankets and sheets under heavy furniture or use clips/clothespins to keep them in place. On hard floor surfaces, consider using non-slip pads or placing heavy objects on the edges of the blankets to prevent them from sliding.
Remember, the stability of your base is essential for the overall integrity of your fort. Take the time to adjust and reinforce as needed.
Once you have a solid base in place, you’re ready to move on to the next step: building the walls of your fort.
Read more: How To Make A Fort On Your Bed
Step 4: Building the Walls
With a sturdy base in place, it’s time to start building the walls of your fort. The walls will define the structure and boundaries of your cozy hideaway.
Take one side of your fort and carefully lift the blankets or sheets that you have draped over the furniture. Secure them to the walls using clips, clothespins, or ropes tied to the furniture. Ensure that the walls are taut and secure.
Repeat this process for each side of your fort, connecting the blankets or sheets together to create a continuous wall. Use additional blankets or sheets as needed to fill in any gaps or create additional partitions within your fort.
Be creative in your wall designs! You can create windows by folding back a portion of the blanket and securing it with clips. You can also leave openings for entrances and exits to your fort by leaving gaps in the walls.
Don’t forget to leave some extra slack in the blankets or sheets to allow for adjustments later on. This will make it easier to modify the positioning and shape of your fort if needed.
Ensure that the walls of your fort are tall enough to provide adequate headroom and space to move comfortably. You want to strike a balance between a cozy space and a functional area where you can sit, relax, and enjoy your fort.
Once the walls are securely in place, it’s time to move on to the next step: adding the roof.
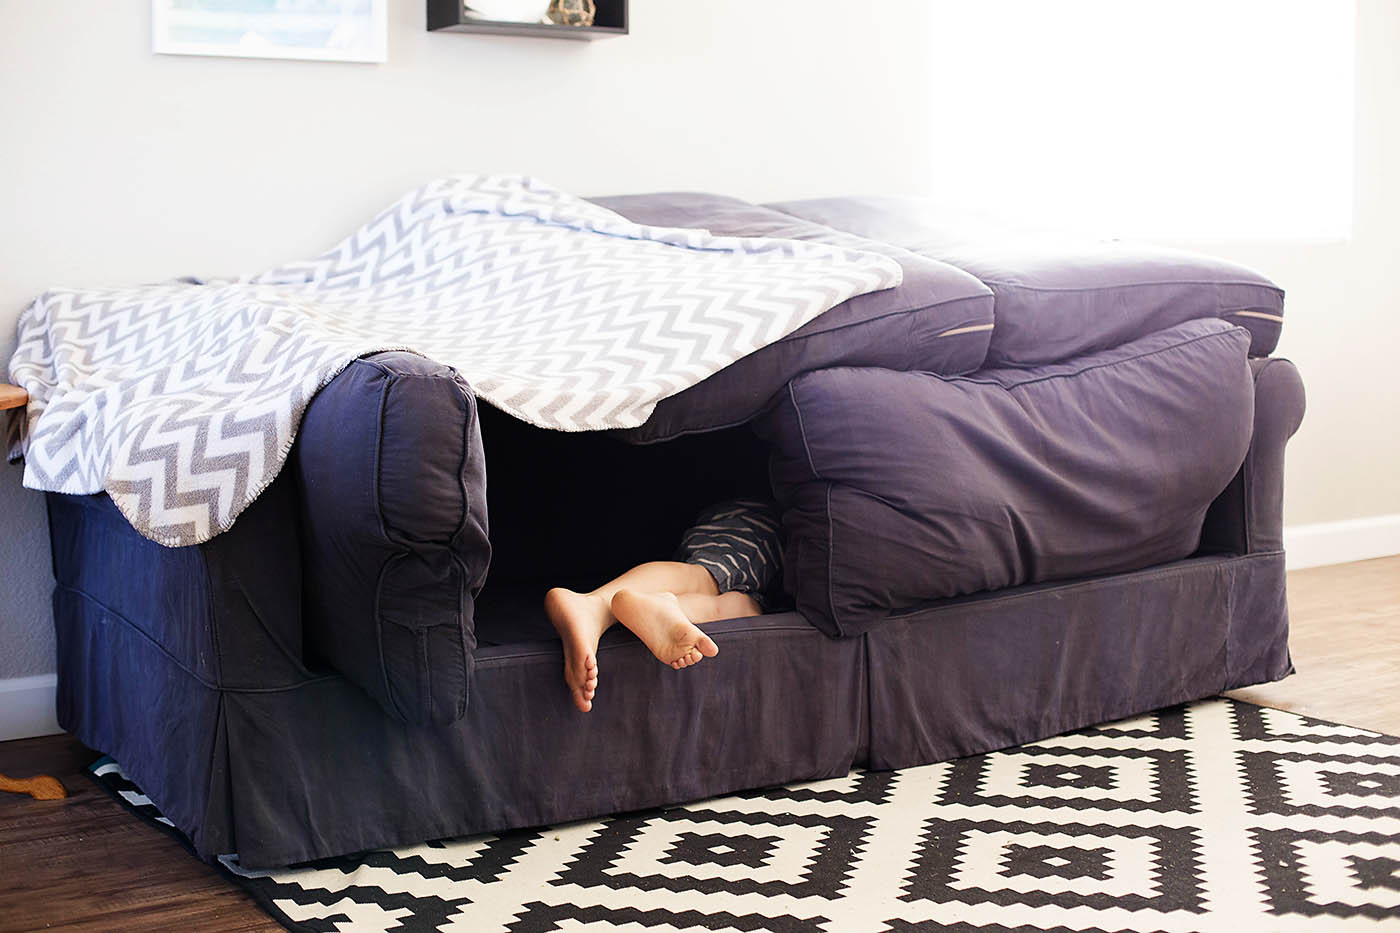
Use couch cushions, blankets, and chairs to create walls and a roof for your fort. Make sure to secure the blankets with heavy objects to keep them in place.
Step 5: Adding the Roof
Now that your walls are built, it’s time to add the roof to your fort. The roof will complete the structure and create a cozy and enclosed space.
Start by assessing the size and shape of your fort. Determine how you want the roof to be formed—whether it will be a flat surface or a peaked roof. This will depend on the available materials and the desired aesthetic of your fort.
If you have a flat area on top of your fort’s walls, you can simply drape a blanket or sheet over it to create a roof. Make sure to secure the roof to the walls using clips, clothespins, or ropes, ensuring that it is taut and stable.
If you want to create a peaked roof, you can use additional blankets or sheets to form a triangular shape. Attach one end of the blankets or sheets to the top of one wall and then extend them to the opposite wall, securing them in place. Repeat this process on the other side of your fort to create the peaked shape.
Ensure that your roof is secure and won’t easily collapse or shift. Adjust the positioning and tension as needed to achieve the desired shape and stability.
Remember, the roof should provide adequate coverage while allowing enough headroom and space inside your fort. It should feel like a cozy haven where you can relax and let your imagination soar.
With the roof securely in place, it’s time to move on to the next step: securing the fort and making it more stable.
Step 6: Securing the Fort
Now that your fort is taking shape, it’s important to ensure that it is secure and stable. This step is crucial for the safety and longevity of your fort.
Start by double-checking the attachments and connections of the blankets, sheets, and ropes. Make sure they are tightly secured and won’t easily come loose. If needed, reinforce any weak spots or reposition the attachments for better stability.
Next, inspect the furniture that serves as the foundation for your fort. Ensure that it is sturdy and won’t shift or move under the weight of the fort. Adjust the positioning or add additional support if necessary.
If you feel that your fort needs an extra level of stability, consider using ropes or bungee cords to tie the walls and roof to nearby furniture or sturdy objects in the room. This will provide additional support and prevent the fort from collapsing or shifting during use.
While securing your fort, be mindful of potential safety hazards. Avoid using sharp objects or materials that could cause injury. Ensure that the fort is well-ventilated and doesn’t obstruct any exits or fire safety measures.
By taking the time to properly secure your fort, you can enjoy it with peace of mind, knowing that it is safe and structurally sound.
With your fort now securely in place, it’s time to move on to the next step: decorating the fort to make it truly magical.
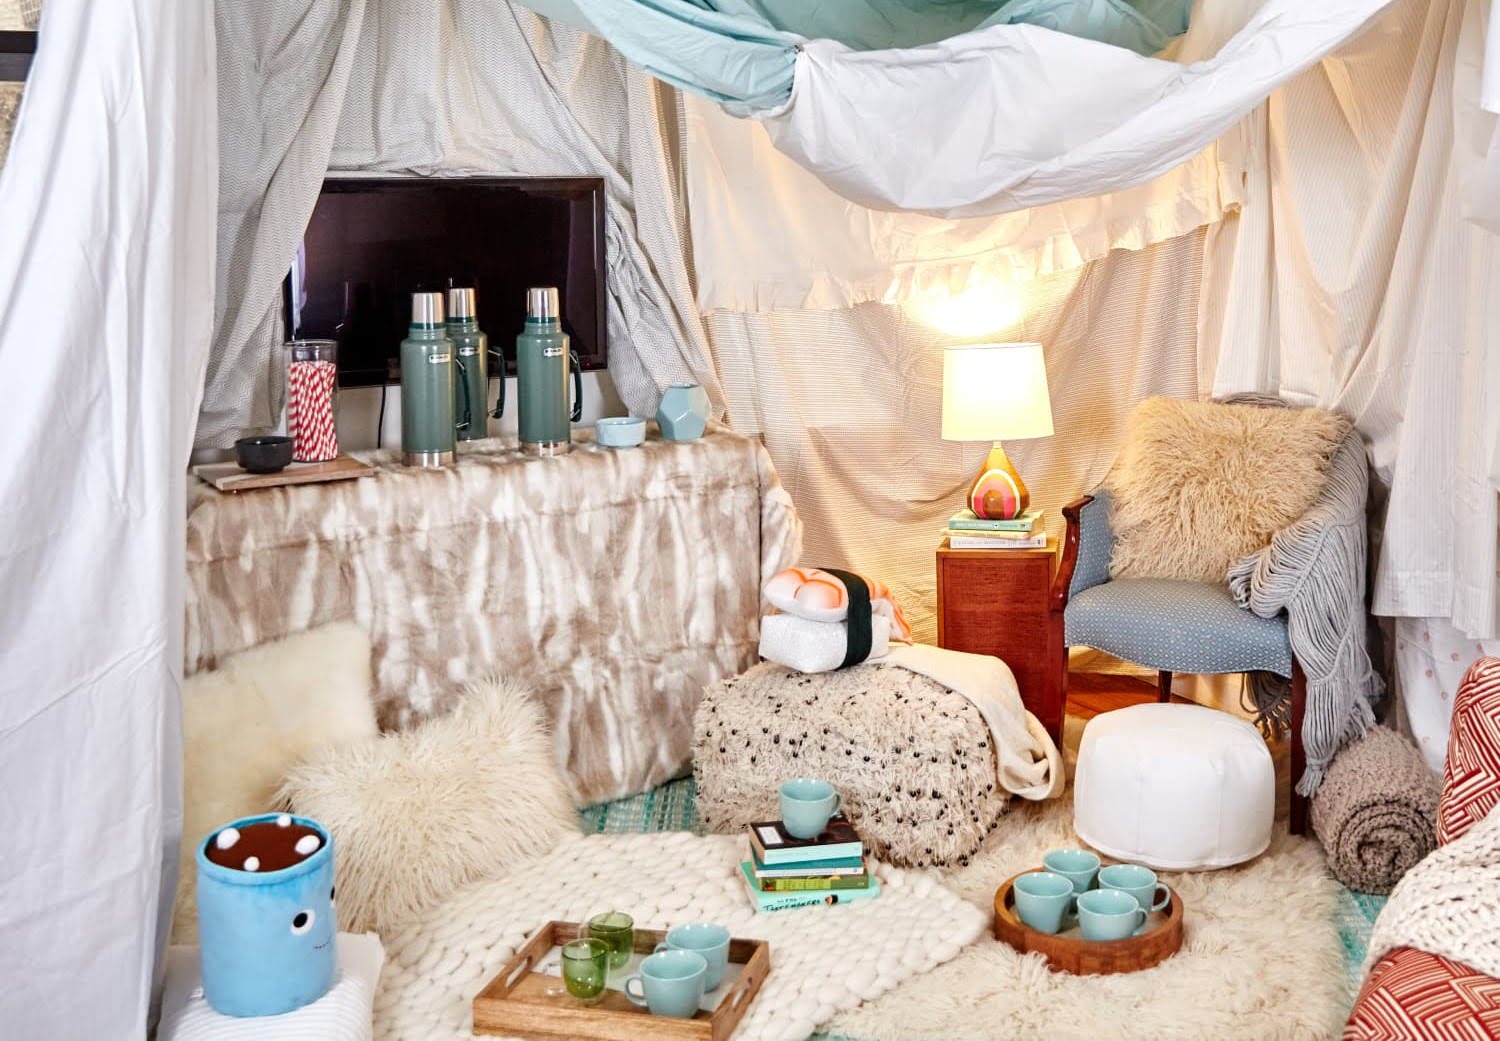
Step 7: Decorating the Fort
Now that your fort is stable and secure, it’s time to unleash your creativity and transform it into a magical space. Decorating your fort will add that extra touch of charm and make it truly unique.
Start by adding soft lighting to create a cozy ambiance. You can use fairy lights, string lights, or even table lamps placed strategically inside the fort. These gentle lights will create a warm and inviting atmosphere.
Consider adding decorative elements such as garlands, paper lanterns, or handmade crafts. Hang them from the walls or drape them across the ceiling to add a whimsical and playful touch to your fort.
Bring in additional comfort by adding cushions, bean bags, or rugs inside the fort. These will provide a cozy seating area and make your fort even more inviting. Get creative with different textures, colors, and patterns to make it visually pleasing.
Personalize your fort with artwork or posters that reflect your interests and passions. Hang them on the walls or prop them up on the floor to add a personalized touch to your fort. You can even create your own artwork or decorate the walls with your favorite quotes or drawings.
Don’t forget about entertainment! Bring in books, board games, or a portable movie projector to make your fort an oasis of fun and relaxation. Create a cozy reading nook or set up a mini theater for a movie night experience.
Lastly, consider adding snacks and refreshments to your fort to make it a complete haven. Set up a small table with your favorite treats, drinks, and a cozy blanket for a perfect picnic atmosphere.
Remember, the goal is to create a space that reflects your imagination and brings joy to your heart. Take your time to decorate your fort and make it a place you’ll want to spend a lot of time in.
With your fort beautifully decorated, it’s time to move on to the final step: adding the finishing touches.
Read more: How To Make Living Room Smell Nice
Step 8: Adding Final Touches
Congratulations! You’ve reached the final step of fort-building, where you can add those special finishing touches to make your fort truly extraordinary.
Start by ensuring that everything is organized and in its place. Tuck in any loose blankets or sheets, straighten the cushions, and arrange the decorations neatly. This will create a polished and inviting appearance.
Take a moment to step back and admire your creation from different angles. Consider if there are any additional touches or adjustments that can elevate the fort’s overall look and feel.
If you have any additional accessories such as fairy tale props, themed décor, or stuffed animals, strategically place them around your fort for added charm. These small details can transport you into a whole new world of imagination.
Consider adding a sign or nametag to your fort, giving it a name or a theme. This adds a personalized touch and makes your fort feel like a special place crafted just for you.
Lastly, don’t forget to capture the magic of your fort by taking photos or videos to share with friends and family. Documenting your masterpiece will allow you to revisit the excitement and fond memories of your fort-building adventure.
Now that you’ve added the final touches, it’s time to step inside your fort, relax, and enjoy the enchanting haven you’ve created. Whether it’s for movie nights, reading, or simply escaping the outside world, your fort will provide a cozy and imaginative retreat.
Remember that fort-building is a creative journey, and there are no right or wrong ways to do it. Let your imagination run wild, experiment with different designs, and most importantly, have fun!
Enjoy your fort and the delightful moments it will bring in the days to come.
Happy fort-building!
Conclusion
Building a fort in your living room is a nostalgic and creative endeavor, offering a delightful escape from the demands of everyday life. It’s a chance to tap into your inner child and indulge in the magic of imagination. By following the steps outlined in this article, you can create a cozy and enchanting oasis right in the comfort of your own home.
From clearing the space and gathering materials to constructing the base, walls, and roof, each step of the fort-building process contributes to the overall experience and stability of your creation. By securing the fort and adding personal touches, you truly bring it to life.
Decorating the fort allows you to infuse your unique style and personality into the space. From soft lighting to comfortable cushions, the added touches create an inviting and magical atmosphere. Once you’ve added the finishing touches, you can step inside your fort, immerse yourself in its cozy embrace, and embark on exciting adventures fueled by your imagination.
Remember, the purpose of fort-building is to create a space where you can relax, let your creativity flourish, and momentarily escape the outside world. It’s a place for solitude or shared experiences, where laughter and joy abound.
So, why wait? Gather your blankets and pillows, clear some space in your living room, and embark on a fort-building adventure. Rediscover the simple pleasures of creating a cozy haven and indulge in the wonderful world of fort-building.
It’s time to let your imagination soar and embrace the magic that awaits within the walls of your fort.
Happy fort-building!
Now that you've mastered building a cozy fort, why not take creativity to another level? Dive into our guide on Playroom Ideas, where inspiration meets practical advice for crafting spaces that spur creative play. From imaginative themes to interactive elements, each idea is designed to foster joy and inventive spirits in kids of all ages. So, whether you're looking to revamp or create from scratch, these ideas are sure to spark both fun and imagination in your home’s play areas.
Frequently Asked Questions about How To Make A Fort In The Living Room
Was this page helpful?
At Storables.com, we guarantee accurate and reliable information. Our content, validated by Expert Board Contributors, is crafted following stringent Editorial Policies. We're committed to providing you with well-researched, expert-backed insights for all your informational needs.


0 thoughts on “How To Make A Fort In The Living Room”