Articles
How To Make A Walk In Freezer
Modified: October 28, 2024
Learn how to make a walk-in freezer with these insightful articles. Discover tips and tricks to create your own freezing space at home and store your perishable items efficiently.
(Many of the links in this article redirect to a specific reviewed product. Your purchase of these products through affiliate links helps to generate commission for Storables.com, at no extra cost. Learn more)
Introduction
Welcome to this comprehensive guide on how to make a walk-in freezer. If you are a business owner or a passionate food enthusiast looking to store perishable items, a walk-in freezer can be a valuable addition to your space. Whether you want to keep your restaurant’s ingredients fresh or store a large amount of frozen food at home, having a walk-in freezer can provide convenience and peace of mind.
Before we dive into the steps of building a walk-in freezer, it’s important to note that this project requires careful planning, proper materials, and skilled execution. While the process may seem intimidating, with the right guidance, you can successfully create a functional walk-in freezer that meets your specific needs.
In this guide, we will walk you through the step-by-step process of planning, gathering materials, and constructing a walk-in freezer. We will also provide tips and insights to ensure the longevity and efficiency of your freezer. So, let’s get started!
Disclaimer: Before embarking on any construction project, always consult local building codes and regulations to ensure compliance. Additionally, if you are unsure about any aspect of the process, it is highly recommended to seek professional assistance.
Key Takeaways:
- Thorough planning, quality materials, and proper insulation are crucial for creating a functional walk-in freezer tailored to specific needs. Careful execution and regular maintenance ensure optimal performance and longevity.
- From setting up the foundation to installing the cooling system, each step in building a walk-in freezer requires precision and attention to detail. Incorporating finishing touches and maintenance practices ensures the freezer remains efficient and reliable.
Read more: How To Mop A Walk-In Freezer
Step 1: Planning the Walk-In Freezer
The first and most crucial step in creating a walk-in freezer is thorough planning. Planning involves assessing the available space, determining the required size and capacity of the freezer, and deciding on its location within your property.
Start by measuring the area where you want to build the walk-in freezer. Consider factors such as height, width, and depth, as well as any obstacles or structural limitations that may affect the construction process. It’s essential to have a clear understanding of the space you have before proceeding with the project.
Next, determine the capacity of the freezer. This will depend on the volume of items you plan to store. Consider your current needs as well as any potential future requirements. Having a larger capacity than you currently need can offer flexibility for expansion.
When selecting the location for your walk-in freezer, keep in mind that it should be easily accessible. Ideally, it should be close to your kitchen or storage area to facilitate the efficient movement of goods. Additionally, consider the proximity to electrical and plumbing connections, as they will be necessary for installing the cooling system.
Once you have gathered all the necessary information, it’s time to create a detailed plan for your walk-in freezer. You can either sketch it on paper or use software to visualize the design. Your plan should include the dimensions, layout, and any specific features you want to incorporate.
During the planning stage, it’s also important to decide on the type of insulation you will use for the walls, ceiling, and floor of the freezer. Common insulation materials for walk-in freezers include polyurethane foam and extruded polystyrene. Choose an insulation material that has a high R-value to ensure effective temperature control and energy efficiency.
Lastly, budgeting is a crucial aspect of the planning process. Determine the overall cost of materials, tools, and any professional assistance you may need. It’s important to have a clear understanding of the financial commitment required before proceeding.
By thoroughly planning your walk-in freezer project, you will have a solid foundation for successful construction and ensure a functional and efficient freezer space for your needs. So, take your time, consult with experts if needed, and move on to the next step once you are confident in your plan.
Step 2: Gathering Materials and Tools
Now that you have a detailed plan in place, it’s time to gather the necessary materials and tools for constructing your walk-in freezer. Having all the required items ready before you begin will ensure a smooth and efficient construction process.
The materials you will need for building a walk-in freezer include:
- Building materials: This includes lumber for framing the walls, ceiling, and floor, as well as drywall or plywood for finishing the interiors.
- Insulation materials: Choose the type of insulation that matches your planned specifications, such as polyurethane foam or extruded polystyrene.
- Sealant: You will need a good-quality sealant to prevent air leakage and ensure the freezer remains well-insulated.
- Doors and windows: Select durable and properly insulated doors and windows designed specifically for walk-in freezers.
- Cooling system: Depending on your budget and requirements, you can choose between a self-contained refrigeration unit or a split system with separate condensing units and evaporators.
- Electrical and plumbing components: This includes wiring, outlets, switches, and any necessary plumbing connections for the cooling system.
- Fasteners: Purchase screws, nails, and other fasteners that are suitable for the materials you’ll be working with.
Aside from the materials, you will also need a set of tools to complete the construction process. Some of the essential tools include:
- Measuring tape
- Level
- Hammer
- Screwdriver set
- Power drill
- Saw
- Caulking gun
- Safety equipment (goggles, gloves, etc.)
Having the right tools at your disposal will facilitate the smooth execution of each step in the construction process, ensuring accuracy and efficiency.
Before purchasing materials and tools, consider your budget and quality requirements. It’s important to strike a balance between affordability and durability. Research suppliers and compare prices to find the best deals without compromising on quality.
Once you have gathered all the necessary materials and tools, double-check your list to ensure you haven’t missed anything. This will save you time and prevent delays during construction.
With the materials and tools in hand, you are now ready to move on to the next step of building your walk-in freezer, which is setting up the foundation. Stay tuned!
Step 3: Setting up the Foundation
With the necessary materials and tools at hand, it’s time to move on to setting up the foundation for your walk-in freezer. A solid and level foundation is essential to ensure the stability and longevity of the structure. Here’s how you can proceed:
1. Preparation: Clear the area where the walk-in freezer will be located. Remove any debris, rocks, or vegetation to ensure a smooth and even surface. If necessary, use a shovel or a sod cutter to level the ground and make adjustments as needed.
2. Marking the layout: Use a measuring tape to mark the dimensions of the walk-in freezer on the ground. Use stakes or spray paint to clearly outline the boundaries of the foundation.
3. Excavation: Dig a trench along the marked lines, ensuring that it is deep enough to accommodate the foundation. The depth will depend on the local building codes and the thickness of your foundation walls.
4. Adding gravel: Fill the trench with a layer of gravel to provide drainage and stability. Compact the gravel using a tamper to ensure a solid base for the foundation.
5. Building the forms: Use lumber and stakes to create forms that will contain the concrete for the foundation. Ensure that the forms are level and properly aligned with the marked layout.
6. Pouring the foundation: Mix the concrete according to the manufacturer’s instructions. Pour the concrete into the forms, starting from one corner and working your way to the other end. Use a trowel to level the surface and remove any air bubbles.
7. Finishing touches: Smooth the surface of the concrete using a float or trowel. If desired, add a broom finish to provide traction and prevent slipping when the freezer floor is wet.
8. Curing the foundation: Allow the concrete foundation to cure for the recommended time, which is typically at least 24 to 48 hours. During this time, protect the foundation from extreme weather conditions and keep it moist to ensure proper curing.
Once the foundation is completely cured, you are ready to move on to the next step of framing the walls. Take the time to ensure the foundation is level and solid before proceeding, as any issues with the foundation can affect the stability and integrity of the entire walk-in freezer structure.
Stay tuned for the next step, where we will guide you through framing the walls of your walk-in freezer.
Step 4: Framing the Walls
After successfully setting up the foundation for your walk-in freezer, it’s time to move on to framing the walls. Framing is a crucial step as it provides the structure and shape of your freezer. Here’s how you can proceed:
1. Start with the corner posts: Measure the height of the walls and cut the corner posts accordingly. Attach the corner posts to the foundation using suitable fasteners, ensuring they are plumb and level. These posts will act as the starting point for your wall framing.
2. Layout the wall studs: Measure and mark the placement of your wall studs along the corner posts, starting from one end and working your way to the other. Typically, studs are placed at 16-inch intervals, but this may vary depending on your specific design and local building codes.
3. Cut the wall studs: Using a saw, cut the wall studs to the appropriate length based on your wall height measurement. Remember to subtract the thickness of the top and bottom plates, which will be installed later.
4. Attach the top and bottom plates: Cut the top and bottom plates to the desired length and attach them to the corner posts using appropriate fasteners. Ensure that the plates are level and securely attached.
5. Install the wall studs: Take the cut wall studs and place them vertically between the top and bottom plates at the marked intervals. Securely attach them using appropriate fasteners, ensuring they are plumb and straight. Repeat this process for all the wall studs.
6. Include openings for doors and windows: If your walk-in freezer design includes doors or windows, make sure to leave appropriate openings in the wall framing. Frame these openings with headers and additional studs to provide necessary support.
7. Reinforce the corners: Strengthen the corners of your wall framing by adding corner braces or blocks. This will provide additional stability and support to the structure.
8. Double-check and adjust: Once all the wall studs are in place, double-check the alignment, plumbness, and overall structure of the framing. Make any necessary adjustments to ensure everything is properly aligned and secure.
Framing the walls is a critical step in creating a sturdy and reliable walk-in freezer. Take your time to ensure accurate measurements, precise cuts, and solid connections. A properly framed wall will provide the necessary support for insulation, sheathing, and finishing materials.
With the walls framed, you’re ready to move on to the next step, which involves installing the insulation to ensure proper temperature control within your walk-in freezer. Stay tuned for the next step!
Read more: How To Clean Walk In Freezer Floor
Step 5: Installing the Insulation
Now that the walls of your walk-in freezer are framed, it’s time to move on to the next crucial step: installing the insulation. Proper insulation is essential for maintaining a consistent temperature inside the freezer, minimizing energy consumption, and preventing condensation. Here’s how you can proceed:
1. Choose the right insulation material: Selecting the appropriate insulation material is key to achieving effective temperature control and energy efficiency. Common options for walk-in freezer insulation include polyurethane foam and extruded polystyrene. Both provide excellent insulation properties and are moisture-resistant.
2. Measure and cut the insulation panels: Using a measuring tape, carefully measure the dimensions of your wall framing. Transfer these measurements onto the insulation panels and use a sharp utility knife to cut them to size. Remember to account for any openings for doors or windows.
3. Install the insulation panels: Starting from one corner, place the cut insulation panels between the wall studs, ensuring a snug fit. Use construction adhesive or insulation-specific adhesive to secure the insulation panels to the framing. Apply the adhesive along the edges and center of each panel to ensure proper adhesion.
4. Seal the insulation joints and gaps: To maximize the effectiveness of the insulation, it’s essential to seal any joints or gaps between the insulation panels. Use foam insulation tape or caulk to fill in any openings, ensuring a tight seal and preventing air leakage.
5. Insulate the ceiling and floor: Repeat the process of measuring, cutting, and installing the insulation panels for the ceiling and the floor of your walk-in freezer, using the same insulation material as your wall panels. Pay attention to any openings in the ceiling or floor and seal them properly for optimal insulation.
6. Insulate the doors and windows: If your walk-in freezer has doors or windows, make sure to use insulated versions specifically designed for cold storage. Install weatherstripping around the edges of the doors and windows to create a tight seal and prevent air infiltration.
7. Check for any gaps or air leaks: Once the insulation is in place, thoroughly inspect the walls, ceiling, floor, and any openings to ensure there are no gaps or air leaks. Address any issues immediately by applying additional insulation or sealant.
Proper insulation is crucial to the overall performance of your walk-in freezer. It helps maintain the desired temperature while minimizing energy usage. Take your time to install the insulation panels correctly and ensure a tight seal to maximize its effectiveness.
With the insulation installed, you’re ready to move on to the next step, which involves building the floor of your walk-in freezer. Stay tuned for more!
When building a walk-in freezer, make sure to properly insulate the walls, floor, and ceiling to maintain the desired temperature and reduce energy costs. Use high-quality insulation materials to ensure efficiency.
Step 6: Building the Floor
Building a solid and well-insulated floor is an important step in the construction of your walk-in freezer. The floor will provide a sturdy base for storing your frozen goods and ensure proper insulation. Here’s how you can proceed:
1. Prepare the area: Clear the designated area where the walk-in freezer floor will be constructed. Remove any debris, rocks, or vegetation, ensuring a clean and level surface.
2. Install a vapor barrier: Lay down a moisture and vapor barrier on the prepared surface. This will prevent moisture from seeping into the floor and causing damage. Use a heavy-duty plastic sheet specially designed for this purpose and ensure it covers the entire floor area, extending slightly up the walls.
3. Frame the floor: Use pressure-treated lumber or treated plywood to create a frame for the floor. Measure and cut the boards to fit the dimensions of the walk-in freezer floor, leaving space for insulation. Ensure that the framing is square and level.
4. Insulate the floor: Install the appropriate insulation material between the floor frame. The insulation material should have a high R-value to provide effective temperature control. Secure the insulation panels in place using construction adhesive or insulation-specific adhesive.
5. Install the subfloor: Cut and install plywood sheets or a suitable flooring material over the insulation. Use screws or nails to secure the subfloor to the framing and ensure a strong and even surface. Adjust the subfloor as necessary to ensure it is flush with the walls.
6. Seal the floor joints: Apply a sealant or caulk to the joints between the subfloor panels. This will prevent air leakage and provide an additional layer of insulation.
7. Finish the floor surface: Depending on your preference and the requirements of your walk-in freezer, you can opt for various flooring options. Common choices include epoxy coatings, commercial-grade vinyl, or non-slip tiles. Choose a flooring material that is durable, easy to clean, and resistant to moisture and temperature fluctuations.
8. Allow the floor to cure: Give the floor ample time to cure and dry before proceeding with further construction or placing any heavy items. Follow the manufacturer’s guidelines for the recommended curing time.
Building a well-insulated and sturdy floor is essential to maintain the cold temperature inside your walk-in freezer. Take your time to ensure proper insulation and a finished floor surface that meets your needs.
With the floor construction complete, you’re ready to move on to the next step, which involves creating the ceiling for your walk-in freezer. Stay tuned for more!
Step 7: Creating the Ceiling
Creating a well-insulated and sturdy ceiling is essential for maintaining the ideal temperature and ensuring energy efficiency in your walk-in freezer. The ceiling acts as an important barrier in preventing heat transfer. Here’s how you can proceed with building the ceiling:
1. Prepare the area: Clear the space where the ceiling will be constructed, ensuring a clean and unobstructed work area. Remove any debris or obstacles that might interfere with the installation process.
2. Attach ceiling joists: Measure and cut the ceiling joists, ensuring they fit the dimensions of your walk-in freezer. Using appropriate fasteners, attach the ceiling joists to the top plates of the wall framing. Make sure they are level and securely fastened.
3. Install insulation: Lay the chosen insulation material in between the ceiling joists, ensuring a snug fit. Use construction adhesive or insulation-specific adhesive to secure the insulation in place. Pay attention to any gaps or spaces and fill them with additional insulation to maximize thermal efficiency.
4. Install the vapor barrier: Attach a vapor barrier, such as a plastic sheet, to the bottom side of the ceiling joists. This will help prevent moisture from entering the freezer and compromising the insulation and structure. Secure the vapor barrier in place using staples or adhesive.
5. Add the ceiling paneling: Cut and install the ceiling paneling over the insulation and between the ceiling joists. Options for paneling include drywall, plywood, or other appropriate materials based on your specific needs and local building codes. Secure the paneling to the joists using screws or nails.
6. Seal the ceiling joints: Apply a sealant or caulk to the joints between the ceiling panels. This will help create a tight seal and prevent any air leakage. Pay attention to corners and edges, ensuring a seamless and secure finish.
7. Finish the ceiling surface: Depending on your preference and the functionality of your walk-in freezer, you may choose to leave the ceiling paneling unfinished or apply a suitable finish. Consider using a paint or coating that is moisture-resistant and easy to clean.
8. Inspect and test: Once the ceiling construction is completed, thoroughly inspect the installation for any gaps, cracks, or areas that may compromise the insulation or overall integrity of the ceiling. Test for any air leakage using a smoke pencil or similar method to identify potential problem areas.
Building a well-insulated and properly sealed ceiling is essential to maintain the consistent temperature and energy efficiency of your walk-in freezer. Take your time to ensure precise measurements, secure installation, and proper sealing.
With the ceiling in place, you are now ready to move on to the next step, which involves adding the doors and windows to your walk-in freezer. Stay tuned for more!
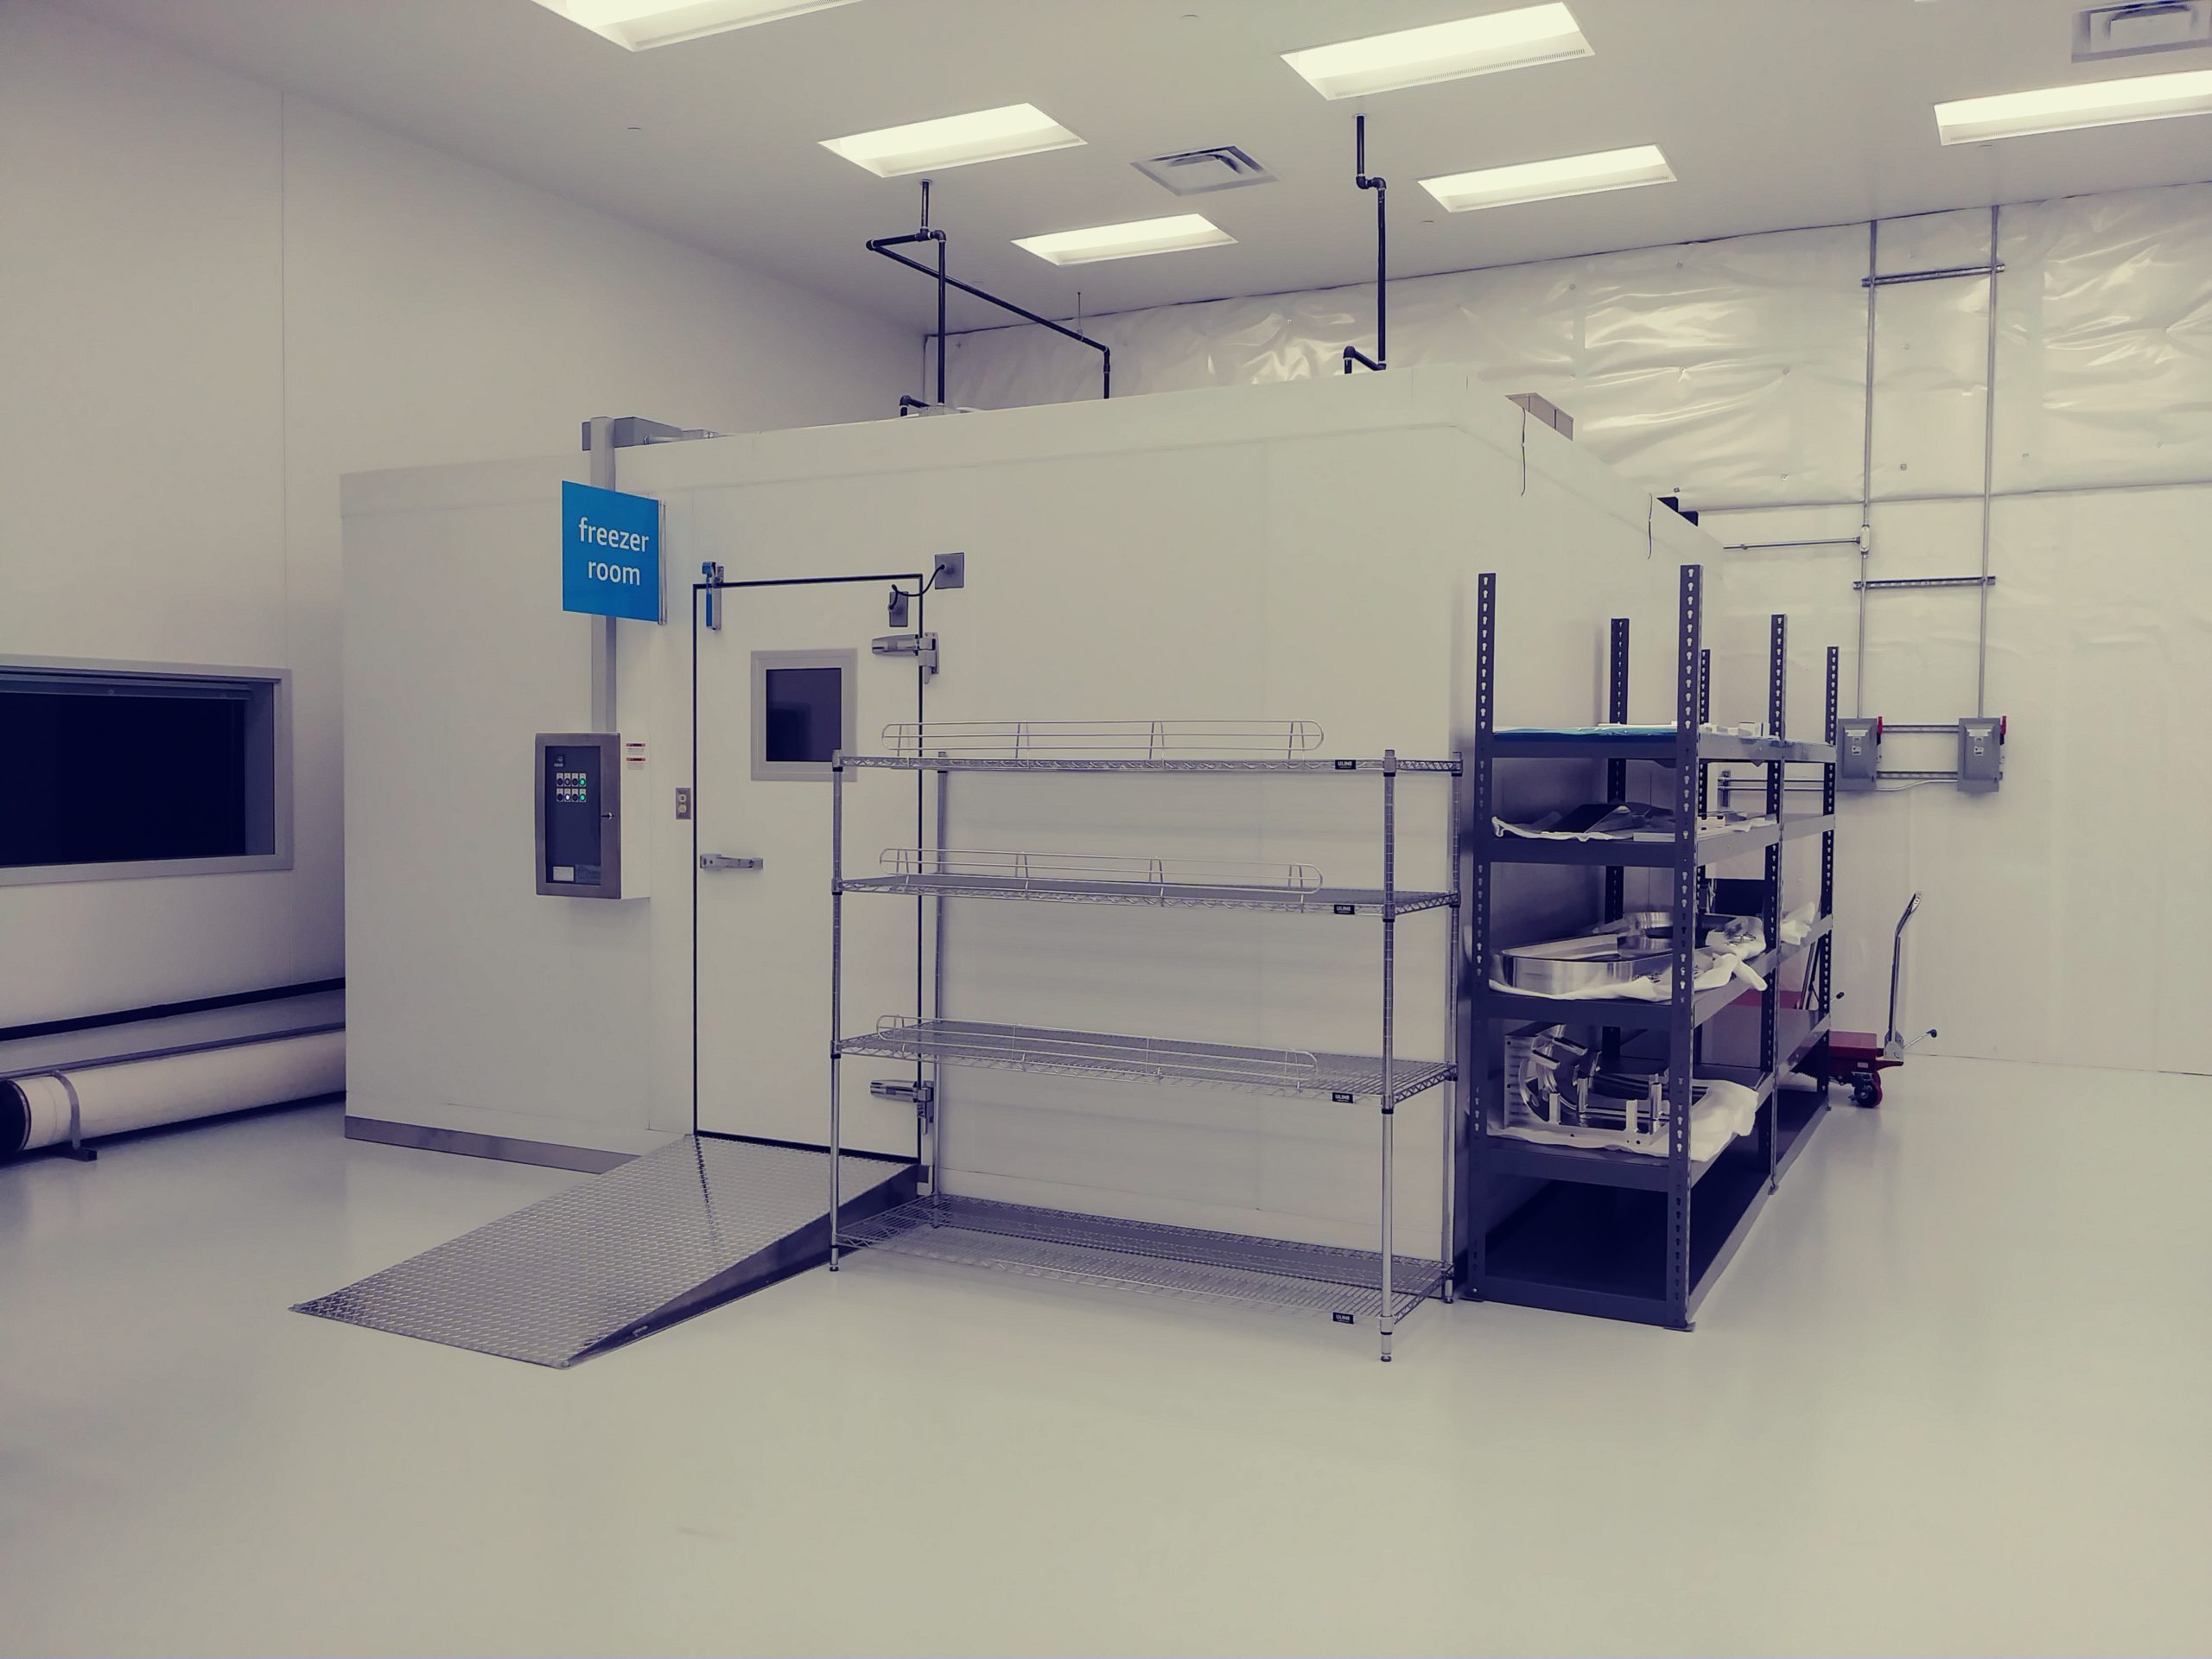
Step 8: Adding the Doors and Windows
Adding the appropriate doors and windows to your walk-in freezer is a crucial step in ensuring accessibility, proper insulation, and efficient operation. Here’s how you can proceed with integrating these elements:
1. Measure and mark the openings: Determine the location and dimensions for the doors and windows in your walk-in freezer. Use a measuring tape and level to ensure accuracy, then mark the positions on the wall framing.
2. Frame the openings: Use lumber or a suitable framing material to create the frames for the doors and windows. Cut the pieces to size and securely attach them to the surrounding wall framing, ensuring they are plumb and level.
3. Install the doors: Carefully position the door(s) within the designated opening(s) and attach them to the framing using the provided hinges and screws. Ensure the door(s) are properly aligned and function smoothly. If necessary, add weatherstripping around the edges of the door(s) to create a tight seal.
4. Install the windows: Place the window(s) into the prepared window frame, ensuring a proper fit. Secure the window(s) in place using screws or other appropriate fasteners. Apply weatherstripping around the window frame to prevent air leakage.
5. Check for gaps and air leaks: Inspect the doors and windows for any gaps or points of air leakage. Use weatherstripping or caulk to seal any areas where air might escape, ensuring a well-insulated and airtight enclosure.
6. Test the functionality: Open and close the doors to ensure they operate smoothly and securely. Test the windows to ensure they open and close properly as well.
7. Consider additional features: Depending on your specific needs and preferences, you may want to consider adding features such as viewing windows or air curtains to help maintain temperature control while allowing visibility and ease of access.
It is crucial to select doors and windows specifically designed for walk-in freezer applications. These components should have proper insulation properties and be able to withstand the low temperatures required for long-term storage of frozen goods.
By adding the appropriate doors and windows, you maximize convenience, facilitate proper airflow, and ensure energy efficiency within your walk-in freezer. With these elements in place, you are now ready to move on to the next step, which involves installing the cooling system. Stay tuned for more!
Read also: 8 Amazing Walk In Freezer For 2025
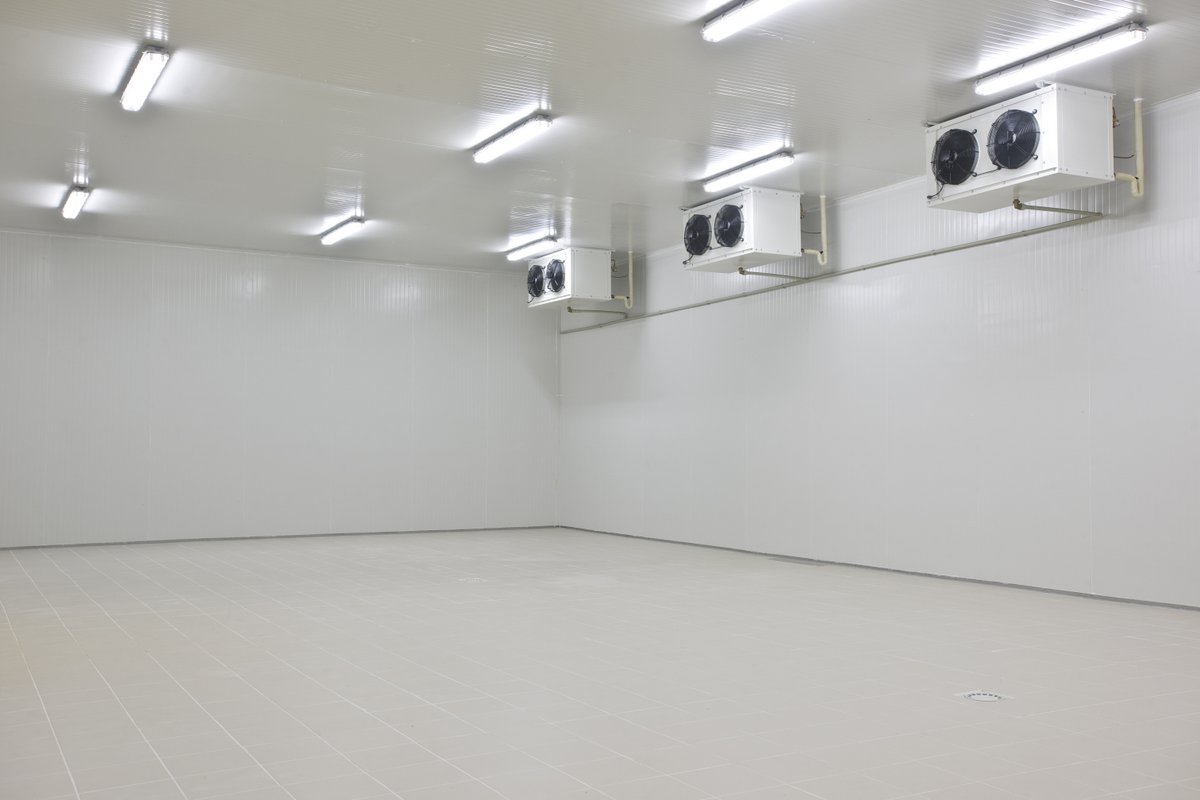
Step 9: Installing the Cooling System
Installing a reliable and efficient cooling system is a crucial step in creating a functional walk-in freezer. The cooling system is responsible for maintaining the desired temperature within the freezer to preserve the quality and freshness of the stored items. Here’s how you can proceed with installing the cooling system:
1. Determine the cooling system type: There are different types of cooling systems available for walk-in freezers, including self-contained refrigeration units and split-system units with separate condensing units and evaporators. Choose the system that best suits your needs and budget.
2. Select an appropriate location: Choose a suitable spot within your walk-in freezer to install the cooling system components. Consider accessibility for maintenance, efficient airflow, and proximity to electrical and plumbing connections.
3. Install the condensing unit: If using a split-system, place the condensing unit outside the walk-in freezer. Follow the manufacturer’s instructions for mounting the unit securely and connecting it to the electrical and plumbing systems. Ensure proper clearance and ventilation for optimal performance.
4. Install the evaporator unit: Position the evaporator unit inside the walk-in freezer according to the manufacturer’s guidelines. Mount it securely and make the necessary electrical and plumbing connections. Ensure that the evaporator is properly sealed to prevent air leaks.
5. Connect electrical and plumbing components: Ensure the electrical and plumbing connections are properly installed and in accordance with local codes. Hire a professional electrician if you are not confident in handling electrical wiring yourself, as safety is paramount.
6. Test the cooling system: Once the cooling system components are securely installed and connected, conduct a thorough test to ensure everything is working correctly. Check for proper cooling, temperature control, and any signs of leakage. Monitor the system over a period of time to verify its consistent performance.
7. Schedule regular maintenance: To maintain the efficiency and longevity of your cooling system, establish a regular maintenance schedule. This may include cleaning the condenser coils, checking refrigerant levels, and inspecting for any potential issues. Follow the manufacturer’s recommendations and consult with professionals if needed.
Proper installation and maintenance of the cooling system are essential for the overall functionality and reliability of your walk-in freezer. A well-maintained system will ensure consistent temperature control and prolong the lifespan of your freezer.
With the cooling system installed and functioning, you’re almost ready to start enjoying your walk-in freezer. But before that, let’s move on to the final step, which involves adding some finishing touches and maintenance tips. Stay tuned for the last step!
Step 10: Finishing Touches and Maintenance Tips
As you near the completion of your walk-in freezer project, it’s time to add some final touches and familiarize yourself with essential maintenance tips. These steps will ensure the longevity and optimal performance of your freezer. Here’s what you need to know:
1. Inspect for any gaps or air leaks: Thoroughly inspect the entire walk-in freezer for any gaps, cracks, or points of air leakage. Address these issues promptly by sealing them with caulk or weatherstripping. Proper insulation and airtightness are crucial for maintaining the desired temperature.
2. Install lighting: Ensure adequate lighting inside the walk-in freezer for visibility and convenience. Select fixtures designed for low-temperature environments and install them securely. LED lights are a popular and energy-efficient choice for walk-in freezers.
3. Implement temperature monitoring: Install a reliable temperature monitoring system to regularly monitor and record the temperature inside the freezer. This will help you ensure that the desired temperature is maintained and alert you to any potential issues.
4. Develop a cleaning and maintenance routine: Establish a regular cleaning and maintenance schedule for your walk-in freezer. Remember to turn off the power before cleaning. Clean the interior regularly, removing any dirt, ice buildup, or spills. Pay attention to gaskets, seals, and coils, as these areas can collect debris and interfere with proper functioning.
5. Check door seals: Regularly inspect the door seals and gaskets to ensure they are intact and functioning correctly. Replace any damaged or worn-out seals to maintain a proper seal and prevent cold air leakage.
6. Practice proper organization: Maintain a well-organized freezer to maximize storage capacity and airflow. Properly label and store items, ensuring easy access and visibility. Regularly rotate stock to prevent items from getting lost or forgotten.
7. Keep an eye on energy consumption: Monitor your walk-in freezer’s energy consumption and explore energy-saving options. Using energy-efficient equipment, insulating exposed pipes, and keeping the freezer door closed as much as possible will help reduce energy costs and increase efficiency.
8. Schedule professional inspections: Consider scheduling professional inspections annually or as recommended by the manufacturer. Professionals can identify any potential issues, provide necessary maintenance, and ensure your walk-in freezer is operating at its best.
By implementing these finishing touches and following maintenance tips, you can ensure the longevity, efficiency, and reliability of your walk-in freezer. Regular care and attention will help you get the most out of your investment and keep your frozen goods in optimal condition.
Congratulations on completing the construction of your walk-in freezer! We hope that this comprehensive guide has provided you with valuable insights and guidance throughout the process. Enjoy the convenience and benefits of having your own walk-in freezer!
Conclusion
Building a walk-in freezer is an exciting and rewarding project that can provide immense value for businesses and individuals who require reliable and efficient cold storage. Throughout this comprehensive guide, we have covered the step-by-step process of creating a walk-in freezer, from planning and gathering materials to installing the cooling system and implementing maintenance practices.
By carefully planning the layout, taking accurate measurements, and selecting quality materials, you can create a walk-in freezer tailored to your specific needs and requirements. Proper insulation, framing, and installation of doors and windows ensure that the freezer maintains a consistent and desired temperature while reducing energy consumption.
The installation of a reliable cooling system is paramount to maintaining optimal temperatures. Regular maintenance, including cleaning, temperature monitoring, and inspections, will help maximize the functionality and lifespan of your walk-in freezer.
As with any construction project, it’s important to consult local building codes and regulations, and seek professional assistance if needed. Safety should be a top priority throughout the entire process.
By following the steps outlined in this guide and paying attention to the finishing touches and maintenance tips, you can enjoy the benefits of a well-designed and properly functioning walk-in freezer. From preserving the freshness of ingredients in restaurants to storing large quantities of frozen food at home, a walk-in freezer offers convenience, efficiency, and peace of mind.
We hope that this guide has provided you with the knowledge and confidence to embark on your walk-in freezer construction project. Embark on this journey with careful planning, expert execution, and dedication to maintenance, and you will soon enjoy the convenience and efficiency of your own walk-in freezer!
Frequently Asked Questions about How To Make A Walk In Freezer
Was this page helpful?
At Storables.com, we guarantee accurate and reliable information. Our content, validated by Expert Board Contributors, is crafted following stringent Editorial Policies. We're committed to providing you with well-researched, expert-backed insights for all your informational needs.


0 thoughts on “How To Make A Walk In Freezer”