
Articles
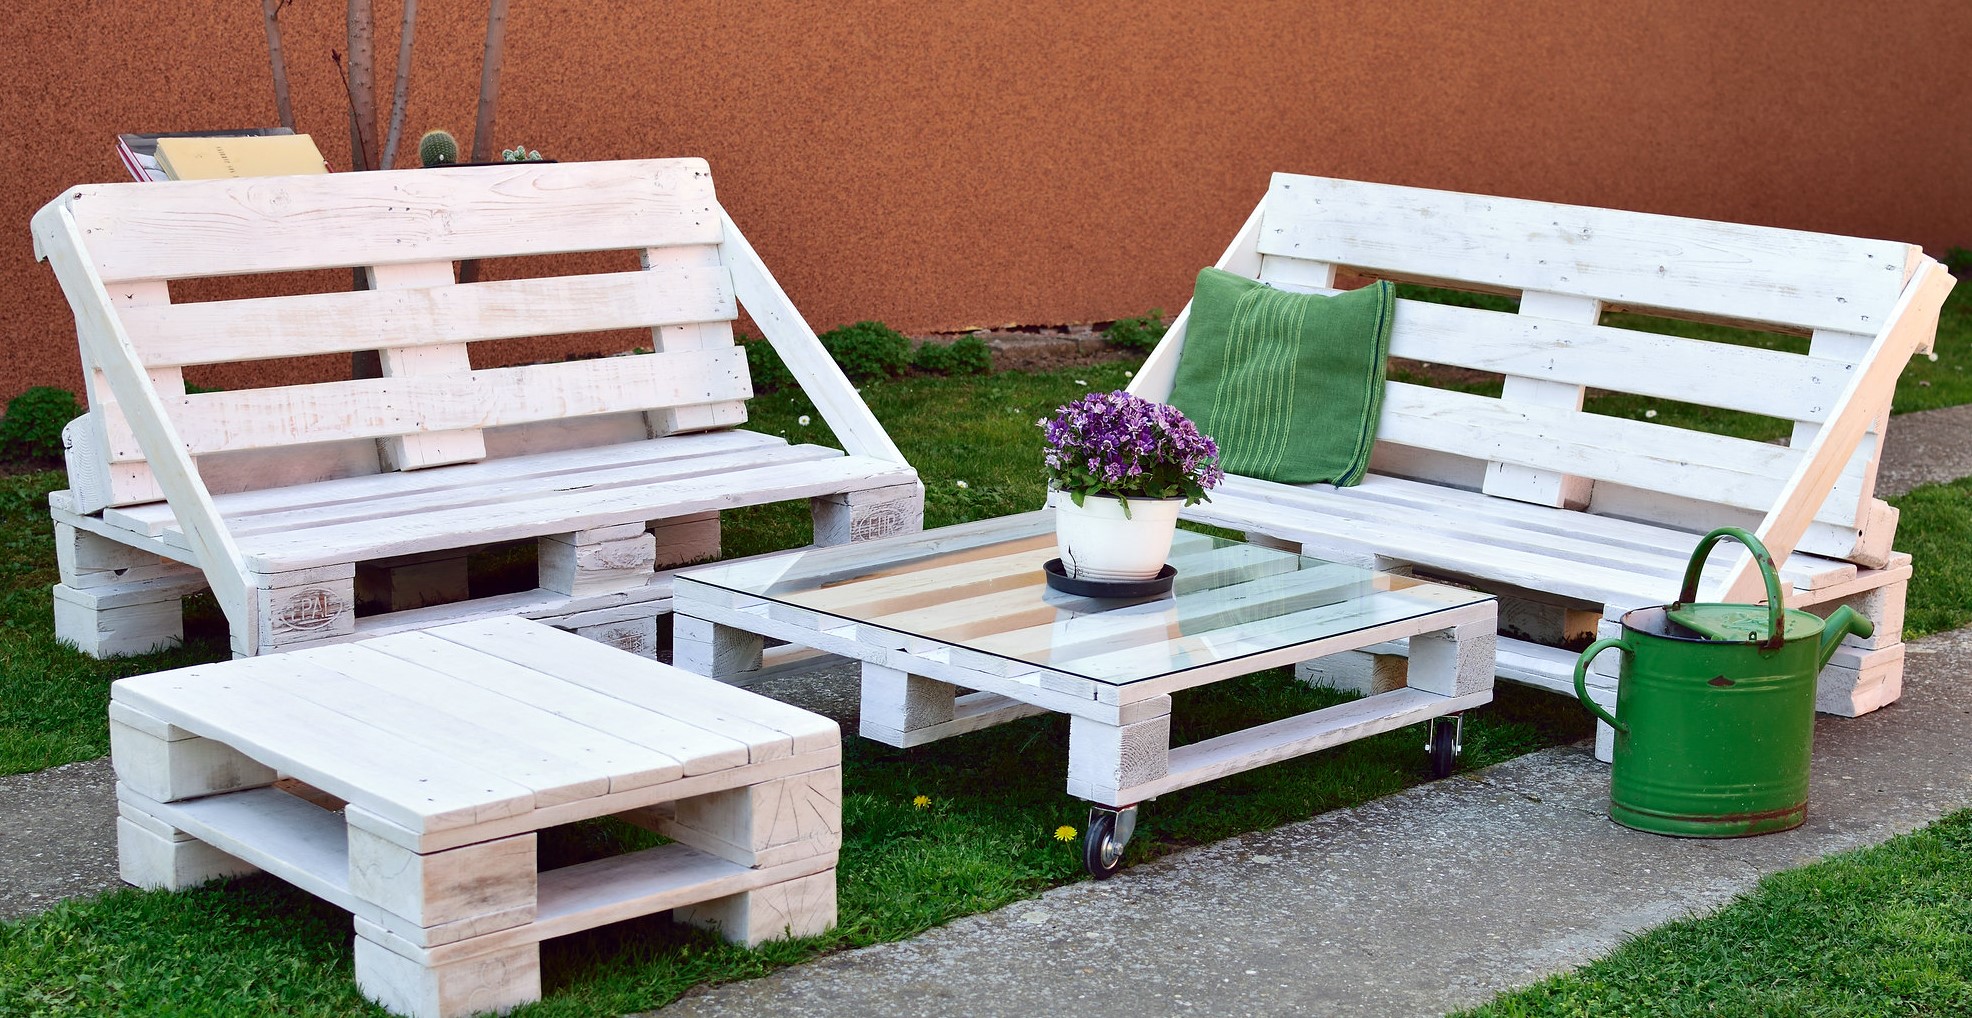
How To Make Porch Furniture
Modified: May 6, 2024
Learn how to make porch furniture with our step-by-step articles. Discover tips and techniques to create beautiful and functional pieces for your outdoor space.
(Many of the links in this article redirect to a specific reviewed product. Your purchase of these products through affiliate links helps to generate commission for Storables.com, at no extra cost. Learn more)
Introduction
Having a porch is a wonderful addition to any home. It provides a cozy outdoor space where you can relax, entertain guests, or simply enjoy a cup of coffee while taking in the fresh air. To make your porch even more inviting, having the right porch furniture is essential. Instead of buying expensive furniture from the store, why not try making your own? Not only will it save you money, but it will also give you a sense of accomplishment and allow you to customize the furniture to suit your style and needs.
In this article, we will guide you through the process of making your own porch furniture. We will cover everything from planning and design to selecting the right materials and assembling the furniture. So grab your tools and let’s get started!
Materials Needed:
- Wood boards
- Screws
- Drill
- Saw
- Sander
- Measuring tape
- Pencil
- Paint or stain (optional)
- Paintbrushes
- Outdoor cushions
Key Takeaways:
- Create a personalized and durable porch furniture set by following the step-by-step guide. Enjoy the satisfaction of designing, building, and customizing your own outdoor oasis.
- Save money and express your creativity by making your own porch furniture. From planning and design to finishing touches, enjoy the process and the unique results.
Read more: How To Make Furniture
Materials Needed
Before you start making your porch furniture, it’s important to gather all the necessary materials. Here’s a list of what you’ll need:
- Wood boards: Look for weather-resistant wood such as cedar or teak. Make sure the boards are of good quality and free from any signs of damage or rot.
- Screws: Choose screws that are appropriate for outdoor use and rust-resistant. The size of the screws will depend on the thickness of the wood.
- Drill: You’ll need a drill to make pilot holes and secure the screws in place. Make sure you have the appropriate drill bits for the screws you’re using.
- Saw: A saw will be needed to cut the wood boards to the desired lengths. A miter saw or circular saw is ideal for making straight and accurate cuts.
- Sander: To achieve a smooth and polished finish, you’ll need a sander to remove any rough edges or splinters from the wood. A palm sander or orbital sander will do the job.
- Measuring tape: Accurate measurements are crucial when building furniture. Use a measuring tape to ensure the proper dimensions of the various pieces.
- Pencil: A pencil will come in handy for marking the wood before cutting or drilling.
- Paint or stain (optional): If you want to add color or protect the wood from the elements, you can choose to paint or stain your porch furniture. Select an outdoor paint or stain that is specifically designed for wood.
- Paintbrushes: Depending on the type of finish you choose, you’ll need paintbrushes for applying paint or stain to the wood. Opt for brushes that are suitable for the type of finish you’re using.
- Outdoor cushions: To make your porch furniture more comfortable, consider adding outdoor cushions. Look for cushions that are weather-resistant and easy to clean.
By gathering these materials in advance, you’ll be well-prepared to start the process of making your porch furniture. Remember to prioritize quality and durability when selecting your materials, as they will determine the longevity of your finished pieces.
Step 1: Planning and Design
Before diving into the construction of your porch furniture, it’s important to spend some time planning and designing your pieces. This step will help ensure that the final result not only looks good but also meets your specific needs and preferences. Here’s how to approach the planning and design process:
- Assess your porch space: Take a look at your porch and determine how much space you have available for furniture. Consider the layout, dimensions, and any potential obstacles, such as doors or windows. This will help you determine the size and quantity of furniture you can comfortably fit on your porch.
- Identify your needs: Think about how you envision using your porch furniture. Do you want a cozy seating area for lounging? Or perhaps a dining set for hosting outdoor meals? Understanding your specific needs will guide the type and style of furniture you choose to build.
- Research designs: Browse through design magazines, websites, or even visit furniture stores for inspiration. Look for designs that catch your eye and align with your aesthetic preferences. Pay attention to the overall style, materials used, and any unique features that you find appealing.
- Consider functionality: Think about the functionality of your furniture. For example, if you plan to store cushions or other items, consider incorporating storage compartments into your design. If you need flexibility, consider furniture pieces that can be easily moved or rearranged.
- Make a sketch or create a blueprint: Visualize your design by creating a sketch or blueprint of your porch furniture. Include dimensions, measurements, and any specific details you want to incorporate. This will serve as your guide throughout the construction process.
By thoroughly planning and designing your porch furniture, you’ll have a clear vision of what you want to build. This will save you time and effort and ensure that you end up with furniture that perfectly fits your porch and meets your needs.
Step 2: Selecting the Right Wood
Choosing the right type of wood is crucial when it comes to building porch furniture that is durable, weather-resistant, and aesthetically pleasing. Here are some factors to consider when selecting the wood for your project:
- Weather resistance: Since your porch furniture will be exposed to the elements, it’s important to choose a wood species that can withstand outdoor conditions. Look for wood that is naturally resistant to moisture, rot, and insects. Cedar, teak, and redwood are popular choices for outdoor furniture due to their natural resistance to decay.
- Durability: Opt for wood that is strong and sturdy to ensure the longevity of your furniture. Hardwood varieties like oak and mahogany are known for their durability and can withstand heavy use without warping or splitting.
- Aesthetics: Consider the appearance and grain of the wood. Look for a wood species that complements the style of your porch and matches your personal taste. Some woods have a natural beauty that can be enhanced with a clear finish, while others may benefit from painting or staining to achieve your desired look.
- Sustainability: If environmental sustainability is important to you, look for wood that is certified by organizations such as the Forest Stewardship Council (FSC). These certifications ensure that the wood comes from responsibly managed forests.
- Budget: Different wood species vary in price, so consider your budget when selecting the wood for your porch furniture. Keep in mind that investing in higher-quality, more durable wood may save you money in the long run by reducing the need for frequent replacement or repairs.
Once you have considered these factors, visit a local lumberyard or home improvement store to explore different wood options. Talk to the staff for recommendations based on your specific needs and budget. It’s also a good idea to physically examine the wood boards for any defects or imperfections before making a purchase.
Remember, selecting the right wood is essential for the overall quality and performance of your porch furniture. By choosing a durable and weather-resistant wood species, you’ll ensure that your furniture can withstand the outdoor elements and maintain its beauty for years to come.
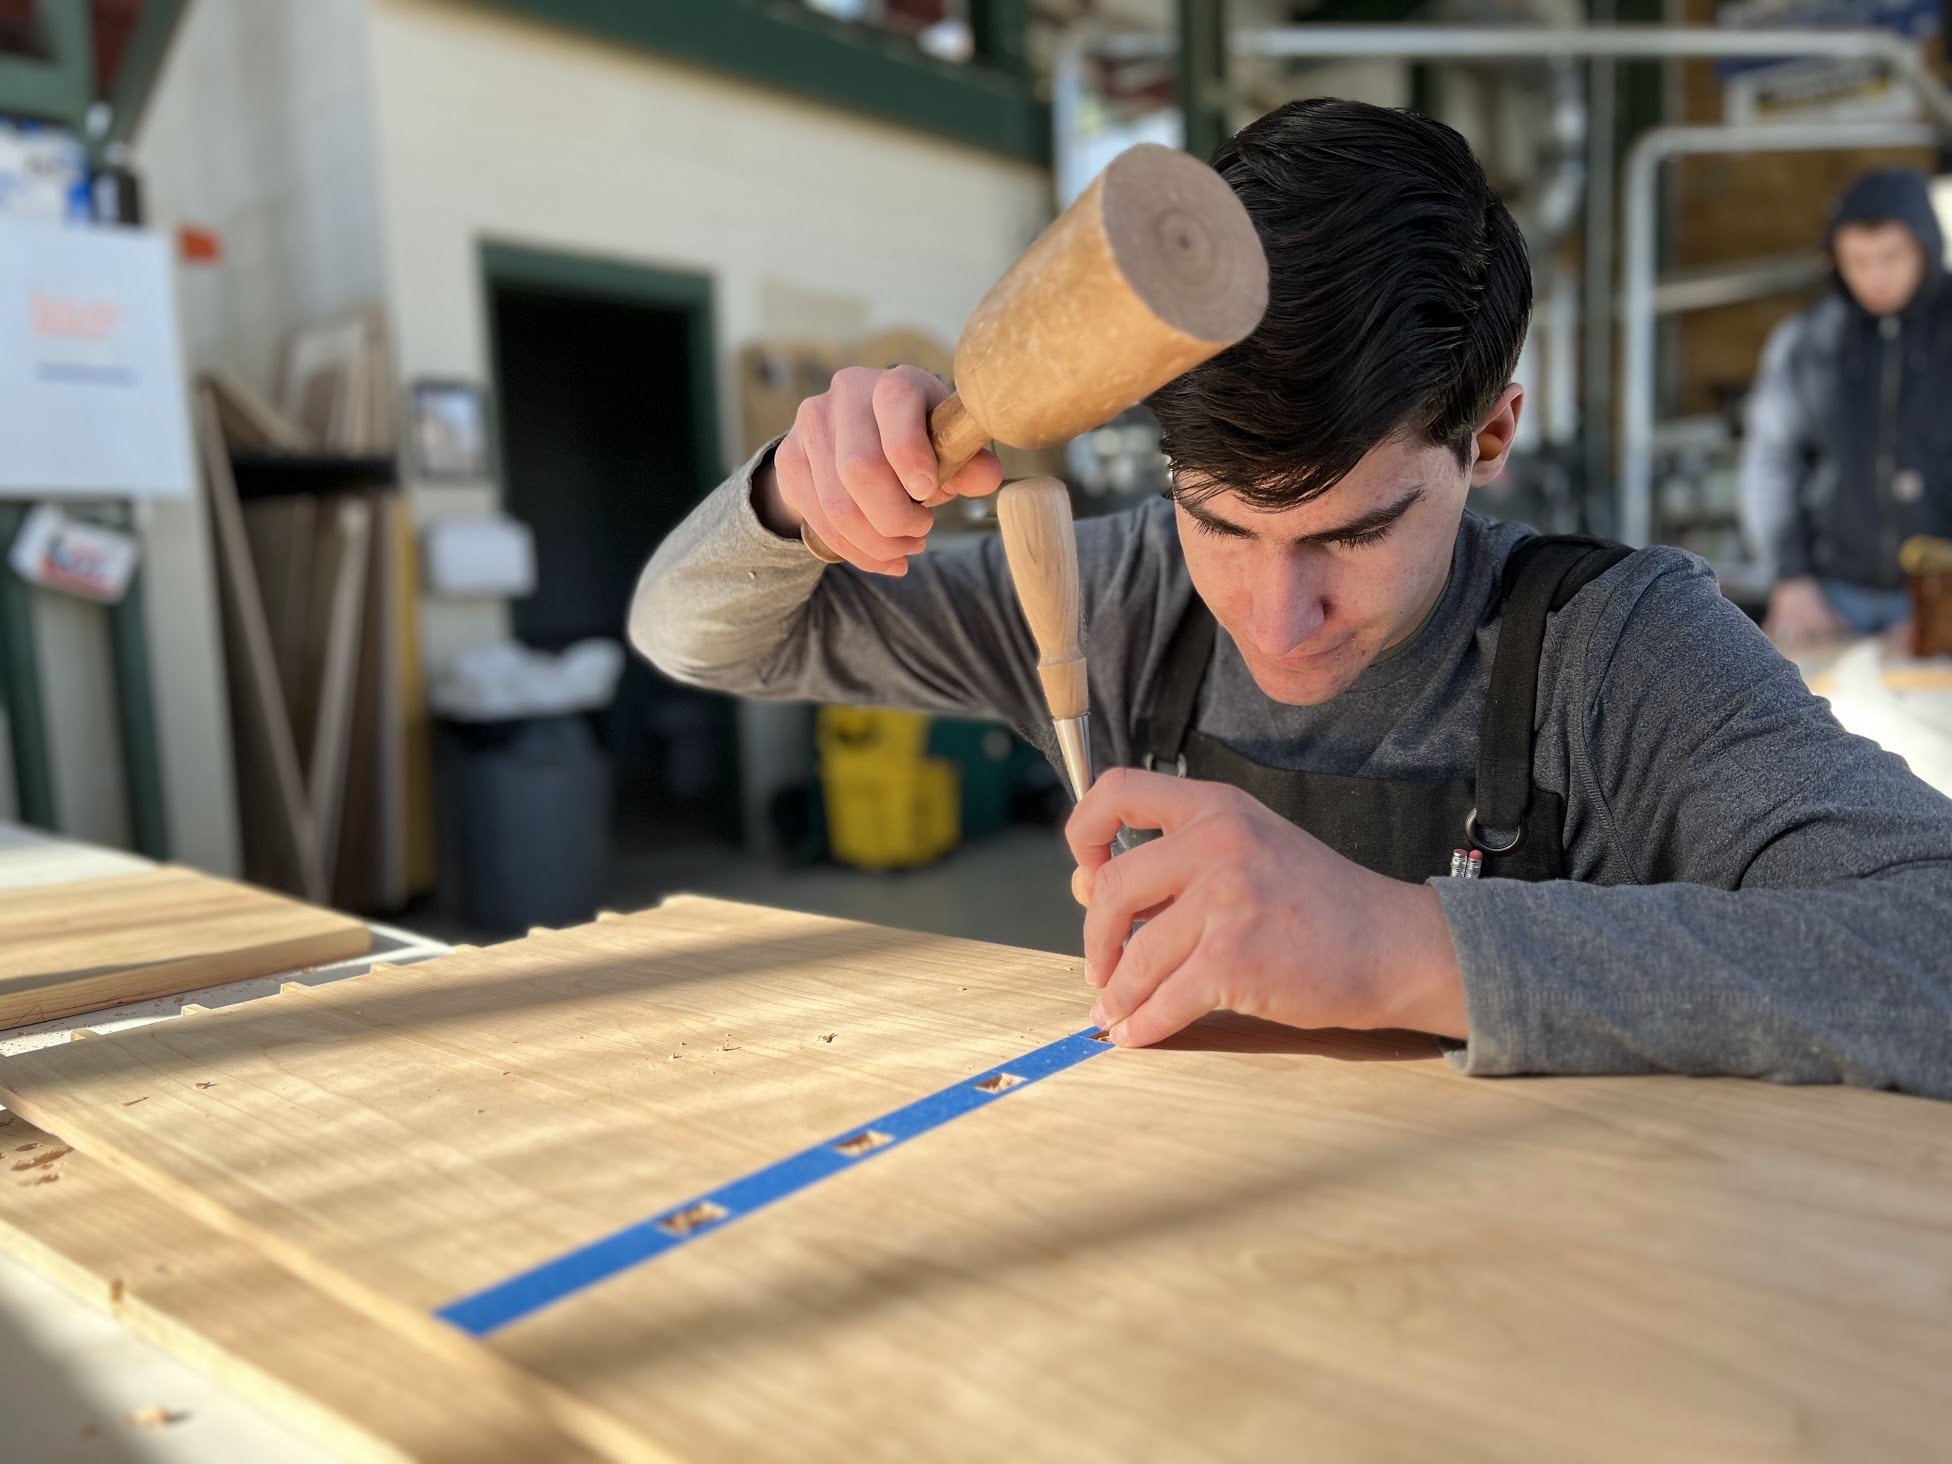
Step 3: Cutting and Sanding the Wood
Once you have selected the right wood for your porch furniture, it’s time to start cutting and sanding the wood to prepare for assembly. This step is crucial in ensuring precise measurements and a smooth finish. Here’s how to go about cutting and sanding the wood:
- Measure and mark: Begin by measuring and marking the wood according to your design plans. Use a measuring tape and a pencil to accurately mark the dimensions and angles for each piece of the furniture.
- Cut the wood: Next, use a saw to cut the wood boards according to the marked measurements. Ensure that your cuts are precise and straight to achieve a professional-looking result. If you are not confident in your cutting skills, consider using a miter saw or circular saw with a guide for accurate cuts.
- Sand the wood: After cutting the wood, it’s important to sand the surfaces to remove any rough edges, splinters, or imperfections. Start with coarse-grit sandpaper to smooth out any major flaws, and then progressively move on to finer-grit sandpaper for a smoother finish. Sand along the grain of the wood for the best results.
- Round the edges: To make the furniture more comfortable and visually appealing, consider rounding the edges of the wood boards using a router or sandpaper. This will prevent sharp corners and give a more polished look to the final furniture pieces.
- Check for smoothness: After sanding, run your hands over the wood to check for any remaining roughness. If you feel any rough spots, sand those areas again until the wood surface feels smooth to the touch.
Throughout the cutting and sanding process, it’s important to wear protective goggles and a dust mask to safeguard yourself from wood dust and debris. Also, ensure that you have a flat and stable work surface to securely hold the wood during cutting and sanding.
Remember, cutting and sanding the wood properly is essential for achieving precise measurements and a smooth finish. Take your time with this step to ensure that you have accurately cut and sanded all the necessary pieces for your porch furniture.
When making porch furniture, be sure to use weather-resistant materials such as cedar or teak to ensure durability and longevity in outdoor conditions.
Read more: How To Make Porch Signs
Step 4: Assembling the Frame
With the wood cut and sanded, it’s time to start assembling the frame of your porch furniture. The frame provides the structure and stability to support the seat and backrest. Follow these steps to efficiently assemble the frame:
- Lay out the pieces: Arrange the cut wood pieces on a flat and stable surface according to your design plans. Double-check that you have all the necessary components to start building the frame.
- Pre-drill pilot holes: To prevent the wood from splitting when you insert screws, it’s essential to pre-drill pilot holes. Use a drill with a drill bit that matches the size of your screws. Drill pilot holes at the marked spots where the wood pieces will join together.
- Attach the frame: Begin attaching the pieces together using screws. Line up the pre-drilled holes and use a screwdriver or drill to secure the screws in place. Start with the main structural pieces, such as the legs, and then gradually add the support pieces to form the frame.
- Check for stability: As you assemble the frame, periodically check for stability and ensure that all joints are tightly secured. Wiggle the frame slightly to see if it wobbles or feels loose. If needed, tighten any screws further to enhance stability.
- Measure for squareness: To ensure that your porch furniture is properly aligned, measure for squareness. Use a measuring tape or a carpenter’s square to check that opposite sides of the frame are equal in length. Adjust the frame as needed to achieve squareness.
During the assembly process, it’s recommended to have an extra set of hands to assist with holding and aligning the wood pieces. This will help ensure that everything is assembled accurately and securely.
Remember to refer to your design plans as you assemble the frame to make sure you’re following the intended structure and dimensions. Properly assembled, the frame will provide the foundation for the seat and backrest in the next steps of building your porch furniture.
Step 5: Adding the Seat and Backrest
With the frame of your porch furniture assembled, it’s time to move on to adding the seat and backrest. This step will provide the comfort and support needed for a relaxing seating experience. Follow these steps to securely attach the seat and backrest:
- Measure and mark: Begin by measuring and marking the spots where the seat and backrest will be attached to the frame. Ensure that the measurements are accurate and align with your design plans.
- Pre-drill pilot holes: Just like in the previous step, it’s important to pre-drill pilot holes to prevent splitting when you attach the wood pieces together. Use a drill with an appropriate drill bit size.
- Attach the seat: Place the seat board onto the frame, aligning the pre-drilled holes. Secure the seat board to the frame using screws. Start with the corners and then add screws along the support beams or slats to reinforce the connection.
- Add the backrest: Position the backrest board against the frame, aligning the pre-drilled holes. Attach the backrest to the frame using screws. Start at the top and work your way down, periodically checking for alignment and stability.
- Test for stability: Once the seat and backrest are securely attached, test the stability of your porch furniture by sitting and gently rocking back and forth. If the furniture feels wobbly or unstable, reinforce the connections with additional screws.
While attaching the seat and backrest, it’s important to ensure that the pieces are level and aligned with each other and the frame. Use a level or measuring tape to double-check for proper positioning.
Adding the seat and backrest completes the basic structure of your porch furniture. Take a moment to admire your progress and envision how it will look once it’s finished. In the next steps, we’ll focus on adding the finishing touches to make your furniture more visually appealing and comfortable.
Step 6: Sanding and Finishing
Once the seat and backrest are securely attached, it’s time to focus on sanding and finishing your porch furniture. This step will not only enhance the appearance of the wood but also provide protection against the elements. Follow these steps to achieve a smooth and beautiful finish:
- Sand the entire furniture: Start by lightly sanding the entire surface of the furniture, including the seat, backrest, and frame. Use fine-grit sandpaper to smooth out any rough spots, blemishes, or imperfections. Sand in the direction of the wood grain to avoid leaving scratches.
- Remove sanding dust: After sanding, use a clean cloth or a tack cloth to remove any sanding dust from the wood surfaces. Wipe down each piece thoroughly to ensure a clean and smooth surface for finishing.
- Choose your finish: Decide on the type of finish you want for your porch furniture. You can choose to apply a clear sealant, paint, or stain. Consider the look you want to achieve and the level of protection you desire for the wood.
- Apply the finish: Follow the instructions on the selected finish product for the appropriate application method. Use a brush or rag to evenly apply the finish to all exposed surfaces, including the seat, backrest, and frame. Apply multiple coats if needed, allowing each coat to dry completely before applying the next one.
- Let the finish cure: After applying the finish, allow the furniture to cure according to the manufacturer’s instructions. This ensures that the finish fully bonds with the wood and provides maximum durability and protection.
Throughout the sanding and finishing process, it’s important to work in a well-ventilated area and follow all safety precautions mentioned on the finish product’s label. You may also want to wear gloves to protect your hands from the finish and use drop cloths to protect your workspace.
By sanding and finishing your porch furniture, you not only enhance its beauty but also protect it from moisture, UV rays, and other outdoor elements. Take your time with this step to achieve a professional-grade finish that will keep your furniture looking great for years to come.
Step 7: Adding Final Touches
With the main construction and finishing steps complete, it’s time to add the final touches to your porch furniture. These details will elevate the aesthetic appeal and comfort of your furniture. Follow these steps to add the final touches:
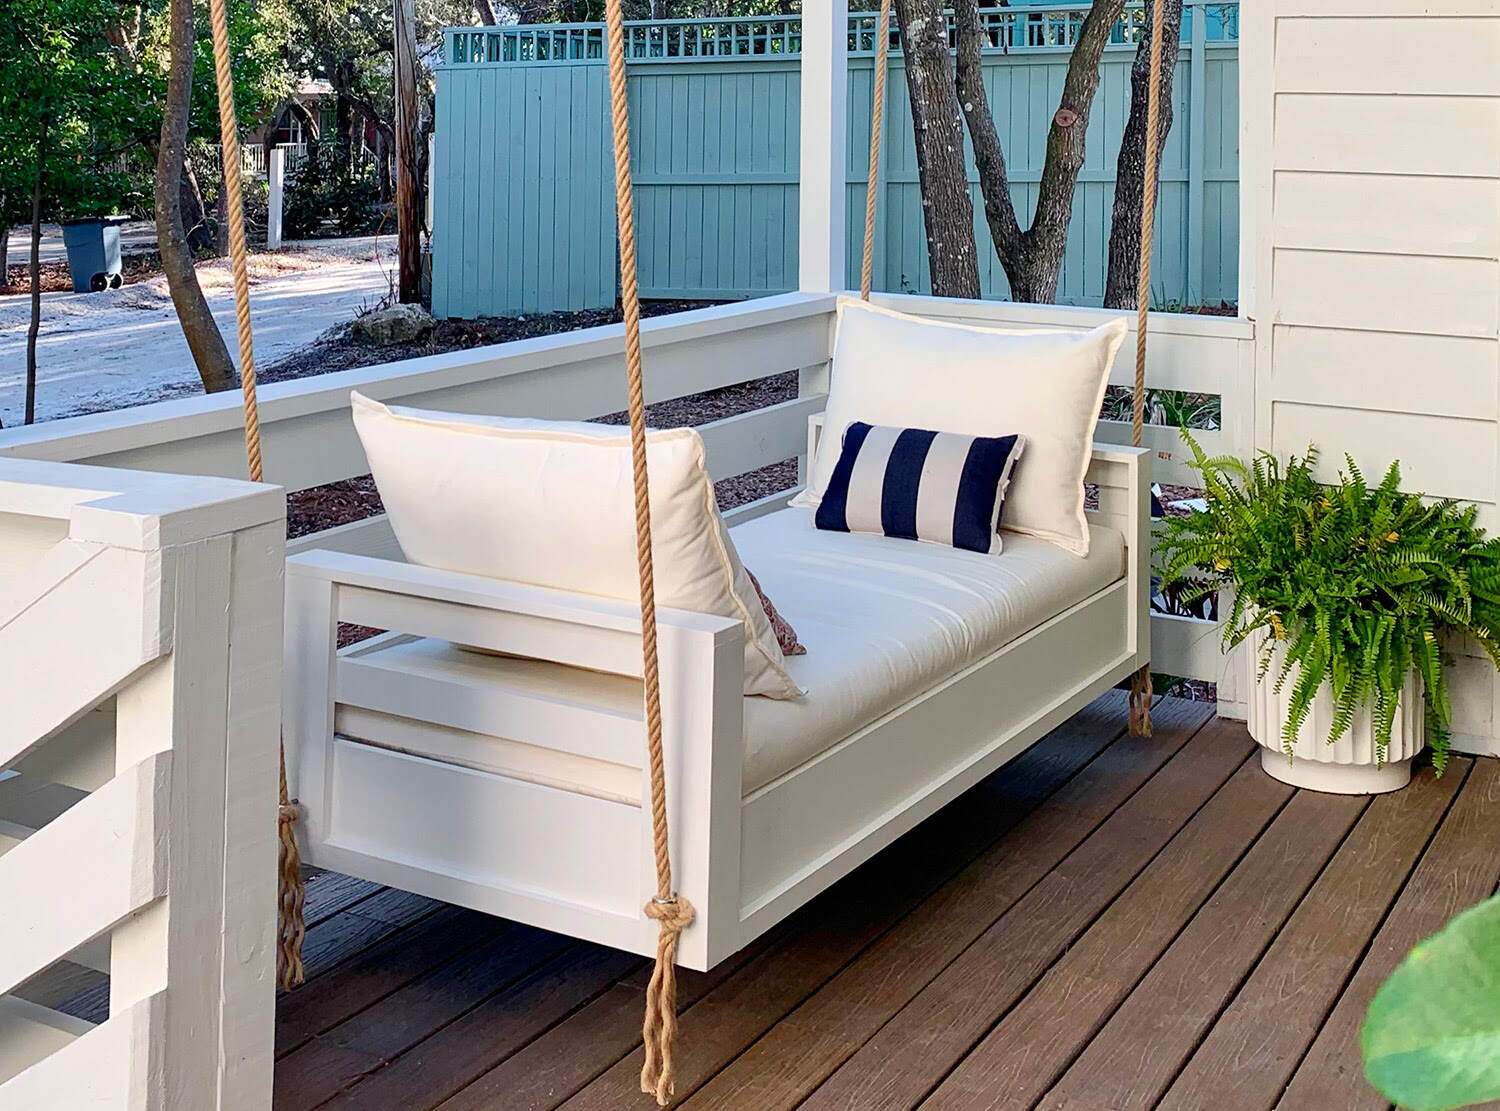
- Add cushions: To make your porch furniture more comfortable and inviting, consider adding cushions to the seat and backrest. Look for outdoor cushions that are designed to withstand the elements and are easy to clean. Choose colors and patterns that complement your porch décor.
- Accessorize with pillows: Enhance the coziness of your porch furniture by adding decorative pillows. These can provide extra support and add a pop of color or patterns that match your personal style. Have fun with the variety of pillow options available and select ones that create a welcoming and inviting atmosphere.
- Include side tables: Consider adding side tables to your porch furniture for practicality and convenience. Place them next to seating areas for holding drinks, books, or other outdoor essentials. Choose tables that complement the style and height of the furniture for a cohesive look.
- Personalize with accessories: Add personal touches to your porch furniture with accessories like lanterns, outdoor rugs, or decorative planters. These elements can further enhance the visual appeal and create a welcoming ambiance on the porch. Incorporate items that reflect your unique style and preferences.
- Maintain and care: Regularly clean and maintain your porch furniture to ensure its longevity. Follow the manufacturer’s guidelines for cleaning, especially if you’ve applied a finish to the wood. Keep cushions and pillows clean and protected from the elements. Store them indoors during harsh weather conditions or use furniture covers to protect them.
Adding these final touches allows you to personalize your porch furniture and create an inviting outdoor space that reflects your style and taste. Don’t be afraid to experiment with different combinations of accessories and decorations to find the perfect balance for your porch.
With the completion of these final touches, your porch furniture is ready to be enjoyed! Whether it’s for relaxing, entertaining guests, or simply enjoying some quiet time outdoors, your handmade furniture will provide comfort, style, and a touch of craftsmanship to your porch.
Read more: How To Make A Porch Canopy
Conclusion
Congratulations! You have successfully completed the process of making your own porch furniture. By following the steps outlined in this article, you have not only saved money but also created a personalized and unique set of furniture that perfectly fits your porch space.
Throughout the journey, you learned the importance of planning and designing, selecting the right wood, cutting and sanding, assembling the frame, adding the seat and backrest, sanding and finishing, and adding the final touches. Each step played a vital role in the creation of your porch furniture.
Not only did you learn about the technical aspects of building furniture, but you also discovered the joy of designing and creating something with your own hands. The satisfaction that comes from seeing your finished pieces and being able to relax and enjoy them cannot be understated.
Remember to maintain and care for your porch furniture properly. Regular cleaning and protection from the elements will help ensure its longevity and continued enjoyment for years to come. With proper maintenance, your handmade furniture will withstand the test of time and continue to be a source of comfort and pride.
So, sit back, relax, and enjoy your porch furniture. Take pleasure in the cozy moments spent with loved ones, the peaceful solitude of a morning coffee, or the joyful gatherings with friends. Your porch has now transformed into a welcoming oasis that reflects your style and personality.
Thank you for joining us on this DIY porch furniture journey. We hope you found this guide helpful and inspiring. Happy porch sitting!
Ready to take your woodworking skills up a notch? Dive into our latest guide on the freshest woodworking projects for the coming year. Whether you're a seasoned carpenter or just starting, these ideas will spark creativity and offer challenges to enhance your craftsmanship. Don't miss out on crafting more stunning pieces for every nook of your home. Get all the know-how you need for your next woodworking adventure!
Frequently Asked Questions about How To Make Porch Furniture
Was this page helpful?
At Storables.com, we guarantee accurate and reliable information. Our content, validated by Expert Board Contributors, is crafted following stringent Editorial Policies. We're committed to providing you with well-researched, expert-backed insights for all your informational needs.


0 thoughts on “How To Make Porch Furniture”