
Articles
How To Read AC Gauges R134A
Modified: August 27, 2024
Learn how to read and interpret AC gauges for R134A refrigerant with informative articles. Master the art of gauging and optimize your HVAC troubleshooting skills.
(Many of the links in this article redirect to a specific reviewed product. Your purchase of these products through affiliate links helps to generate commission for Storables.com, at no extra cost. Learn more)
Introduction
Welcome to the world of AC gauges – the essential tools for anyone who wants to effectively diagnose and troubleshoot air conditioning systems. Whether you are a seasoned HVAC technician or a DIY enthusiast, understanding how to read AC gauges can save you time, money, and frustration.
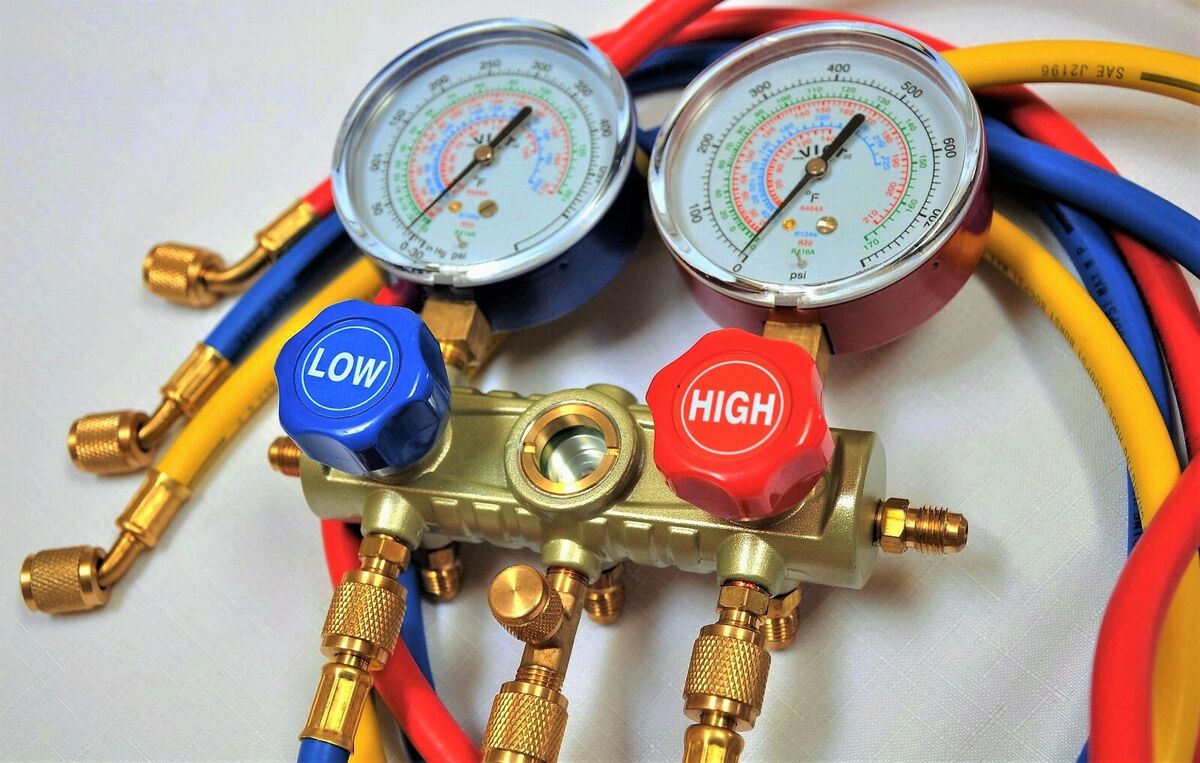
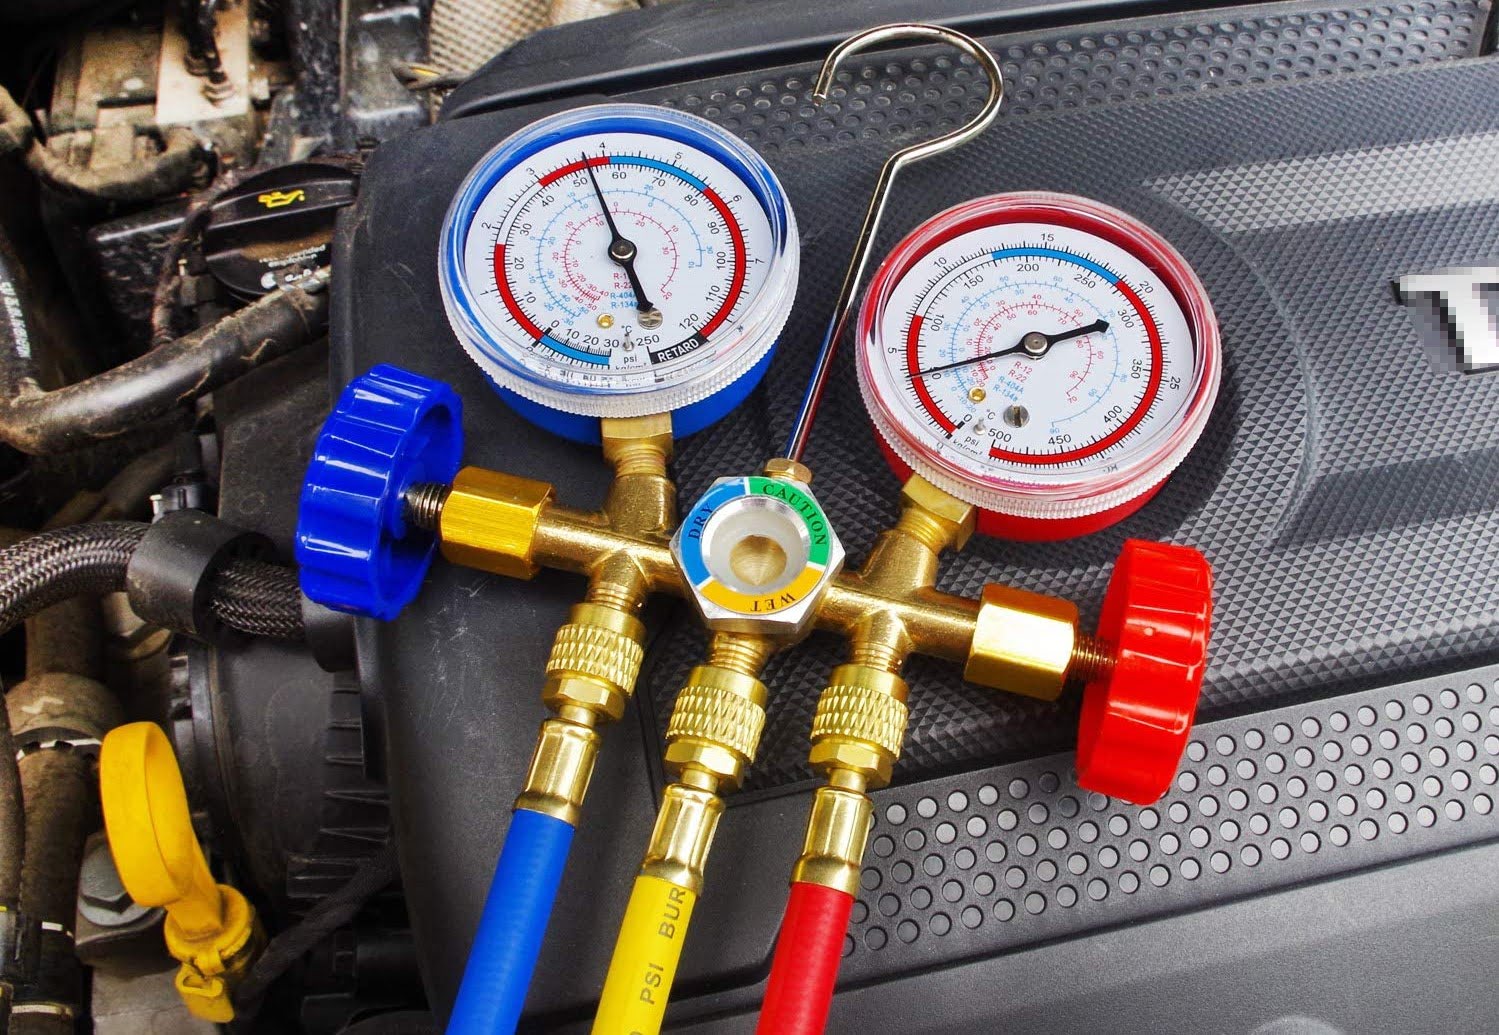
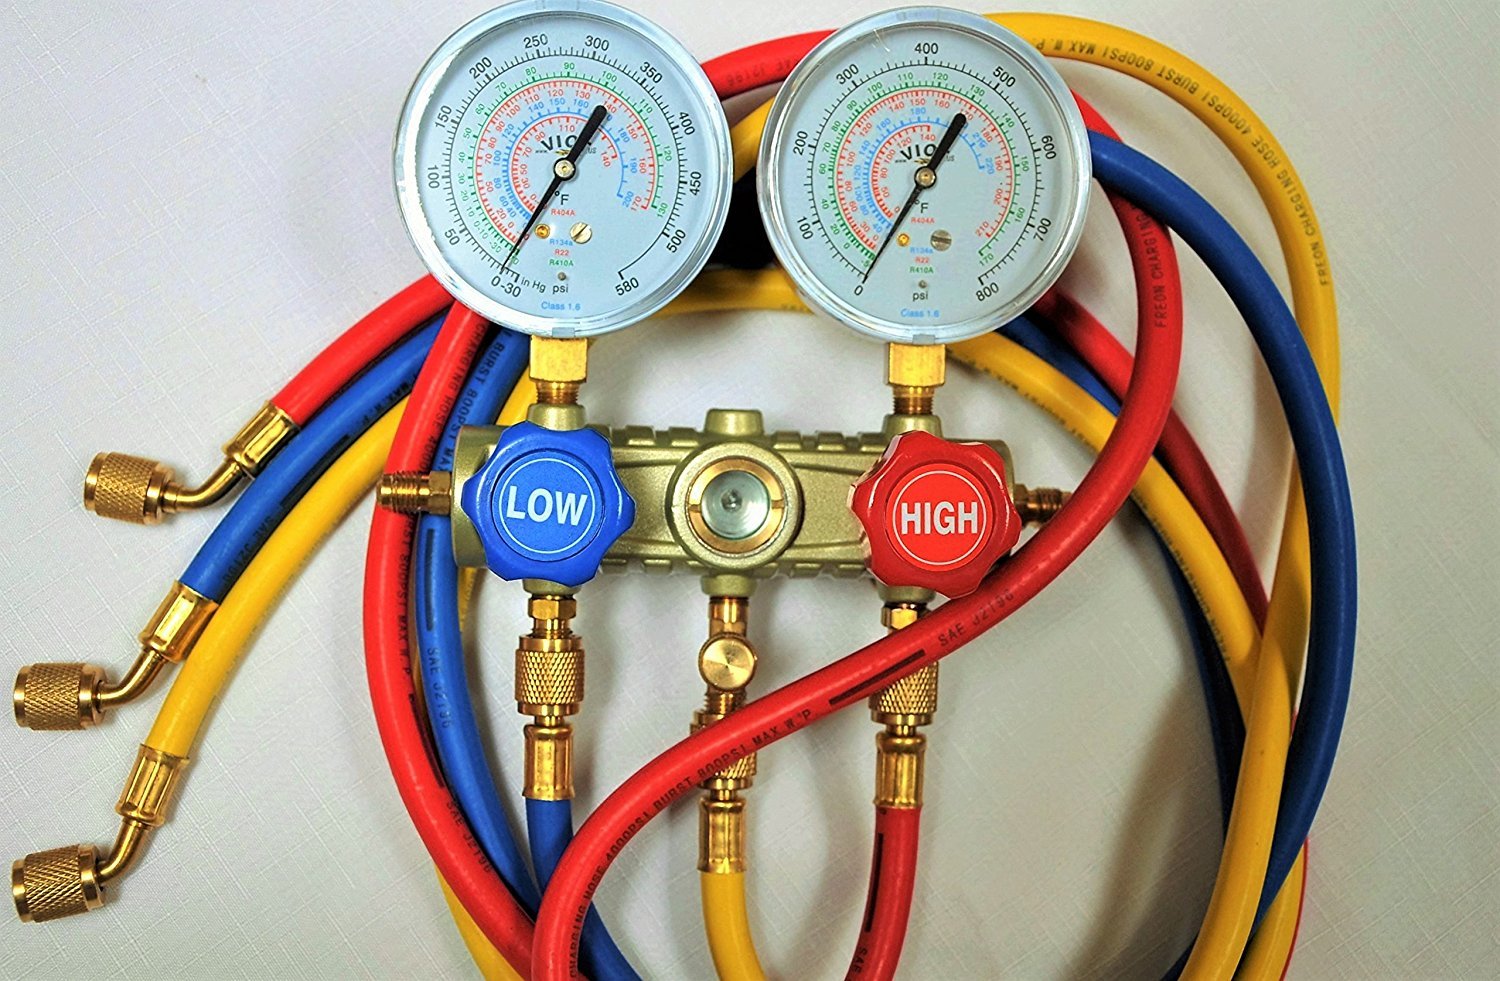
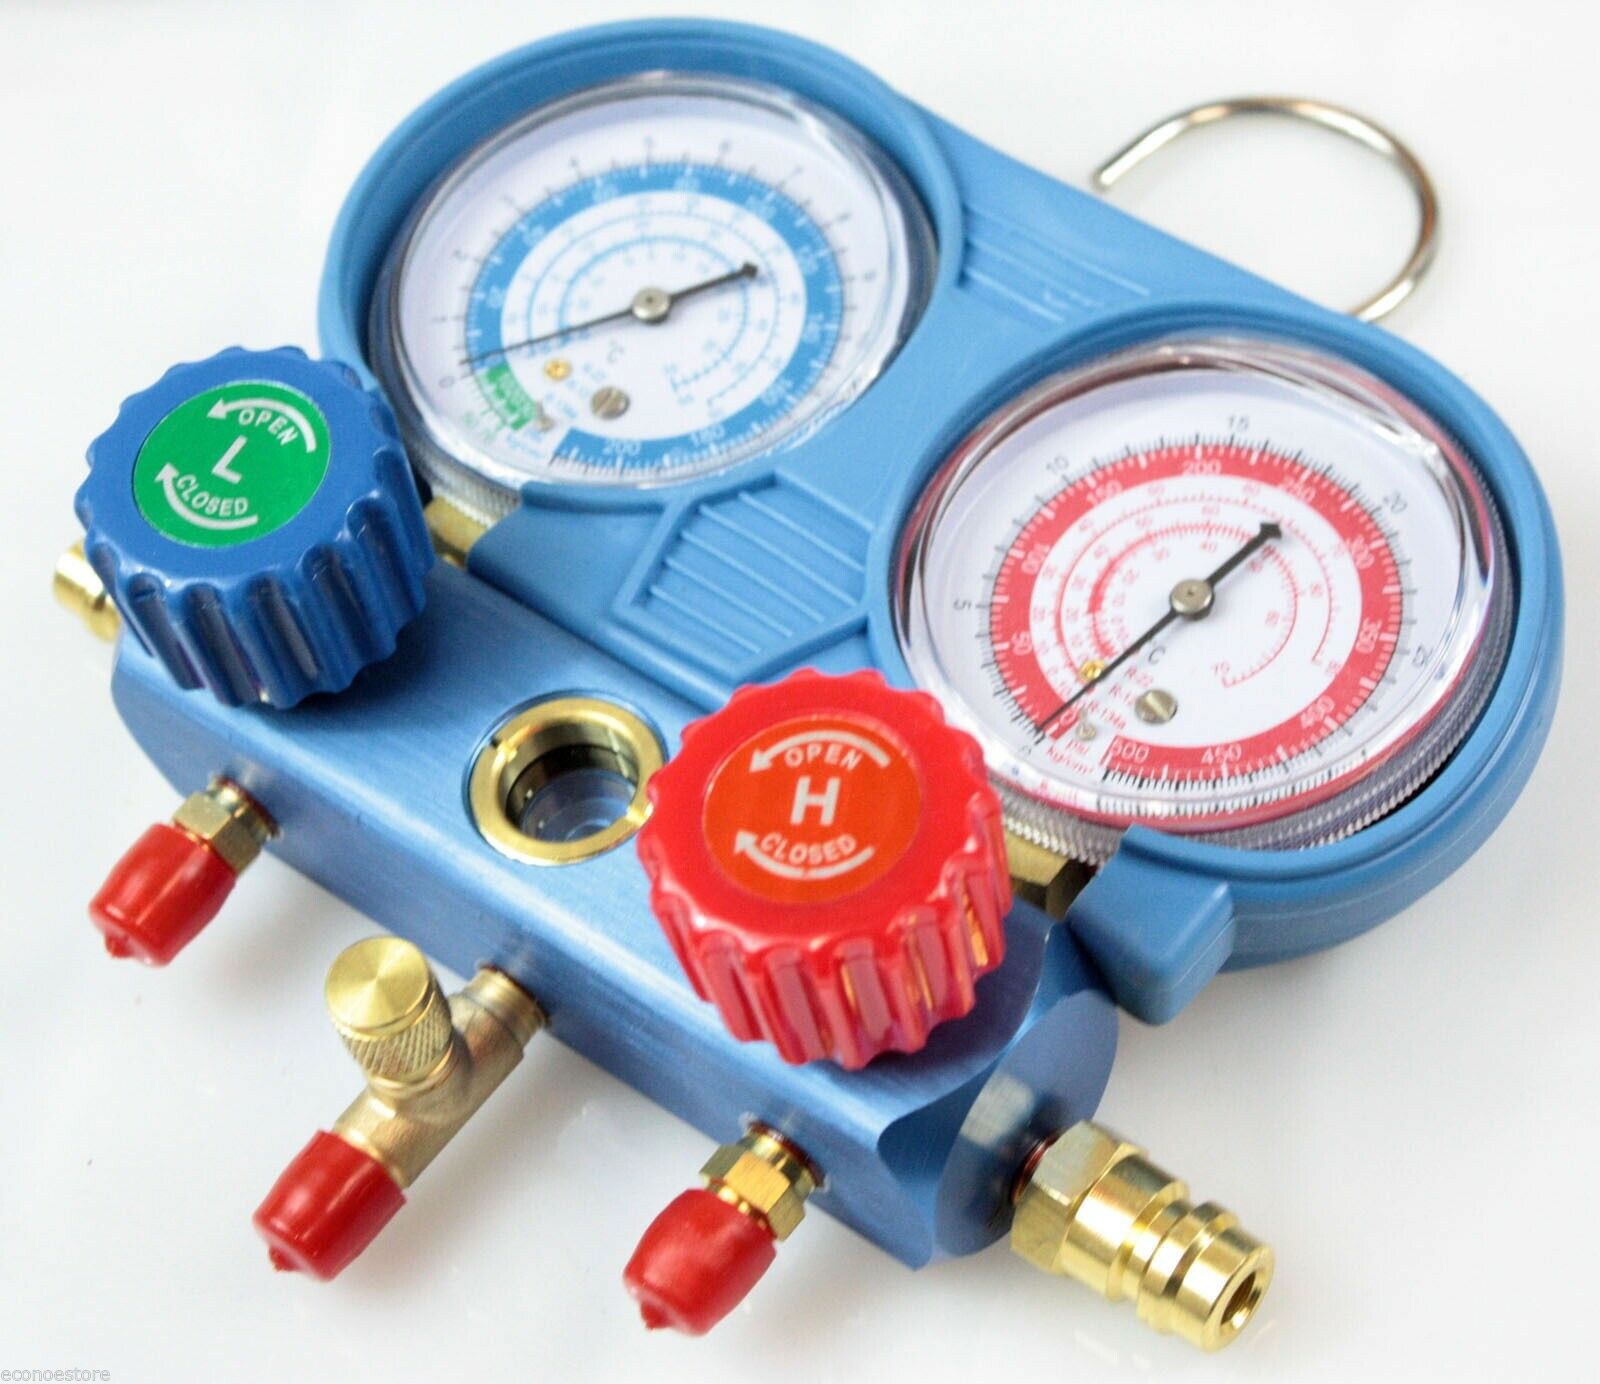
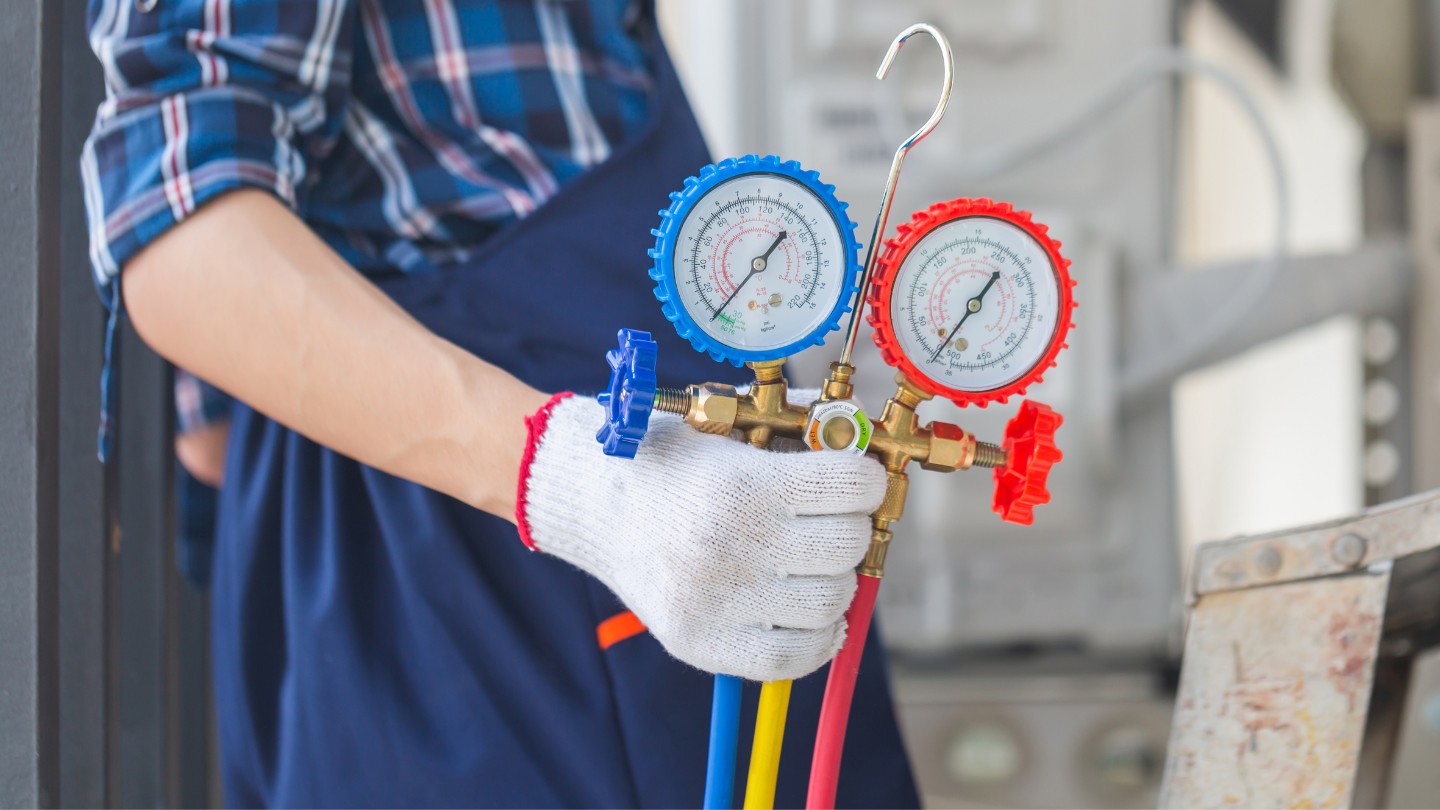
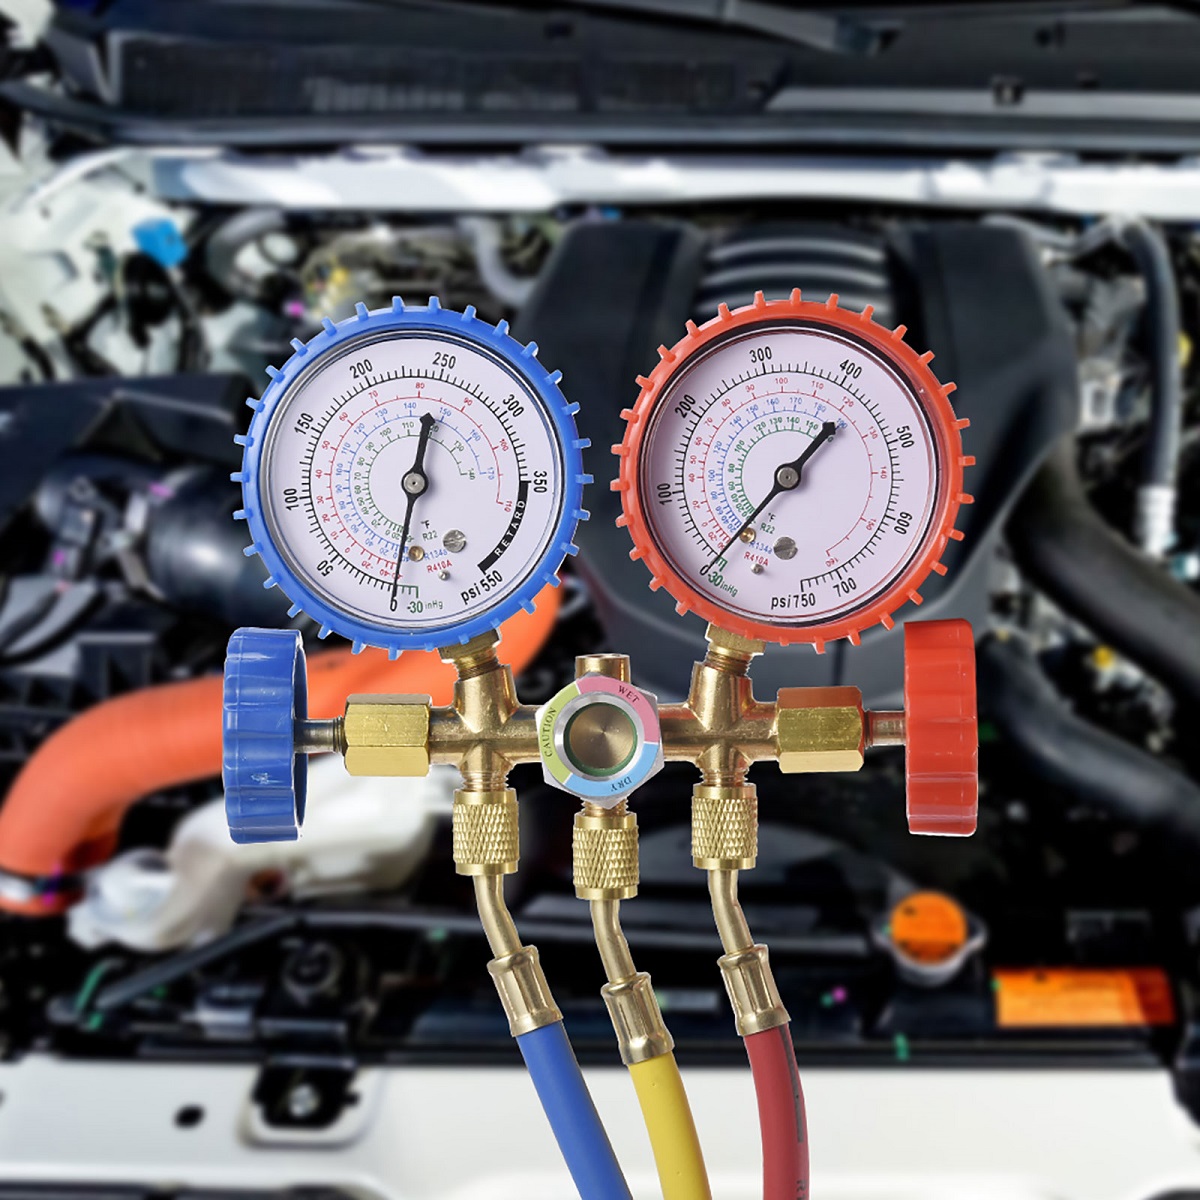
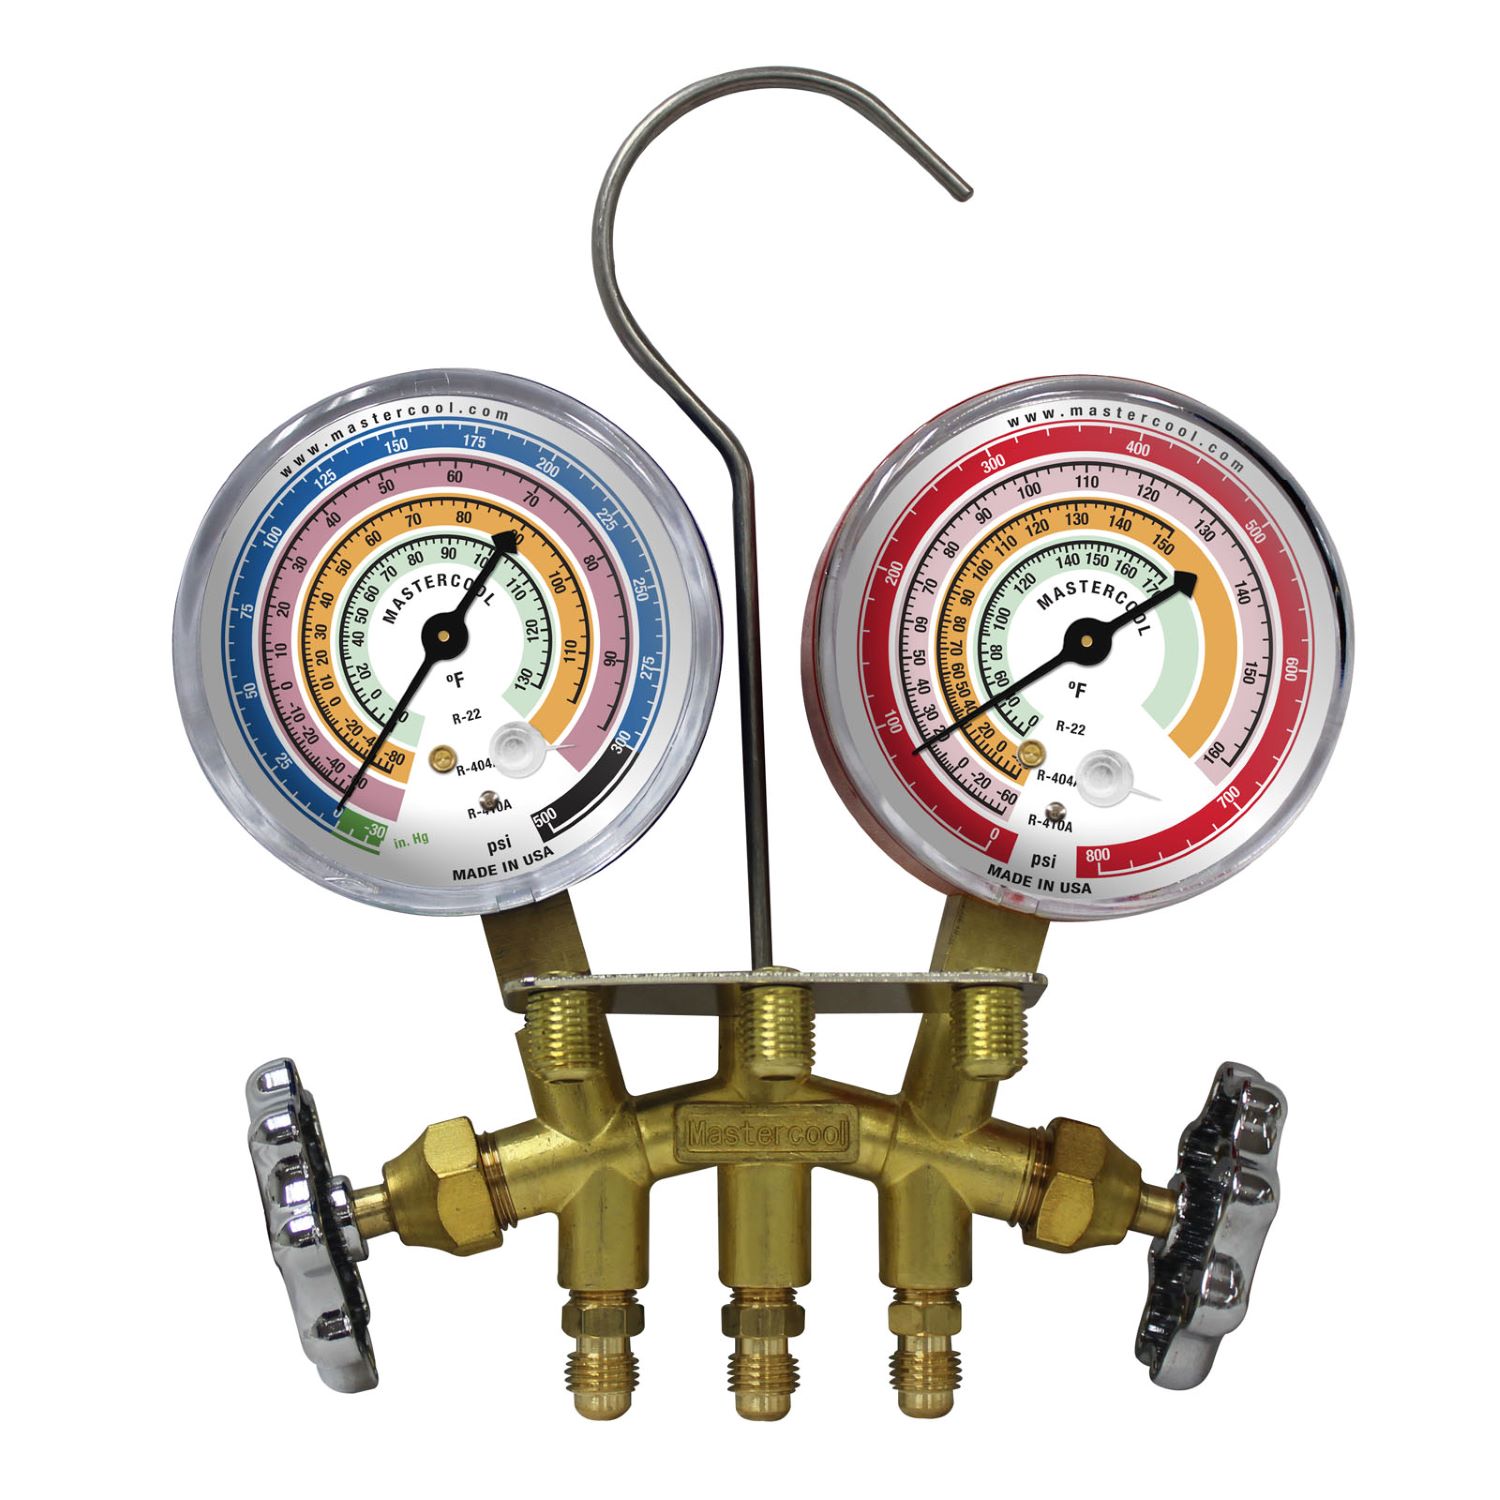
AC gauges, also known as manifold gauges, are devices used to measure the pressure and temperature of refrigerant in an air conditioning system. They consist of two gauges – the low-pressure gauge and the high-pressure gauge – along with color-coded hoses and valves.
By connecting the AC gauges to the service ports on the air conditioning system, you can obtain crucial information about the system’s performance. This includes important measurements such as low-side and high-side pressures, as well as superheat and subcooling temperatures.
In this article, we will explore the various parts of AC gauges, provide a step-by-step guide on how to read them, explain the pressure readings you may encounter, offer troubleshooting tips, and discuss necessary safety precautions. By the end, you will have a comprehensive understanding of how to effectively utilize AC gauges and diagnose issues with air conditioning systems.
So, grab your AC gauges, put on your HVAC technician hat, and let’s dive into the world of AC gauges!
Key Takeaways:
- AC gauges are essential for diagnosing air conditioning system issues, providing crucial pressure and temperature readings to identify common problems like low refrigerant levels, leaks, and restricted systems.
- Safety precautions are vital when using AC gauges, including wearing PPE, handling refrigerant properly, and following manufacturer’s guidelines. By prioritizing safety, you can minimize risks and troubleshoot effectively.
Read more: How To Recharge AC In Car R134A
What are AC Gauges?
AC gauges, also known as manifold gauges, are essential tools used in air conditioning systems to measure and monitor the pressure and temperature of the refrigerant. They consist of two gauges – the low-pressure gauge and the high-pressure gauge – along with color-coded hoses and valves.
These gauges are designed to connect to the service ports on the air conditioning system. The low-pressure gauge is connected to the suction line or the “low side” of the system, while the high-pressure gauge is connected to the discharge line or the “high side” of the system.
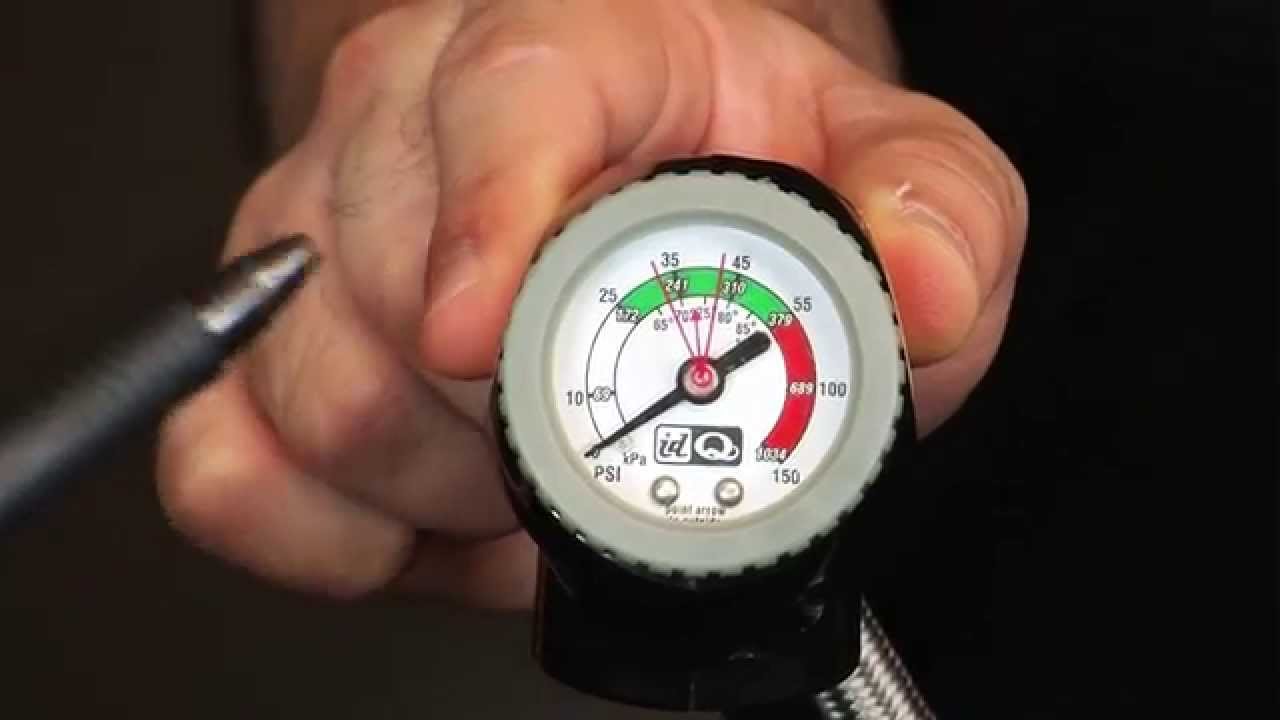
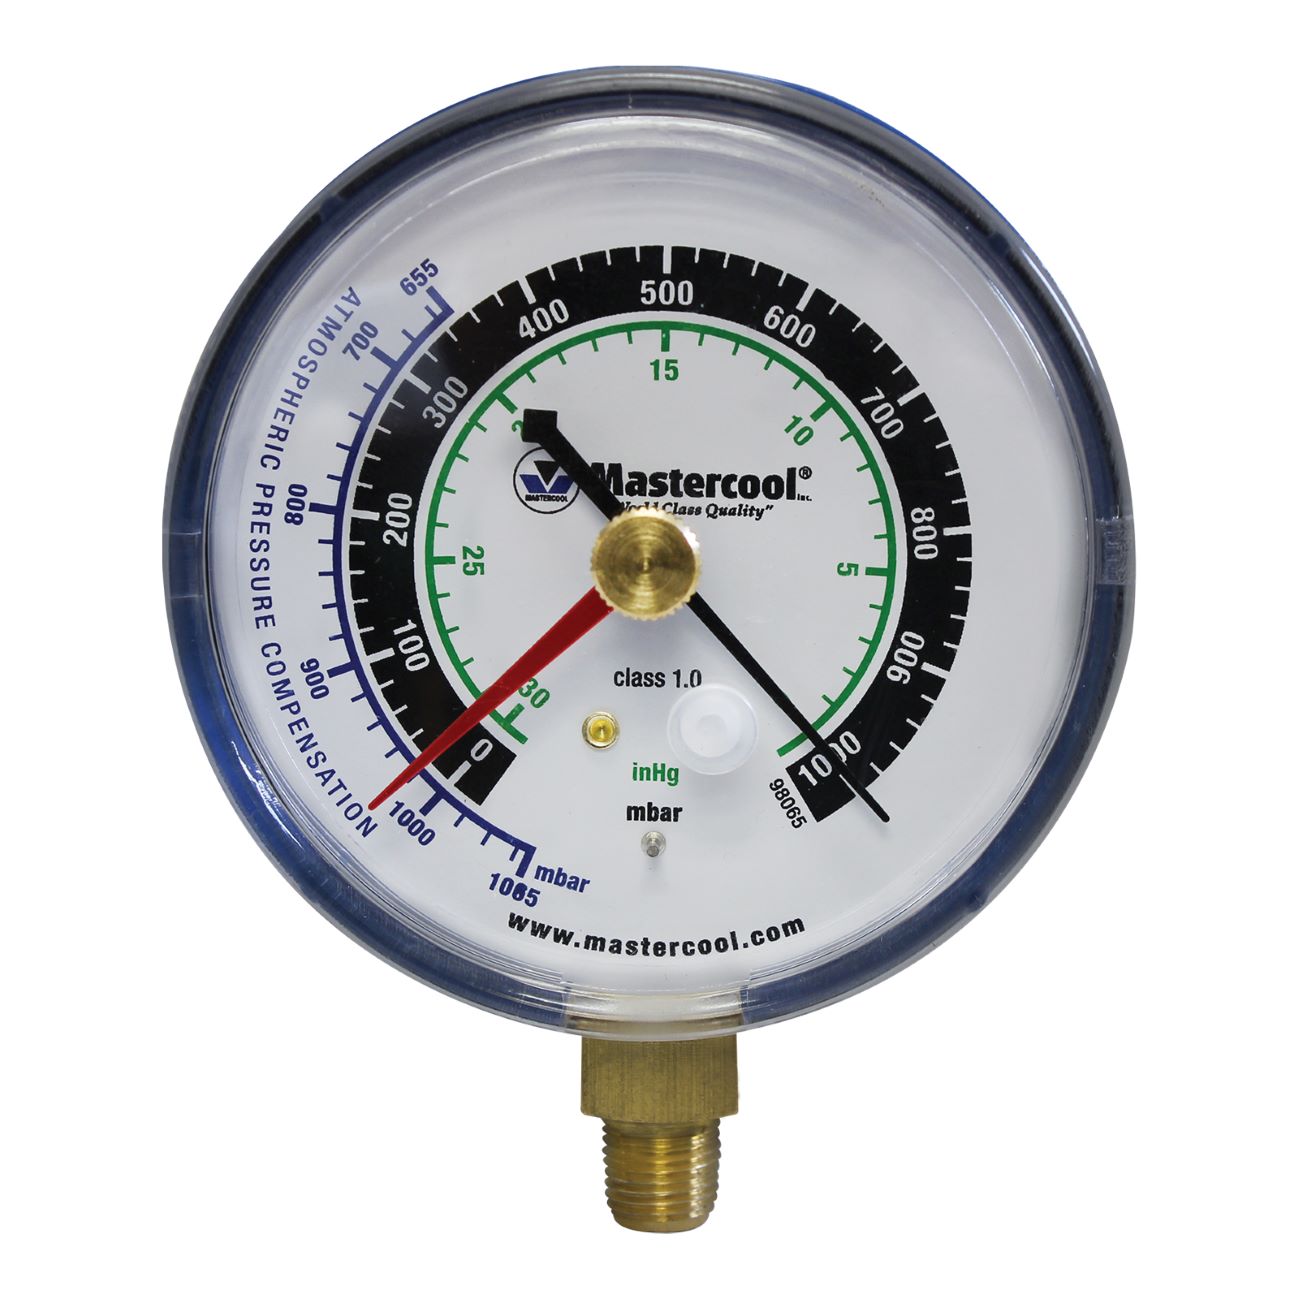
The gauges are equipped with pressure scales that are typically in psi (pounds per square inch) or kPa (kilopascals). The pressure readings displayed on the gauges provide crucial information about the system’s performance.
AC gauges also feature temperature scales that allow you to measure superheat and subcooling, which are critical values for determining the efficiency and condition of the air conditioning system.
Superheat is the temperature of the refrigerant gas above its boiling point at a particular pressure. It helps indicate if there is enough refrigerant in the system and if it is boiling off completely in the evaporator coil.
Subcooling, on the other hand, is the temperature of the refrigerant liquid below its condensing temperature at a particular pressure. It indicates if the liquid line is properly cooling the refrigerant before it enters the expansion valve.
By using AC gauges, you can accurately measure these pressures and temperatures, allowing you to diagnose and troubleshoot common issues with air conditioning systems, such as low refrigerant levels, refrigerant leaks, blockages, and more.
Without the use of AC gauges, it would be challenging to understand what is happening inside the air conditioning system, leading to unreliable diagnoses and potential mistakes when attempting repairs or maintenance. Therefore, AC gauges are indispensable tools for HVAC technicians and anyone working on air conditioning systems.
Now that you have an understanding of what AC gauges are, let’s delve into the different parts of these gauges and how to use them properly to obtain accurate measurements.
Parts of AC Gauges
To effectively read AC gauges, it is important to familiarize yourself with the various components that make up these tools. Here are the key parts of AC gauges:
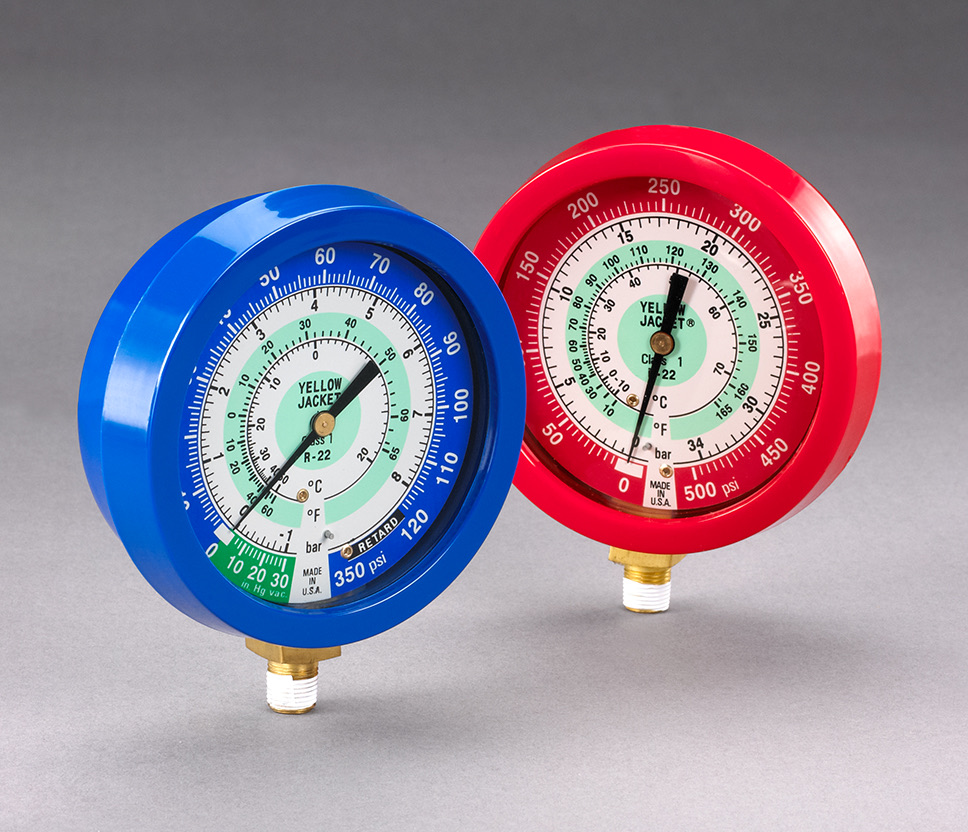
- Gauges: AC gauges consist of two primary gauges – the low-pressure gauge and the high-pressure gauge. These gauges are typically circular and have a dial that displays the pressure readings. The low-pressure gauge is marked in blue and measures pressures in the low-side of the system, while the high-pressure gauge is marked in red and measures pressures in the high-side of the system.
- Hoses: AC gauges are equipped with color-coded hoses that connect the gauges to the service ports on the air conditioning system. The low-pressure hose is typically blue and connects to the low-side service port, while the high-pressure hose is red and connects to the high-side service port. These hoses are designed to handle the pressure and temperature of the refrigerant.
- Valves: AC gauges have valves located on the manifold body. These valves control the flow of refrigerant between the gauges, hoses, and system. The valves are used to open and close the connections, allowing for the proper measurement of pressure and temperature.
- Service Ports: The air conditioning system is equipped with service ports, which are access points for connecting the AC gauges. There are two service ports – the low-side service port and the high-side service port – corresponding to the low-pressure and high-pressure sides of the system, respectively. The service ports are usually capped to prevent debris and moisture from entering the system.
- Pressure Scales: The gauges feature pressure scales that indicate the pressure readings in psi (pounds per square inch) or kPa (kilopascals). These scales allow you to measure and analyze the pressure levels in the air conditioning system, helping you identify any abnormalities or issues.
- Temperature Scales: AC gauges also have temperature scales that allow you to measure the superheat and subcooling temperatures. The temperature scales are usually in degrees Fahrenheit or Celsius. These measurements aid in evaluating the efficiency and performance of the air conditioning system.
Understanding the different parts of AC gauges will enable you to use them correctly and interpret the readings accurately. With this knowledge, you are ready to learn how to read AC gauges step-by-step.
Step-by-Step Guide on How to Read AC Gauges
Reading AC gauges may seem intimidating at first, but with a step-by-step approach, you can easily interpret the pressure and temperature readings. Here is a guide on how to read AC gauges:
- Preparation: Before you begin, ensure that you have the necessary safety equipment, including gloves and safety goggles. Familiarize yourself with the different parts of the AC gauges, such as the gauges, hoses, valves, and service ports.
- Connect the gauges: Identify the low-side and high-side service ports on the air conditioning system. Connect the low-pressure gauge hose to the low-side service port and the high-pressure gauge hose to the high-side service port. Make sure the hose connections are secure.
- Open the valves: Open the valves on the AC gauges by turning them counterclockwise. This allows the refrigerant to flow into the gauges and equalizes the pressure between the gauges and the system.
- Observe the pressure readings: Look at the two gauges and note the pressure readings. The low-pressure gauge measures the pressure on the low side of the system, while the high-pressure gauge measures the pressure on the high side of the system. Read the pressure on the scales, which is typically displayed in psi or kPa.
- Check the temperature: Use the temperature scales on the AC gauges to measure the superheat and subcooling temperatures. The superheat is measured on the low-pressure side, while the subcooling is measured on the high-pressure side. Read the temperatures on the respective scales in degrees Fahrenheit or Celsius.
- Compare the readings: Compare the pressure and temperature readings to the manufacturer’s specifications or reference charts for the specific air conditioning system. This will help you determine if the readings are within the normal range or indicate any issues or abnormalities.
- Interpret the readings: Based on the readings and the comparison, you can diagnose potential problems with the air conditioning system. For example, low-pressure readings may indicate low refrigerant levels or a blockage, while high-pressure readings may signal a restriction or a faulty compressor. Superheat and subcooling temperatures can help identify issues with the expansion valve or the condenser.
- Take necessary action: Once you have interpreted the AC gauge readings, you can take appropriate action to address any identified issues. This may involve adding or removing refrigerant, repairing or replacing components, or performing further diagnostic tests.
Remember, practice and experience play a significant role in becoming proficient at reading AC gauges. Over time, you will become more comfortable with interpreting the readings and diagnosing air conditioning system problems accurately.
Now that you know how to read AC gauges, let’s delve into understanding the pressure readings and what they indicate.
When reading AC gauges for R134A, ensure the system is running and at operating temperature. Connect the gauges and compare the high and low side pressures to the manufacturer’s specifications for the current ambient temperature.
Understanding the Pressure Readings on AC Gauges
The pressure readings displayed on AC gauges provide valuable insights into the state of the air conditioning system. By understanding these readings, you can diagnose potential issues and make informed decisions about system maintenance and repairs. Here’s a breakdown of the different pressure readings on AC gauges:
Low-Side Pressure: The low-side pressure, also known as the suction pressure, represents the pressure of the refrigerant on the “low side” of the air conditioning system. This pressure is measured by the low-pressure gauge and is typically indicated in psi or kPa.
The normal range for the low-side pressure can vary depending on factors such as ambient temperature, system design, and the type of refrigerant being used. However, as a general guideline, low-side pressures for air conditioning systems using R134a refrigerant typically range between 30 to 40 psi (206 to 275 kPa) when the system is running at full capacity.
Low low-side pressure readings may indicate a refrigerant leak, insufficient refrigerant charge, or a problem with the suction line. Conversely, high low-side pressure readings may suggest an issue with the expansion valve, a restriction in the evaporator coil, or inadequate airflow across the evaporator.
High-Side Pressure: The high-side pressure, also known as the discharge pressure, represents the pressure of the refrigerant on the “high side” of the air conditioning system. This pressure is measured by the high-pressure gauge and is indicated in psi or kPa.
Similar to the low-side pressure, the normal range for the high-side pressure can vary based on several factors. For R134a systems, typical high-side pressures range between 150 to 250 psi (1034 to 1724 kPa) under normal operating conditions.
Elevated high-side pressure readings may suggest a restriction in the condenser, a faulty compressor, or excessive heat in the system. On the other hand, low high-side pressure readings may indicate insufficient refrigerant flow, a refrigerant leak, or a problem with the discharge line.
Pressure Differential: The pressure differential, also known as the pressure drop, is the difference between the low-side and high-side pressures. It can help determine the overall performance and efficiency of the air conditioning system.
A normal pressure differential ranges between 18 to 30 psi (124 to 206 kPa) for systems using R134a refrigerant. If the pressure differential is significantly lower or higher than the expected range, it may indicate a restriction in the system, an incorrect refrigerant charge, or an issue with the compressor.
It is important to note that these pressure readings should always be interpreted alongside temperature measurements, such as superheat and subcooling, for a comprehensive assessment of the air conditioning system’s condition.
Understanding the pressure readings on AC gauges allows you to identify potential problems, determine the system’s efficiency, and make informed decisions when it comes to maintenance and repairs. Now, let’s explore common issues that can be identified and troubleshooted with the help of AC gauges.
Troubleshooting Common Issues with AC Gauges
AC gauges are invaluable tools when it comes to troubleshooting air conditioning system issues. By interpreting the readings on the gauges and combining them with other diagnostic information, you can identify and address common problems. Here are some common issues that can be diagnosed and troubleshooted using AC gauges:
Low Refrigerant Levels: Low refrigerant levels can lead to poor cooling performance and inefficient operation. AC gauges can help detect this issue by showing unusually low pressure readings on both the low-side and high-side gauges. This indicates that there is insufficient refrigerant circulating in the system. To resolve this problem, you will need to locate and repair any leaks in the system, evacuate any remaining refrigerant, and recharge the system with the appropriate amount of refrigerant.
Refrigerant Leaks: Refrigerant leaks can occur in various parts of the air conditioning system, causing a reduction in system performance. AC gauges can help identify leaks by showing a gradual decrease in pressure readings over time, even after recharging the system. By using electronic leak detectors and visual inspections, you can locate the source of the leak and proceed with the necessary repairs or component replacements.
Restricted or Clogged System: Blockages or restrictions in the air conditioning system can hinder the flow of refrigerant and reduce its cooling capacity. AC gauges can indicate a restricted or clogged system by displaying abnormally high-pressure readings on the high-side gauge and low-pressure readings on the low-side gauge. This could be caused by debris, contamination, or a faulty expansion valve. In such cases, it is necessary to clean or replace the affected components to restore proper refrigerant flow.
Faulty Compressor: A faulty compressor can result in poor cooling performance and irregular pressure readings. AC gauges can help identify compressor issues by showing inconsistent pressure readings or extremely high or low readings on both gauges. It is crucial to diagnose the root cause of the compressor failure, which can be due to electrical problems, refrigerant slugging, or a mechanical failure. Depending on the severity of the issue, you may need to repair or replace the compressor.
Inefficient Heat Transfer: Problems with heat transfer in the air conditioning system can lead to inadequate cooling. AC gauges can help diagnose this issue by showing high superheat temperatures and low subcooling temperatures. High superheat indicates that the refrigerant is not absorbing enough heat in the evaporator coil, while low subcooling suggests that the refrigerant is not releasing enough heat in the condenser. This could be caused by issues such as insufficient airflow, a dirty condenser coil, or a faulty expansion valve. Troubleshooting will involve cleaning or replacing components to ensure efficient heat transfer.
Keep in mind that while AC gauges are essential for troubleshooting, they are just one part of the diagnostic process. It is important to combine the information from the gauges with visual inspections, electronic diagnostic tools, and manufacturer’s guidelines to accurately identify and resolve system issues.
Always follow proper safety procedures and consult a professional if you are unsure or if the repairs require specialized knowledge. Now, let’s move on to discussing the safety precautions that should be taken when using AC gauges.
Safety Precautions When Using AC Gauges
When using AC gauges, it is crucial to prioritize safety to prevent accidents and ensure a smooth and secure operation. Here are some essential safety precautions to follow when working with AC gauges:
1. Wear Personal Protective Equipment (PPE): Always wear appropriate personal protective equipment, including safety goggles, gloves, and, if necessary, a face mask. This will protect you from potential refrigerant leaks, harmful fumes, and any accidental fluid contact.
2. Familiarize Yourself with the System: Before connecting the AC gauges, familiarize yourself with the specific air conditioning system you are working on. Locate the service ports, identify any potential hazards, and understand the system’s layout to ensure safe and effective operation.
3. Handle Refrigerant Properly: Refrigerants used in air conditioning systems can be hazardous to your health and the environment. Follow local regulations and guidelines for handling, storing, and disposing of refrigerants. Avoid direct contact with refrigerant and always use appropriate tools and equipment for recovery, evacuation, and charging.
4. Securely Connect Hoses and Valves: When connecting AC gauges to the air conditioning system, ensure that the hoses are securely attached to the service ports, and the valves on the gauges are tightened properly. This will prevent refrigerant leaks and maintain a safe working environment.
5. Avoid Overpressure Situations: Pay attention to the pressure readings on the AC gauges to avoid overpressure situations. If the pressure exceeds the system’s maximum allowable limit or if there is a sudden increase in pressure, immediately close the valves and safely evacuate the area.
6. Prevent Exposure to Hot Surfaces: During operation, air conditioning system components, such as the condenser and compressor, can become hot. Avoid touching these hot surfaces to prevent the risk of burns. Allow sufficient time for the system to cool down before performing any maintenance or repairs.
7. Follow Manufacturer’s Guidelines: Always adhere to the manufacturer’s instructions and guidelines for using the AC gauges and troubleshooting the air conditioning system. Follow proper procedures for connecting and disconnecting the gauges, handling the hoses, and interpreting the pressure and temperature readings.
8. Turn off the System: Before connecting or disconnecting the AC gauges, ensure that the air conditioning system is turned off. This will prevent accidental system activation, which can cause injury or damage to the equipment.
9. Use Proper Ventilation: When working in enclosed spaces or areas with inadequate ventilation, ensure proper ventilation or use exhaust fans to prevent the accumulation of potentially harmful refrigerant fumes.
10. Seek Professional Help if Needed: If you encounter any issues or if you are unsure about the proper usage of AC gauges, it is always recommended to seek professional help. HVAC technicians and experts have the knowledge and experience to handle complex systems and ensure safety.
By following these safety precautions, you can minimize risks, protect yourself and others, and efficiently diagnose and troubleshoot air conditioning system issues using AC gauges.
Now that you are familiar with the safety measures, let’s conclude our discussion on AC gauges.
Conclusion
AC gauges are powerful tools that enable you to diagnose and troubleshoot air conditioning system issues with precision and accuracy. By understanding how to read and interpret the pressure and temperature readings on AC gauges, you can identify common problems such as low refrigerant levels, refrigerant leaks, restricted systems, faulty compressors, and inefficient heat transfer.
Throughout this article, we have covered the various parts of AC gauges, provided a step-by-step guide on how to read them, delved into the pressure readings and their implications, discussed common issues that can be diagnosed with AC gauges, and emphasized the importance of safety precautions when utilizing these tools.
Remember, while AC gauges are invaluable for troubleshooting, they are just one aspect of the diagnostic process. Visual inspections, electronic tools, and manufacturer’s guidelines should also be considered to ensure accurate diagnoses and appropriate solutions.
Whether you are an HVAC technician or a DIY enthusiast, practicing with AC gauges, gaining experience, and staying up-to-date with the latest industry standards and regulations will enhance your skills and enable you to maintain and repair air conditioning systems effectively.
So, put on your gloves, secure your safety goggles, and confidently connect your AC gauges. With the knowledge and understanding you’ve gained from this article, you are well-equipped to tackle air conditioning system issues and ensure optimal performance for a cool and comfortable environment.
Navigating through HVAC challenges doesn't end with understanding how to read AC gauges. For those eager to delve deeper into maintenance and repair, our upcoming article on the most effective AC repair strategies for the upcoming year is just right. This guide promises practical insights for maintaining your system at peak performance. So, if keeping cool with minimal fuss is your goal, don't miss out on our essential read for AC upkeep.
Frequently Asked Questions about How To Read AC Gauges R134A
Was this page helpful?
At Storables.com, we guarantee accurate and reliable information. Our content, validated by Expert Board Contributors, is crafted following stringent Editorial Policies. We're committed to providing you with well-researched, expert-backed insights for all your informational needs.




0 thoughts on “How To Read AC Gauges R134A”