Home>Articles>How To Remove Flow Restrictor In Waterpik® Elite™ Twin Turbo™ Handheld Showerhead
Articles
How To Remove Flow Restrictor In Waterpik® Elite™ Twin Turbo™ Handheld Showerhead
Modified: May 6, 2024
Learn how to remove the flow restrictor in your Waterpik® Elite™ Twin Turbo™ handheld showerhead with our helpful articles. Unlock the full power of your shower experience.
(Many of the links in this article redirect to a specific reviewed product. Your purchase of these products through affiliate links helps to generate commission for Storables.com, at no extra cost. Learn more)
Introduction
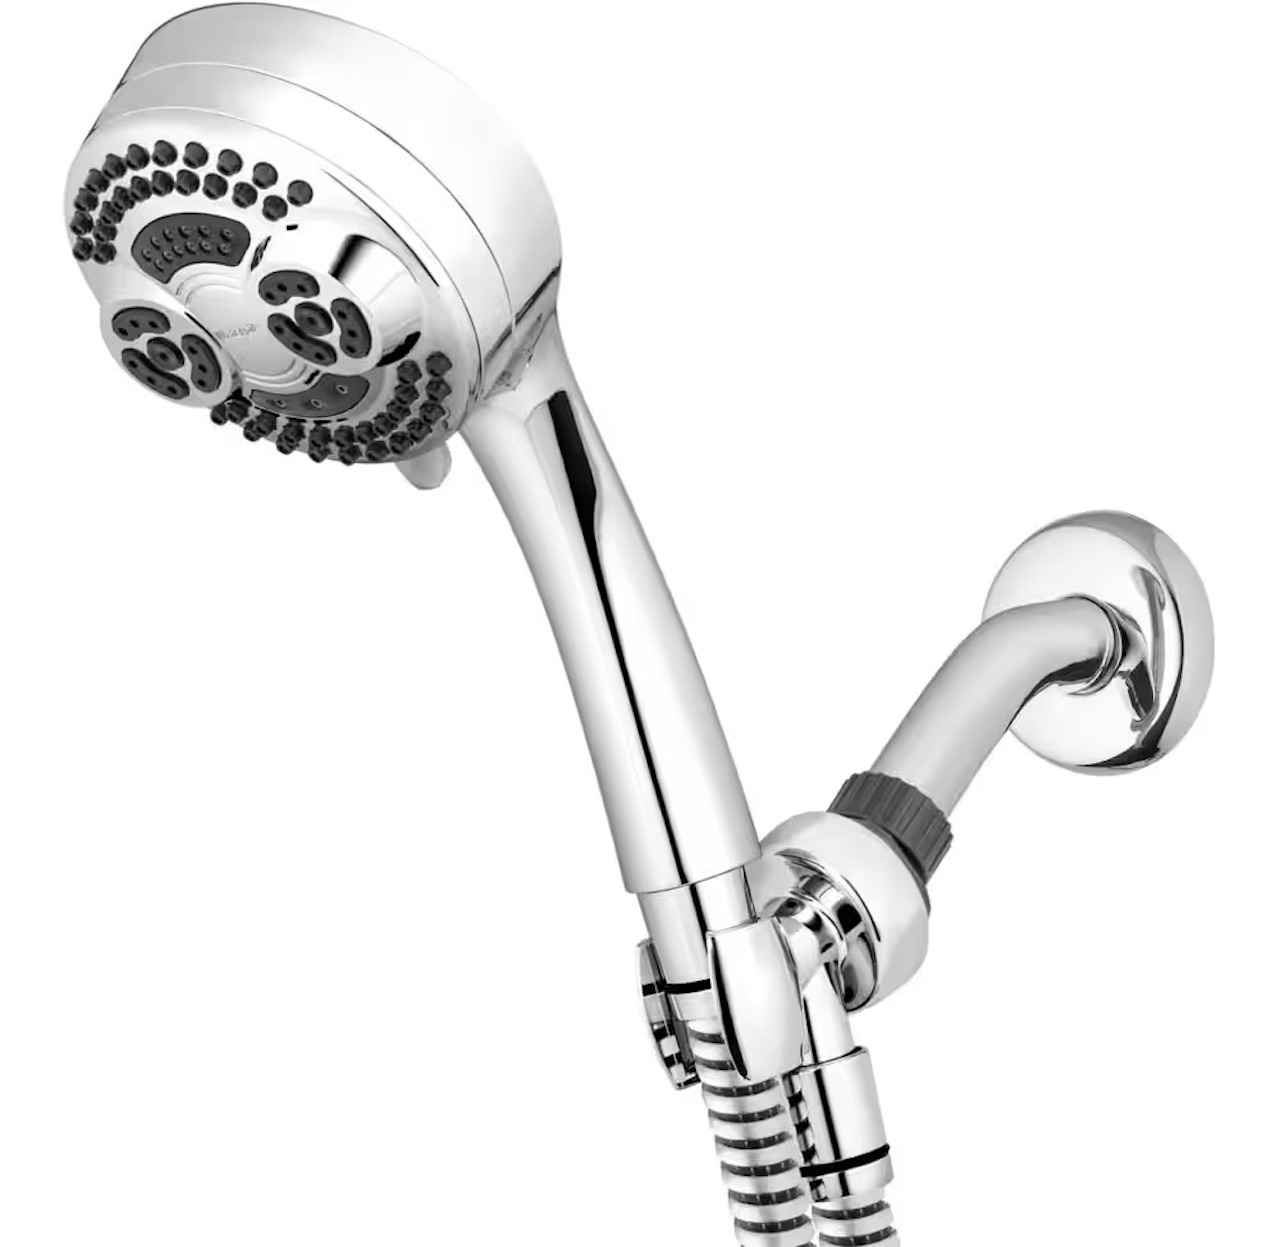
Waterpik® is a renowned brand known for its innovative and high-quality bathroom products. Among their popular offerings is the Waterpik® Elite™ Twin Turbo™ Handheld Showerhead. While this showerhead delivers a refreshing and powerful spray, some users may want to remove the flow restrictor to increase the water flow.
The flow restrictor is a small device incorporated into many showerheads to limit water consumption and increase water efficiency. While it serves an important purpose in conserving water, removing the flow restrictor can enhance the showering experience for those who prefer a stronger water flow.
In this article, we will guide you through the process of removing the flow restrictor in the Waterpik® Elite™ Twin Turbo™ Handheld Showerhead. Before we dive into the step-by-step instructions, let’s gain a better understanding of what the flow restrictor is and why it is used in showerheads.
Key Takeaways:
- Enhance Your Shower Experience
Removing the flow restrictor in your Waterpik® Elite™ Twin Turbo™ Handheld Showerhead can provide a more invigorating shower with a stronger water flow, allowing you to customize your shower experience to your preferences. - Balance Comfort and Conservation
While removing the flow restrictor may increase water usage, it’s important to find a balance between a satisfying shower experience and water conservation, ensuring responsible water consumption while enjoying a customized shower.
Understanding the Flow Restrictor
Before attempting to remove the flow restrictor in your Waterpik® Elite™ Twin Turbo™ Handheld Showerhead, it’s essential to understand its purpose and function. The flow restrictor is a small, circular plastic insert located behind the showerhead’s faceplate. Its primary objective is to regulate and reduce the water flow rate, ensuring water conservation.
Flow restrictors are commonly used in showerheads and other plumbing fixtures as a part of water-saving measures. By limiting water flow, they help reduce water consumption and promote sustainable living. This eco-friendly feature is particularly beneficial in areas with water scarcity or high water utility costs.
Although flow restrictors are essential for water conservation, some individuals may find that the restricted flow is not sufficient for their preferences. If you desire a stronger water flow for a more invigorating shower experience, removing the flow restrictor can provide the desired result.
It’s important to note that removing the flow restrictor may increase water usage, and as a result, your utility bill. Additionally, it’s crucial to check local regulations regarding water flow restrictions before proceeding. Keep in mind that altering the flow of water may not be permitted in certain areas.
Now that we have a better understanding of the flow restrictor, let’s gather the necessary tools and materials to complete the process.
Tools and Materials Needed
Before you begin the process of removing the flow restrictor in your Waterpik® Elite™ Twin Turbo™ Handheld Showerhead, gather the following tools and materials:
- Adjustable wrench or pliers
- Cloth or towel
- Teflon tape
- Bucket or container (optional)
An adjustable wrench or pliers will be necessary to loosen and remove the showerhead. Choose the tool that you are most comfortable using and ensure it fits securely around the showerhead without causing damage. A cloth or towel will come in handy to protect the finish of the showerhead and provide a better grip during the removal process.
Teflon tape is a thin, white tape that is used to create a watertight seal when reassembling the showerhead. It is recommended to use Teflon tape specifically designed for plumbing applications. The tape will help prevent any potential leaks once the flow restrictor is removed.
Lastly, a bucket or container is optional but can be useful to catch any excess water that may drip during the process. This will help minimize mess and keep your bathroom floor dry.
Now that you have gathered all the necessary tools and materials, let’s proceed with the step-by-step guide on removing the flow restrictor in your Waterpik® Elite™ Twin Turbo™ Handheld Showerhead.
To remove the flow restrictor in the Waterpik® Elite™ Twin Turbo™ Handheld Showerhead, unscrew the showerhead from the hose and locate the flow restrictor inside the connection. Use a pair of needle-nose pliers to gently pull out the flow restrictor, and then reattach the showerhead to the hose.
Step-by-Step Guide: Removing the Flow Restrictor in Waterpik® Elite™ Twin Turbo™ Handheld Showerhead
Follow these simple steps to remove the flow restrictor in your Waterpik® Elite™ Twin Turbo™ Handheld Showerhead:
- Turn off the water supply: Before you begin, ensure that the water supply to your shower is turned off. This will prevent any water from flowing while you remove the showerhead.
- Wrap the showerhead: Use a cloth or towel to wrap around the showerhead. This will protect the finish and provide a better grip for the removal process.
- Gently unscrew the showerhead: Use an adjustable wrench or pliers to loosen and unscrew the showerhead in an anticlockwise direction. Be careful not to apply excessive force or damage the showerhead in the process.
- Remove the flow restrictor: After removing the showerhead, you will notice a circular plastic insert behind the faceplate. This is the flow restrictor. Carefully pull it out using your fingers or a pair of pliers.
- Inspect the flow restrictor: Take a moment to examine the flow restrictor and ensure it is intact. If you wish to reinstall it at a later time, it’s important to keep it in good condition.
- Clean and reassemble: While the showerhead is removed, take the opportunity to clean any debris or buildup that may have accumulated. Use a soft brush or cloth to remove any grime. Once cleaned, reassemble the showerhead by screwing it back onto the shower arm in a clockwise direction.
- Apply Teflon tape: Before fully tightening the showerhead, wrap a few layers of Teflon tape around the shower arm’s threads. This will create a watertight seal and prevent any leaks.
- Tighten the showerhead: Use an adjustable wrench or pliers to securely tighten the showerhead onto the shower arm. Be careful not to overtighten, as it may damage the showerhead or cause leaks.
- Turn on the water supply: Once the showerhead is securely in place, turn on the water supply to your shower. Check for any leaks around the connections and ensure that the water flow is as desired.
Following these steps will allow you to successfully remove the flow restrictor in your Waterpik® Elite™ Twin Turbo™ Handheld Showerhead. Enjoy your shower with the enhanced water flow!
Tips and Precautions
When removing the flow restrictor in your Waterpik® Elite™ Twin Turbo™ Handheld Showerhead, keep the following tips and precautions in mind:
- Check local regulations: Before making any modifications to your showerhead, be sure to check local regulations regarding water flow restrictions. In some areas, removing the flow restrictor may not be allowed.
- Use caution when using tools: When using an adjustable wrench or pliers to remove the showerhead, exercise caution to avoid damaging the showerhead or surrounding fixtures. Use a tool that fits securely without applying excessive force.
- Protect the finish: To prevent scratches or damage to the showerhead’s finish, wrap it with a cloth or towel before attempting to remove it.
- Inspect the flow restrictor: After removing the flow restrictor, inspect it to ensure it is intact. If you plan to reinstall it at a later time, store it in a safe place.
- Clean the showerhead: Take advantage of the opportunity to clean the showerhead while it is removed. Use a soft brush or cloth to remove any debris or buildup. This will help maintain optimal water flow.
- Apply Teflon tape correctly: When reassembling the showerhead, make sure to apply Teflon tape to the shower arm’s threads in a clockwise direction. This will create an effective seal and prevent leaks.
- Avoid overtightening: While tightening the showerhead onto the shower arm, be careful not to overtighten. Doing so may cause damage or leaks. Use an adjustable wrench or pliers to tighten it securely without excess force.
- Test for leaks: After turning on the water supply, carefully check for any leaks around the connections. If you notice any leaks, use the adjustable wrench or pliers to tighten the showerhead further.
- Balance water conservation and comfort: Removing the flow restrictor may increase water usage. Consider finding a balance between a satisfying shower experience and water conservation by adjusting the flow to your preference.
By following these tips and taking proper precautions, you can successfully remove the flow restrictor from your Waterpik® Elite™ Twin Turbo™ Handheld Showerhead and enjoy a customized shower experience.
Read also: 9 Best Low Flow Handheld Showerhead for 2025
Conclusion
Removing the flow restrictor in your Waterpik® Elite™ Twin Turbo™ Handheld Showerhead can be a simple and effective way to enhance your showering experience. While the flow restrictor serves a valuable purpose in conserving water, some individuals prefer a stronger water flow for a more invigorating shower.
By following the step-by-step guide provided in this article and using the necessary tools and materials, you can easily remove the flow restrictor and enjoy a more powerful water flow. However, it’s important to check local regulations regarding water flow restrictions before proceeding.
Throughout the process, remember to exercise caution when using tools to avoid damaging the showerhead or surrounding fixtures. Take the opportunity to clean the showerhead and inspect the flow restrictor for future use, if desired. When reassembling the showerhead, ensure a watertight seal by applying Teflon tape correctly and avoiding overtightening.
Ultimately, finding the right balance between water conservation and personal comfort is essential. Removing the flow restrictor may increase water consumption, so it’s important to be mindful of your usage and strive for sustainable living.
Now that you have a comprehensive understanding of how to remove the flow restrictor in your Waterpik® Elite™ Twin Turbo™ Handheld Showerhead, you can revitalize your showering experience and enjoy the perfect water flow for your preferences.
Remember, always stay informed about local regulations and consider the impact on water usage. With proper care and consideration, you can customize your shower experience while promoting responsible water consumption.
Now that you're on your way to mastering the removal of flow restrictors, why not dive deeper into showerhead options? Check out our guide on the latest models for a refreshing shower upgrade. You'll find everything needed to make an informed choice about which handheld showerhead suits your needs best.
Frequently Asked Questions about How To Remove Flow Restrictor In Waterpik® Elite™ Twin Turbo™ Handheld Showerhead
Was this page helpful?
At Storables.com, we guarantee accurate and reliable information. Our content, validated by Expert Board Contributors, is crafted following stringent Editorial Policies. We're committed to providing you with well-researched, expert-backed insights for all your informational needs.


0 thoughts on “How To Remove Flow Restrictor In Waterpik® Elite™ Twin Turbo™ Handheld Showerhead”