Home>Articles>How To Remove Melted Plastic From Toaster Oven
Articles
How To Remove Melted Plastic From Toaster Oven
Modified: September 1, 2024
Learn effective techniques and tips to safely remove melted plastic from your toaster oven with our informative articles.
(Many of the links in this article redirect to a specific reviewed product. Your purchase of these products through affiliate links helps to generate commission for Storables.com, at no extra cost. Learn more)
Introduction
Having a melted plastic mishap in your toaster oven can be quite a frustrating experience. Whether it’s a forgotten plastic container or a melted utensil, it can leave your toaster oven in a sticky and unpleasant condition. However, fear not! With the right techniques and a little bit of patience, you can effectively remove the melted plastic from your toaster oven and have it looking as good as new.
In this article, we will guide you through the step-by-step process of removing melted plastic from your toaster oven. From gathering the necessary materials to reconnecting the power source, we will cover everything you need to know to tackle this challenging task.
Before we proceed, it’s important to note that safety should be your top priority. Always ensure that the toaster oven is disconnected from the power source before attempting any cleaning. Additionally, take proper precautions to protect yourself from heat and potentially harmful cleaning solutions.
Now let’s dive into the details of how to successfully remove melted plastic from your toaster oven!
Key Takeaways:
- Safely and effectively remove melted plastic from your toaster oven by following a step-by-step process, using simple materials and cleaning solutions, and prioritizing safety throughout the cleaning process.
- Prevent future mishaps by being mindful of the items you place in your toaster oven, and enjoy the convenience of a clean and functional appliance after successfully removing melted plastic.
Step 1: Gather the necessary materials
Before you begin the process of removing melted plastic from your toaster oven, it’s essential to gather all the necessary materials. Having these items on hand will make the cleaning process more efficient and effective.
Here’s a list of the materials you’ll need:
- Gloves: Protect your hands from heat and cleaning solutions by wearing gloves.
- Mask: A mask will prevent you from inhaling any fumes or particles released during the cleaning process.
- Plastic scraper or spatula: Use a plastic scraper or spatula to gently remove any loose plastic from the toaster oven. Avoid using metal utensils, as they could damage the oven’s interior.
- Heat-resistant cleaning sponge: Choose a sponge that is safe to use on hot surfaces.
- Dish soap: Use a mild dish soap as part of the cleaning solution.
- Baking soda: Baking soda is an excellent natural cleaning agent that can help to remove stubborn stains.
- White vinegar: Vinegar is another effective cleaning agent that can help to dissolve the melted plastic.
- Hot water: Hot water will be used to rinse and wipe down the toaster oven.
- Clean cloth or towel: Have a clean cloth or towel ready to dry the toaster oven after cleaning.
By gathering these materials beforehand, you’ll be well-prepared to tackle the task at hand. It’s important to note that these materials may vary depending on your specific cleaning preference and the type of toaster oven you have. Make sure to read the manufacturer’s instructions before using any cleaning agents to ensure they are suitable for your appliance.
Once you have all the necessary materials ready, you can move on to the next step of disconnecting the power source.
Step 2: Disconnect the power source
Before you start cleaning the melted plastic from your toaster oven, it’s vital to ensure your safety by disconnecting the power source. This step will prevent any accidents and protect you from electric shock.
Follow these steps to disconnect the power source:
- Unplug the toaster oven: Locate the plug and gently pull it out from the electrical outlet. Ensure that the oven is completely disconnected from the power source before proceeding.
- Confirm power off: Double-check that the toaster oven is turned off and that no power is running through it. Look for any lights or indicators that may indicate that the oven is still on.
By taking these precautions, you will minimize any potential risks and create a safe environment for the cleaning process.
Once you’ve disconnected the power source, it’s time to allow the toaster oven to cool down before proceeding to the next step.
Step 3: Allow the toaster oven to cool down
After disconnecting the power source, the next step in removing melted plastic from your toaster oven is to allow it to cool down. This is important for two reasons: your safety and the effectiveness of the cleaning process.
Here’s what you need to do:
- Give it time: Depending on the severity of the melted plastic and how long it has been stuck to the toaster oven, it may take some time for the oven to cool down completely. Patience is key, so let it cool naturally without attempting to speed up the process.
- Prevent damage: Cooling down the toaster oven prevents any potential damage to the appliance itself. Sudden temperature changes or adding water to a hot surface can cause the oven’s glass or interior to crack or shatter.
By allowing the toaster oven to cool down, you ensure your safety and minimize the risk of damaging the appliance during the cleaning process.
Once the toaster oven has cooled down, you’re ready to move on to the next step of removing any loose plastic pieces.
Step 4: Remove loose plastic pieces
Now that your toaster oven has cooled down, it’s time to remove any loose plastic pieces. This step is crucial to prevent further damage and make the cleaning process easier.
- Put on gloves: To protect your hands during the cleaning process, it’s essential to wear gloves.
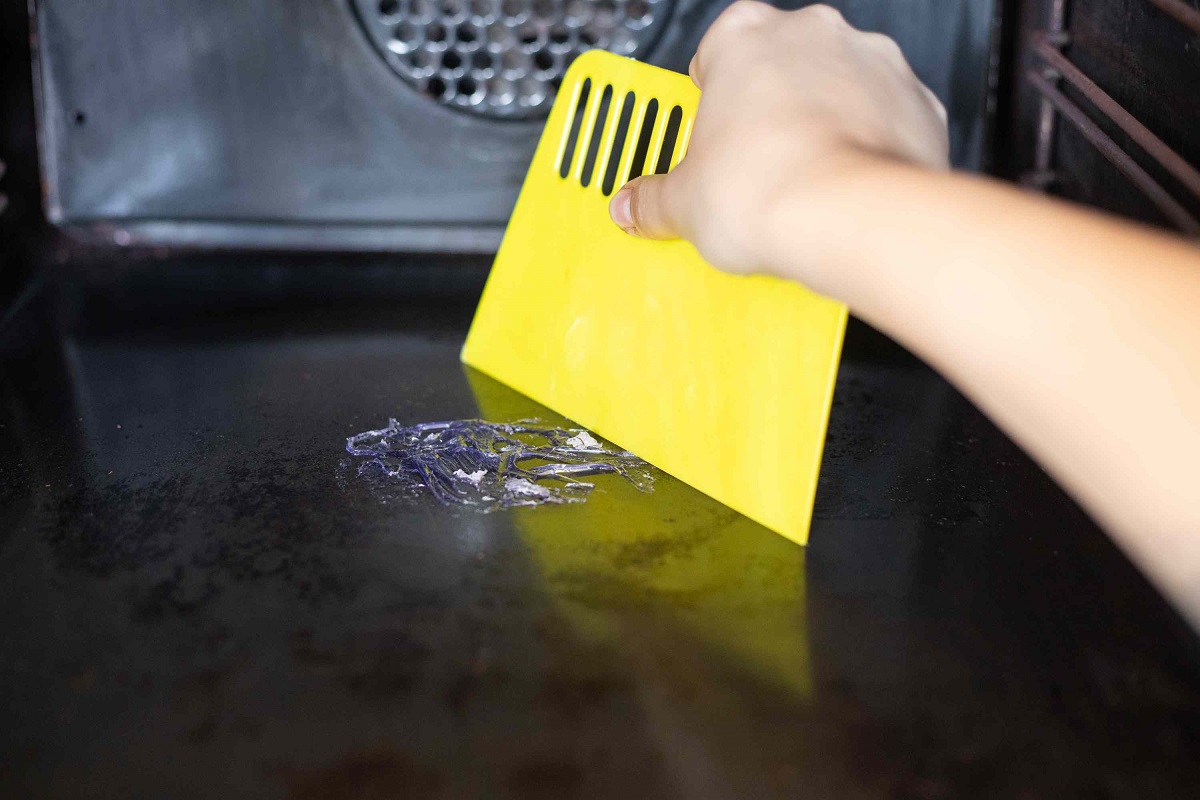
- Use a plastic scraper or spatula: Carefully use a plastic scraper or spatula to gently scrape off any loose or melted plastic. Avoid using metal utensils as they can scratch or damage the interior of the toaster oven.
- Be gentle: Take your time and be gentle while removing the plastic. Apply light pressure to avoid scratching the surfaces.
- Dispose of the plastic: Place the removed plastic pieces in a trash bag or suitable container for proper disposal.
It’s important to note that not all the melted plastic may come off during this step. Stubborn or hardened plastic may require additional cleaning methods, which we will discuss in the following steps.
By removing any loose plastic pieces, you’ll ensure a cleaner and more effective cleaning process. With this step completed, you can now move on to preparing a cleaning solution.
Step 5: Prepare a cleaning solution
Now that you’ve removed the loose plastic pieces from your toaster oven, it’s time to prepare a cleaning solution that will help break down the melted plastic residue and remove any stubborn stains.
- Heat-resistant cleaning sponge: Choose a sponge that is safe to use on hot surfaces to avoid any damage to your toaster oven.
- Dish soap: Mild dish soap works well as a cleaning agent, helping to dissolve the melted plastic and remove grease or grime.
- Baking soda: Baking soda is a natural and effective cleaning agent that can help tackle stubborn stains and odors.
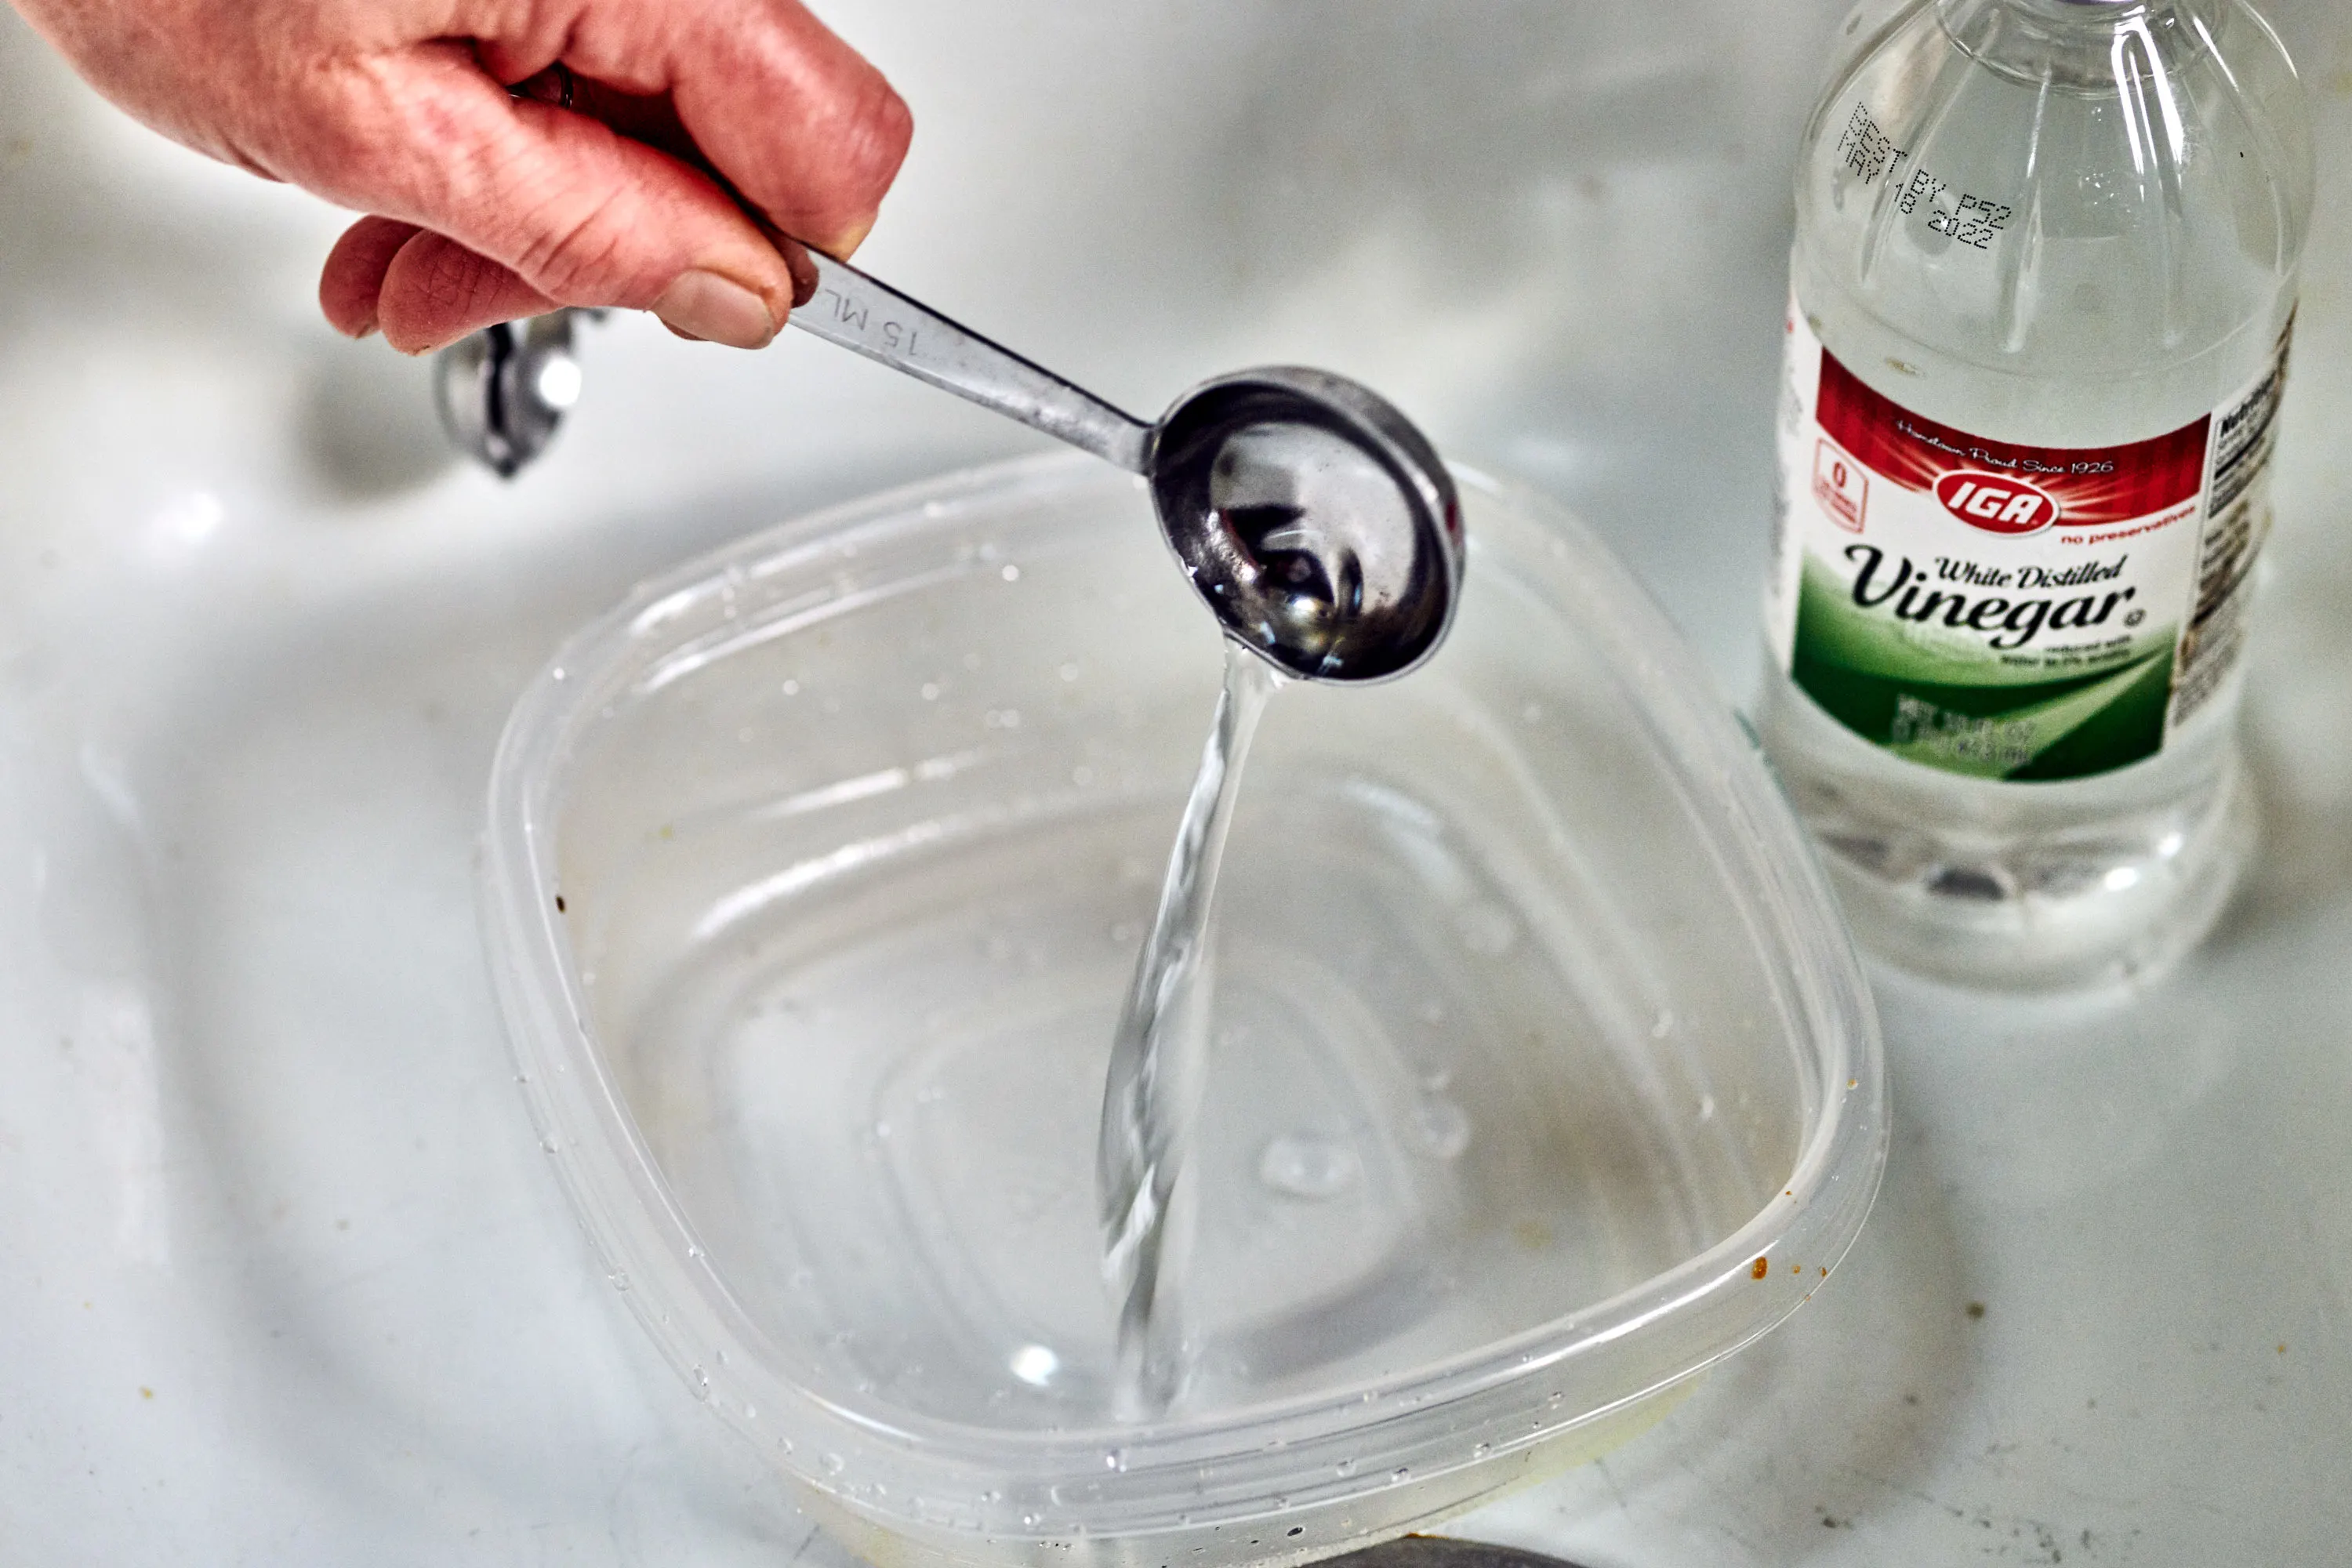
- White vinegar: Vinegar is another powerful cleaning solution that can help break down the melted plastic residue.
Here’s how to prepare the cleaning solution:
- Fill a bucket or sink with warm water.
- Add a few drops of mild dish soap and mix well until it creates a soapy solution.
- Add one tablespoon of baking soda to the soapy water and stir it in.
- For extra cleaning power, you can also add a splash of white vinegar to the solution.
By combining these ingredients, you’ll create a powerful yet gentle cleaning solution to tackle the melted plastic on your toaster oven.
With the cleaning solution ready, you’re now prepared to apply it to the affected areas of the toaster oven in the next step.
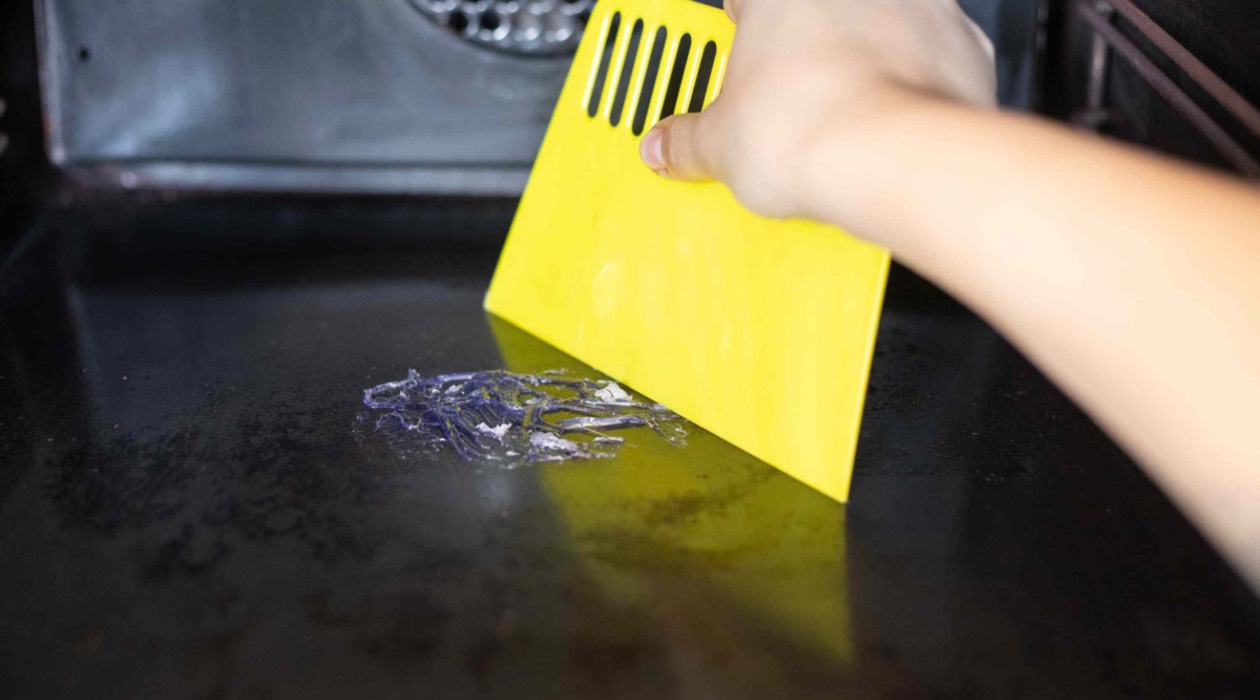
Use a plastic scraper to gently remove as much melted plastic as possible. Then, apply ice to harden the remaining plastic and carefully scrape it off. Finally, use a mixture of baking soda and water to scrub off any residue.
Step 6: Apply the cleaning solution
With the cleaning solution prepared, it’s time to apply it to the affected areas of your toaster oven. The cleaning solution will help to break down the melted plastic and remove any stubborn residue.
- Put on gloves to protect your hands during the cleaning process.
- Take a clean sponge and dip it into the prepared cleaning solution.
- Gently squeeze out any excess liquid from the sponge to avoid excessive moisture.
- Apply the cleaning solution to the areas with melted plastic, focusing on the most affected areas.
- Let the cleaning solution sit on the plastic for a few minutes to allow it to penetrate and soften the residue.
It’s important to be careful not to saturate the toaster oven with excessive liquids, especially if it has electrical components. Avoid getting the cleaning solution on heating elements or other sensitive parts of the appliance.
By applying the cleaning solution, you’re taking a crucial step in breaking down the melted plastic and preparing it for removal. Once the solution has had some time to work its magic, you can move on to the next step of scrubbing the affected areas.
Step 7: Scrub the affected areas
After allowing the cleaning solution to sit for a few minutes, it’s time to scrub the affected areas of your toaster oven. Scrubbing will help to loosen the melted plastic residue and remove it from the surface of the appliance.
- Put on gloves to protect your hands during the cleaning process.
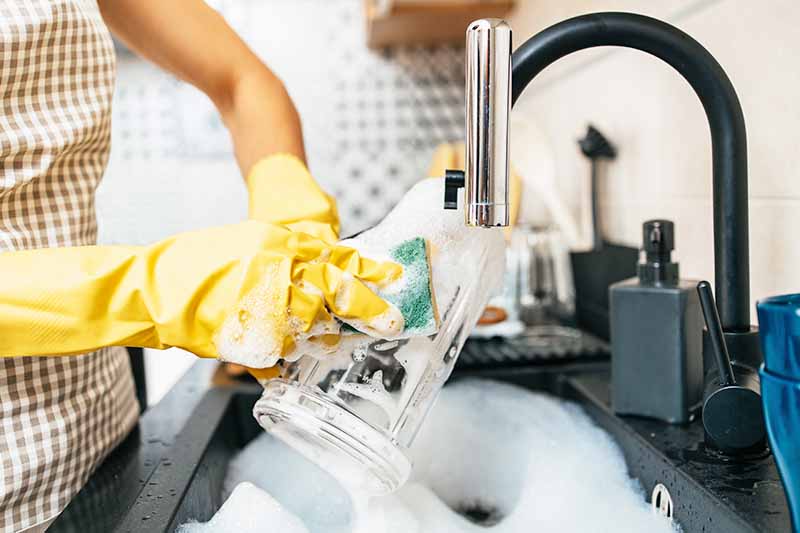
- Take a clean sponge or a soft-bristled brush and use it to scrub the affected areas.
- Apply gentle pressure as you scrub, focusing on any remaining melted plastic residue.
- Continue scrubbing until the melted plastic starts to come off and the surface feels smooth.
- If necessary, dip the sponge or brush into the cleaning solution again and reapply it to stubborn areas.
- Rinse the sponge or brush frequently to remove any loosened plastic particles.
Be cautious not to scrub too hard or use abrasive materials, as this can damage the surface of the toaster oven. Take your time and be patient, especially with stubborn areas that may require additional attention.
By scrubbing the affected areas, you’ll effectively remove the melted plastic residue and restore the cleanliness of your toaster oven. Once you’re satisfied with the results, it’s time to move on to the next step of rinsing and wiping down the appliance.
Step 8: Rinse and wipe down the toaster oven
After successfully scrubbing off the melted plastic residue from your toaster oven, it’s essential to rinse and wipe down the appliance to remove any remaining cleaning solution and ensure a clean and spotless finish.
- Fill a clean bucket or sink with warm water.
- Dip a clean sponge or cloth into the water and wring out any excess moisture.
- Thoroughly rinse the affected areas of the toaster oven, ensuring that all traces of the cleaning solution are removed.
- Wipe down the entire interior and exterior of the toaster oven, removing any residual cleaning solution.
- Pay special attention to the areas where the melted plastic was present to ensure they are thoroughly cleaned.
- For stubborn areas or spots, you can dampen the cloth with a small amount of white vinegar and wipe them down.
- Once the rinsing and wiping down are complete, use a dry cloth or towel to dry the toaster oven completely.
Make sure to check that no moisture remains inside the toaster oven before reconnecting the power source. This will prevent any electrical issues or potential damage.
By rinsing and wiping down the toaster oven, you’ll remove any residue from the cleaning solution and leave it looking clean and refreshed.
With the cleaning process almost complete, let’s move on to the next step of repeating if necessary.
Read more: How To Remove Stains From Toaster Oven Tray
Step 9: Repeat if necessary
Sometimes, removing melted plastic from a toaster oven may require multiple attempts to completely eliminate all traces of residue. If you find that there are still lingering bits of melted plastic or stubborn stains, don’t worry – you can repeat the cleaning process.
- Inspect the toaster oven: Take a close look at the appliance to determine if there are any remaining melted plastic or stains.
- If needed, prepare the cleaning solution again: If you find that additional cleaning is necessary, prepare another batch of the cleaning solution as mentioned in Step 5.
- Apply the cleaning solution: Repeat Steps 6 and 7 by applying the cleaning solution to the affected areas and scrubbing gently with a sponge or brush.
- Rinse and wipe down again: Repeat Step 8 by rinsing and wiping down the toaster oven to remove any remaining residue.
- Inspect and repeat if needed: Assess the toaster oven after each cleaning attempt and repeat the process if necessary until all melted plastic and stains are completely eliminated.
By repeating the cleaning process, you’ll ensure that your toaster oven is thoroughly cleaned and free from any melted plastic or residue that may affect its performance or appearance.
Once you’re satisfied with the results, it’s time to move on to the final step of reconnecting the power source.
Step 10: Reconnect the power source
After successfully removing the melted plastic and thoroughly cleaning your toaster oven, it’s time to reconnect the power source and get it ready for use again.
- Double-check the cleanliness: Before reconnecting the power source, ensure that the toaster oven is completely dry and free from any cleaning solution or moisture.
- Position the toaster oven: Place the appliance back in its designated spot on your kitchen countertop or wherever it was previously positioned.
- Plug it in: Gently insert the plug into the electrical outlet and ensure it is securely connected.
- Turn on the toaster oven: Switch on the toaster oven using the appropriate controls as directed by the manufacturer.
- Test it out: Once the oven is turned on, test its functionality to ensure that it is working properly.
It’s important to follow these steps carefully to ensure that the toaster oven is fully operational and safe to use. By reconnecting the power source, you can once again enjoy the convenience and benefits of your freshly cleaned toaster oven.
With that, you’ve successfully gone through the step-by-step process of removing melted plastic from your toaster oven. Congratulations on successfully restoring your appliance to its pristine condition.
Remember, prevention is the best approach, so be mindful of any plastic items that you place inside the toaster oven to avoid future mishaps. Enjoy using your clean and functional toaster oven for all your toasting and baking needs!
If you have any further questions or concerns, make sure to consult the appliance’s manufacturer or seek professional assistance.
Happy toasting!
Conclusion
Removing melted plastic from your toaster oven can be a challenging task, but with the right techniques and a little bit of patience, you can successfully restore your appliance to its original condition. By following the step-by-step process outlined in this article, you can effectively remove the melted plastic and prevent any further damage to your toaster oven.
We started by gathering the necessary materials, including gloves, plastic scraper, cleaning sponge, dish soap, baking soda, white vinegar, hot water, and a clean cloth. Then, we emphasized the importance of disconnecting the power source to ensure your safety throughout the cleaning process.
Next, we allowed the toaster oven to cool down and removed any loose plastic pieces. We then prepared a cleaning solution using mild dish soap, baking soda, white vinegar, and warm water.
Applying the cleaning solution and scrubbing the affected areas helped to break down the melted plastic residue. We then rinsed and wiped down the toaster oven to remove any remaining cleaning solution.
If necessary, we recommended repeating the cleaning process to ensure a thorough removal of the melted plastic. Finally, we concluded by reconnecting the power source and testing the toaster oven to ensure its proper functionality.
Remember, safety should always be a priority when dealing with a toaster oven or any electrical appliance. Always follow the manufacturer’s instructions and take necessary precautions to protect yourself and the appliance.
With the melted plastic residue removed and your toaster oven looking as good as new, you can start enjoying its functionality and convenience again. Regular maintenance and avoiding plastic items in the toaster oven can help prevent future mishaps.
Thank you for reading our comprehensive guide on how to remove melted plastic from a toaster oven. We hope you found it helpful and informative. Happy toasting!
Frequently Asked Questions about How To Remove Melted Plastic From Toaster Oven
Was this page helpful?
At Storables.com, we guarantee accurate and reliable information. Our content, validated by Expert Board Contributors, is crafted following stringent Editorial Policies. We're committed to providing you with well-researched, expert-backed insights for all your informational needs.


0 thoughts on “How To Remove Melted Plastic From Toaster Oven”