Articles
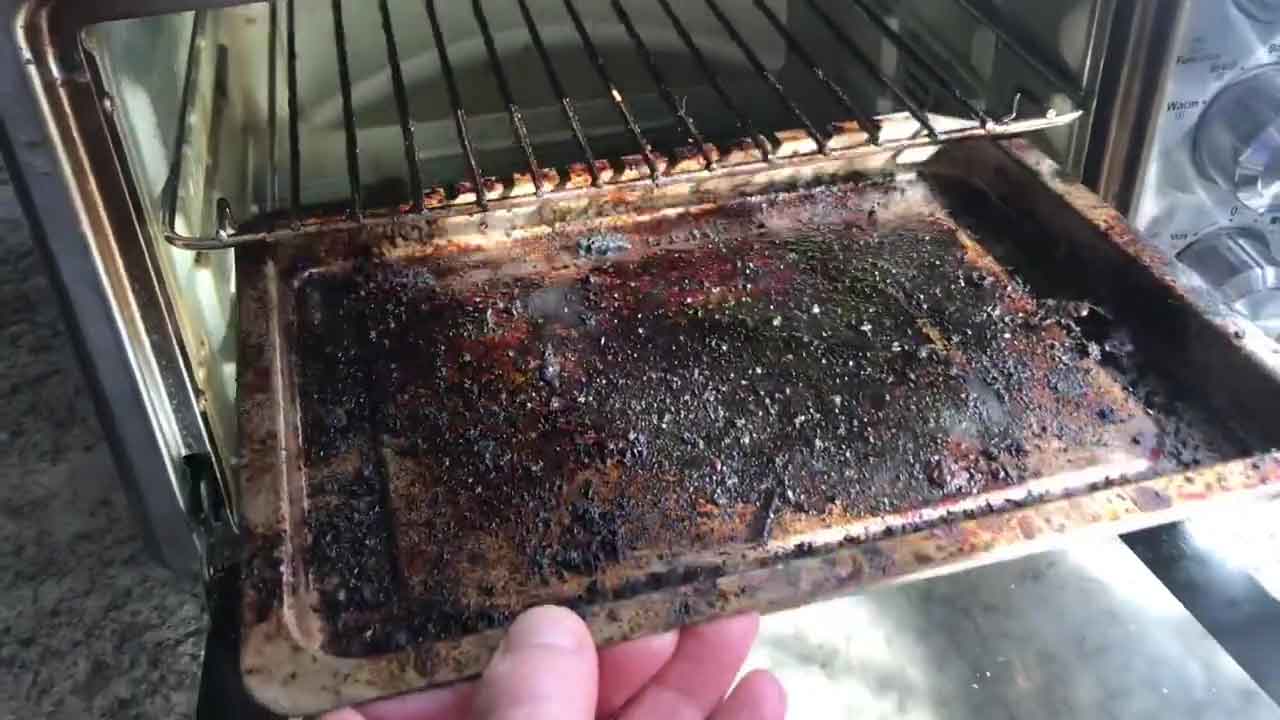
How To Remove Stains From Toaster Oven Tray
Modified: September 1, 2024
Looking for articles on how to remove stains from your toaster oven tray? Discover effective tips and tricks to get your tray sparkling clean again.
(Many of the links in this article redirect to a specific reviewed product. Your purchase of these products through affiliate links helps to generate commission for Storables.com, at no extra cost. Learn more)
Introduction
A toaster oven tray is an essential accessory for any kitchen, providing a convenient way to cook and reheat food. However, over time, these trays can become stained and dirty from grease, food residue, and other substances. Not only can these stains affect the appearance of your toaster oven tray, but they can also impact the quality and taste of your cooked food. Therefore, it is important to regularly clean and maintain your toaster oven tray to ensure optimal performance.
Removing stains from a toaster oven tray may seem like a daunting task, but with the right techniques and cleaning supplies, it can be a relatively straightforward process. In this article, we will explore different methods to effectively remove stains from your toaster oven tray, including grease and baked-on residue, burnt-on food particles, rust stains, and mineral stains.
By following the steps outlined in this article, you will not only restore the cleanliness and functionality of your toaster oven tray but also prolong its lifespan. So let’s dive in and learn how to effectively remove stains from your toaster oven tray!
Key Takeaways:
- Regularly cleaning your toaster oven tray not only ensures food safety and taste quality but also prolongs its lifespan and enhances your kitchen’s aesthetics.
- Gather the necessary cleaning supplies and follow specific methods to effectively remove different types of stains, ensuring a clean and functional toaster oven tray.
Read also: 15 Incredible Toaster Oven Tray For 2025
Importance of Keeping Your Toaster Oven Tray Clean
Maintaining a clean toaster oven tray is essential for several reasons. First and foremost, a clean tray ensures the hygiene and safety of your food. Over time, food particles can accumulate on the tray, leading to the growth of bacteria and potentially causing foodborne illnesses. Cleaning your toaster oven tray regularly eliminates this risk and ensures that your cooked meals are safe to consume.
In addition to food safety, keeping your toaster oven tray clean also helps maintain the taste and quality of your dishes. Stains and buildup on the tray can transfer onto your food, altering its flavor and texture. By regularly cleaning your tray, you can ensure that your meals are cooked evenly and taste their best.
Another important aspect to consider is the longevity of your toaster oven tray. Stains and residue can corrode the surface of the tray, potentially causing damage and reducing its lifespan. By cleaning your tray regularly and removing any stains, you can extend its durability and prevent the need for premature replacement.
Cleanliness is also key when it comes to the overall aesthetics of your kitchen. A dirty and stained toaster oven tray can be an eyesore and detract from the visual appeal of your kitchen. Regularly cleaning your tray not only improves its appearance but also contributes to a clean and welcoming cooking environment.
Lastly, a clean toaster oven tray is easier to maintain and prevents the buildup of stubborn stains. By dedicating a few minutes to cleaning your tray after each use, you can avoid the need for more intensive cleaning methods down the line. This saves you time and effort in the long run.
In summary, there are several compelling reasons to keep your toaster oven tray clean. From ensuring food safety and maintaining the taste of your meals to prolonging the tray’s lifespan and enhancing the aesthetics of your kitchen, regular cleaning is a small but significant task that yields numerous benefits.
Understanding the Different Types of Stains
Before diving into the cleaning methods, it is important to understand the different types of stains that can accumulate on your toaster oven tray. Each type of stain requires a specific approach to effectively remove it. Here are the common types of stains you may encounter:
- Grease and Baked-on Residue: Over time, oils and fats from cooking can accumulate on the tray, resulting in greasy stains. Baked-on residue refers to food particles that have hardened and adhered to the surface, making them difficult to remove.
- Burnt-on Food Particles: When food spills or splatters onto the tray and is left unattended, it can burn and become stuck to the surface. Burnt-on food particles can leave stubborn stains that require specific cleaning methods.
- Rust Stains: If your toaster oven tray is made of metal, it can be susceptible to rust formation, especially when exposed to moisture. Rust stains not only affect the appearance of the tray but can also affect the taste and quality of your food.
- Mineral Stains: If you live in an area with hard water, mineral stains can develop on your toaster oven tray. These stains are usually caused by mineral deposits from the water, leaving unsightly marks.
By identifying the type of stain you are dealing with, you can choose the appropriate cleaning method and achieve the best results. In the following sections, we will explore different cleaning techniques for each type of stain, providing you with the knowledge and tools to restore your toaster oven tray to its former glory.
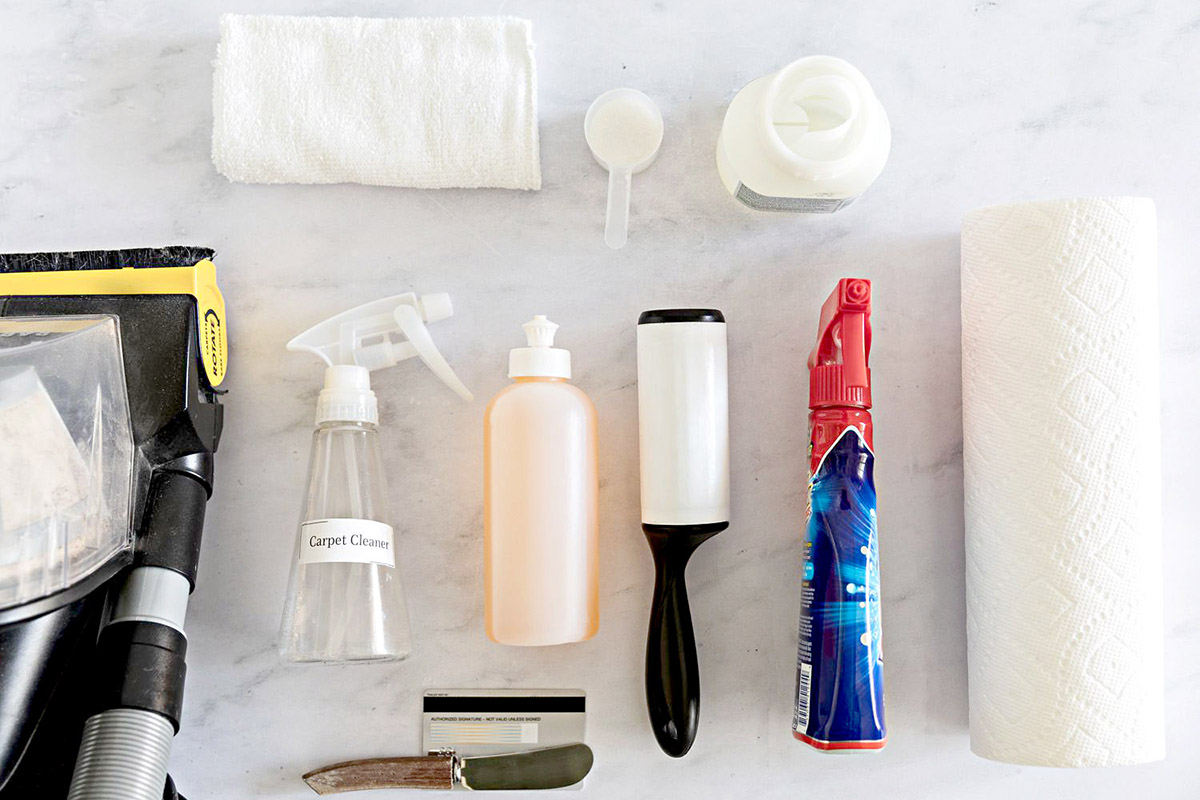
Preparing the Necessary Cleaning Supplies
Before you begin the process of removing stains from your toaster oven tray, it is important to gather the necessary cleaning supplies. Having these items ready will ensure that you can tackle the task efficiently and effectively. Here are the supplies you will need:
- Baking Soda: Baking soda is a versatile and gentle abrasive that can effectively remove stains without damaging the surface of your toaster oven tray. It also helps to neutralize odors and disinfect the tray.
- Vinegar: Vinegar is a natural cleaning agent that is effective in removing grease, baked-on residue, and mineral stains. Its acidic properties help to break down stains and dissolve buildup on the tray.
- Dish Soap: A mild dish soap is an essential component for removing grease and grime from your toaster oven tray. Opt for a gentle formula that is effective in cutting through grease without leaving behind residue.
- Lemon Juice: Lemon juice is another natural ingredient that can help tackle stains, especially rust stains. Its acidic properties work to break down rust particles and brighten the surface of the tray.
- Soft-bristle Brush or Sponge: To scrub away stains and residue, you will need a soft-bristle brush or sponge. Avoid using abrasive scrubbers or rough materials that may scratch the surface of the tray.
- Microfiber Cloth: A microfiber cloth is ideal for wiping away cleaning solutions and drying the tray. It is gentle yet effective in removing residue and leaving a streak-free finish.
- Gloves: As you will be working with cleaning solutions, it is advisable to wear gloves to protect your hands from any potential irritation or harsh chemicals.
Ensure that you have all these cleaning supplies readily available before starting the stain removal process. Having the right tools at your disposal will streamline the cleaning process and help you achieve the best results.
Method 1: Removing Grease and Baked-on Residue
Grease and baked-on residue can be some of the most stubborn stains to remove from your toaster oven tray. However, with the right method, you can effectively tackle these stains and restore the cleanliness of your tray. Follow these steps:
- Step 1: Prepare the tray: Start by removing any loose debris or food particles from the tray. Rinse it with warm water to soften the stains and make the cleaning process easier.
- Step 2: Make a baking soda paste: In a small bowl, mix baking soda with a few tablespoons of water to create a thick paste. Baking soda acts as a gentle abrasive that helps break down grease and baked-on residue.
- Step 3: Apply the baking soda paste: Spread the baking soda paste evenly on the stained areas of the tray. Pay special attention to any particularly stubborn or greasy spots.
- Step 4: Let it sit: Allow the baking soda paste to sit on the stains for about 15-20 minutes. This gives the baking soda time to work its magic and loosen the grease and residue.
- Step 5: Scrub the tray: Using a soft-bristle brush or sponge, gently scrub the tray in circular motions. Apply a bit of pressure, focusing on the areas with stains. The baking soda and scrubbing action will help lift and remove the grease and residue.
- Step 6: Rinse and dry: Once you have thoroughly scrubbed the tray, rinse it with warm water to remove any leftover baking soda residue. Dry the tray using a microfiber cloth or allow it to air dry.
By following these steps, you can effectively remove grease and baked-on residue from your toaster oven tray. Remember to regularly clean your tray to prevent the buildup of stubborn stains and maintain its cleanliness and functionality.
To remove stains from a toaster oven tray, create a paste of baking soda and water, apply it to the stained areas, and let it sit for 15-20 minutes before scrubbing with a sponge or brush. Rinse thoroughly with water.
Method 2: Removing Burnt-on Food Particles
Burnt-on food particles can be a common occurrence on toaster oven trays, especially if there have been spills or splatters that were left unattended. Fortunately, there are effective methods to tackle these stubborn stains and restore your tray to its pristine condition. Follow these steps:
- Step 1: Cool the tray: Before starting the cleaning process, ensure that the toaster oven tray has completely cooled down to avoid any potential burns.
- Step 2: Create a vinegar and baking soda solution: In a small bowl, mix equal parts vinegar and water. Sprinkle baking soda over the burnt-on food particles on the tray.
- Step 3: Apply the solution: Pour the vinegar and water solution over the baking soda on the tray. The mixture will start to fizz, which helps to loosen and lift the burnt-on food particles.
- Step 4: Let it sit: Allow the solution to sit on the tray for approximately 15-20 minutes. This gives the vinegar and baking soda time to penetrate the stains and soften the burnt-on food particles.
- Step 5: Scrub the tray: Using a soft-bristle brush or sponge, scrub the tray in circular motions. Focus on the areas with the burnt-on food particles, applying a bit of pressure to help dislodge the stains.
- Step 6: Rinse and dry: Once you have thoroughly scrubbed the tray, rinse it with warm water to remove any leftover solution and residue. Dry the tray using a microfiber cloth or allow it to air dry.
By following these steps, you can effectively remove burnt-on food particles from your toaster oven tray. Remember to exercise caution when handling the tray, as it may still be hot after use. Regular maintenance and cleaning will help prevent the buildup of burnt-on stains and ensure a clean and functional tray.
Method 3: Removing Rust Stains
If your toaster oven tray is made of metal, it may be prone to rust formation, especially when exposed to moisture. Rust stains not only affect the appearance of the tray but can also impact the taste and quality of your food. However, there are effective methods to remove rust stains and restore the tray’s condition. Follow these steps:
- Step 1: Prepare the tray: Start by rinsing the tray with warm water to remove any loose debris or dirt. Pat it dry with a cloth, but make sure to leave some moisture on the surface for the rust removal process.
- Step 2: Create a lemon juice solution: Squeeze fresh lemon juice into a small bowl. You can also use bottled lemon juice if fresh lemons are not available.
- Step 3: Apply the lemon juice: Dip a cloth or sponge into the lemon juice solution and gently rub it onto the rust stains. Make sure to cover the entire affected area with the lemon juice.
- Step 4: Let it sit: Allow the lemon juice to sit on the rust stains for approximately 15-20 minutes. The acidic properties of the lemon juice will help break down the rust particles and loosen them from the surface of the tray.
- Step 5: Scrub the tray: After the lemon juice has had time to work on the rust stains, use a soft-bristle brush or sponge to scrub the tray. Apply gentle pressure and focus on the areas with the rust stains. The combination of the lemon juice and scrubbing action will help remove the rust.
- Step 6: Rinse and dry: Once you have thoroughly scrubbed the tray, rinse it with warm water to remove any leftover lemon juice and rust residue. Dry the tray using a microfiber cloth or allow it to air dry.
- Step 7: Prevent future rust formation: To prevent future rust formation, make sure to thoroughly dry the tray after each use and store it in a dry location. You can also apply a light coat of cooking oil to the tray to create a protective barrier against moisture.
By following these steps, you can effectively remove rust stains from your toaster oven tray and prevent further rust formation. Remember to regularly inspect and maintain the tray to ensure its longevity and functionality.
Method 4: Removing Mineral Stains
If you live in an area with hard water, mineral stains can develop on your toaster oven tray. These stains are usually caused by mineral deposits from the water, leaving unsightly marks on the surface of the tray. However, there are effective methods to remove mineral stains and restore the tray’s appearance. Follow these steps:
- Step 1: Prepare the tray: Start by rinsing the tray with warm water to remove any loose debris or dirt. Pat it dry with a cloth, but make sure to leave some moisture on the surface for the stain removal process.
- Step 2: Create a vinegar and water solution: In a small bowl, mix equal parts vinegar and water. Vinegar is acidic and helps to dissolve mineral deposits.
- Step 3: Apply the vinegar solution: Dip a cloth or sponge into the vinegar and water solution and gently rub it onto the mineral stains. Make sure to cover the entire affected area with the solution.
- Step 4: Let it sit: Allow the vinegar solution to sit on the mineral stains for approximately 15-20 minutes. The acidic properties of the vinegar will help break down the minerals and loosen them from the surface of the tray.
- Step 5: Scrub the tray: After the vinegar solution has had time to work on the mineral stains, use a soft-bristle brush or sponge to scrub the tray. Apply gentle pressure and focus on the areas with the stains. The combination of the vinegar and scrubbing action will help remove the mineral stains.
- Step 6: Rinse and dry: Once you have thoroughly scrubbed the tray, rinse it with warm water to remove any leftover vinegar solution and mineral residue. Dry the tray using a microfiber cloth or allow it to air dry.
- Step 7: Prevent future mineral stains: To prevent future mineral stains, consider using filtered or distilled water in your toaster oven. This will reduce the amount of minerals that can deposit on the tray. Additionally, regularly cleaning your tray and drying it thoroughly after each use will help prevent the buildup of mineral stains.
By following these steps, you can effectively remove mineral stains from your toaster oven tray and maintain its clean appearance. Regular cleaning and preventive measures will help ensure that your tray remains free from mineral deposits in the long run.
Additional Tips for Maintaining a Clean Toaster Oven Tray
Keeping your toaster oven tray clean is not only about removing stains but also about implementing proper maintenance to prevent future buildup. Here are some additional tips to help you maintain a clean tray:
- Clean the tray after each use: Get into the habit of cleaning your toaster oven tray after each use. This will prevent stains and residue from building up and becoming more difficult to remove later on.
- Use a non-abrasive cleaner: When cleaning your tray, avoid using harsh and abrasive cleaners that can damage the surface. Opt for gentle cleaning agents such as baking soda, vinegar, lemon juice, or mild dish soap.
- Scrub gently: While it’s important to scrub away stains and residue, make sure to do so gently to avoid scratching or damaging the surface of the tray. Use a soft-bristle brush or sponge for scrubbing.
- Dry the tray thoroughly: After cleaning, make sure to dry the tray thoroughly to prevent the formation of new stains or rust. Use a microfiber cloth or allow it to air dry completely.
- Consider using parchment paper or aluminum foil: To minimize the buildup of stains and residue, you can line your tray with parchment paper or aluminum foil before placing food on it. This creates a protective barrier and makes for easier cleanup.
- Regularly inspect for damage: Periodically check your tray for any signs of damage or deterioration. If you notice any cracks, rusting, or warping, consider replacing the tray to maintain optimal performance.
- Store the tray in a dry place: When not in use, store your toaster oven tray in a dry location to prevent moisture buildup and the formation of rust or other stains. Avoid storing it in humid environments or places prone to water exposure.
By implementing these additional tips, you can ensure that your toaster oven tray stays clean and in good condition for a long time. Regular maintenance and preventive measures will not only make the cleaning process easier but also extend the lifespan of your tray.
Conclusion
Keeping your toaster oven tray clean and free from stains is an essential part of maintaining a hygienic and efficient kitchen. By following the methods outlined in this article, you can effectively remove different types of stains, including grease, baked-on residue, burnt-on food particles, rust, and mineral deposits. Regularly cleaning and maintaining your tray will ensure the longevity of its functionality and enhance the overall cooking experience.
Remember to gather the necessary cleaning supplies, such as baking soda, vinegar, lemon juice, dish soap, and a soft-bristle brush or sponge, before embarking on the stain removal process. Each method addresses specific stains, so identifying the type of stain you are dealing with will help you choose the most appropriate cleaning technique.
In addition to removing stains, it’s important to implement preventive measures to keep your tray clean in the future. Some tips include cleaning the tray after each use, using non-abrasive cleaners, being gentle when scrubbing, drying the tray thoroughly, considering the use of parchment paper or aluminum foil, regularly inspecting for damage, and storing the tray in a dry place.
In conclusion, by taking the time to clean and maintain your toaster oven tray, you can ensure food safety, maintain optimal taste and quality, extend the tray’s lifespan, enhance the aesthetics of your kitchen, and simplify future cleaning tasks. With the knowledge and techniques provided in this article, you can confidently tackle stains and keep your toaster oven tray in pristine condition for many delicious meals to come.
Now that you've mastered cleaning your toaster oven tray, why not tackle other common household cleaning challenges? For instance, refrigerators can accumulate all sorts of spills and scents. Learn valuable cleaning tips to ensure every nook and cranny shines, from shelves to bins. Additionally, bathrooms often suffer from stubborn marks. Our guide on stain removal offers practical advice to make your toilet seat look brand new. Jump right into these articles to keep every part of your home spotless and inviting!
Frequently Asked Questions about How To Remove Stains From Toaster Oven Tray
Was this page helpful?
At Storables.com, we guarantee accurate and reliable information. Our content, validated by Expert Board Contributors, is crafted following stringent Editorial Policies. We're committed to providing you with well-researched, expert-backed insights for all your informational needs.


0 thoughts on “How To Remove Stains From Toaster Oven Tray”