Articles
How To Remove Stain From Fence
Modified: August 24, 2024
Learn effective techniques and proven methods for removing stubborn stains from your fence with our informative articles.
(Many of the links in this article redirect to a specific reviewed product. Your purchase of these products through affiliate links helps to generate commission for Storables.com, at no extra cost. Learn more)
Introduction
Having a fence around your property can not only enhance its aesthetic appeal but also provide privacy and security. However, over time, fences can accumulate stains due to factors such as weather exposure, mold, mildew, or even accidental spills. These stains can not only detract from the overall appearance of your fence but also weaken its structural integrity if left untreated.
If you’re faced with the daunting task of removing stains from your fence, fear not! In this article, we will guide you through various methods to effectively and efficiently remove stains from your fence, restoring its beauty and ensuring its longevity.
Before proceeding with any stain removal method, it’s essential to understand the types of stains that can affect fences. This understanding will help you determine the most suitable approach for removing the specific stain on your fence.
Key Takeaways:
- Understanding the type of stain on your fence is crucial for effective removal. Different stains require specific methods, such as using a pressure washer for water stains and a bleach solution for mold and mildew stains.
- Prioritize safety when removing stains from your fence by wearing protective gear, following product instructions, and maintaining proper ventilation. Regular maintenance and preventive measures can help keep your fence looking fresh and stain-free.
Read more: How To Remove Stains From Mattress
Understanding the types of stains on fences
Fences can be subject to different types of stains, including:
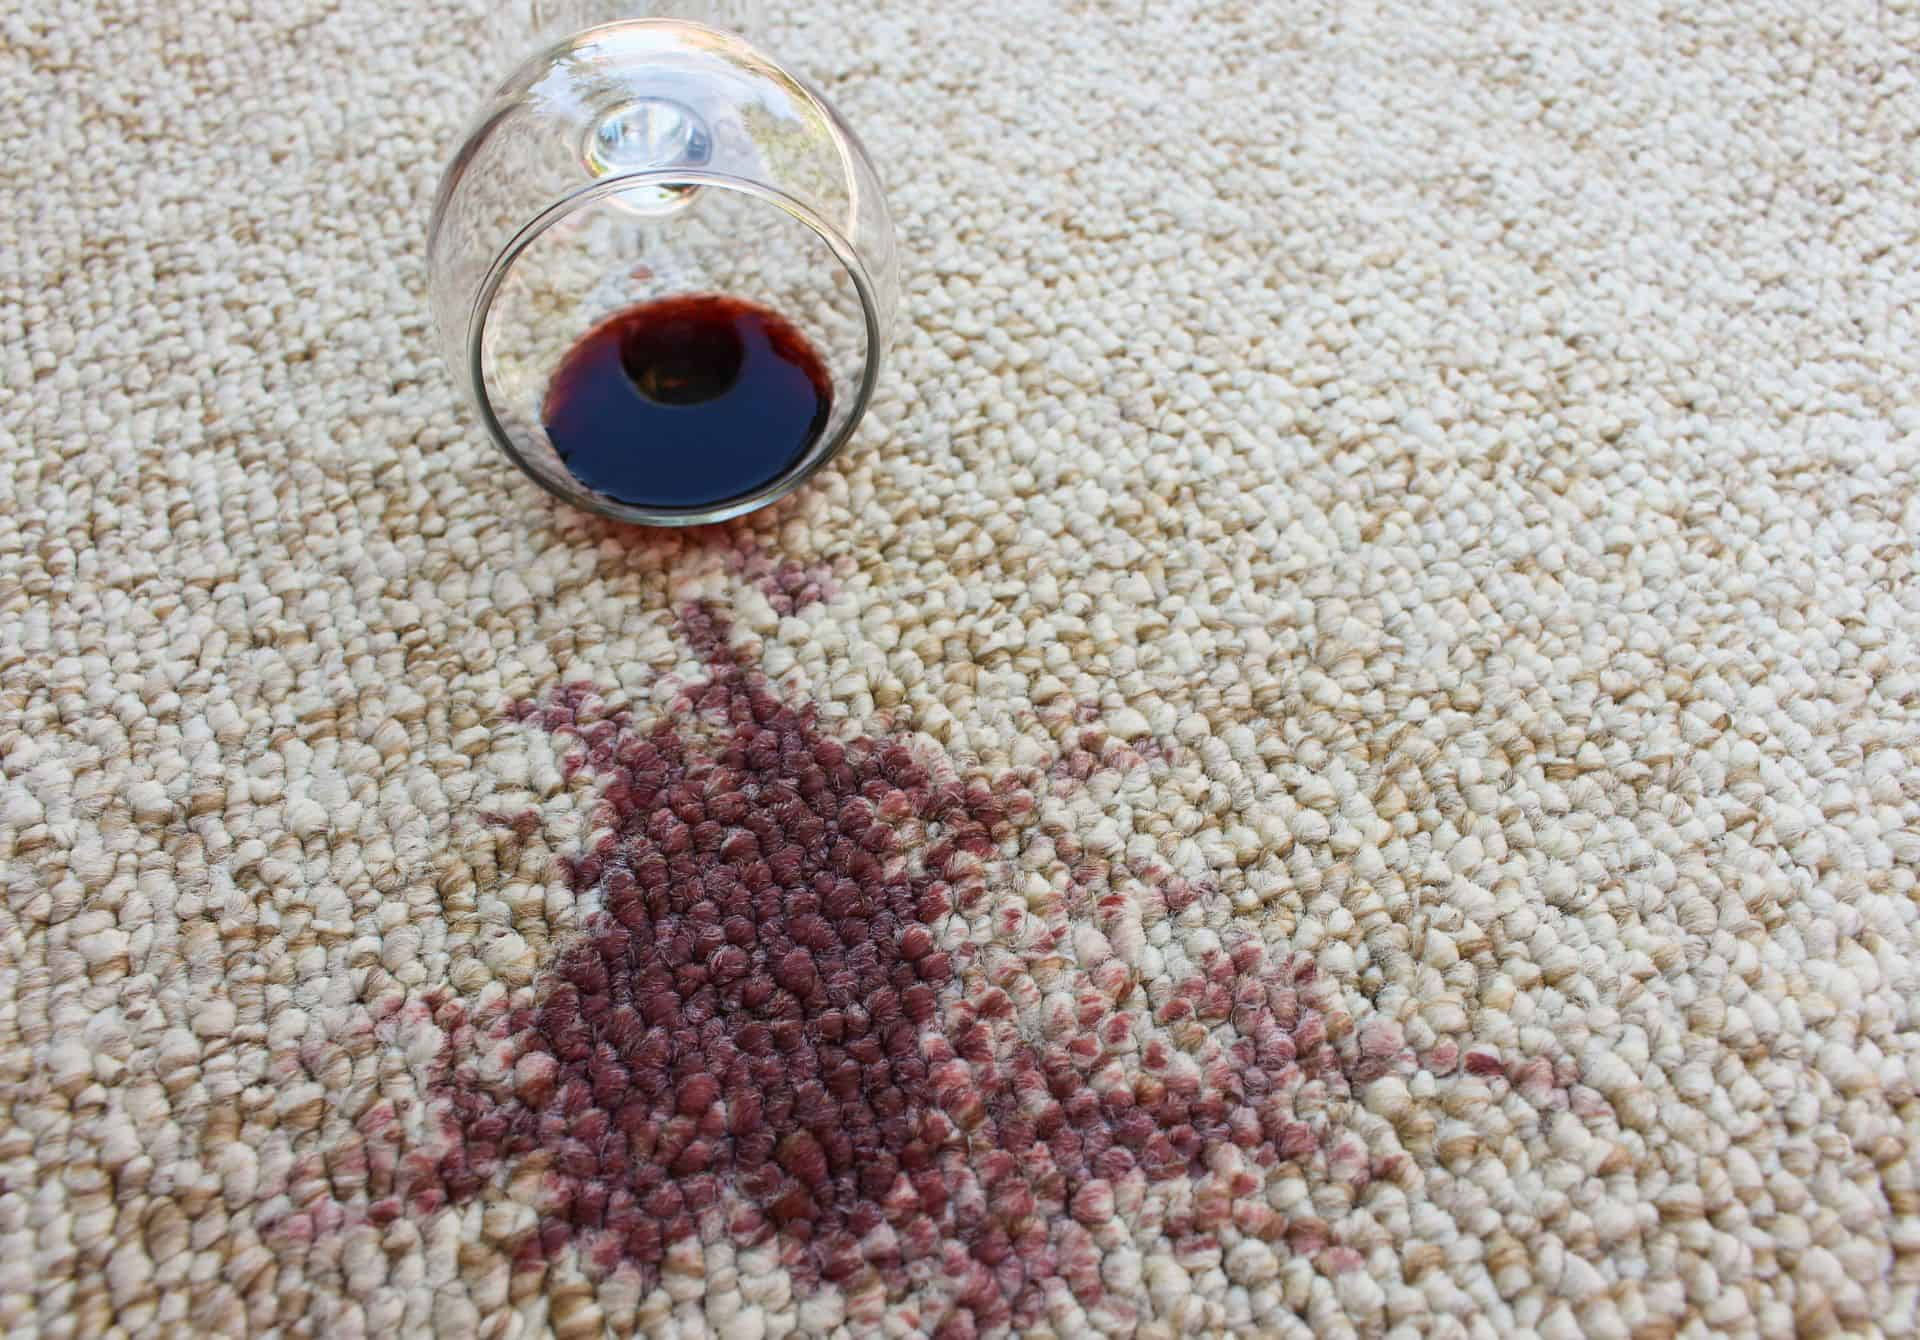
- Water stains: These stains are caused by rainwater, sprinkler systems, or irrigation runoff. They often appear as discolored patches or streaks on the fence surface.
- Mold and mildew stains: Moisture and humidity can create the perfect environment for mold and mildew growth on fences. These stains appear as black or greenish patches and can be accompanied by a musty odor.
- Oil and grease stains: These stains are typically caused by spills from machinery, vehicles, or outdoor cooking. They can leave dark, oily marks on the fence surface.
- Rust stains: Rust stains are caused by metal components or hardware on the fence that have corroded or rusted over time. These stains often appear as reddish-brown marks on the fence.
- Paint or stain over-spray: If you recently painted or stained nearby surfaces, overspray can unintentionally land on your fence, leaving unwanted spots or streaks.
By identifying the type of stain on your fence, you can select the most appropriate stain removal method and ensure the best possible results.
Key Takeaways:
- Understanding the type of stain on your fence is crucial for effective removal. Different stains require specific methods, such as using a pressure washer for water stains and a bleach solution for mold and mildew stains.
- Prioritize safety when removing stains from your fence by wearing protective gear, following product instructions, and maintaining proper ventilation. Regular maintenance and preventive measures can help keep your fence looking fresh and stain-free.
Read more: How To Remove Stains From Mattress
Understanding the types of stains on fences
Fences can be subject to different types of stains, each requiring a specific approach for effective removal. By understanding the nature of these stains, you can choose the most suitable method and ensure the best possible results.
Water stains: These stains are a common issue for fences exposed to rainwater, sprinkler systems, or irrigation runoff. The water can contain minerals or pollutants that leave unsightly marks on the fence surface. Water stains often appear as discolored patches or streaks, which can be particularly noticeable on lighter-colored fences.
Mold and mildew stains: Fences located in humid or moist environments are prone to mold and mildew growth. These stains not only affect the appearance of your fence but also pose health risks. Mold and mildew stains typically appear as black or greenish patches and may be accompanied by a musty odor. It’s important to address these stains promptly to prevent further mold development and potential damage to the fence.
Oil and grease stains: If your fence is close to a driveway, parking area, or outdoor cooking space, it may accumulate oil and grease stains from machinery, vehicles, or cooking activities. These stains can leave dark, oily marks on the fence surface, making it look dirty and unappealing. Additionally, oil and grease stains can penetrate the wood or other materials used for the fence, potentially causing long-term damage if not addressed.
Rust stains: Fences with metal components or hardware, such as nails, screws, or hinges, are susceptible to rust stains. Over time, these metal elements can corrode or rust, leading to reddish-brown marks on the fence. Rust stains not only detract from the fence’s appearance but can also indicate structural issues or deterioration that need to be addressed to maintain the fence’s integrity.
Paint or stain overspray: Sometimes, when painting or staining nearby surfaces, overspray can inadvertently land on the fence, resulting in unwanted spots or streaks. If left unaddressed, these overspray stains can mar the appearance of your fence and create an inconsistent finish. It’s important to remove these stains as soon as possible to maintain a uniform and appealing look.
By identifying the type of stain affecting your fence, you can choose the appropriate method and materials to effectively remove it. In the next section, we will discuss the necessary tools and materials you’ll need to tackle the stain removal process.
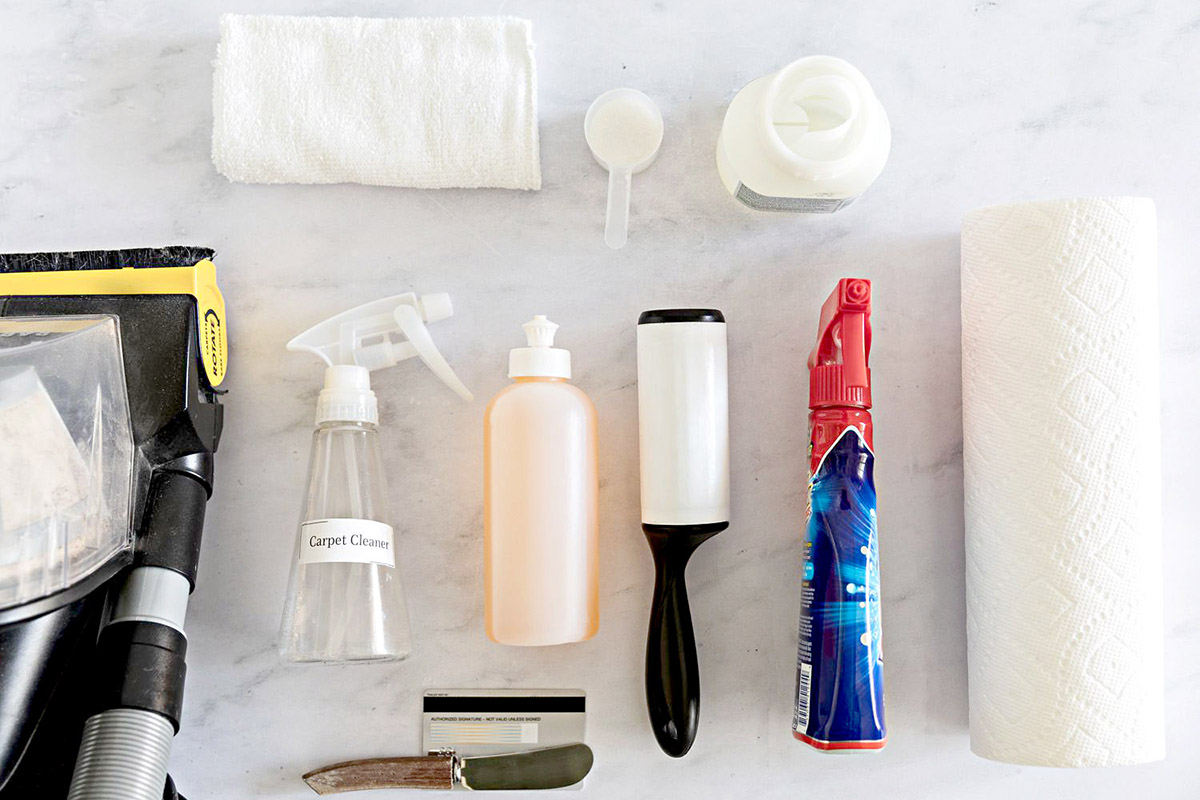
Preparing the necessary tools and materials
Before diving into the stain removal process, it’s crucial to gather the necessary tools and materials to ensure a smooth and efficient experience. Having everything on hand will save you time and frustration as you work on restoring your fence.
Here are the essential tools and materials you’ll need:
- Protective gear: Prioritize your safety by wearing appropriate protective gear, such as safety goggles, gloves, and a mask. Stain removal methods often involve chemicals or high-pressure equipment, so it’s essential to protect yourself from potential splashes, fumes, and debris.
- Pressure washer: A pressure washer is a versatile tool that can make the stain removal process much easier. It uses high-pressure water to effectively remove stains, dirt, and grime from various surfaces. Make sure to choose a pressure washer suitable for the size and material of your fence.
- Bleach or mildew cleaner: For mold and mildew stains, you’ll need bleach or a specialized mildew cleaner. Look for products specifically designed for outdoor use and follow the instructions on the packaging for proper dilution and application.
- Commercial fence cleaner: There are commercial fence cleaning products available that can effectively remove various stains. These products are formulated to be safe for use on fences and may come in different forms, such as sprays or concentrates. Read the labels carefully to ensure they are suitable for your fence material and stain type.
- Vinegar and baking soda: For a natural and eco-friendly stain removal option, you can use a mixture of vinegar and baking soda. Vinegar is known for its cleaning properties, while baking soda helps to remove odors. These common household items can be effective in breaking down stains and eliminating mildew or mold.
- Power sander: If your fence has stubborn stains that won’t come off with other methods, a power sander can be a valuable tool. It helps smooth out the surface by sanding away the stain, making it easier to apply paint or stain for a fresh and clean appearance.
- Chemical paint stripper: In cases where the stain is a result of overspray or a previous paint or stain application, a chemical paint stripper may be necessary. This product helps to strip away the layer of paint or stain, allowing you to start with a clean surface.
- Clean water and bucket: It’s important to have a ready supply of clean water for rinsing the fence during and after the stain removal process. A bucket or hose can be handy for this purpose.
- Brushes and scrubbers: Depending on the stain removal method, you may need various brushes or scrub brushes to assist in loosening and removing the stains. Choose brushes suitable for your fence material to avoid causing any damage.
By gathering these essential tools and materials, you’ll be well-prepared to tackle the stain removal process. However, before diving in, it’s recommended to test the chosen stain removal method on a small, inconspicuous section of the fence to ensure it provides the desired results without causing any harm. In the next section, we will discuss this crucial step in more detail.
Testing the stain removal method on a small section
Before applying any stain removal method to your entire fence, it’s crucial to perform a test on a small, inconspicuous section. This step is important to ensure that the chosen method and materials are effective in removing the stain without causing any damage or discoloration to the fence.
Here’s a step-by-step guide on how to test the stain removal method:
- Choose a small area of the fence that is not easily noticeable, such as behind a shrub or near the ground.
- Prepare the stain removal solution or method according to the instructions. This may involve diluting a cleaning product, mixing vinegar and baking soda, or setting up the pressure washer.
- Apply the solution or method to the selected test area. Be sure to follow the recommended application technique and allow the solution to sit for the specified amount of time.
- Using a brush or scrub brush, gently scrub the test area to help loosen the stain and assess the effectiveness of the method.
- Rinse the area thoroughly with clean water to remove the solution and observe the results.
- Examine the test area for any signs of damage, discoloration, or adverse reactions. Look for changes in the fence material, such as swelling, discoloration, or texture alterations.
- Wait for a day or two to see if there are any delayed reactions or changes to the test area.
By performing this test, you can ensure that the stain removal method is suitable for your fence material and doesn’t cause any unwanted effects. If there are no adverse reactions or damage observed, you can proceed with confidence to tackle the rest of the stained areas on your fence using the chosen stain removal method.
However, if there are any negative effects from the test, it’s essential to reassess the chosen method or seek professional advice. Testing the method on a small section helps minimize potential risks and allows you to adjust your approach if needed.
Now that you’ve successfully tested the stain removal method, we can move on to discussing different methods you can employ to remove stains from your fence. In the next sections, we will explore various techniques, including using a pressure washer, bleach solution, commercial fence cleaner, vinegar and baking soda, power sander, and chemical paint stripper.
Read more: How To Remove Stains From Stucco
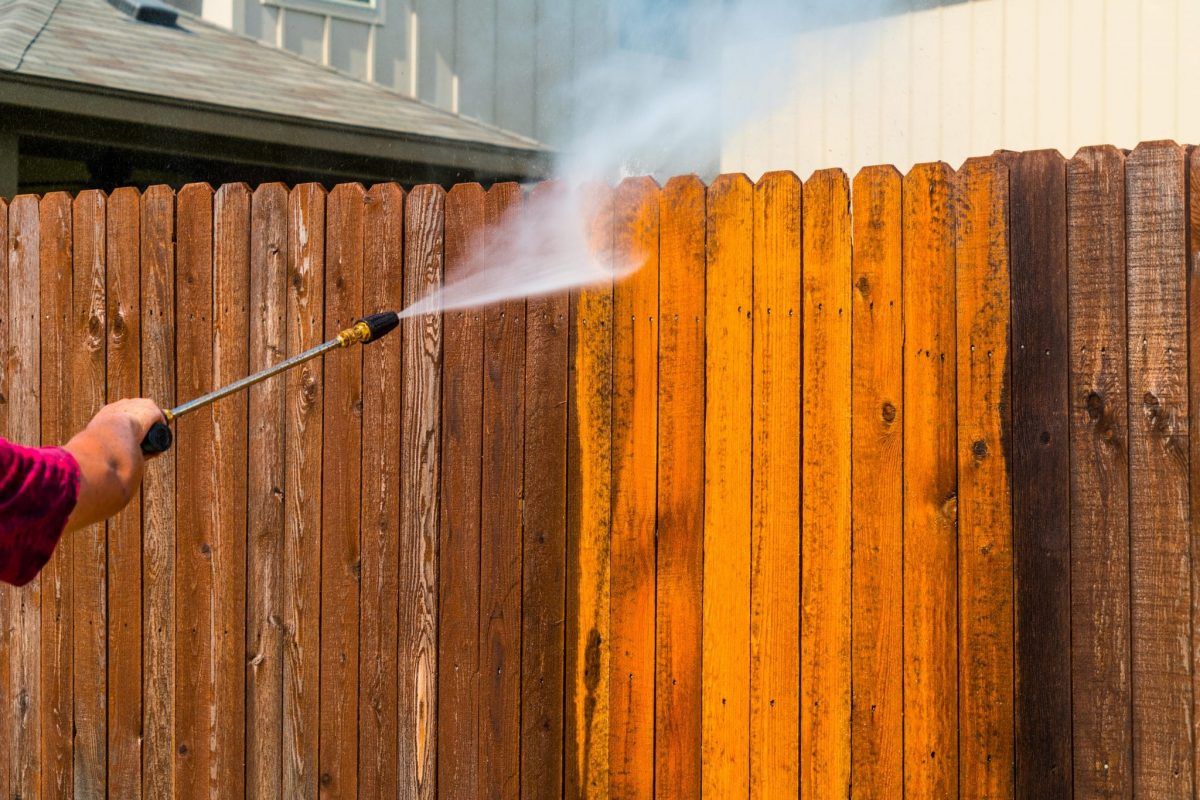
Method 1: Removing stain using a pressure washer
A pressure washer is a powerful tool that can make the process of removing stains from your fence faster and more efficient. It uses highly pressurized water to blast away dirt, grime, and stains from the surface of your fence. However, it’s important to use the pressure washer with caution to avoid damaging the fence or causing injury.
Here’s how you can use a pressure washer to remove stains from your fence:
- Read the instruction manual of your pressure washer to familiarize yourself with its operation and safety features. Ensure that you have the appropriate nozzle for the job, such as a wide-angle or fan nozzle.
- Clear the area around your fence to ensure there are no obstructions or delicate items that could be damaged by the high-pressure water.
- Attach the appropriate nozzle to the pressure washer and connect it to a water source.
- Adjust the pressure settings of the washer to a lower setting to avoid damaging the fence. Start with the lowest pressure and gradually increase if necessary.
- Stand a few feet away from the fence and begin spraying the stained areas with the pressure washer. Hold the nozzle at a slight angle and move it back and forth to cover the entire stain.
- Pay particular attention to areas with stubborn stains, applying more pressure if needed. Keep your distance to prevent any damage to the fence.
- Rinse the fence thoroughly with clean water after removing the stains to remove any residue and prevent any potential chemical interactions.
- Allow the fence to air dry completely before applying any paint or stain to the surface.
While using a pressure washer can be effective in removing stains, it’s important to exercise caution. High-pressure water can damage or splinter certain types of wood or other materials used for fencing. Additionally, it’s best to avoid using a pressure washer on painted surfaces, as it can strip off the paint layer.
Before using a pressure washer, it’s a good idea to test it on a small, inconspicuous area of your fence to ensure it doesn’t cause any damage. Always follow the manufacturer’s instructions and use appropriate safety gear, such as goggles and gloves, to protect yourself during the process.
With the right precautions and careful application, a pressure washer can be an effective tool for removing stains from your fence and restoring its original beauty.
In the next section, we’ll explore Method 2: Removing stain with a bleach solution.
Method 2: Removing stain with a bleach solution
If you’re dealing with mold or mildew stains on your fence, a bleach solution can be highly effective in removing them. Bleach is a powerful disinfectant and cleaner that can eliminate mold, mildew, and other organic stains. However, it’s essential to handle bleach with caution and follow the proper safety guidelines.
Here’s how you can use a bleach solution to remove stains from your fence:
- Mix a solution of 1 part bleach to 4 parts water in a bucket. Ensure that you are using a bleach specifically formulated for outdoor use.
- Put on protective gloves and goggles to protect your skin and eyes from the bleach solution.
- Dip a brush or sponge into the bleach solution and apply it directly to the stained areas of the fence.
- Gently scrub the stains in a circular motion, allowing the bleach solution to penetrate the surface and break down the mold or mildew.
- Let the bleach solution sit on the stained areas for about 15 minutes to allow it to thoroughly disinfect and remove the stains. Avoid leaving the bleach solution on the fence for an extended period, as it can potentially damage the surface.
- Rinse the fence with clean water using a garden hose or pressure washer to remove the bleach solution and any remaining stains.
- Repeat the process if necessary for stubborn stains, but do not exceed the recommended exposure time for the bleach solution.
- Allow the fence to dry completely before assessing the results or applying any additional treatments or finishes.
Remember to read the manufacturer’s instructions on the bleach product and follow the recommended dilution ratios and application guidelines. Different brands and concentrations may require slight variations in the process.
While bleach can be effective in removing stains, it’s important to exercise caution when using it. Bleach is a strong chemical and can cause skin and eye irritation. Avoid contact with plants and take steps to protect nearby surfaces from coming into direct contact with the bleach solution. If you have a colored or painted fence, test the bleach solution on a small, inconspicuous area to ensure it doesn’t cause any discoloration.
Once the stains have been successfully removed, consider applying a protective finish or stain to your fence to prevent future staining and enhance its longevity.
In the next section, we will discuss Method 3: Removing stain using a commercial fence cleaner.
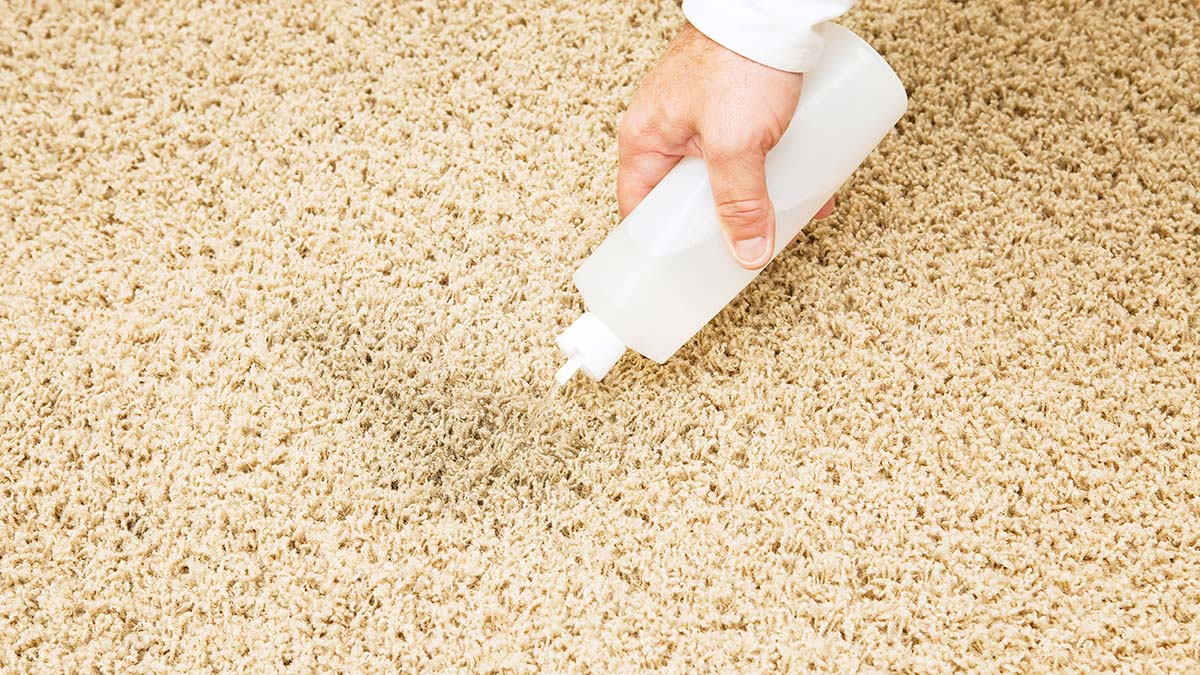
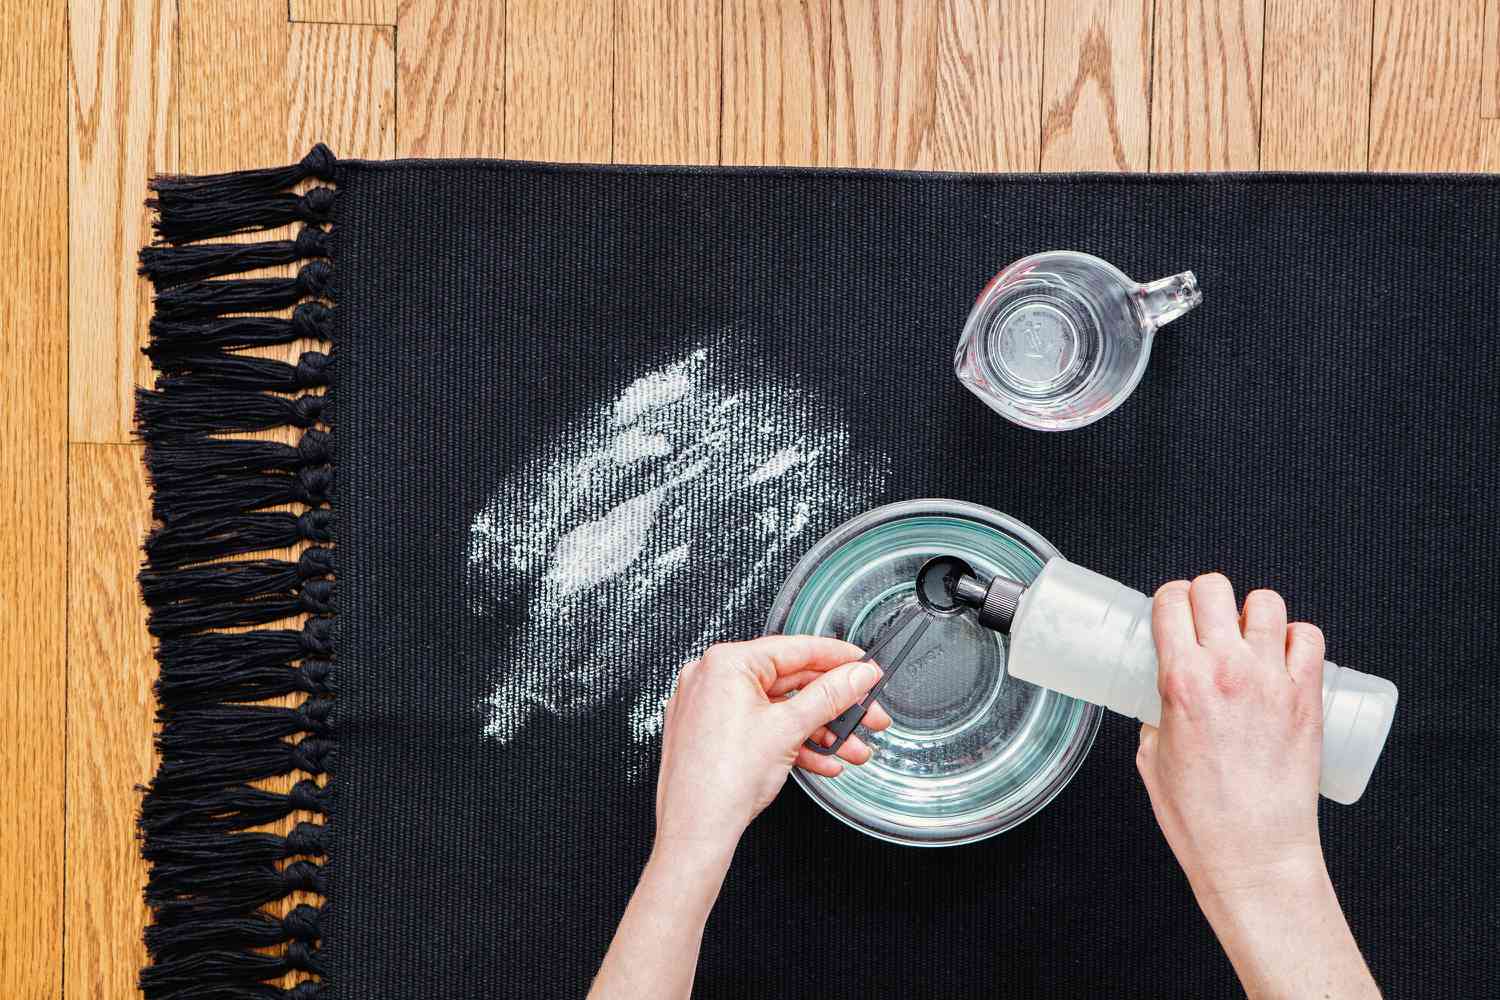
Mix equal parts of white vinegar and water in a spray bottle. Spray the solution onto the stained area of the fence and scrub with a brush. Rinse with water and repeat if necessary.
Method 3: Removing stain using a commercial fence cleaner
If you prefer a ready-to-use solution specifically designed for removing stains from fences, a commercial fence cleaner can be a convenient option. These cleaners are formulated to break down and remove various types of stains, including dirt, grime, mold, and mildew. They often come in spray or concentrate forms, and different brands may have slightly different application instructions, so be sure to read the product label for specific guidelines.
Here’s how you can use a commercial fence cleaner to remove stains from your fence:
- Choose a commercial fence cleaner that is suitable for your type of fence material and stain type. Read the product label for information on the recommended application method, dilution ratio, and safety precautions.
- Prepare the cleaner according to the instructions. This may involve diluting the concentrate with water or simply attaching the spray nozzle to the bottle.
- Clear the area around your fence to ensure there are no obstructions or delicate items that could be damaged by the cleaner.
- Using a spray bottle or appropriate applicator, apply the fence cleaner directly to the stained areas of the fence.
- Allow the cleaner to sit on the stains for the recommended amount of time. This will vary depending on the product, but typically ranges from a few minutes to half an hour.
- Gently scrub the stained areas with a brush or scrub brush to help loosen the stain. Be careful not to apply excessive pressure or use abrasive tools that could damage the fence surface.
- Rinse the fence thoroughly with clean water to remove the cleaner and any residue. You can use a garden hose or pressure washer for this step.
- Inspect the fence to assess the results. If any stains remain, you may need to repeat the process or consider alternative methods for stubborn stains.
- Allow the fence to dry completely before applying any additional treatments or finishes.
Commercial fence cleaners are designed to be effective and convenient, often requiring less effort compared to homemade solutions. However, it’s important to follow the manufacturer’s instructions and any safety precautions provided. Ensure proper ventilation during the application process, and protect yourself by wearing gloves, goggles, and other recommended safety gear.
Keep in mind that different brands of commercial fence cleaners may have varying levels of potency and compatibility with different fence materials. Do a small test patch in an inconspicuous area before applying the cleaner to the entire fence to ensure it doesn’t cause any adverse reactions or damage to the surface.
Now that you know how to use a commercial fence cleaner, let’s move on to Method 4: Removing stain with vinegar and baking soda.
Method 4: Removing stain with vinegar and baking soda
If you prefer a natural and eco-friendly approach to stain removal, using vinegar and baking soda can be an effective solution. Both vinegar and baking soda have cleaning properties that can help break down stains and eliminate odors from your fence. This method is particularly useful for removing organic stains, such as mold or mildew.
Here’s how you can use vinegar and baking soda to remove stains from your fence:
- Mix equal parts of white vinegar and water in a spray bottle. For example, if you use 1 cup of vinegar, add 1 cup of water.
- Spray the vinegar solution directly onto the stained areas of your fence.
- Allow the vinegar solution to sit on the stains for about 15 minutes. This will give it time to break down the stain.
- In a separate bowl, create a paste by mixing baking soda with a small amount of water. The consistency should be thick enough to spread but not runny.
- Apply the baking soda paste to the stains, spreading it evenly over the affected areas.
- Gently scrub the stained areas with a brush or scrub brush to work the vinegar and baking soda into the stain and help remove it.
- Rinse the fence thoroughly with clean water to remove the vinegar and baking soda residue.
- Inspect the fence to assess the results. If any stains remain, you may need to repeat the process or consider alternative methods for stubborn stains.
- Allow the fence to dry completely before applying any additional treatments or finishes.
Vinegar and baking soda are mild and safe to use, making them suitable for various fence materials. However, as with any cleaning method, it’s always a good idea to test the vinegar and baking soda paste on a small, inconspicuous area of the fence to ensure it doesn’t cause any discoloration or adverse effects.
Keep in mind that vinegar has a strong smell that may linger, especially during the application process. If the odor is a concern, you can rinse the fence with a mixture of water and a few drops of essential oil of your choice to help mask the vinegar scent.
While this method is effective for organic stains, it may not be as potent for other types of stains, such as oil or rust. In such cases, alternative methods may be more suitable.
In the next section, we’ll discuss Method 5: Removing stain using a power sander.
Read more: How To Remove Stains From Furniture
Method 5: Removing stain using a power sander
If your fence has stubborn stains that cannot be easily removed using other methods, a power sander can be a valuable tool to achieve a clean and even surface. A power sander uses abrasive materials to sand away the stained layer, providing a fresh canvas for staining or painting.
Here’s how you can use a power sander to remove stains from your fence:
- Choose a power sander suitable for your fence material and the size of the stained area. Consider whether a handheld sander or a larger, more powerful sander will best meet your needs.
- Put on safety goggles and a dust mask to protect your eyes and respiratory system from flying debris and dust.
- Start the power sander and position it on the stained area of your fence. Hold it firmly, but not too forcefully, to allow the sander to do the work.
- Move the sander back and forth in the direction of the wood grain, applying even pressure. Avoid staying in one spot for too long to prevent uneven sanding or damage to the surface.
- Continue sanding until the stained layer is removed, revealing a clean and bare surface. Check periodically to ensure you’re achieving the desired results.
- After removing the stain, switch to a finer grit sandpaper to smooth the surface further and prepare it for painting or staining, if desired.
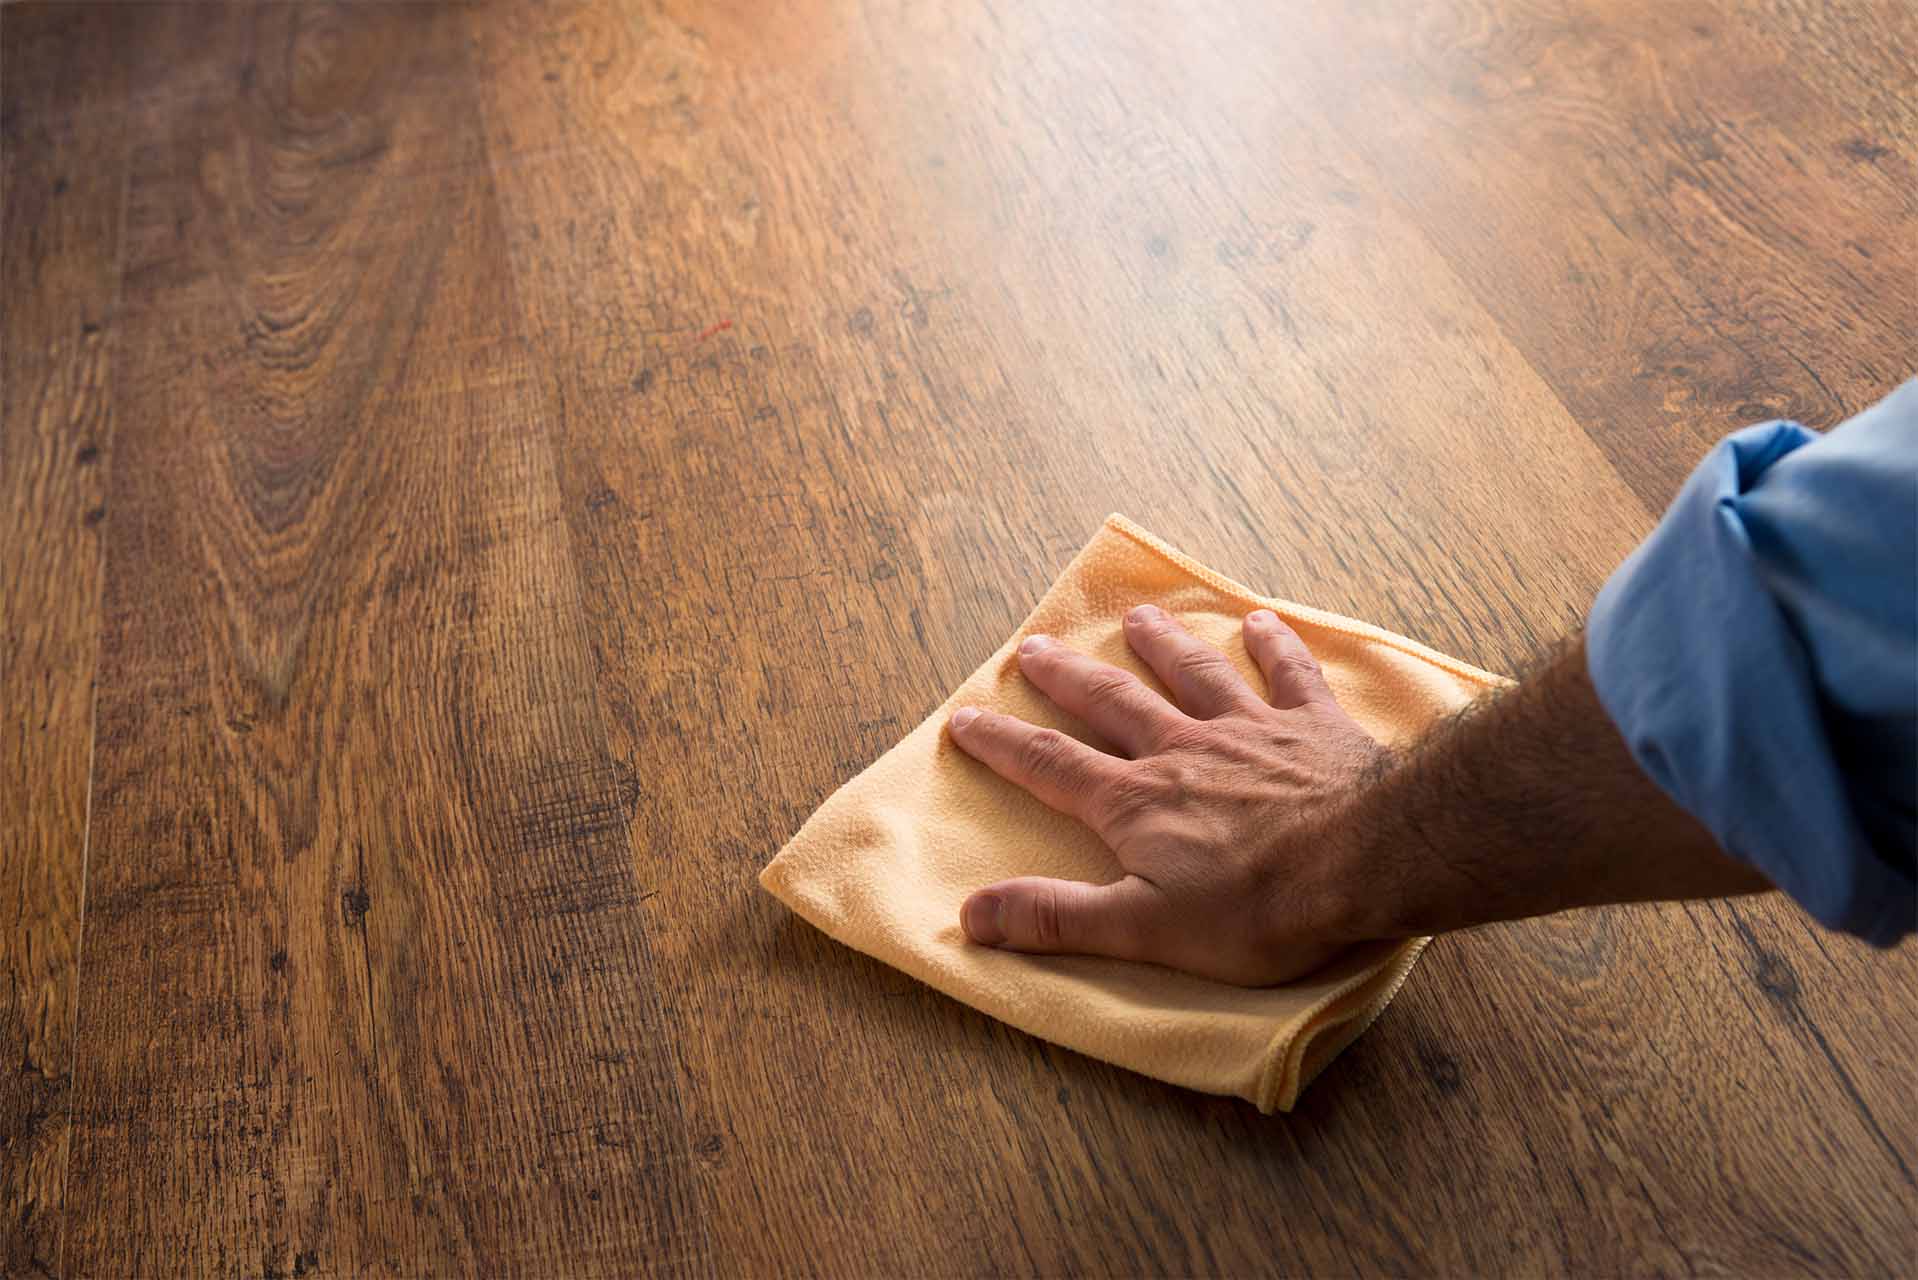
- Once you’ve achieved the desired results, use a soft brush or cloth to remove any dust or debris left behind by the sanding process.
- Inspect the fence to ensure all the stains have been successfully removed. If any stains remain, you may need to repeat the sanding process or consider alternative methods.
- Before proceeding with painting or staining, make sure the fence is clean and dry. Follow the product instructions for the paint or stain application.
Using a power sander can be an effective method for removing stubborn stains, such as deep-set oil stains or paint overspray. However, keep in mind that sanding can be a time-consuming process, especially for larger areas or intricate designs on your fence.
When using a power sander, it’s important to maintain a steady and controlled motion to avoid uneven sanding or accidental damage. Be mindful of the specific requirements and recommendations provided by the power sander manufacturer.
Additionally, wearing appropriate safety gear, such as goggles and a dust mask, is essential to protect yourself from flying debris and dust particles generated during the sanding process.
If you’re unsure about using a power sander or if the stains are particularly stubborn, it may be best to consult a professional who can provide guidance and assistance.
In the next section, we’ll explore Method 6: Removing stain with a chemical paint stripper.
Method 6: Removing stain with chemical paint stripper
If your fence is stained with old or stubborn paint or stain, a chemical paint stripper can be an effective option for complete removal. Paint strippers are designed to dissolve and remove layers of paint, stain, or varnish from various surfaces, including fences. However, these products contain powerful chemicals, so it’s crucial to follow safety precautions and handle them with care.
Here’s how you can use a chemical paint stripper to remove stains from your fence:
- Choose a paint stripper specifically formulated for outdoor use and suitable for your fence material and stain type. It’s important to select the appropriate type of stripper for the specific stains you’re dealing with.
- Read and follow the manufacturer’s instructions carefully. Ensure that you have the necessary safety equipment, such as rubber gloves, goggles, and a respirator, to protect yourself from potential chemical exposure.
- Prepare the area by clearing any obstructions or delicate items that could be damaged by the dripping or splashing of the paint stripper.
- Apply a thick and even layer of the paint stripper to the stained areas of your fence, using a brush or roller. Ensure that the stripper covers the entire stain.
- Allow the paint stripper to sit on the fence surface for the recommended amount of time specified by the manufacturer. This typically ranges from 10 to 30 minutes.
- Use a scraper or wire brush to gently scrape away the softened paint or stain. Work in the direction of the wood grain to avoid any potential damage.
- If necessary, apply a second or third coat of the paint stripper to fully remove all layers of paint or stain. Follow the manufacturer’s instructions regarding the number of layers to apply.
- Once all the paint or stain has been removed, rinse the fence thoroughly with clean water to neutralize the chemical and remove any residue.
- Inspect the fence to ensure all the stains have been successfully removed. If any stubborn stains persist, you may need to repeat the paint stripping process or consider alternative stain removal methods.
- Allow the fence to dry completely before applying any new paint, stain, or protective finish.
It’s worth noting that chemical paint strippers can emit strong fumes and require proper ventilation during application. It’s recommended to perform this method in a well-ventilated outdoor area.
When working with chemical paint strippers, it’s crucial to follow all safety precautions provided by the manufacturer. This includes wearing appropriate protective gear, working in a well-ventilated area, and using caution to prevent contact with skin or eyes.
If you’re uncomfortable or inexperienced with using chemical paint strippers, it may be best to seek professional assistance to ensure safe and effective stain removal.
With the stain removed, you can now enjoy a rejuvenated fence that is ready for a fresh coat of paint, stain, or protective finish.
In the next section, we’ll discuss important safety precautions to consider when performing any stain removal method on your fence.
Safety precautions to consider
When removing stains from your fence, it’s important to prioritize safety and take necessary precautions to protect yourself and the surrounding environment. Here are some key safety measures to consider:
- Protective gear: Always wear appropriate protective gear, including safety goggles, gloves, and a mask. This will safeguard you from potential chemical splashes, fumes, and debris.
- Read product labels: Carefully read and follow the instructions and safety guidelines provided by the manufacturer of any cleaning products or chemicals you are using. Pay attention to recommended dilution ratios, application methods, and any specific safety precautions.
- Ventilation: Ensure proper ventilation when working with chemicals or applying stain removal methods. Perform the task in an open, well-ventilated area to minimize exposure to fumes and promote better air circulation.
- Protect nearby surfaces: Cover or protect nearby surfaces, plants, and delicate items that may be affected by the stain removal process or cleaning solutions. Use plastic sheets, drop cloths, or tarps to protect surfaces as necessary.
- Test on a small section: Before applying any stain removal method to the entire fence, perform a test on a small, inconspicuous area to ensure it doesn’t cause any damage, discoloration, or adverse reactions.
- Avoid contact with skin and eyes: Take precautions to avoid direct contact between cleaning solutions, chemicals, or any other substances and your skin or eyes. If contact occurs, rinse immediately with plenty of clean water and seek medical attention if necessary.
- Use tools properly: Familiarize yourself with the proper use of any tools, such as pressure washers or power sanders, and follow the manufacturer’s instructions. Improper use can result in injury or damage to the fence or surrounding areas.
- Dispose of waste responsibly: Dispose of any waste materials, such as empty containers, used cleaning solutions, or debris, responsibly and according to local regulations. Avoid any actions that may harm the environment.
- Monitor weather conditions: Consider weather conditions when planning the stain removal process. Avoid working in extreme heat or cold, high winds, or during rain showers, as these conditions can affect the effectiveness and safety of the methods applied.
By taking these safety precautions, you can minimize the risks associated with stain removal and ensure a safe and successful outcome. If you have any concerns or doubts about the process, it may be advisable to seek professional help or guidance.
Now that we have explored the different stain removal methods and safety precautions, we’ll conclude with some final tips and recommendations.
Final tips and recommendations
As you embark on the journey of removing stains from your fence, here are some final tips and recommendations to help you achieve the best results:
- Regular maintenance: To prevent stains from becoming deeply ingrained on your fence, it’s important to engage in regular maintenance. This includes cleaning the fence regularly and addressing any spills or stains promptly.
- Identify the stain type: Before choosing a stain removal method, identify the type of stain affecting your fence. Different stains may require specific approaches for effective removal.
- Patience is key: Some stains may require multiple attempts or different methods to be completely removed. Be patient and persistent when working on stubborn stains, ensuring you follow the necessary steps to achieve the desired results.
- Take preventive measures: Once you have successfully removed the stains, consider preventive measures to keep your fence looking fresh and stain-free. This can include applying a protective finish, regular cleaning, and proactive maintenance.
- Consider professional assistance: If you’re unsure about the stain removal process, dealing with extremely stubborn stains, or working with delicate fence materials, it may be wise to seek professional assistance. Professional cleaners or contractors have the expertise and experience to handle different types of stains and fences effectively.
- Maintain safety precautions: Throughout the stain removal process, prioritize safety by wearing protective gear, handling chemicals properly, and following the recommended safety guidelines. Protect yourself, your surroundings, and the environment from any potential harm.
- Preserve the fence’s integrity: While removing stains, ensure you do not compromise the structural integrity of your fence. Avoid excessive pressure or the use of abrasive tools that could cause damage. Choose stain removal methods that are suitable for your fence material.
- Document the process: Consider taking before and after pictures of your fence to track the progress and showcase the transformation. It can be a satisfying reminder of your efforts and the difference made by removing the stains.
Remember, maintaining a well-kept and stain-free fence not only enhances the overall appearance of your property but can also extend the lifespan of your fence. By regularly inspecting your fence and promptly addressing any stains, you can ensure its long-term durability and beauty.
With the knowledge and tips shared in this article, you are well-equipped to tackle the task of removing stains from your fence. Embrace the process, exercise caution, and enjoy the satisfying results of a cleaned and refreshed fence.
Now, armed with these techniques, go forth and restore the beauty of your fence, leaving it stain-free and looking splendid once again!
If you have any questions or need further assistance, feel free to reach out. Happy stain removal!
Read more: How To Remove Stains From A Blanket
Conclusion
Your fence is an important part of your property, offering not only aesthetic appeal but also privacy and security. However, over time, stains can accumulate and detract from its overall beauty. By understanding the different types of stains and employing the appropriate removal methods, you can restore your fence’s appearance and ensure its longevity.
In this comprehensive guide, we explored various methods to remove stains from your fence, including using a pressure washer, bleach solution, commercial fence cleaner, vinegar and baking soda, power sander, and chemical paint stripper. Each method has its benefits and considerations, and it’s essential to choose the one that suits your specific stain type and fence material.
Throughout the stain removal process, we emphasized the importance of safety precautions. Wearing protective gear, following product instructions, maintaining proper ventilation, and handling chemicals responsibly are crucial for your well-being and the environment.
Additionally, we provided useful tips such as regular maintenance, identifying stain types, exercising patience, taking preventive measures, considering professional assistance when necessary, and documenting the process for your satisfaction and reference.
Remember, removing stains from your fence goes beyond just improving its appearance—it contributes to the overall curb appeal and durability of your property. With the knowledge and techniques shared in this guide, you are now equipped to tackle stains, restore your fence to its former glory, and enjoy a fresh and clean outdoor space.
If you have any further questions or need assistance, don’t hesitate to ask. Happy stain removal and fence restoration!
Frequently Asked Questions about How To Remove Stain From Fence
Was this page helpful?
At Storables.com, we guarantee accurate and reliable information. Our content, validated by Expert Board Contributors, is crafted following stringent Editorial Policies. We're committed to providing you with well-researched, expert-backed insights for all your informational needs.


0 thoughts on “How To Remove Stain From Fence”