Articles
How To Repair Glass Cooktop
Modified: August 27, 2024
Learn how to repair your glass cooktop with our informative articles. Discover expert tips and tricks to fix common issues and keep your cooktop looking brand new.
(Many of the links in this article redirect to a specific reviewed product. Your purchase of these products through affiliate links helps to generate commission for Storables.com, at no extra cost. Learn more)
Introduction
Welcome to our guide on how to repair a glass cooktop. Glass cooktops are a popular choice for modern kitchens due to their sleek and elegant appearance. However, accidents happen, and the cooktop can become cracked or damaged. While this may seem like a daunting task, repairing a glass cooktop can be easier than you think.
In this article, we will provide you with step-by-step instructions on how to assess the damage, gather the necessary supplies, and safely repair your glass cooktop. We will also offer some tips and precautions to ensure a successful repair without putting yourself or your cooktop at risk.
Before we dive into the repair process, it’s crucial to remember that working with glass can be dangerous, so it’s important to take the necessary safety precautions. Always wear protective gloves and eyewear when handling broken glass, and never attempt any repairs if you are unsure or uncomfortable.
Now, let’s get started on how to repair your glass cooktop and restore it to its former glory!
Key Takeaways:
- Prioritize safety by wearing protective gear, turning off the power, and following manufacturer instructions when repairing a glass cooktop. Accurate damage assessment is crucial for determining repair feasibility.
- Gather all necessary supplies, including a replacement glass cooktop, adhesive, and cleaning solution, before starting the repair process. Carefully reinstall the cooktop and test its functionality to ensure a successful repair.
Read more: How To Restore Glass Cooktop
Safety Precautions
When working with a glass cooktop, it is crucial to prioritize safety to avoid any potential accidents or injuries. Here are some important safety precautions to keep in mind before and during the repair process:
- Wear Protective Gear: Always wear thick, heat-resistant gloves and safety goggles to protect your hands and eyes from broken glass and any loose debris.
- Turn off the Power: Before starting any repair work, ensure that the power to the cooktop is completely turned off. This will prevent any electrical shocks or accidents while handling the appliance.
- Avoid Contact with Hot Surfaces: Allow the cooktop to cool down completely before attempting any repairs. The glass surface can retain heat even after the appliance has been turned off, so exercise caution and use insulated gloves or tools when necessary.
- Work in a Well-Ventilated Area: Repairing a glass cooktop can release fumes or odors, especially if adhesives or cleaning products are used. Make sure you are working in a well-ventilated area to avoid inhaling any harmful substances.
- Use the Right Tools and Materials: Ensure that you have all the necessary tools and materials for the repair. Using improper tools or low-quality materials can lead to a poor repair job or even further damage to the cooktop.
- Follow Manufacturer’s Instructions: Different cooktop models have specific repair guidelines provided by the manufacturer. Always refer to the manual or consult the manufacturer’s website for any specific instructions or warnings related to your particular cooktop model.
- Seek Professional Help if Needed: If you are unsure about the repair process or if the damage is extensive, it’s best to consult a professional technician. They have the expertise and experience to handle complex repairs and ensure the safety and longevity of your cooktop.
By following these safety precautions, you can minimize the risk of accidents and injuries while repairing your glass cooktop. Remember, safety should always be your top priority, so take your time and proceed with caution throughout the repair process.
Tools and Materials Needed
Before you begin the repair process, it’s important to gather all the necessary tools and materials. Having everything on hand will help streamline the process and ensure that you have everything you need to successfully repair your glass cooktop. Here are the tools and materials you will need:
- Safety Gloves: Thick, heat-resistant gloves are essential to protect your hands from broken glass and any sharp edges.
- Safety Goggles: Wear safety goggles to protect your eyes from any flying glass or debris.
- Scraper or Putty Knife: You will need a scraper or putty knife to remove any stubborn residue or adhesive from the surface of the cooktop.
- Replacement Glass Cooktop: Depending on the severity of the damage, you may need to replace the entire glass cooktop. Ensure that you have the correct replacement glass that is compatible with your cooktop model.
- Screwdriver: A screwdriver will be necessary to remove any screws holding the cooktop in place.
- Adhesive or Sealant: You may need an adhesive or sealant to secure the new glass cooktop in place. Make sure to use a high-quality adhesive that is specifically designed for glass and heat-resistant surfaces.
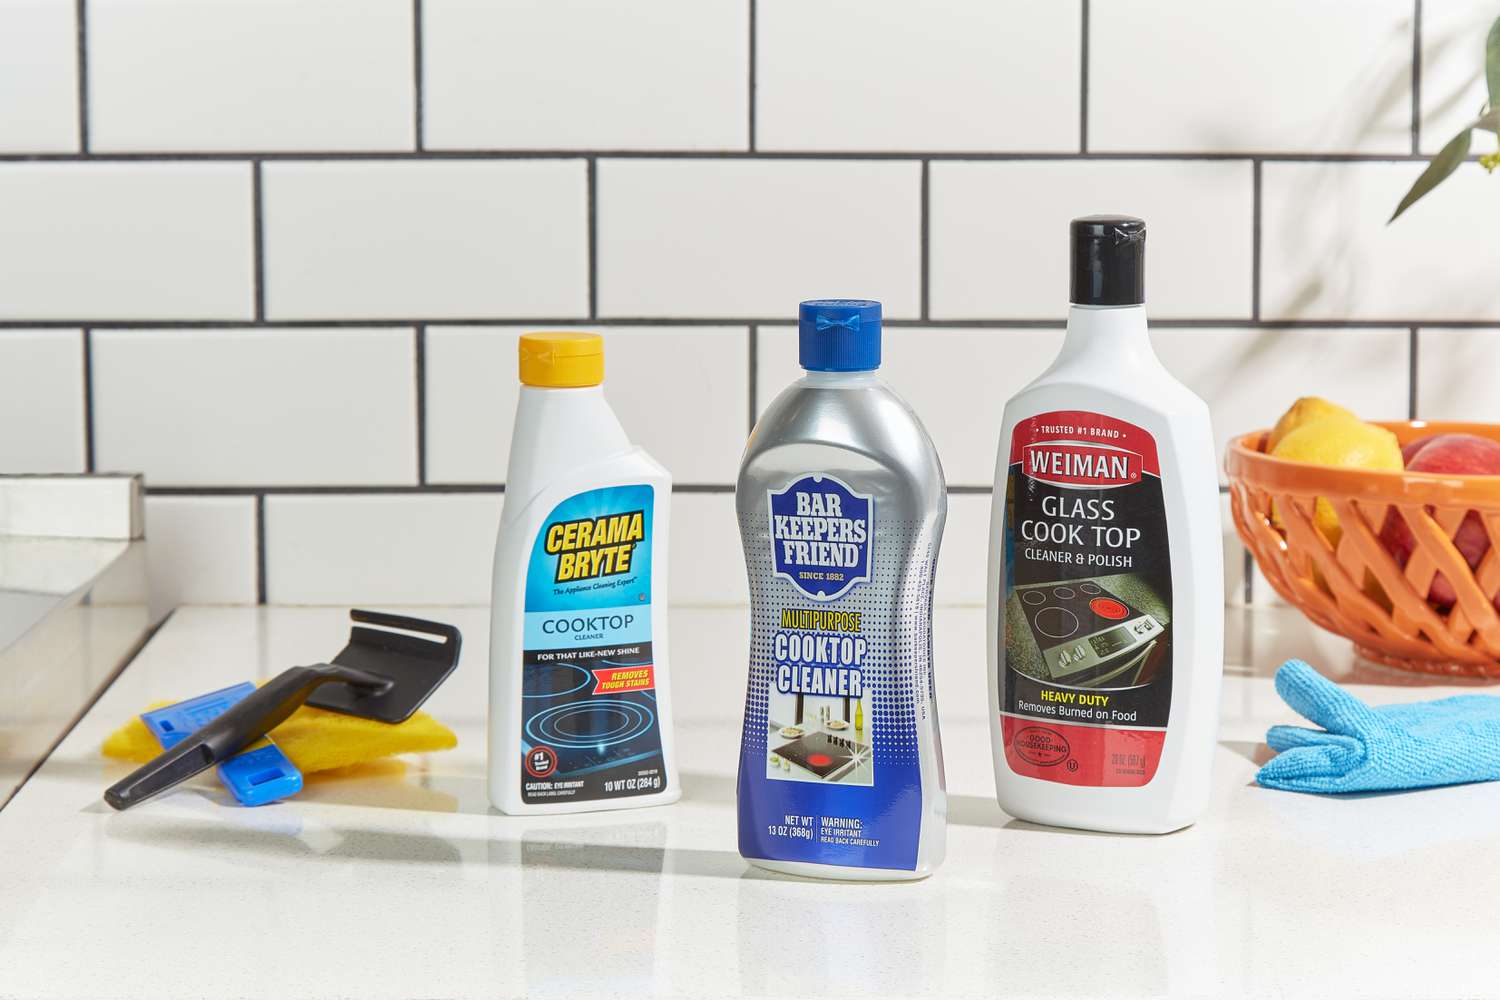
- Cleaning Solution: It is important to have a suitable cleaning solution to thoroughly clean the cooktop surface before and after the repair.
- Cloth or Sponge: Use a cloth or sponge to apply the cleaning solution and wipe down the cooktop surface.
- Tape Measure: A tape measure will come in handy for measuring the dimensions of the replacement glass cooktop or ensuring accurate placement on the appliance.
- Power Source: Make sure you have a power source nearby to test the cooktop once the repair is complete.
By having these tools and materials ready, you will be well-prepared to tackle the repair process and restore your glass cooktop to its full functionality.
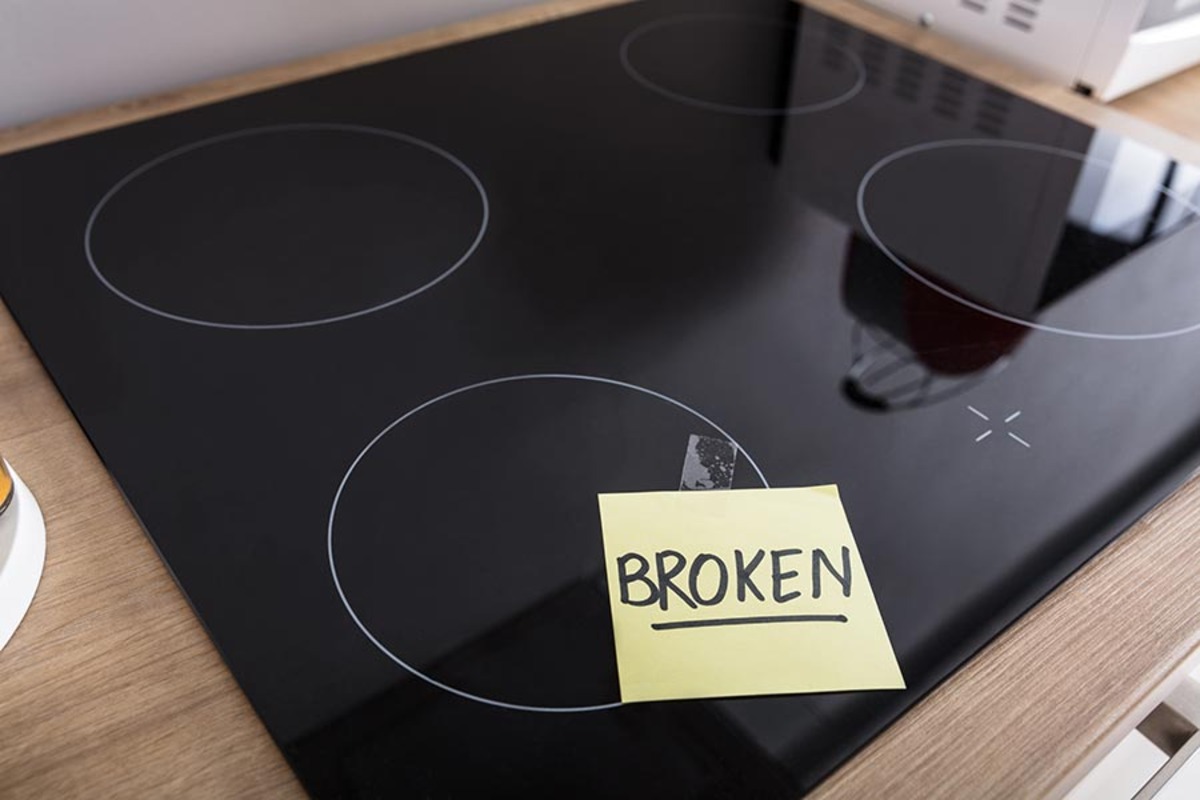
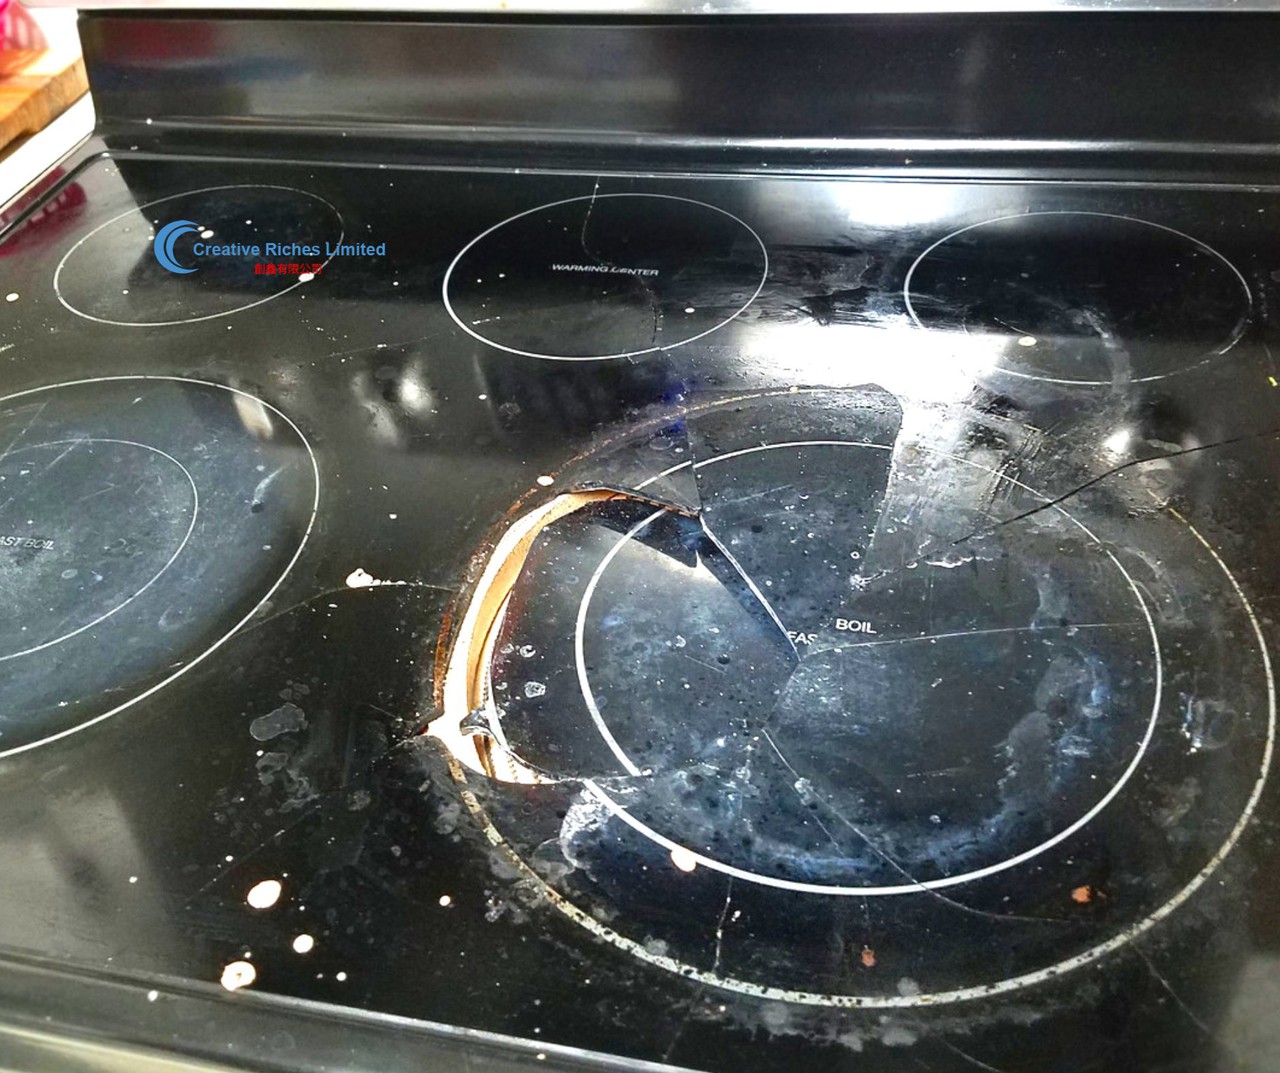
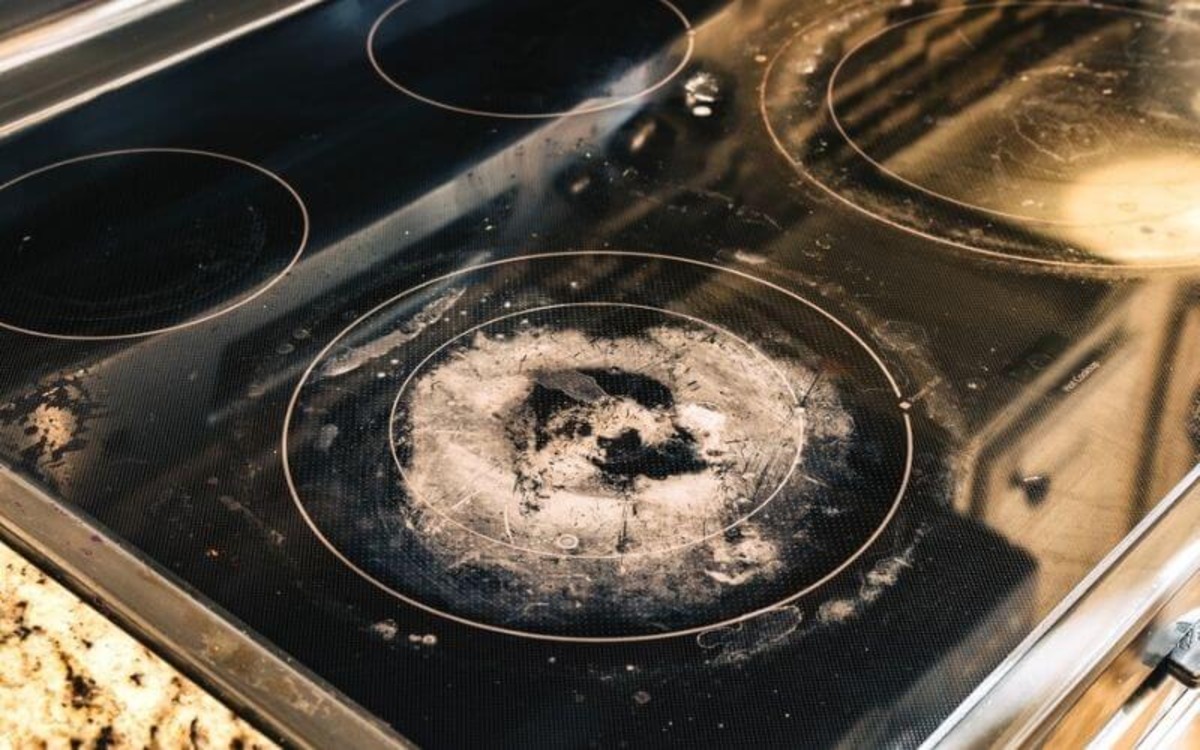
Step 1: Assess the Damage
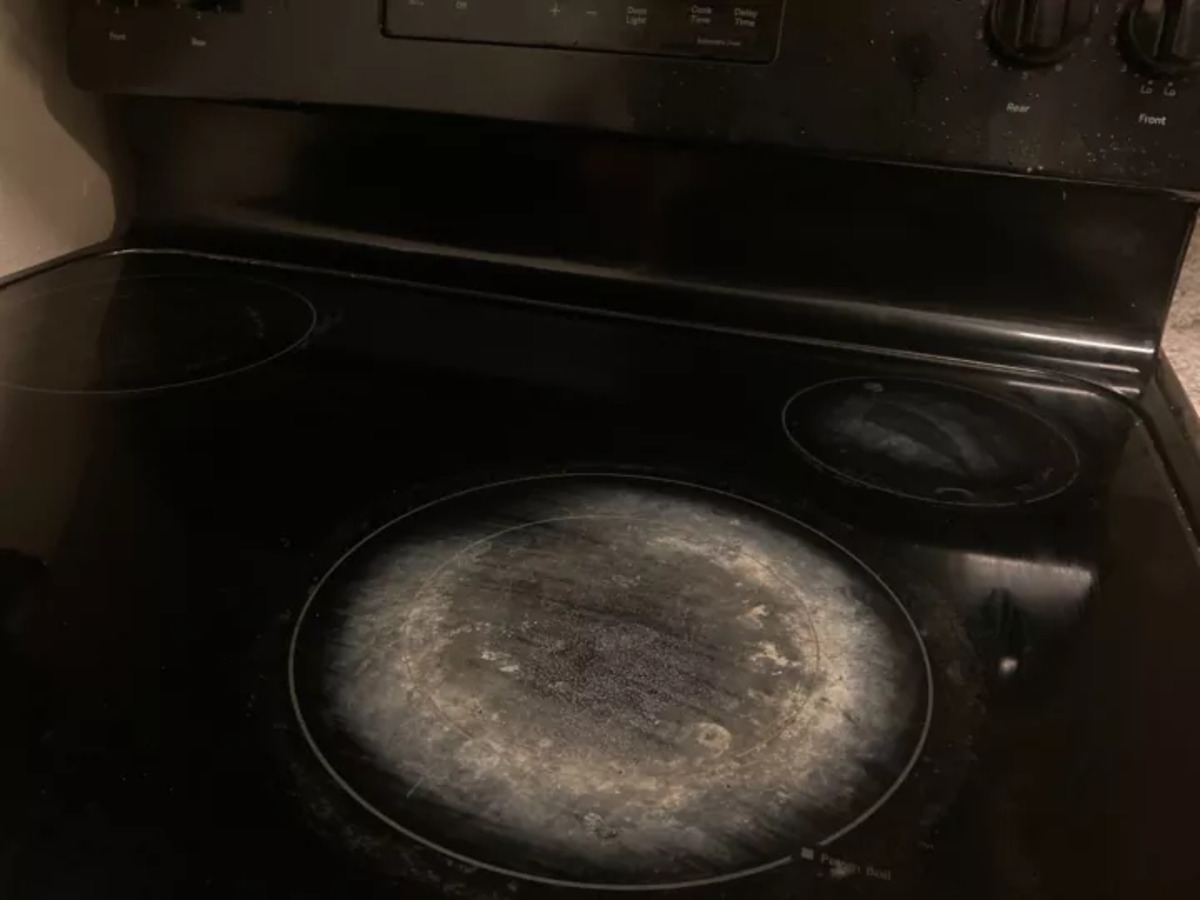
Before you can begin the repair process, it is crucial to assess the extent of the damage to your glass cooktop. This step will help you determine if the cooktop can be repaired or if it needs to be replaced entirely. Here’s how you can assess the damage:
- Examine the Cracks or Damage: Carefully inspect the glass cooktop to identify any cracks, chips, or other forms of damage. Take note of the size, location, and severity of the damage.
- Check for Functionality: Test the functionality of the cooktop. Turn on each burner to see if it heats up evenly and make sure the control knobs or buttons are responsive.
- Assess Safety Risks: Consider the safety risks associated with the damage. Cracks or chips near the heating elements can lead to electrical malfunctions or pose a risk of injury from sharp edges.
- Determine Repair Feasibility: Based on your assessment, determine if the damage can be repaired or if it necessitates a full replacement. Minor scratches, small chips, or cosmetic blemishes can often be repaired, but major cracks or extensive damage may require a replacement.
- Consult a Professional: If you are unsure about the severity of the damage or the feasibility of repair, it is recommended to consult a professional technician. They can provide expert advice based on their assessment of the cooktop.
Assessing the damage is an essential first step in the repair process as it guides your decision-making when it comes to repairing or replacing the glass cooktop. Once you have a clear understanding of the damage, you can proceed with confidence and move on to the next steps of the repair process.
Step 2: Gather Necessary Supplies
After assessing the damage and deciding to repair your glass cooktop, the next step is to gather all the necessary supplies. Having everything you need at hand will make the repair process smoother. Here are the supplies you’ll need:
- Replacement Glass Cooktop: Depending on the extent of the damage, you may need to replace the entire glass cooktop. Ensure that you purchase the correct replacement glass that is compatible with your specific cooktop model. You can find this information in your appliance’s manual or by contacting the manufacturer.
- Protective Gear: Wearing protective gear is crucial throughout the repair process. Ensure you have heat-resistant gloves and safety goggles to protect your hands and eyes from broken glass and other hazards.
- Toolkit: While the specific tools may vary depending on your cooktop model, you will generally need a screwdriver to remove any screws that hold the cooktop in place. Check your appliance’s manual to determine the right type and size of screwdriver you’ll need.
- Adhesive or Sealant: If the replacement glass cooktop doesn’t come with pre-applied adhesive or sealant, you’ll need to purchase a high-quality adhesive specifically designed for glass. Make sure it can withstand high temperatures and adhere well to the cooktop surface. Consult the manual or manufacturer for recommended adhesive types and brands.
- Cleaning Solution: It is important to have a suitable cleaning solution to clean the cooktop surface before applying the new glass. Ensure the cleaning solution is safe to use on glass and won’t leave any residue or damage the appliance.
- Cloth or Sponge: Use a soft cloth or sponge to apply the cleaning solution and wipe down the cooktop surface. Avoid using abrasive materials that could scratch the glass.
- Tape Measure: If you are replacing the glass cooktop, it’s essential to measure the dimensions accurately. Use a tape measure to determine the length, width, and any other specific measurements required for a proper fit.
By gathering all the necessary supplies in advance, you’ll have everything you need ready and easily accessible during the repair process. This will save you time and ensure a more efficient repair job.
Read more: How To Clean A Cloudy Glass Cooktop
Step 3: Turn Off the Power
Before you begin any repair work on your glass cooktop, it is crucial to ensure that the power supply is turned off. This step is essential for your safety and to prevent any electrical accidents while handling the appliance. Here’s how you can turn off the power:
- Locate the Power Source: Identify the power source for your cooktop. It is usually located near the back of the appliance, either in an overhead cabinet or below the cooktop itself.
- Find the Circuit Breaker: Once you’ve located the power source, locate the circuit breaker that controls the cooktop. This is usually labeled in the electrical panel or fuse box.
- Switch Off the Circuit Breaker: To turn off the power, simply flip the switch associated with the cooktop in the electrical panel. This will cut off the electricity supply to the appliance.
- Double Check for Power: To be absolutely certain that the power is off, test the cooktop by turning on one of the burners. If the burner doesn’t heat up, it confirms that the power has been successfully turned off.
Ensuring that the power is turned off is essential for your safety while working on the glass cooktop. It significantly reduces the risk of electrical shock or injury during the repair process. Remember, it’s always better to be safe than sorry, so take the time to double-check and ensure the power is completely off.
Once you have confirmed that the power is off, you can proceed with confidence to the next steps of the repair process.
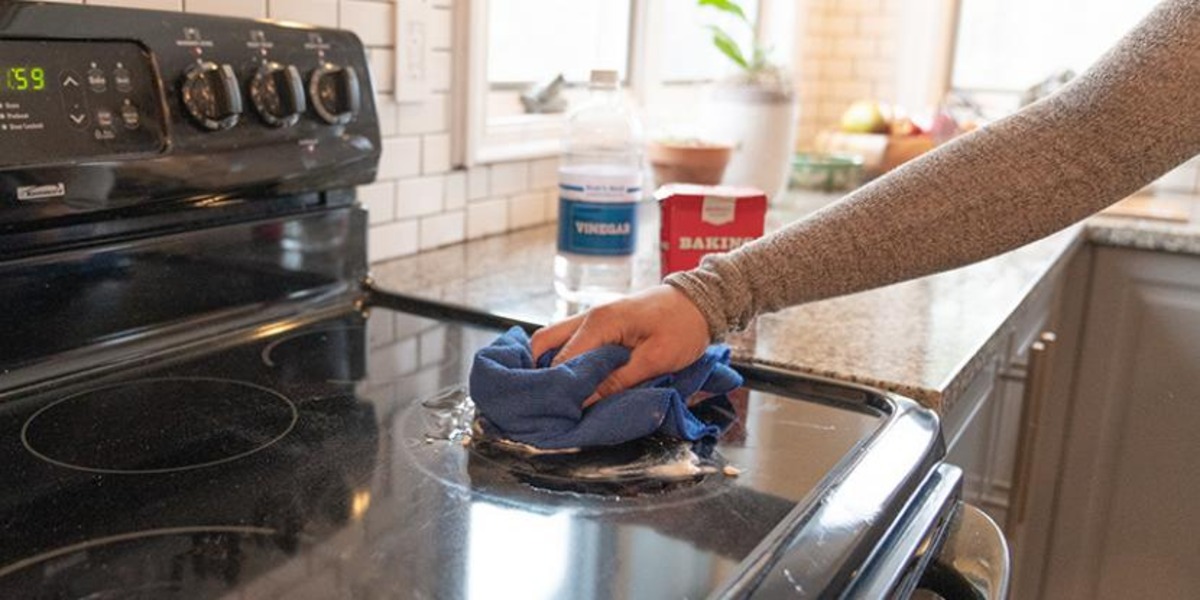
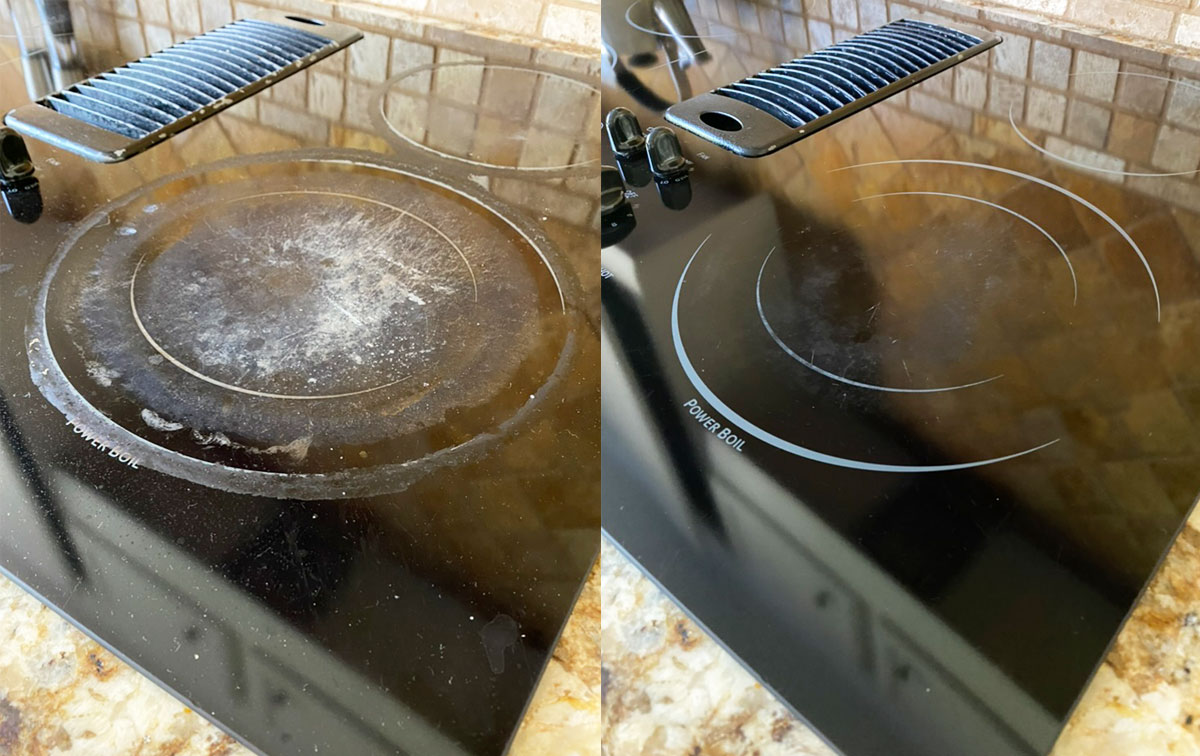
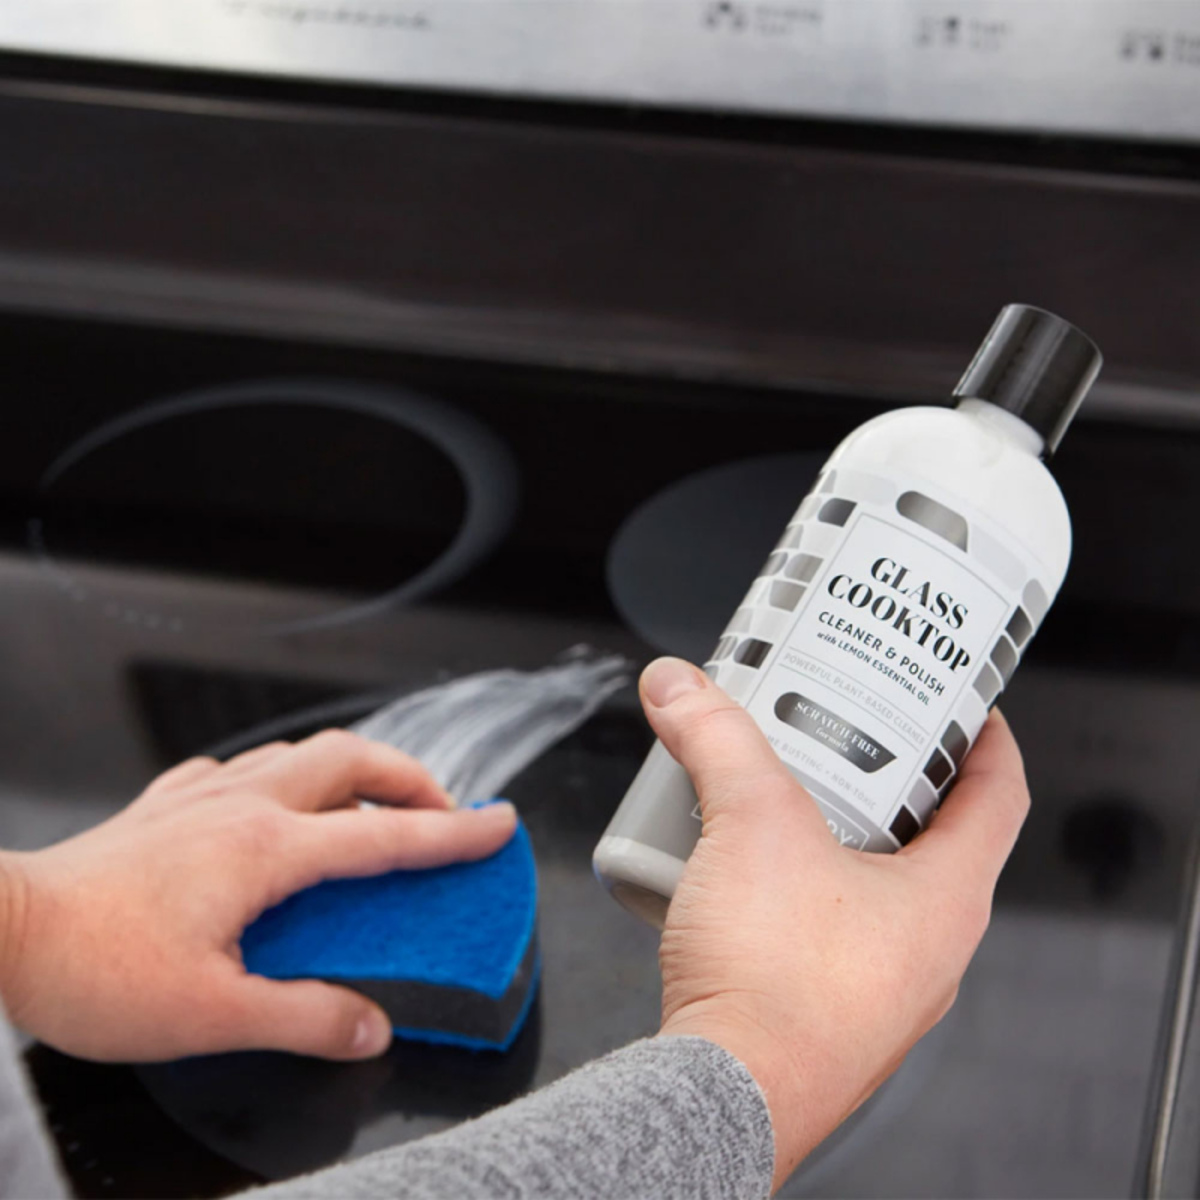
Use a glass cooktop cleaner and a non-abrasive sponge to remove stubborn stains. Apply the cleaner, let it sit for a few minutes, then gently scrub and wipe clean.
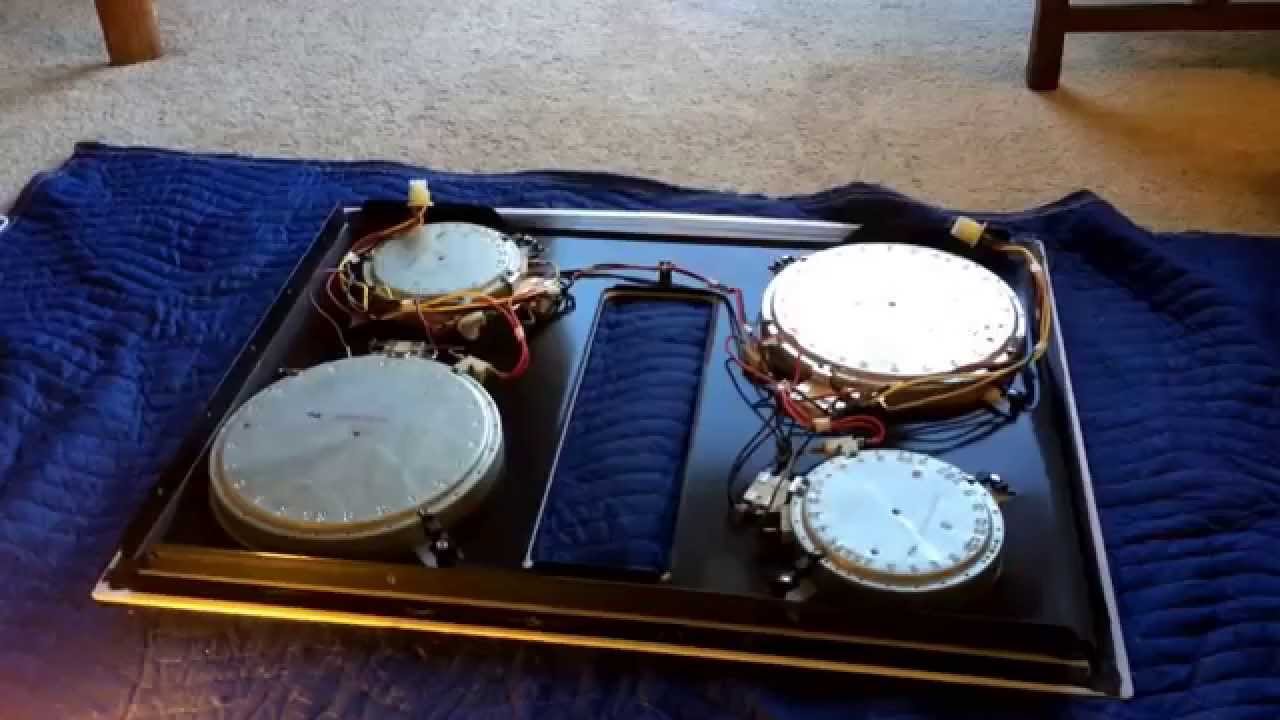
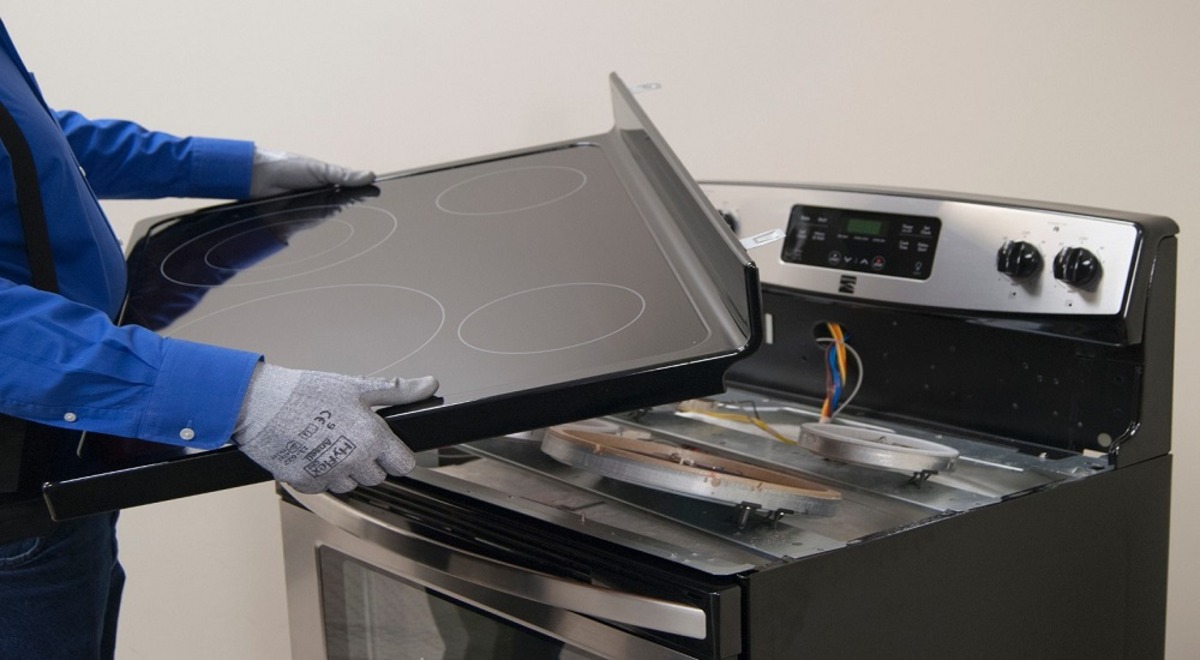
Step 4: Remove the Cooktop
Now that you have turned off the power, it’s time to remove the glass cooktop from your appliance. Removing the cooktop will allow you to access the damaged glass more easily and replace it if necessary. Here are the steps to safely remove the cooktop:
- Disconnect the Power Supply: Before removing the cooktop, ensure that the power supply is disconnected by turning off the circuit breaker associated with the appliance.
- Prepare the Work Area: Clear a spacious and flat work surface where you can place the cooktop. Lay down a soft cloth or towel to protect the surface and prevent any scratches to the cooktop or surrounding area.
- Remove the Burners: Carefully lift the burners off the cooktop surface. These are typically removable and may be held in place by clips or screws. Set the burners aside in a safe location.
- Locate the Mounting Screws: Look for the mounting screws that secure the cooktop to the appliance. These screws are usually located near the edges of the cooktop or underneath it. Use a screwdriver to carefully remove each screw.
- Lift and Remove the Cooktop: Once all the screws are removed, gently lift the cooktop from its position. Be cautious as the cooktop may still be connected to the appliance by power cords or other wiring. Carefully disconnect any electrical connections and set the cooktop aside.
It is important to handle the cooktop with care during this step to avoid further damage or injury. Make sure to support the cooktop evenly and avoid placing excessive pressure on any one area.
With the cooktop removed, you now have a clear view of the damaged glass and can proceed to the next steps of repairing or replacing it.
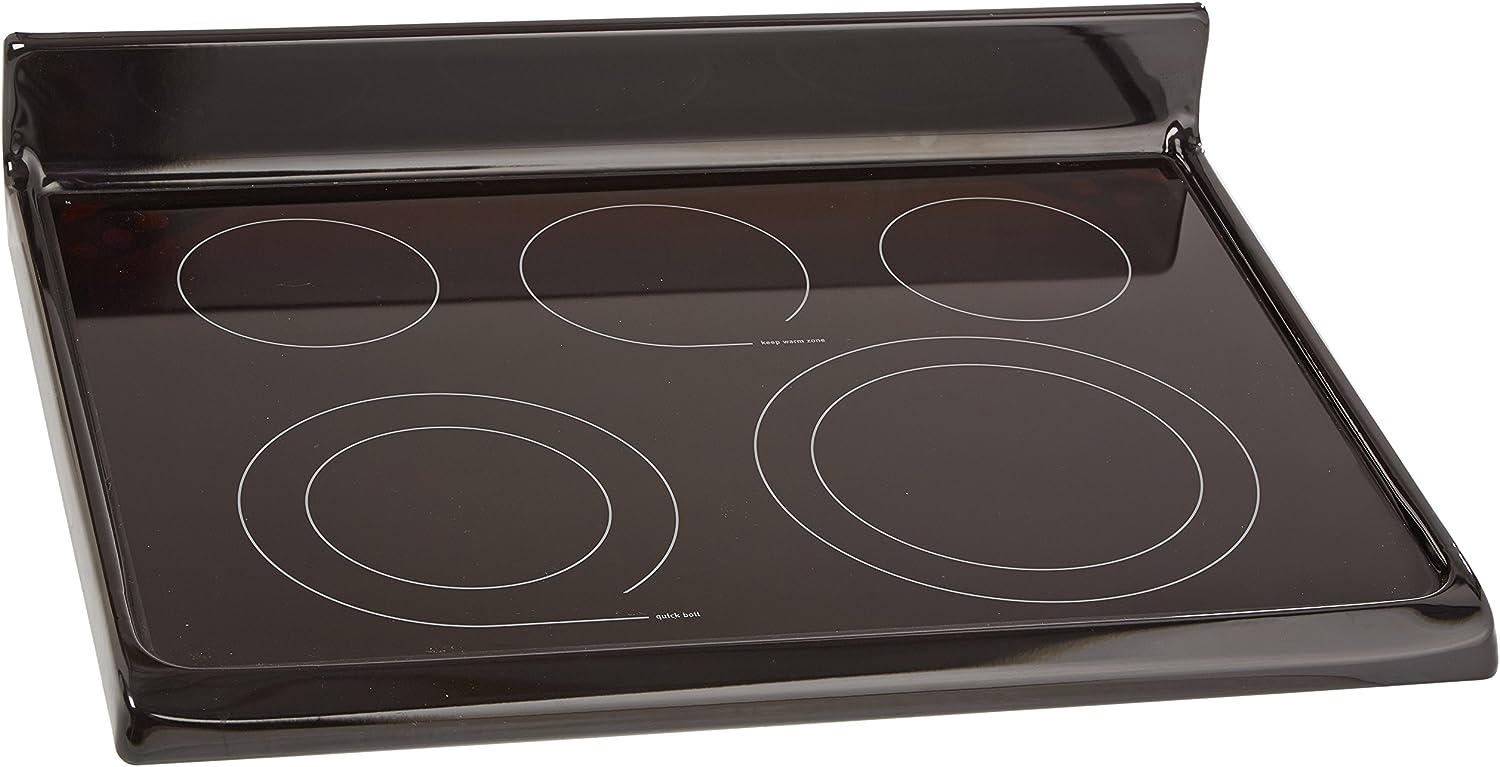
Step 5: Replace the Glass Cooktop
If you’ve determined that replacement is necessary, it’s time to install the new glass cooktop. Follow these steps to ensure a successful replacement:
- Clean the Surface: Before installing the new glass cooktop, thoroughly clean the surface of the appliance. Remove any debris, adhesive residue, or dirt using a suitable cleaning solution and a soft cloth or sponge. Ensure that the surface is dry before proceeding.
- Retrieve the New Glass Cooktop: Carefully unpack the new glass cooktop and inspect it for any signs of damage. Verify that it is the correct replacement for your specific cooktop model.
- Apply Adhesive: If the new cooktop does not come with pre-applied adhesive, carefully apply a thin layer of heat-resistant adhesive or sealant to the underside of the cooktop. Be sure to follow the manufacturer’s instructions and apply the adhesive evenly.
- Align the Cooktop: Position the new glass cooktop over the appliance, ensuring that it aligns correctly with the burner openings and control panel. Take your time to position it accurately, as any misalignment can lead to issues later on.
- Secure the Cooktop: Once the cooktop is aligned, carefully lower it onto the appliance, ensuring that it sits evenly on the surface. If there are any mounting brackets or clips provided with the cooktop, secure them in place according to the manufacturer’s instructions.
- Tighten the Mounting Screws: Using a screwdriver, reinsert and tighten the mounting screws that hold the cooktop in place. Start with the corners and gradually work your way around, alternating between screws, to ensure an even and secure fit.
- Double Check the Alignment: After securing the mounting screws, double-check the alignment of the cooktop. Ensure that it sits flat on the appliance and that the burner openings and control panel are properly aligned.
With the new glass cooktop securely installed, you are one step closer to restoring your appliance to its full functionality. However, there are a few more steps to complete before you can test your cooktop.
Step 6: Reinstall the Cooktop
Now that you have replaced the glass cooktop, it’s time to reinstall it back into your appliance. Follow these steps to ensure a proper reinstallation:
- Verify the Power is Still Turned Off: Before proceeding, double-check that the power supply to the appliance is still turned off. Safety should always be the top priority during any repair or installation work.
- Inspect the Power Connections: Check the power connections between the cooktop and the appliance. Ensure that all electrical connections are secure and properly fitted. If any wires are loose or damaged, consult a professional technician for assistance.
- Align the Cooktop: Carefully align the edges of the cooktop with the appliance. Ensure that it sits securely and evenly on the surface.
- Attach the Mounting Screws: Using a screwdriver, insert and tighten the mounting screws to secure the cooktop in place. Start with the corners and gradually work your way around, tightening each screw firmly but not excessively.
- Reinstall the Burners: Place the burners back onto the cooktop’s surface, making sure they are properly aligned with the burner openings. If there are any clips or screws that hold the burners in place, reattach them securely.
- Test the Control Knobs or Buttons: Turn on the control knobs or buttons to test their responsiveness. Ensure that they operate smoothly and that the correct burners are activated.
- Reconnect the Power Supply: Only after you have completed all the previous steps and are satisfied with the alignment and functionality, can you reconnect the power supply to the cooktop. Flip the circuit breaker switch associated with the appliance back to the “On” position.
By following these steps, you can safely and effectively reinstall the glass cooktop into your appliance. Once the cooktop is securely installed, you’re ready for the final step — testing your repaired cooktop.
Read more: What Kind Of Pots For Glass Cooktop
Step 7: Test the Cooktop
Now that you have completed the repair process and reinstalled the glass cooktop, it’s time to test the functionality of your cooktop. Follow these steps to ensure that everything is in working order:
- Turn on the Power: Flip the circuit breaker switch associated with the cooktop back to the “On” position to restore power to the appliance. Ensure that the power is successfully restored.
- Ignite the Burners: Turn on each burner to test if they ignite and heat up properly. Observe the flame and make sure it is consistent and evenly distributed on each burner.
- Check Control Panel Functions: Test the control knobs or buttons on the cooktop’s control panel. Make sure that they are responsive and adjust the heat settings as desired. Check that any digital displays or indicators are functioning correctly.
- Monitor Heat Distribution: While the burners are running, observe the heat distribution on the cooktop’s surface. Ensure that the heat is evenly distributed across all burners and that there are no hotspots or cold spots.
- Inspect for Leaks or Issues: Take a close look at the cooktop and its surrounding area for any signs of leaks, unusual noises, or issues such as loose connections. If you notice any problems, consult a professional technician for assistance.
- Clean the Cooktop: Once you have confirmed that the cooktop is working properly, clean the surface using a suitable cleaning solution and a soft cloth or sponge. This will remove any fingerprints, residue, or dirt accumulated during the repair process.
By performing these tests and inspections, you can ensure that your glass cooktop is fully functional and safe to use. If you encounter any ongoing issues or concerns, it’s best to consult a professional technician for further assistance.
Congratulations on successfully repairing your glass cooktop! Enjoy cooking on your newly restored appliance.
Conclusion
Repairing a glass cooktop may seem like a daunting task, but with the right tools, materials, and guidance, it can be a manageable DIY project. In this guide, we have provided you with comprehensive steps to assess the damage, gather necessary supplies, turn off the power, remove and replace the glass cooktop, and finally, test the cooktop to ensure its proper functionality.
Throughout the repair process, it is crucial to prioritize safety by wearing protective gear, turning off the power, and following manufacturer instructions. Taking safety precautions will help prevent accidents and injuries.
Remember, not all damage can be repaired, and there may be instances where a full replacement is necessary. Assessing the damage accurately will guide your decision-making and ensure the best outcome for your glass cooktop.
While this guide provides a general overview of the repair process, it’s essential to consult your appliance’s manual or contact the manufacturer for model-specific instructions and recommendations. If you feel unsure or uncomfortable with any step, it is always best to seek the assistance of a professional technician.
We hope this guide has been helpful in guiding you through the process of repairing your glass cooktop. By following these steps with caution and care, you can restore your cooktop to its original functionality and ensure safe and efficient cooking in your kitchen.
Remember to always prioritize safety, double-check your work, and enjoy the satisfaction of a job well done!
Frequently Asked Questions about How To Repair Glass Cooktop
Was this page helpful?
At Storables.com, we guarantee accurate and reliable information. Our content, validated by Expert Board Contributors, is crafted following stringent Editorial Policies. We're committed to providing you with well-researched, expert-backed insights for all your informational needs.

0 thoughts on “How To Repair Glass Cooktop”