Articles
How To Remove Jenn Air Glass Cooktop
Modified: August 28, 2024
Discover the most effective methods for removing a Jenn Air glass cooktop in this comprehensive article. Explore step-by-step instructions and helpful tips to make the process easier.
(Many of the links in this article redirect to a specific reviewed product. Your purchase of these products through affiliate links helps to generate commission for Storables.com, at no extra cost. Learn more)
Introduction
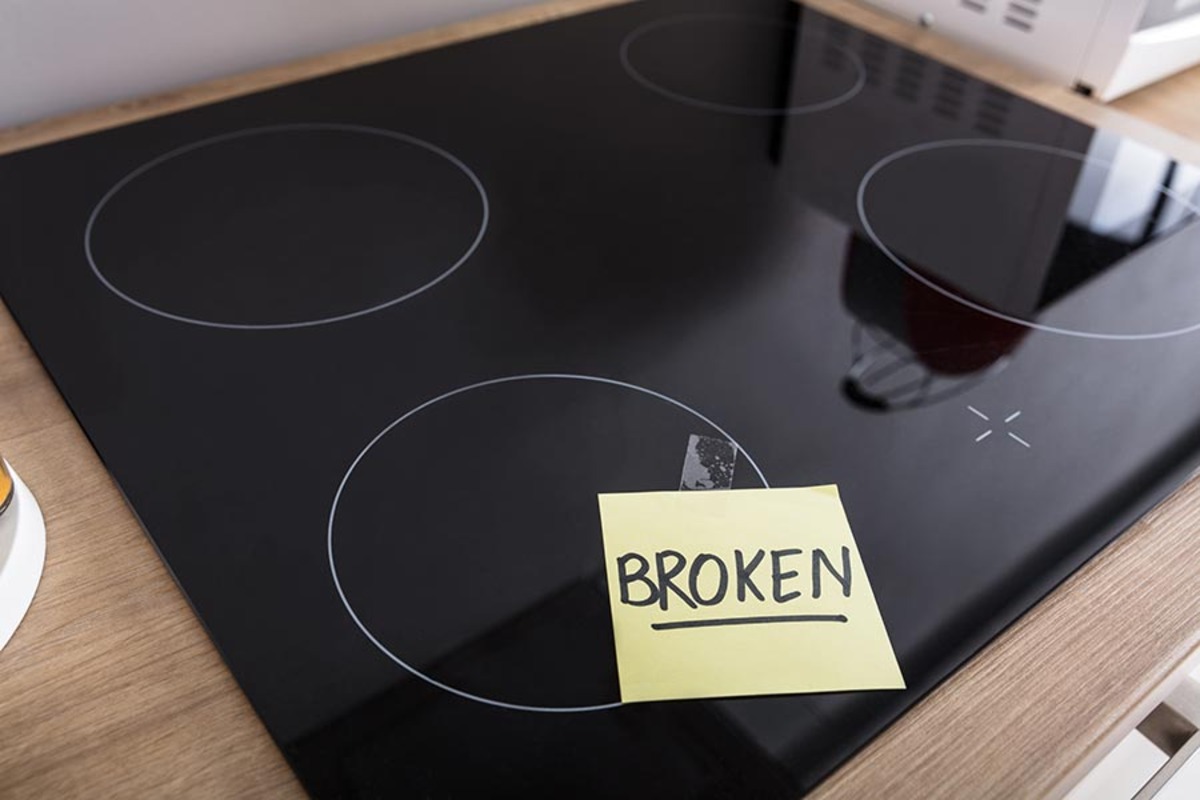
When it comes to cooking, having a functional and well-maintained cooktop is essential. However, over time, the glass cooktop on your Jenn Air appliances may become cracked, chipped, or stained, compromising both its aesthetic appeal and performance. In such cases, removing the damaged glass cooktop and replacing it with a new one becomes necessary.
Replacing a Jenn Air glass cooktop may seem like a daunting task, but with the right tools and instructions, it can be done easily and safely. In this article, we will guide you through the step-by-step process of removing a Jenn Air glass cooktop, ensuring that you can replace it with a new one and restore the functionality of your cooktop.
Before we dive into the details, it’s important to note that safety should always be your top priority when working with any electrical appliances. Make sure to follow all safety precautions and disconnect the power supply before starting the removal process. Additionally, it is highly recommended to consult the user manual or seek professional assistance if you are unsure or uncomfortable with performing the task yourself.
Now, let’s gather the necessary tools to successfully remove the Jenn Air glass cooktop.
Key Takeaways:
- Prioritize safety by disconnecting the power supply, wearing protective gear, and handling the glass cooktop with care. Follow the step-by-step guide to successfully remove and replace the cooktop for a secure and functional appliance.
- Whether installing a new cooktop or reassembling the existing one, ensure proper alignment, secure electrical connections, and thorough cleaning for an enhanced culinary experience. Always consult the user manual or seek professional assistance for specific concerns.
Read more: How To Repair Jenn-Air Cooktop
Safety Precautions
Before you start removing the glass cooktop on your Jenn Air appliance, it’s crucial to follow these safety precautions to ensure your well-being and prevent any accidents:
1. Disconnect the power supply: Before beginning any work on your cooktop, make sure to turn off the power supply at the circuit breaker. This will help prevent the risk of electrical shock while you’re working on the appliance.
2. Protect yourself: Wear protective gloves to safeguard your hands from sharp edges and broken glass. It’s also advisable to wear safety goggles to protect your eyes from any flying debris.
3. Allow the cooktop to cool down: Always ensure that the cooktop is completely cool before attempting to remove it. Trying to remove a hot cooktop can lead to burns or injuries. Give it ample time to cool down before starting the removal process.
4. Clear the workspace: Prior to removing the glass cooktop, clear the area around the appliance of any flammable materials or clutter. This will provide you with a safe and spacious working environment.
5. Take caution with gas connections: If your Jenn Air cooktop is fueled by gas, be extra cautious when working around the gas connections. Ensure that the gas has been switched off and disconnected properly before starting the removal process.
6. Handle the glass cooktop with care: Glass is fragile and can break easily. While removing the cooktop, be gentle and avoid applying too much pressure or force. Take note of any cracks or damage to the glass and proceed with caution.
7. Use the correct tools: Make sure you have the appropriate tools for the job. Using the wrong tools can not only damage the cooktop but also pose a risk to your safety. Refer to the user manual or consult a professional to determine the correct tools needed for removing the glass cooktop.
By adhering to these safety precautions, you can minimize the risk of accidents and injuries while removing the glass cooktop of your Jenn Air appliance. Remember to prioritize your safety at all times during the removal process.
Tools Required
Before you begin the process of removing the glass cooktop on your Jenn Air appliance, gather the following tools to ensure a smooth and efficient removal:
1. Screwdriver: A Phillips head screwdriver will be needed to remove the screws that secure the glass cooktop to the appliance. Make sure the screwdriver is the right size to avoid stripping the screws.
2. Putty knife: A putty knife or similar flat-edged tool is useful for gently prying and lifting the glass cooktop. It helps in separating the cooktop from the appliance without causing any damage.
3. Work gloves: Wearing work gloves will protect your hands from sharp edges and potential broken glass. Opt for gloves that provide both dexterity and grip to handle the cooktop securely.
4. Safety goggles: Safety goggles are essential to shield your eyes from any debris that may be released during the removal process. Be sure to wear them to prevent eye injuries.
5. Cleaning supplies: It’s advisable to have some cleaning supplies on hand to clean the area underneath the glass cooktop once it is removed. This may include a mild cleaning solution, a sponge or cloth, and paper towels.
6. Replacement components (if applicable): If you are replacing the glass cooktop entirely, you will also need to have the replacement cooktop ready. Make sure to check the model number of your Jenn Air appliance to ensure you purchase the correct replacement part.
Having these tools readily available before you begin the glass cooktop removal process will save you time and frustration. Ensure that all tools are in good condition and functioning properly for a safe and successful removal. Remember to follow the manufacturer’s instructions and consult the user manual if you have any doubts about the tools needed for your specific Jenn Air appliance model.
Step 1: Turn off the Cooktop and Disconnect the Power Supply
Before you begin the process of removing the glass cooktop on your Jenn Air appliance, it is crucial to turn off the cooktop and disconnect the power supply. This step ensures your safety and prevents any potential accidents. Follow these steps:
1. Locate the circuit breaker: Find the circuit breaker that controls the power supply to your cooktop. Typically, the circuit breaker panel is located in the basement, garage, or utility room of your home.
2. Identify and turn off the corresponding circuit: Look for the circuit breaker switch that is labeled or identified as powering the cooktop. Flip the switch into the “OFF” position to cut off the power supply to the cooktop.
3. Double-check the power: To ensure that the power is disconnected, turn on one of the surface elements or knobs on the cooktop. If the element or knob does not turn on, it confirms that the power supply has been successfully cut off.
4. Secure the cooktop knobs: Once the power supply is turned off, it is a good practice to secure the cooktop knobs by removing them. Simply pull the knobs straight out towards you to detach them from the cooktop. Keep the knobs in a safe place to prevent misplacement.
5. Disconnect the appliance from the power source: If your Jenn Air appliance has a power cord, unplug it from the electrical outlet. For hard-wired cooktops, you may need to seek the assistance of a professional electrician to safely disconnect the appliance from the power source.
Taking the time to turn off the cooktop and disconnect the power supply is essential for your safety while performing the glass cooktop removal. Always double-check and ensure the power is completely disconnected before proceeding with the next steps. Remember to consult the user manual or seek professional assistance if you are unsure about disconnecting the power supply to your specific Jenn Air appliance model.
Step 2: Remove the Cooking Grates and Burners
After disconnecting the power supply, the next step in removing the glass cooktop on your Jenn Air appliance is to remove the cooking grates and burners. Follow these steps:
1. Allow the cooktop to cool: Ensure that the cooktop has completely cooled down before proceeding with this step. This will prevent any burns or injuries during the removal process.
2. Lift and remove the cooking grates: Gently lift the cooking grates off the cooktop surface. Depending on your Jenn Air appliance model, the grates may simply lift off, or you may need to undo clips or screws that secure them in place. Set the grates aside in a safe location.
3. Remove the burners: Identify the burners on the cooktop. Depending on your appliance, they may be secured with screws or brackets. Unscrew or detach the burners from the cooktop carefully. If the burners are connected via a harness or wire, detach them by carefully unplugging the electrical connections. Keep track of which wire corresponds to each burner to ensure proper reinstallation later.
4. Set aside the removed components: Once the cooking grates and burners are removed, set them aside in a safe area. It is a good idea to clean them using mild soap and water or any manufacturer-recommended cleaner while they are detached.
By removing the cooking grates and burners, you create clear access to the glass cooktop, making it easier to proceed with the next steps of removing and replacing it. Store the removed components safely to ensure they are not damaged during the glass cooktop removal process. Remember to consult the user manual for your specific Jenn Air appliance model or seek professional assistance if needed.
Read more: How To Use Jenn-Air Induction Cooktop
Step 3: Unscrew the Screws Securing the Glass Cooktop
Once you have removed the cooking grates and burners, the next step in removing the glass cooktop on your Jenn Air appliance is to unscrew the screws that secure it in place. Follow these steps:
1. Locate the screws: Examine the edges of the glass cooktop to locate the screws holding it in position. Depending on your Jenn Air appliance model, there may be multiple screws around the perimeter or in specific locations.
2. Use the correct screwdriver: Select the appropriate screwdriver based on the type of screws used to secure the glass cooktop. It is recommended to use a Phillips head screwdriver, matching the size of the screws to prevent stripping or damaging them.
3. Carefully unscrew the screws: Begin unscrewing each screw one at a time. It’s important to apply gentle pressure and maintain a firm grip on the screwdriver to avoid slipping and potential injury. Set the screws aside in a safe place to ensure they are not misplaced or lost.
4. Keep track of the screw locations: As you remove each screw, take note of their original positions and orientations. This will help when it comes time to reassemble the cooktop or install a new glass cooktop.
5. Lift the glass cooktop: Once all the screws have been removed, the glass cooktop should be ready to lift. Place your hands on opposite sides of the cooktop and lift it carefully, ensuring that it is fully detached from the appliance. If there is any resistance, double-check to ensure all screws have been removed before proceeding further.
By unscrewing the screws that secure the glass cooktop, you are one step closer to fully removing it. Be cautious while handling the cooktop, as it may still be fragile and prone to breakage. Store the screws in a safe place to avoid misplacement and make sure to keep track of their original positions for reassembly. If you are replacing the glass cooktop, proceed to the next steps. Otherwise, move on to Step 4 to continue removing the existing glass cooktop.
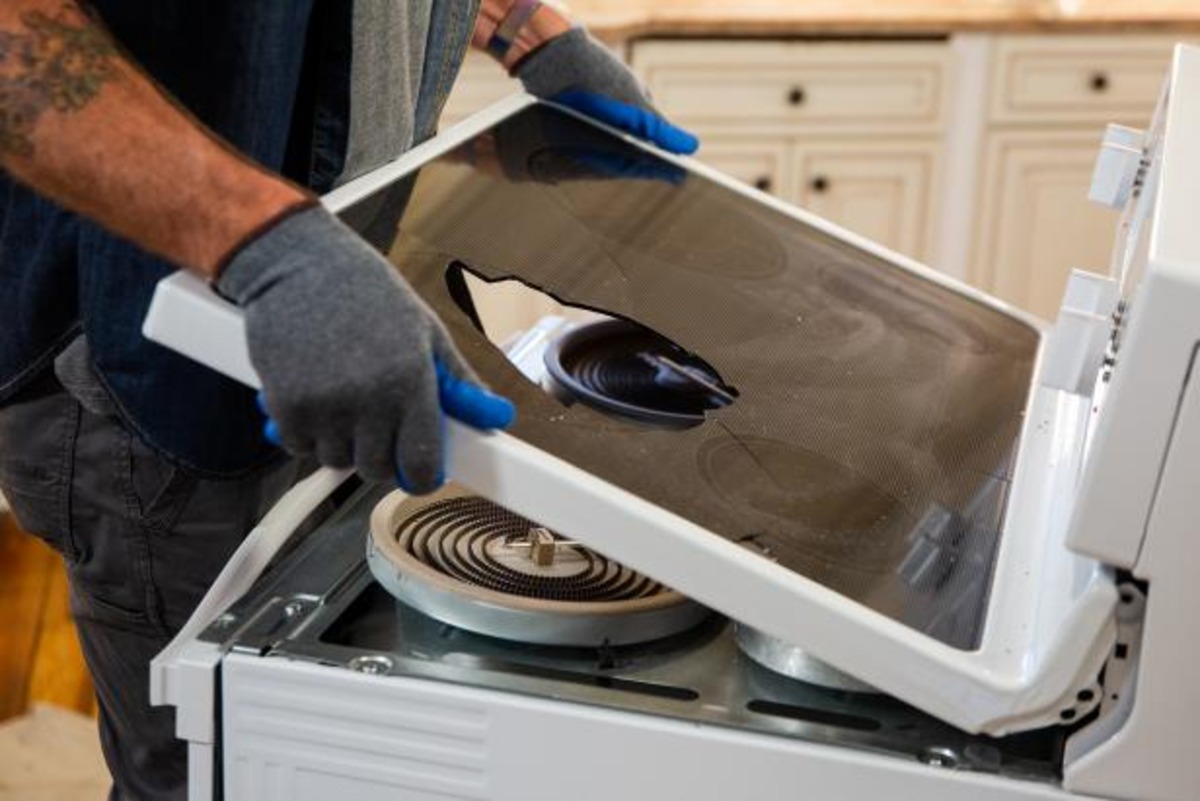
Step 4: Lift and Detach the Glass Cooktop
Once you have unscrewed the screws securing the glass cooktop, it’s time to lift and detach it from your Jenn Air appliance. Follow these steps to safely remove the glass cooktop:
1. Ensure a secure grip: Before lifting the glass cooktop, make sure you have a secure grip on it to avoid any accidents or damage. It’s a good idea to use both hands and ensure that your fingers are placed on the sides or edges of the cooktop for stability.
2. Lift the cooktop: Gently lift the glass cooktop upwards, applying consistent and even pressure. Take care to lift it straight up to ensure that it separates from any mounting brackets or clips.
3. Check for any resistance: As you lift the cooktop, be mindful of any resistance or stuck areas. If you encounter any difficulty or feel resistance, stop and recheck if any screws or fasteners are still attached.
4. Set the glass cooktop down carefully: Once the cooktop is lifted and detached from the appliance, set it down on a flat, secure surface. Take care not to place it on a hard or abrasive surface that might scratch or damage the glass.
5. Inspect the cooktop: Now that the glass cooktop is removed, inspect it for any cracks, chips, or other damage. If you are replacing the cooktop, this is a good time to compare it with the new one to ensure you have the correct replacement.
By lifting and detaching the glass cooktop, you have successfully removed it from your Jenn Air appliance. Take a moment to inspect the cooktop for any damage before proceeding to the next steps. If you are replacing the cooktop, continue with the following steps. Otherwise, move on to Step 5 to disconnect the electrical connections.
Use a razor blade to carefully scrape off any remaining residue after removing the glass cooktop. Be sure to use a gentle touch to avoid scratching the surface.
Step 5: Disconnect the Electrical Connections
With the glass cooktop successfully lifted and detached from your Jenn Air appliance, the next step is to disconnect the electrical connections. Follow these steps to ensure a smooth disconnection process:
1. Locate the electrical connections: Look for the electrical connections underneath the glass cooktop. These connections typically consist of wires or harnesses that are plugged into the cooktop or terminal blocks.
2. Unplug the electrical connections: Carefully unplug the wires or disconnect the harnesses from the cooktop. Depending on the design of your appliance, you may need to use a flathead screwdriver or gently pull on the connectors to release them.
3. Take note of the wire positions: As you disconnect each electrical connection, take note of the positioning and orientation of the wires. This will be helpful when reconnecting the new glass cooktop or during the reinstallation process.
4. Secure the wire connections: Once the electrical connections are disconnected, use zip ties or tape to secure the wires out of the way. This will prevent them from interfering with the rest of the removal process and ensure they stay organized for the reinstallation.
5. Double-check for any additional connections: Before proceeding, double-check the area to ensure all electrical connections have been disconnected. Sometimes there could be hidden or additional connections that need to be detached before moving forward.
By disconnecting the electrical connections, you have successfully prepared the glass cooktop for removal or replacement. Take care to handle the wires with caution and keep them organized to avoid any confusion during the reinstallation process. With this step complete, you can move on to the next steps to either install a replacement cooktop or continue with the reinstallation of the existing glass cooktop.
Step 6: Install the Replacement Cooktop (if Applicable)
If you are replacing the glass cooktop on your Jenn Air appliance with a new one, follow these steps to properly install the replacement cooktop:
1. Prepare the new cooktop: Before installing the new glass cooktop, ensure that it is the correct model for your Jenn Air appliance. Check for any protective packaging or film on the surface and remove it accordingly.
2. Position the replacement cooktop: Carefully position the replacement cooktop over the opening on your appliance. Align the edges of the cooktop with the mounting brackets or clips.
3. Lower the cooktop into place: Slowly lower the replacement cooktop onto the appliance, making sure it fits securely. Take care to avoid any excessive force or pressure that could potentially damage the cooktop.
4. Align the screw holes: Align the screw holes on the replacement cooktop with the corresponding holes on the appliance. Ensure that the cooktop is positioned correctly and evenly before proceeding.
5. Insert and tighten the screws: Once the cooktop is properly aligned, insert the screws that were previously removed into the screw holes. Use a Phillips head screwdriver to tighten the screws until they are snug, but be careful not to overtighten and risk cracking the glass.
6. Check for stability and alignment: After the screws are tightened, gently check the stability and alignment of the replacement cooktop. Ensure that it sits evenly and securely on the appliance.
7. Remove any protective film (if applicable): If there is any remaining protective film or packaging on the replacement cooktop, carefully remove it according to the manufacturer’s instructions.
By following these steps, you can install the replacement cooktop on your Jenn Air appliance. Make sure to move on to the next steps to reconnect the electrical connections and secure the glass cooktop properly. If you are not replacing the cooktop, proceed to the next steps to reinstall the existing glass cooktop.
Read also: 15 Best Jenn-Air Cooktop For 2025
Step 7: Reconnect the Electrical Connections
Now that you have either installed a replacement cooktop or are reassembling the existing glass cooktop on your Jenn Air appliance, it’s time to reconnect the electrical connections. Follow these steps to ensure a proper and secure connection:
1. Locate the electrical connections: Identify the electrical connections on the appliance where the wires or harnesses were detached earlier. These connections may consist of plugs, terminals, or terminal blocks.
2. Align the connections: Align the wires or harnesses with their respective connectors on the appliance. Match the wire colors or labels to ensure correct alignment.
3. Insert the wires into the connectors: Carefully insert the wires or harnesses into their corresponding connectors. If necessary, a gentle push or a slight twisting motion may be needed to fully seat the connections.
4. Ensure a secure fit: Once the connections are inserted, check that they are seated securely and have a firm connection. Gently tug on the wires to verify that they are properly attached.
5. Double-check the wire positions: Before proceeding, double-check the positioning and orientation of each wire. Compare them to your notes from earlier to ensure accurate reconnection.
6. Secure the wire connections: Once all the electrical connections are reattached, use zip ties or tape to secure the wires, ensuring they are neatly organized and kept out of the way of other components.
By reconnecting the electrical connections, you are ensuring that the glass cooktop is properly powered and ready for use. Take care to double-check the wire positions and verify that all connections are secure before proceeding with the next steps. With this step complete, you are ready to move on to securing the glass cooktop and reassembling the rest of the components.
Step 8: Place the Glass Cooktop Back onto the Stove
With the electrical connections securely reattached, it’s time to place the glass cooktop back onto your Jenn Air appliance. Follow these steps to ensure a proper fit:
1. Lift the glass cooktop: Carefully lift the glass cooktop, ensuring that you have a firm grip on it and that your hands are positioned on opposite sides or edges.
2. Align the cooktop with the stove: Position the glass cooktop over the opening on the stove, aligning it with the mounting brackets or clips. Take your time to make sure it is centered and correctly positioned.
3. Lower the cooktop onto the stove: Slowly lower the glass cooktop onto the stove, making sure it rests evenly and securely on the appliance. Be cautious not to apply excessive force or pressure that could cause damage.
4. Check for proper alignment: Once the cooktop is lowered onto the stove, check for proper alignment. Ensure that all edges are flush with the stove and that the cooktop sits level.
5. Verify stability: Gently press down on various areas of the cooktop to verify that it is stable and does not wobble. This will ensure a secure fit and proper functioning of the appliance.
By placing the glass cooktop back onto the stove, you are nearing the completion of the installation or reassembly process. Make sure that the cooktop is aligned correctly and rests securely on the stove. With this step finished, you are ready to move on to securing the cooktop with screws in the next step.
Step 9: Secure the Glass Cooktop with Screws
To ensure the stability and proper functioning of the glass cooktop on your Jenn Air appliance, it is important to secure it in place with screws. Follow these steps to effectively secure the cooktop:
1. Align the screw holes: Check that the screw holes on the glass cooktop align with the corresponding holes on the stove. Aligning them properly will ensure that the cooktop sits flush and evenly on the appliance.
2. Insert the screws: Take the screws that were removed earlier and insert them into the screw holes. Start with one corner of the cooktop and work your way around, gradually tightening each screw.
3. Use the correct screwdriver: Utilize the screwdriver to tighten the screws, making sure not to overtighten. Tighten until the screws are snug, but be cautious not to apply excessive force, as it may lead to cracking or damaging the glass.
4. Double-check the alignment: After securing all the screws, double-check the alignment of the cooktop. Ensure that it is still properly aligned with the stove and sits level.
5. Verify stability: Gently press down on different areas of the cooktop to confirm that it is stable and securely attached. Check for any wobbling or movement, as this could indicate that the screws are not tightened adequately.
By securing the glass cooktop with screws, you are ensuring that it is properly held in place and will withstand everyday use. Take care to align the screw holes correctly and tighten the screws without applying excessive force. With this step complete, you are ready to move on to reassembling the cooking grates and burners in the final step.
Step 10: Reinstall the Cooking Grates and Burners
After securing the glass cooktop with screws, the final step in the process of removing and replacing the glass cooktop on your Jenn Air appliance is to reinstall the cooking grates and burners. Follow these steps to complete the reinstallation:
1. Retrieve the cooking grates and burners: Gather the cooking grates and burners that you set aside earlier. Ensure they are clean and free from any debris or residue.
2. Position the burners: Place each burner back onto its designated location on the cooktop. Make sure they align correctly and sit securely in their respective positions.
3. Secure the burners: If your burners are secured with clips or screws, reattach them to the cooktop using the appropriate fasteners. Tighten them securely but be careful not to overtighten and risk damaging the cooktop.
4. Install the cooking grates: Place the cooking grates back onto the cooktop, ensuring they sit evenly and securely. Depending on your Jenn Air appliance model, they may simply rest on top or need to be secured with clips or screws.
5. Test the reinstalled components: Once all the cooking grates and burners are in place, give them a gentle jiggle to ensure they are secure and properly positioned.
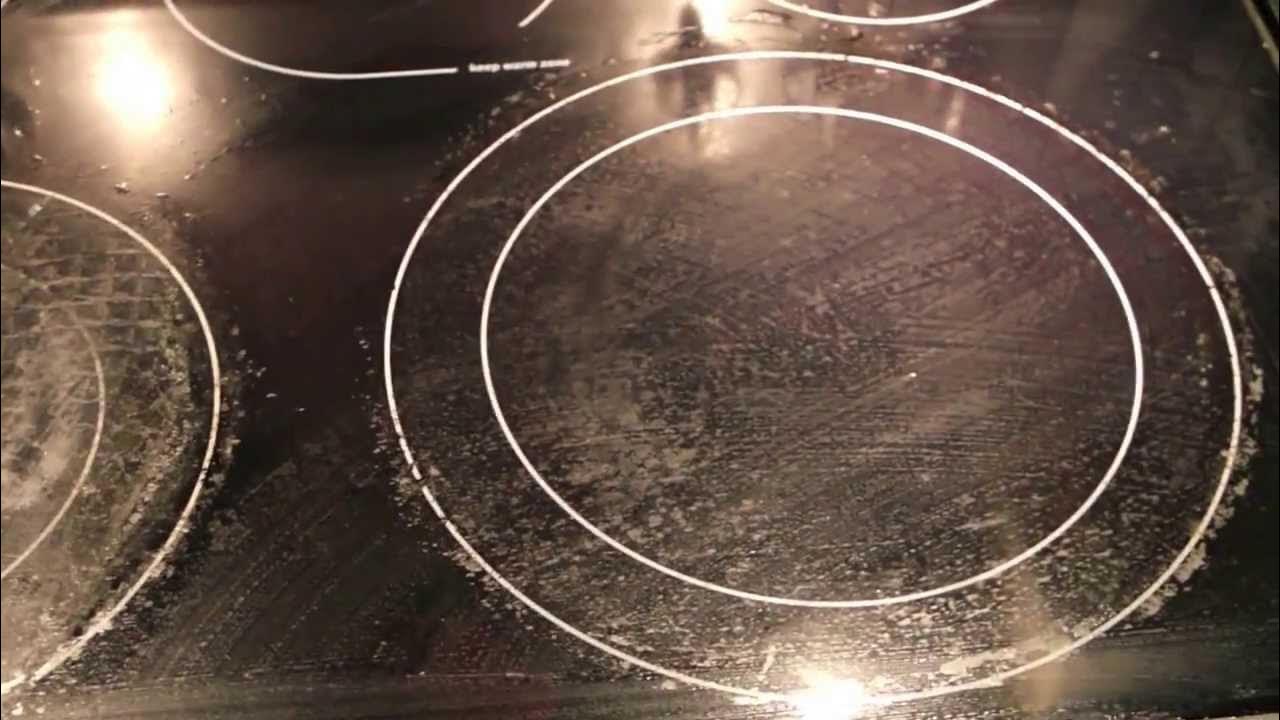
6. Clean the cooktop: Before using the cooktop, take a moment to clean the glass surface using a mild cleanser suitable for glass cooktops. Wipe away any fingerprints or residue to restore its appearance and cleanliness.
By reinstalling the cooking grates and burners, you have successfully completed the process of removing and replacing the glass cooktop on your Jenn Air appliance. Take a moment to double-check the stability and positioning of the components before using the cooktop again. By following these steps, you’ve restored the functionality and appearance of your appliance, ensuring many more enjoyable cooking experiences ahead.
Read also: 10 Superior Jenn Air Cooktop For 2025
Conclusion
Removing and replacing the glass cooktop on your Jenn Air appliance may seem like a daunting task, but with the right tools and guidance, it can be accomplished successfully. By following the steps outlined in this guide, you can safely remove the damaged glass cooktop and replace it with a new one, or reassemble the existing cooktop to restore its functionality.
Throughout the process, it is crucial to prioritize safety by disconnecting the power supply, wearing protective gear, and handling the glass cooktop with care. Remember to consult the user manual or seek professional assistance if you have any concerns or uncertainties.
Equipped with the necessary tools and a step-by-step approach, you can easily remove and replace the glass cooktop on your Jenn Air appliance. Whether you’re upgrading to a new cooktop or installing a replacement, by following these steps, you can ensure a secure and functional cooktop for your cooking needs.
Remember to maintain a clean and well-maintained cooktop by regularly cleaning and caring for it as recommended by the manufacturer. This will help increase its lifespan and preserve its appearance over time.
Now that you have successfully completed the process, enjoy cooking on your newly-installed or reassembled glass cooktop. The revamped appearance and improved functionality will enhance your overall culinary experience.
Please note that this guide is a general overview and may not cover specific model variations or unique circumstances. Always consult the user manual or seek professional assistance tailored to your Jenn Air appliance if you encounter any difficulties or have specific questions.
Happy cooking!
Frequently Asked Questions about How To Remove Jenn Air Glass Cooktop
Was this page helpful?
At Storables.com, we guarantee accurate and reliable information. Our content, validated by Expert Board Contributors, is crafted following stringent Editorial Policies. We're committed to providing you with well-researched, expert-backed insights for all your informational needs.


0 thoughts on “How To Remove Jenn Air Glass Cooktop”