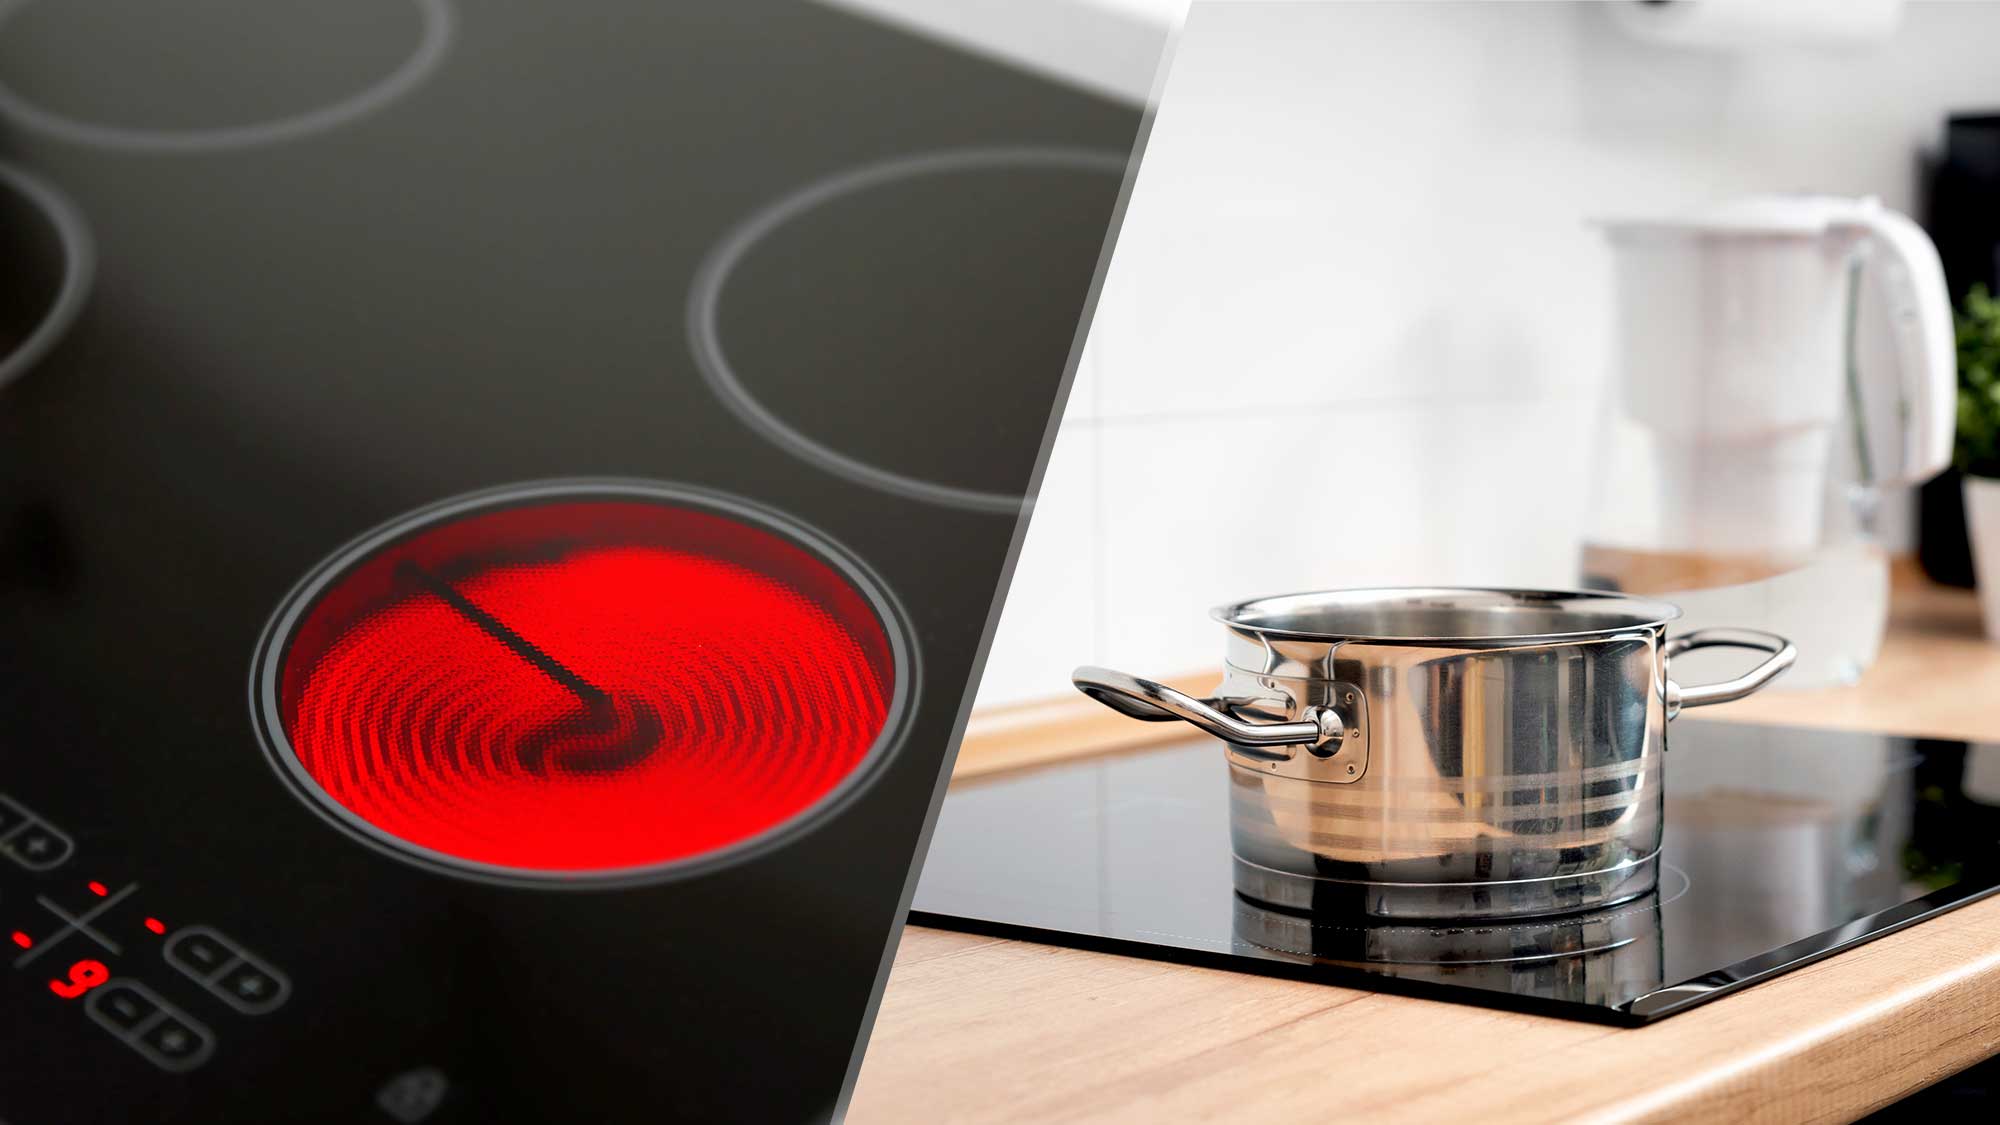
Home>Articles>How To Replace A Glass Cooktop On An Electric Range
Articles
How To Replace A Glass Cooktop On An Electric Range
Modified: September 1, 2024
Learn step-by-step instructions and tips for replacing the glass cooktop on your electric range with helpful articles on maintenance and repair.
(Many of the links in this article redirect to a specific reviewed product. Your purchase of these products through affiliate links helps to generate commission for Storables.com, at no extra cost. Learn more)
Introduction
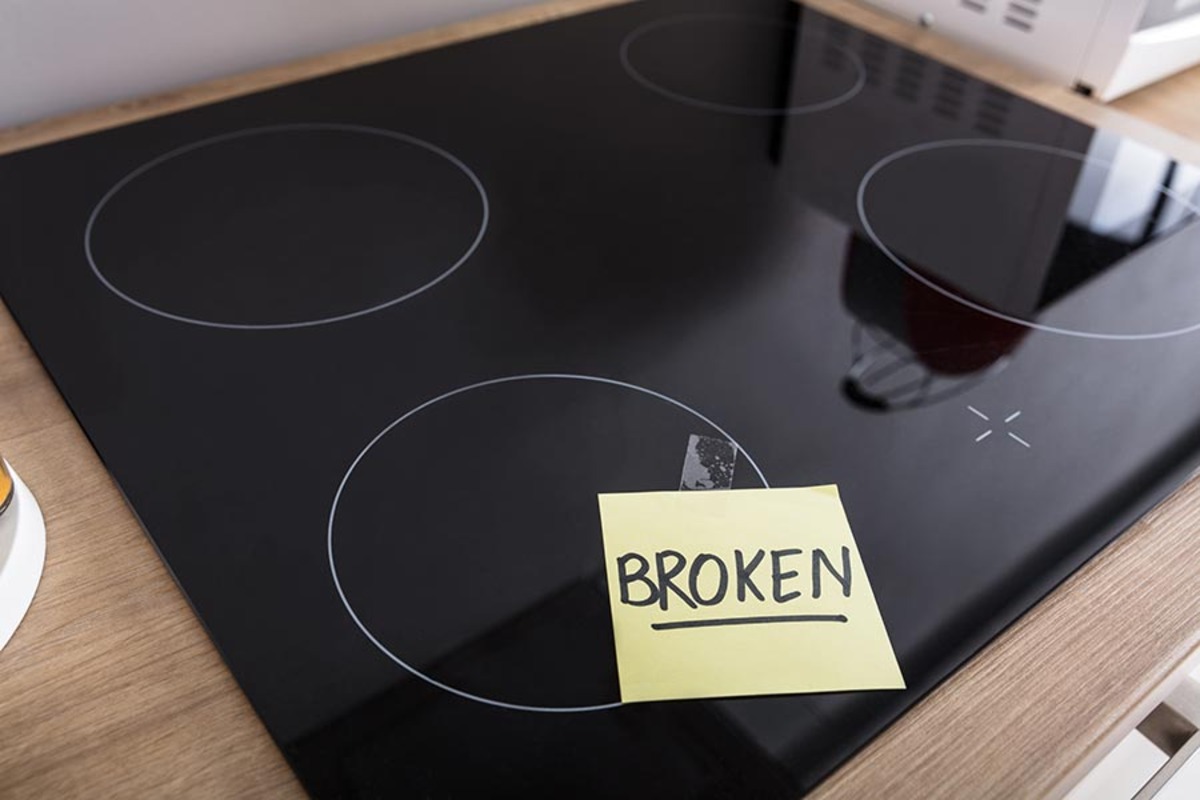
Replacing a cracked or damaged glass cooktop on an electric range can seem like a daunting task. However, with the right tools, precautions, and step-by-step guide, you can tackle this DIY project with confidence. Not only will replacing the glass cooktop improve the appearance of your range, but it will also ensure safe and efficient cooking.
Before you begin this project, it is important to prioritize safety. Make sure to turn off the power supply to the range and take necessary precautions to avoid any accidents. Additionally, gather all the required tools and materials before you start the process. This will save you time and ensure a smooth replacement.
In this article, we will provide you with a comprehensive guide on how to replace a glass cooktop on an electric range. We will go through each step, from disconnecting the power supply to testing the new cooktop. By following these instructions, you can successfully replace the glass cooktop and have your range looking as good as new in no time.
Keep in mind that while the steps mentioned in this article are generally applicable to most electric ranges, it is essential to consult your specific range’s user manual for any manufacturer-specific instructions. Additionally, if you are not comfortable working with electrical appliances, it is always best to seek professional assistance.
Now, let’s get started with the necessary safety precautions before diving into the step-by-step process of replacing a glass cooktop on an electric range.
Key Takeaways:
- Prioritize safety by disconnecting the power supply, wearing protective gear, and taking your time during each step. Following the outlined process will result in a successful and refreshed glass cooktop for your electric range.
- Gather the necessary tools, follow manufacturer guidelines, and test the cooktop thoroughly to ensure a smooth and efficient replacement process. By prioritizing safety and attention to detail, you can enjoy a renewed cooking experience with your new glass cooktop.
Read more: How To Replace A Gas Cooktop
Safety Precautions
Before you begin the process of replacing the glass cooktop on your electric range, it is crucial to prioritize safety. Follow these safety precautions to ensure a secure and hazard-free experience:
- Turn off the power: Before starting any work on the range, make sure to turn off the power supply. Locate the main circuit breaker or unplug the range from the power outlet. This step is essential to prevent electric shock or injury.
- Protective gear: Wear appropriate protective gear, such as gloves and safety goggles, to safeguard yourself from any potential accidents or injuries. Broken glass shards and sharp edges can pose a risk, so it’s important to protect your hands and eyes during the replacement process.
- Cool down the cooktop: Allow the glass cooktop to cool completely if it was in use recently. The high temperature of the cooktop can cause burns if touched, so it is essential to wait until it is safe to handle.
- Clear the workspace: Before starting the replacement process, clear the workspace of any items that may obstruct your movement or cause accidents. This includes removing utensils, pots, and pans from the range and ensuring there is ample space to manoeuvre.
- Patience and caution: Take your time and work with caution during the replacement process. Rushing or using excessive force can lead to accidental damage or injury. Follow the steps carefully and remain focused on the task at hand.
- Professional assistance: If you are unsure about any aspect of the replacement process or do not have experience working with electrical appliances, it is always best to seek professional assistance. They have the necessary expertise and knowledge to safely perform the replacement.
By following these safety precautions, you can minimize the risk of accidents and injuries while replacing the glass cooktop on your electric range. Now that you are aware of the necessary safety measures, let’s move on to the step-by-step process of replacing the glass cooktop.
Step 1: Gather the Necessary Tools
Before replacing the glass cooktop on your electric range, it is important to gather all the necessary tools and materials. Having everything ready beforehand will streamline the process and prevent interruptions. Here are the essential tools you will need:
- Screwdriver set: A set of screwdrivers, both flathead and Phillips, will be needed to remove the screws holding the cooktop in place.
- Protective gloves: Wear protective gloves to protect your hands from sharp edges and potential cuts or scratches.
- Safety goggles: Safety goggles are essential to protect your eyes from any glass shards that may fly during the replacement process.
- Replacement glass cooktop: Purchase a replacement glass cooktop that is compatible with your electric range model. Ensure you have the correct dimensions and specifications.
- Putty knife: A putty knife will come in handy for removing any adhesive or sealant that is holding the cooktop in place.
- Adhesive or sealant: Depending on your range model, you may need adhesive or sealant to secure the new glass cooktop in place. Check the manufacturer’s instructions.
- Cleaning supplies: Have cleaning supplies such as glass cleaner, a sponge, and a microfiber cloth on hand to clean the cooktop and surrounding area before and after the replacement.
- Electrical tape: Electrical tape is useful for securing any loose or exposed wires during the process.
Make sure to double-check the user manual for your specific electric range model to see if there are any additional tools or materials recommended by the manufacturer. Having all the necessary tools ready will ensure a smooth replacement process without any hiccups.
Now that you have gathered the required tools, it’s time to move on to the next step: disconnecting the power supply to the electric range.
Step 2: Disconnect the Power Supply
Before you start working on replacing the glass cooktop, it is crucial to disconnect the power supply to your electric range. This step is essential for your safety and to ensure that no electric current is flowing through the appliance during the replacement process. Follow these steps to disconnect the power supply:
- Locate the circuit breaker: Identify the circuit breaker that controls the power supply to your electric range. It is usually located in the electrical panel of your home.
- Turn off the circuit breaker: Flip the switch of the circuit breaker that corresponds to your range to the “Off” position. This will cut off the power supply completely.
- Check for power supply: To ensure that the power supply has been successfully disconnected, test the range by turning on one of the burners. If it does not heat up, then the power has been properly disconnected.
- Double-check for safety: It is important to double-check that the power supply is indeed disconnected before proceeding. Use a multimeter or voltage tester to verify that there is no electrical voltage present at the range.
Disconnecting the power supply ensures that you can work on replacing the glass cooktop safely. Remember, electricity can be extremely dangerous, so do not skip this step or take any risks. Once you are sure that the power supply is disconnected, you can proceed to the next step: removing the burner elements from the cooktop.
Step 3: Remove the Burner Elements
With the power supply disconnected, it’s time to remove the burner elements from the glass cooktop. Removing the burner elements will make it easier to detach and replace the cooktop. Follow these steps to remove the burner elements:
- Allow the cooktop to cool: Ensure that the glass cooktop has completely cooled down before proceeding. This will prevent any burns or injuries during the removal process.
- Identify the burner elements: Locate the burner elements on the cooktop. These are the heating elements that provide the heat for cooking.
- Turn the burner elements off: Make sure that all the burner elements are turned off and not in use.
- Gently lift the burner elements: Carefully lift each burner element from its position on the cooktop. Depending on your range model, the elements may be held in place by clips or brackets.
- Disconnect the electrical connections: Once the burner elements are lifted, disconnect the electrical connections between the elements and the range. This can usually be done by gently pulling the connectors apart.
- Set the burner elements aside: Place the removed burner elements in a safe location to prevent them from getting damaged or in the way during the replacement process.
By removing the burner elements, you make the cooktop more accessible for the next steps. Keep in mind that each burner element may have different connectors or brackets, so pay attention to how they are attached and disconnect them accordingly. With the burner elements removed, you can now proceed to the next step: removing the old glass cooktop.
Read more: How To Replace A Range Hood
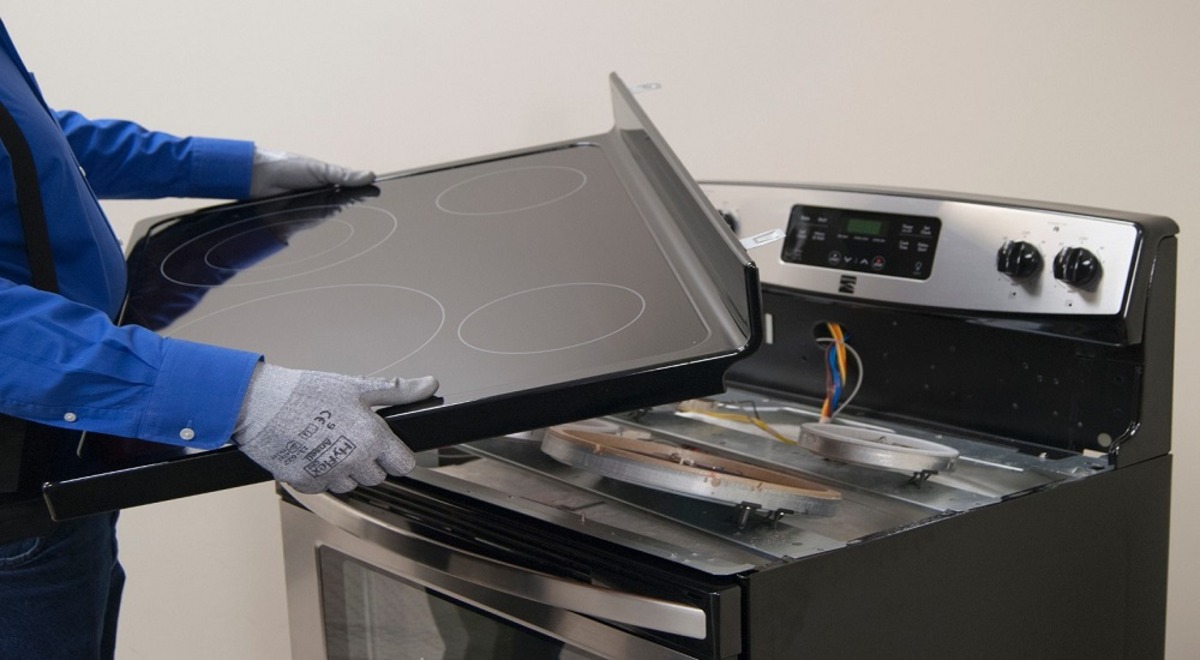
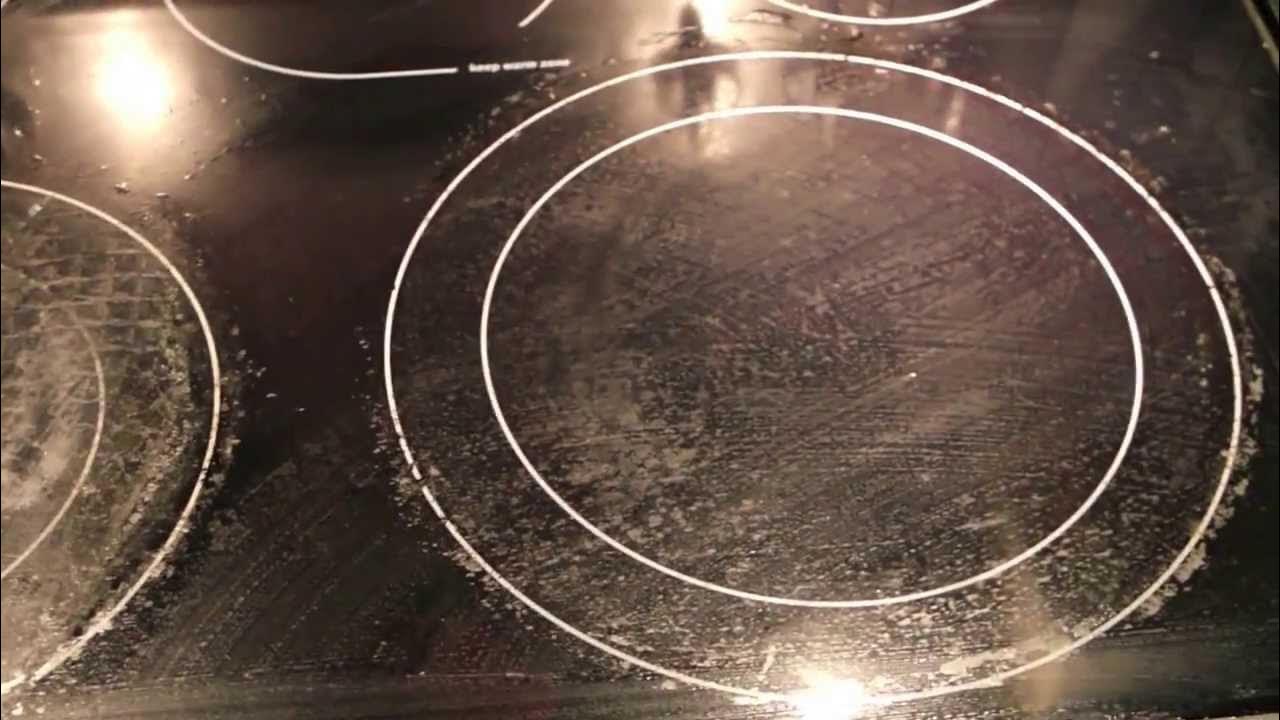
Step 4: Remove the Old Glass Cooktop
Now that the burner elements have been removed, it’s time to remove the old glass cooktop from your electric range. Follow these steps to safely remove the old cooktop:
- Inspect the cooktop: Take a closer look at the existing cooktop to identify any screws, brackets, or adhesive that may be securing it in place. This will give you an idea of what needs to be removed.
- Remove any screws: If there are screws holding the cooktop in place, use a screwdriver to carefully remove them. Keep track of the screws and organize them in a safe spot for easy reassembly later.
- Detach any brackets: Some cooktops may have additional brackets or clamps that secure it to the range. If this is the case, use a screwdriver or pliers to detach these brackets, allowing the cooktop to be lifted.
- Loosen any adhesive or sealant: If the cooktop is adhered to the range with an adhesive or sealant, use a putty knife to carefully loosen and scrape away the material. Take caution not to damage the surrounding surface.
- Lift the old cooktop: With the screws, brackets, and adhesive removed, gently lift the old cooktop from the range. Ensure that you have a firm grip on the cooktop to prevent it from slipping or dropping.
- Set the old cooktop aside: Place the old cooktop in a safe location, away from any potential damage or obstacles. You can discard it or keep it for reference until the replacement process is complete.
Removing the old glass cooktop may require some patience and careful maneuvering. Take your time and double-check that all screws, brackets, and adhesive have been properly removed before attempting to lift the cooktop. With the old cooktop removed, you can move on to the next step: installing the new glass cooktop.
When replacing a glass cooktop on an electric range, always disconnect the power supply and follow the manufacturer’s instructions for safe removal and installation.
Step 5: Install the New Glass Cooktop
With the old cooktop removed, it’s now time to install the new glass cooktop onto your electric range. Follow these steps to ensure a smooth and successful installation:
- Prepare the new cooktop: Carefully unpack the new glass cooktop and inspect it for any damages. Verify that it matches the dimensions and specifications of your electric range model.
- Clean the range surface: Use a gentle glass cleaner and a soft cloth or sponge to clean the surface of the range where the new cooktop will be installed. Remove any dust, debris, or residue from the previous cooktop.
- Apply adhesive or sealant (if required): Depending on your range model, you may need to apply adhesive or sealant to secure the new cooktop in place. Follow the manufacturer’s instructions and apply the adhesive or sealant around the edges of the range surface.
- Position the new cooktop: Carefully align the new glass cooktop with the range surface, ensuring that it fits securely and snugly into place. Pay attention to any notches or grooves that need to be aligned.
- Press down gently: Once the cooktop is properly aligned, press down gently to secure it to the range surface. Apply even pressure across the entire cooktop to ensure a proper seal with the adhesive or sealant.
- Reinstall any screws or brackets: If there were screws or brackets that held the old cooktop in place, reinstall them using a screwdriver or pliers. Make sure they are tightened enough to secure the new cooktop, but be careful not to overtighten and damage the glass.
- Allow the adhesive or sealant to set: If you used adhesive or sealant, allow it to properly set according to the manufacturer’s instructions. This will ensure a strong bond between the new cooktop and the range surface.
It’s important to follow the specific instructions provided by the manufacturer of your electric range and the new glass cooktop. This will ensure that the installation is done correctly and securely. With the new cooktop installed, you can now move on to the next step: reinstalling the burner elements.
Step 6: Reinstall the Burner Elements
Now that the new glass cooktop is securely installed, it’s time to reinstall the burner elements onto the cooktop. Follow these steps to properly reinstall the burner elements:
- Retrieve the burner elements: Take the burner elements that were previously removed and ensure that they are clean and in good condition. Wipe away any dust or debris with a soft cloth if necessary.
- Identify the correct placement: Look for the markings or indicators on the new cooktop that indicate the proper placement of each burner element. These markings are usually labeled with the size or position of each element.
- Connect the electrical connections: Gently align the electrical connectors on each burner element with their corresponding receptacles on the cooktop. Push them together until they fit snugly and securely.
- Align the burner element: Carefully align each burner element with its designated position on the cooktop. The element should sit flat and level, without any tilting or gaps.
- Push the burner element down: Apply gentle pressure to push the burner element down onto the cooktop. It should lock into place or be secured by clips or brackets, depending on your range model.
- Test the burner elements: Once all burner elements are reinstalled, test each one by turning it on and verifying that it heats up properly. This ensures that the connections are secure and the elements are functioning correctly.
It is important to properly align and secure each burner element to avoid any hazards or malfunctions during cooking. Double-check that all electrical connections are secure and that the elements sit flush on the cooktop. With the burner elements reinstalled, you can now move on to the next step: reconnecting the power supply.
Step 7: Reconnect the Power Supply
With the burner elements securely reinstalled, it’s time to reconnect the power supply to your electric range. Follow these steps to safely reconnect the power supply:
- Ensure all burner elements are turned off: Before reconnecting the power supply, double-check that all burner elements on the cooktop are in the off position. This will prevent any accidental heat or potential hazards during the reconnection process.
- Locate the circuit breaker or power outlet: Identify the circuit breaker that controls the power supply to your electric range or locate the power outlet where it is plugged in.
- Turn on the circuit breaker or plug in the range: If the power supply was disconnected at the circuit breaker, flip the switch to the “On” position. If it was unplugged, plug the electric range back into the power outlet.
- Test the power supply: Test the power supply by turning on one of the burner elements. It should heat up and function properly. This confirms that the reconnection was successful.
Ensure that the power supply is properly reconnected and functioning before proceeding. This step is crucial to power your electric range and allows you to use the newly installed glass cooktop. With the power supply reconnected, you can move on to the final step: testing the cooktop.
Read more: How To Clean A Smooth Top Range Or Cooktop
Step 8: Test the Cooktop
After completing the installation and reconnecting the power supply, it’s important to test the cooktop to ensure that everything is functioning correctly. Follow these steps to test the cooktop:
- Turn on each burner element: Turn on each burner element one by one to verify that they heat up properly. Allow each element to reach its desired temperature and ensure there are no abnormal sounds or smells.
- Check for any issues: While the burner elements are heating, closely inspect the cooktop and surrounding areas for any signs of problems. Look for any leaking gas, loose connections, or unusual sparks. If you notice anything concerning, immediately turn off the burner elements and consult a professional.
- Adjust the controls: Test the control knobs or touch controls for each burner to ensure they are working correctly. Make sure that the heat levels adjust accordingly and that the controls respond properly to your adjustments.
- Verify the cooktop surface: Examine the surface of the new glass cooktop for any irregularities, cracks, or damage. Ensure that it is level and there are no loose or uneven areas.
- Clean the cooktop: Once you have finished testing, use a mild cleaner and a soft cloth to clean the cooktop surface. This will remove any fingerprints, smudges, or residue that may have accumulated during the installation process.
By thoroughly testing the cooktop, you can identify and address any issues or concerns before regular use. Take your time during this step and be attentive to any signs of malfunction or abnormalities. Once you are satisfied that the cooktop is functioning properly, you have successfully replaced the glass cooktop on your electric range.
Congratulations! You have completed all the necessary steps to replace the glass cooktop on your electric range. Enjoy your newly installed cooktop and its enhanced appearance and functionality. If you encounter any difficulties or face any further issues, it’s always wise to consult a professional for assistance.
Remember, safety should always be a priority when working with electrical appliances. Take necessary precautions, follow manufacturer guidelines, and seek proper professional help if needed. With proper care and maintenance, your new glass cooktop will provide you with years of reliable and efficient cooking.
Conclusion
Replacing a glass cooktop on an electric range may initially seem daunting, but with the right tools, precautions, and step-by-step guidance, it can be a manageable DIY project. By following the outlined steps and prioritizing safety, you can successfully replace the glass cooktop and enjoy a refreshed and functional cooking surface.
Throughout this article, we have discussed the importance of safety precautions, gathering the necessary tools, disconnecting the power supply, removing the burner elements, taking out the old glass cooktop, installing the new cooktop, reinstalling the burner elements, reconnecting the power supply, and testing the cooktop. Each step is crucial to ensure a smooth and successful replacement process.
Remember to always prioritize safety by turning off the power supply and wearing appropriate protective gear. Take your time during each step, being cautious and thorough to avoid any accidents or damage to the cooktop or range. If you are unsure or uncomfortable with any aspect of the replacement process, it is best to seek professional assistance.
By following the provided steps and guidelines, you can transform the appearance and functionality of your electric range with a new glass cooktop. Enjoy the benefits of a clean and efficient cooking surface, allowing you to prepare your favorite meals with ease.
Thank you for reading this comprehensive guide on how to replace a glass cooktop on an electric range. We hope that the information provided has been helpful, and we wish you success in your DIY project. Remember to prioritize safety, follow the manufacturer’s instructions, and enjoy your renewed cooking experience!
Frequently Asked Questions about How To Replace A Glass Cooktop On An Electric Range
Was this page helpful?
At Storables.com, we guarantee accurate and reliable information. Our content, validated by Expert Board Contributors, is crafted following stringent Editorial Policies. We're committed to providing you with well-researched, expert-backed insights for all your informational needs.


0 thoughts on “How To Replace A Glass Cooktop On An Electric Range”