
Articles
How To Roast Garlic In Toaster Oven
Modified: August 27, 2024
Learn how to roast garlic to perfection using your toaster oven. This informative article provides easy steps and helpful tips for achieving delicious, caramelized garlic cloves.
(Many of the links in this article redirect to a specific reviewed product. Your purchase of these products through affiliate links helps to generate commission for Storables.com, at no extra cost. Learn more)
Introduction
Roasted garlic adds a depth of flavor and a delightful aroma to numerous dishes, making it a popular ingredient in many cuisines. It brings a sweet and mellow taste to sauces, spreads, meats, vegetables, and even baked goods. While many people associate roasting garlic with using a conventional oven, it is also possible to achieve deliciously roasted garlic in a toaster oven.
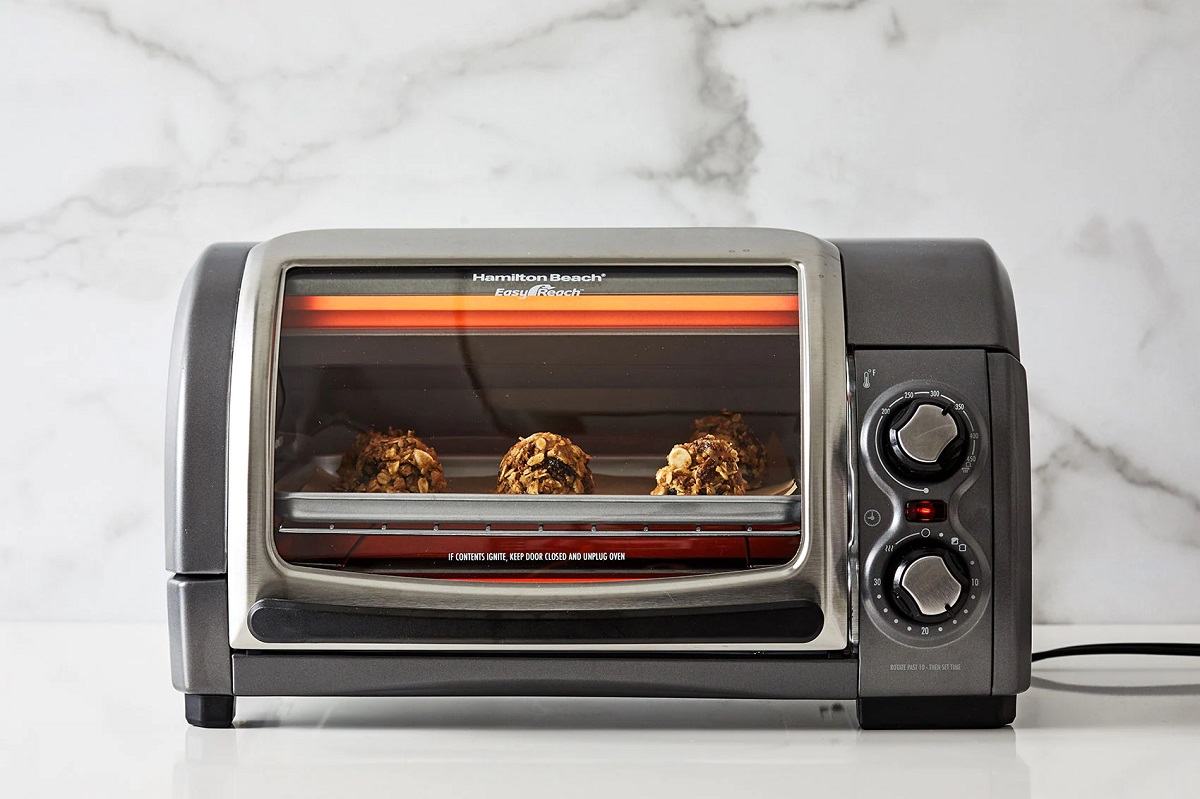
Toaster ovens are a versatile and convenient kitchen appliance that can handle a variety of tasks, including roasting garlic. They provide a quick and efficient way to transform raw garlic cloves into soft, caramelized cloves of culinary goodness.
In this guide, we will be walking you through the steps to roast garlic in a toaster oven. Whether you’re a seasoned cook or a beginner in the kitchen, you’ll discover just how easy it is to elevate your dishes with the rich flavor of roasted garlic.
Now, let’s get started on this aromatic journey!
Key Takeaways:
- Elevate your dishes with rich, caramelized flavor by roasting garlic in a toaster oven. Follow simple steps from preparation to storage for a delightful culinary experience.
- Unleash the aromatic potential of roasted garlic with a toaster oven. Enjoy its sweet, mellow taste in various dishes and savor the convenience of this flavorful ingredient.
Read more: How To Roast Corn In Toaster Oven
Step 1: Preparing the Garlic
Before you can roast garlic in a toaster oven, it’s essential to prepare the garlic properly. Here’s what you need to do:
- Choose Fresh Garlic: Select firm and plump heads of garlic from your local grocery store or farmers’ market. The cloves should feel firm and tightly packed.
- Peel the Outer Layers: Remove any loose and papery outer layers of the garlic head. Make sure to keep the cloves intact.
- Cut the Top Off: Use a sharp knife to slice off the top of the head, exposing the cloves. Aim to remove about 1/4 to 1/2 inch to expose the tops of the cloves without cutting into them.
- Trim the Roots: Trim the roots of the garlic head to ensure stability and even roasting. However, be careful not to cut too much, as this can cause the cloves to fall apart during roasting.
- Repeat for Multiple Heads: If you plan to roast multiple heads of garlic, repeat the above steps for each head.
Once you have prepared the garlic cloves, you are ready to move on to the next step: preheating the toaster oven.
Step 2: Preheating the Toaster Oven
Before you begin roasting the garlic, it’s important to preheat your toaster oven. This ensures that the oven is at the proper temperature for even cooking. Here are the steps to preheat your toaster oven:
- Clear the Oven: Remove any racks, trays, or accessories from the toaster oven to create space for the garlic.
- Set the Temperature: Turn the toaster oven on and set the temperature to around 400°F (200°C). This temperature allows the garlic to roast evenly without burning.
- Allow for Preheating Time: Let the toaster oven preheat for about 5-10 minutes or until it reaches the desired temperature. This ensures that the oven is fully heated and ready for roasting.
- Monitor the Temperature: Some toaster ovens have a built-in temperature gauge, while others may require an external kitchen thermometer. Keep an eye on the oven’s temperature to ensure accuracy.
Once your toaster oven is preheated, it’s time to move on to the next step: wrapping the garlic in foil.
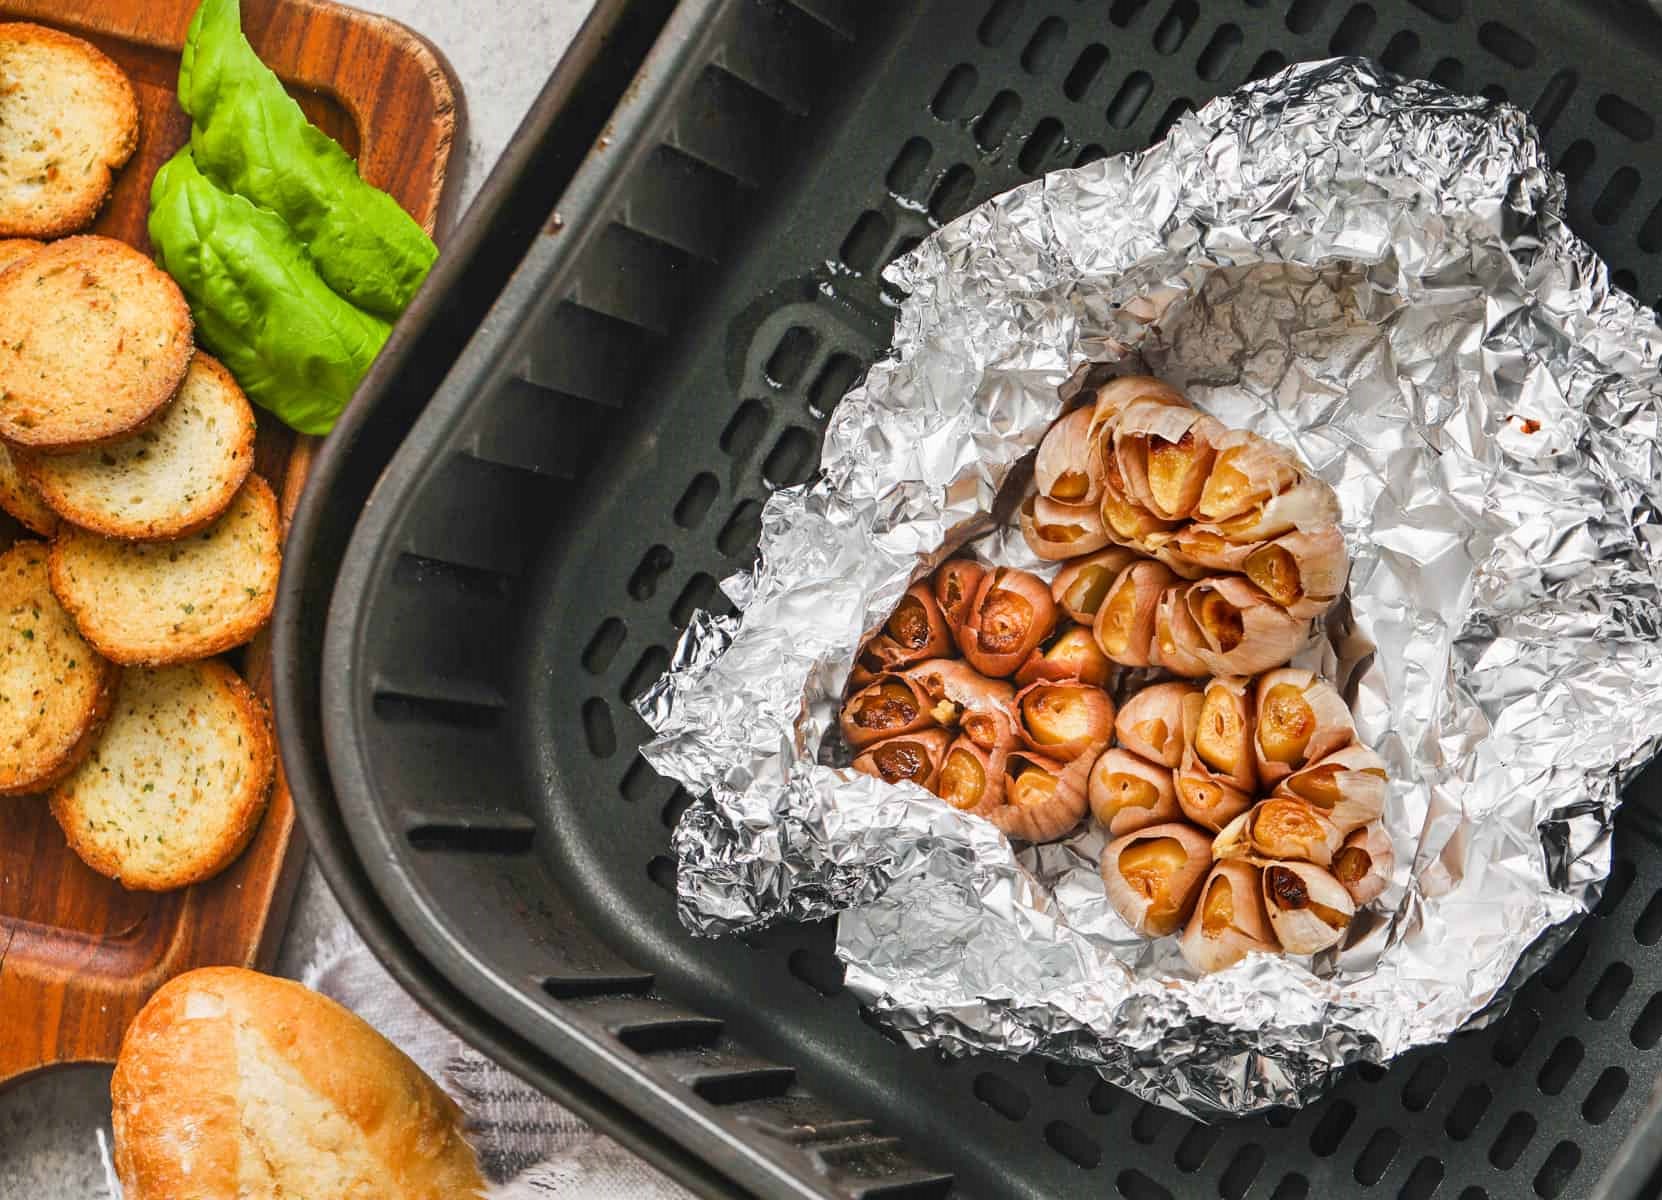
Step 3: Wrapping the Garlic in Foil
Wrapping the garlic in foil is an essential step in the roasting process. The foil helps to contain the heat and steam, allowing the garlic to cook evenly and become tender without drying out. Here’s how to wrap the garlic in foil:
- Tear off a Piece of Foil: Cut a piece of aluminum foil that is large enough to wrap the entire garlic head.
- Place the Garlic in the Center: Position the garlic head, cut side up, in the center of the foil.
- Drizzle with Olive Oil (Optional): For added flavor and moisture, you can drizzle a teaspoon or two of olive oil over the exposed cloves of the garlic head. This will help prevent them from drying out during roasting.
- Wrap the Garlic: Bring the edges of the foil up and over the garlic head, forming a tight bundle. Make sure to seal the foil packet completely to trap the heat and moisture inside.
By wrapping the garlic in foil, you create a controlled environment for the garlic to roast to perfection. Now, it’s time to move on to step 4: roasting the garlic in the toaster oven.
Step 4: Roasting the Garlic in the Toaster Oven
With the garlic wrapped securely in foil, it’s time to roast it in the toaster oven. Roasting garlic in the toaster oven allows the cloves to become soft, caramelized, and infused with a rich and savory flavor. Follow these steps to roast the garlic:
- Place the Foil Packet on the Rack: Carefully place the foil packet containing the garlic head on the middle rack of the preheated toaster oven. Make sure it is placed cut side up for even roasting.
- Close the Oven Door: Gently close the oven door, ensuring that the foil packet is not pressed or squeezed tightly.
- Set the Timer: Depending on the size of the garlic head and your desired level of roasting, set the timer for approximately 30-40 minutes.
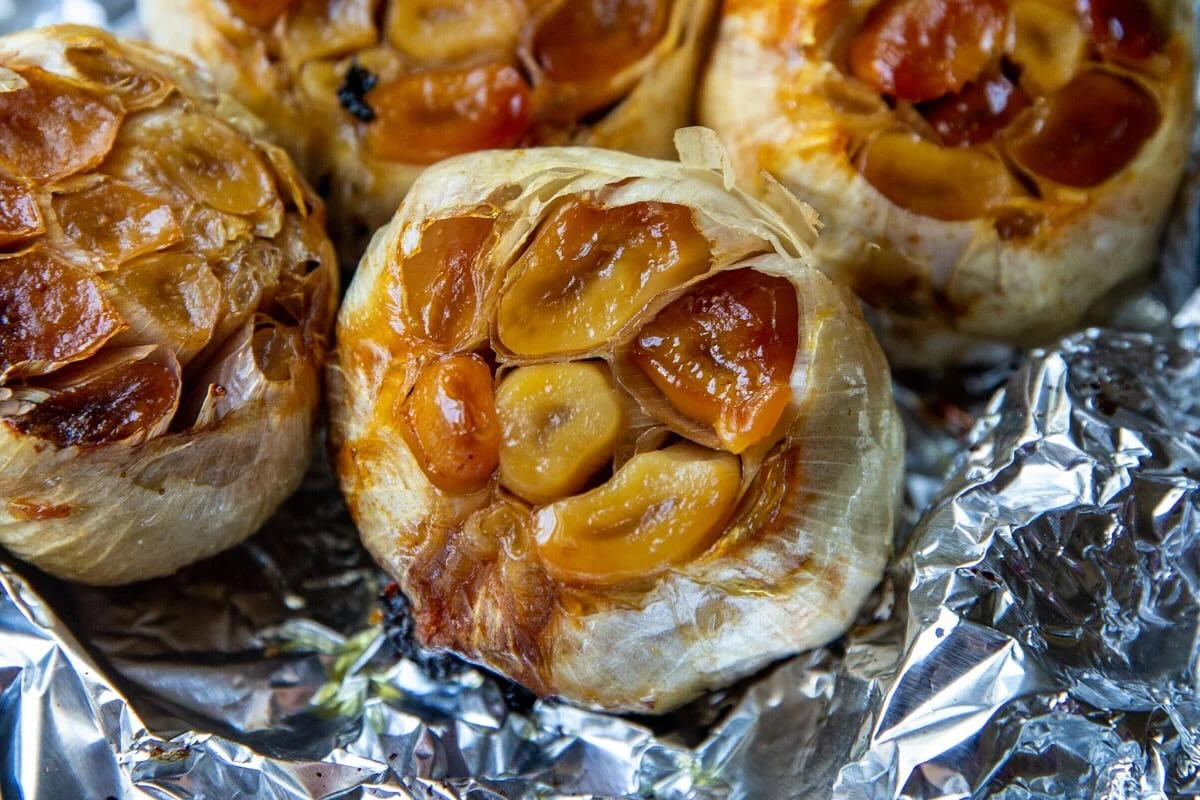
- Monitor the Roasting Process: Keep an eye on the garlic while it’s roasting. You may start to notice a wonderful aroma filling your kitchen. The garlic is ready when the cloves have become soft, golden, and spreadable.
It’s important not to overcook the garlic, as it can become bitter and lose its delicate flavor. Once the garlic is roasted to perfection, it’s time to move on to the next step: checking for doneness.
To roast garlic in a toaster oven, preheat the oven to 400°F, slice off the top of a head of garlic, drizzle with olive oil, wrap in foil, and roast for 30-40 minutes until soft and golden.
Read more: How To Roast Jalapenos In Toaster Oven
Step 5: Checking for Doneness
Checking for doneness is a crucial step to ensure that your roasted garlic is cooked to perfection. Here’s how to determine if the garlic is done:
- Take a Peek: After the designated roasting time, carefully open the toaster oven door and unfold the foil packet slightly to expose the garlic head.
- Check the Cloves: Gently poke a clove of garlic with a fork or knife. It should be soft and easily spreadable. The color of the cloves should be golden brown, indicating they are fully roasted.
- Test the Flavor: For a more accurate assessment, taste a small piece of the roasted garlic. It should have a sweet, mellow, and slightly nutty flavor. If it tastes raw or still has a harsh bite, it needs more time to cook.
If the garlic is not fully cooked, reseal the foil packet and return it to the toaster oven for an additional 5-10 minutes, checking for doneness again. Repeat this process until the garlic reaches the desired level of tenderness.
Once you’re satisfied with the doneness of the garlic, it’s time to move on to the next step: cooling and peeling the roasted garlic.
Step 6: Cooling and Peeling the Roasted Garlic
After the roasted garlic is done, it’s important to let it cool before handling it. Cooling allows the garlic to set and makes it easier to handle and peel. Here’s how to cool and peel roasted garlic:
- Remove from the Toaster Oven: Carefully remove the foil packet containing the roasted garlic from the toaster oven. Place it on a heat-resistant surface.
- Allow to Cool: Let the roasted garlic cool for about 5-10 minutes. This also helps prevent any burning or discomfort while handling the hot garlic cloves.
- Peel the Garlic Cloves: Once the garlic has cooled down, gently unwrap the foil packet. The cloves should be soft and easily separable. Squeeze the roasted garlic head from the bottom, and the cloves should slide out effortlessly.
- Remove Any Residual Skin: If there is any remaining skin or papery husk on the cloves, peel it off using your fingers or a small knife. The roasted garlic should be soft and smooth.
Now that you have peeled the roasted garlic cloves, they are ready to be used in various recipes or enjoyed on their own. You can spread the creamy roasted garlic onto bread, stir it into sauces and dips, or use it as a flavor-boosting ingredient in your favorite dishes.
But before you start incorporating the roasted garlic, let’s learn how to store it properly in the next step.
Step 7: Storing Roasted Garlic
Roasted garlic can be stored for future use, allowing you to enjoy its delicious flavor whenever you need it. Here are some guidelines for storing roasted garlic:
- Cool Completely: Before storing roasted garlic, make sure it has cooled completely to room temperature. Hot garlic can create condensation, leading to spoilage during storage.
- Keep in an Airtight Container: Transfer the peeled roasted garlic cloves to an airtight container, such as a glass jar or a sealed plastic container. Make sure the container is clean and dry before adding the garlic.
- Add Olive Oil (Optional): To prolong the shelf life and enhance the flavor of the roasted garlic, you can cover the cloves with extra virgin olive oil. The oil acts as a natural preservative and adds richness to the garlic.
- Refrigerate or Freeze: Store the roasted garlic in the refrigerator for up to two weeks. If you want to extend its shelf life further, you can freeze the roasted garlic cloves for up to three months. Just make sure to label and date the container.
- Thaw and Bring to Room Temperature: If you freeze the roasted garlic, thaw it in the refrigerator overnight before using it. Once thawed, allow the garlic to come to room temperature before incorporating it into your recipes.
By properly storing the roasted garlic, you can enjoy its fantastic flavor and aroma even when it’s not freshly roasted.
Now that you know how to roast garlic in a toaster oven, it’s time to add this wonderfully flavorful ingredient to your culinary repertoire. Experiment with different dishes, spreads, and sauces to discover the unique richness that roasted garlic can bring to your cooking.
So, go ahead and unlock the delicious possibilities with roasted garlic!
Happy cooking!
Conclusion
Roasted garlic is a simple yet transformative ingredient that can elevate the flavor profile of your dishes. With the convenience of a toaster oven, you can easily roast garlic to perfection without the need for a full-size oven.
In this guide, we’ve walked you through the step-by-step process of roasting garlic in a toaster oven, from preparing the garlic to storing the roasted cloves. By following these steps, you can enjoy the sweet, caramelized, and mellow flavor of roasted garlic in a variety of recipes.
Remember to choose fresh garlic, carefully peel and trim the heads, and wrap them in foil before roasting. Preheat your toaster oven, roast the garlic at the appropriate temperature, and check for doneness using visual cues and taste tests. Once the garlic is roasted, allow it to cool and peel the cloves before storing them properly.
Whether you spread it on crusty bread, use it as a flavorful addition to sauces and dips, or incorporate it into your favorite recipes, roasted garlic is sure to enhance the taste and aroma of your dishes.
So, the next time you’re looking to add depth and complexity to your cooking, reach for your trusty toaster oven and follow these steps to create delicious roasted garlic. Your taste buds will thank you!
Happy roasting and enjoy the amazing flavors of roasted garlic!
Now that you've mastered roasting garlic in your toaster oven, why not expand your culinary skills further? Our next guide digs into the perfect technique for a popular snack. Learn the exact timing and settings needed to cook Hot Pockets flawlessly with your toaster oven. You'll be surprised at how simple and quick it is to transform this classic freezer staple into a delicious treat that's crispy on the outside and piping hot on the inside.
Frequently Asked Questions about How To Roast Garlic In Toaster Oven
Was this page helpful?
At Storables.com, we guarantee accurate and reliable information. Our content, validated by Expert Board Contributors, is crafted following stringent Editorial Policies. We're committed to providing you with well-researched, expert-backed insights for all your informational needs.


0 thoughts on “How To Roast Garlic In Toaster Oven”