Articles
How To Store A Cooler When Not In Use
Modified: October 19, 2024
Learn how to store your cooler properly to ensure it stays in optimal condition when not in use. Check out our articles for helpful tips and tricks.
(Many of the links in this article redirect to a specific reviewed product. Your purchase of these products through affiliate links helps to generate commission for Storables.com, at no extra cost. Learn more)
Introduction
When it comes to outdoor activities and adventures, having a reliable cooler is essential. Whether you’re camping, fishing, or on a road trip, a cooler helps keep your food and beverages fresh and chilled. However, once you’ve returned from your outing or the warmer seasons have come to an end, it’s important to store your cooler properly to ensure its longevity and performance. In this article, we will explore the importance of proper cooler storage and provide you with useful tips to ensure your cooler stays in top shape.
Proper storage not only helps to maintain the functionality of your cooler but also prevents any potential damage that may occur during storage. By following these guidelines, you can extend the lifespan of your cooler, saving you money in the long run and ensuring you’re always prepared for your next adventure.
Key Takeaways:
- Properly storing your cooler is essential for maintaining its longevity and performance. From cleaning and drying to avoiding extreme temperatures, these steps ensure your cooler is always ready for your next adventure.
- Taking the time to check for damage, reassemble the cooler, and follow long-term storage tips will preserve its functionality. By storing your cooler with care, you can enjoy years of reliable performance on your outdoor excursions.
Read more: How To Store A Yeti Cooler When Not In Use
Importance of Proper Storage for Coolers
Properly storing your cooler when it’s not in use is crucial for maintaining its performance and durability. Here are a few reasons why investing time in proper storage is key:
- Prevent Mold and Mildew: A cooler is a prime breeding ground for mold and mildew, especially if it has been exposed to moisture or leftover food residue. Proper storage methods ensure that your cooler remains clean and dry, minimizing the growth of these harmful substances.
- Extend Lifespan: Coolers are built to withstand rugged outdoor conditions, but they are not indestructible. Storing your cooler properly can help prevent unnecessary wear and tear and prolong its lifespan. This means you can depend on your cooler for years to come.
- Maintain Performance: The insulation properties of a cooler are essential in keeping your food and drinks cold. However, improper storage can lead to damage to the insulation, resulting in decreased performance. By storing your cooler correctly, you can ensure that it retains its insulating capabilities.
- Save Space: Coolers can take up a significant amount of room when not in use. Proper storage techniques allow you to maximize space in your storage area or garage, making it easier to organize and access your outdoor gear.
Now that you understand the importance of proper storage for your cooler, let’s move on to the next section: cleaning and drying the cooler.
Cleaning and Drying the Cooler
Before storing your cooler, it’s crucial to give it a thorough cleaning. Follow these steps to ensure your cooler is clean and free from any lingering odors:
- Empty the Cooler: Start by emptying the cooler of any leftover food, drinks, or ice. Dispose of any perishable items properly.
- Remove Accessories: Take out any removable accessories such as dividers, trays, or baskets. These can be cleaned separately.
- Wash the Interior: Use a mild detergent or dish soap and warm water to scrub the interior of the cooler. Pay close attention to any stains or spills. You can also use baking soda for tougher stains or odors.
- Rinse Thoroughly: Rinse the cooler with clean water to remove any soap residue. Make sure to rinse all surfaces, including corners and crevices.
- Clean the Exterior: Don’t forget to wipe down the exterior of the cooler using a mild detergent or soap. This will remove any dirt or debris that may have accumulated during your outdoor adventures.
- Dry Completely: After cleaning, allow the cooler to air dry completely. Open all the lids and ensure that there is no moisture trapped inside. You can also use a clean, dry cloth to wipe down the interior and exterior to speed up the drying process.
Once your cooler is clean and dry, it’s time to move on to the next step: removing and washing any accessories that came with the cooler.
Removing and Washing Accessories
Many coolers come with additional accessories such as dividers, trays, or baskets. These accessories are designed to help you organize and separate your items within the cooler. To ensure the longevity of these accessories and maintain their cleanliness, follow these steps:
- Remove the Accessories: Carefully take out all the removable accessories from your cooler. Check for any small compartments or hidden sections that may contain accessories.
- Inspect for Damage: Before washing, inspect each accessory for any signs of damage or wear. Check for cracks, tears, or loose parts. If you notice any issues, consider replacing or repairing the accessory as needed.
- Wash with Mild Soap and Water: Fill a sink or basin with warm water and add a small amount of mild detergent or dish soap. Submerge the accessories in the soapy water and use a soft brush or cloth to clean them thoroughly.
- Rinse: Rinse each accessory with clean water to remove any soap residue. Ensure that all surfaces are clean and free from any debris or stains.
- Dry Completely: After washing, allow the accessories to air dry completely. Place them on a clean, dry surface or use a towel to dry them manually. Make sure they are completely dry before storing them with the cooler.
Once your accessories are clean and dry, you can move on to the next step: removing any remaining ice and water from the cooler.
Removing Ice and Water
Before storing your cooler, it’s important to remove any remaining ice and water. This will help prevent mold, mildew, and unpleasant odors from developing during storage. Follow these steps to ensure your cooler is completely empty:
- Drain the Water: Start by draining out any water that may be left in your cooler. This can be done by tilting the cooler to one side and allowing the water to pour out. If your cooler has a drain plug, remove it to drain the water more easily.
- Remove the Ice: If there is still ice present in your cooler, empty it out. You can use a scoop or your hands to remove the ice. Be careful not to damage the interior of the cooler while doing this.
- Wipe Dry: Use a clean, dry cloth or paper towels to wipe the interior of the cooler. Pay close attention to the corners and crevices to remove any moisture that may be trapped.
- Inspect for Any Remaining Water: After wiping down the interior, visually inspect the cooler for any remaining signs of moisture. If you notice any damp spots, use the cloth to dry them completely.
By ensuring that your cooler is free from ice and water, you minimize the risk of mold and mildew growth during storage. Continue reading to learn how to deflate air chambers (if applicable) and collapse or fold the cooler (if applicable).
Read more: How To Use Air Cooler
Deflating Air Chambers (if applicable)
Some coolers, particularly those designed for camping or outdoor activities, may have built-in air chambers or inflatable elements for added insulation or cushioning. If your cooler has air chambers, it’s essential to deflate them properly before storing the cooler. Here’s how you can deflate the air chambers:
- Locate the Air Chambers: Identify where the air chambers are located in your cooler. They are often located on the sides or the lid of the cooler.
- Open the Valves: Look for the valves on the air chambers. These valves are designed to let air in and out. Open the valves by turning them counterclockwise or following any specific instructions provided by the manufacturer.
- Press and Squeeze: Gently press and squeeze the air chambers to remove the air inside. Start from one end, gradually working your way to the other end, squeezing out the air as you go. Apply gentle pressure to ensure all the air is released.
- Close the Valves: Once the air chambers are deflated, close the valves by turning them clockwise. Make sure they are securely closed to prevent any air from re-entering.
If your cooler doesn’t have air chambers, you can skip this step and move on to the next section. In the following section, we will discuss how to collapse or fold the cooler (if applicable).
Collapsing or Folding the Cooler (if applicable)
Some coolers are designed to be collapsible or foldable, making them more compact and easier to store. If your cooler has this feature, follow these steps to collapse or fold it properly:
- Empty the Cooler: Make sure your cooler is empty and all accessories have been removed before attempting to collapse or fold it.
- Follow Manufacturer’s Instructions: Check the manufacturer’s instructions or guidelines specific to your cooler model. Different coolers may have varying methods to collapse or fold.
- Release Any Locking Mechanisms: If your cooler has any locking mechanisms, release them before attempting to collapse or fold the cooler.
- Collapse or Fold: Follow the designated steps to collapse or fold the cooler. This may involve folding down certain panels, pressing buttons or levers, or following a specific folding pattern. Take your time and be gentle to avoid any damage to the cooler.
- Secure the Collapsed or Folded Cooler: Once the cooler is collapsed or folded, make sure it is secured properly. This may involve attaching straps or fastening mechanisms to keep the cooler in its folded position.
If your cooler doesn’t have the option to collapse or fold, you can skip this step and move on to the next section. In the following sections, we will discuss how to store the cooler in a cool and dry place, as well as how to avoid exposure to sunlight and extreme temperatures.
To store a cooler when not in use, make sure it is clean and completely dry to prevent mold and mildew. Store with the lid open to allow for air circulation and prevent odors. Keep it in a cool, dry place to prolong its lifespan.
Storing the Cooler in a Cool and Dry Place
Choosing the right location for storing your cooler is crucial in maintaining its condition. Follow these guidelines to ensure your cooler is stored in a cool and dry place:
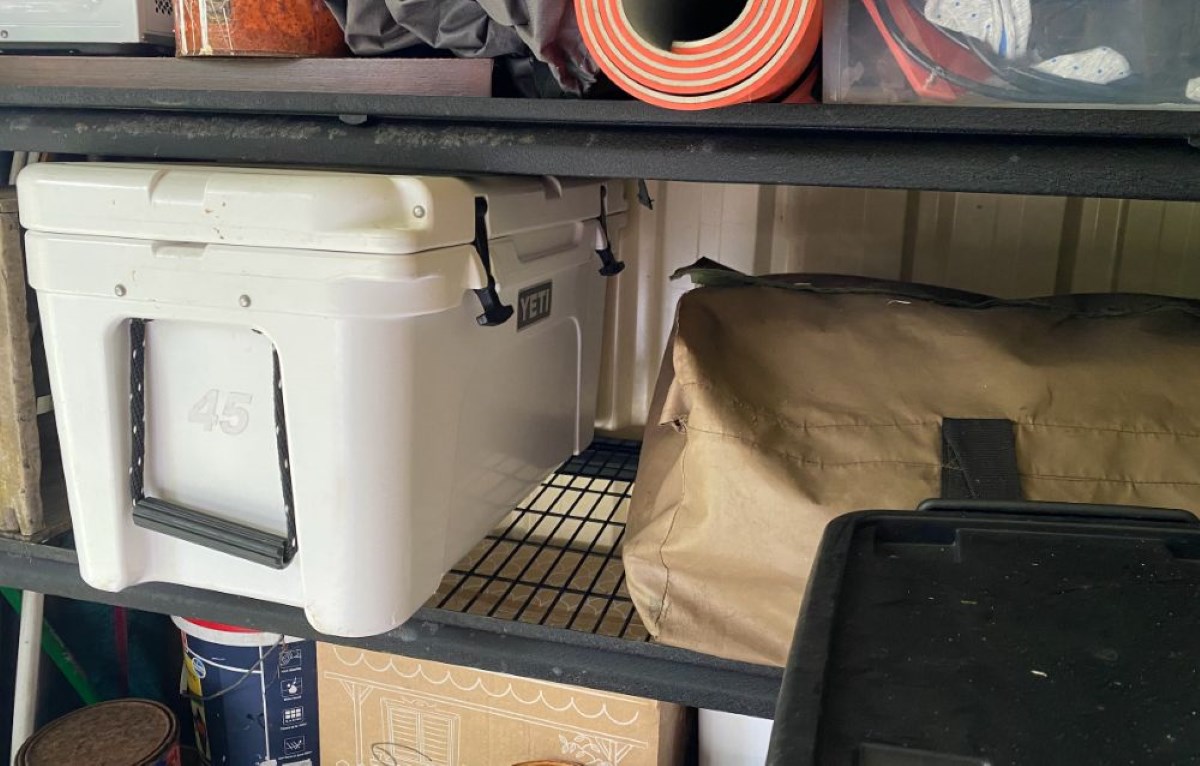
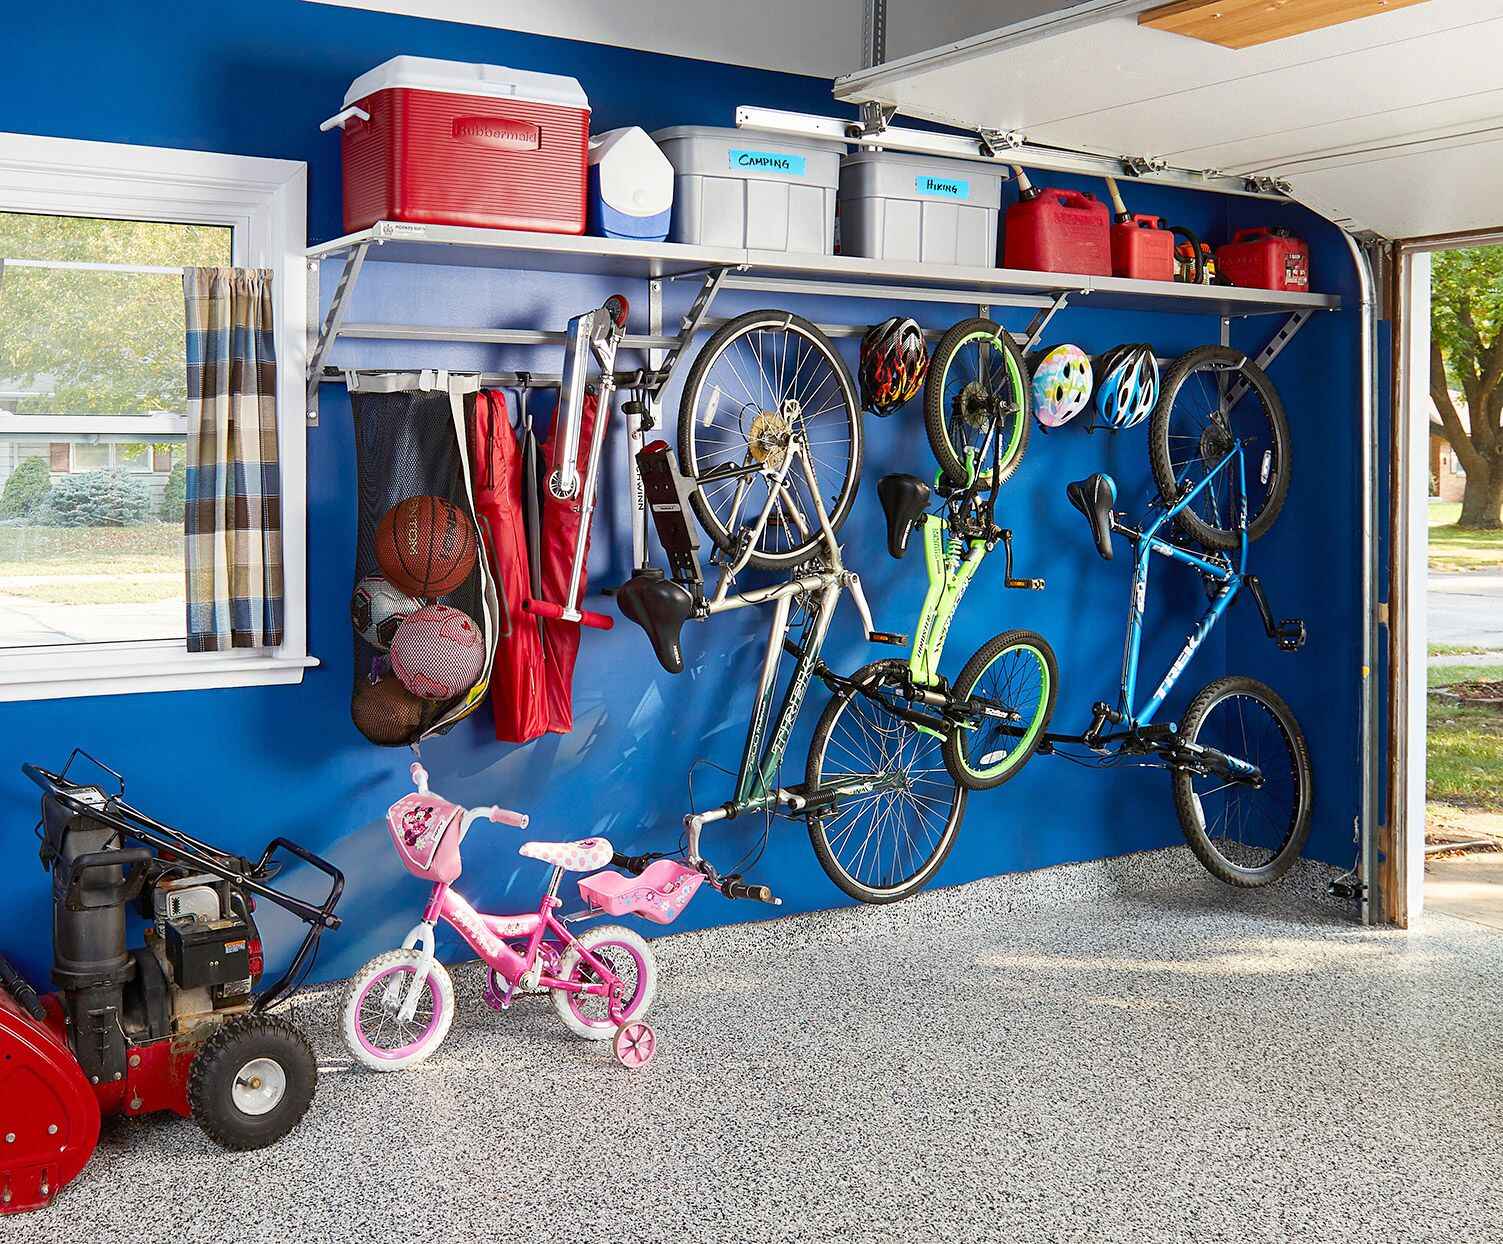
- Select a Clean Area: Find a clean and clutter-free area in your storage space. This can be a shelf, a dedicated storage cabinet, or even a corner of your garage. Make sure the area is free from any dirt, dust, or potential contaminants.
- Avoid Moisture and Humidity: Choose a spot that is well-ventilated and has low humidity. Moisture can promote the growth of mold and mildew, which can damage your cooler. Avoid storing your cooler in damp areas such as basements or crawl spaces.
- Protect from Water Leaks: Ensure that the area you choose is protected from any potential water leaks or spills. Avoid storing your cooler directly on the floor or near plumbing fixtures to prevent water damage.
- Elevate if Necessary: If your storage area is prone to occasional water drips or leaks, consider elevating your cooler by placing it on a shelf or using a pallet. This will help protect it from any potential water damage.
- Keep Away from Chemicals: Avoid storing your cooler near any harsh chemicals or substances that could cause damage, discoloration, or deterioration. Keep it away from paint, solvents, gasoline, or other chemicals that may be present in your storage area.
- Consider Covering the Cooler: If you live in a particularly dusty area or if your storage space is not completely enclosed, you may want to consider covering your cooler with a clean cloth or using a dedicated cooler cover. This will help protect it from dust, debris, and any potential scratches.
By following these guidelines and storing your cooler in a cool and dry place, you can ensure its longevity and performance. In the next section, we will discuss how to avoid exposure to sunlight and extreme temperatures.
Avoiding Exposure to Sunlight and Extreme Temperatures
Exposure to sunlight and extreme temperatures can have a detrimental effect on the performance and lifespan of your cooler. Here are some tips to protect your cooler from these elements:
- Avoid Direct Sunlight: Sunlight can cause the temperature inside the cooler to rise, affecting its ability to keep your items cold. Store your cooler in a shaded area or use a cooler cover to protect it from direct sunlight.
- Keep Away from Heat Sources: Keep your cooler away from sources of heat such as heaters, grills, campfires, or any other high-temperature areas. Extreme heat can damage the insulation or even melt the materials of the cooler.
- Protect from Freezing Temperatures: Extremely low temperatures can also impact the performance of your cooler, especially if there is still water or moisture trapped inside. Avoid exposing your cooler to freezing temperatures for prolonged periods.
- Consider Insulation: If you anticipate storing your cooler in an area with fluctuating temperatures, consider using additional insulation such as towels or foam insulation sleeves to help maintain a more consistent temperature inside the cooler.
- Monitor Extreme Weather Conditions: Be mindful of severe weather conditions such as storms, heavy rain, or snowfall. While coolers are designed to withstand outdoor conditions, it’s best to move your cooler to a more protected area during extreme weather events.
- Don’t Leave in Vehicles: Avoid leaving your cooler in a vehicle exposed to direct sunlight or extreme temperatures for an extended period. If you must leave it in the vehicle temporarily, try to park in a shaded area or use reflective window shades to reduce heat absorption.
By taking these precautions and avoiding exposure to sunlight and extreme temperatures, you can ensure that your cooler remains in optimal condition for your future adventures. In the next section, we will discuss the importance of checking for damage or wear before storing your cooler.
Read more: How To Store Oysters In A Cooler
Checking for Damage or Wear
Before storing your cooler, it’s essential to check for any signs of damage or wear. This step will help you address any issues and ensure that your cooler is in good condition for future use. Here’s how to check for damage or wear:
- Inspect the Exterior: Carefully examine the exterior of the cooler for any cracks, dents, or scratches. These can not only affect the aesthetics but also compromise the insulation and structural integrity of the cooler.
- Check the Handles and Latches: Test the handles and latches to ensure they are functioning correctly. They should open and close smoothly without any resistance. If you notice any loose handles or faulty latches, consider repairing or replacing them before storing the cooler.
- Examine the Seals: Inspect the seals or gaskets around the lid of the cooler. They should be intact and pliable, providing a tight and secure seal when closed. Replace any damaged or worn seals to maintain the insulation properties of the cooler.
- Look for Leaks: Fill the cooler with water and observe if there are any leaks. Check the drain plug, seams, and corners for any signs of water leakage. If you notice any leaks, address them before storing the cooler.
- Check Hinges and Fasteners: Inspect the hinges and fasteners that hold the lid of the cooler in place. Make sure they are secure and in good condition. Tighten any loose screws or fasteners and lubricate hinges if necessary.
- Test the Drain Plug: Ensure that the drain plug is functioning properly by opening and closing it. Check for any signs of damage or wear and replace if needed.
By conducting a thorough inspection and addressing any damage or wear before storing your cooler, you can prolong its lifespan and avoid any unpleasant surprises when you take it out for your next adventure. In the following section, we will discuss reassembling the cooler (if applicable) and provide some additional tips and tricks for long-term storage.
Reassembling the Cooler (if applicable)
If you have disassembled any parts or accessories of your cooler during the cleaning or storage preparation process, it’s important to reassemble them properly before storing the cooler. Here’s a step-by-step guide to reassembling your cooler:
- Gather All Parts: Collect all the parts and accessories that you previously removed. Make sure you have everything you need for reassembly.
- Follow the Manufacturer’s Instructions: Refer to the manufacturer’s instructions or guidelines specific to your cooler model for reassembling the parts. These instructions will provide you with the most accurate and detailed guidance.
- Align and Connect: Align the parts according to the instructions and reattach them to the designated locations. Whether it’s dividers, trays, baskets, or other accessories, ensure they fit securely and function as intended.
- Secure Fasteners: Use any necessary screws, bolts, or fasteners to secure the parts in place. Make sure they are tightly fastened without over-tightening and potentially damaging the cooler or accessories.
- Double-Check: Once you have reassembled the cooler, double-check that all parts are properly connected and secure. Give them a gentle tug or shake to ensure they are firmly in place.
By following these steps and referring to the manufacturer’s instructions, you can ensure that your cooler is fully reassembled and ready for storage. In the next section, we will provide you with some additional tips and tricks for long-term storage of your cooler.
Tips and Tricks for Long-Term Storage
When it comes to long-term storage of your cooler, there are some additional tips and tricks that can help preserve its condition and ready it for future use. Consider the following guidelines:
- Use Desiccants: Place silica gel packets or other desiccants inside your cooler during storage. These absorb moisture and help prevent the growth of mold and mildew.
- Rotate Outdated Items: Before storing your cooler, remove any leftover food, beverages, or perishable items. Make sure to rotate and replace any expired or outdated items.
- Label and Organize: If you plan on storing multiple coolers or different items in your storage space, label your coolers to easily identify their contents. This will help you locate specific items quickly when you’re ready to use them.
- Consider Elevated Storage: To further protect your cooler, elevate it off the ground using shelving or pallets. This helps prevent potential damage from pests, water, or other hazards on the floor.
- Regularly Check on Your Cooler: Even during long-term storage, it’s important to periodically check on your cooler. This allows you to ensure that it remains in good condition and address any potential issues early on.
- Keep the Manual: Store the user manual or instructions for your cooler in a safe place. These documents can provide valuable information regarding maintenance, care, and warranty information.
- Avoid Heavy Stacking: When storing multiple coolers or stacking your cooler with other items, avoid excessive weight or pressure that can cause damage. Distribute the weight evenly to maintain the structural integrity of the cooler.
By following these tips and tricks for long-term storage, you can ensure that your cooler remains in optimal condition until your next adventure. Now that you have learned all about proper storage and care for your cooler, you’re ready to store it with confidence!
Remember, taking the time to clean, dry, and store your cooler properly will help maintain its performance and ensure that it always stands ready to keep your food and beverages cool whenever and wherever you need them.
Safe travels and happy cooling!
Conclusion
Properly storing your cooler when it’s not in use is vital for maintaining its longevity and performance. By following the guidelines outlined in this article, you can ensure that your cooler remains in top shape, ready for your next outdoor adventure.
From cleaning and drying the cooler to removing and washing accessories, each step plays a crucial role in preserving the condition of your cooler. Taking the time to deflate air chambers, collapse or fold the cooler (if applicable), and store it in a cool and dry place will protect it from mold, mildew, and physical damage.
Avoiding direct sunlight and extreme temperatures is key to maintaining the insulation properties of the cooler. Checking for any damage or wear, and reassembling the cooler properly, ensures its functionality and performance are not compromised.
Lastly, the tips and tricks provided for long-term storage will help you keep your cooler in optimal condition. Using desiccants, rotating outdated items, and regularly checking on the cooler will ensure that it is always ready for use when needed.
Remember, your cooler is more than just a means to keep your food and beverages cold; it’s a reliable companion on your outdoor adventures. By following the proper storage techniques outlined in this article, you can enjoy the benefits of a well-maintained cooler for years to come.
So, take care of your cooler, store it with care, and get ready for your next thrilling outing, knowing that your cooler is prepared to keep your refreshments chilled and your memories unforgettable!
Storing your cooler properly is just the start. If you're eager to keep cool with the latest gadgets, don't miss our guide on portable coolers, featuring the most efficient models for the upcoming year. These units aren't just compact; they're designed to enhance your indoor climate without hogging space. Perfect for any setting, these coolers are a practical addition to your cooling arsenal.
Frequently Asked Questions about How To Store A Cooler When Not In Use
Was this page helpful?
At Storables.com, we guarantee accurate and reliable information. Our content, validated by Expert Board Contributors, is crafted following stringent Editorial Policies. We're committed to providing you with well-researched, expert-backed insights for all your informational needs.


0 thoughts on “How To Store A Cooler When Not In Use”