Articles
How To Store A Refrigerator When Not In Use
Modified: August 24, 2024
Learn the best methods to store a refrigerator when it's not in use. These helpful articles will guide you through the process and ensure your appliance remains in good condition.
(Many of the links in this article redirect to a specific reviewed product. Your purchase of these products through affiliate links helps to generate commission for Storables.com, at no extra cost. Learn more)
Introduction
When it comes to storing a refrigerator, proper preparation is crucial to ensure its longevity and efficient functioning when you need it again. Whether you’re moving homes, renovating, or simply not using your refrigerator for an extended period, following the right steps will help maintain its condition and protect it from damage.
In this article, we will guide you through the process of storing a refrigerator safely and effectively. From cleaning and defrosting to securing the doors and moving it to a storage area, we’ll cover all the necessary steps to ensure your refrigerator remains in optimal condition during its time in storage.
By following these steps, you can have peace of mind knowing that your refrigerator will be ready to use again when you need it, without any issues or complications. So, let’s dive into the details and learn how to store a refrigerator properly.
Key Takeaways:
- Properly preparing and storing a refrigerator when not in use is essential for maintaining its condition and ensuring its functionality for future use. Following the outlined steps and precautions will protect the appliance from damage and preserve its longevity.
- Taking the time to clean, defrost, secure, and store a refrigerator properly can save you from potential headaches and costly repairs in the future. By following the recommended guidelines, you can ensure that your refrigerator remains in optimal condition and ready for use whenever you need it again.
Read more: How To Store A Refrigerator Not In Use
Step 1: Cleaning and Defrosting the Refrigerator
The first step in preparing your refrigerator for storage is to thoroughly clean and defrost it. This is essential to prevent the growth of mold, bacteria, and unpleasant odors during the time it is not in use.
To clean the refrigerator, start by removing all the food items from the shelves and drawers. Check the expiration dates and discard any expired or spoiled items. Then, take out the removable shelves and drawers and wash them separately with warm soapy water. Rinse them thoroughly and allow them to air dry.
Next, mix a solution of mild detergent or baking soda with warm water. Use a clean cloth or sponge to wipe down the interior surfaces of the refrigerator, including the walls, shelves, and door racks. Pay close attention to any spills or stains and make sure to clean them thoroughly.
Once the interior is clean, move on to defrosting the freezer if necessary. If your refrigerator has a manual defrost option, turn it on and allow the ice to melt naturally. If not, turn off the refrigerator and leave the freezer door open to let the ice thaw. Place towels or a tray underneath to catch any water that may drip.
Remember to disconnect the refrigerator from the power supply before cleaning or defrosting. This will ensure your safety and prevent any electrical accidents from occurring.
After the freezer has fully defrosted, remove any remaining ice or water using a towel. Wipe the interior of the freezer with a clean, dry cloth to remove any moisture.
Finally, before moving on to the next step, double-check that the interior of the refrigerator and freezer are completely dry. Any leftover moisture can lead to mildew and musty odors during storage.
By taking the time to thoroughly clean and defrost your refrigerator, you’ll eliminate any potential contaminants and set a solid foundation for proper storage. Now, let’s move on to the next step of preparing your refrigerator for storage.
Step 2: Removing and Securing the Shelves and Drawers
Once you have cleaned and defrosted the refrigerator, it’s time to remove the shelves and drawers to prevent them from shifting or getting damaged during storage. This step is crucial as it helps maintain the structural integrity of these components and prevents them from causing any unnecessary stress on the refrigerator.
To remove the shelves and drawers, carefully lift them out one by one. Take note of the positioning and arrangement, as this will make it easier to reinstall them when you need to use the refrigerator again. Wrap each shelf and drawer individually with bubble wrap or thick towels to provide cushioning and protect them from scratches or breakage.
Once you have wrapped the shelves and drawers, place them securely in a separate box or container. Label the box clearly to keep track of its contents. If possible, store the box of shelves and drawers in an upright position to prevent any warping or bending.
It’s also a good idea to tape any loose parts, such as compartments or latches, to prevent them from moving around or becoming damaged during transportation and storage.
By removing and securing the shelves and drawers, you are ensuring their safety and preserving their condition for future use. Now, let’s move on to the next step to prepare your refrigerator for storage.
Step 3: Disconnecting the Power Supply
Before storing your refrigerator, it is essential to disconnect it from the power supply to avoid any electrical hazards and unnecessary energy consumption. This step not only ensures your safety but also helps prevent any damage to the refrigerator’s components.
Start by locating the power cord of your refrigerator, typically located at the back or on the bottom of the appliance. Carefully unplug the cord from the electrical outlet. Make sure to handle the cord with care and avoid pulling or yanking on it, as this can cause damage.
Once the power cord is unplugged, assess the cord and plug for any signs of wear or damage. If you notice any frayed wires, exposed metal, or other signs of deterioration, it is important to have the cord repaired or replaced before using the refrigerator again.
Take the opportunity to clean the power cord, especially if it has accumulated dust or debris. Use a cloth or sponge dampened with a mild detergent solution to gently wipe down the cord. Ensure that it is completely dry before moving on to the next step.
After disconnecting the power supply, be sure to secure the power cord to the back of the refrigerator using tape or cord ties. This will help prevent it from dangling or getting tangled during transportation or storage.
By disconnecting the power supply, you not only protect yourself from electrical hazards but also preserve the integrity of your refrigerator. Now that you have completed this step, let’s move on to the next one to ensure a smooth storage process.
Step 4: Emptying and Cleaning the Water Dispenser
If your refrigerator is equipped with a water dispenser or an ice maker, it is vital to properly empty and clean these components before storing the appliance. Failing to do so might result in the growth of bacteria, mold, or mineral deposits that can affect the quality of the water and lead to unpleasant odors.
To empty the water dispenser, locate the water reservoir or holding tank and drain any remaining water. Follow the manufacturer’s instructions for your specific refrigerator model if you’re unsure of the exact procedure.
Once the water dispenser is empty, it’s time to clean it. Start by removing the water filter, if applicable, and dispose of it according to the manufacturer’s instructions. After that, prepare a mixture of warm water and mild detergent or use a solution specifically designed for cleaning water dispensers.
Use a clean sponge or cloth dampened with the cleaning solution to wipe down the dispenser area thoroughly. Pay attention to the nooks, crannies, and spigot, as these areas are common places for buildup and bacteria growth. Rinse the dispenser thoroughly with clean water to remove any residue from the cleaning solution.
If you notice any mineral deposits or hard water stains, you can use a mixture of equal parts water and white vinegar to remove them. Apply the vinegar solution to a cloth and gently scrub the affected areas. Rinse with clean water afterward.
Once the water dispenser is clean and free from any residue, allow it to dry completely. This step is crucial to prevent the growth of mold or the development of odors. You can use a soft, dry cloth to expedite the drying process.
Remember to reinstall or replace the water filter if applicable, following the manufacturer’s instructions. This ensures that your water will be filtered and clean when you resume using the refrigerator.
By emptying and cleaning the water dispenser, you are maintaining the quality and hygiene of your refrigerator’s water supply. With this step complete, let’s move on to the next one to ensure your refrigerator is properly prepared for storage.
Before storing a refrigerator, make sure it is completely defrosted and clean. Leave the door slightly ajar to prevent mold and mildew growth. Use a refrigerator storage bag to protect it from dust and moisture.
Read more: How To Store A Printer When Not In Use
Step 5: Securing the Doors and Wrapping the Refrigerator
To ensure the safety and protection of your refrigerator during storage, it is crucial to properly secure the doors and wrap the appliance. This step not only prevents the doors from opening accidentally but also shields the refrigerator from scratches, dust, and other potential damage.
Start by closing and latching the doors of the refrigerator. This step is essential to prevent them from swinging open during transportation or storage. Double-check that the doors are securely closed and latched before proceeding.
Next, use strong packing tape or bungee cords to secure the doors. Place the tape or cords in an X or crisscross pattern across the front of the refrigerator, ensuring that they are tight and secure. This extra measure helps keep the doors in place and prevents any accidental openings or shifting.
After securing the doors, it’s time to wrap the refrigerator for added protection. Start by using moving blankets or thick furniture pads to cover the entire appliance. These blankets provide cushioning and help protect the refrigerator’s exterior from scratches or dings.
Wrap the blankets tightly around the refrigerator and use packing tape or stretch wrap to secure them in place. Make sure that the entire appliance is covered and that there are no exposed areas. Pay particular attention to the corners and edges, as these are vulnerable to damage during transportation and storage.
If you don’t have access to moving blankets or furniture pads, you can use multiple layers of bubble wrap or thick blankets as an alternative. Just make sure that the refrigerator is adequately wrapped and secured to prevent any potential damage.
Once the refrigerator is securely wrapped, use additional packing tape or stretch wrap to secure any loose parts, such as handles or shelves, to prevent them from moving or getting damaged during transportation.
By securing the doors and wrapping the refrigerator, you are providing an extra layer of protection during storage. With this step complete, let’s move on to the next step to ensure a smooth storage process.
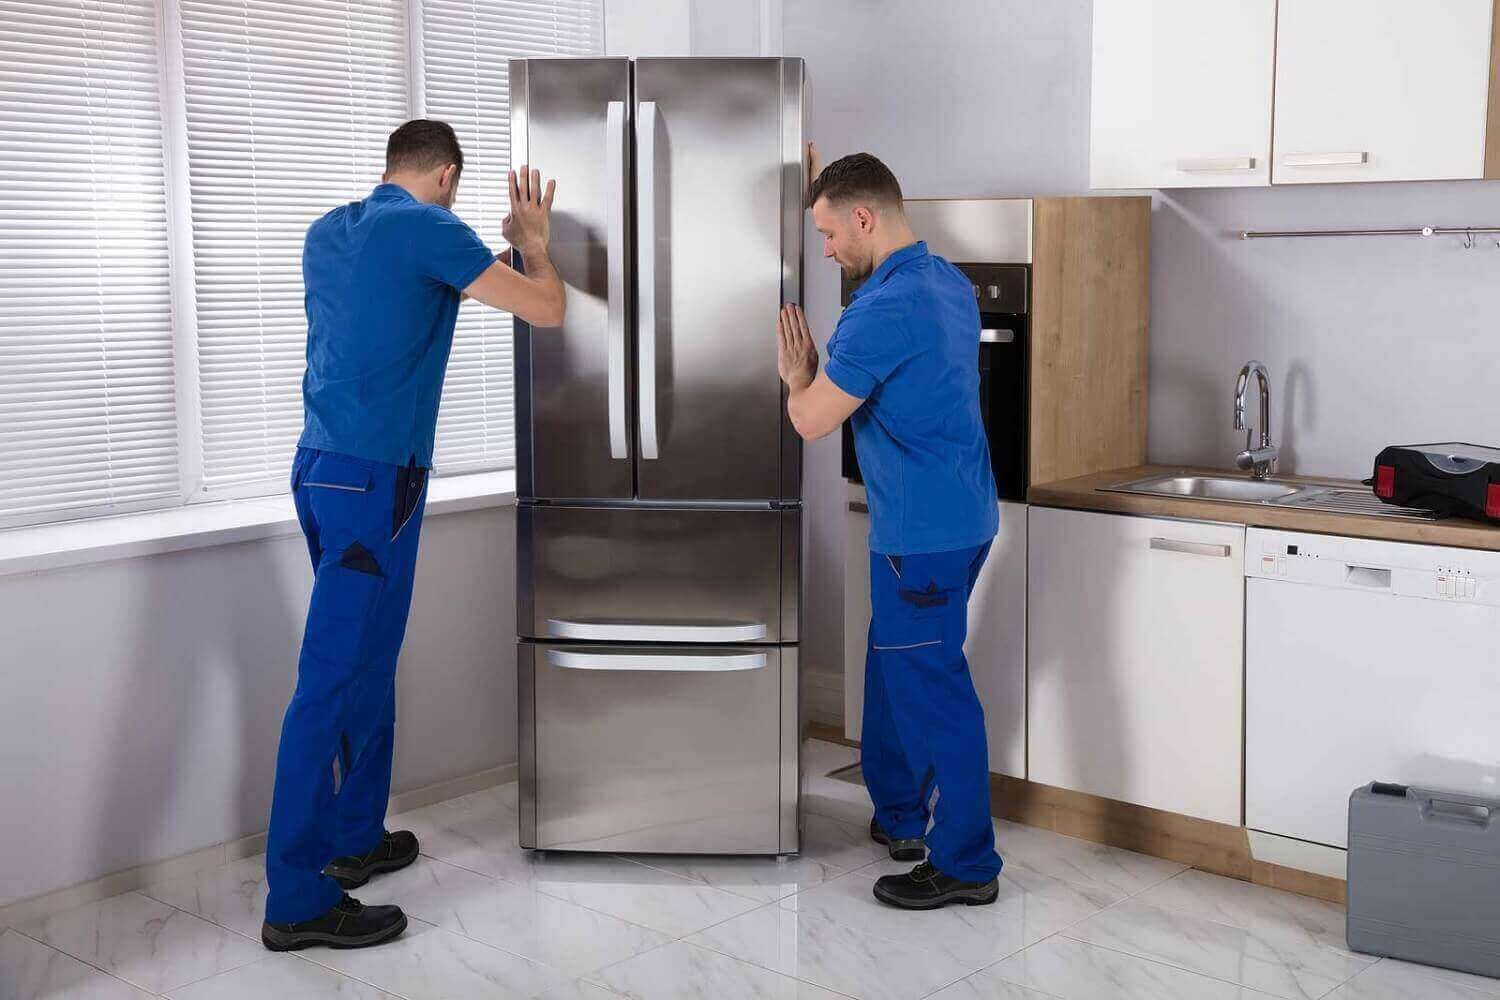
Step 6: Moving and Storing the Refrigerator
Now that your refrigerator is thoroughly prepared for storage, it’s time to carefully move and store it in a suitable location. Taking precautions during this step will help prevent any damage to the refrigerator and ensure that it remains in optimal condition during its time in storage.
If possible, enlist the help of at least one other person to assist you in moving the refrigerator. This will make the process safer and more manageable, as refrigerators can be heavy and bulky. Before lifting, make sure to bend your knees and use proper lifting techniques to avoid straining your back.
Clear a path to the storage area and remove any obstacles that may hinder the smooth transportation of the refrigerator. This can include rugs, furniture, or other items that may obstruct the way.
Once you have reached the storage area, carefully place the refrigerator in its designated spot. Avoid placing it directly on the floor to prevent any potential moisture damage. You can use wooden pallets or boards to elevate the refrigerator slightly and provide adequate airflow.
Ensure that the refrigerator is positioned securely to prevent it from tipping over. If you are storing multiple items, make sure to leave enough space around the refrigerator to allow for ventilation and easy access.
Label the storage area or the box containing the refrigerator to make it easy for you to locate it when needed. It is also helpful to keep a record of the storage location for future reference.
If you are storing the refrigerator for an extended period, it is advisable to periodically check on it to ensure it is in good condition. This can include inspecting for any signs of pest infestation, moisture buildup, or damage.
Take note of the storage conditions, such as temperature and humidity levels, to ensure it remains within the optimal range for refrigerator storage. If necessary, you can use a dehumidifier or moisture absorber to maintain the right humidity levels in the storage area.
By moving and storing the refrigerator with care and considering the appropriate storage conditions, you are protecting it from damage and preserving its functionality. With this final step complete, your refrigerator is now properly stored and ready for future use.
Step 7: Precautions and Maintenance Tips
Once your refrigerator is stored, it’s important to take a few additional precautions and follow some maintenance tips to ensure it remains in optimal condition until you are ready to use it again. These precautions and tips will help prevent any potential damage or issues that may arise during its time in storage.
First, it is essential to keep the storage area clean and free from dust and debris. Regularly sweep or vacuum the area to prevent any buildup that could infiltrate the refrigerator and impact its functionality.
Monitor the temperature and humidity levels in the storage area regularly. Extreme temperature fluctuations or excessive humidity can potentially damage the refrigerator. Aim to keep the temperature within a range of 50 to 85 degrees Fahrenheit (10 to 29 degrees Celsius) and humidity level between 40% to 60% to maintain ideal storage conditions.
If possible, periodically open the doors of the refrigerator and allow some fresh air circulation. This helps prevent any stale odors and ensures proper ventilation inside the unit.
Check the storage area for signs of pests regularly. Insects or rodents can cause damage to the refrigerator’s wiring or insulation. If you notice any signs of infestation, take appropriate measures to get rid of the pests and protect your appliance.
Consider placing moisture absorbers or desiccant packs near and inside the refrigerator to control moisture levels and prevent any musty odors or mold growth. These packs are readily available at hardware or home goods stores.
If you are storing the refrigerator for a long period, it is advisable to periodically run the refrigerator for a few hours to maintain its optimal performance. This helps prevent compressor issues and ensures that the seals and moving parts remain in good condition.
When the time comes to retrieve your stored refrigerator, make sure to follow the reverse process of the steps mentioned above. Clean the interior, reconnect the power supply, remove the wrapping, reinstall the shelves and drawers, and allow the refrigerator to acclimate to room temperature before plugging it back in.
By taking these precautions and following the maintenance tips, you are actively preserving your refrigerator and ensuring its smooth operation when you decide to use it again. With these measures in place, you can have peace of mind knowing that your refrigerator is well cared for during its time in storage.
Conclusion
Properly storing a refrigerator when it is not in use is crucial for maintaining its condition and ensuring its functionality when you need it again. Following the steps outlined in this article will help protect your refrigerator from damage, preserve its components, and prevent any unpleasant odors or issues that may arise during storage.
From cleaning and defrosting the refrigerator to securing the doors and wrapping the appliance, each step plays a critical role in preparing your refrigerator for storage. The precautions and maintenance tips mentioned ensure that your refrigerator remains in optimal condition throughout its time in storage.
Remember to disconnect the power supply, clean the water dispenser, and remove the shelves and drawers to prevent any damage or issues during storage. Secure the doors and wrap the refrigerator to provide added protection. Take the necessary precautions in the storage area and periodically check on the appliance to maintain its optimal condition.
By following these steps and taking the necessary precautions, you can have peace of mind knowing that your refrigerator will be ready for use whenever you need it again. Properly storing your refrigerator ensures its longevity and saves you from potential headaches and costly repairs.
So, whether you’re moving homes, undergoing renovations, or simply not using your refrigerator for an extended period, take the time to prepare it for storage using these guidelines. Your refrigerator will thank you for the care and attention, and you’ll be able to enjoy its reliable performance for years to come.
Frequently Asked Questions about How To Store A Refrigerator When Not In Use
Was this page helpful?
At Storables.com, we guarantee accurate and reliable information. Our content, validated by Expert Board Contributors, is crafted following stringent Editorial Policies. We're committed to providing you with well-researched, expert-backed insights for all your informational needs.


0 thoughts on “How To Store A Refrigerator When Not In Use”