Articles
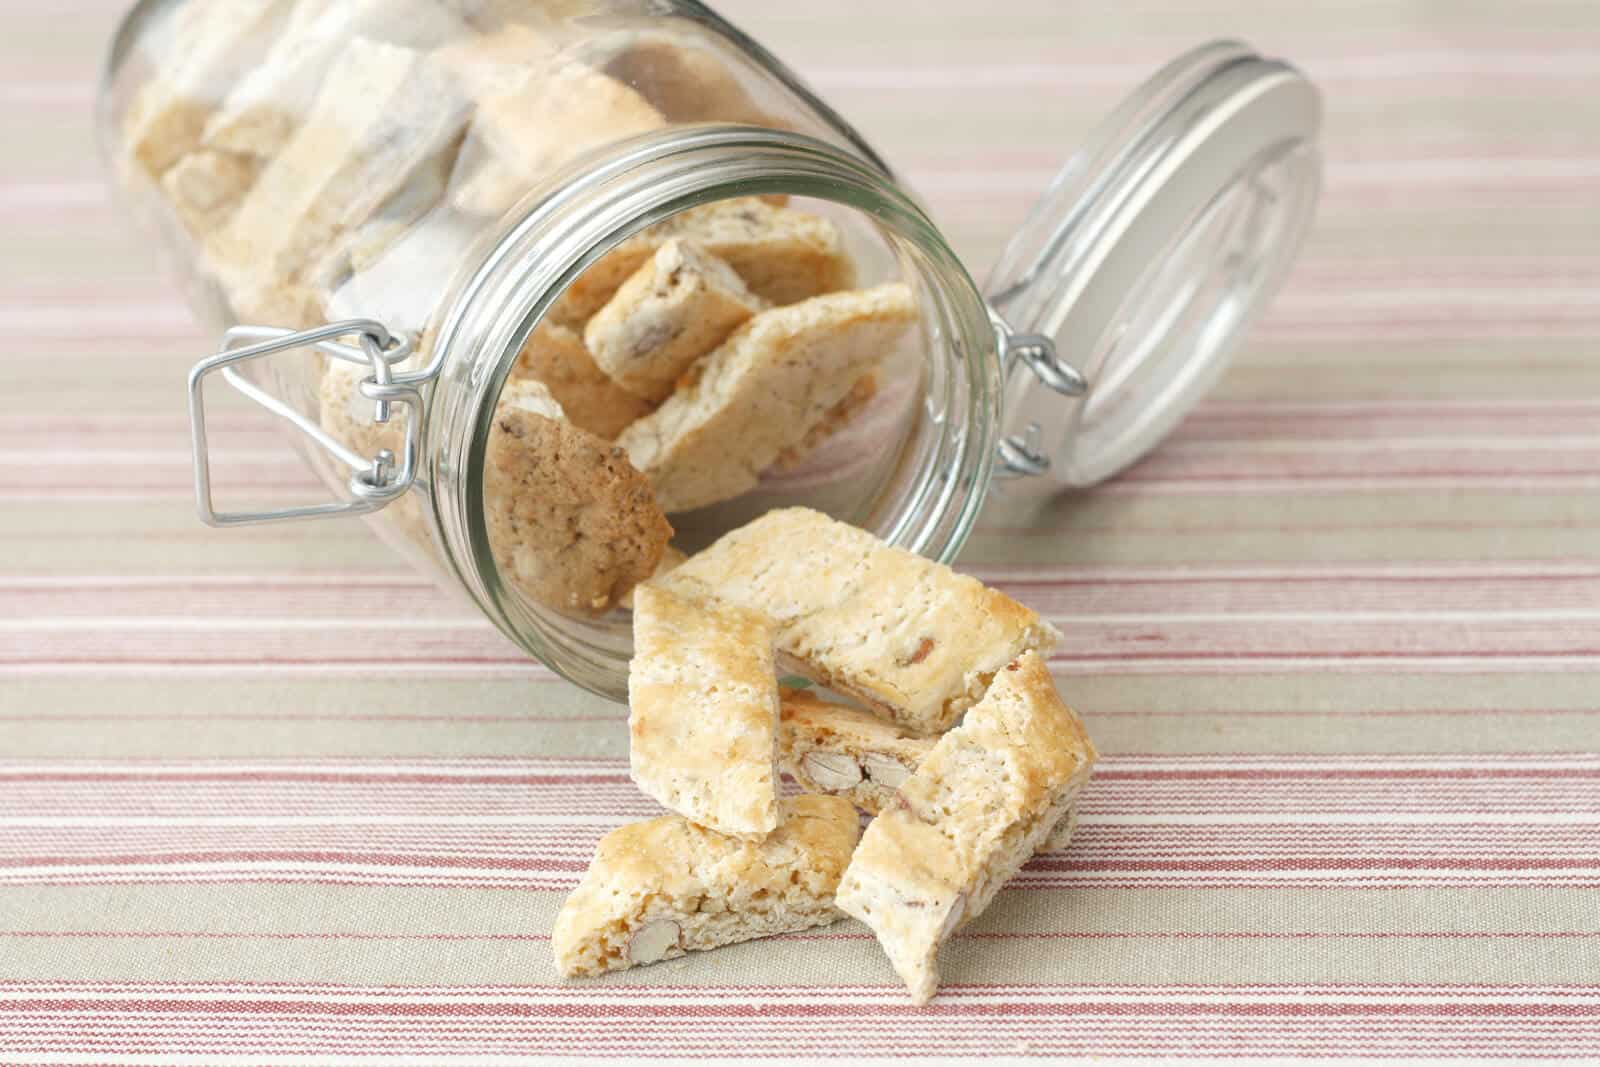
How To Store Biscotti
Modified: December 7, 2023
Discover the best way to store biscotti with our helpful articles. Keep your biscotti fresh and delicious for longer with these tips and tricks.
(Many of the links in this article redirect to a specific reviewed product. Your purchase of these products through affiliate links helps to generate commission for Storables.com, at no extra cost. Learn more)
Introduction
Are you a fan of the crispy, flavorful delight that is biscotti? If so, you’re not alone! These double-baked Italian cookies have gained popularity all over the world for their crunchy texture and versatility in flavors. While enjoying a freshly-made biscotti is undoubtedly delightful, many people wonder how to store biscotti properly to maintain their freshness and taste over time.
In this article, we will guide you through the process of storing biscotti to ensure they remain crispy and delicious for as long as possible. We will cover everything from the necessary equipment and ingredients to the step-by-step process of preparing and shaping the biscotti. Additionally, we will provide you with handy tips and variations to customize your biscotti experience.
So, whether you are preparing a batch of biscotti for a special occasion or simply want to have a delicious treat on hand for your daily coffee fix, read on to learn how to store biscotti like a pro.
Key Takeaways:
- Master the art of storing biscotti to maintain their crispy texture and delicious flavors. From preparing the dough to final storage, follow these steps for perfectly stored and delightful biscotti.
- Experiment with flavors and add-ins to customize your biscotti experience. Don’t forget to refresh stale biscotti, decorate for special occasions, and freeze for long-term storage. Enjoy the delightful treat!
Read more: How To Store Store-Bought Bread
Equipment Needed
Before we dive into the process of storing biscotti, let’s take a moment to gather the necessary equipment. Having the right tools on hand will not only make the process easier but also contribute to better biscotti storage results.
Here are the essential equipment pieces you will need:
- Baking Sheets: You’ll require sturdy baking sheets to bake the biscotti. Look for ones that are non-stick or lined with parchment paper for easy removal.
- Cooling Rack: A cooling rack is essential to allow the biscotti to cool down properly after baking. It aids in preventing moisture buildup underneath, which can affect the crispiness.
- Airtight Container or Jar: To store the biscotti, you will need an airtight container or jar that can keep them fresh and protected from moisture.
- Plastic Wrap or Ziplock Bags: These will come in handy if you plan to store individual or smaller portions of biscotti for easy grab-and-go treats.
- Metal Tins or Cookie Jars (optional): If you want to showcase your biscotti in style or plan to give them as gifts, metal tins or cookie jars can add a decorative touch to the storage.
Having these items readily available will make the storing process hassle-free and ensure that your biscotti remain fresh and crispy for an extended period.
Ingredients
Now that we have our equipment ready let’s move on to the essential ingredients for making biscotti. The beauty of biscotti is its versatility, allowing you to experiment with different flavors and add-ins. However, there are a few staple ingredients you’ll need for the base dough:
- All-purpose flour: Biscotti typically require all-purpose flour as its base. You’ll need around 2 to 2 1/2 cups, depending on the recipe and desired yield.
- Granulated Sugar: To sweeten the biscotti dough, you’ll need granulated sugar. Typically around 1 cup is used, but this can be adjusted to taste.
- Eggs: Eggs act as a binding agent and provide structure to the biscotti. You’ll need around 2 to 3 large eggs.
- Baking Powder: Baking powder is essential for the rise and texture of the biscotti. It’s typically used in small quantities, usually around 1 teaspoon.
- Salt: Salt enhances the flavors and balances the sweetness in the biscotti. You’ll need around 1/4 to 1/2 teaspoon.
- Vanilla Extract: A splash of vanilla extract adds a delightful aroma and flavor to the biscotti. You’ll need around 1 to 2 teaspoons, depending on your preference.
- Optional Add-ins: This is where you can get creative. You can add anything from chopped nuts like almonds or pistachios, to dried fruits, chocolate chips, or even citrus zest. The quantities of the add-ins can vary based on your taste preferences.
These ingredients form the foundation for making biscotti, and depending on the recipe you choose or the flavors you want to explore, you can modify and experiment with additional ingredients to create a unique and delicious biscotti experience.
Step 1: Preparing the Biscotti Dough
Now that we have our equipment and ingredients ready, it’s time to start preparing the biscotti dough. Follow these step-by-step instructions to ensure a successful and delicious outcome:
- Preheat the oven: Start by preheating your oven to 350°F (175°C) to ensure it’s hot and ready when it’s time to bake the biscotti.
- In a mixing bowl, combine the dry ingredients: In a large mixing bowl, whisk together the all-purpose flour, granulated sugar, baking powder, and salt. Make sure the dry ingredients are evenly combined.
- Add in the wet ingredients: In a separate bowl, beat the eggs until well mixed, then add the vanilla extract. Pour the egg mixture into the dry ingredients and stir until a dough starts to form. It may be slightly crumbly, but that’s okay.
- Optional: Add your choice of add-ins: This is the perfect time to incorporate any optional add-ins, such as chopped nuts or dried fruits. Gently fold them into the dough until evenly distributed.
- Shape the dough: Divide the dough into two equal portions. Roll each portion into a log shape, approximately 12 inches long and 2 inches wide. Place the logs onto the prepared baking sheets, leaving enough space between them for spreading during baking.
- Bake the dough: Place the baking sheets in the preheated oven and bake for about 25-30 minutes or until the logs are firm and golden brown. Remove them from the oven and let them cool for a few minutes.
Congratulations! You have successfully completed the first step of preparing the biscotti dough. Next, we’ll move on to shaping the biscotti before the second baking stage.
Step 2: Shaping the Biscotti
Now that the biscotti dough has been baked and cooled, it’s time to shape the dough into the classic biscotti form. Follow these steps to achieve those iconic oblong cookies:
- Preheat the oven: Preheat your oven to 325°F (160°C) for the second baking stage. Lowering the temperature will help dry out the biscotti without over-browning them.
- Cut the logs: Using a sharp serrated knife, gently cut the cooled logs diagonally into slices. Aim for slices that are about 1/2 inch thick. You can adjust the thickness based on your personal preference.
- Place the biscotti on the baking sheet: Arrange the cut slices on the baking sheets in a single layer, leaving a small amount of space between each one. This will allow air to circulate around the biscotti as they bake.
- Bake the biscotti: Place the baking sheets back in the preheated oven and bake for about 10-12 minutes, or until the biscotti are crisp and golden. Carefully remove them from the oven and let them cool completely on a wire rack.
And voilà! Your biscotti are now beautifully shaped and ready for their final stage of storage. The biscotti can be enjoyed as is, or you can proceed with the next step to enhance their flavor and texture.
Note: If you prefer softer biscotti, you can reduce the baking time during the second stage. Experiment with different baking times to find your desired level of crunchiness.
Store biscotti in an airtight container at room temperature for up to 2 weeks. For longer storage, freeze in a resealable plastic bag for up to 3 months.
Read more: How To Store Basil From Grocery Store
Step 3: Baking the Biscotti
Now that the biscotti have been shaped, it’s time for the final baking stage. This step is crucial for achieving the perfect crispness and texture in your biscotti. Follow these steps to bake the biscotti to perfection:
- Preheat the oven: Preheat your oven to 325°F (160°C) to ensure it’s hot and ready for the final baking stage.
- Arrange the biscotti on a baking sheet: Place the sliced biscotti in a single layer on a baking sheet. Make sure there is enough space between each biscotti to allow for proper air circulation.
- Bake the biscotti: Transfer the baking sheet to the preheated oven and bake for about 10-15 minutes. Flip the biscotti halfway through to ensure even browning. Keep a close eye on them to prevent over-browning.
- Cool the biscotti: Once the biscotti are golden brown and have reached your desired level of crispness, remove them from the oven and let them cool completely on a wire rack. As they cool, they will continue to harden and become even more crunchy.
And there you have it – freshly baked, perfectly crispy biscotti ready to be enjoyed or stored. The final baking stage not only enhances the flavor and texture of the biscotti but also ensures their longevity when properly stored.
Now, let’s move on to the next and final step: cooling and storing the biscotti.
Step 4: Cooling and Storing the Biscotti
After baking the biscotti, it’s important to properly cool and store them to maintain their crispness and flavor. Follow these steps to ensure your biscotti stay fresh for an extended period:
- Cool the biscotti completely: Once you have baked the biscotti, allow them to cool completely on a wire rack. This step is crucial as it allows any remaining moisture to evaporate, resulting in crispier biscotti.
- Choose your storage container: To store biscotti, opt for an airtight container or jar. This will help keep the biscotti fresh and protect them from moisture. Alternatively, you can use resealable plastic bags.
- Layer the biscotti: In the chosen storage container, layer the biscotti with a sheet of parchment paper or wax paper between each layer. This will prevent them from sticking together and preserve their shape.
- Store in a cool, dry place: Place the container of biscotti in a cool, dry area, away from direct sunlight and sources of heat. A pantry or cupboard is an ideal spot. Make sure the container is sealed tightly to keep out air and moisture.
- Avoid storing with moist or aromatic foods: Biscotti can absorb moisture and odors from the environment, so it’s best to avoid storing them with foods that release moisture or strong aromas.
- Check for freshness: Periodically check the biscotti for any signs of softness or staleness. If the biscotti have become soft or lost their crunch, it’s time to refresh them in the oven.
By following these steps, you can ensure your biscotti remain fresh and crispy for an extended period, ready to be enjoyed whenever you have a craving for a delectable treat.
Tips and Variations
Now that you know how to store biscotti, here are some additional tips and variations to elevate your biscotti experience:
- Experiment with flavors: Biscotti are incredibly versatile, so don’t be afraid to get creative with flavors. Try adding different ingredients like cocoa powder, almond extract, or even spices like cinnamon or cardamom. Let your taste buds guide you!
- Customize with add-ins: In addition to the traditional add-ins like nuts and dried fruits, consider incorporating other ingredients like chocolate chips, coconut flakes, or even espresso powder. These additions can enhance the taste and add delightful bursts of flavor.
- Adjust the thickness: The thickness of the biscotti slices can make a difference in their texture. Thicker slices will result in a softer interior, while thinner slices will yield a crisper biscotti. Experiment with different thicknesses to find your preferred texture.
- Refresh stale biscotti: If your biscotti have become slightly stale or lost their crunch, you can give them a second life by refreshing them in the oven. Preheat the oven to 300°F (150°C), place the biscotti on a baking sheet, and bake for about 5-7 minutes to restore their crispness.
- Decorate for special occasions: Biscotti can be transformed into delightful treats for special occasions. Dip the ends in melted chocolate and sprinkle with crushed nuts or colored sugar to add a festive touch. These decorated biscotti make wonderful gifts or party favors.
- Freeze for long-term storage: If you have a surplus of biscotti or simply want to have a stash on hand, you can freeze them for long-term storage. Wrap the biscotti tightly in plastic wrap or place them in airtight freezer bags. They can be frozen for up to 3 months. Thaw at room temperature before enjoying.
Remember, while storing biscotti can help prolong their freshness, they are best enjoyed within a couple of weeks for optimal flavor and texture. So, don’t wait too long to indulge in these delightful treats!
Conclusion
Biscotti, with their crispy texture and delightful flavors, are a beloved treat enjoyed by many. Knowing how to properly store biscotti is essential to maintain their freshness and preserve their deliciousness over time.
In this article, we’ve guided you through the process of storing biscotti, from preparing the dough and shaping the cookies to the final stages of baking and storage. We’ve shared tips and variations to help you customize your biscotti experience and make it even more enjoyable.
Remember to gather the necessary equipment, such as baking sheets, airtight containers, and cooling racks, before you begin. Use high-quality ingredients and experiment with flavors and add-ins to create your own unique biscotti creations.
Once your biscotti are baked and cooled, make sure to store them in an airtight container in a cool, dry place to maintain their crispness and flavor. Keep an eye on their freshness and refresh them in the oven if needed.
Whether you enjoy biscotti with your morning coffee, as a snack throughout the day, or as a delightful addition to a special occasion, having properly stored biscotti on hand ensures you can savor their delightful taste whenever the craving strikes.
So go ahead, put your new knowledge into practice, and enjoy the delight of perfectly stored and delicious biscotti!
Frequently Asked Questions about How To Store Biscotti
Was this page helpful?
At Storables.com, we guarantee accurate and reliable information. Our content, validated by Expert Board Contributors, is crafted following stringent Editorial Policies. We're committed to providing you with well-researched, expert-backed insights for all your informational needs.


0 thoughts on “How To Store Biscotti”