
Articles
How To Store Homemade Cookie Dough
Modified: January 8, 2024
Learn the best methods and tips for storing homemade cookie dough in this informative article. Keep your dough fresh and ready to bake for longer!
(Many of the links in this article redirect to a specific reviewed product. Your purchase of these products through affiliate links helps to generate commission for Storables.com, at no extra cost. Learn more)
Introduction
Homemade cookie dough is a delicious treat that many people enjoy making at home. Whether you’re baking a batch of chocolate chip cookies or experimenting with unique flavors, it’s important to store your homemade cookie dough properly to ensure its freshness and flavor. In this article, we’ll explore the reasons why proper storage is essential for homemade cookie dough and provide you with tips and techniques to keep your dough fresh and ready for baking.
When it comes to homemade cookie dough, proper storage is vital to maintain its quality and taste. Without proper storage, the dough can become dry, lose its flavor, and even spoil. Additionally, storing your cookie dough correctly can save you time and effort, allowing you to enjoy fresh-baked cookies at any time.
Follow along as we guide you through the best practices for storing your homemade cookie dough, from selecting the right container to refrigerating and freezing techniques. We’ll also discuss the importance of following safety precautions when storing raw dough to avoid any potential foodborne illnesses.
So, whether you’re a seasoned baker or someone who loves to indulge in occasional baking sessions, read on to discover the secrets of storing homemade cookie dough to ensure that your cookies come out perfect every time.
Key Takeaways:
- Properly storing homemade cookie dough is crucial for maintaining freshness, flavor, and convenience. Airtight containers, refrigeration, and freezing techniques are key to ensuring delicious, ready-to-bake dough for any occasion.
- Safety precautions, such as avoiding raw dough consumption and thorough baking, are essential for preventing foodborne illnesses. By following these guidelines, you can confidently store and handle homemade cookie dough while prioritizing food safety.
Read more: How To Store Homemade Dough
Why Homemade Cookie Dough Needs Proper Storage
Properly storing homemade cookie dough is crucial to maintain its freshness, taste, and texture. Here are a few reasons why you need to pay attention to the storage of your homemade cookie dough:
- Freshness: Freshly made cookie dough contains perishable ingredients like eggs and butter, which can spoil if not stored properly. By storing the dough correctly, you can extend its shelf life and ensure that you always have fresh dough on hand for baking.
- Flavor Development: Cookie dough flavors deepen and develop over time as the ingredients meld together. Proper storage allows the flavors to combine, resulting in a more delicious and well-rounded cookie. Storing the dough in the right conditions ensures that these flavors are preserved, enhancing the taste of the final baked cookies.
- Convenience: Storing homemade cookie dough properly offers the convenience of having ready-to-bake dough readily available. By preparing a large batch of dough and storing it, you can easily bake a few cookies whenever a craving strikes or surprise guests arrive unexpectedly.
- Time-Saving: By storing your cookie dough, you save time by making a larger batch at once. This eliminates the need to mix ingredients and prepare dough each time you want to bake cookies. Having pre-made dough on hand allows you to indulge in freshly baked cookies without the added effort.
- Flexibility: Properly stored cookie dough gives you the flexibility to bake cookies whenever you desire. Whether you want warm cookies for a late-night snack or need a quick treat for a social gathering, having stored dough on hand allows you to bake on your own schedule.
As you can see, storing homemade cookie dough ensures that you have fresh, flavorful dough ready to be transformed into delicious cookies whenever you want. Now that we understand the importance of proper storage, let’s delve into some effective tips and techniques for storing homemade cookie dough.
General Tips for Storing Homemade Cookie Dough
When it comes to storing homemade cookie dough, there are a few general tips and guidelines to keep in mind. Following these recommendations will help maintain the freshness and quality of your dough:
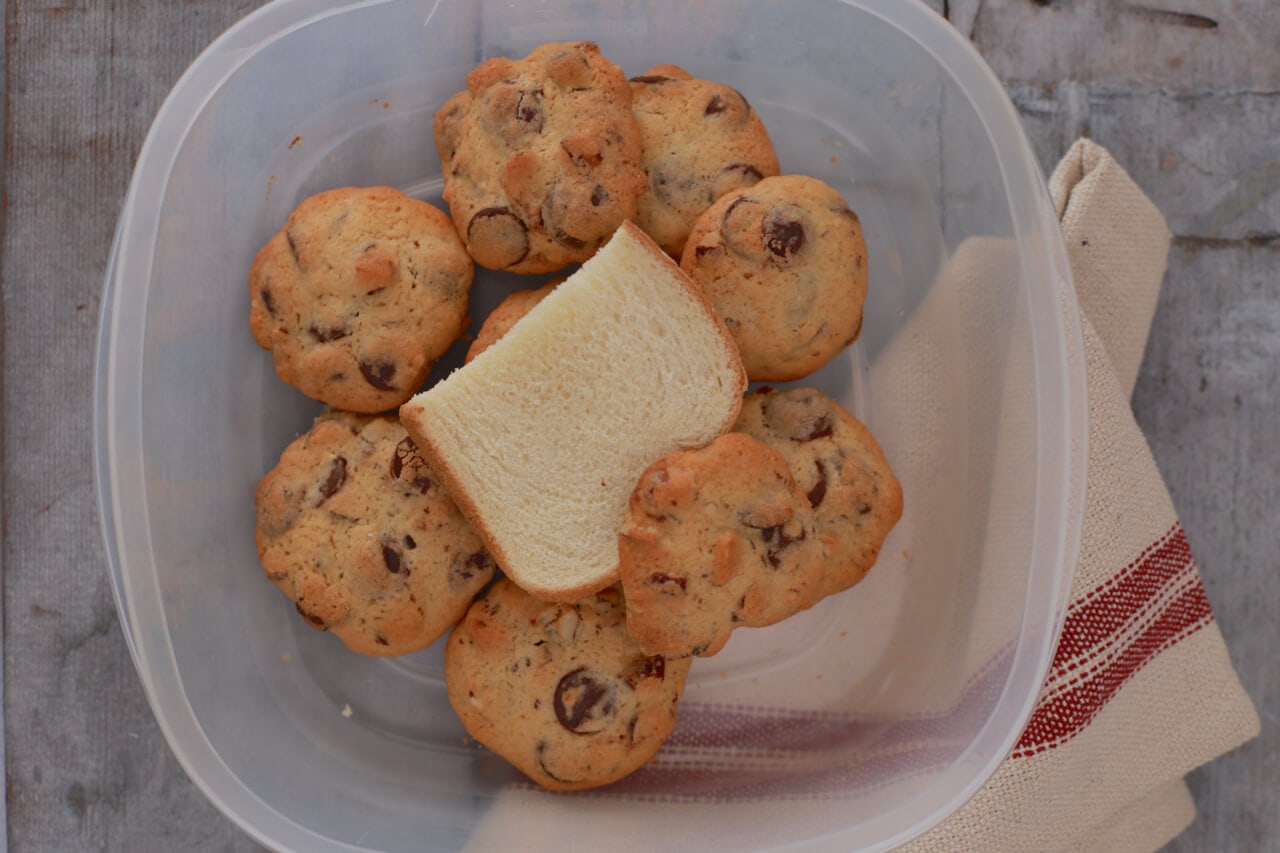
- Use airtight containers: An airtight container is essential for storing cookie dough. It prevents air from entering and keeps the dough moist. Choose a container that is the right size for your batch of dough to minimize any empty space.
- Label and date: To avoid confusion, label the container with the type of dough and the date it was made. This way, you know exactly what’s inside and can keep track of its freshness.
- Divide into portions: If you are planning to bake cookies in smaller batches, divide the dough into individual portions before storing. This allows you to thaw and bake only what you need, leaving the rest of the dough untouched.
- Chill the dough before storing: It’s important to chill the dough in the refrigerator for at least 30 minutes before transferring it to storage containers. This helps the dough firm up and prevents it from spreading or losing its shape during storage.
- Store in the refrigerator or freezer: Depending on your baking plans, you can store homemade cookie dough in either the refrigerator or the freezer. The refrigerator is suitable for short-term storage (up to a few days), while the freezer can prolong the dough’s shelf life for several weeks or even months.
- Keep away from strong odors: Cookie dough can easily absorb strong odors from other foods in the fridge or freezer. To avoid any unpleasant flavor transfer, place the dough in a separate compartment or use odor-proof containers.
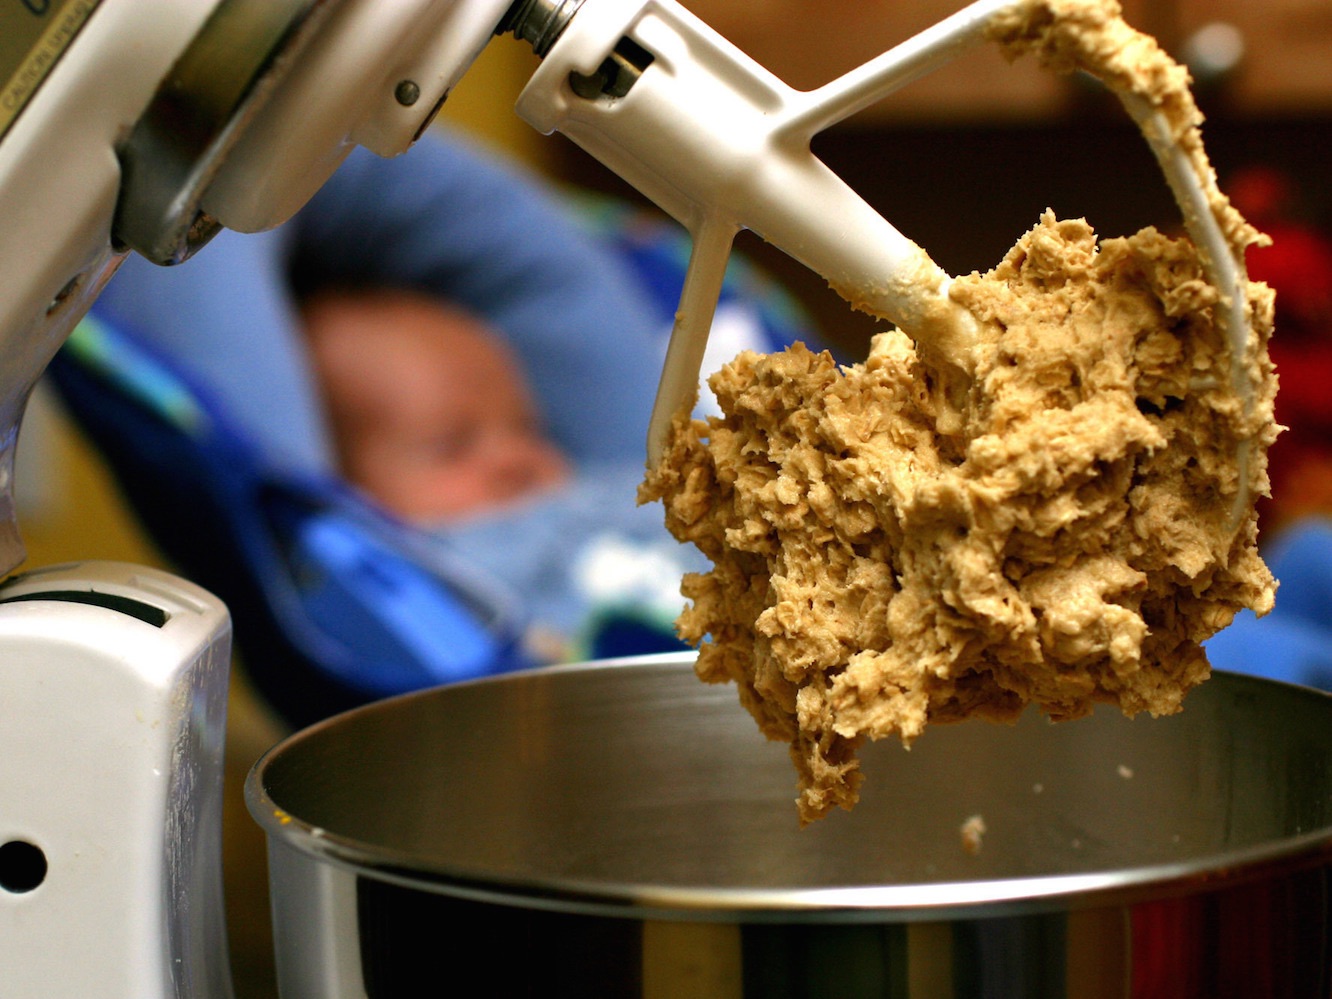
- Don’t overmix: When combining the ingredients for your cookie dough, be careful not to overmix. Overmixing can lead to tough cookies. Mix until the ingredients are just combined, ensuring a tender and soft texture.
- Follow recipe instructions: Always follow the recipe instructions when storing homemade cookie dough. Some doughs may require specific storage techniques or ingredient adjustments. The recipe will guide you on the best practices for that particular dough.
By following these general tips, you can ensure that your homemade cookie dough stays fresh, flavorful, and ready to be transformed into delicious cookies whenever you’re in the mood for a sweet treat. In the next sections, we’ll explore different container options for storing cookie dough and the specific techniques for refrigerating and freezing dough for longer storage periods.
Container Options for Storing Cookie Dough
Choosing the right container for storing homemade cookie dough is vital to maintain its freshness and prevent any cross-contamination with other foods in your refrigerator or freezer. Here are a few container options to consider:
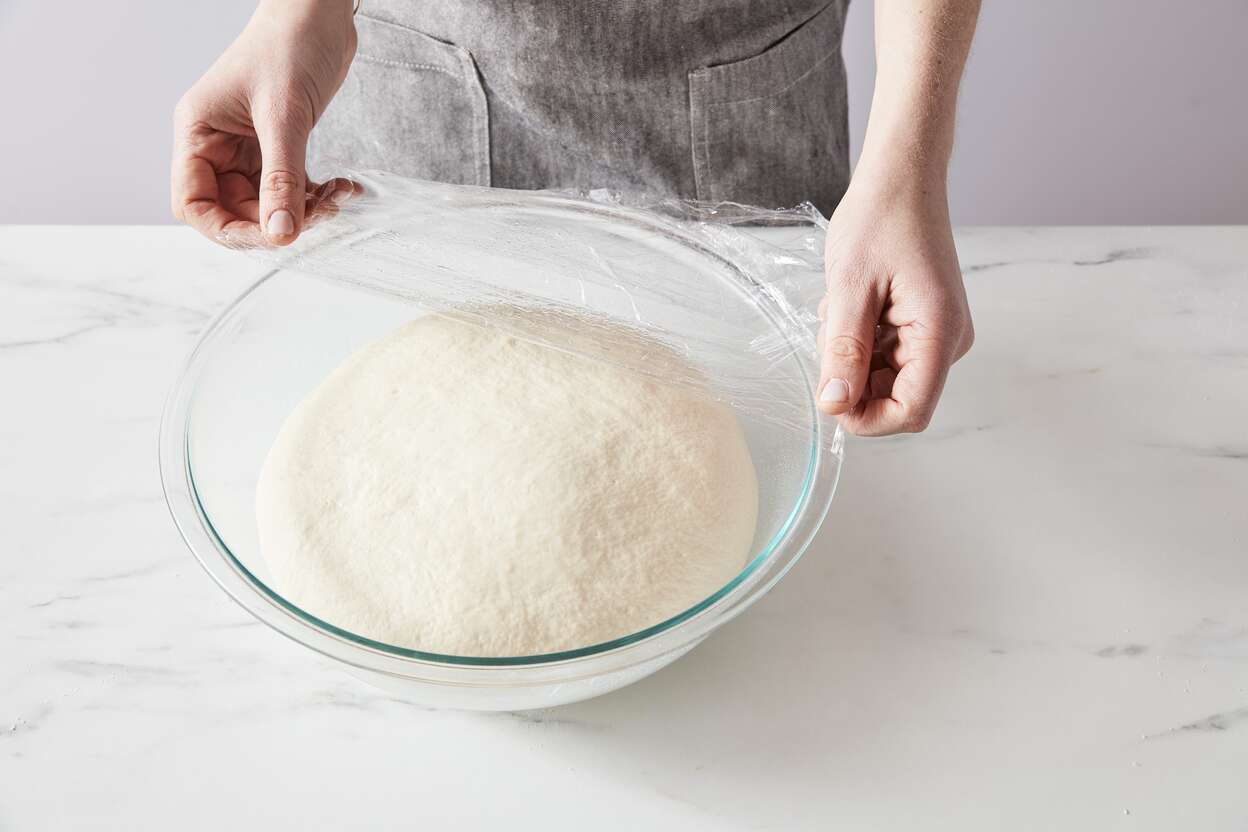
- Plastic Wrap: Wrapping your cookie dough tightly in plastic wrap is a simple and cost-effective option. It helps seal in the moisture and prevents any air from reaching the dough. Make sure to wrap it securely and press out any excess air before storing.
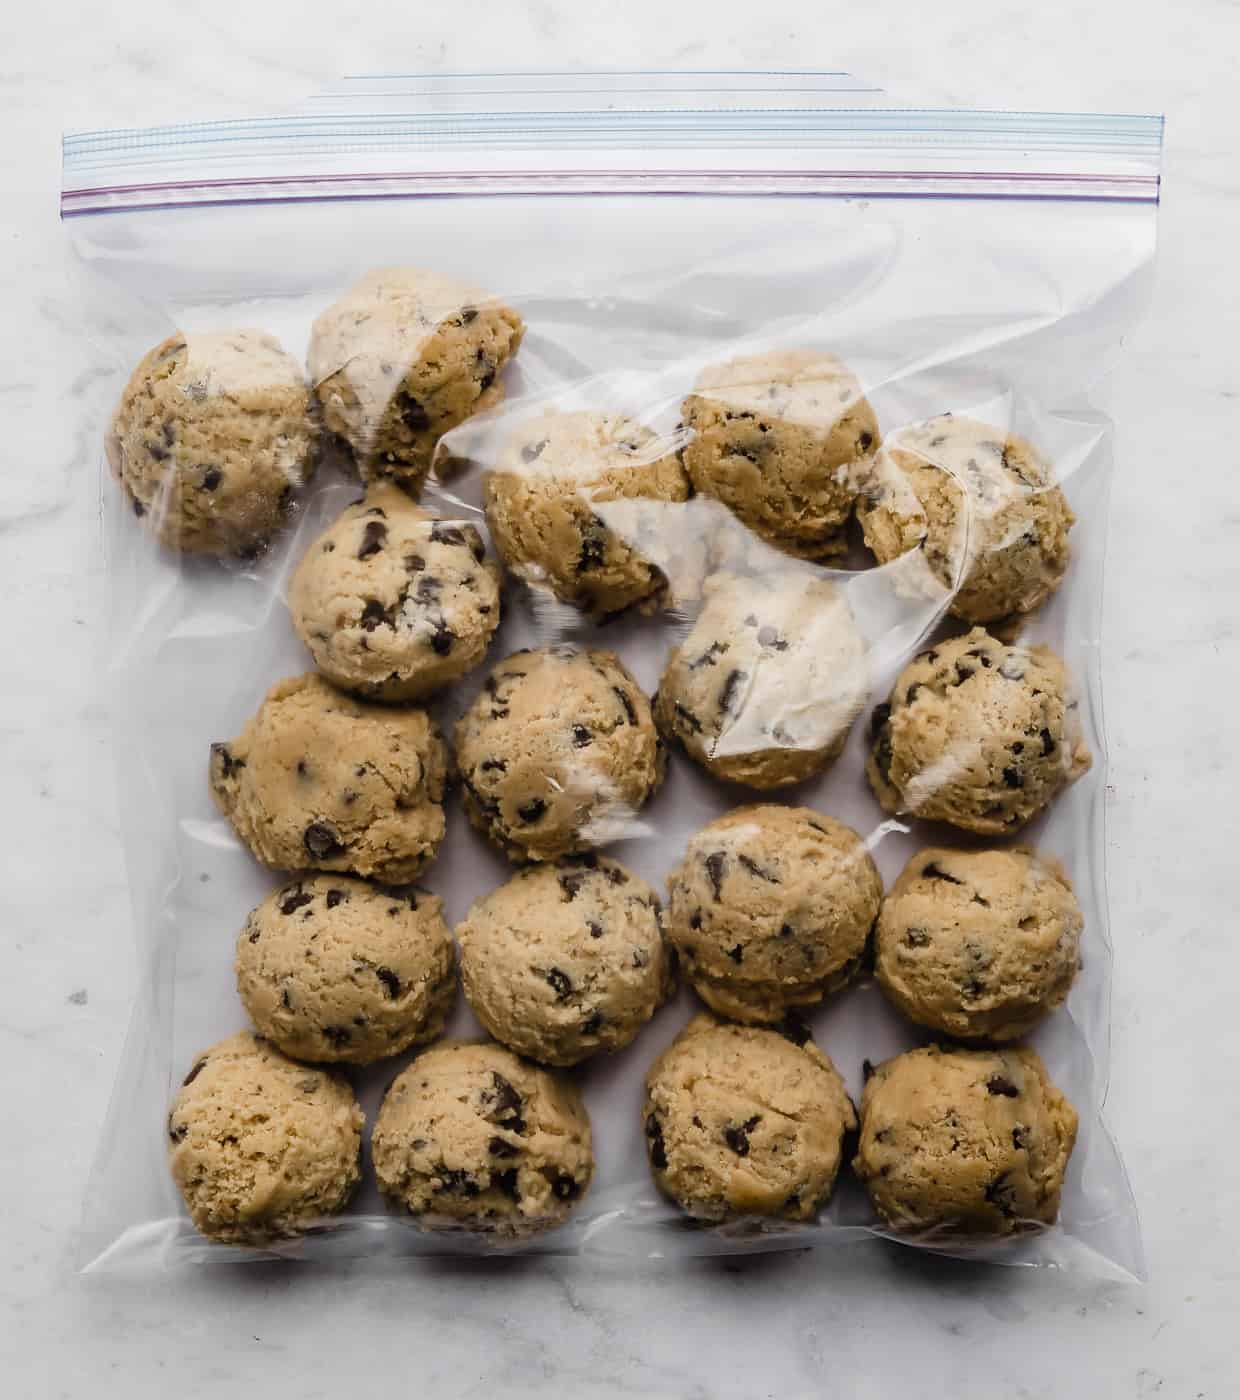
- Zip-Top Bags: Zip-top bags are convenient for storing smaller portions of cookie dough. They are airtight and allow you to easily squeeze out any excess air before sealing. Using freezer bags will provide an extra layer of protection against freezer burn if you plan to freeze the dough.
- Reusable Stasher Bags: Reusable silicone Stasher bags are an eco-friendly option that provides an airtight seal. They are a durable and sustainable alternative to single-use plastic bags and can be used for storing cookie dough as well as other foods.
- Tupperware or Plastic Containers: Using Tupperware or plastic containers with secure lids is another option for storing homemade cookie dough. They come in various sizes and are easy to stack in the refrigerator or freezer.
- Glass Jars or Containers: Glass jars or containers with airtight lids can also be used for storing cookie dough. They are non-reactive and do not absorb odors, ensuring the dough remains fresh. Additionally, glass containers are environmentally friendly and can be safely used in the microwave or oven for thawing or baking the dough.
When choosing a container, consider the size of your batch and how you plan to use the dough. Smaller individual containers are ideal if you want to bake in smaller portions, while larger containers are suitable for storing a larger batch for future baking sessions.
Remember to always label your containers with the type of dough and the date it was made, ensuring you can easily identify and track its freshness. Now that you know about different container options, let’s move on to the specific techniques for refrigerating and freezing homemade cookie dough.
Refrigerating Homemade Cookie Dough
Refrigerating homemade cookie dough is a common method of storing it for short-term use. The cool temperature of the refrigerator helps slow down the growth of bacteria while keeping the dough ready for baking. Follow these steps to refrigerate your cookie dough:
- Prepare the dough: Mix your cookie dough according to the recipe instructions. Be sure not to overmix to avoid tough cookies.
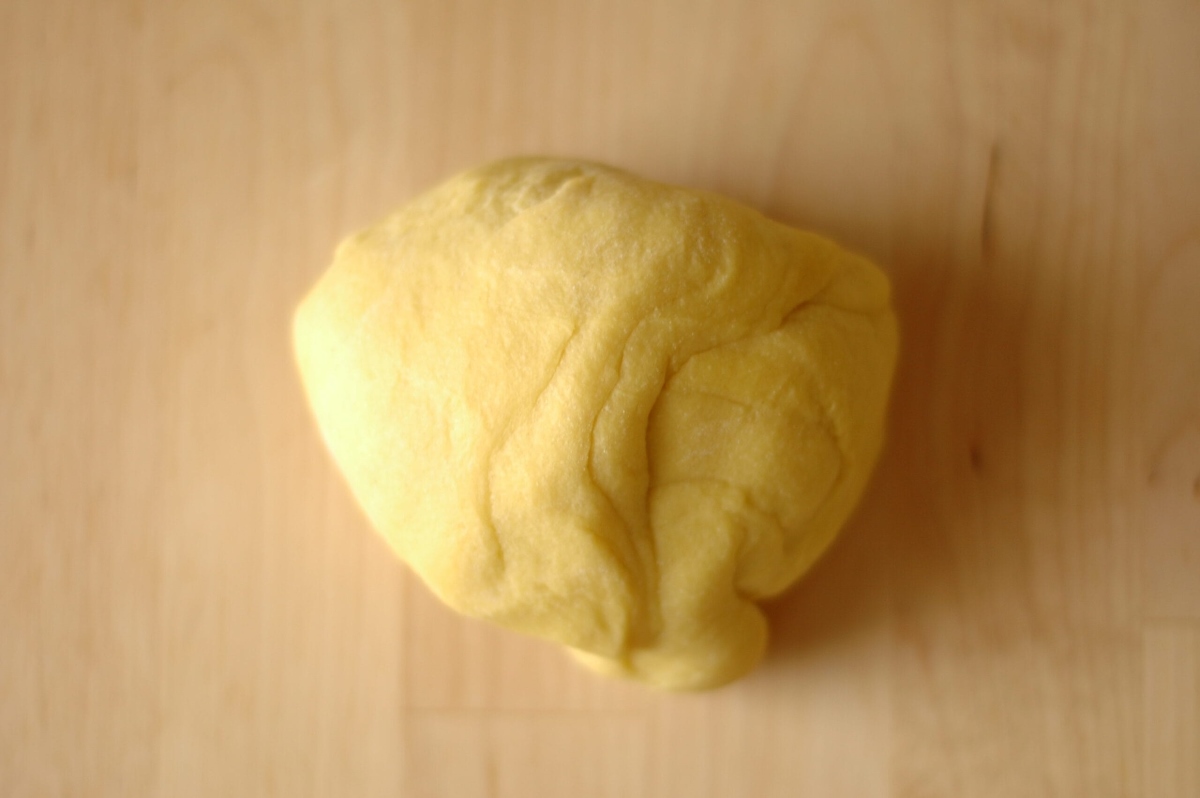
- Chill the dough: Wrap the dough tightly in plastic wrap or place it in an airtight container. Refrigerate the dough for at least 30 minutes to firm it up and make it easier to work with.
- Store in the refrigerator: Once the dough is chilled, transfer it to the refrigerator. Store the dough in the coldest part of the fridge, usually the back or bottom shelf, to maintain a consistent temperature.
- Monitor the freshness: Cookie dough stored in the refrigerator can typically last for up to three to five days. However, it’s essential to check for any signs of spoilage or off flavors before using the dough.
- Bring to room temperature: When you’re ready to bake, remove the dough from the refrigerator and let it come to room temperature for about 15-20 minutes. This allows the dough to soften slightly, making it more pliable and easier to work with.
- Shape and bake the dough: Once the dough has reached room temperature, you can shape it into cookies and bake them according to the recipe instructions. Enjoy your freshly baked cookies!
Refrigerating homemade cookie dough is a convenient way to have fresh cookies whenever you desire. Whether you want to enjoy warm cookies right away or bake them for a special occasion, properly refrigerated dough will provide you with delicious results. However, if you want to store the dough for a longer period, freezing is the best option.
Keep in mind that refrigeration slows down the growth of bacteria but does not completely prevent it. It’s crucial to follow refrigerator storage guidelines and not to consume cookie dough that has been stored for too long or shows signs of spoilage. Now, let’s explore how to freeze homemade cookie dough for extended storage.
After preparing the cookie dough, roll it into a log using plastic wrap and store it in the refrigerator for up to 3 days or in the freezer for up to 3 months. Slice and bake as needed.
Read more: How To Store Sugar Cookie Dough
Freezing Homemade Cookie Dough
Freezing homemade cookie dough is an excellent option for prolonging its shelf life and having dough readily available for future baking. Follow these steps to successfully freeze your cookie dough:
- Prepare the dough: Mix your cookie dough according to the recipe instructions, ensuring it is thoroughly combined. Avoid overmixing to maintain a tender texture.
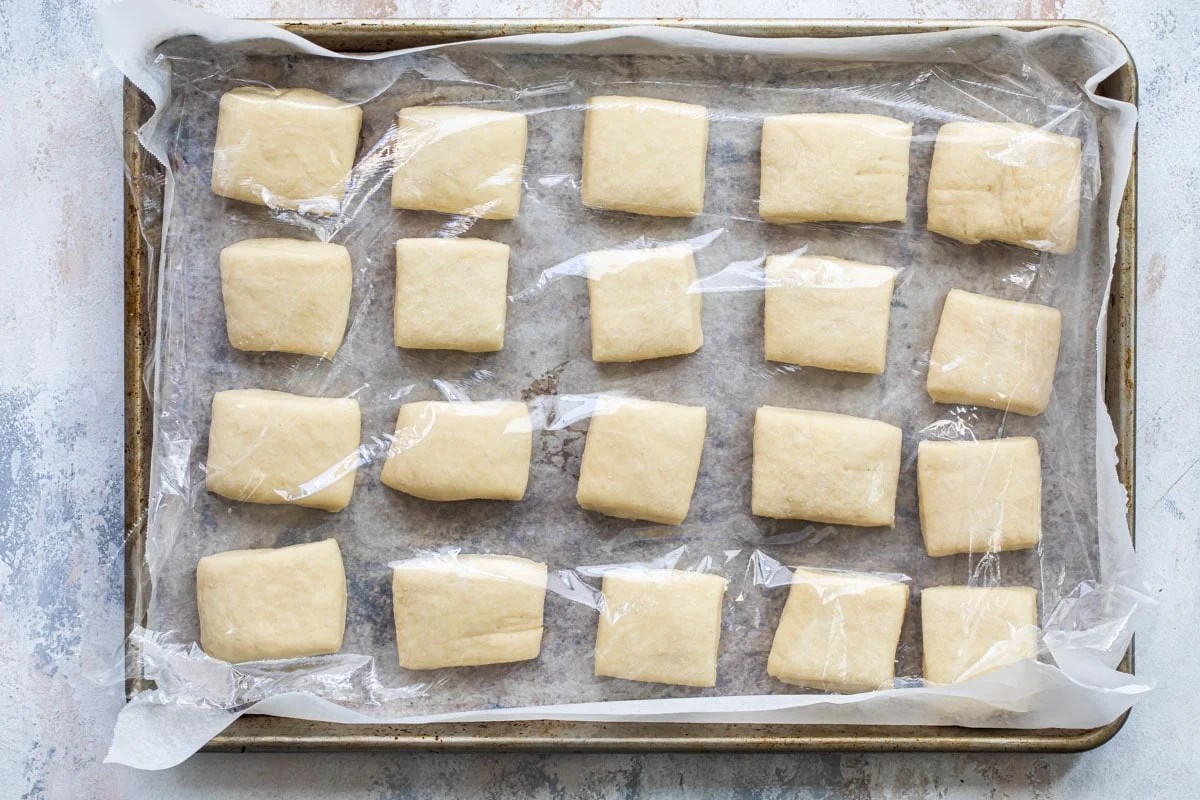
- Divide and shape the dough: Divide the dough into individual portions or shape it into small balls, ready for baking. This way, you can easily thaw and bake only what you need without having to defrost the entire batch.
- Wrap or store in containers: Wrap each portion of dough tightly in plastic wrap, or place them in airtight containers or freezer bags. Make sure to remove any excess air to prevent freezer burn.
- Label and date: Label each wrapped portion or container with the type of dough and the date it was made. This will help you keep track of its freshness and easily identify it in the freezer.
- Freeze the dough: Place the wrapped or containerized dough in the freezer, taking care to arrange them in a flat, even layer. This will allow for quicker and more even freezing.
- Storage duration: When properly stored, homemade cookie dough can last in the freezer for up to three months. However, for the best flavor and texture, try to use it within one to two months.
- Thawing before baking: When you’re ready to bake, remove the desired portion of dough from the freezer and let it thaw in the refrigerator overnight. This ensures a gradual thawing process and prevents any drastic temperature changes that could affect the dough’s texture.
- Baking instructions: Once the dough is thawed, follow the recipe instructions for baking. You may need to adjust the baking time slightly, as frozen dough may require a few minutes longer in the oven.
- Enjoy freshly baked cookies: Indulge in the delicious aroma and taste of freshly baked cookies, thanks to your thoughtfully frozen homemade cookie dough!
Freezing homemade cookie dough allows you to have a ready supply of dough whenever you want fresh-baked cookies. By taking the time to portion and wrap the dough properly, you can enjoy the convenience of baking just a few cookies at a time or a whole batch for special occasions.
Remember to not refreeze thawed dough, as this can compromise its texture and quality. It’s also important to note that while frozen cookie dough can be kept for an extended period, it’s best to use it within a few months for optimal taste and texture.
Now that you know how to freeze and store homemade cookie dough, let’s discuss the process of thawing and baking frozen dough to ensure your cookies turn out perfect every time.
Thawing and Baking Frozen Cookie Dough
Thawing and baking frozen cookie dough requires a few simple steps to ensure that your cookies are baked to perfection. Here’s a guide to thawing and baking frozen cookie dough:
- Remove from the freezer: Take the desired portion of frozen cookie dough from the freezer. Keep the remaining dough stored in the freezer for future use.
- Thaw in the refrigerator: Place the frozen dough in the refrigerator and let it thaw overnight. Thawing in the refrigerator allows for a gradual thawing process, which helps maintain the texture and quality of the dough.
- Bring to room temperature: Once the dough has thawed, let it come to room temperature for about 15-20 minutes. This step ensures that the dough softens slightly, making it easier to shape and bake.
- Preheat the oven: While the dough comes to room temperature, preheat your oven to the temperature specified in the recipe.
- Shape the dough: Shape the softened dough into balls or the desired cookie shape. Roll the dough balls in sugar or other toppings if desired.
- Place on a baking sheet: Line a baking sheet with parchment paper or a silicone baking mat. Space the dough balls evenly on the sheet, leaving room for them to spread during baking.
- Bake according to recipe instructions: Slide the baking sheet into the preheated oven and bake the cookies according to the recipe instructions. Keep an eye on the cookies as they bake to ensure they reach the desired doneness.
- Cool and enjoy: Once the cookies are baked to a golden brown, remove them from the oven and let them cool on a wire rack. Enjoy the freshly baked cookies once they have cooled enough to handle.
Thawing and baking frozen cookie dough is a convenient method to have freshly baked cookies whenever you desire. By following these steps, you can ensure that your cookies retain their softness, texture, and delicious flavors. Remember to adjust the baking time if needed, as frozen dough may require a few extra minutes in the oven.
Now that you know how to thaw and bake frozen cookie dough, you can enjoy homemade cookies with minimal effort and on-demand. However, it’s important to keep safety precautions in mind when storing and handling raw cookie dough, which we will discuss in the next section.
Safety Precautions for Storing Homemade Cookie Dough
While making and enjoying homemade cookie dough is a delightful experience, it is essential to follow safety precautions when storing it to prevent any potential foodborne illnesses. Here are some important safety measures to keep in mind:
- Avoid consuming raw dough: Raw cookie dough should not be consumed due to the potential presence of harmful bacteria, such as salmonella in raw eggs or E. coli in raw flour. Always refrain from tasting or eating raw dough, whether it’s intended for immediate use or stored for future baking.
- Refrigerate or freeze promptly: After preparing the cookie dough, refrigerate or freeze it promptly. Leaving the dough at room temperature for too long can allow bacteria to multiply, increasing the risk of foodborne illness. Be sure to store the dough within two hours of preparation.
- Wash hands thoroughly: Before handling the dough, make sure to wash your hands thoroughly with soap and warm water for at least 20 seconds. This helps remove any potential contaminants from your hands and prevents cross-contamination.
- Use fresh ingredients: When making homemade cookie dough, use fresh and high-quality ingredients. Check the expiration dates of ingredients like eggs, butter, and flour to ensure their freshness and minimize the risk of bacterial contamination.
- Label and date the containers: Properly label your containers with the type of dough and the date it was made. This helps you track the freshness of the dough and avoid confusion if you have multiple batches stored.
- Monitor storage time: Regularly check the storage time of your cookie dough and adhere to the recommended storage duration. Discard any dough that has been stored beyond the recommended time to ensure safety.
- Thoroughly bake the cookies: When baking frozen or thawed cookie dough, make sure to bake it thoroughly. Ensure that the cookies reach an internal temperature of at least 165°F (74°C) to kill any potential bacteria that may have been present in the raw dough.
- Clean storage containers: Regularly clean and sanitize the storage containers you use for storing cookie dough. Wash them with hot, soapy water and rinse thoroughly before each use to eliminate any potential bacteria.
By implementing these safety precautions, you can greatly reduce the risk of foodborne illnesses associated with homemade cookie dough. It is important to prioritize food safety to ensure the well-being of yourself and those enjoying your delicious baked treats.
Now that you are aware of the safety precautions, you can confidently store and handle homemade cookie dough without compromising your health. Let’s conclude this article with a summary of the key points discussed.
Conclusion
Properly storing homemade cookie dough is essential to maintain its freshness, flavor, and quality. By following the tips and techniques outlined in this article, you can ensure that your dough remains delicious and ready to be transformed into mouthwatering cookies whenever the craving strikes.
From selecting the right container to refrigerating and freezing techniques, we’ve covered the necessary steps for storing homemade cookie dough. Airtight containers, such as plastic wrap, zip-top bags, reusable Stasher bags, Tupperware, or glass jars, can help keep your dough fresh and prevent any cross-contamination.
Refrigeration is suitable for short-term storage, while freezing is ideal for extending the shelf life of the dough. Thawing the frozen dough in the refrigerator and bringing it to room temperature before shaping and baking ensures that your cookies bake evenly and maintain their softness and texture.
It is crucial to follow safety precautions when storing and handling cookie dough to prevent any potential foodborne illnesses. Avoid consuming raw dough, refrigerate or freeze dough promptly, wash hands thoroughly, and use fresh ingredients. Adhering to these precautions and baking the dough thoroughly will ensure the safety of everyone enjoying your homemade cookies.
Remember, homemade cookie dough is a versatile and convenient treat that allows you to enjoy freshly baked cookies at any time. By mastering the art of storing the dough properly, you can indulge in the pleasure of warm, delicious cookies whenever you desire.
So go ahead, whip up a batch of your favorite homemade cookie dough, and store it correctly to have a sweet treat available whenever the craving strikes. Just remember to label and date your containers, monitor storage durations, and prioritize safe food handling practices.
With these insights and guidelines, you can confidently store your homemade cookie dough, ensuring that you always have a delectable treat waiting to be baked. Happy baking!
Frequently Asked Questions about How To Store Homemade Cookie Dough
Was this page helpful?
At Storables.com, we guarantee accurate and reliable information. Our content, validated by Expert Board Contributors, is crafted following stringent Editorial Policies. We're committed to providing you with well-researched, expert-backed insights for all your informational needs.


0 thoughts on “How To Store Homemade Cookie Dough”